
How To Use Screwdrivers To Change Your Dirt Bike Tire
In this article, I’m going to show you how to minimize the damage to your rim, tube, and tire when screwdrivers are the only tools you have available.

We’ve all been in this scenario at some point – You need to change the tube or tire on your dirt bike, but you don’t have a set of tire spoons and rim guards or even a set of tire irons available.
So what can you do? Get creative!
(If you’ve never changed a tire or tube before, read my tire change article first to learn how.)
Your primary objective is to get your tire on and off of the rim. Your second objective is to do that without damaging anything because damage means dollars.
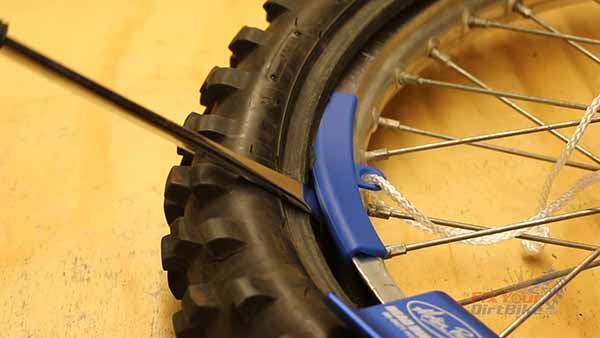
As you saw in the tire change article, I was using tire spoons and rim guards to manipulate the tire. I was also using a Motion Pro Bead Buddy to hold the bead in place during install.
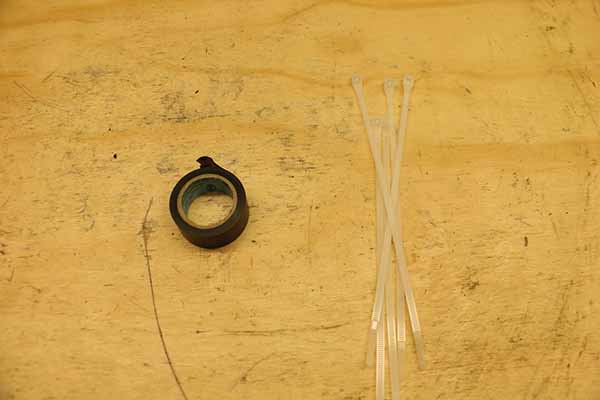
The spoons and bead holder cost around $50 HERE!. So our goal is to replicate those tools for free using tools and supplies you already have. Start by finding some electrical tape and zip-ties.
D.I.Y. Tire Change Spoons
Tire spoons are designed with a wide contact area and rounded edges. This ensures every point of contact is safe for the rim, tire, and tube.
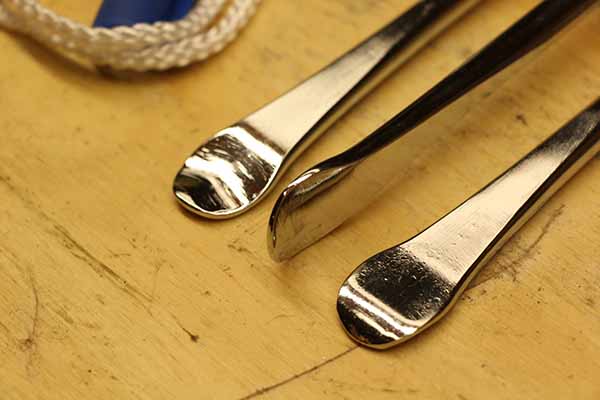
(My tire irons vs. screwdriver article goes into more detail about the point of contact.)
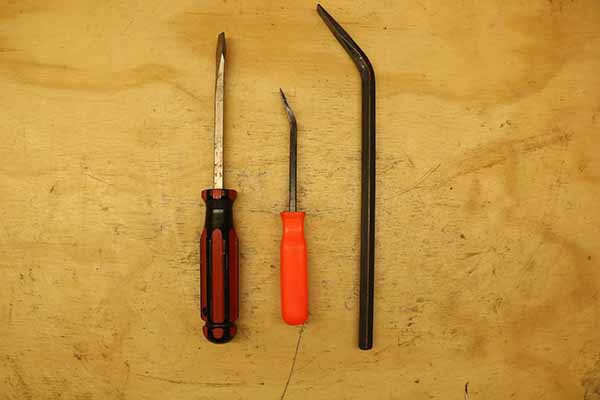
Start by finding your widest screwdrivers, or if you have pry bars, even better.
Now we need to get the sharp edges and corners as rounded as possible using electrical tape. The trick here is to round the edges and corners without turning the tip into a wad of tape.
This covers our point of contact with the tire.
As for widening the point of contact where the screwdriver or pry bar touches the rim, we can’t do much.
So for now, just wrap the body of the screwdriver or pry bar in a layer of electrical tape to avoid scraping the rim.
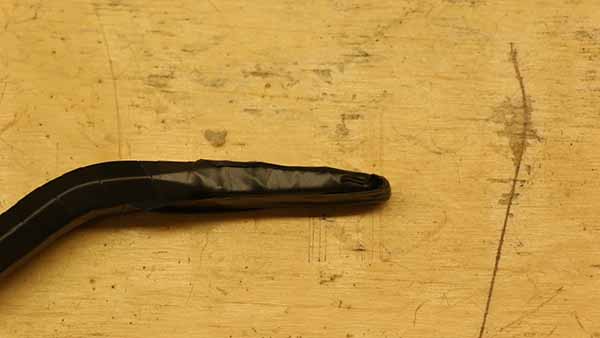
The electrical tape will get stripped off, so you will need to re-wrap a few times.
Related: Install your innertube with red rubber grease to make the job way too easy.
Cardboard Rim Guards
The rim guards are simply a piece of rubber with a safety string attached to it in case you drop the guard inside the tire.
This can easily be re-created using cardboard and electrical tape.
- Find a piece of cardboard roughly four inches by four inches.
- Fold the cardboard about one quarter from the end.
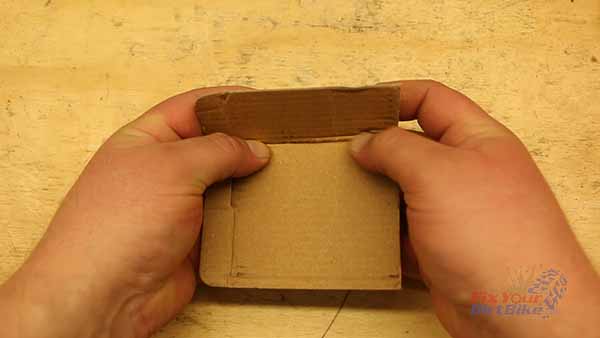
- Check to make sure the cardboard covers the inside of the rim past the bead seat.
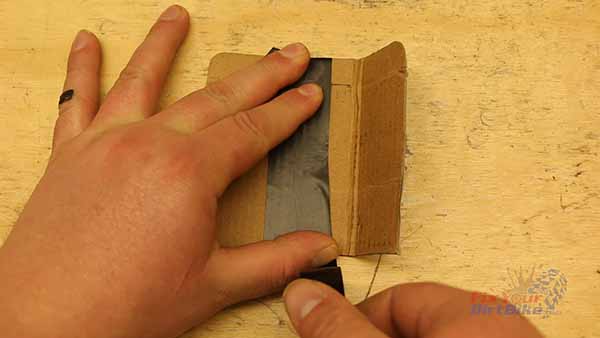
- Unfold the cardboard and wrap the folded half in electrical tape.
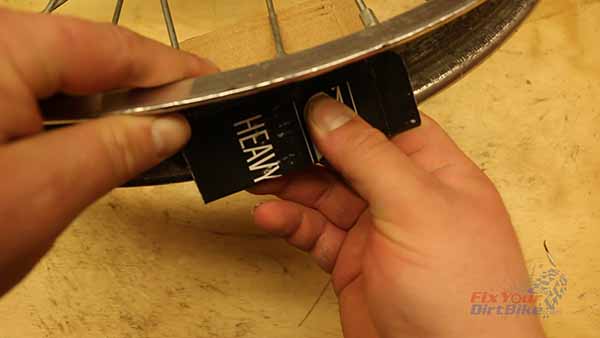
When using your cardboard rim guards, they will rip if you’re not careful.
The rim guards will get stuck between the tire and rim, so you need to install the next guard and push the tire down to release the pressure on the previous guard to remove it.
This is a great way to gauge your patience. If your cardboard guards are getting ripped up, you need to slow down.
Related: What tools do you keep in your trail pack?
Makeshift Bead Holder
The Motion Pro Bead Buddy is designed to hold the tire bead inside the rim during install, so you don’t have to fight a slipping tire.
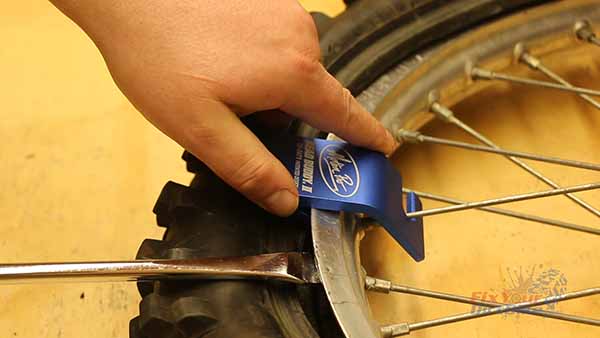
If you have a pair of vise grips, you win. All you need to do is clamp the rim at your starting point. Just make sure to wrap the ends in electrical tape to avoid scraping the rim.
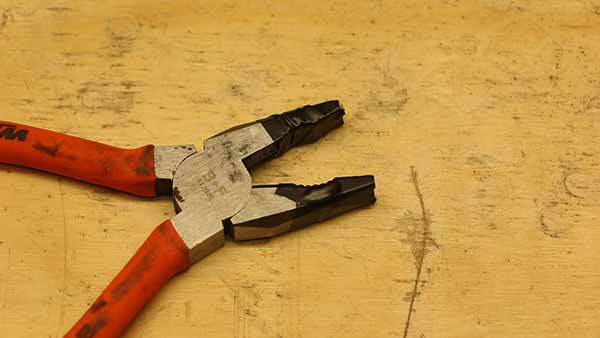
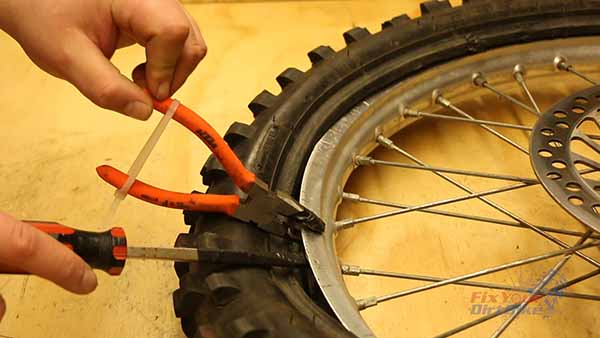
If you don’t have a set of vise grips, a pair of pliers or a hand break with a zip-tie will do the trick.
Just remember that when you are done with your makeshift bead holder that you don’t force it out of the rim, as this may damage it.
Simply push the tire away from the rim with your screwdriver to release your holding tool.
Now you have some ideas on how to improvise tools in a pinch. Just be sure to take your time, so you don’t damage your parts or yourself.
If you can think of any other improvised methods, I’d love to hear about them in the comments or on our FaceBook page!
Keep Reading – Screwdrivers V.S. Tire Irons


