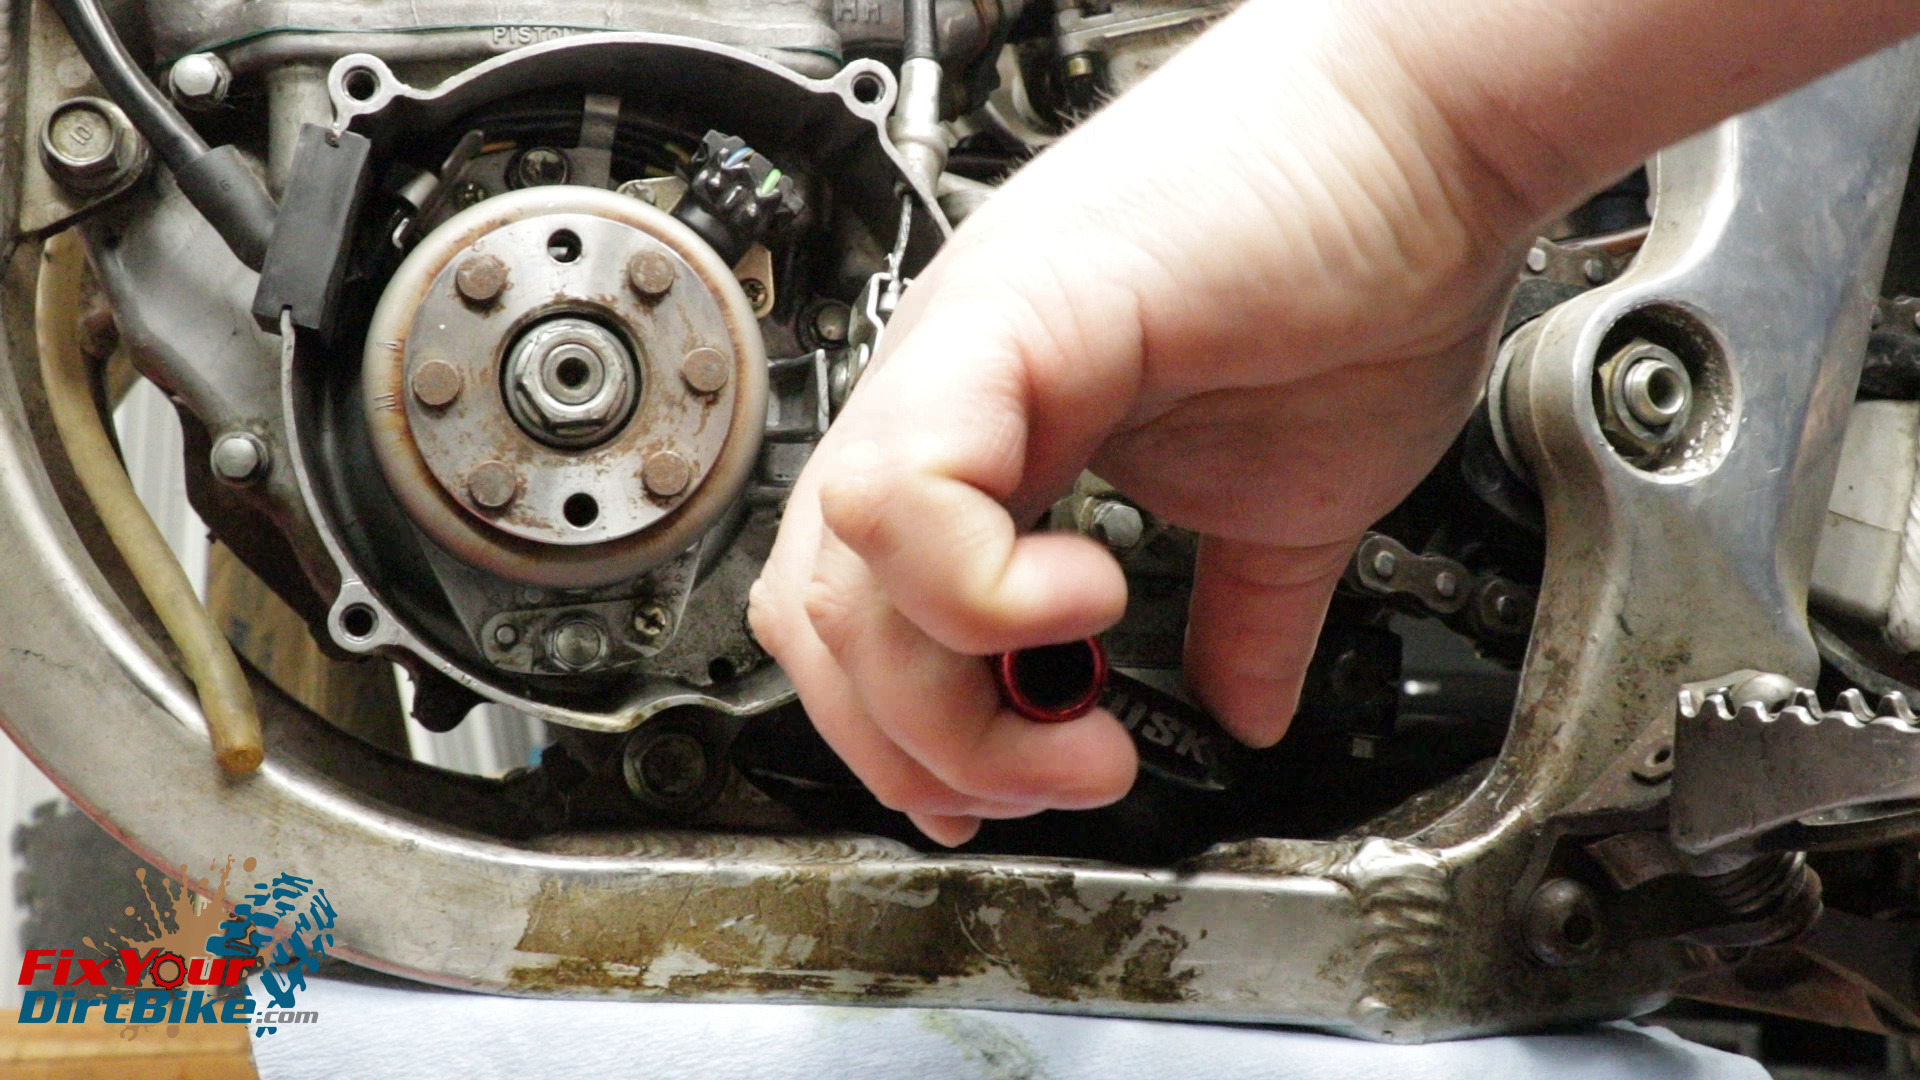
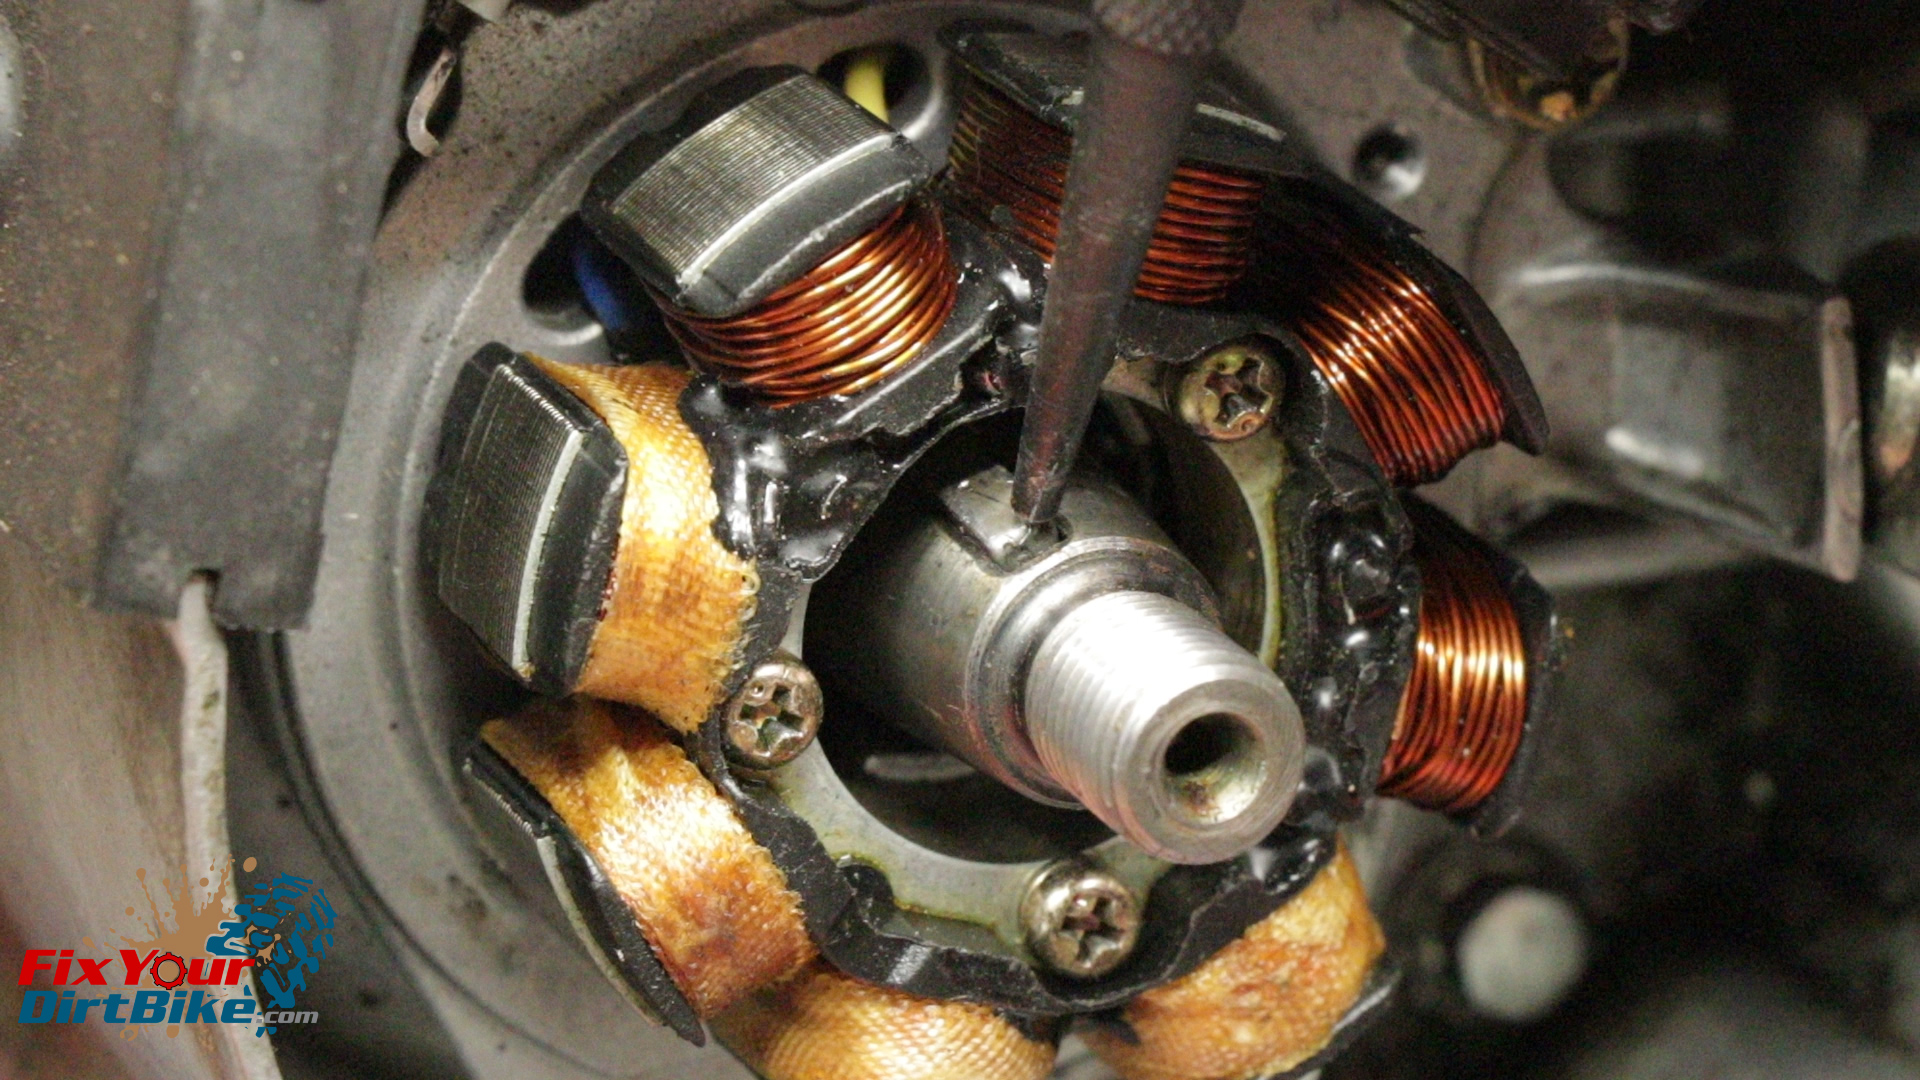
Your flywheel is secured to your crankshaft with a single nut torqued to 40 foot-pounds. To remove the flywheel, you need to stop the crankshaft from rotating, and this is done with a flywheel holding tool. Unfortunately, the pins on my holder are too big for my flywheel, so here is how to loosen the flywheel nut without the proper tool.
How To Remove And Install The Flywheel On You 1997 – 2001 Honda CR250
The Tools You Will Need
Philips Head Screwdriver
Torque Wrench
Socket Wrench
Breaker Bar
17mm Wrench
17mm Socket
Large Channel Lock Pliers
Specialty Tools
Flywheel Holder
Flywheel Puller – Size M27x1.0L
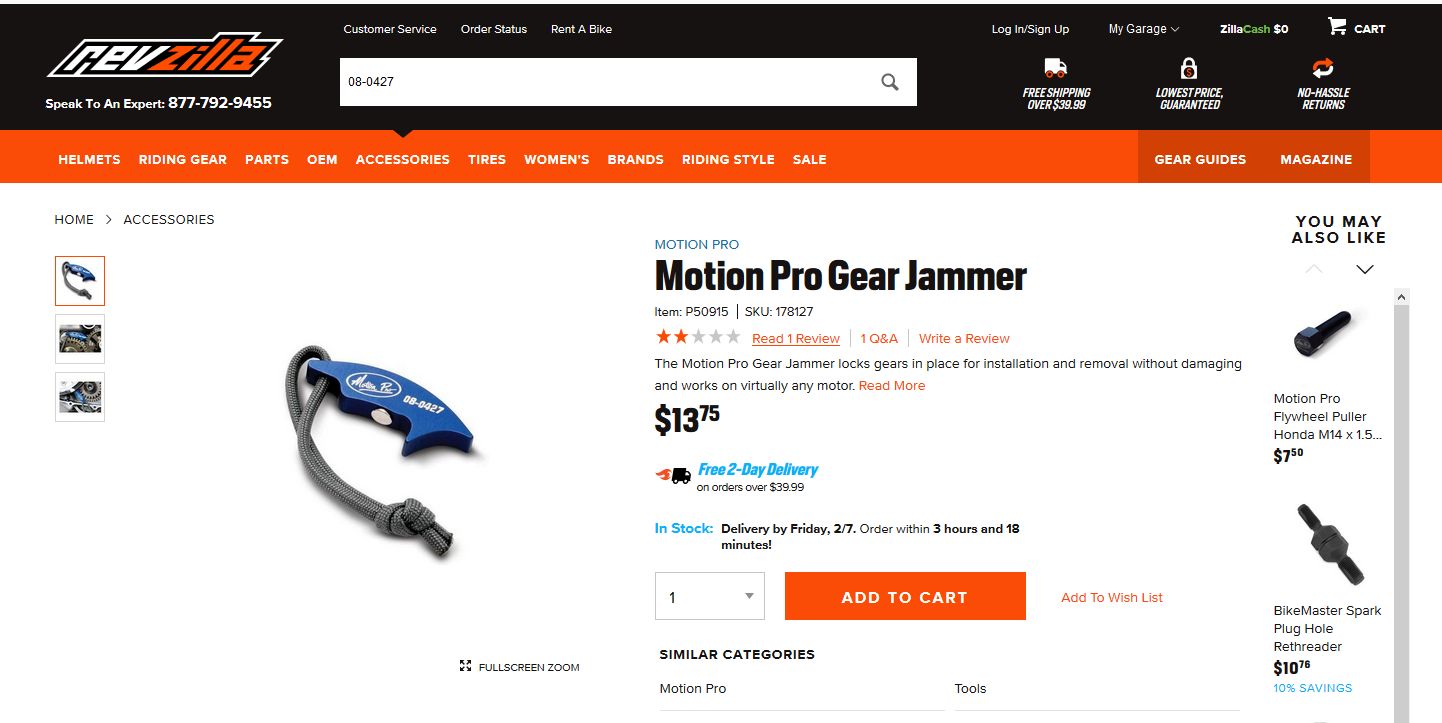
You can get all the tools you need through our partner links HERE!
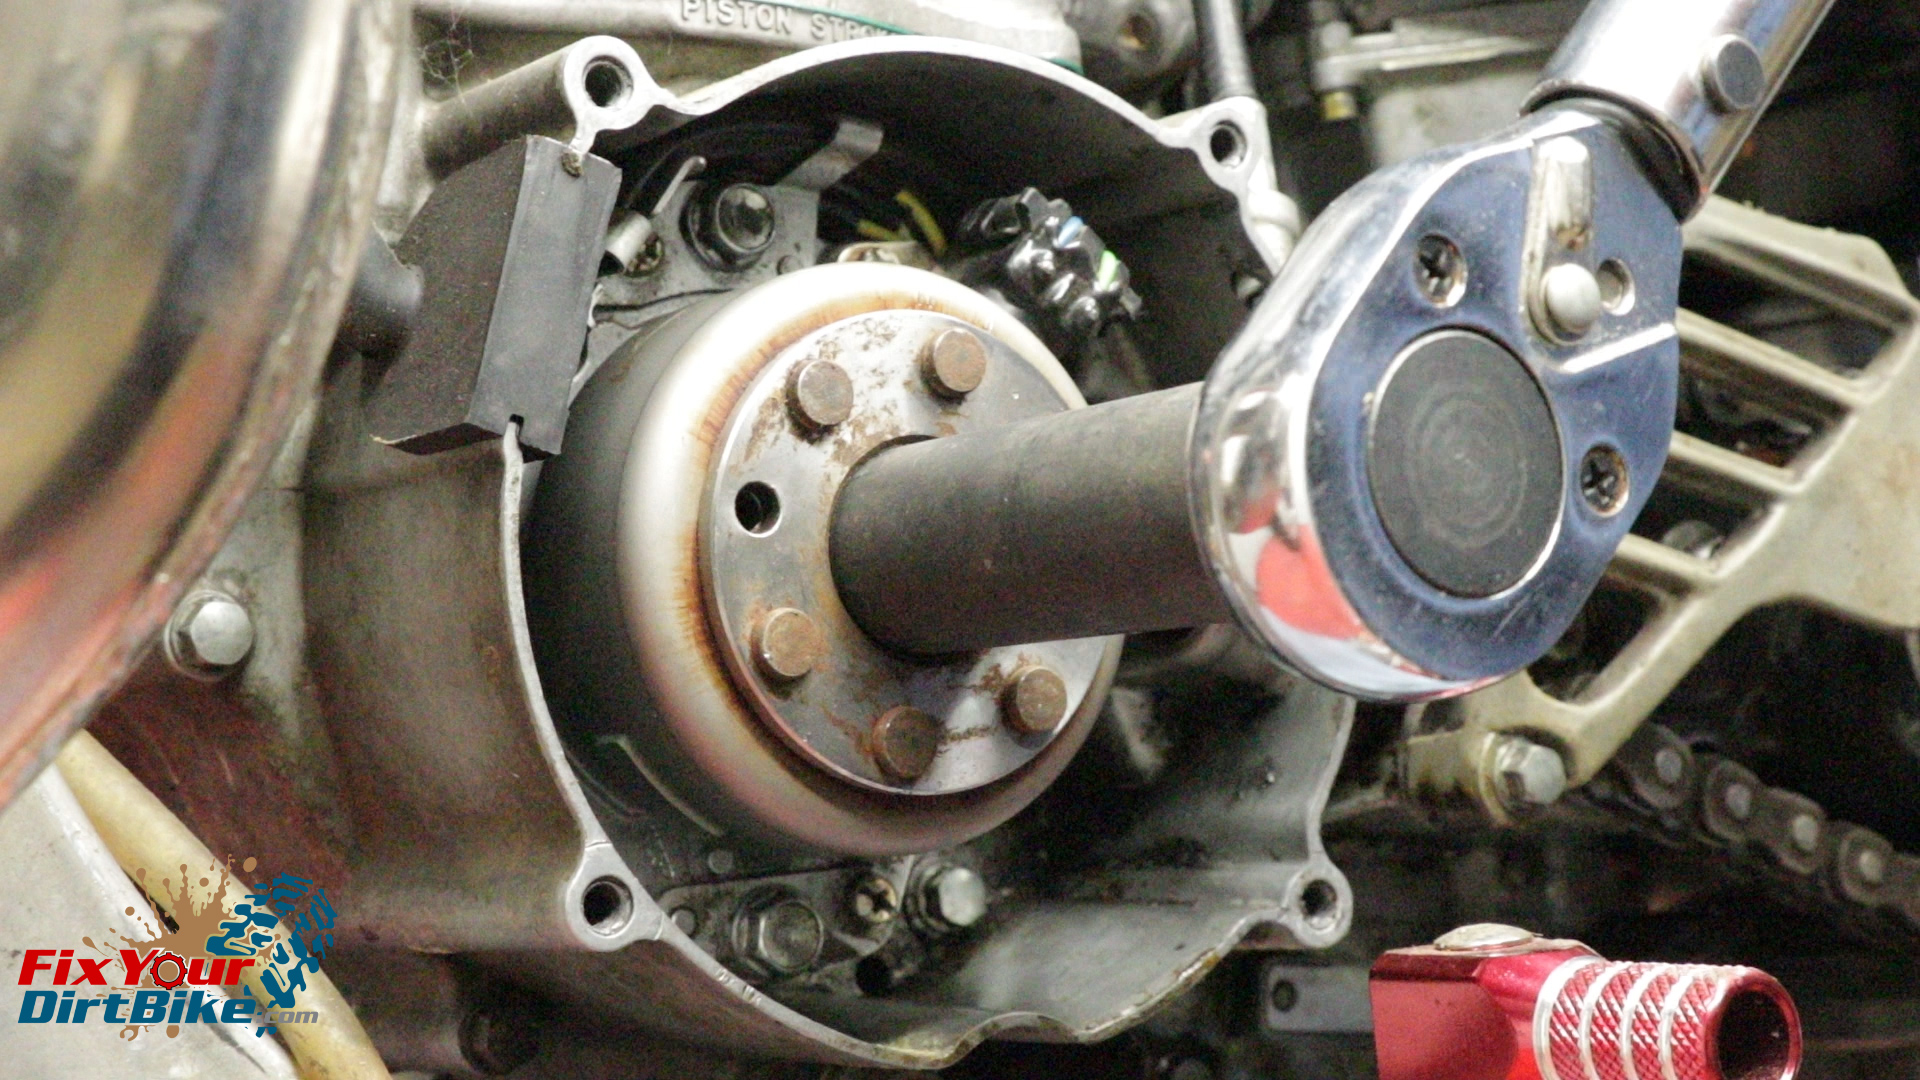
Your flywheel is secured to your crankshaft with a single nut torqued to 40 foot-pounds. To remove the flywheel, you need to stop the crankshaft from rotating, and this is done with a flywheel holding tool. Unfortunately, the pins on my holder are too big for my flywheel, so here is how to loosen the flywheel nut without the proper tool.
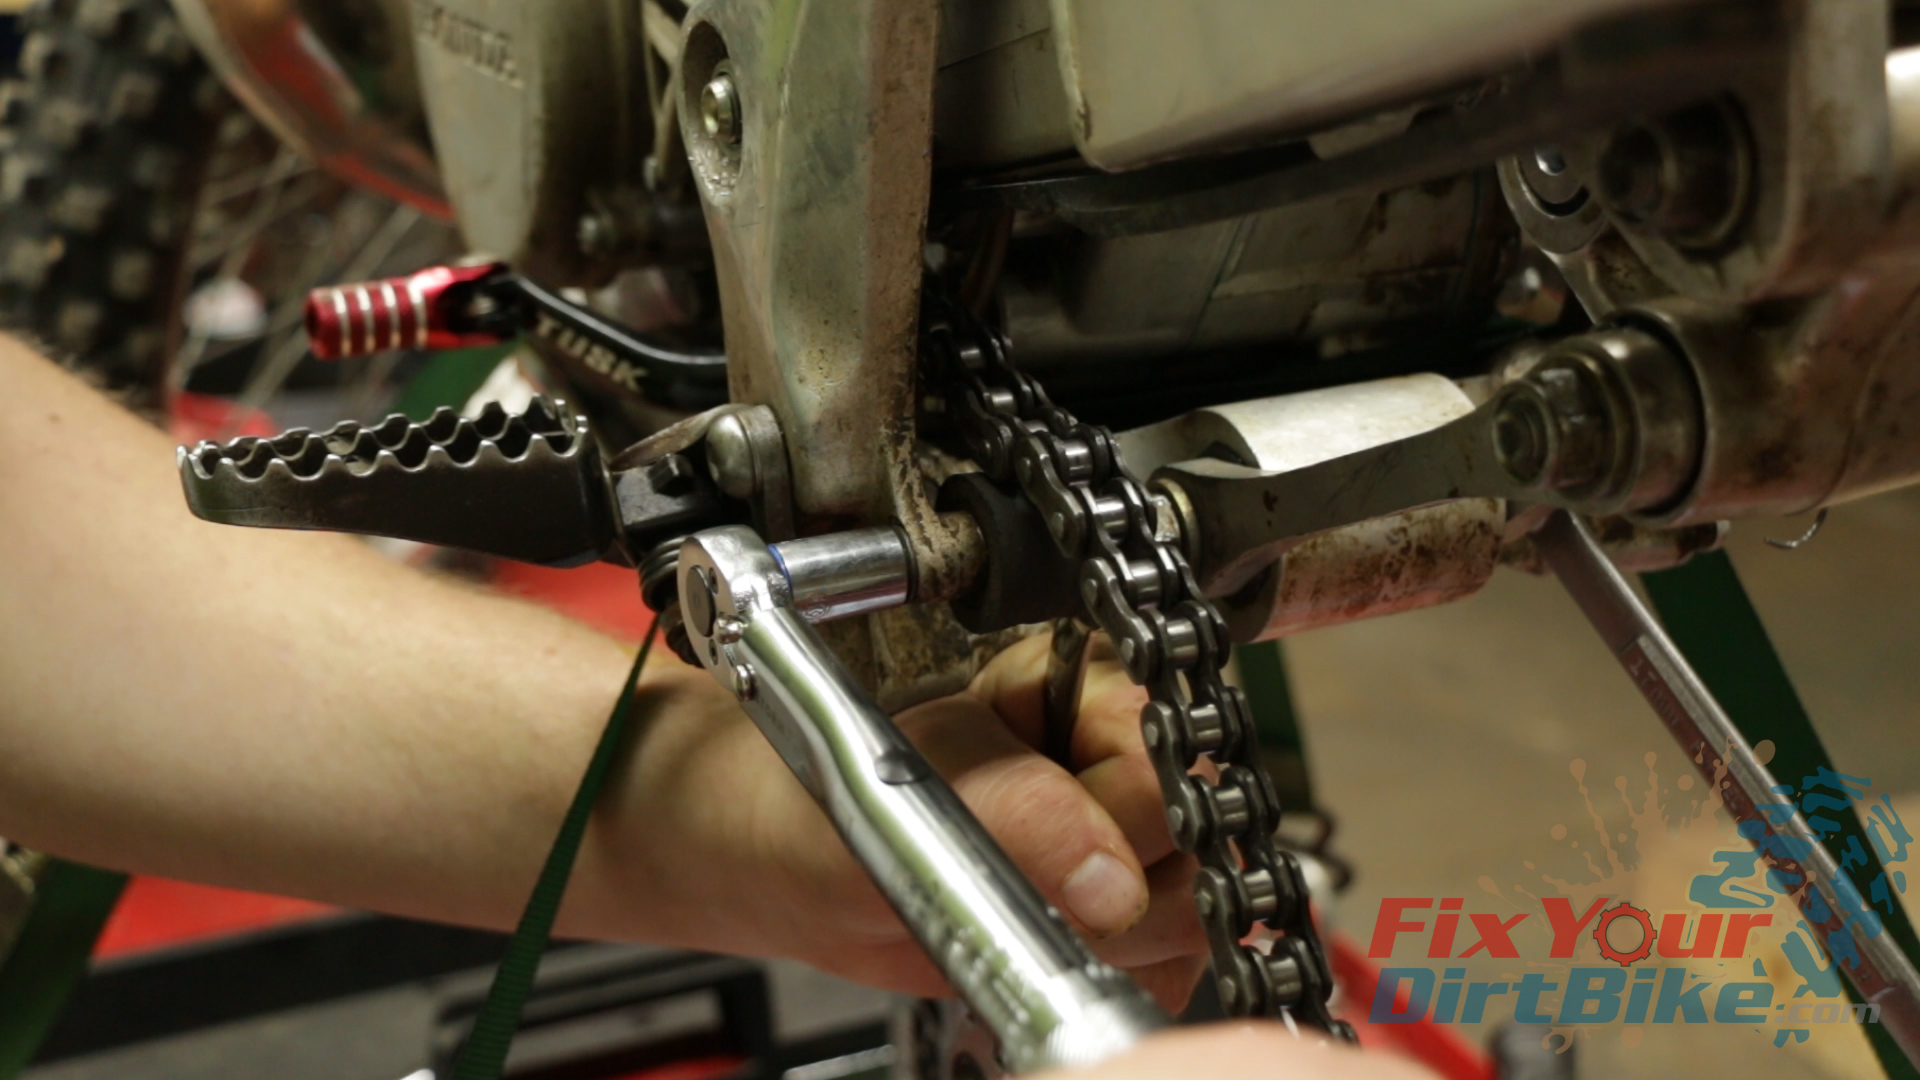
Your next best option is to use a gear jammer to lock the crankshaft and clutch together, but that requires access to the right crankcase. If your right crankcase cover is already off, you’re good to go. But if all you want to do is change your clutch cable, this won’t work. And, if you are adjusting your timing, this definitely won’t work, because you need the engine running.
Motion Pro Gear Jammer
So now we need to move farther down the driveline to find a good binding point, and that would be the rear wheel. Start by shifting into 5th gear. The 5th gear ratio is 0.896, giving you a slight leverage advantage at the rear wheel.
Shift Your Transmission Into 5th Gear
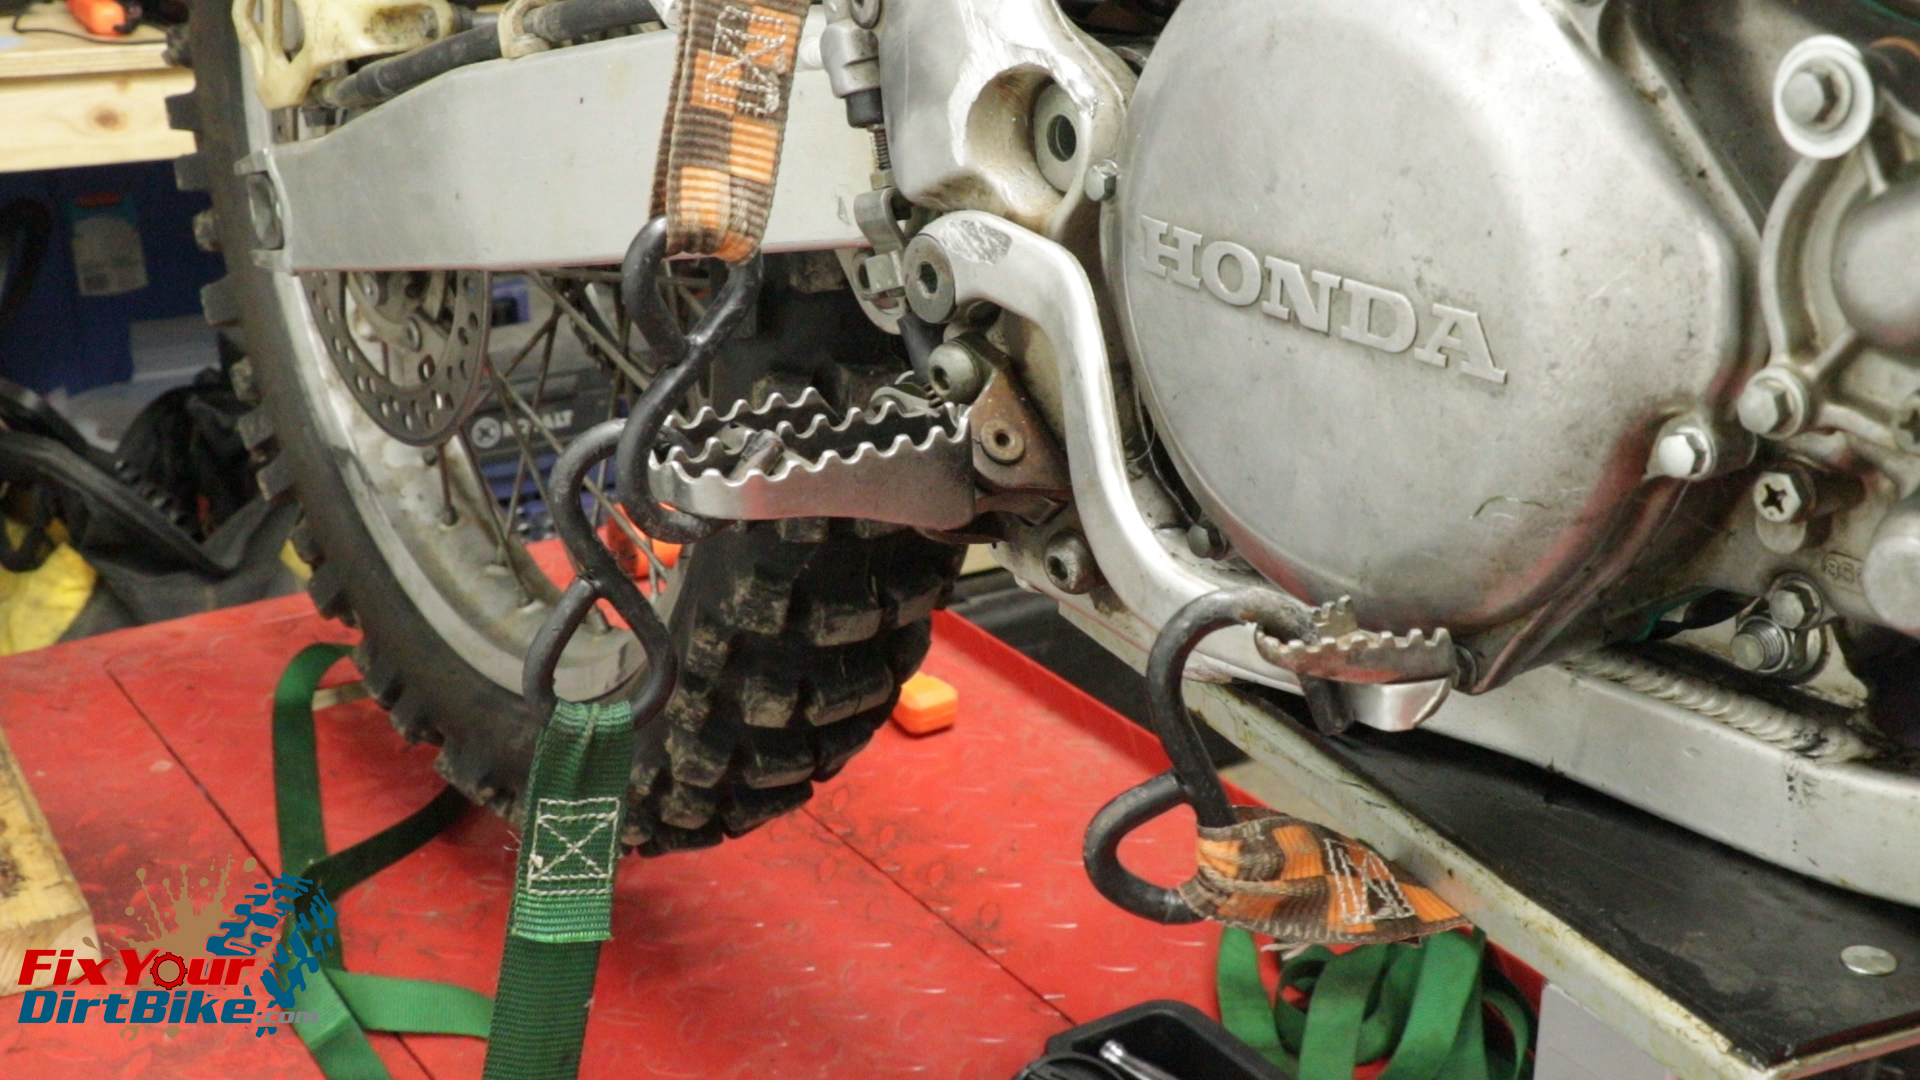
If your brakes are in good condition and your workspace isn’t too cold, you can bind the rear brake with a strap. My shop was around 40 degrees that day, so this didn’t work for me.
Bind Your Rear Brake With A Ratchet Strap
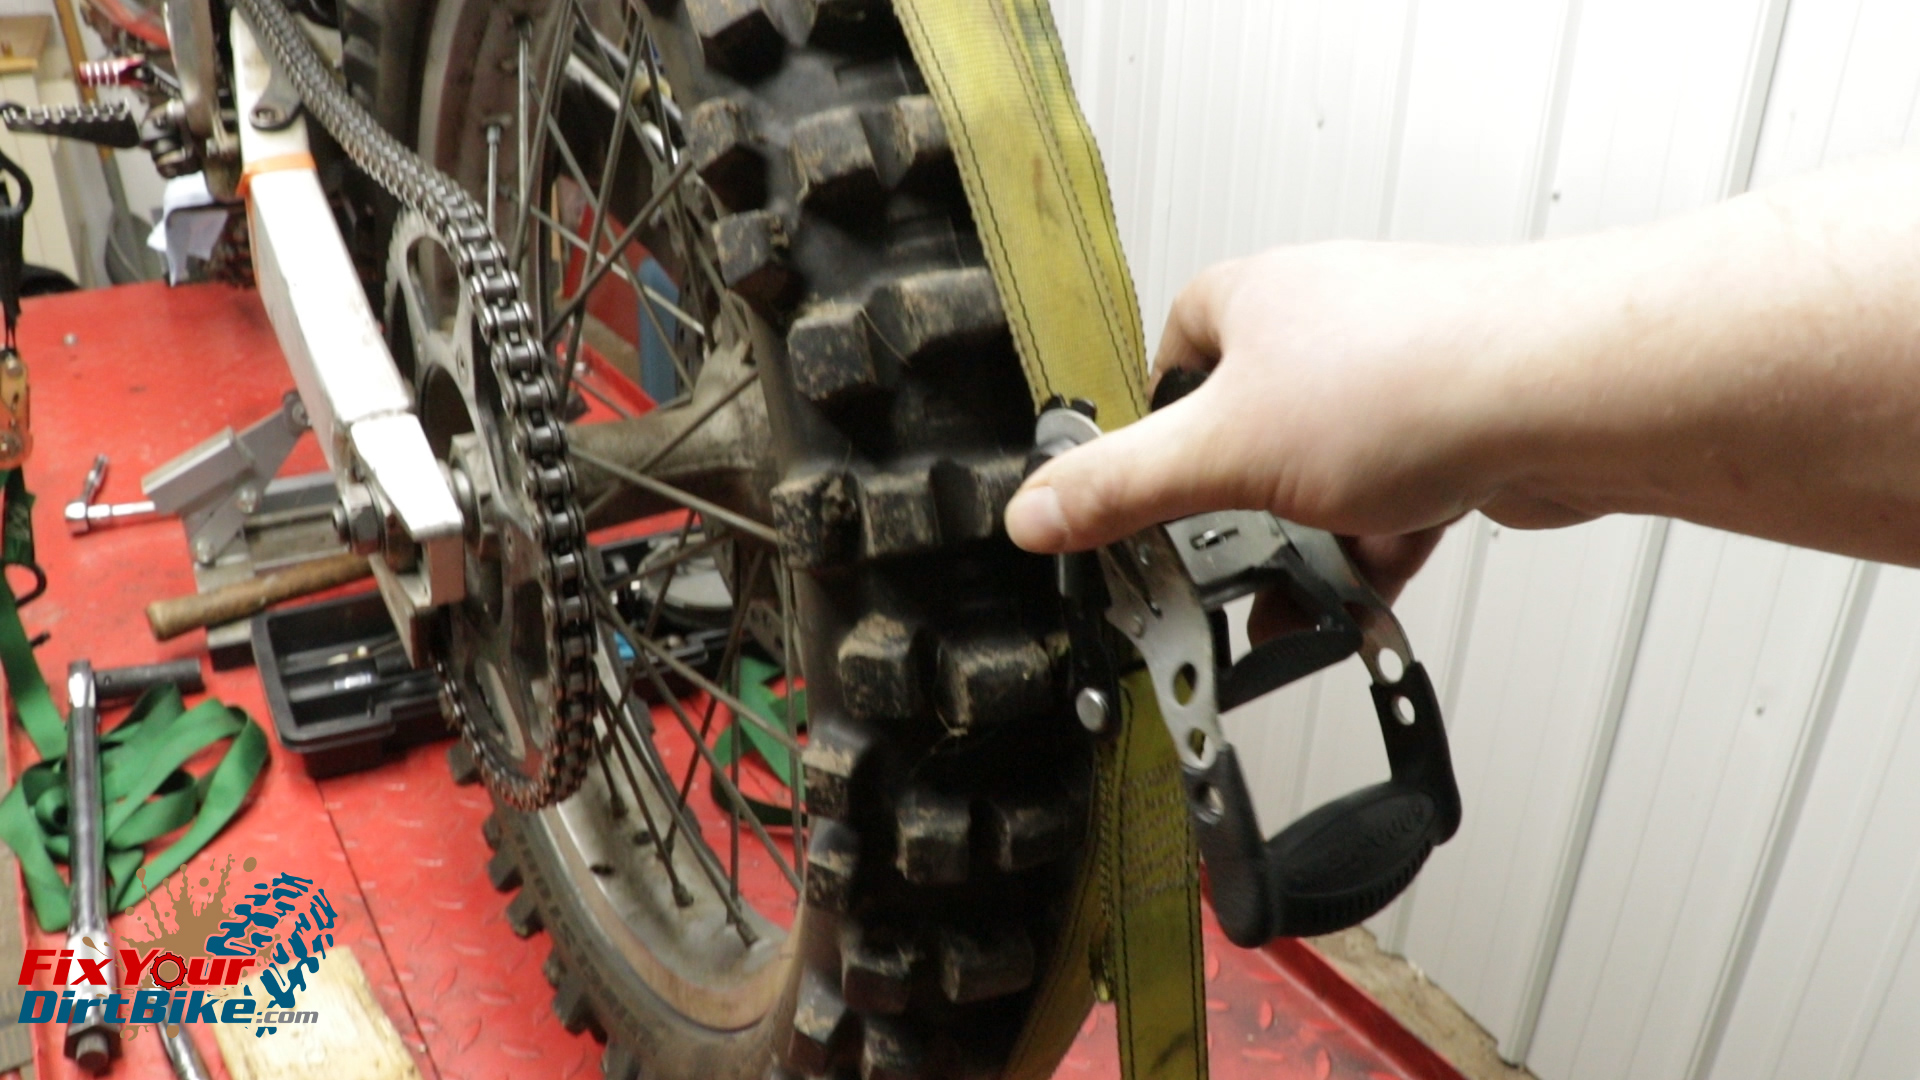
The next option is a long ratchet strap wrapped around the rear tire and strapped to something solid. My bike is on a stand, and my lift was not stable enough for this method. If I had another set of hands to help, this would have worked great, but it didn’t, so I moved on to the last resort, direct interference.
Bind The Rear Wheel With A Long Ratchet Strap
Direct Interference
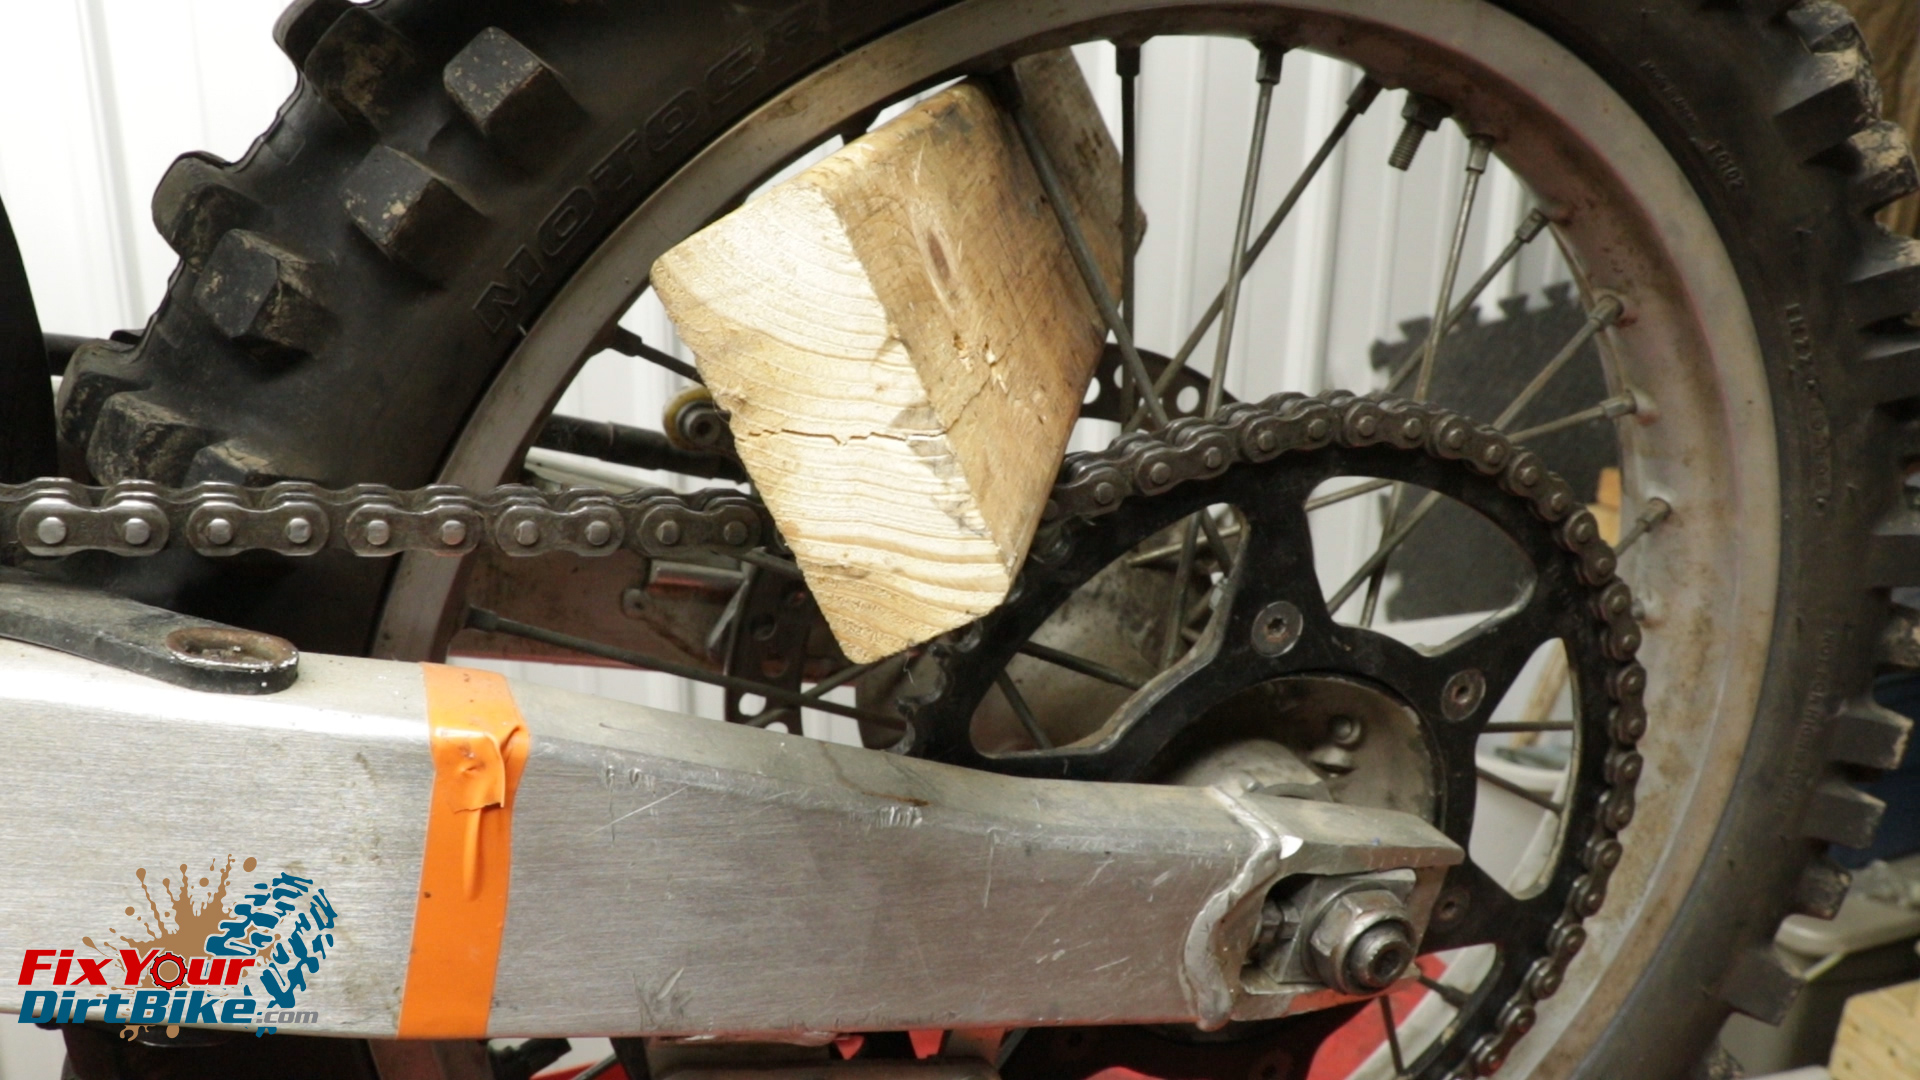
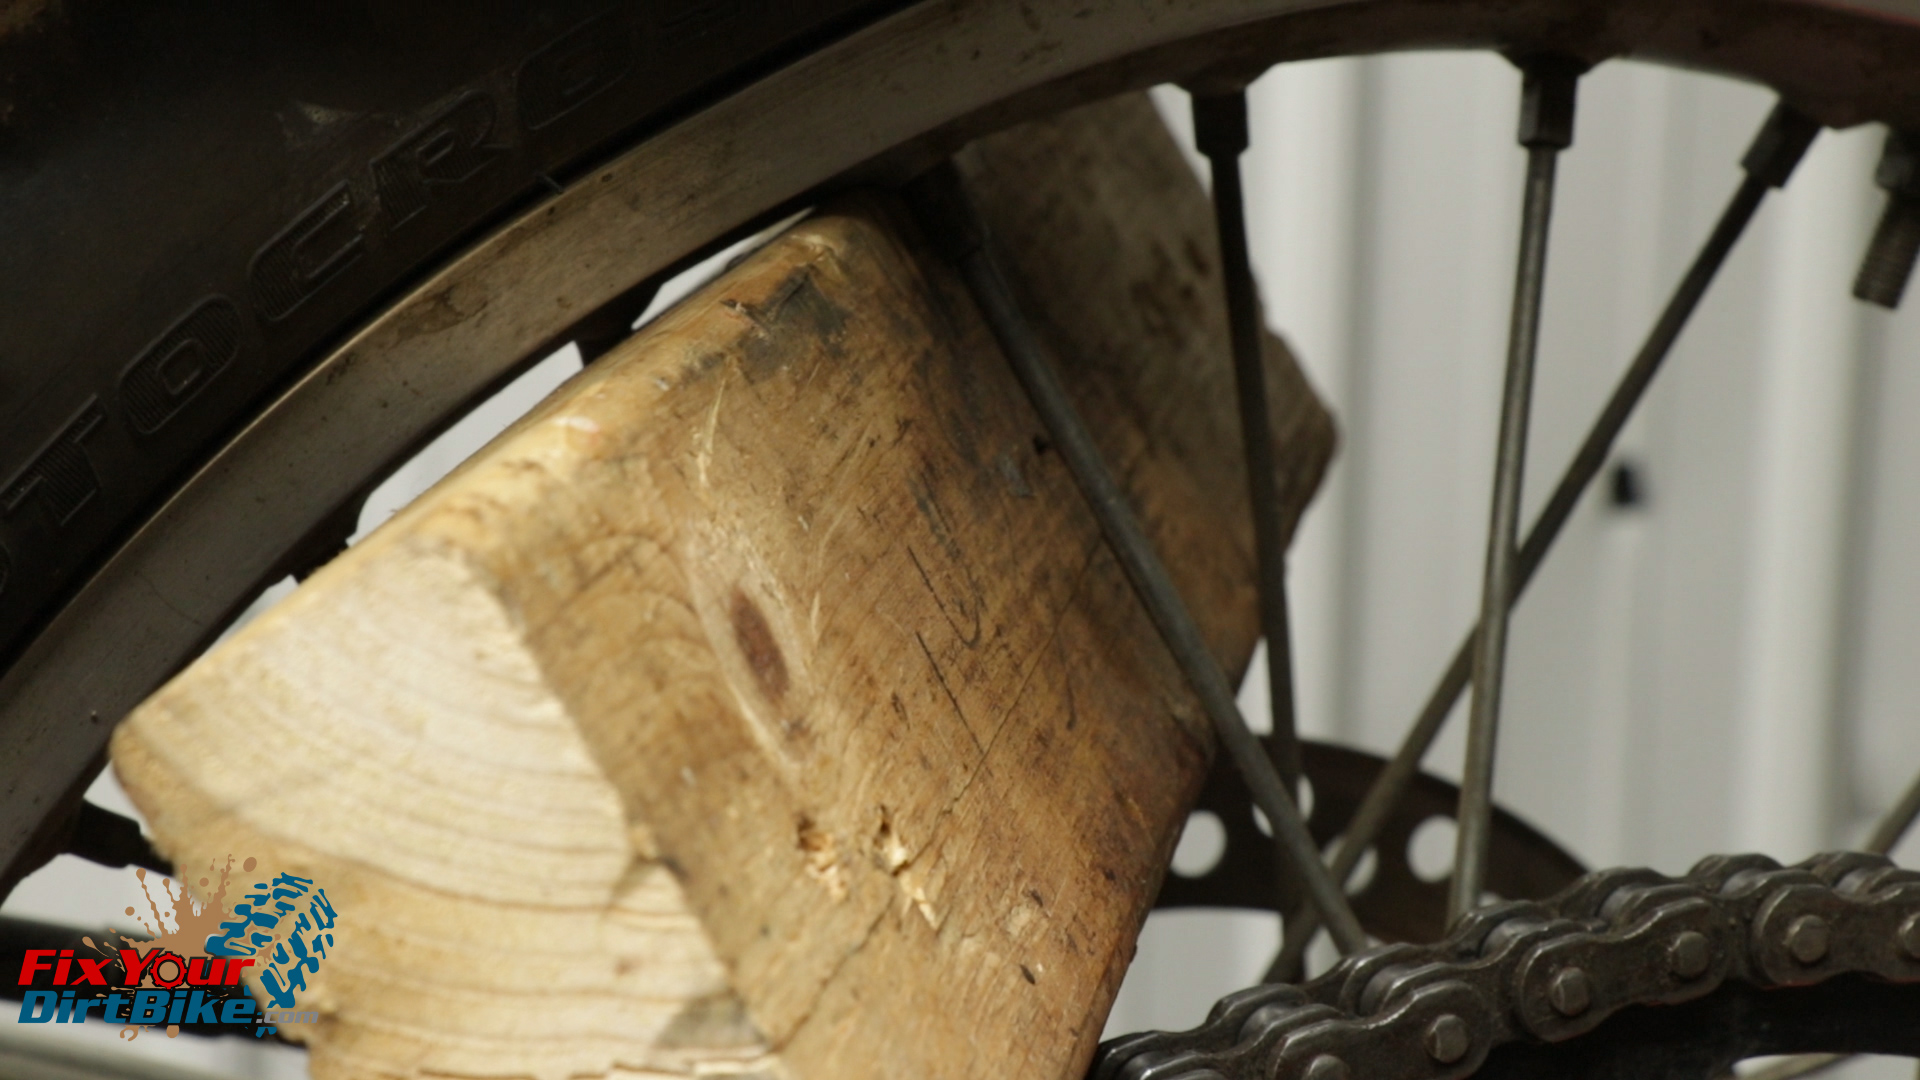
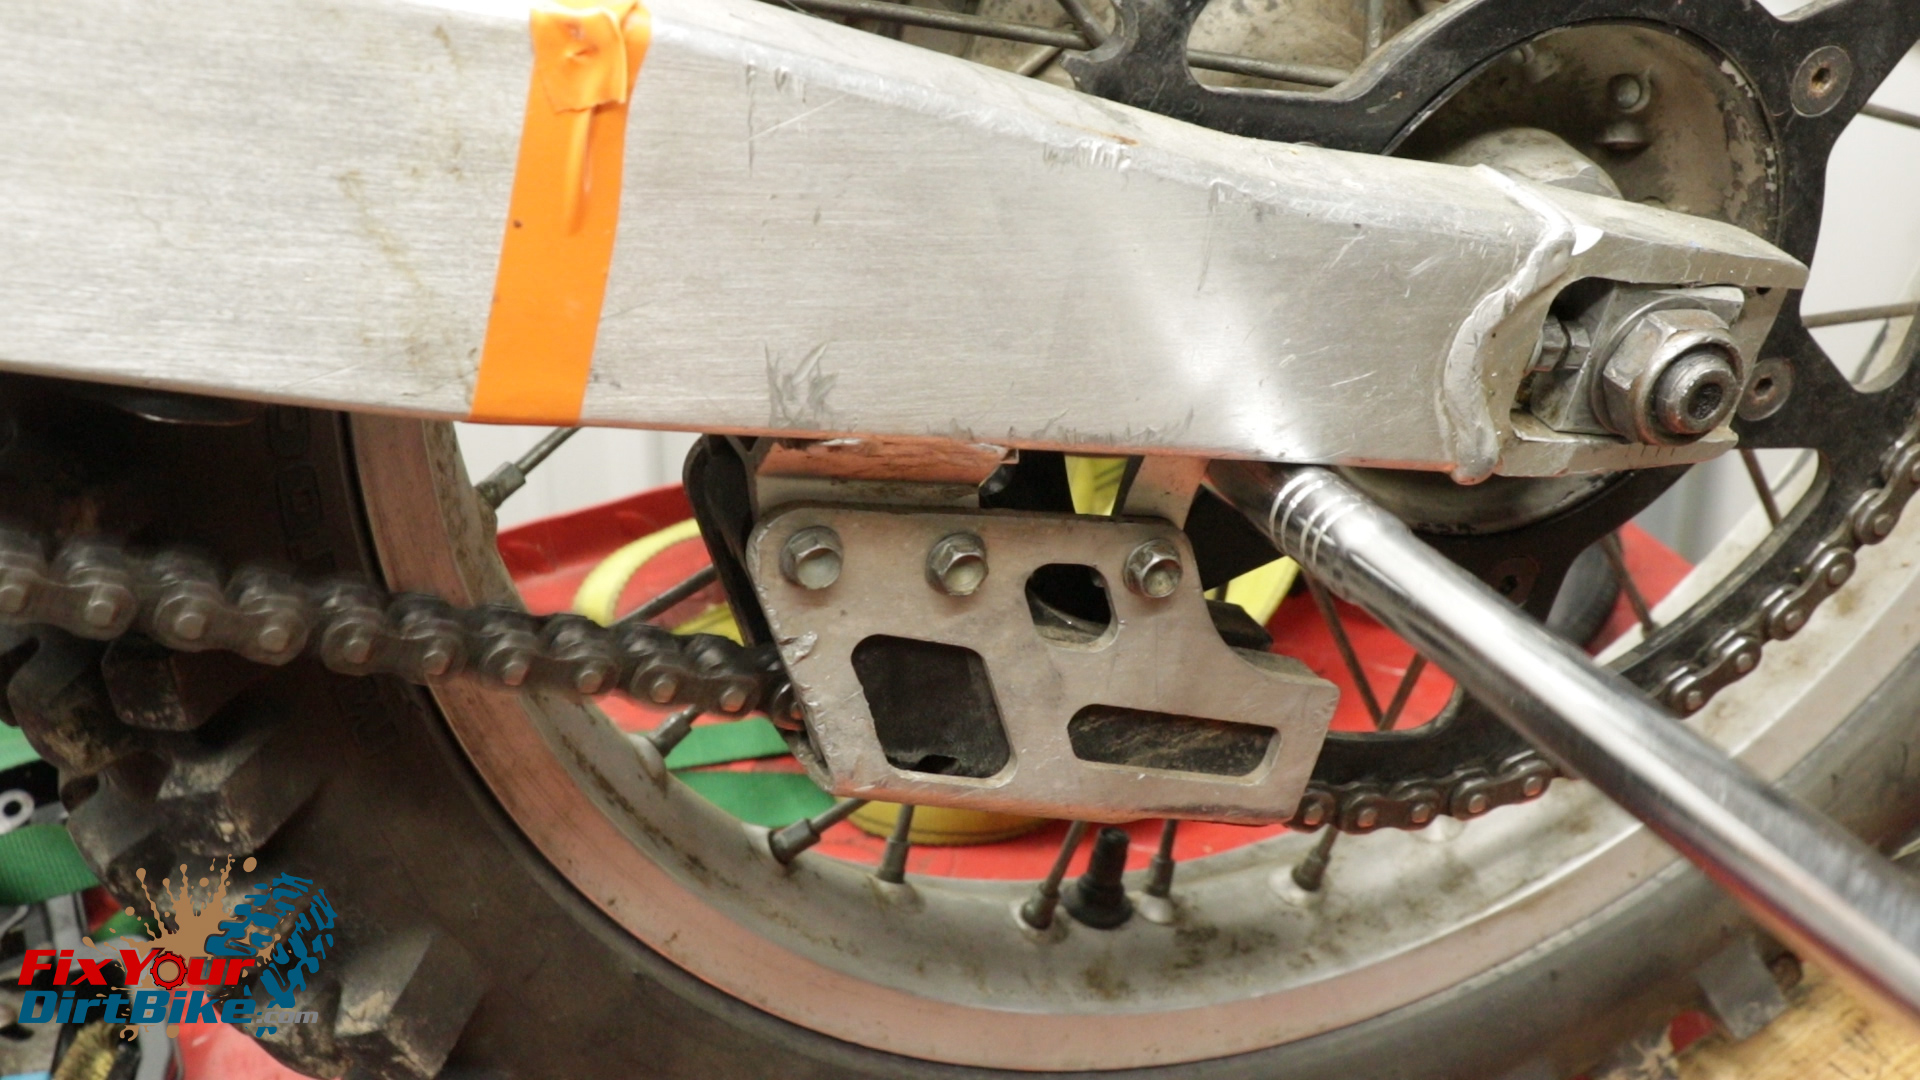
Forty foot-pounds take a lot of force, and you can easily damage your spokes and sprocket, so be very careful if you need to use this method. Despite the obvious potential for damage, if you use a 2×4 correctly, you won’t have any issues.
Position the 2×4 tight up against the rim, so it pushes against the spoke nipple and not the spoke itself.
Then turn your wheel forward until the 2×4 touches the brake caliper, then the drive chain. Your 2×4 will be at an angle, but that’s ok.
Put some pressure on the flywheel nut and double-check where the 2×4 is sitting. If the spokes are clear, loosen the nut.
Again, this is NOT ideal and is the last resort for a reason, if done right, though, it works every time.
Position the 2×4 tight up against the rim, so it pushes against the spoke nipple and not the spoke itself.Then turn your wheel forward until the 2×4 touches the brake caliper, then the drive chain. Your 2×4 will be at an angle, but that’s ok.Put some pressure on the flywheel nut and double-check where the 2×4 is sitting. If the spokes are clear, loosen the nut.
Flywheel Removal
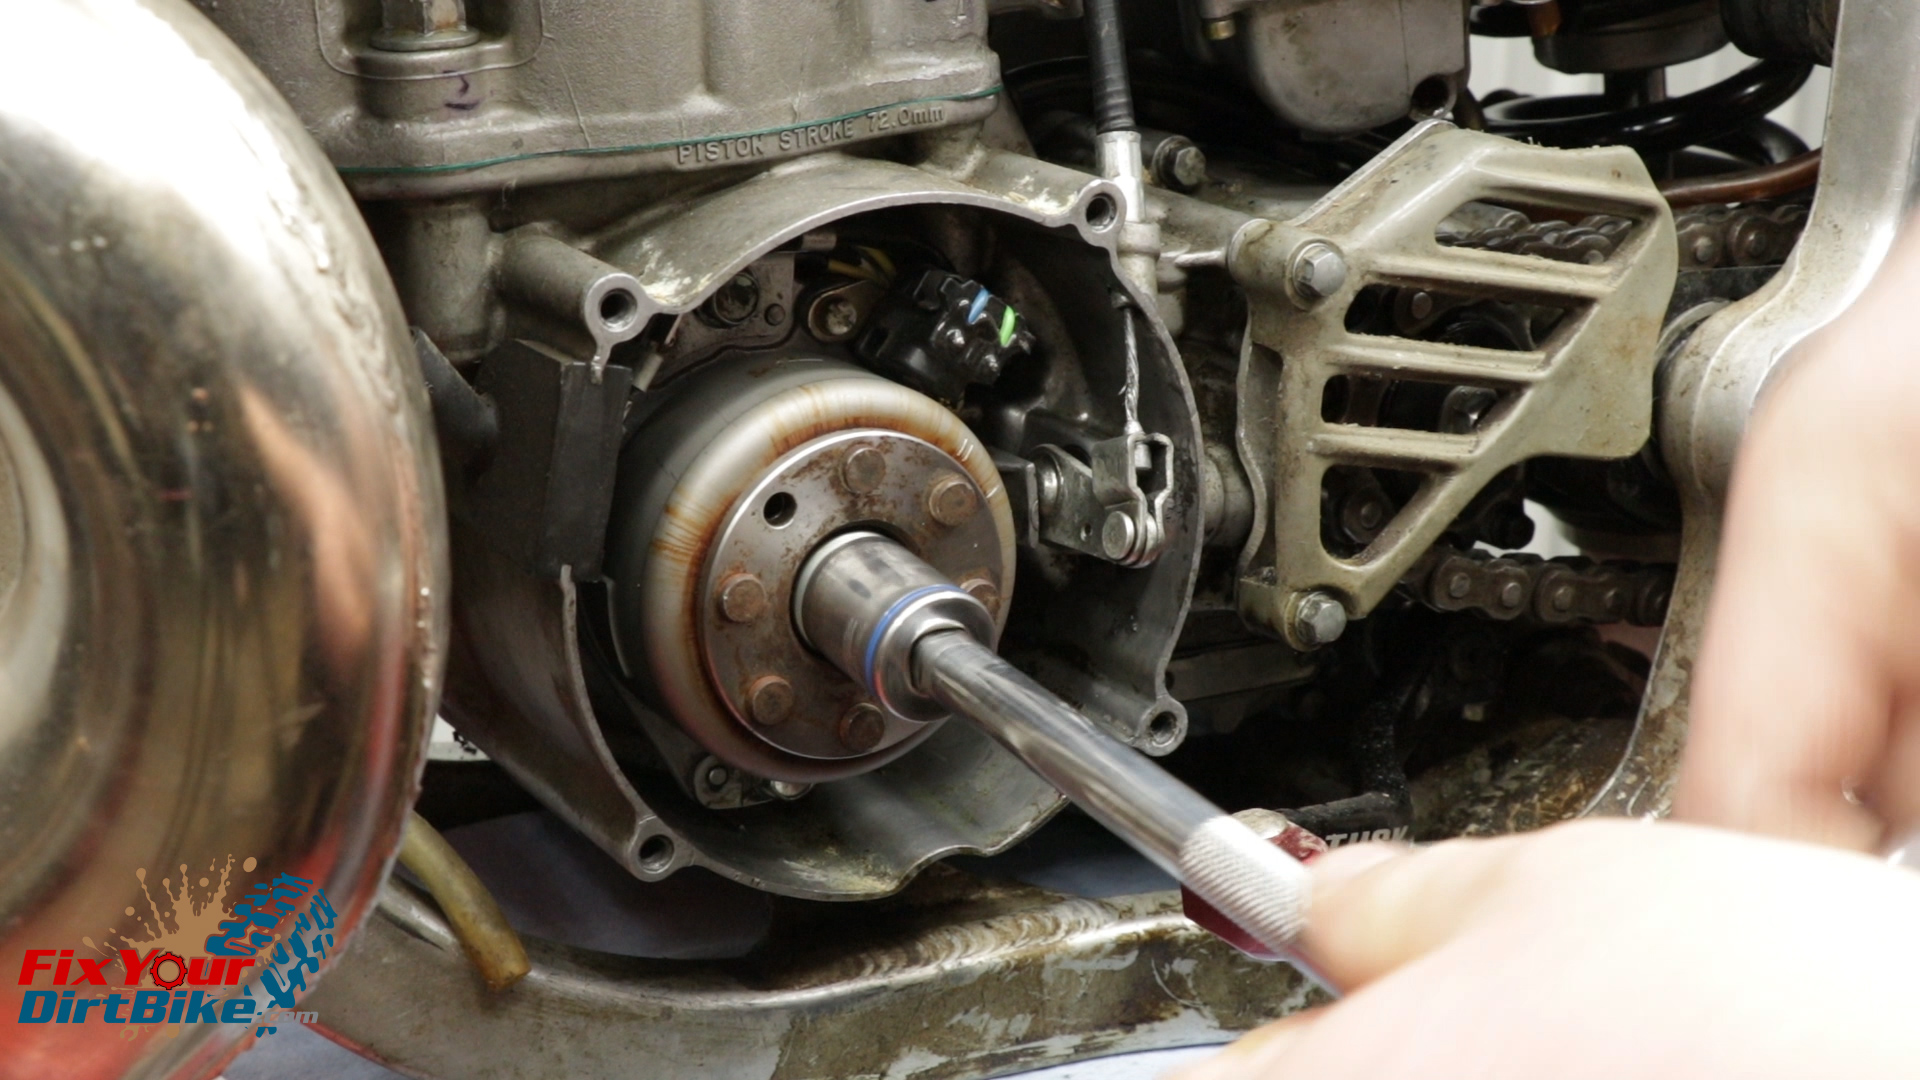
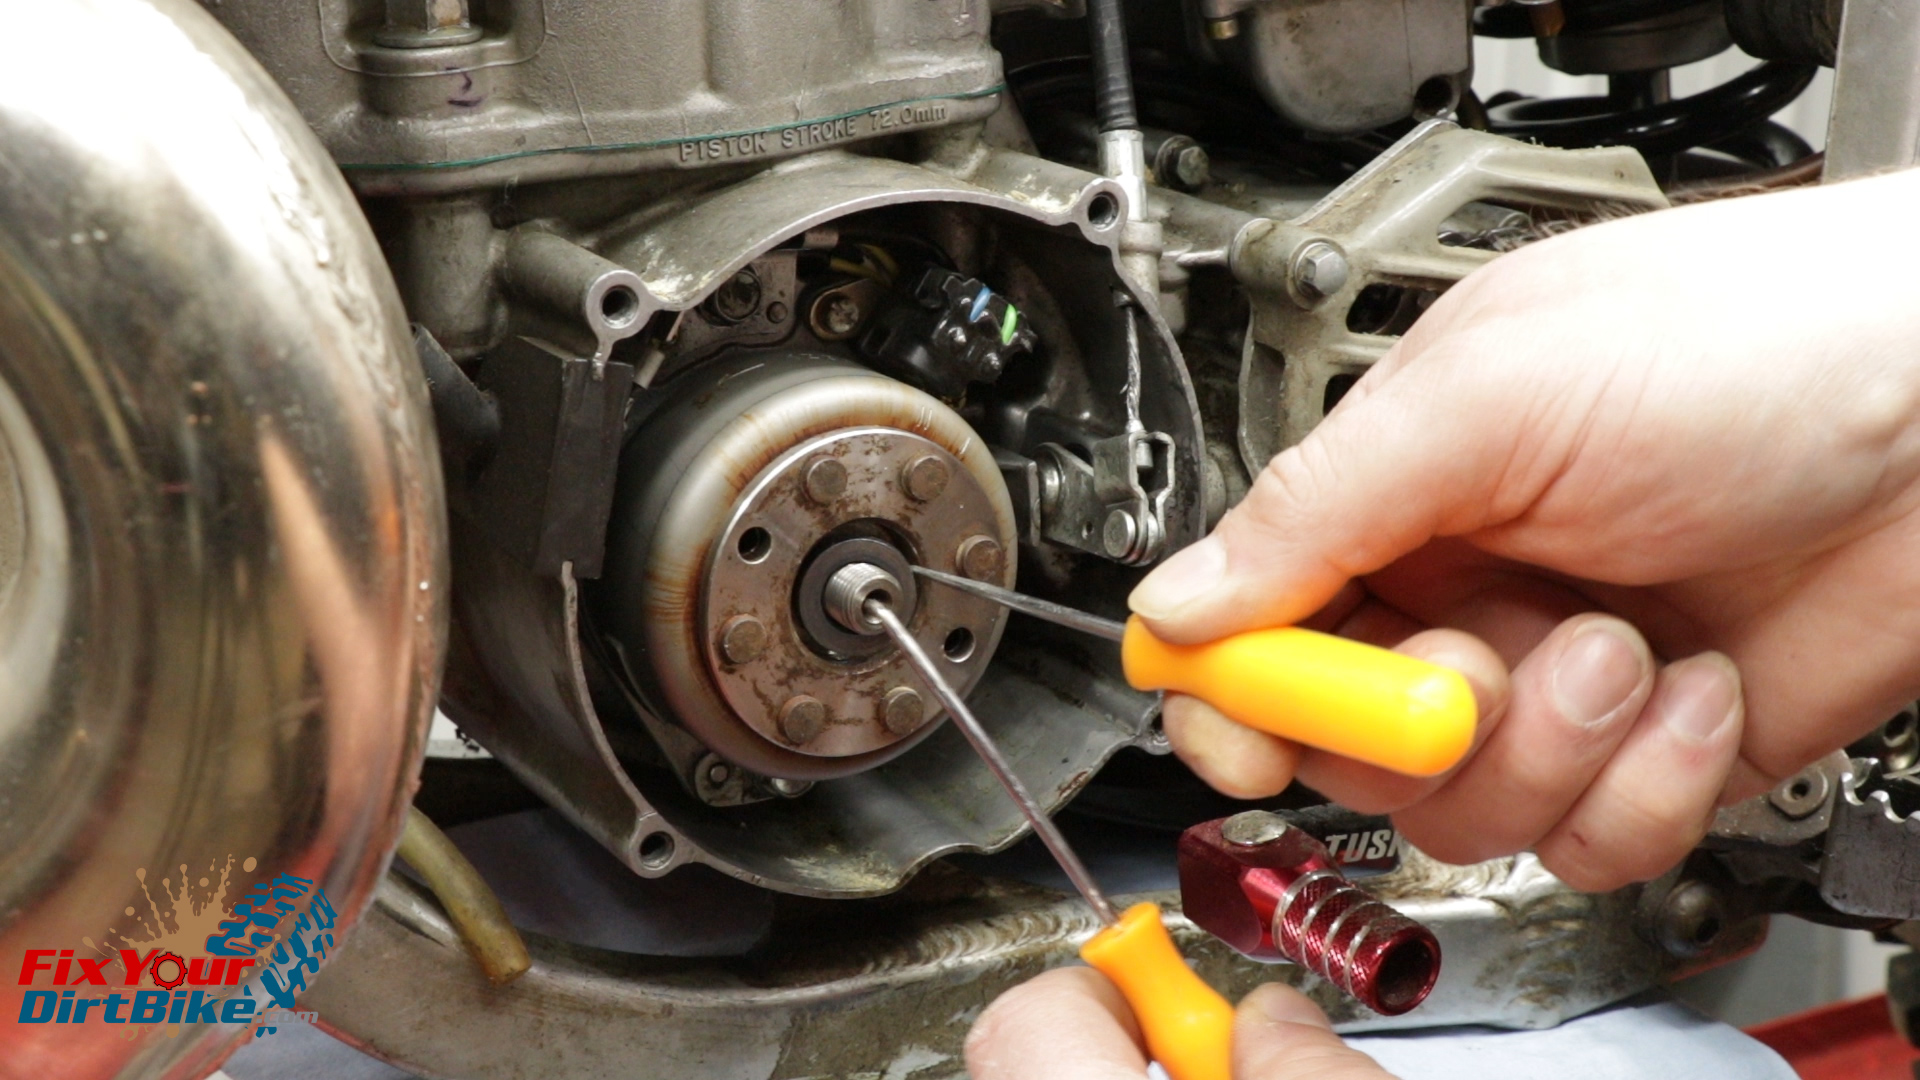
Remove the flywheel nut and washer.
You will need a center push, external thread flywheel puller, size M27x1.0L.
Remove the center bolt from the puller to ensure full engagement of the flywheel threads.
The flywheel is a reverse thread, so “lefty tighty, righty loosey.”
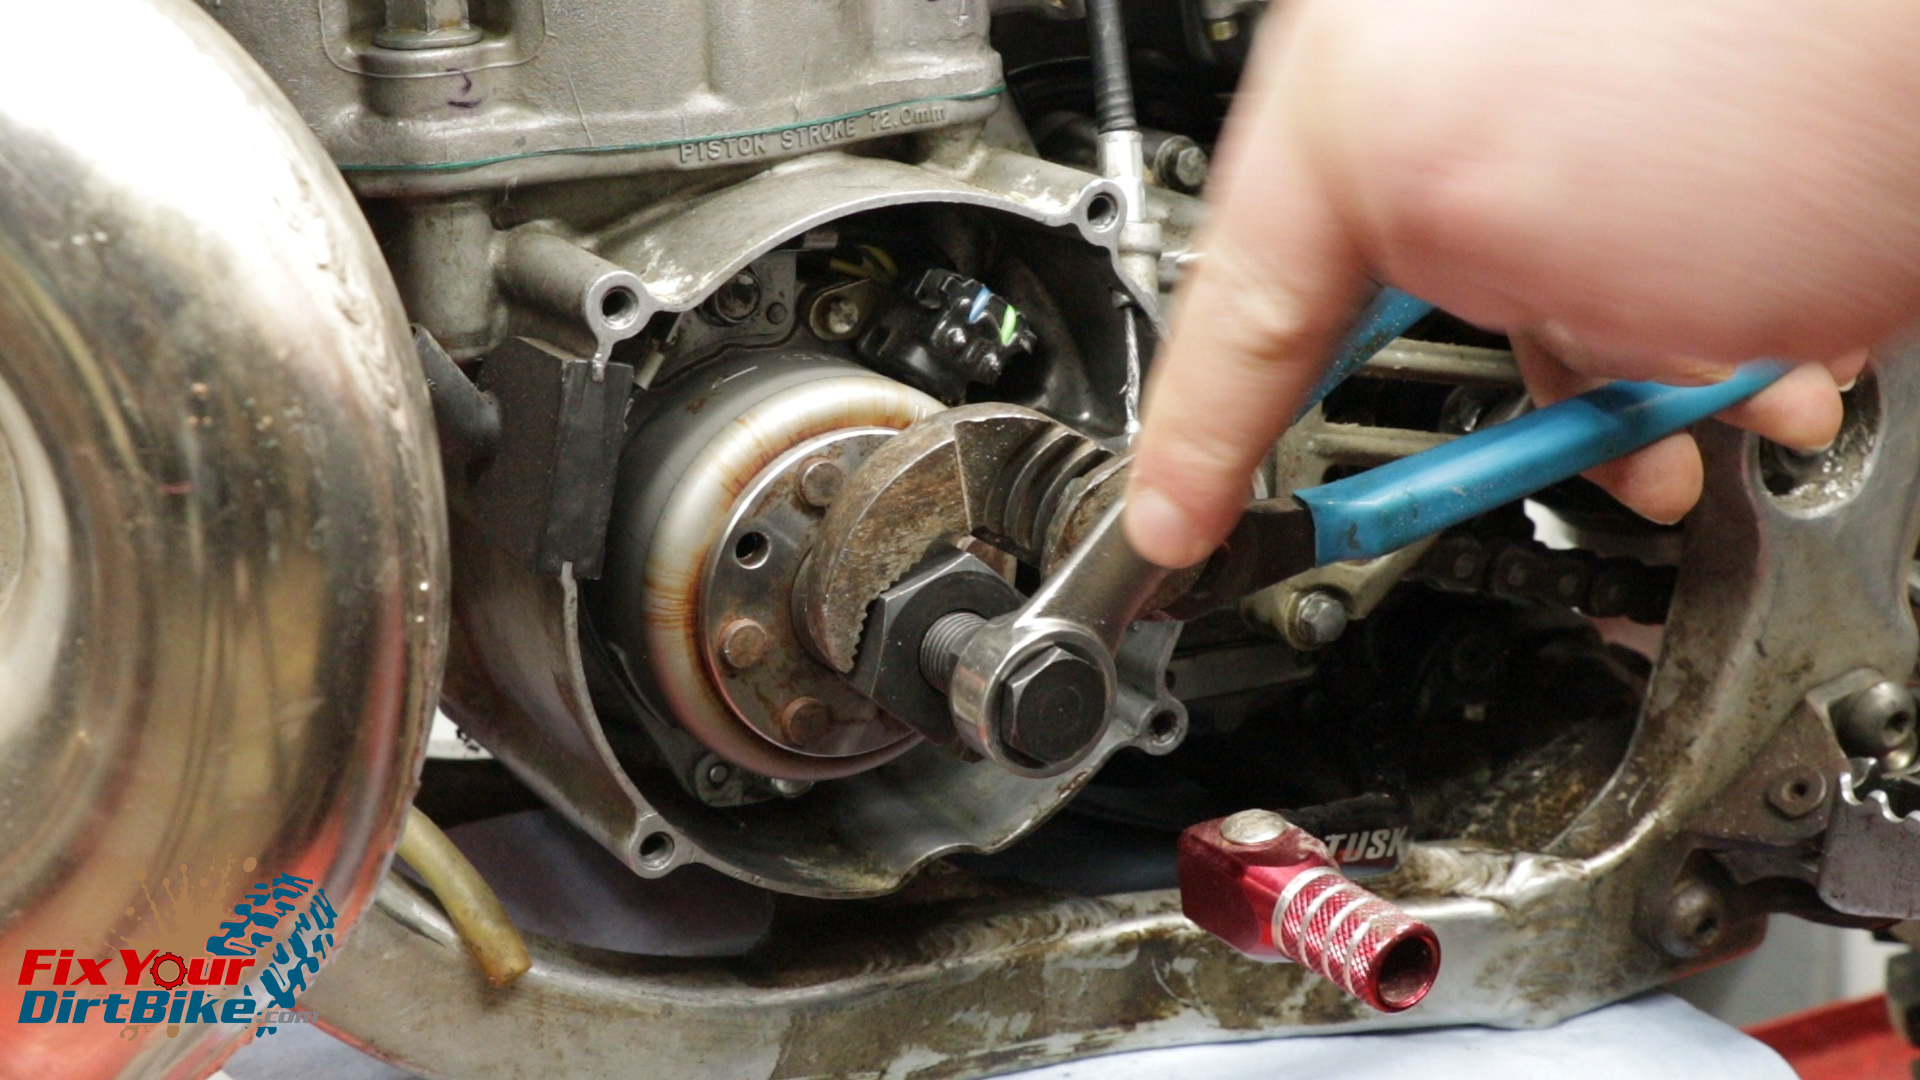
Thread the puller into the flywheel until it bottoms out.
Install the inner bolt and tighten it against the crankshaft snout.
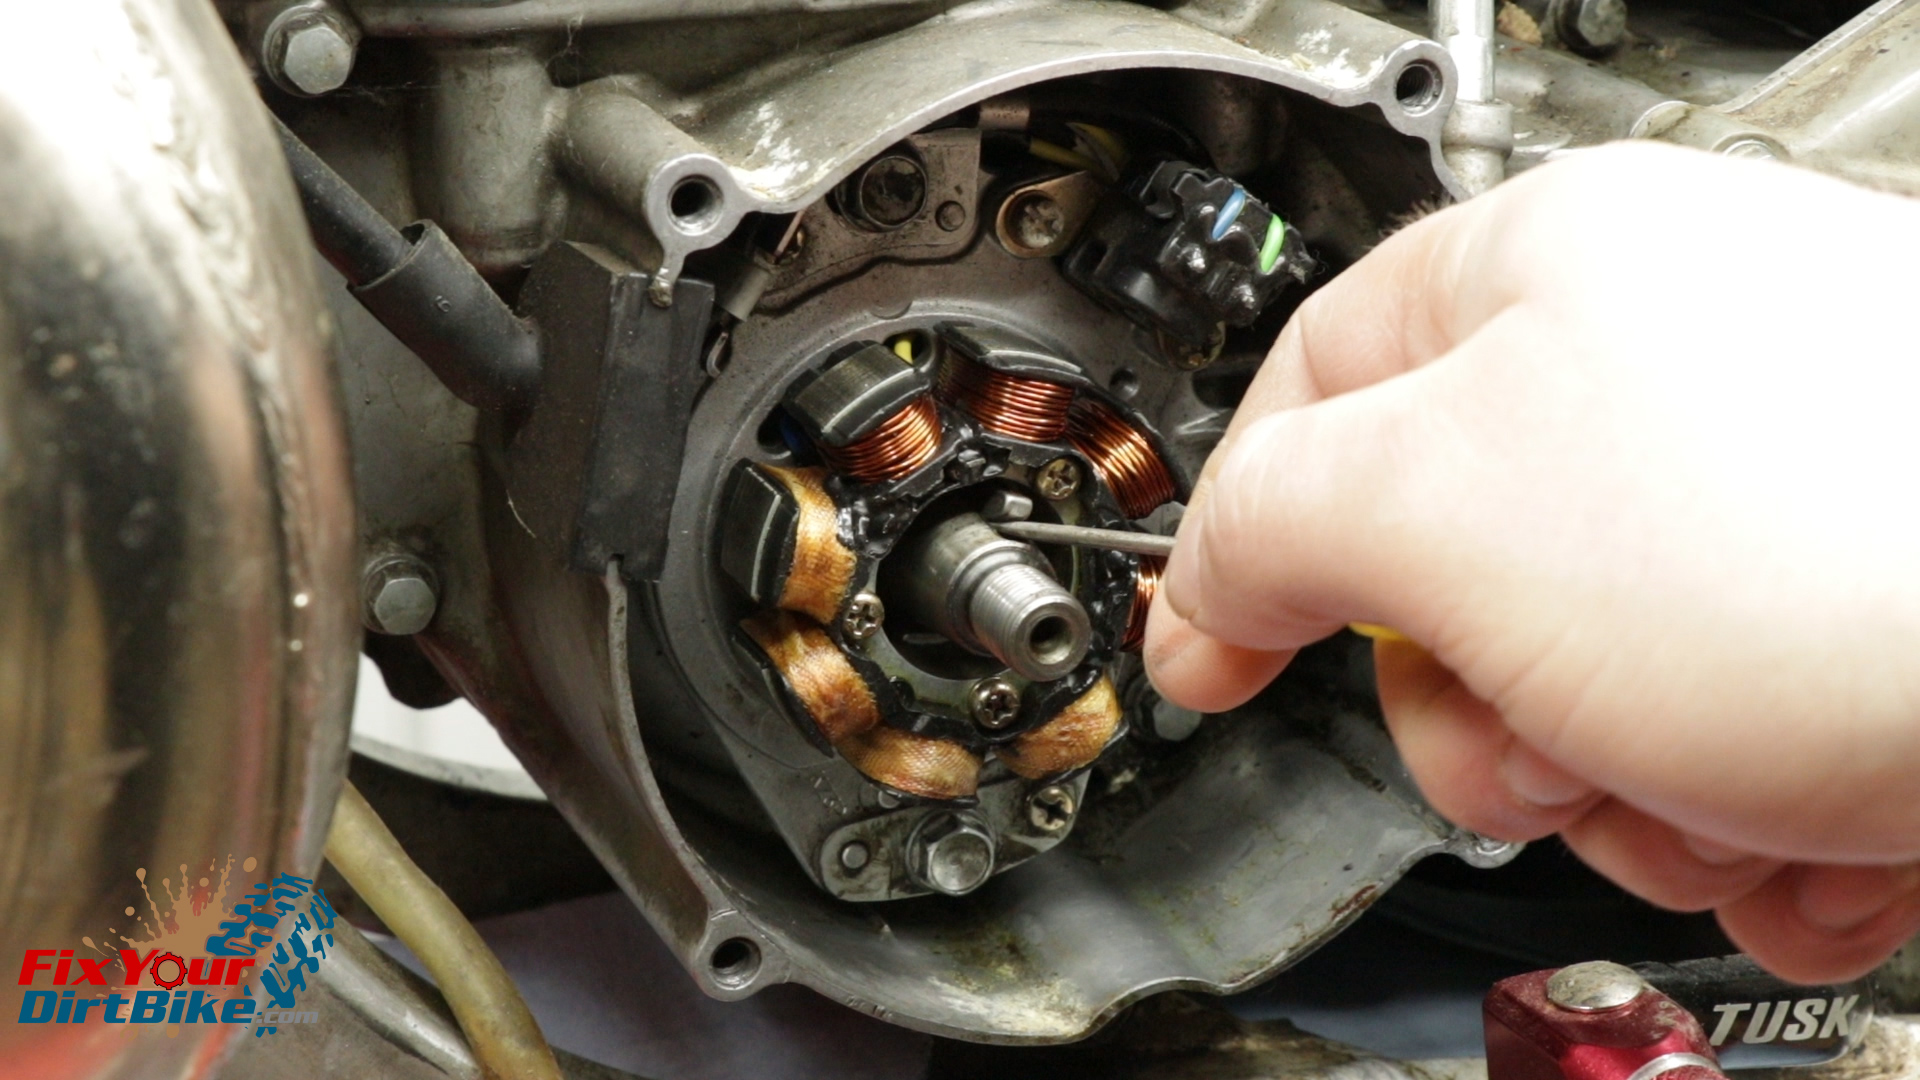
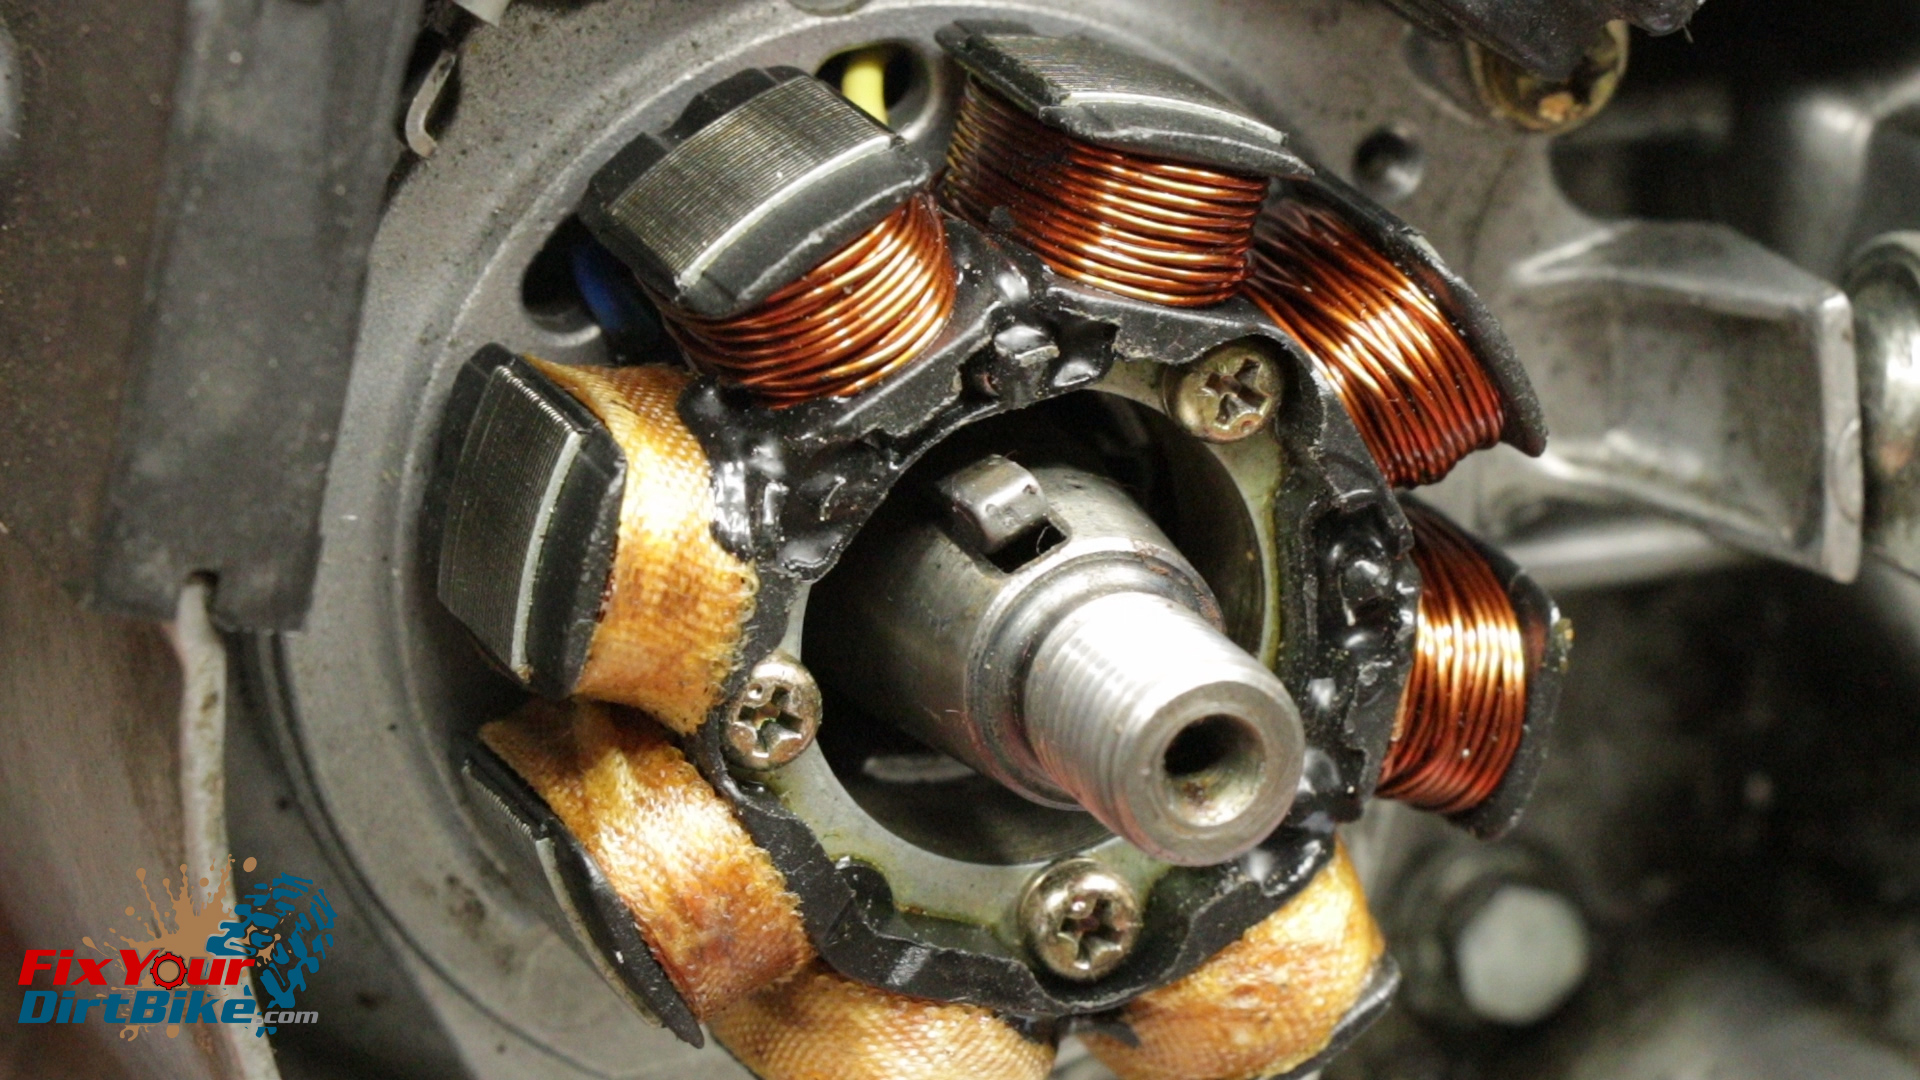
With the flywheel removed, remove the woodruff key from the crankshaft.
Remove the flywheel nut and washer.You will need a center push, external thread flywheel puller, size M27x1.0L.Hold the outer, then turn the inner bolt, and press the flywheel off the crankshaft.With the flywheel removed, remove the woodruff key from the crankshaft.
Flywheel Installation
*Before you install the flywheel, inspect the woodruff key and groove. If the key is overly rounded or damaged, it needs to be replaced.*
Install the woodruff key into the groove. You may need to tap it in with a punch.
Install the flywheel, washer, and nut.
If you ended up having to bind your rear tire with a 2×4, it will not work in the other direction, because of the extreme angle caused by the chain guide.
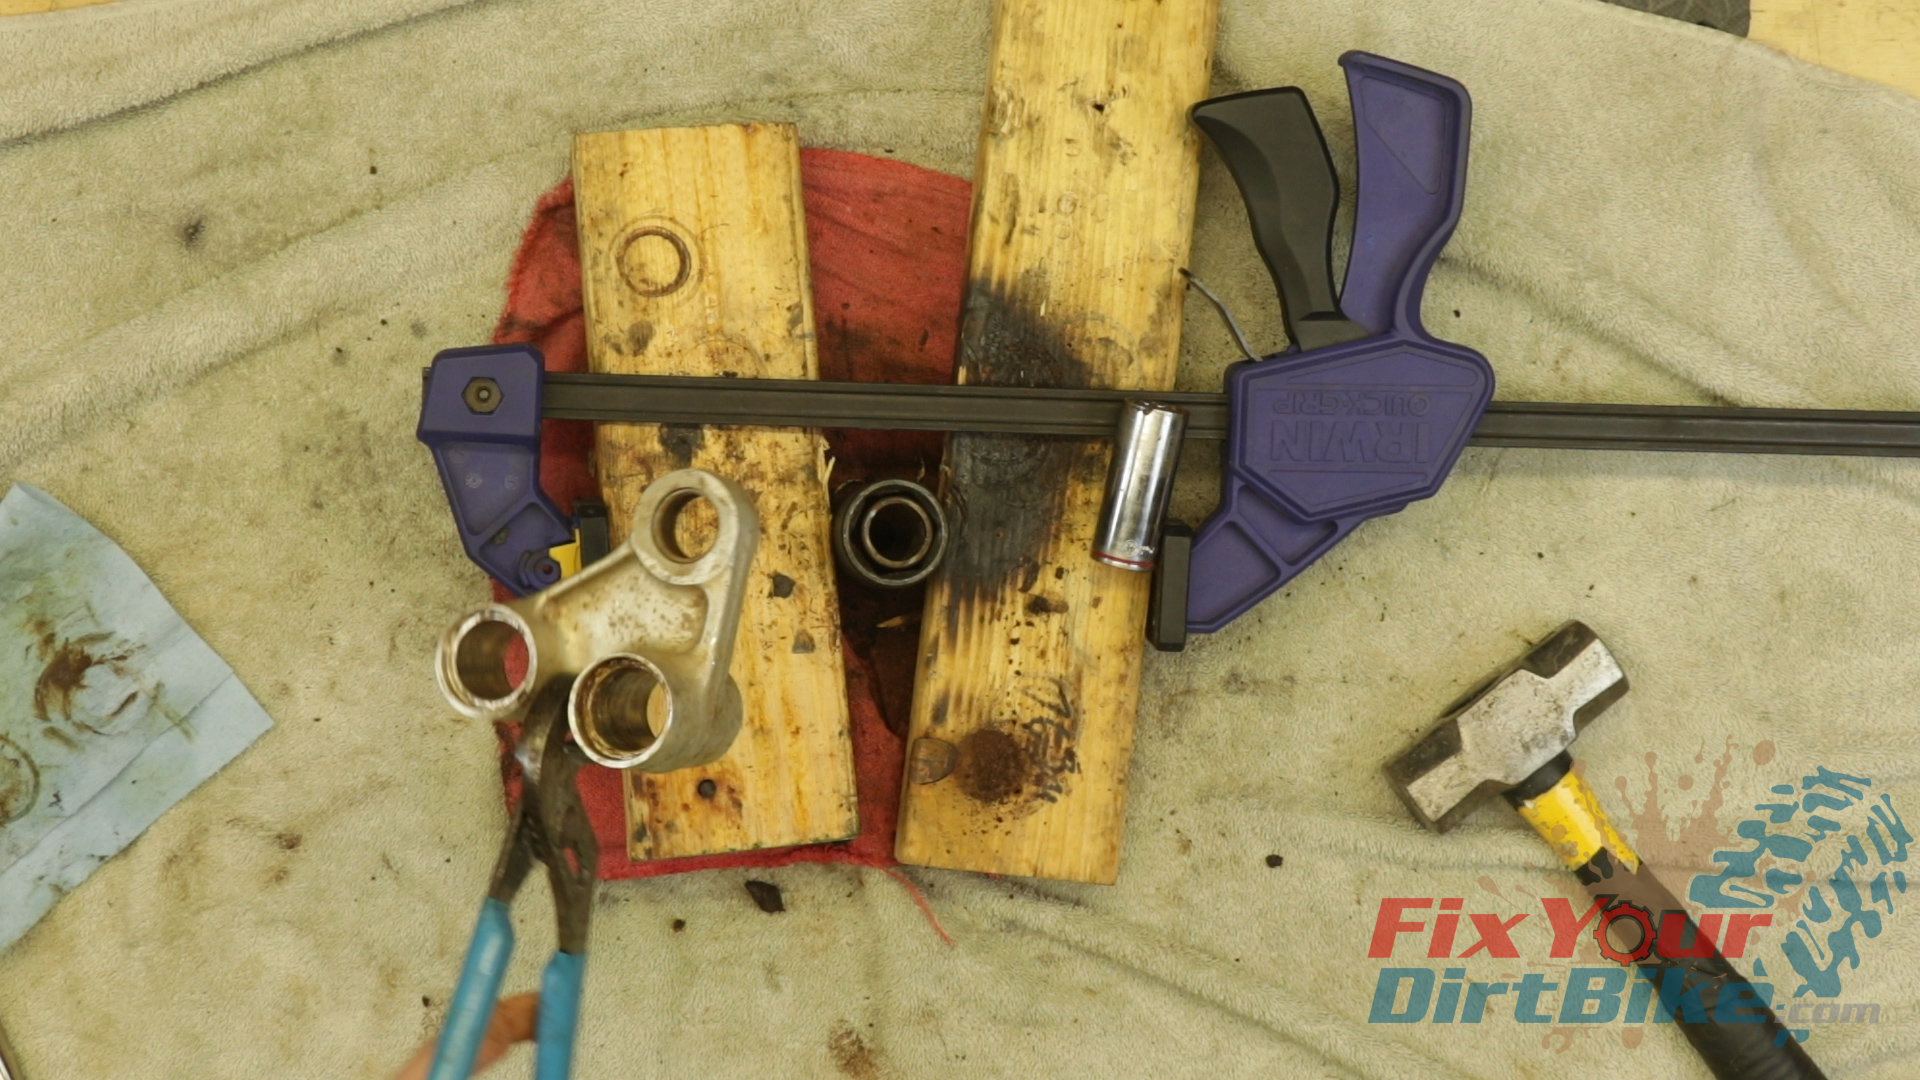
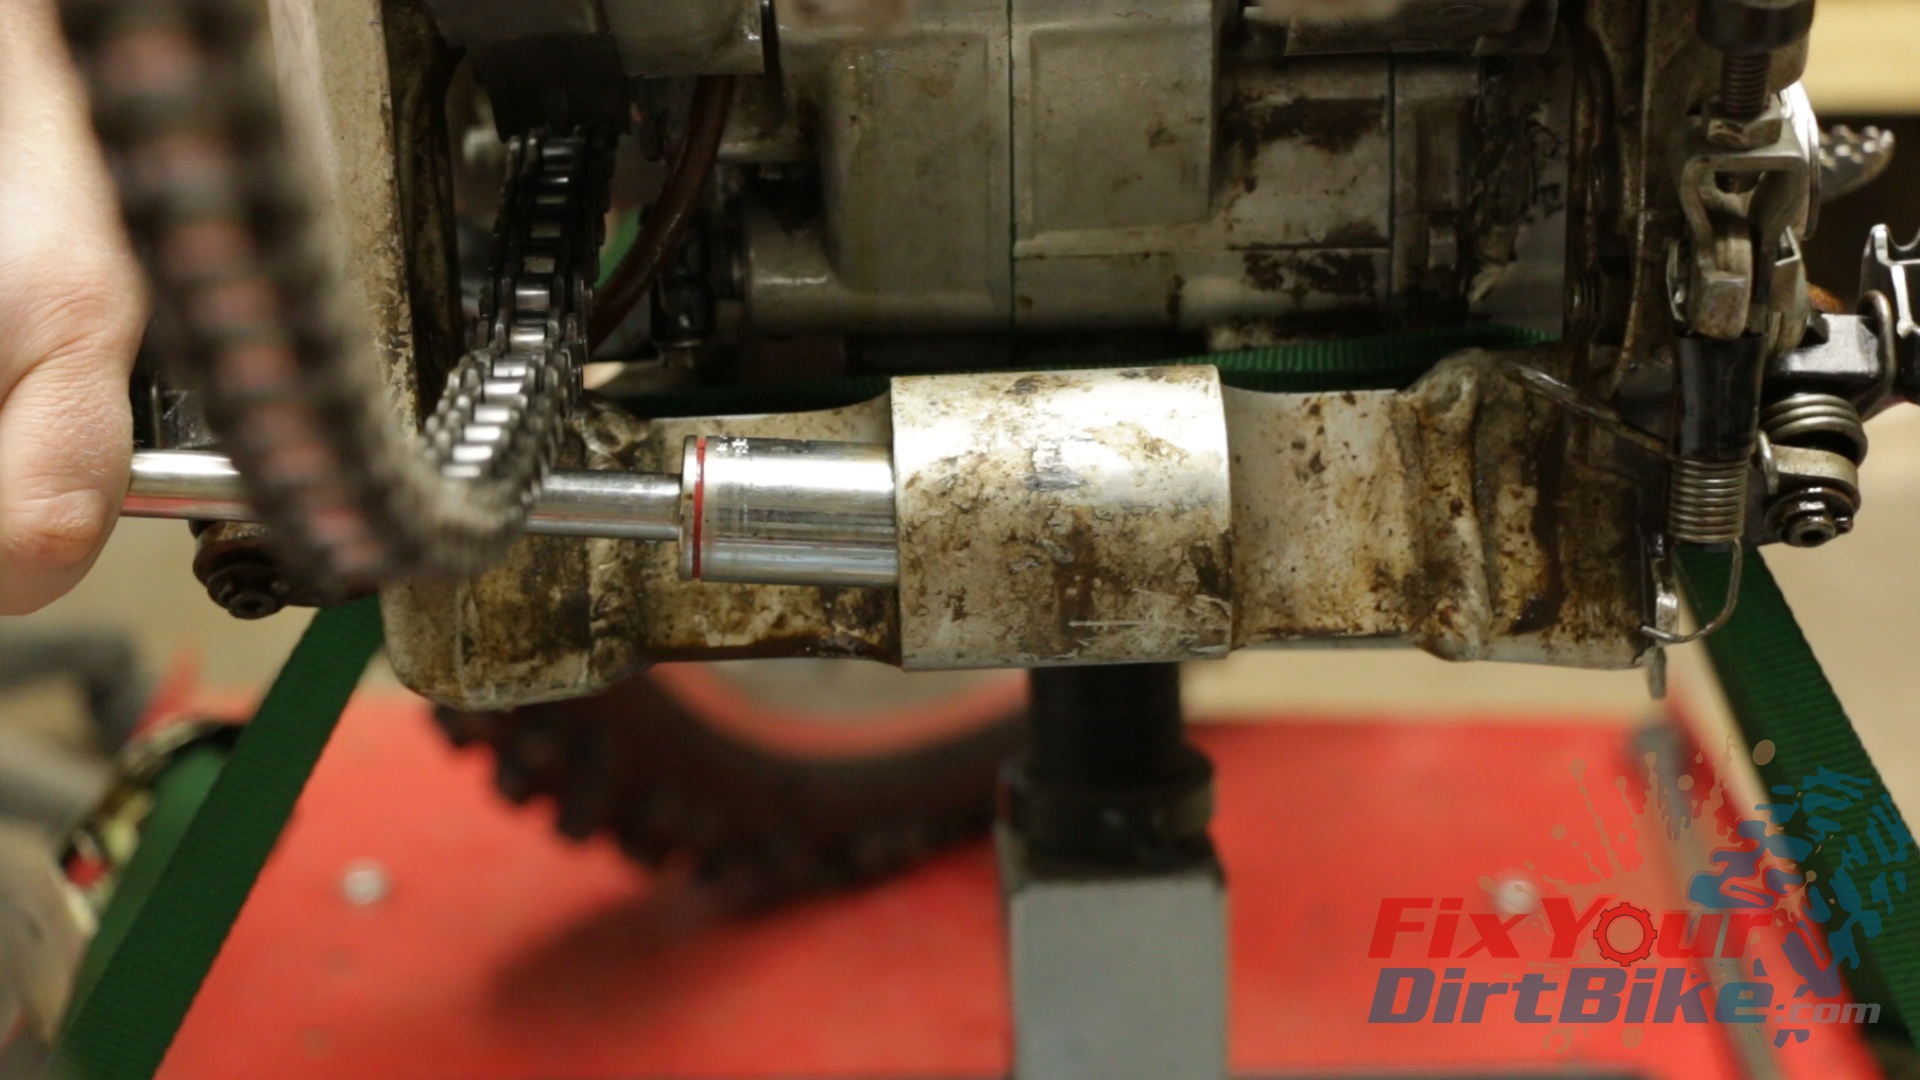
Instead, you can bind the rear sprocket and the swingarm with something round.
Your stopper must be round and placed as close to the hub as possible to avoid any deflection that could warp your sprocket.
Hold the stopper in place and torque your center bolt to 40 ft-lbs.
Again, this is not the ideal method but will work when done correctly.
Install the woodruff key into the groove. You may need to tap it in with a punch.Your stopper must be round and placed as close to the hub as possible to avoid any deflection that could warp your sprocket.Hold the stopper in place and torque your center bolt to 40 ft-lbs.
If you have any methods that I didn’t cover, please let me know in the comments, and I’ll give them a try!
Deep Clean Your Carburetor With A Soak In Pine-Sol! Soaking your Carburetor In Pine-Sol is a cheap alternative to Chem-dip. We know Berrymans Chem-Dip works for heavy cleaning jobs, but it also costs around $30 gallon, and if all you are doing is cleaning the varnish out your carburetor, it’s extreme overkill.
Deep Clean Your Carburetor With A Soak In Pine-Sol
Soaking your Carburetor In Pine-Sol is a cheap alternative to Chem-dip. We know Berrymans Chem-Dip works for heavy cleaning jobs, but it also costs around $30 gallon, and if all you are doing is cleaning the varnish out your carburetor, it’s extreme overkill.
Right off the top, there are two things to know when cleaning your carb with pine-sol.
1. Soaking takes at least a day, and up to two if your carb is really gummed up, so plan accordingly.
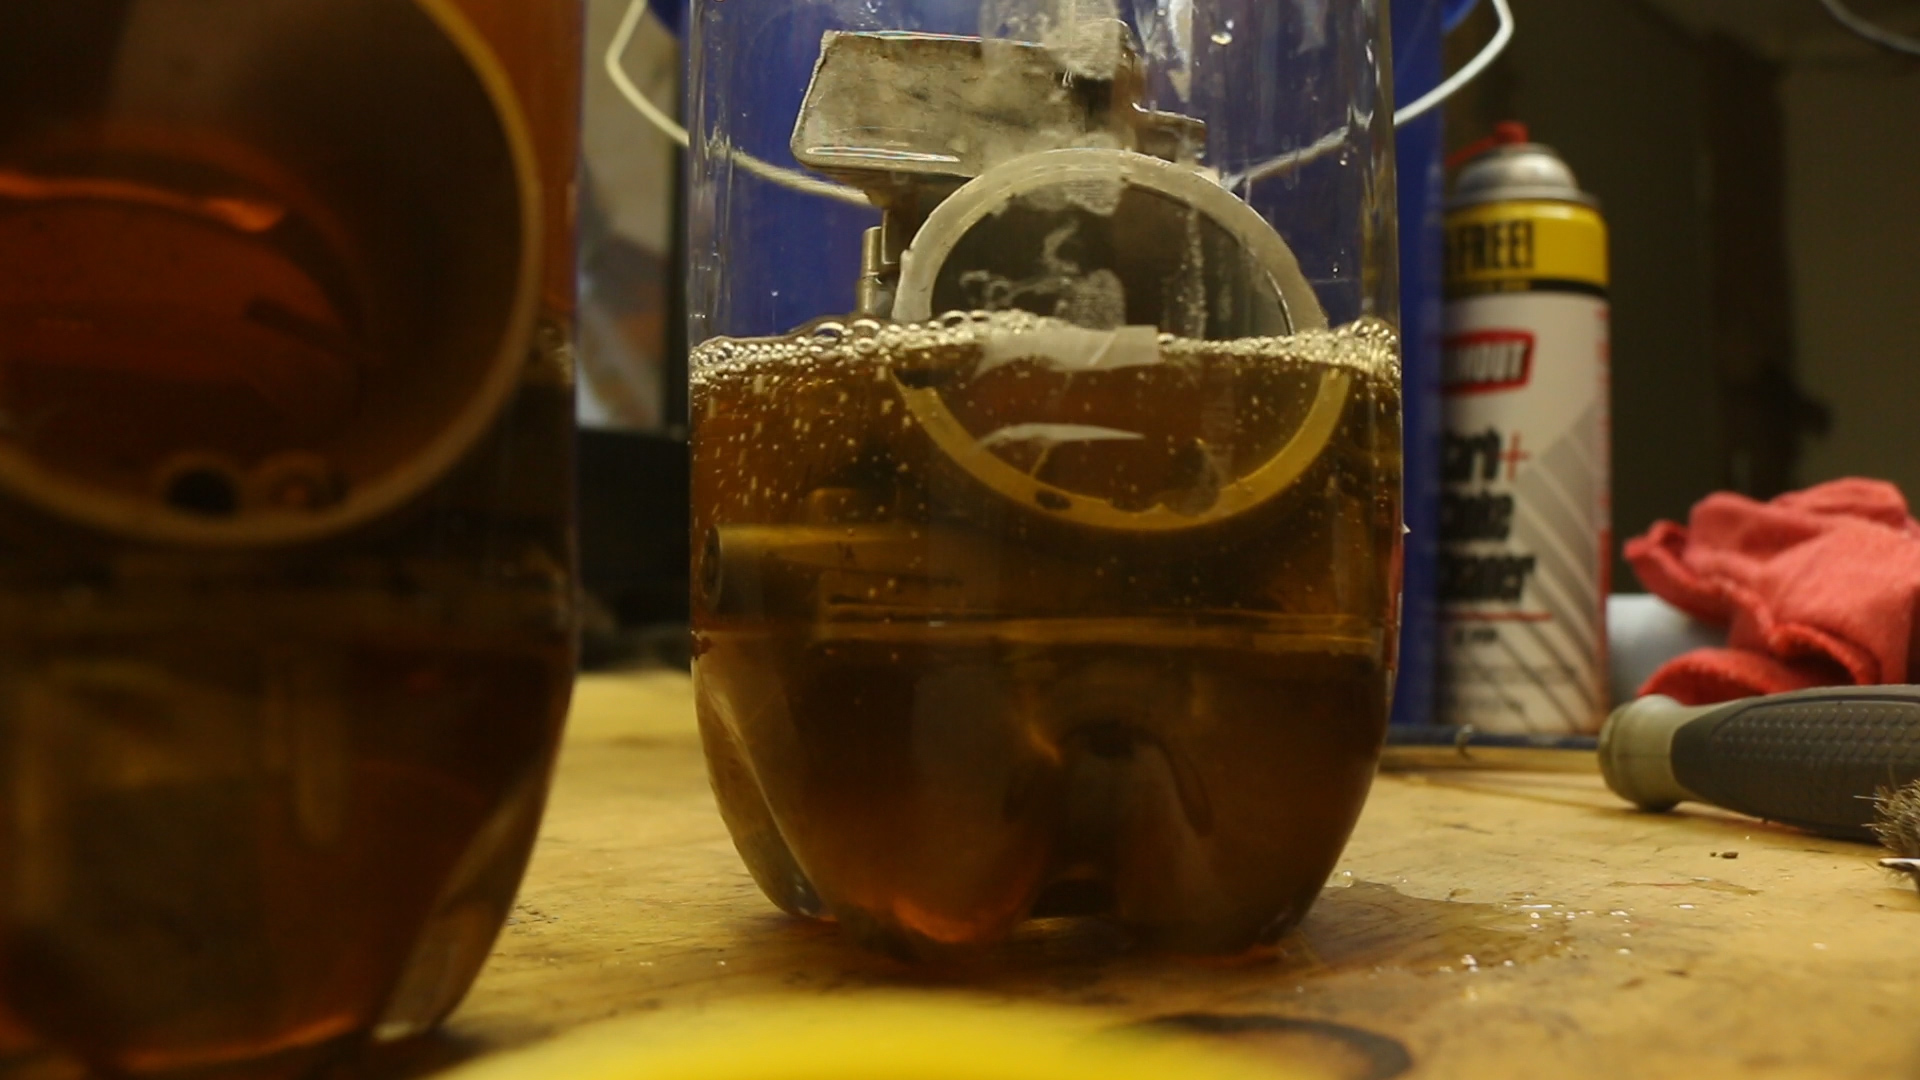
2. Soak your carb is a sealed container away from your workspace. As you’ll see in this video, I am using open containers to show what’s happening to the carbs. My shop is filled with a thick lemon scent, and my eyes are burning. LEARN FROM ME!
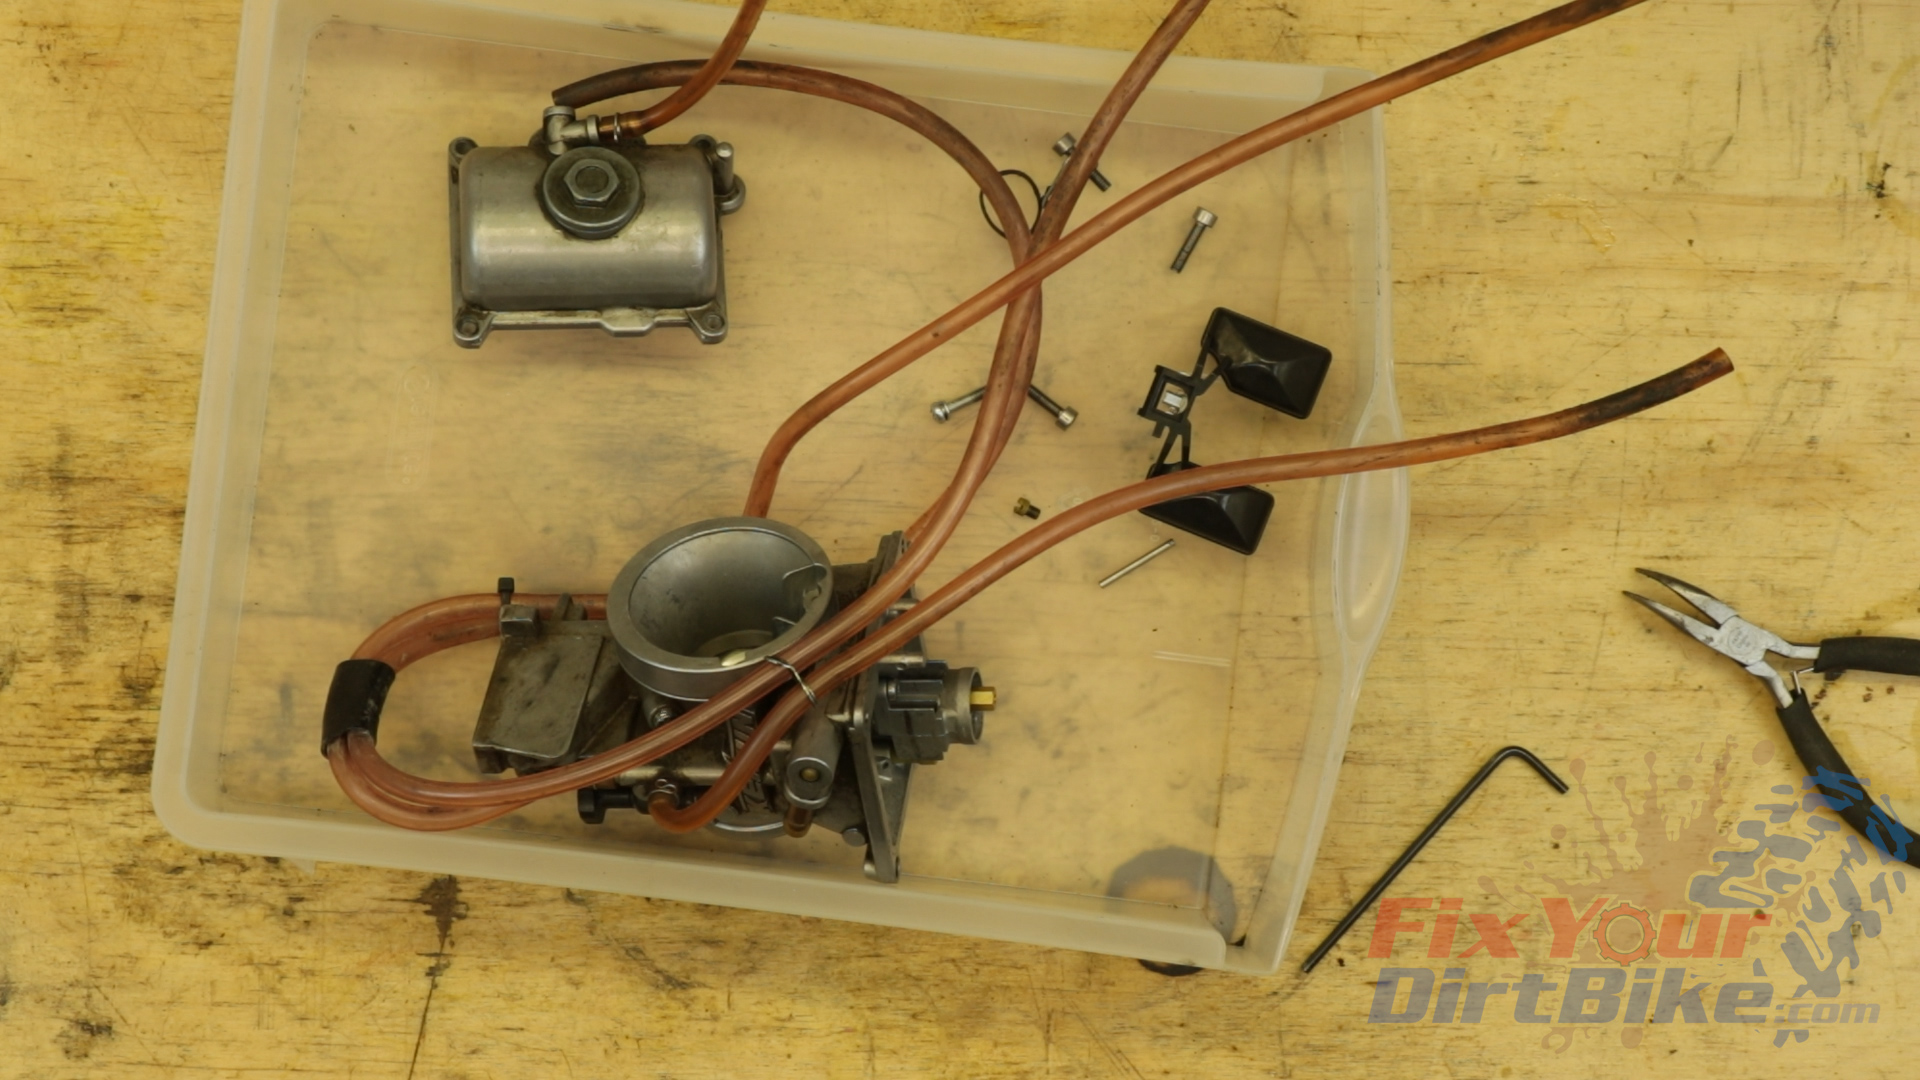
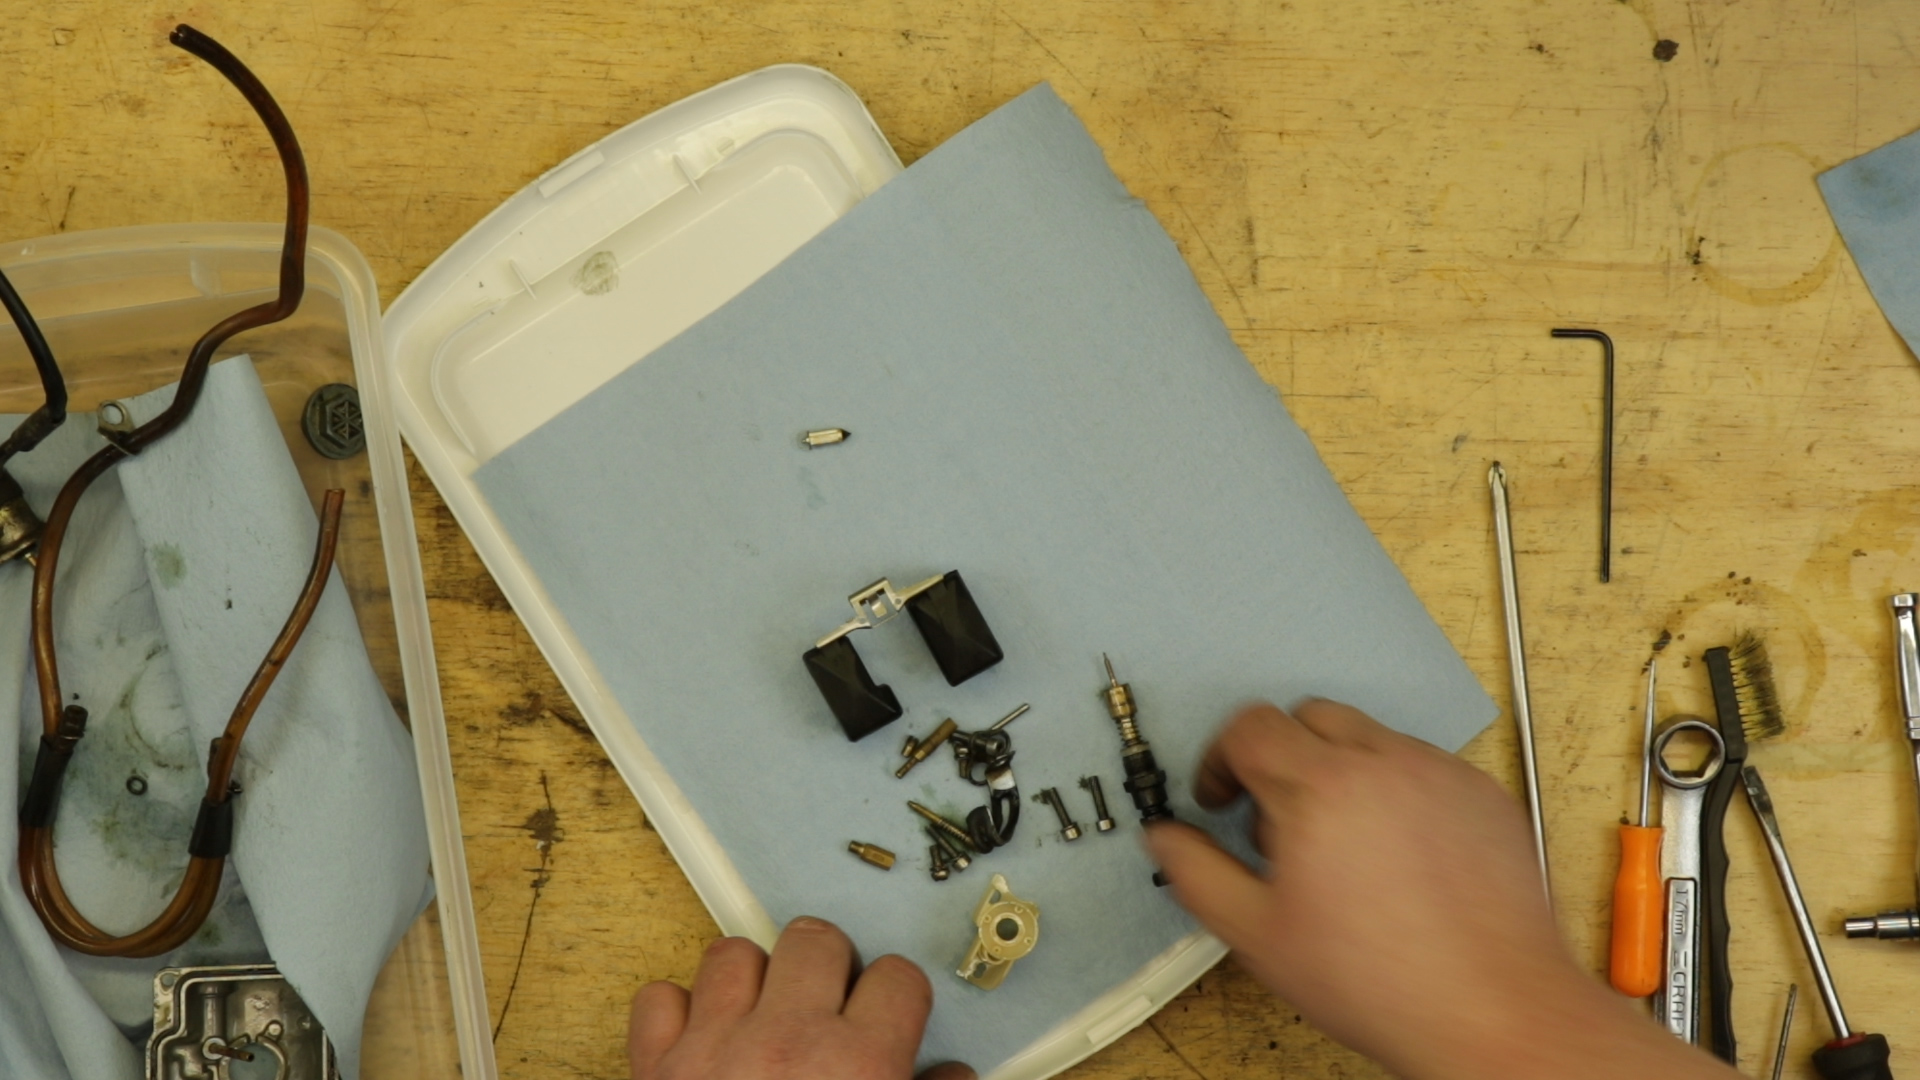
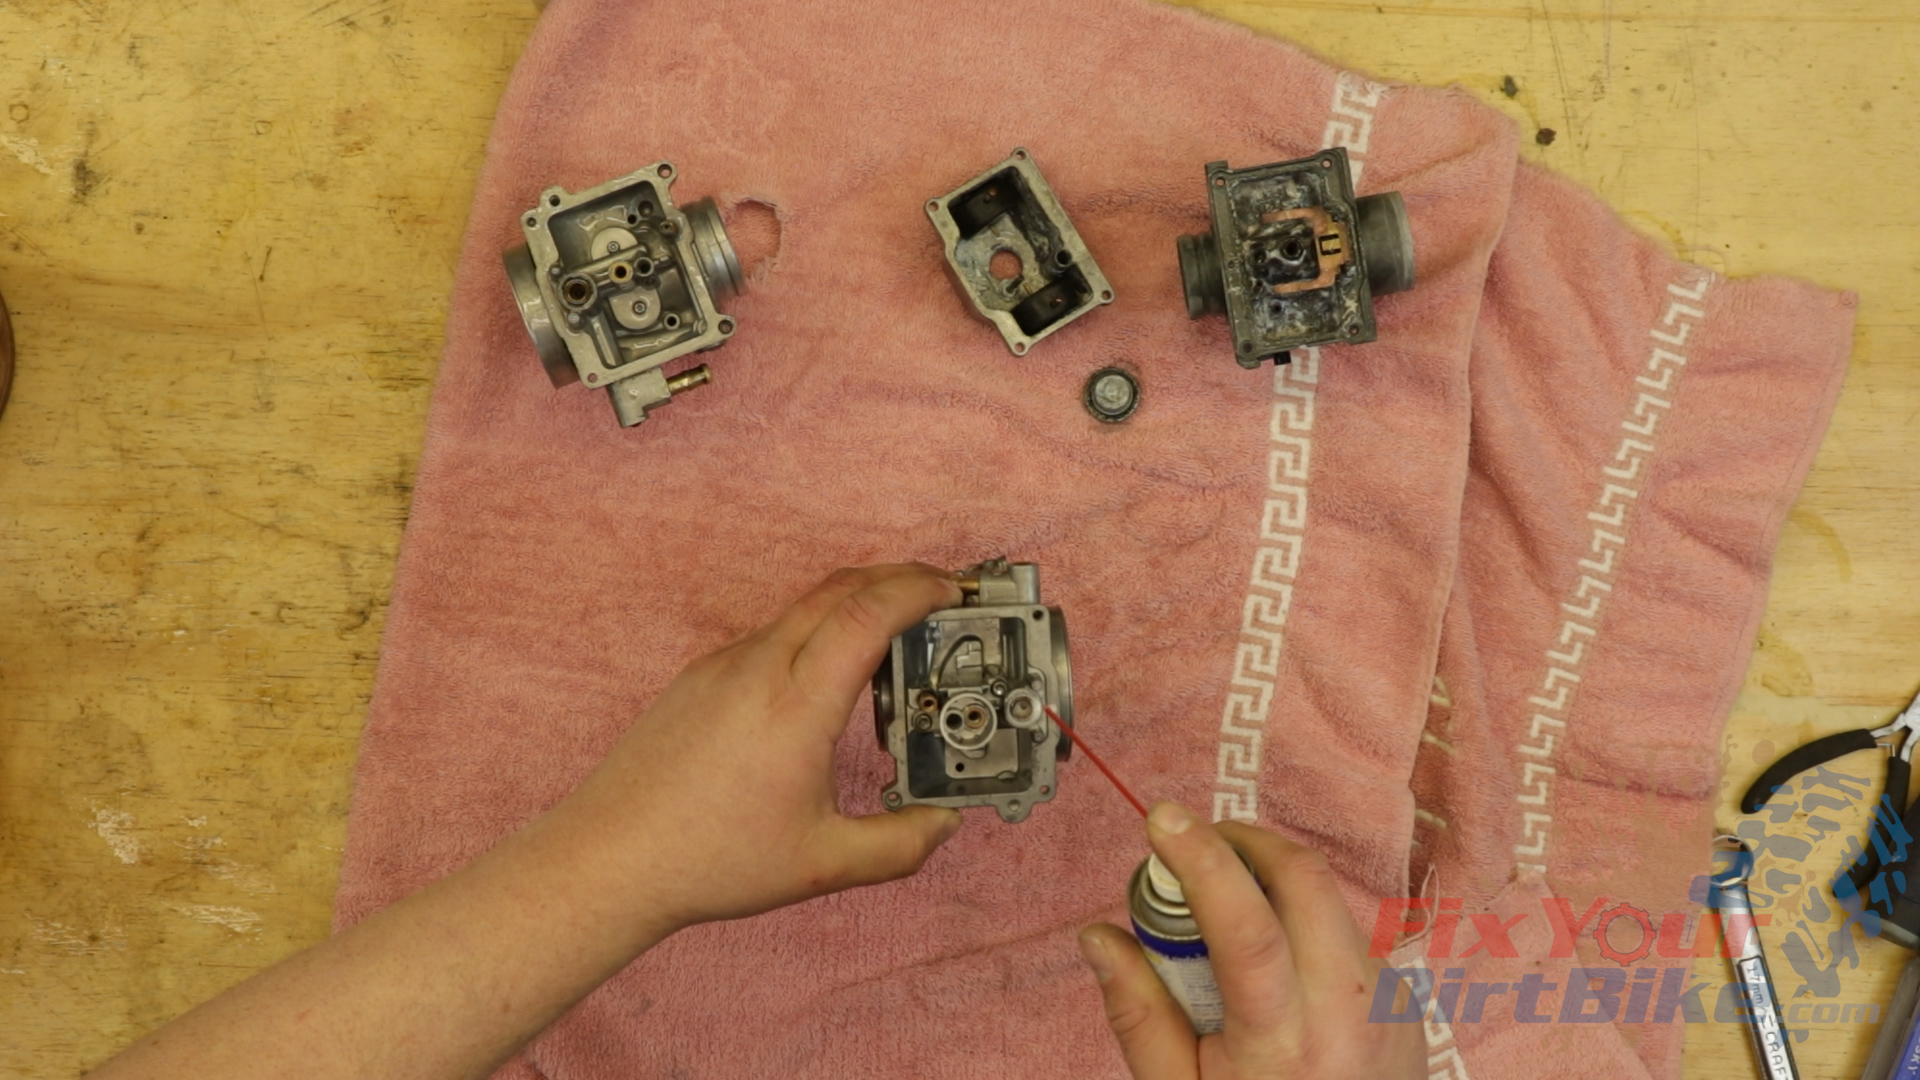
Carburetor Prep
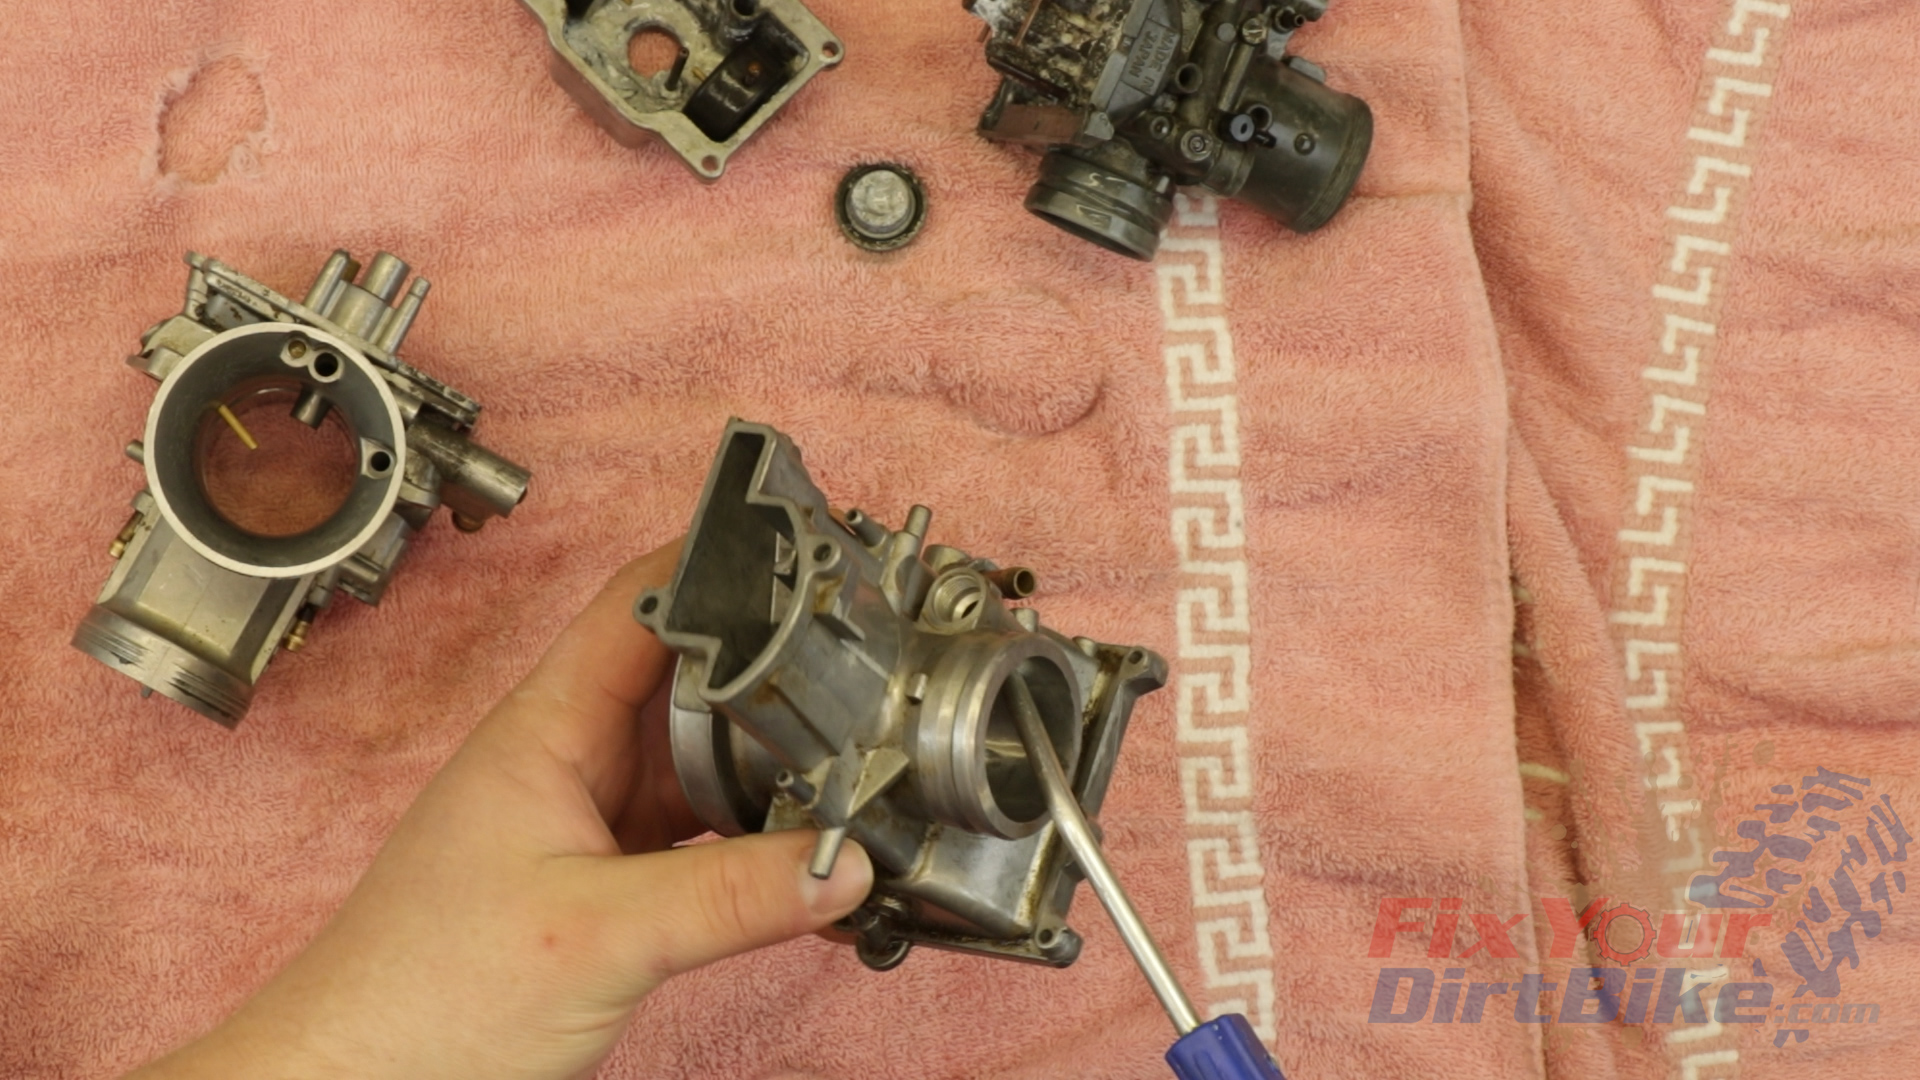
Start by completely disassembling your carburetor. Pine-Sol will eat rubber and plastic, so make sure you remove the bowl gasket and float valve.
You will only need to soak the carburetor body, so set everything else aside.
Get your carburetor body as clean as possible before you soak it in Pine-Sol.
If you soak your carb straight from the bike, you run the risk of contaminants floating around and clogging your circuits, which would defeat the whole purpose of the soak.
The soak is meant to clean the varnish and buildup from the internal circuits, not a one-shot cleaning solution.
I am cleaning three carburetors with different degrees of blockage.
The first carb is off my KTM 300 XC-W 2-stroke that I recently swapped for a Lectron self-adjusting carburetor. This carb will not be going back on that bike, but I do have plans for it.
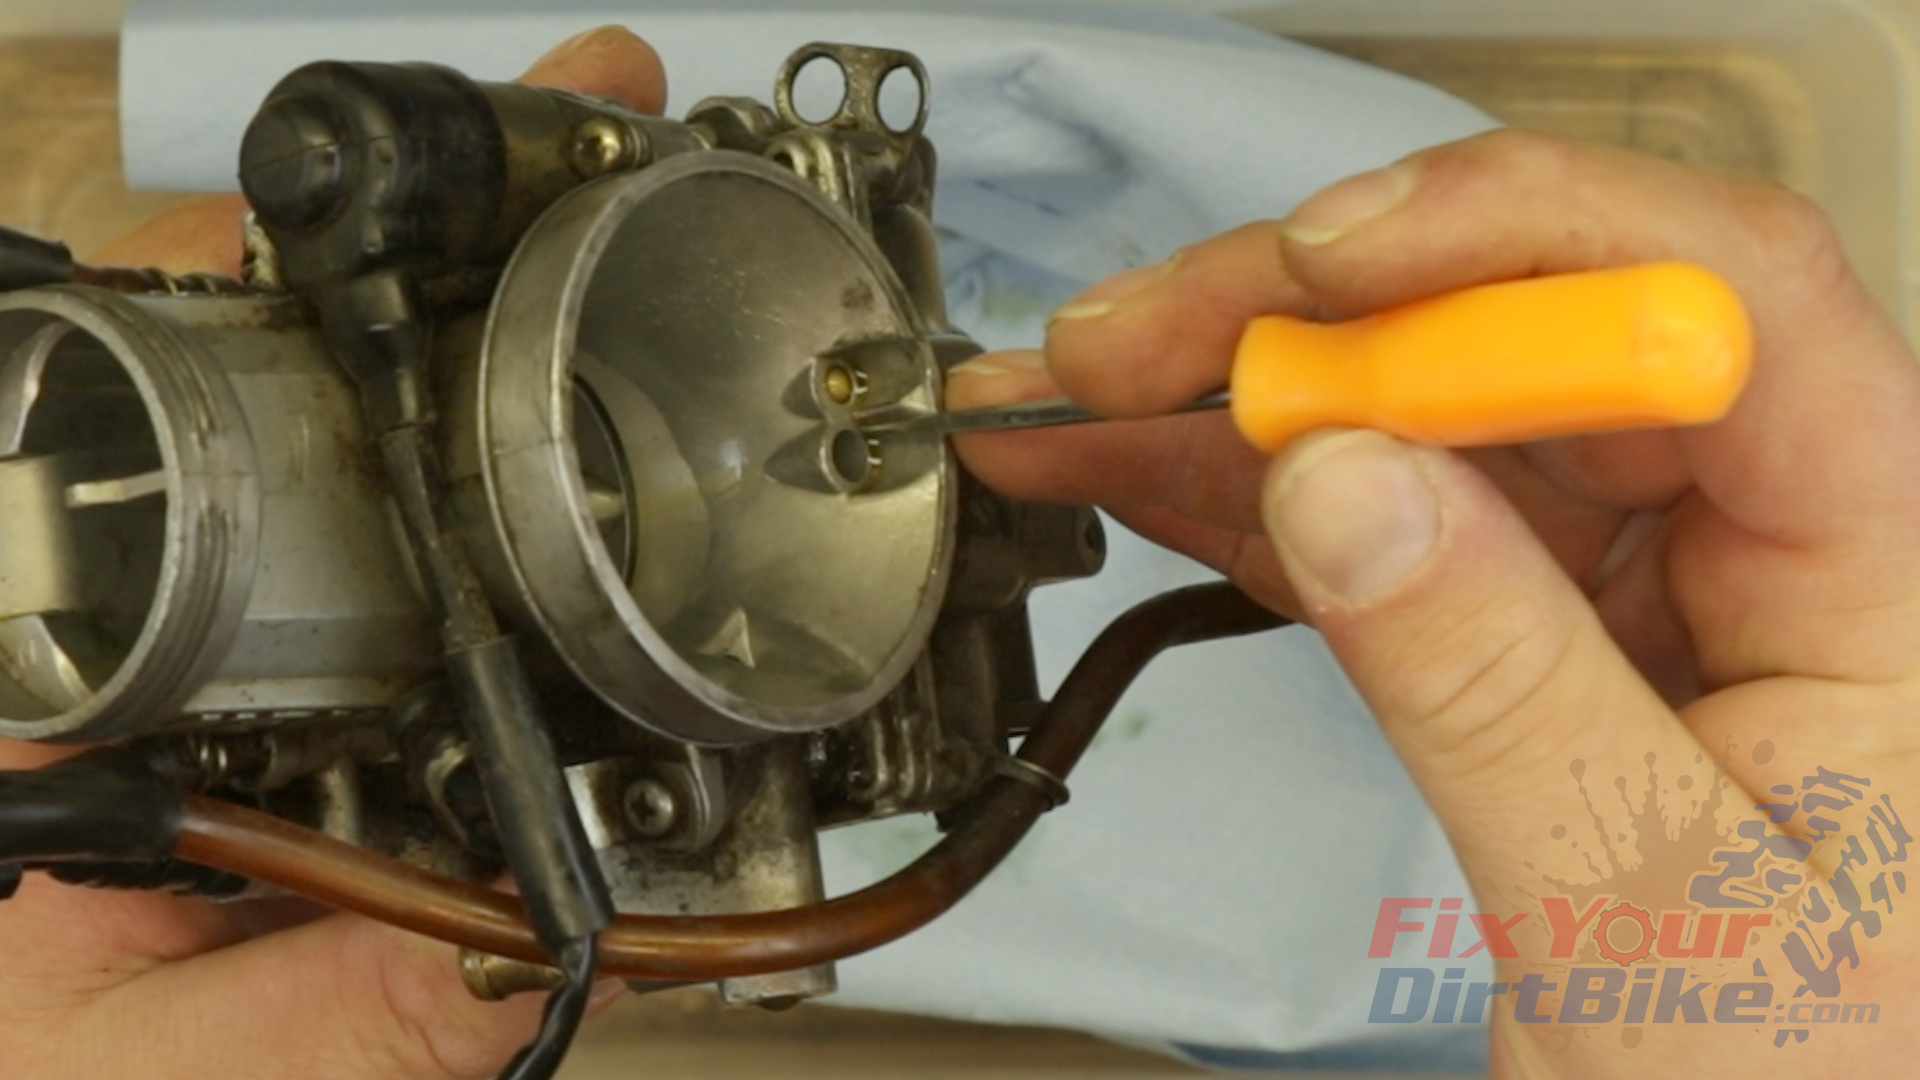
The second carb is another 2-stroke off my 1997 Honda CR250. As you can see, it has a bit of varnish build-up on the idle circuit intake. If you can see varnish on the outside, you can bet it’s gummed up on the inside. This varnish is a typical result of letting fuel sit in the carb for a few months.
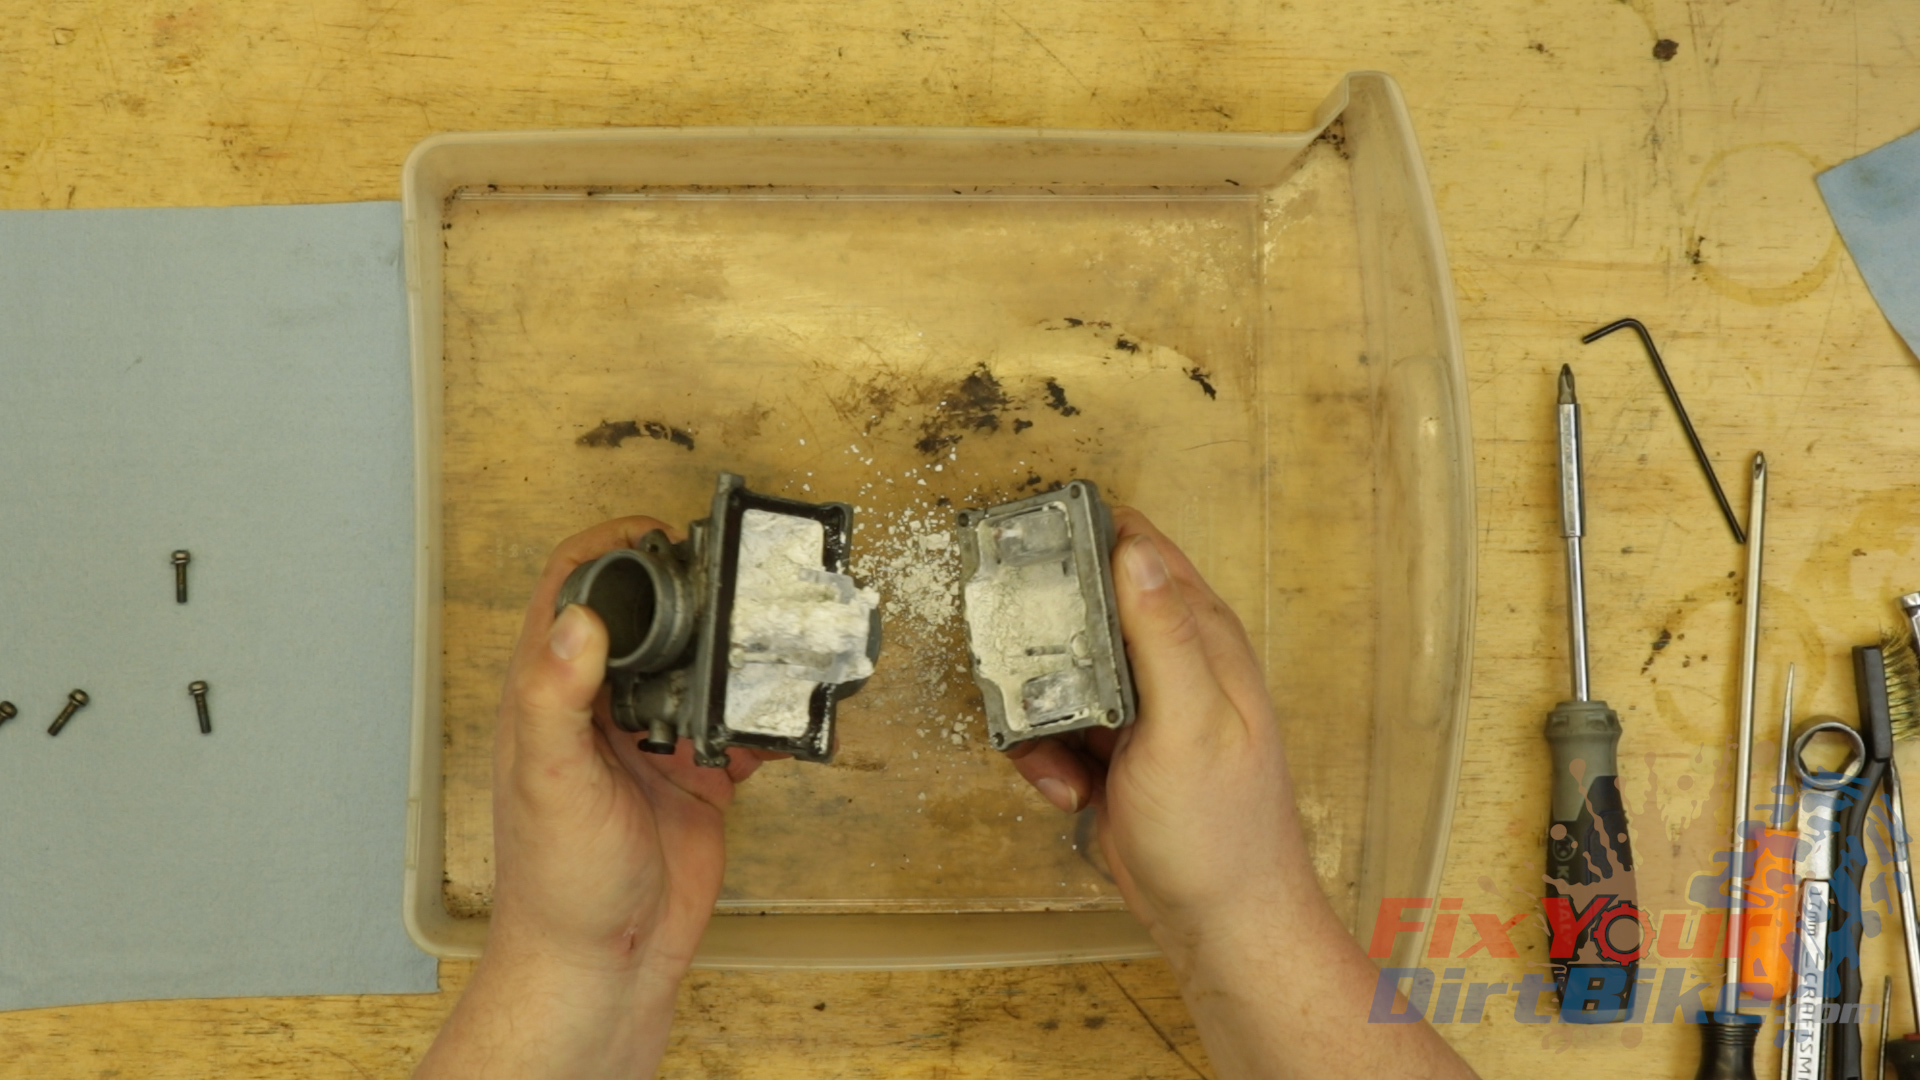
The third carb is an extreme case. This carburetor came off a drowned ATV that the previous owner never bothered fixing. I don’t know how long ago exactly, but long enough to get this.
This ATV carb is extremely corroded, and I wanted to see just how far pine sol would go, but I wasn’t expecting much. Surprisingly, I was able to disassemble everything except the slow jet and float valve.
You will need a soak bucket, a rinse bucket, compressed air, and WD40. Soak you carb for 24 to 48 hours. Every 12 hours or so, pull your carb, let it drain, and replace it in a different position.
Why Does Pine-Sol Work?
You’re probably wondering why a household cleaner works for cleaning carbs.
Well, it isn’t as harmless as it seems. If you look at the Materials Safety Datasheet for both Pine-Sol and Chem-Dip, you will find both products use similar active ingredients, but in different concentrations.
Rinse And Inspect
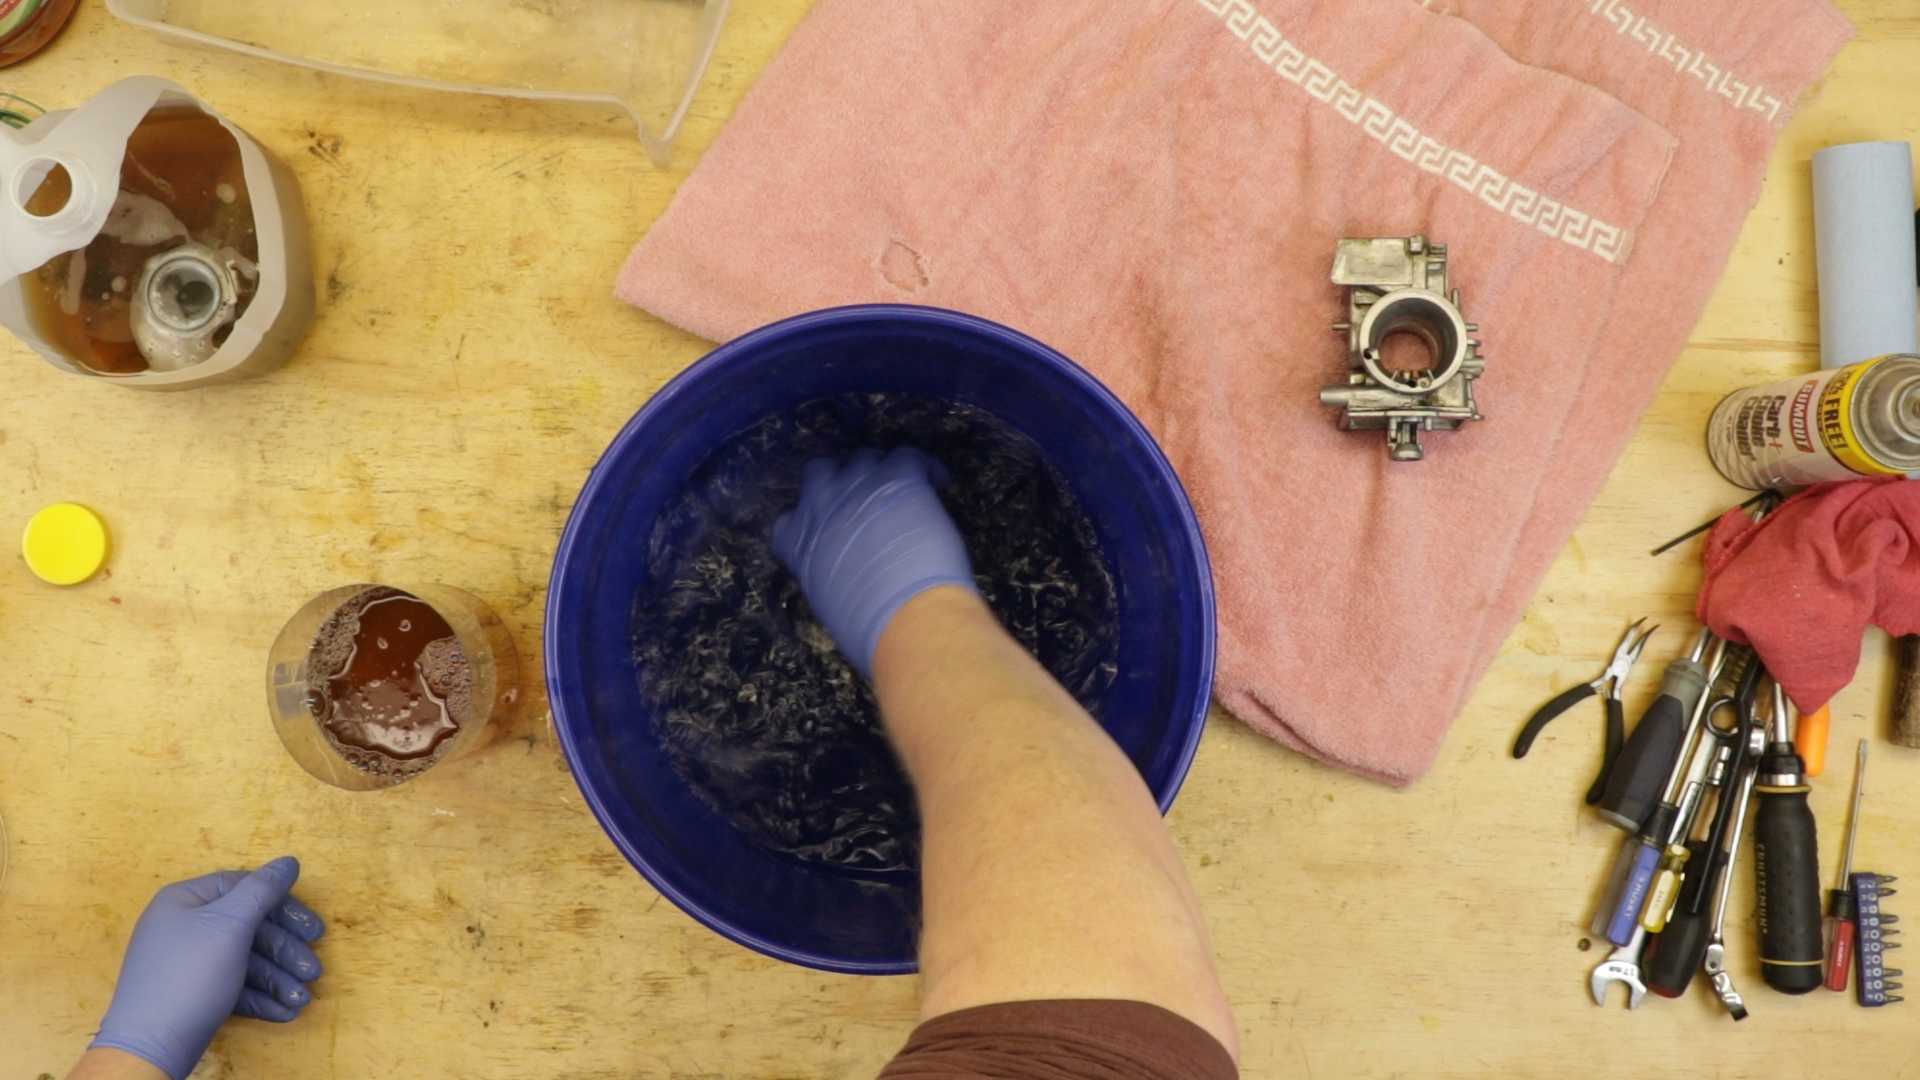
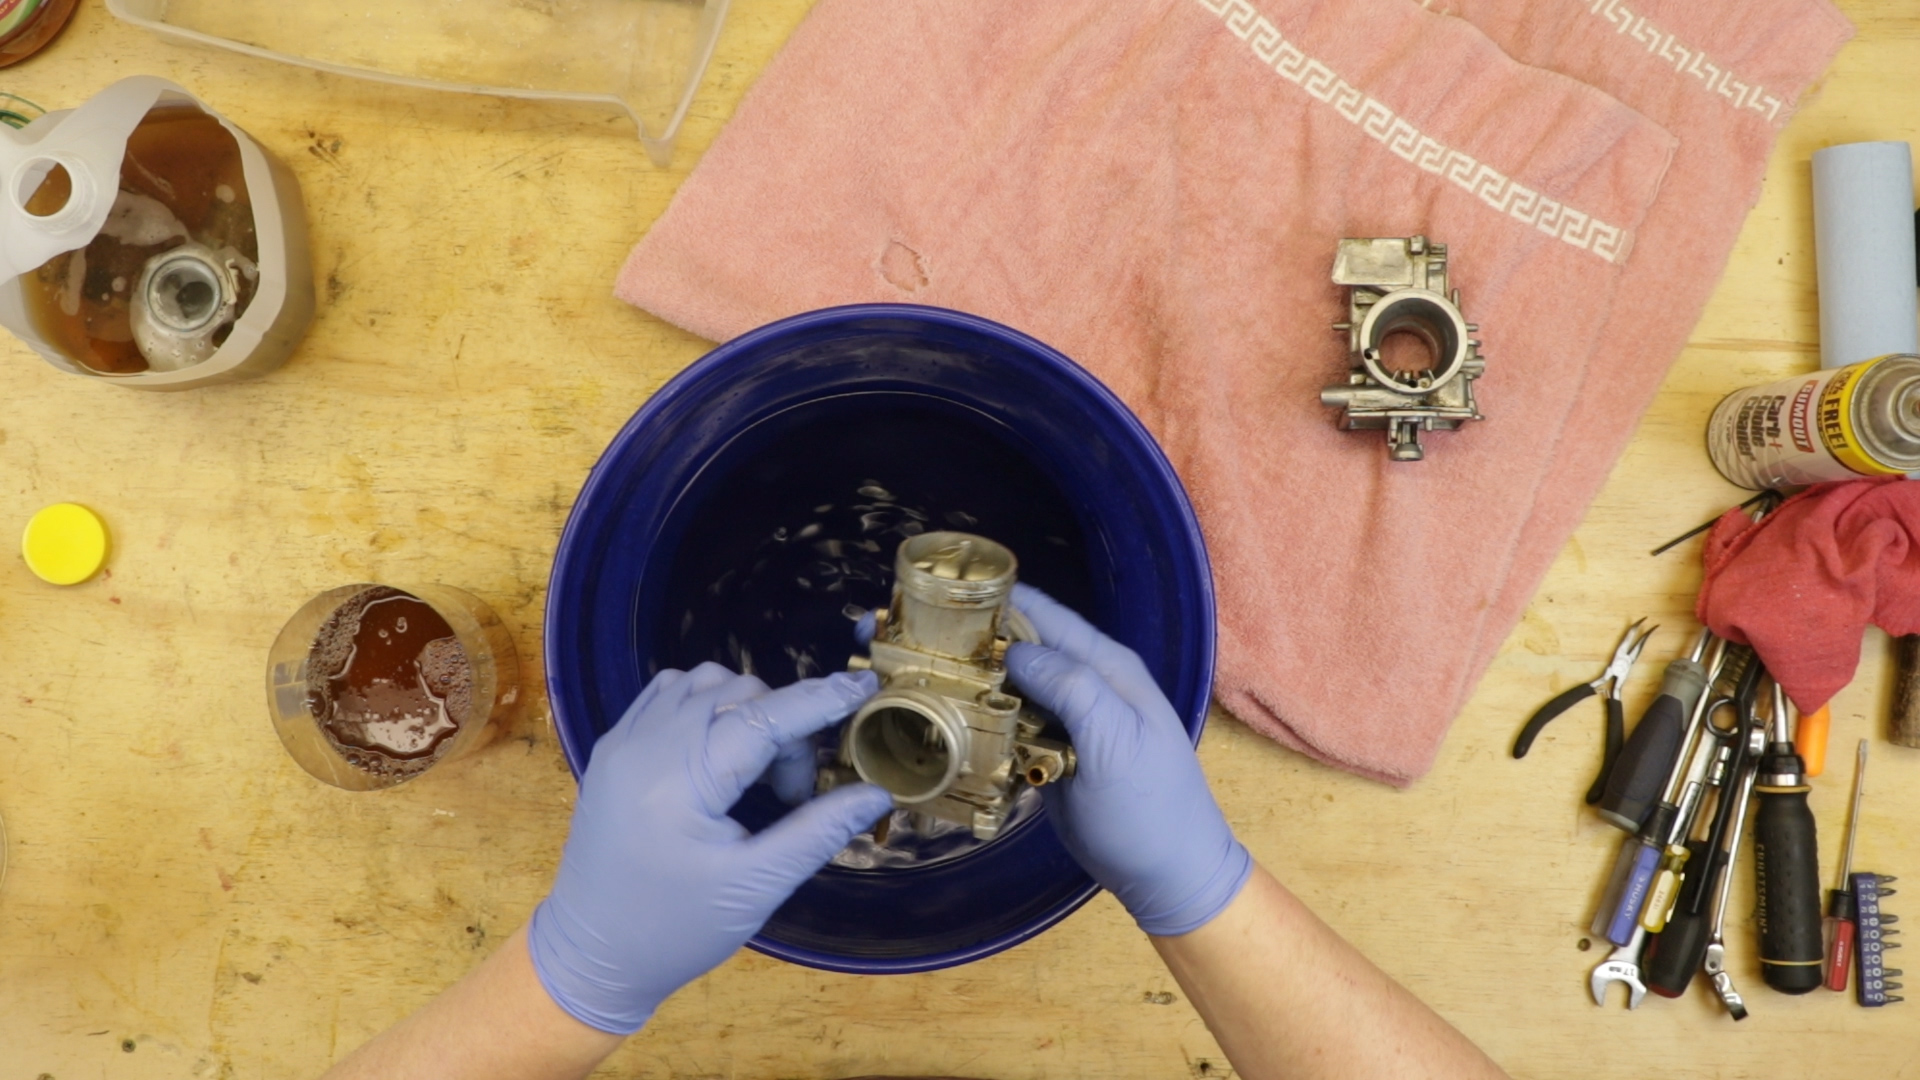
Really Give Your Carb A Good Rinse
Pull your carburetor and rinse thoroughly in water. Aggressively agitate your carb in every direction to clear as much pine-sol as you can.
It Looks Like That Goo Is GoneBlast The Air Passages CleanIf You’re Going To Store Your Bike, Void The Passages With WD40.
Now, you never want to use water to clean your carb, but this is an exception. With your carb rinsed, blow compressed air through every hole you can see from both directions. Once your carb is dry, hit the internals with WD40 to make sure the circuits are entirely voided of water.
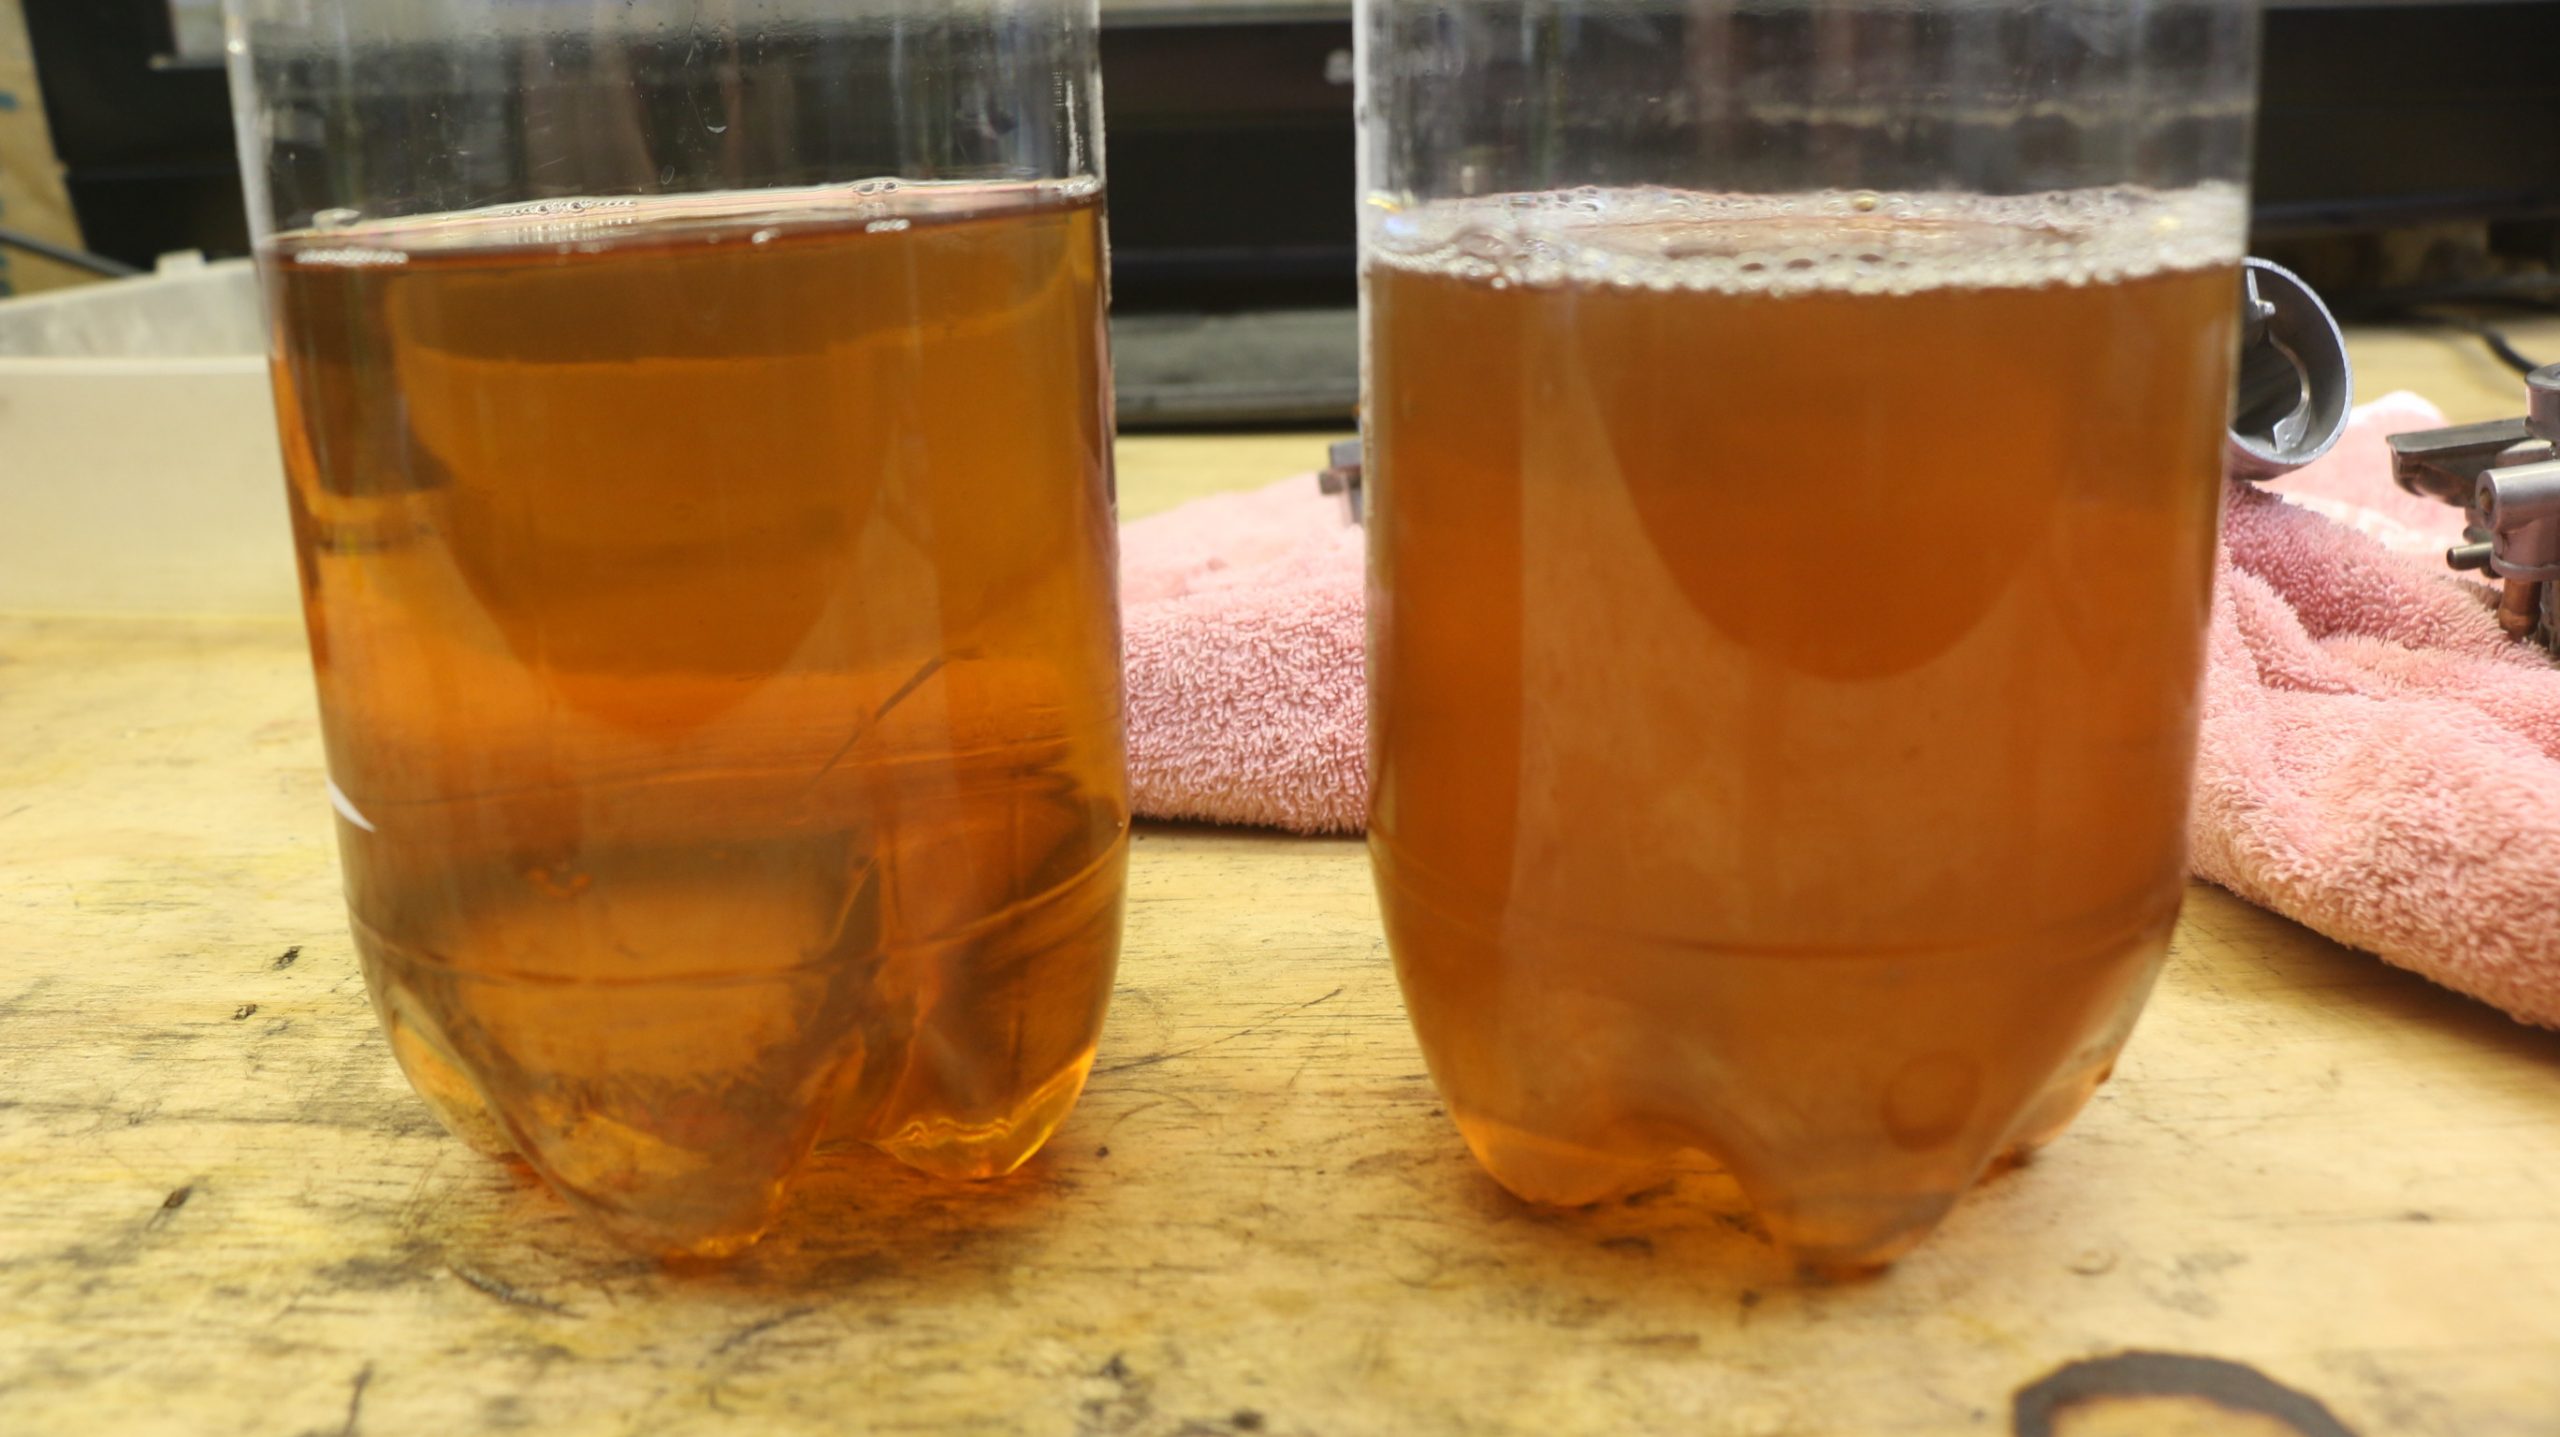
You can get a good idea of how well the soak worked, or at least how dirty your carb was, by looking at the used Pine-Sol.
Easy To See How Well The Pine-Sol Cleaned.
The left container had my KTM carb, and the right had my CR250 carb. You can see the CR250 carb was pretty dirty, and the pine-sol did its job.
As for the ATV carb, well, that’s a lost cause.
Judging by the weight, this is a cast metal carb, so the white corrosion was white rust, which is what happens when zinc is exposed to hydrogen and oxygen. The exposure to H2O creates zinc oxide, which eats away at the metal as it forms. So the pine-sol didn’t do much to remove it.
I still might try to resurrect this carb as a challenge, but I’d need to do some serious work.
How To Service The Steering Stem Bearings On Your 2009-2010 Honda CRF450R
You will need a steering stem nut adjustment wrench, a long nut, and bolt bearing press, and a metal pipe that fits over the steering stem, but small enough to match the diameter of the inner bearing race.
The adjustment nut wrench will cost around $13. You can get your press parts and metal pipe from your local hardware store in exchange for money.
How To Service The Steering Stem Bearings On Your 2009-2010 Honda CRF450R
Servicing the steering stem bearings on your dirt bike is much simpler with the right tools. You will need a steering stem nut wrench, a long nut-and-bolt bearing press, and a metal pipe that fits over the steering stem, but is small enough to match the diameter of the inner bearing race.
The adjustment nut wrench will cost around $13. You can get your press parts and metal pipe from your local hardware store in exchange for money.
The Tools You Will Need Are:
Steering Stem Adjustment Wrench
Smackin’ Pipe
Bolt Press
Chisel / Dremel
32mm Socket
10mm Socket
Breaker Bar
Long Flat Screwdriver / Blind Bearing Puller
Torque Wrench
Gloves
Grease
The Parts You Will Need Are:
New ’09-’10 Honda CRF450R Steering Stem Bearing Kit
Lithium EP Grease
You can get all the parts and tools you need through our partner links HERE!
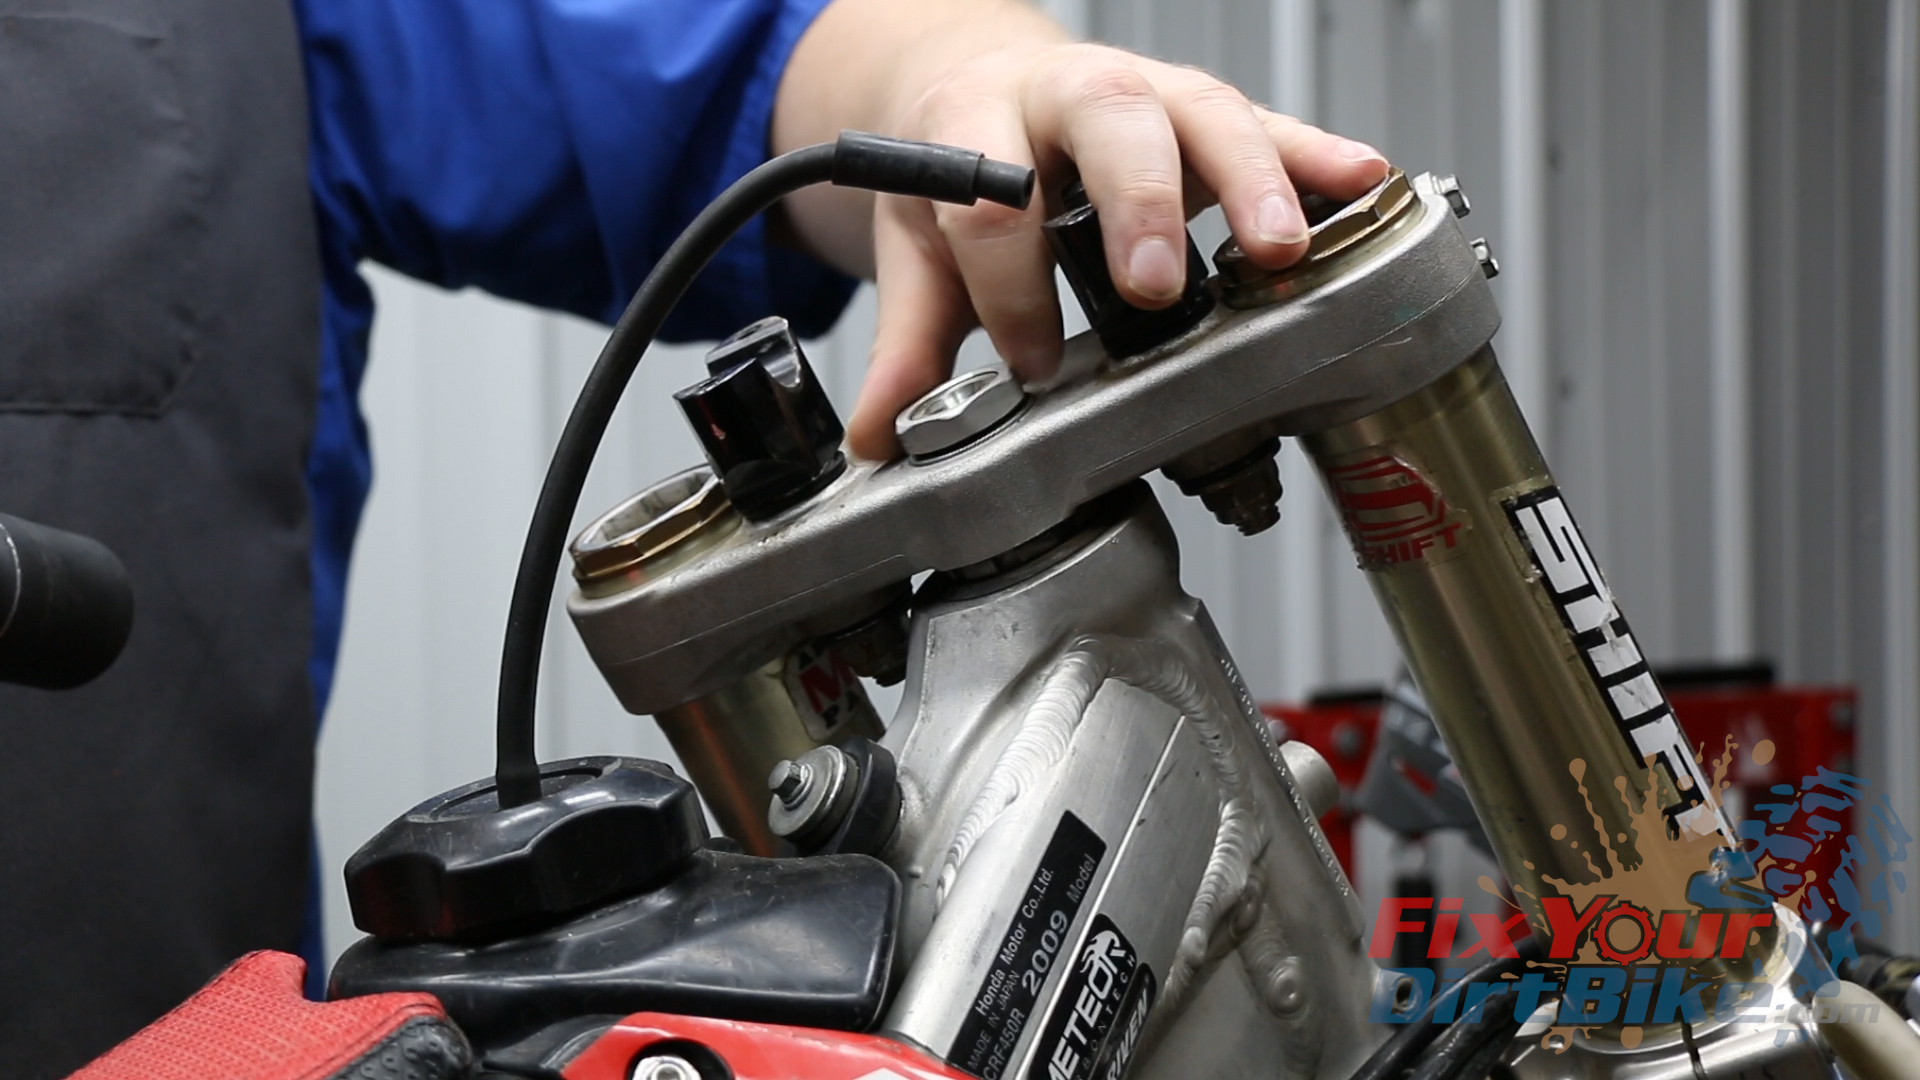
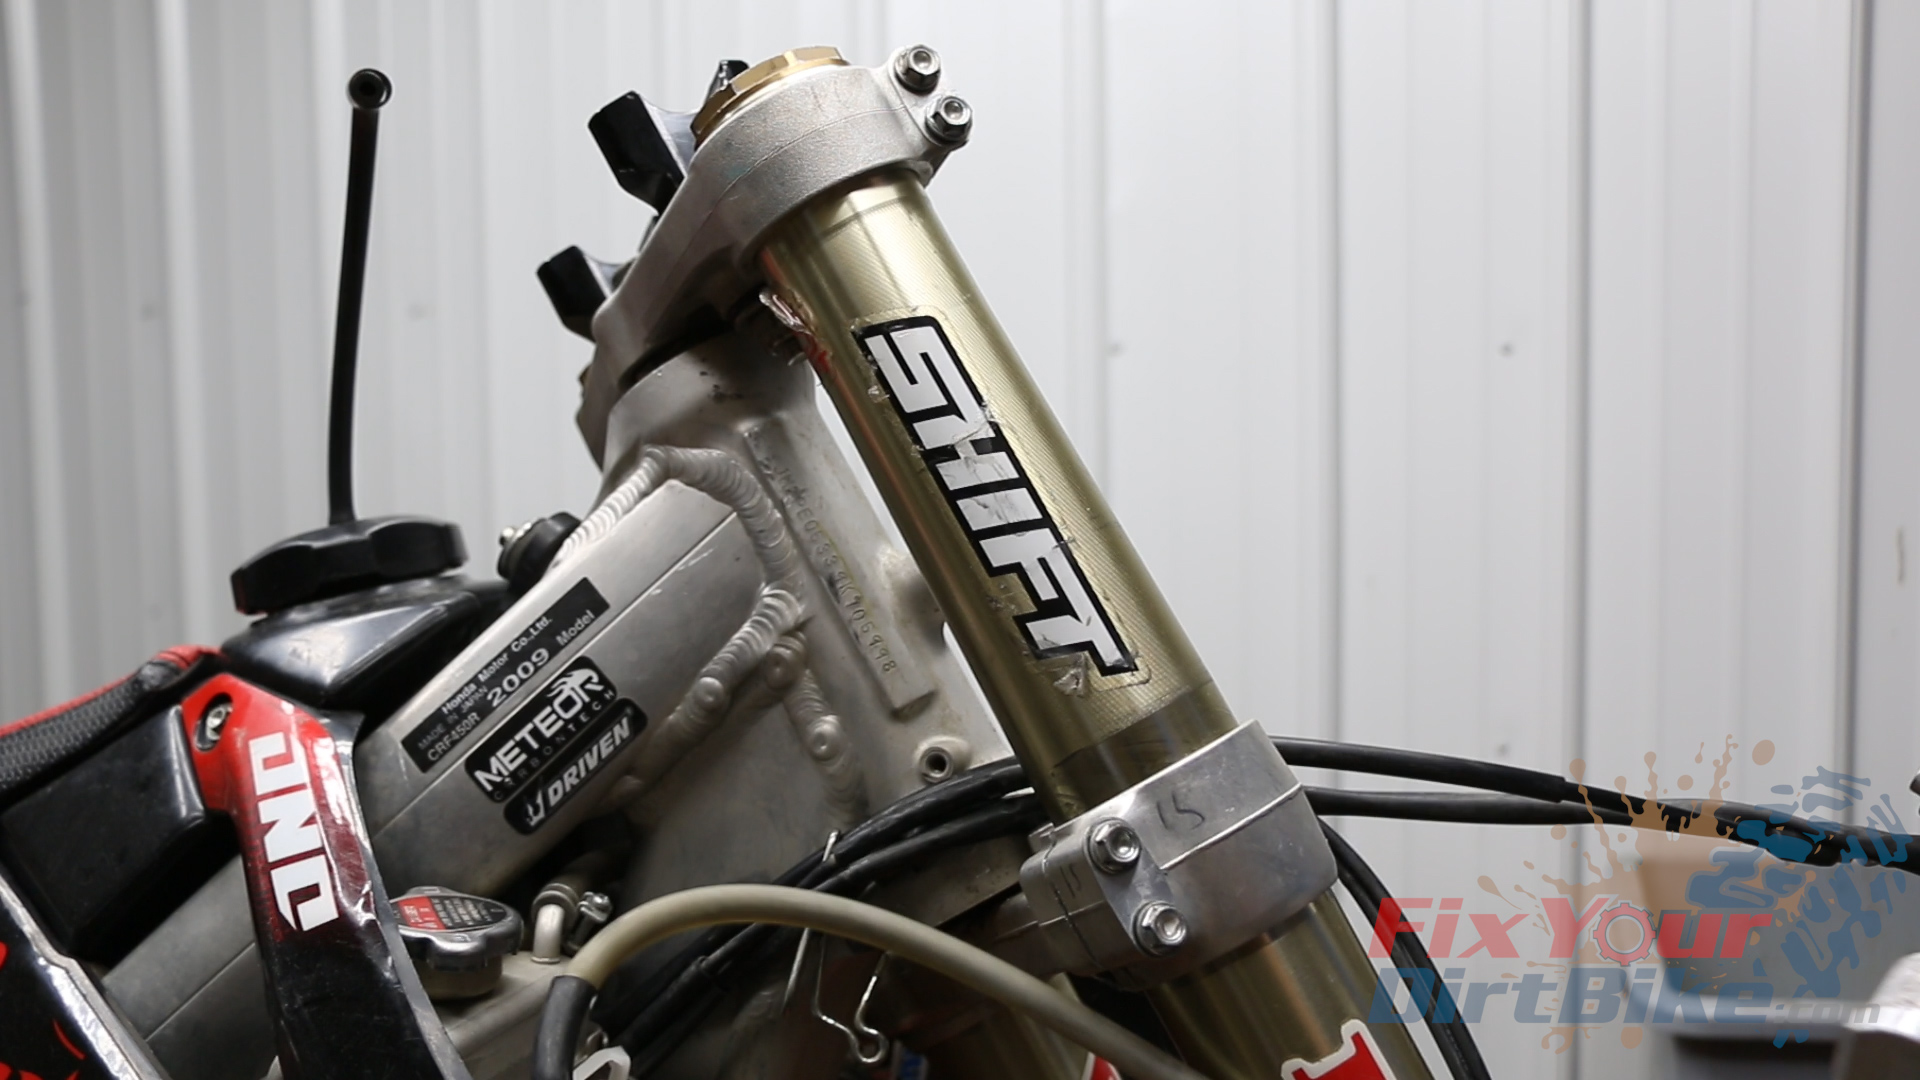
Start with your bike on a stand with front end disassembled except for the forks.
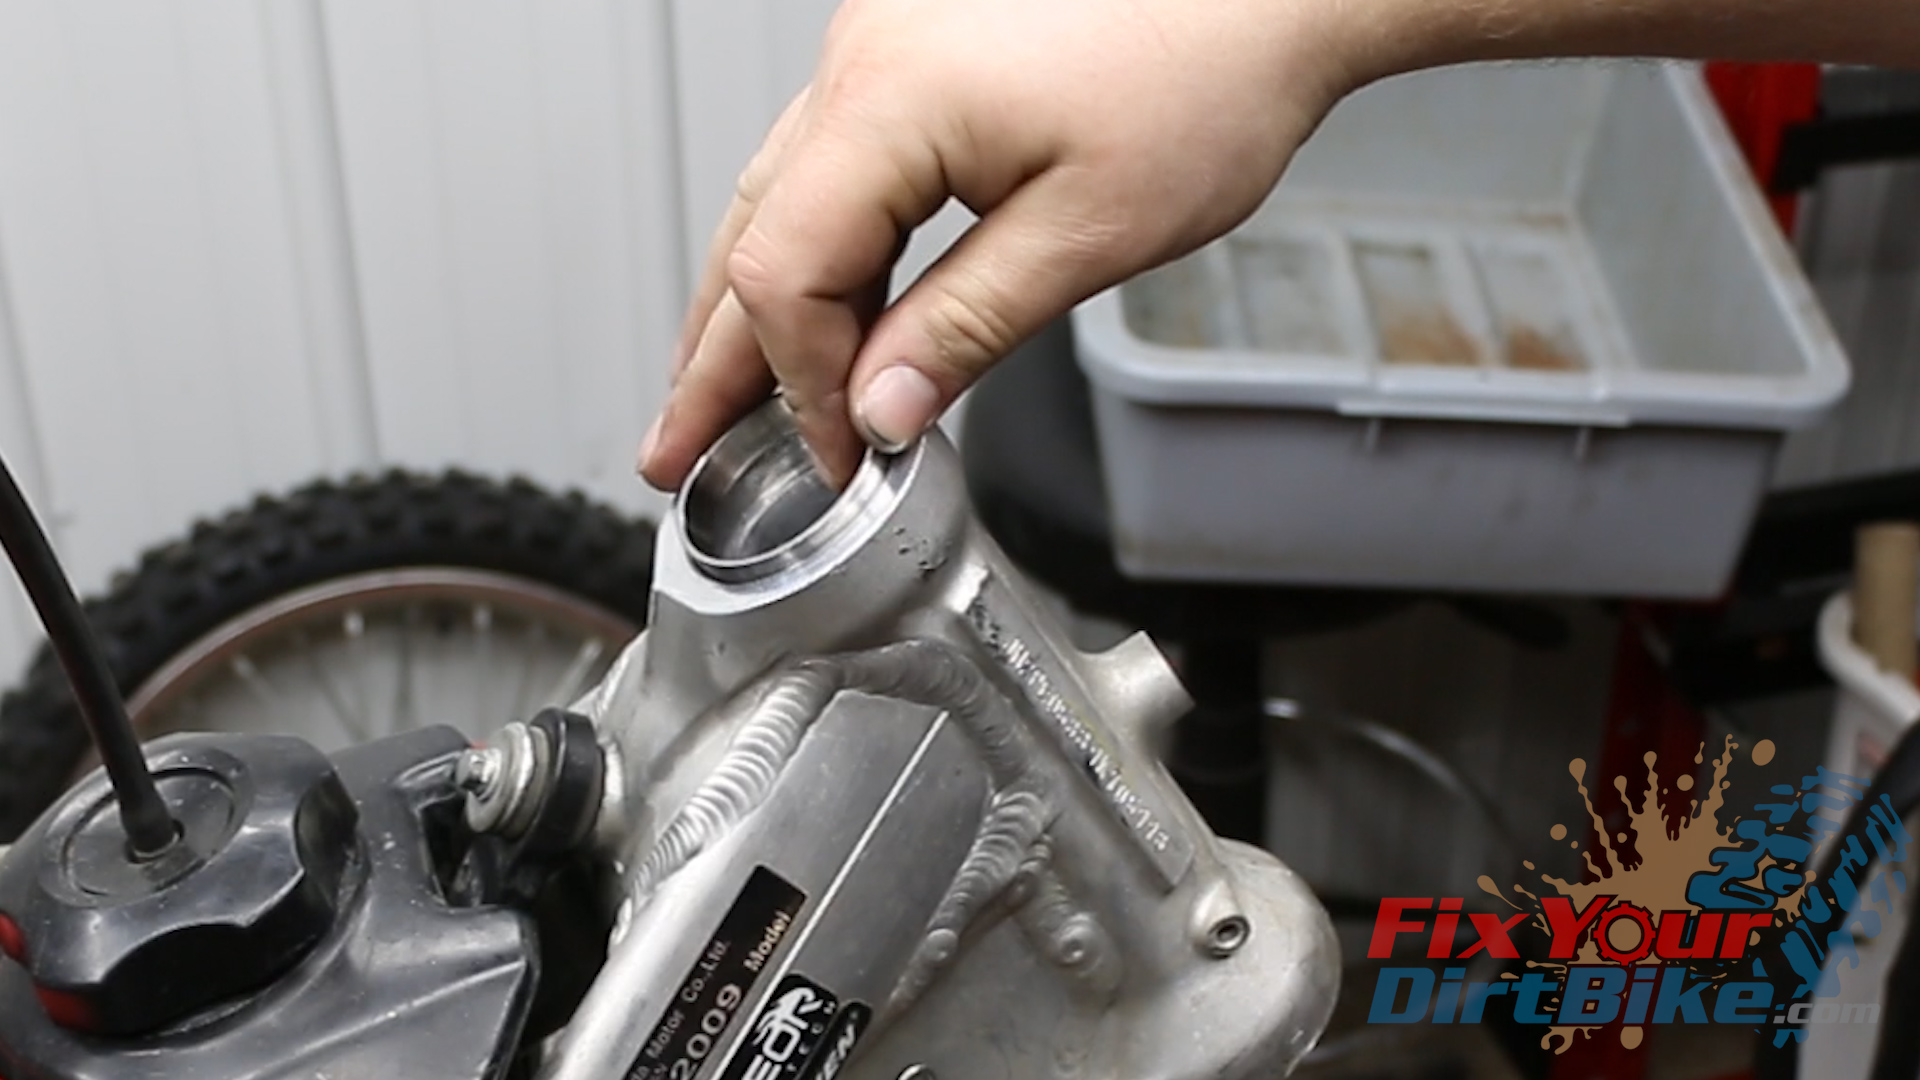
Steering Stem Removal
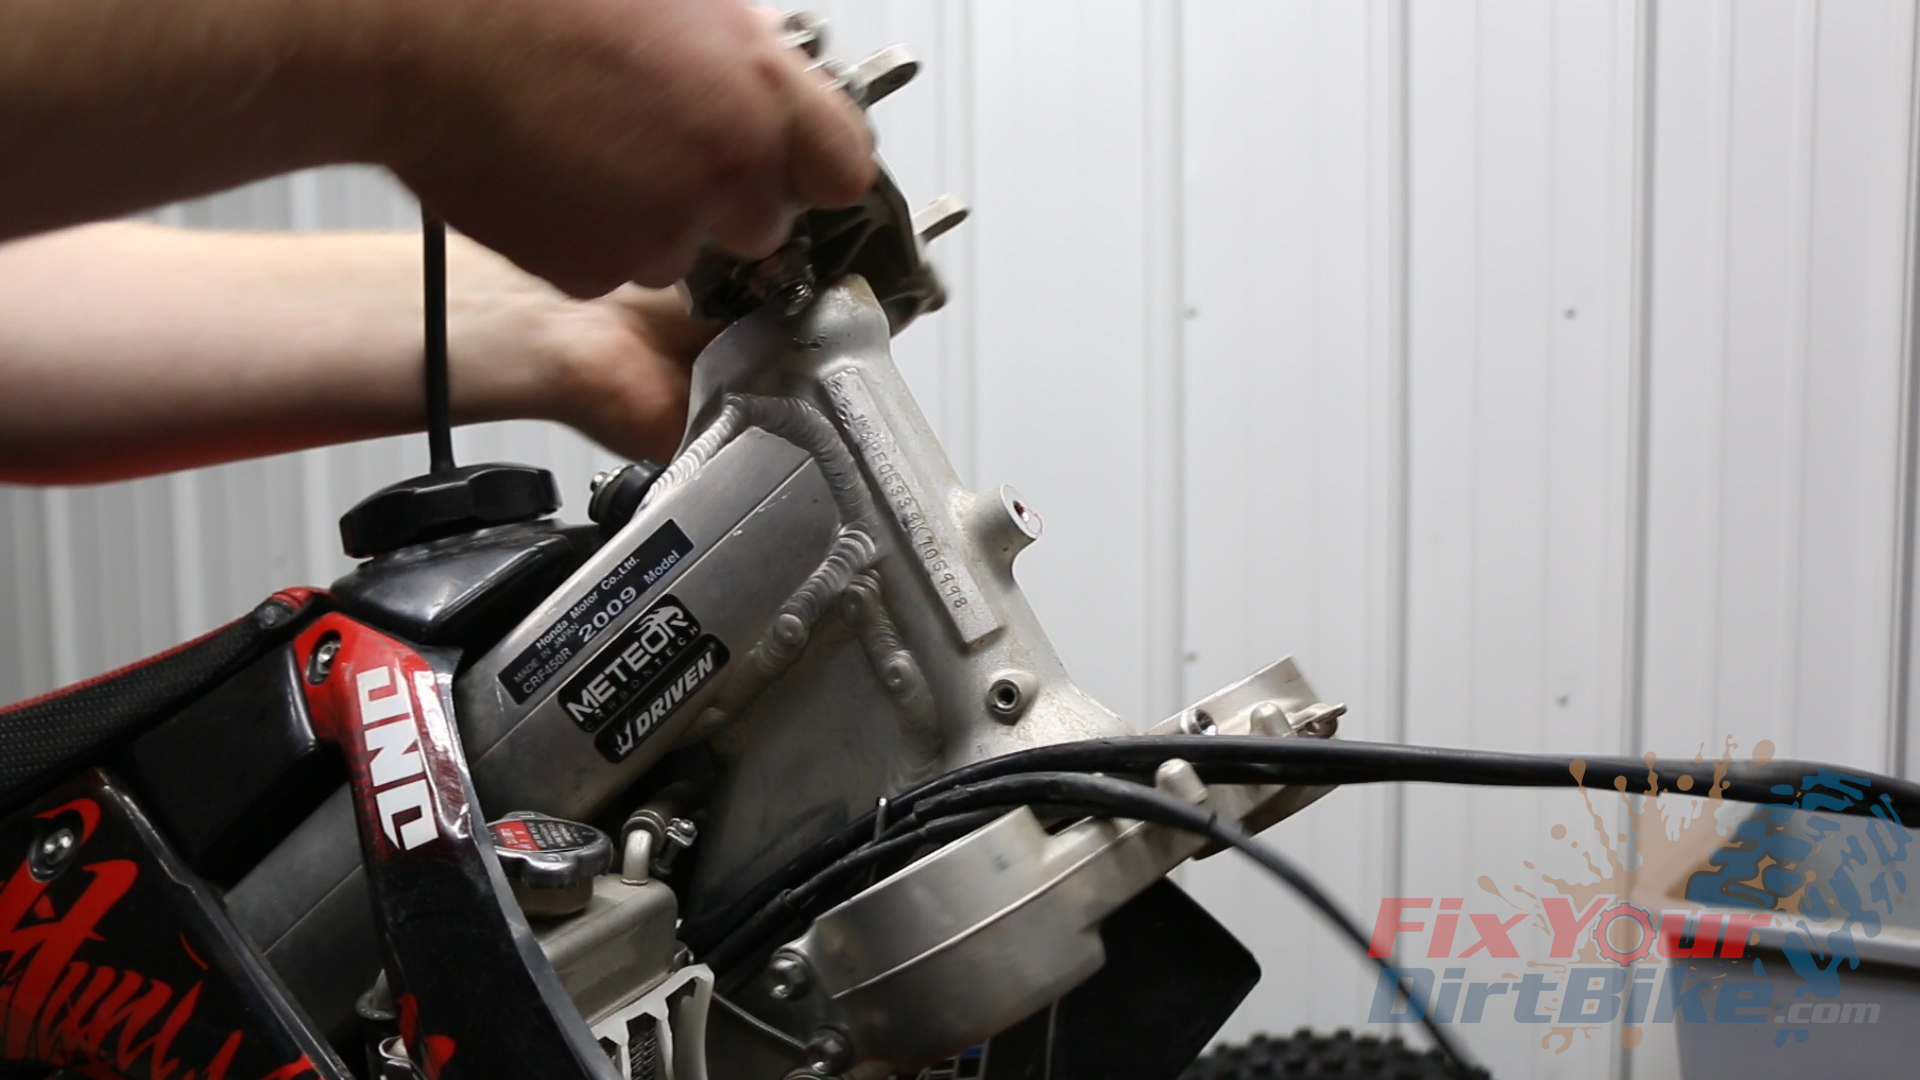
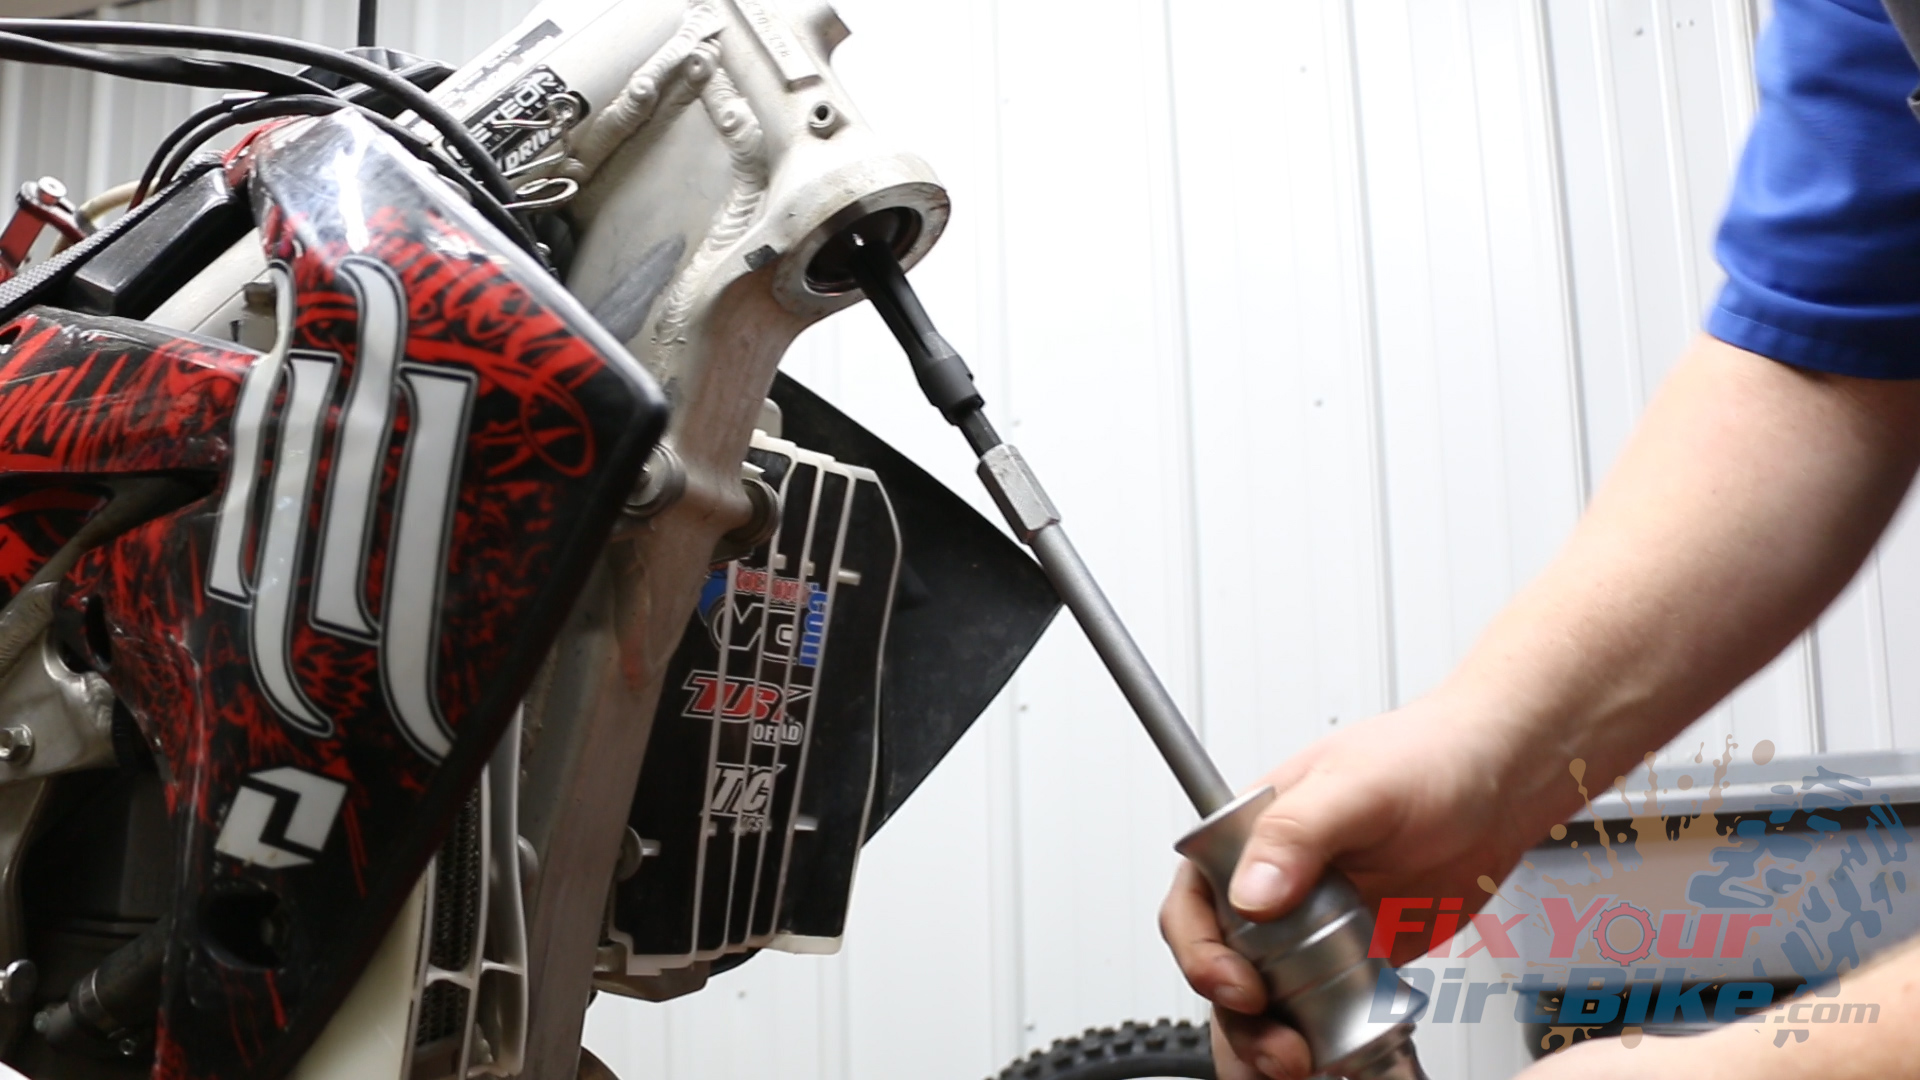
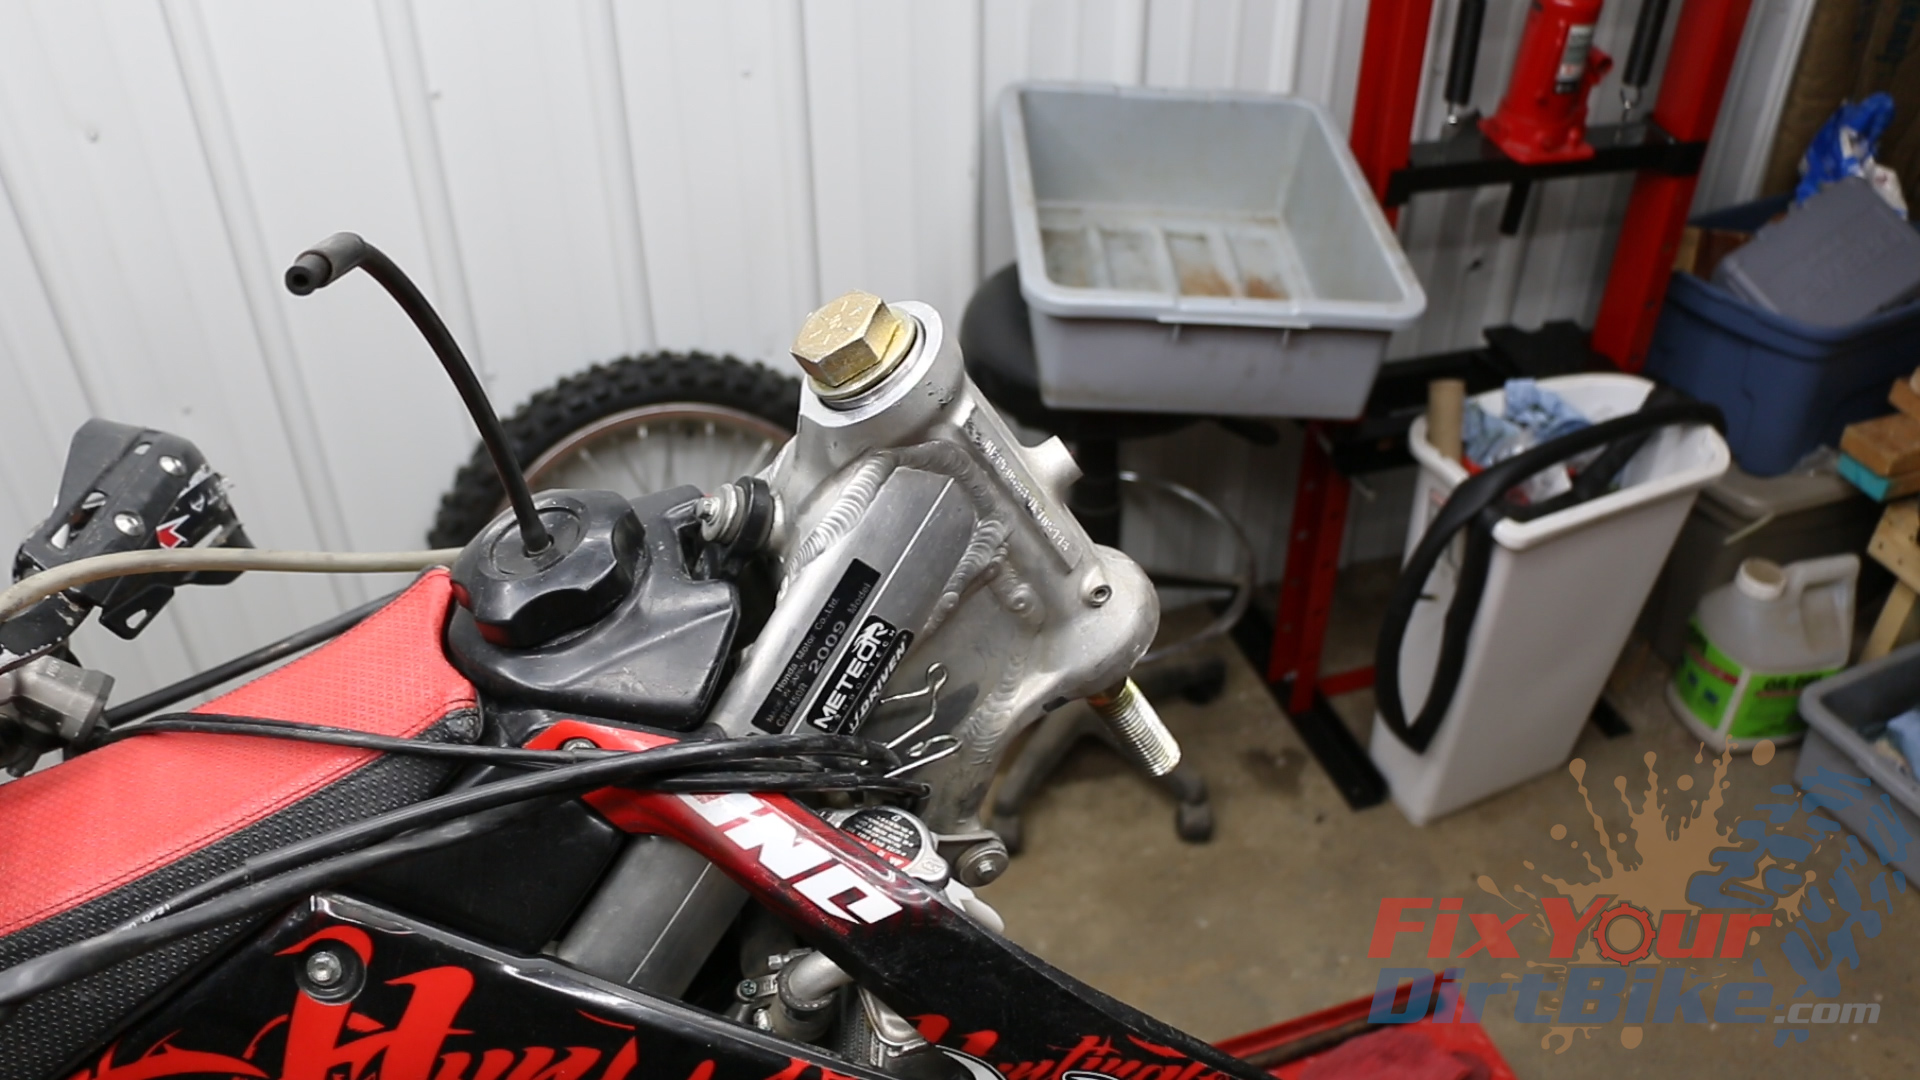
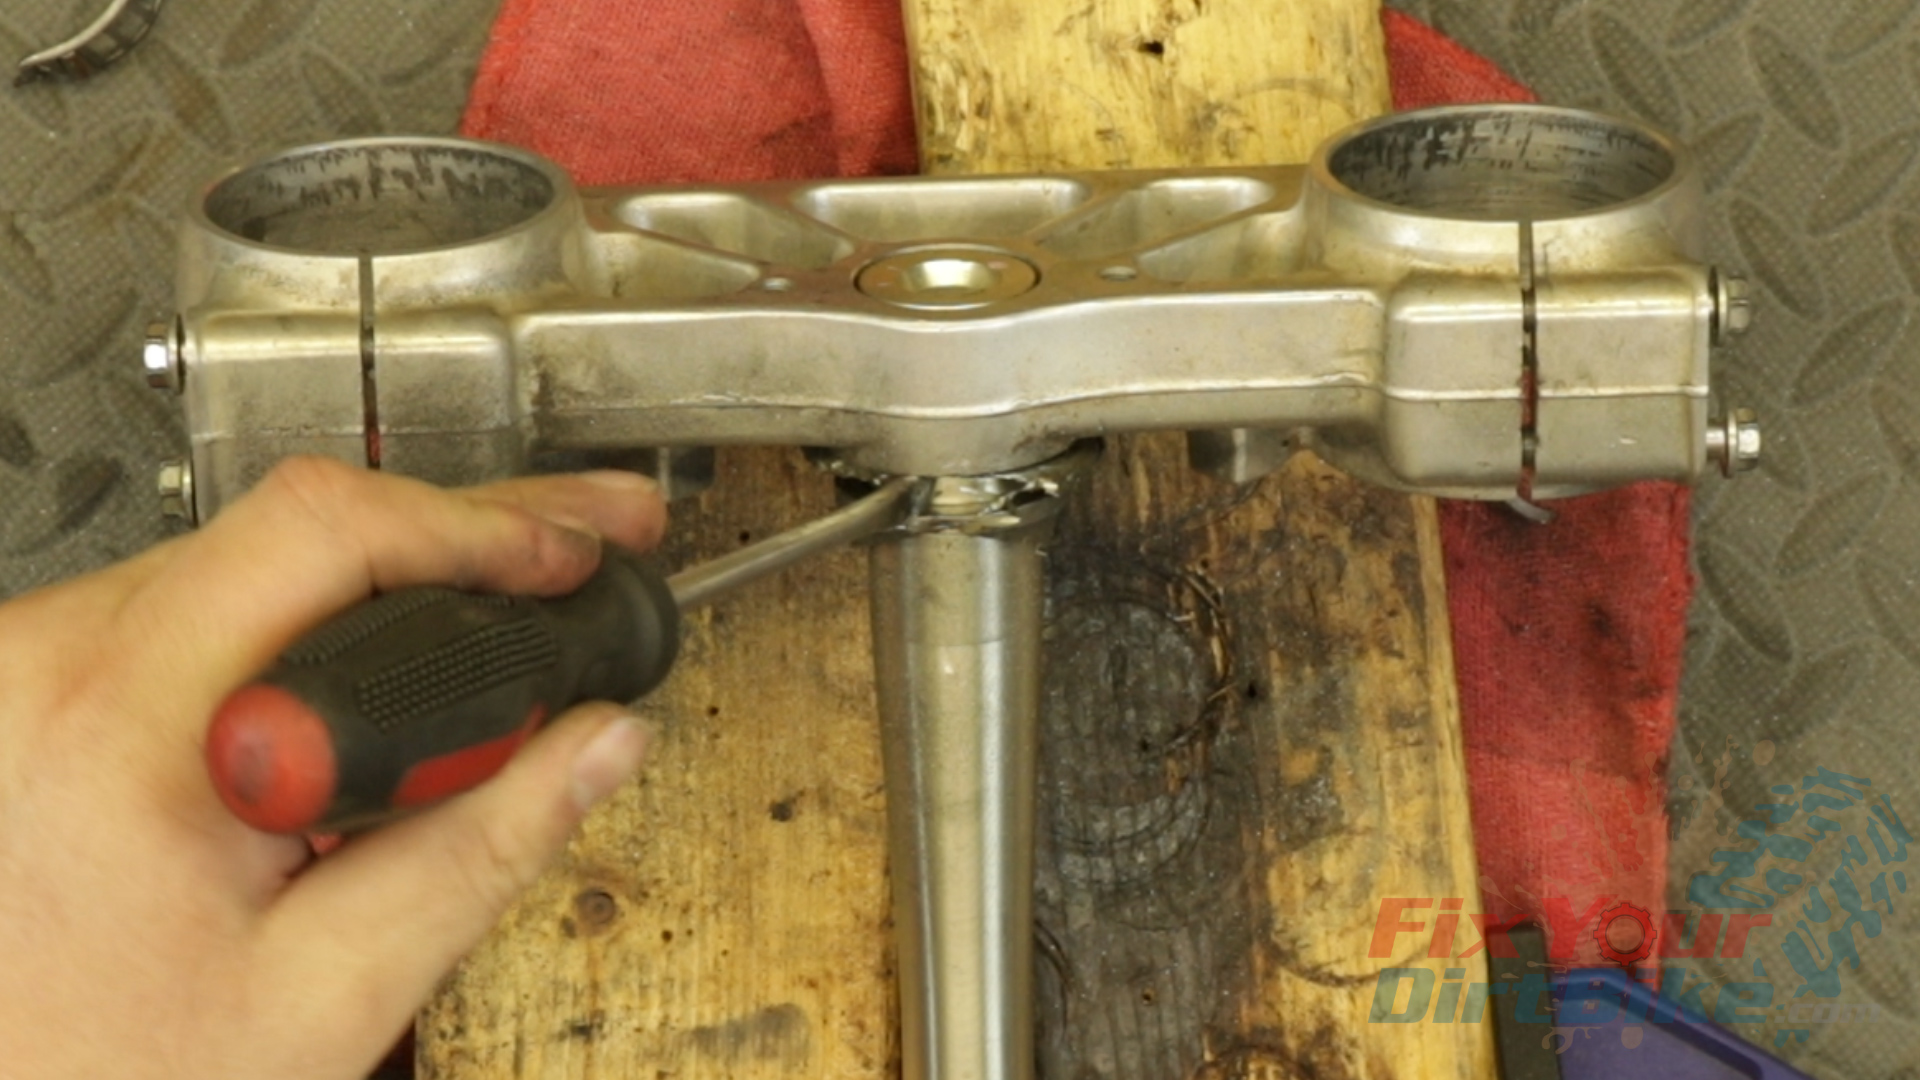
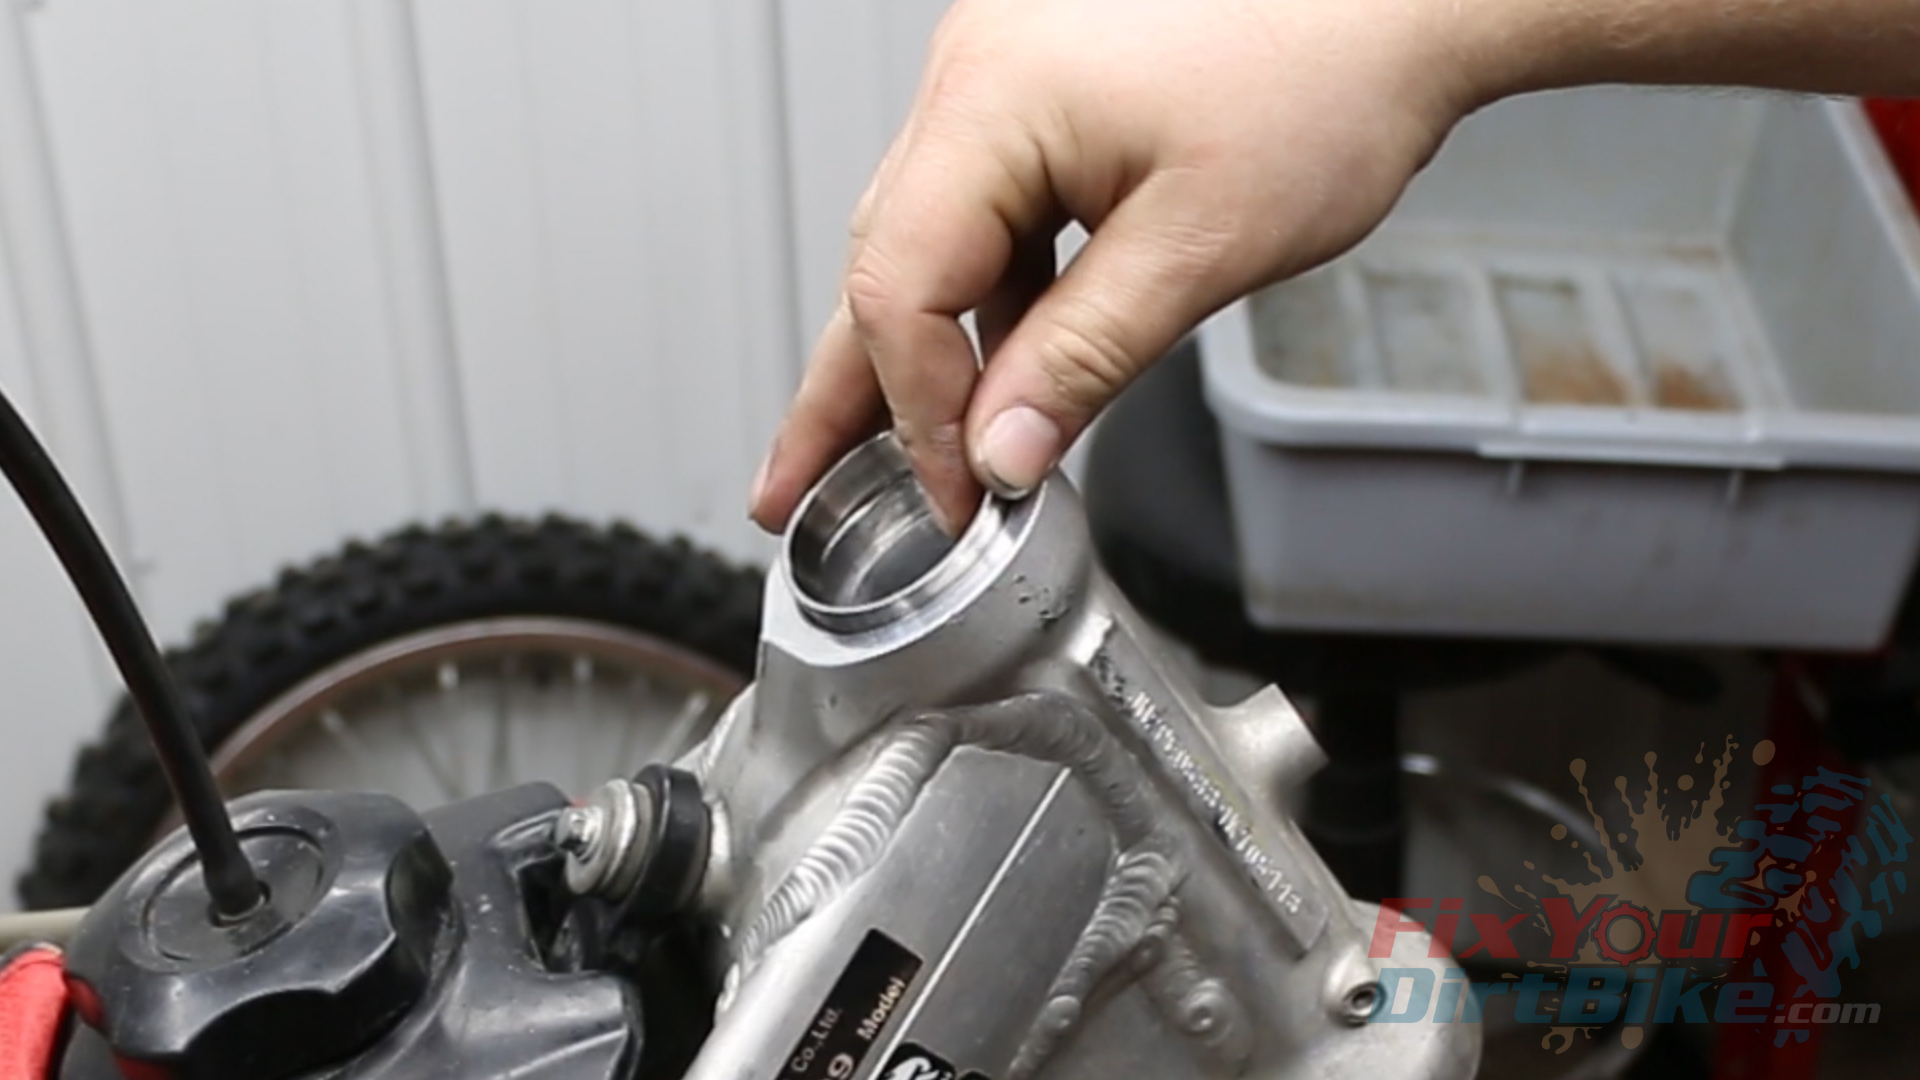
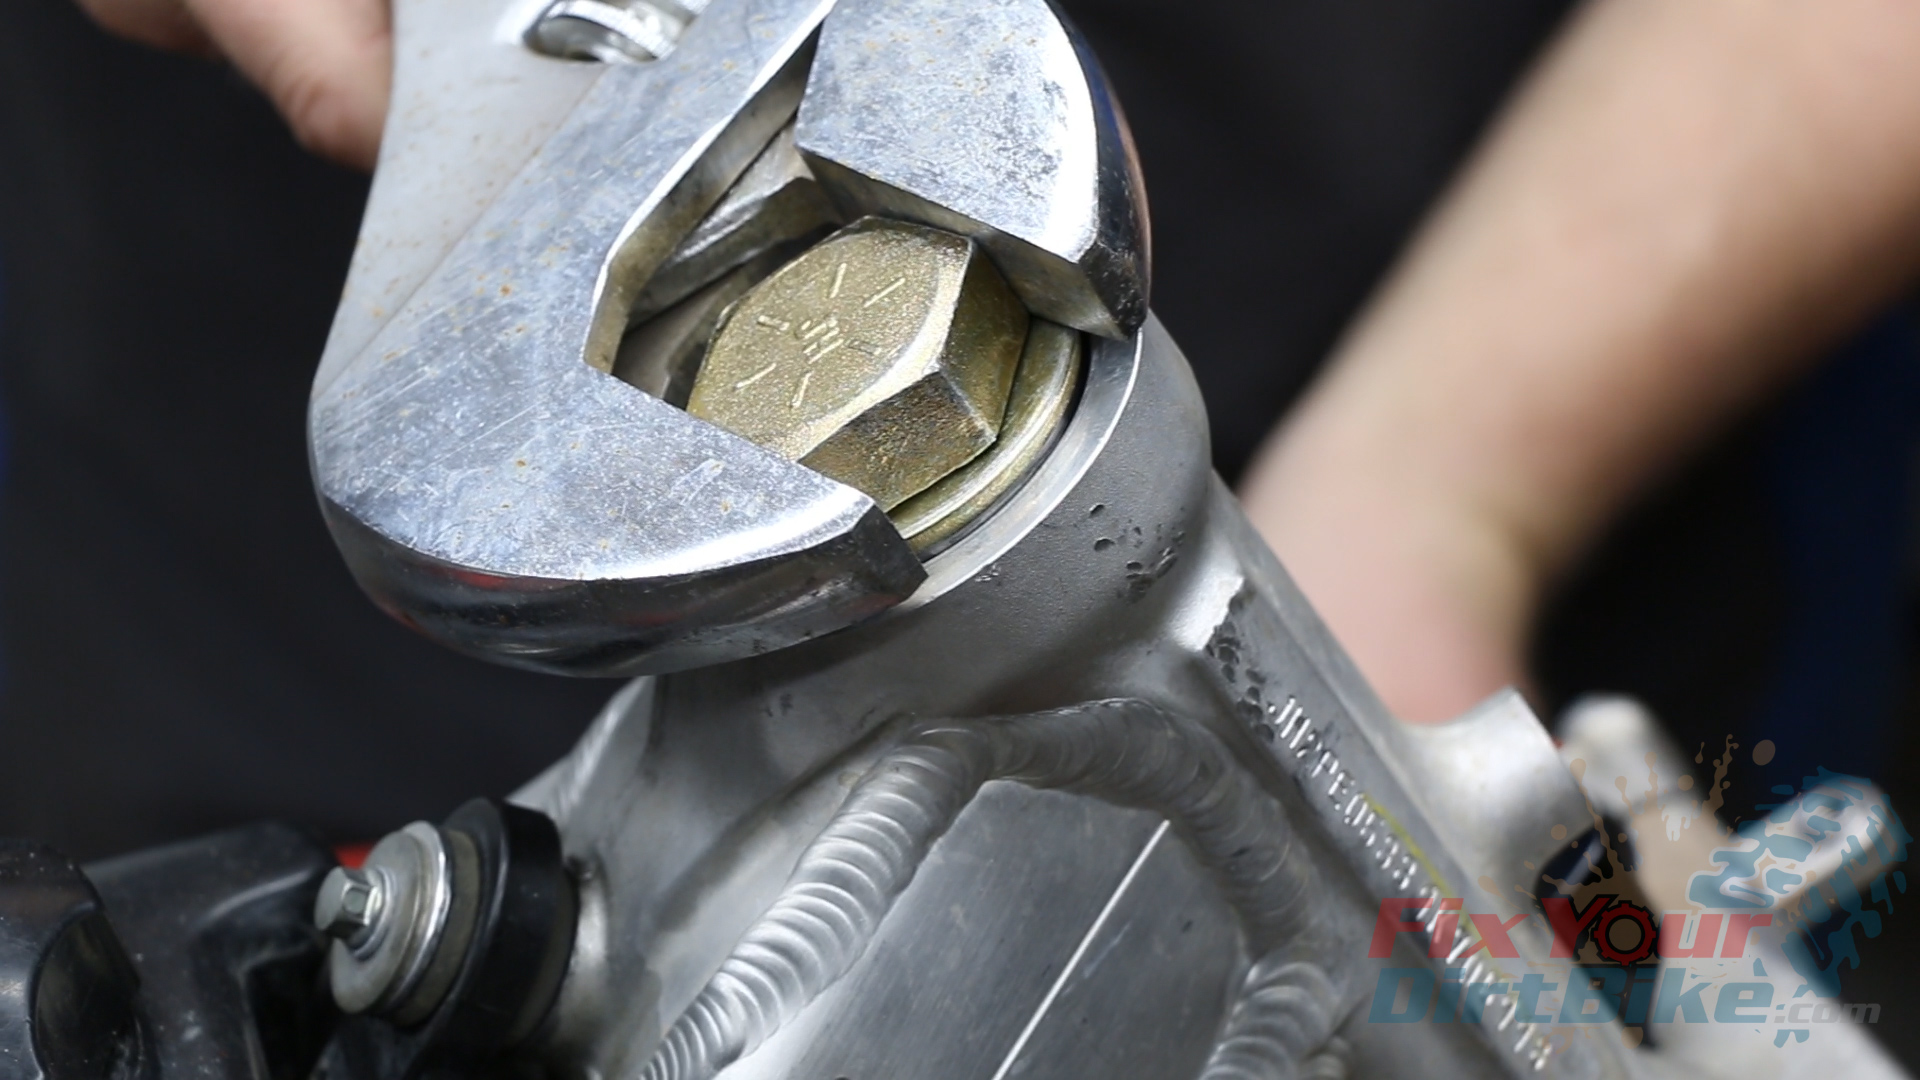
Loosen and remove the steering stem nut and washer, followed by the forks and upper bridge.
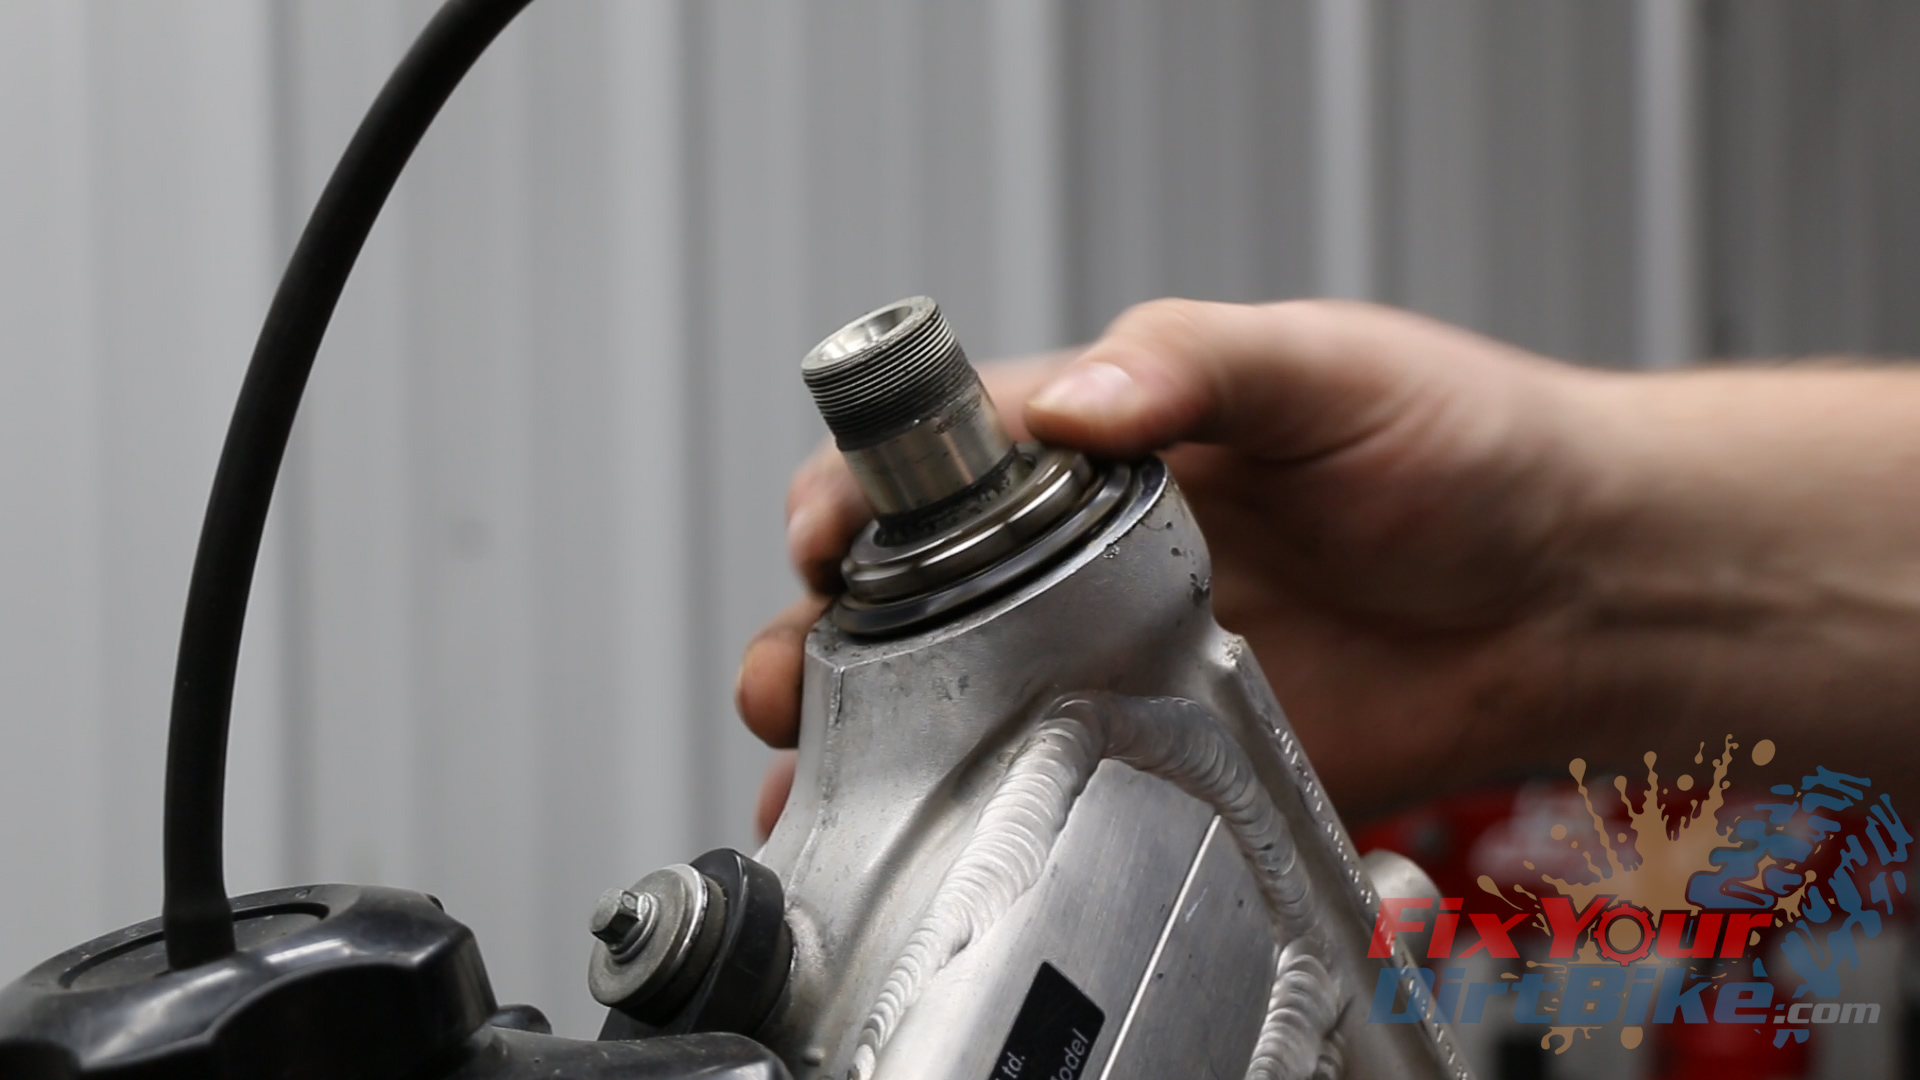
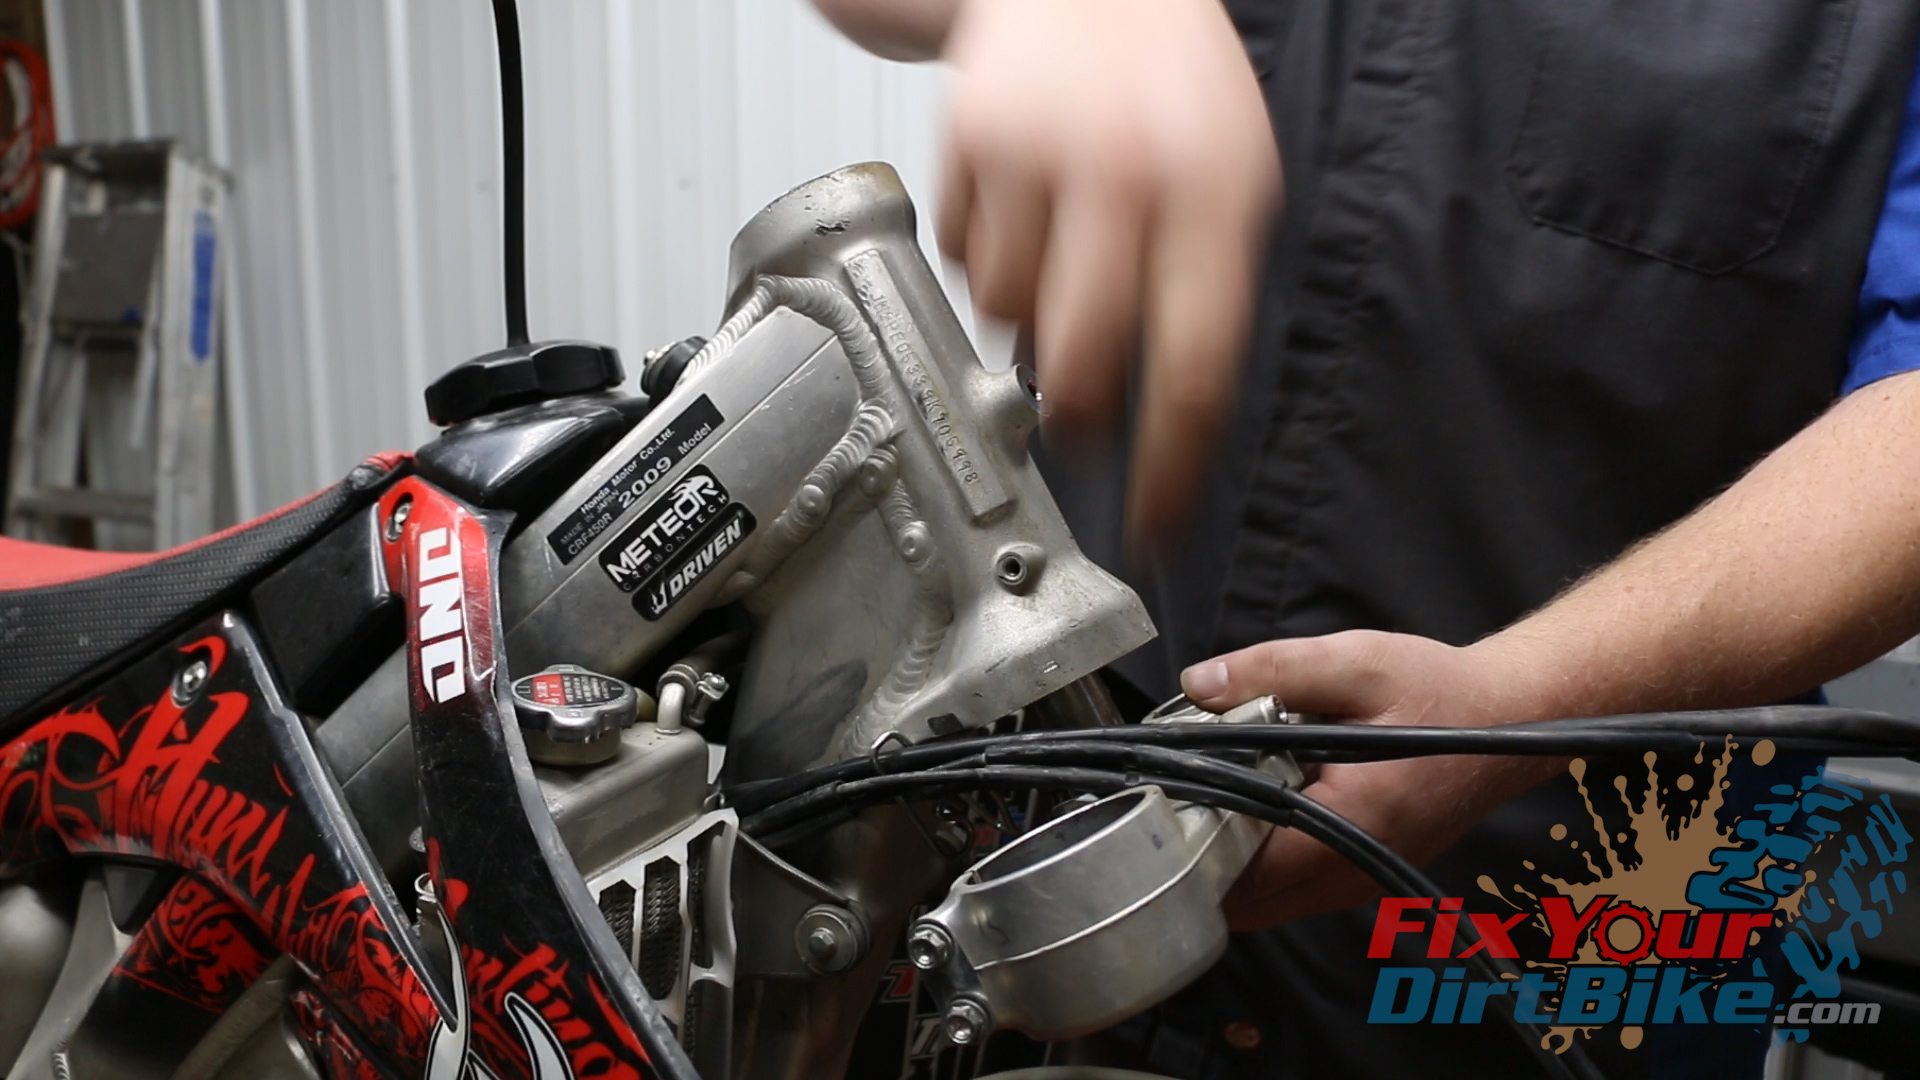
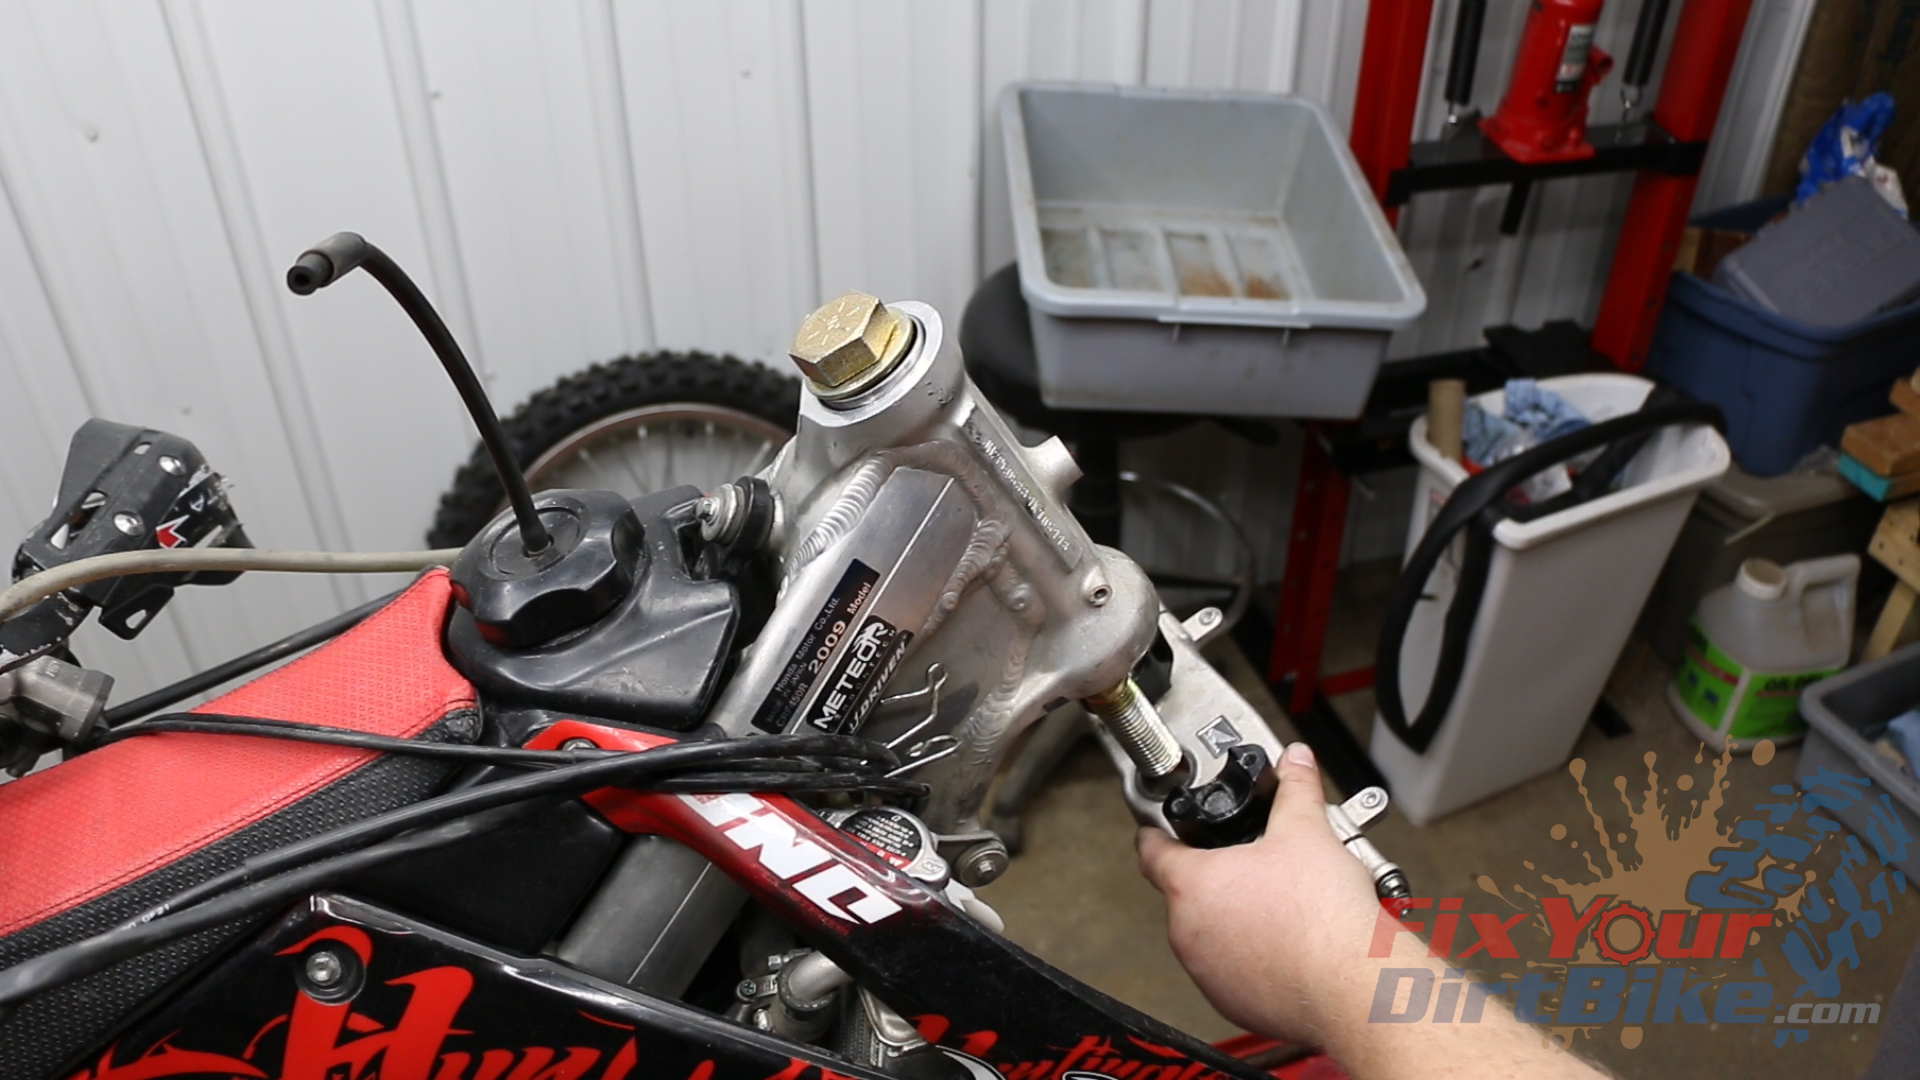
Remove the steering stem adjustment nut, and lower the steering stem out of the steering head.
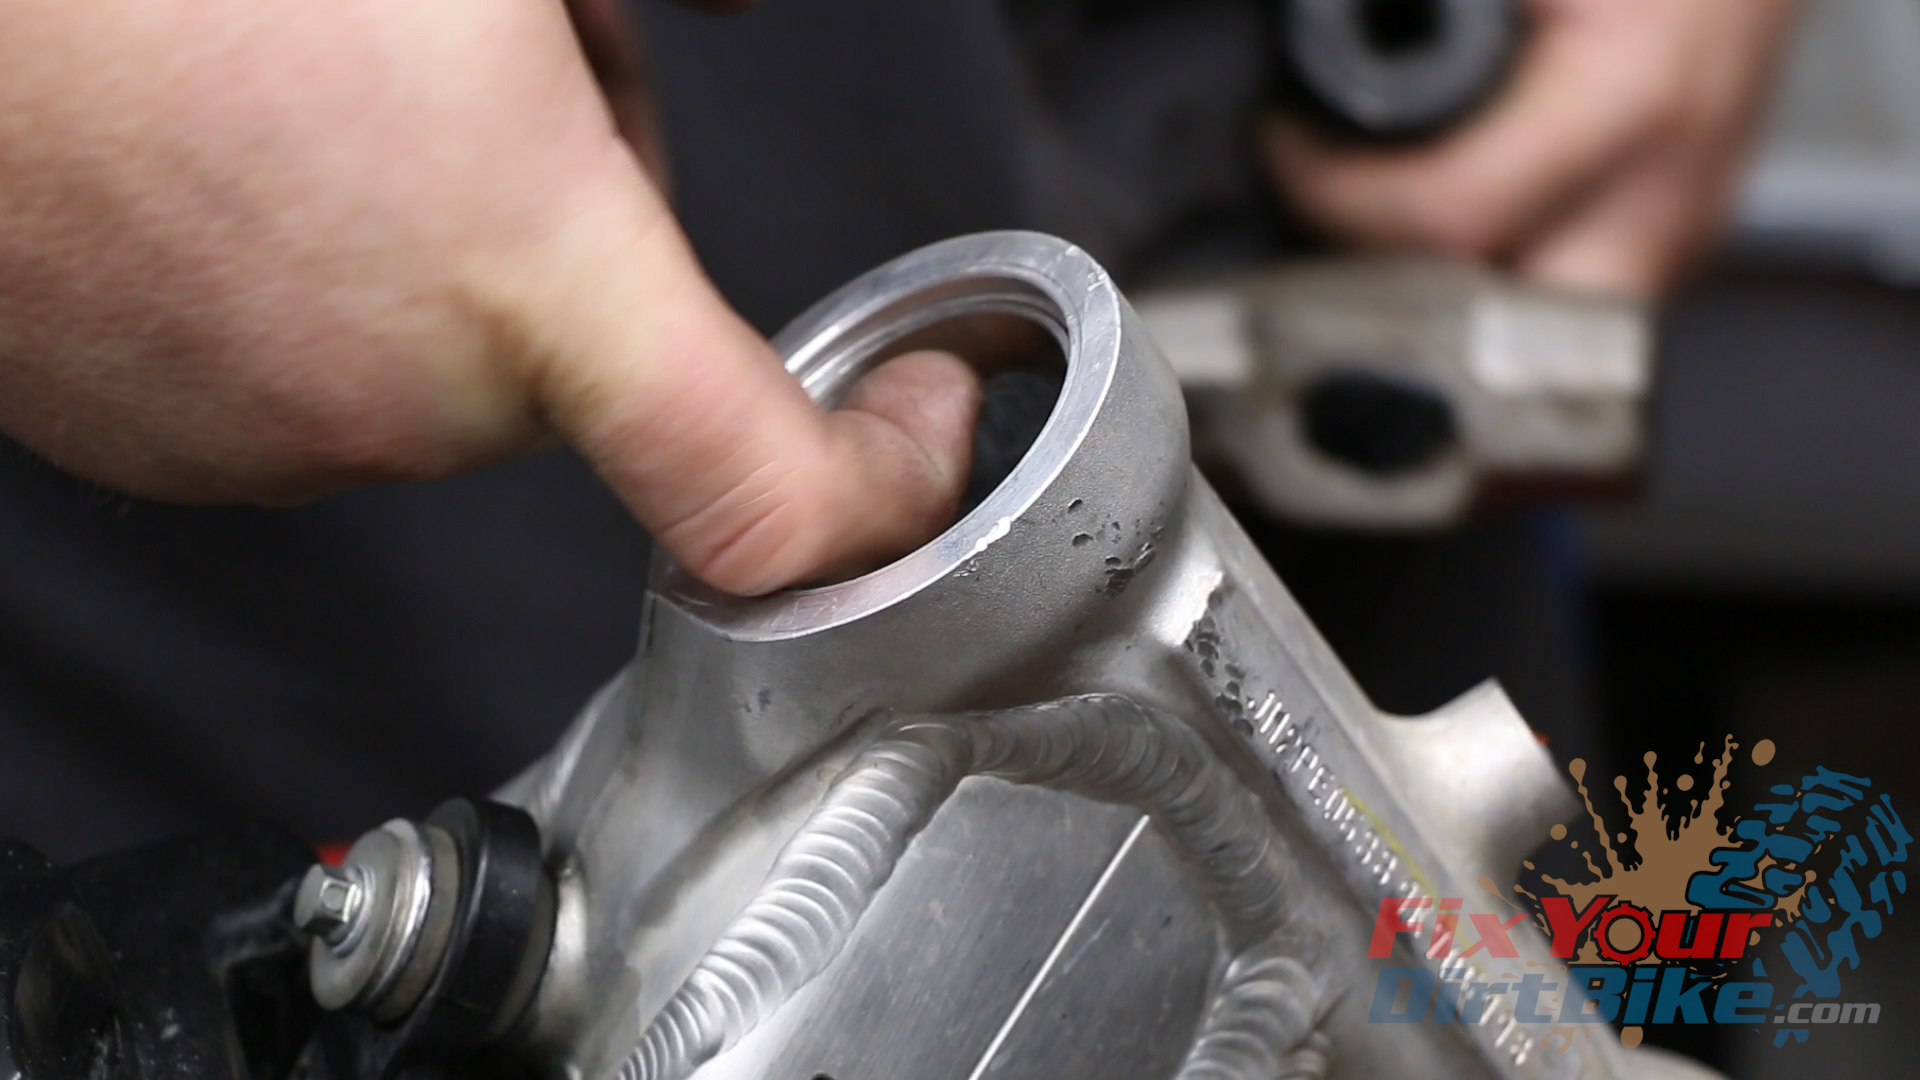
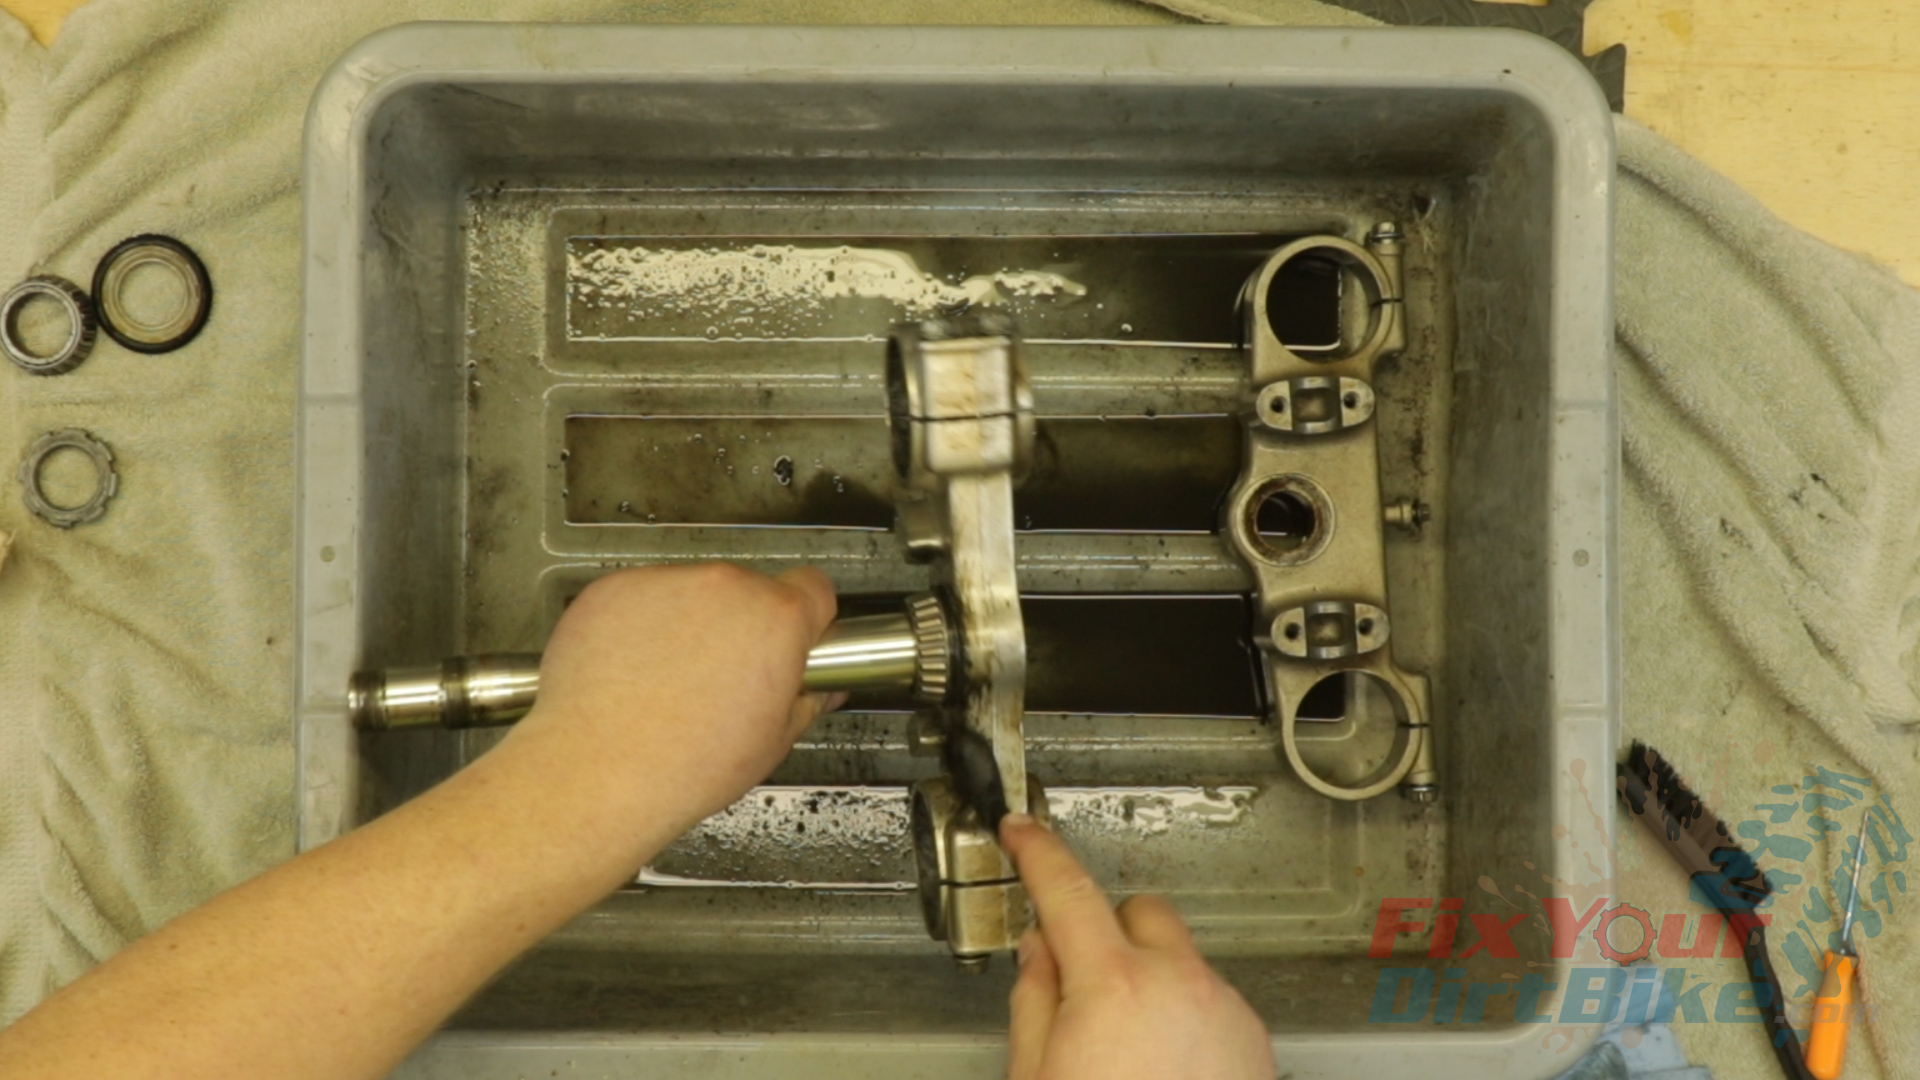
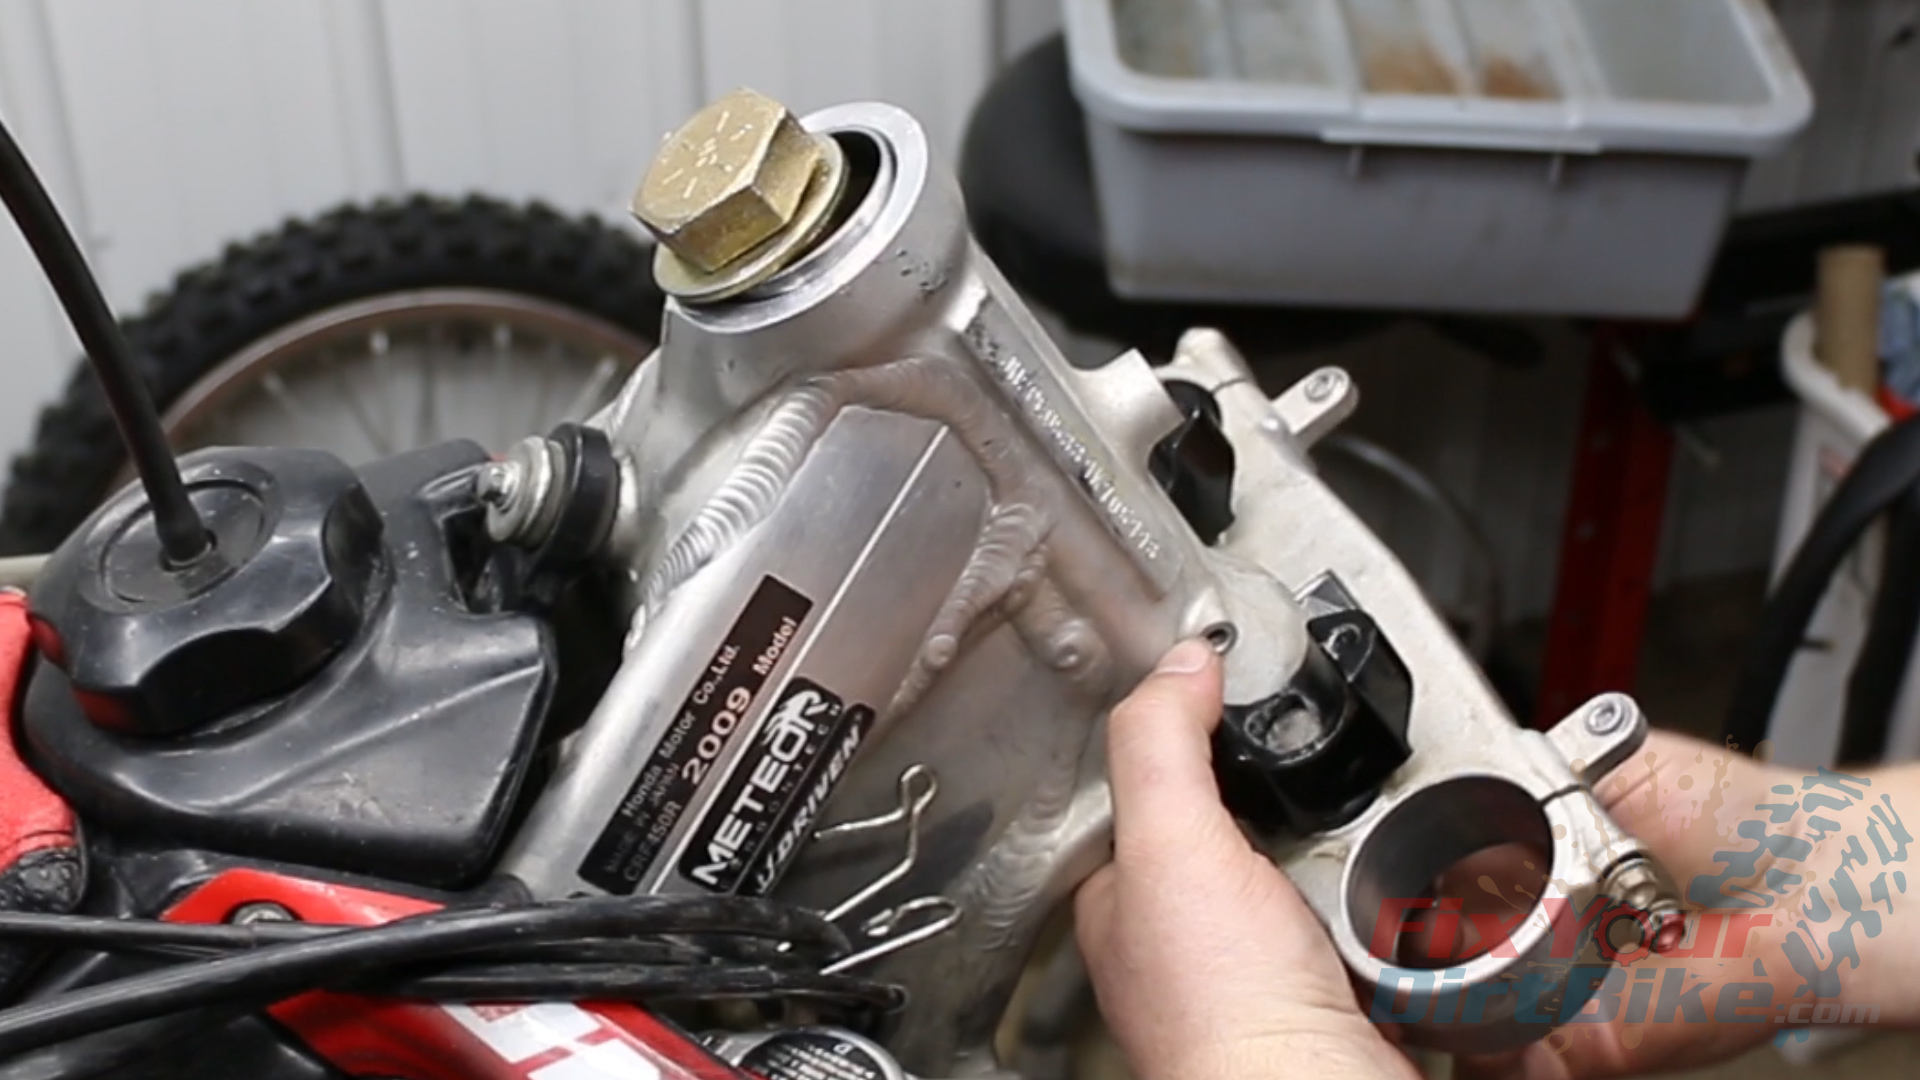
Clean all components and check for obvious damage or wear to the bearings and welds.
DO NOT TRY TO REMOVE THE LOWER BEARING front the steering stem unless you need to replace it.
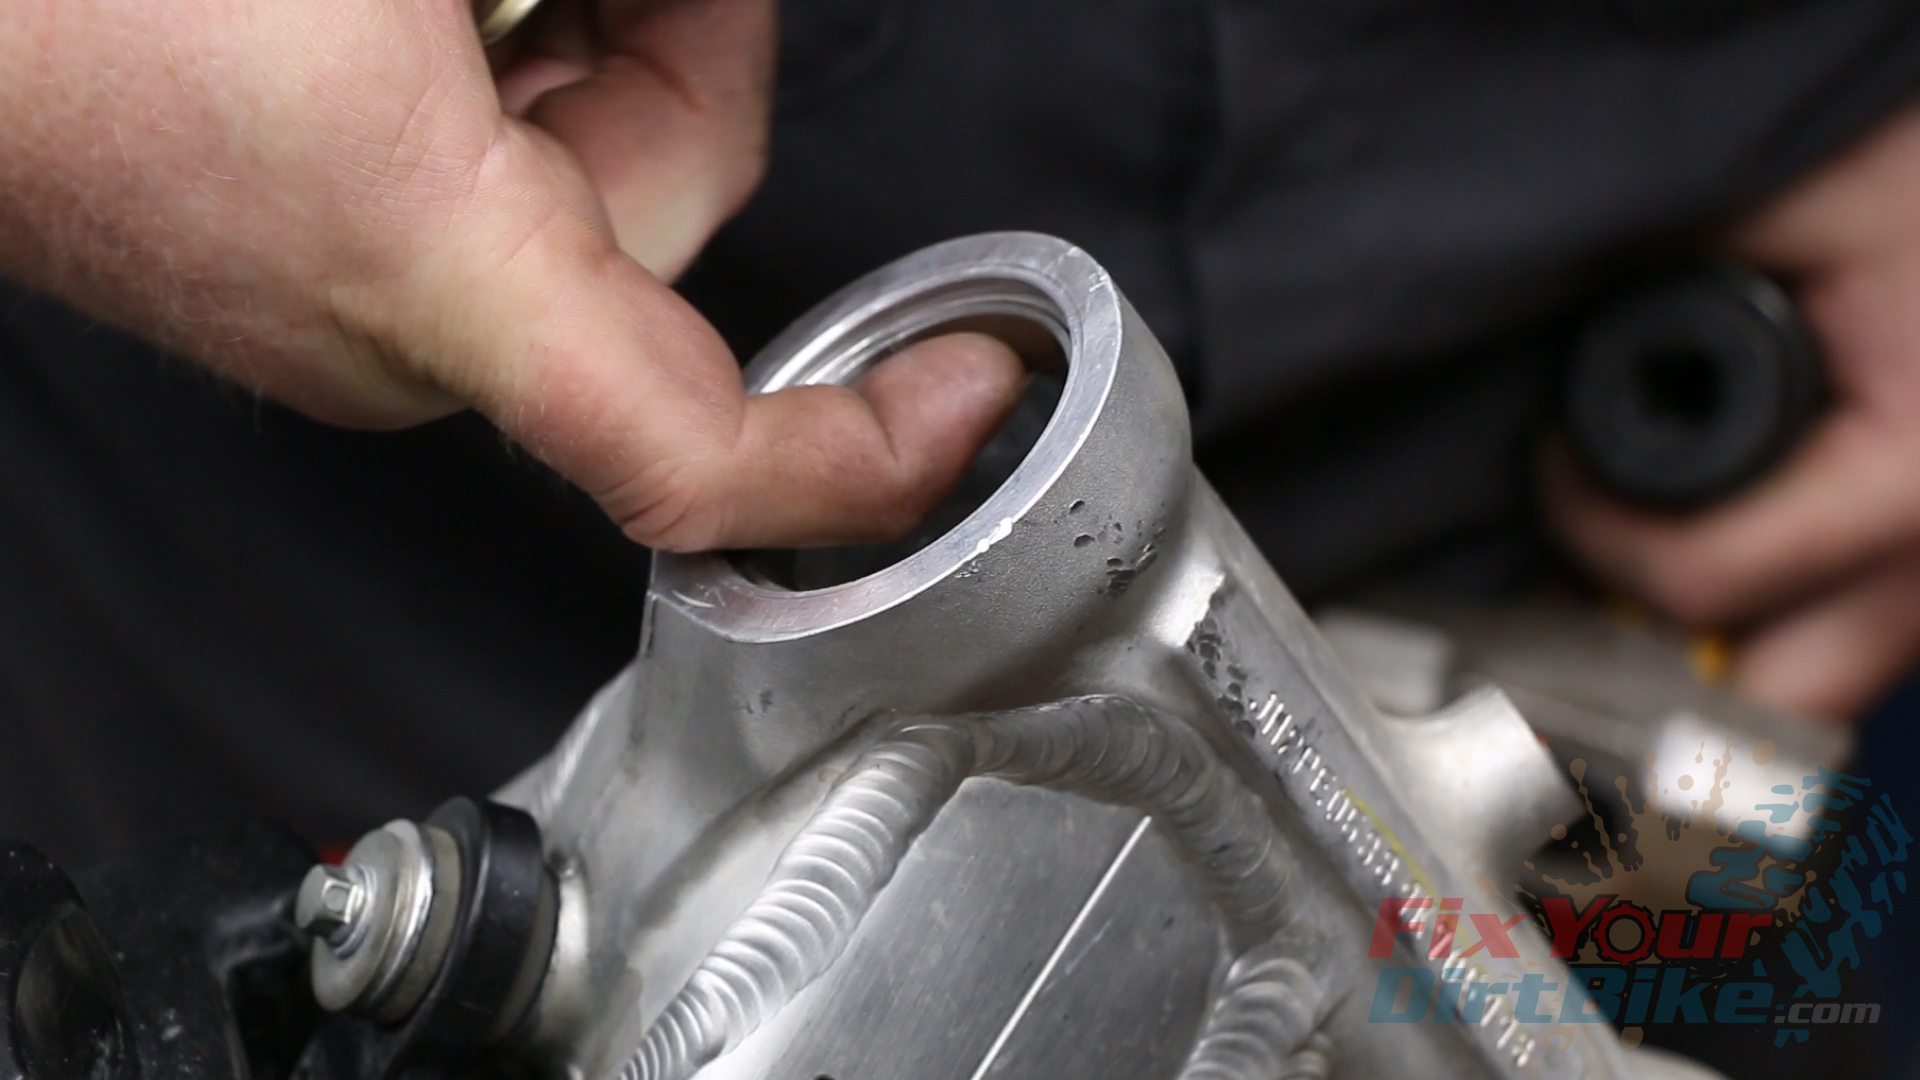
Clean and inspect the steering head, and check for damage to the races and welds.
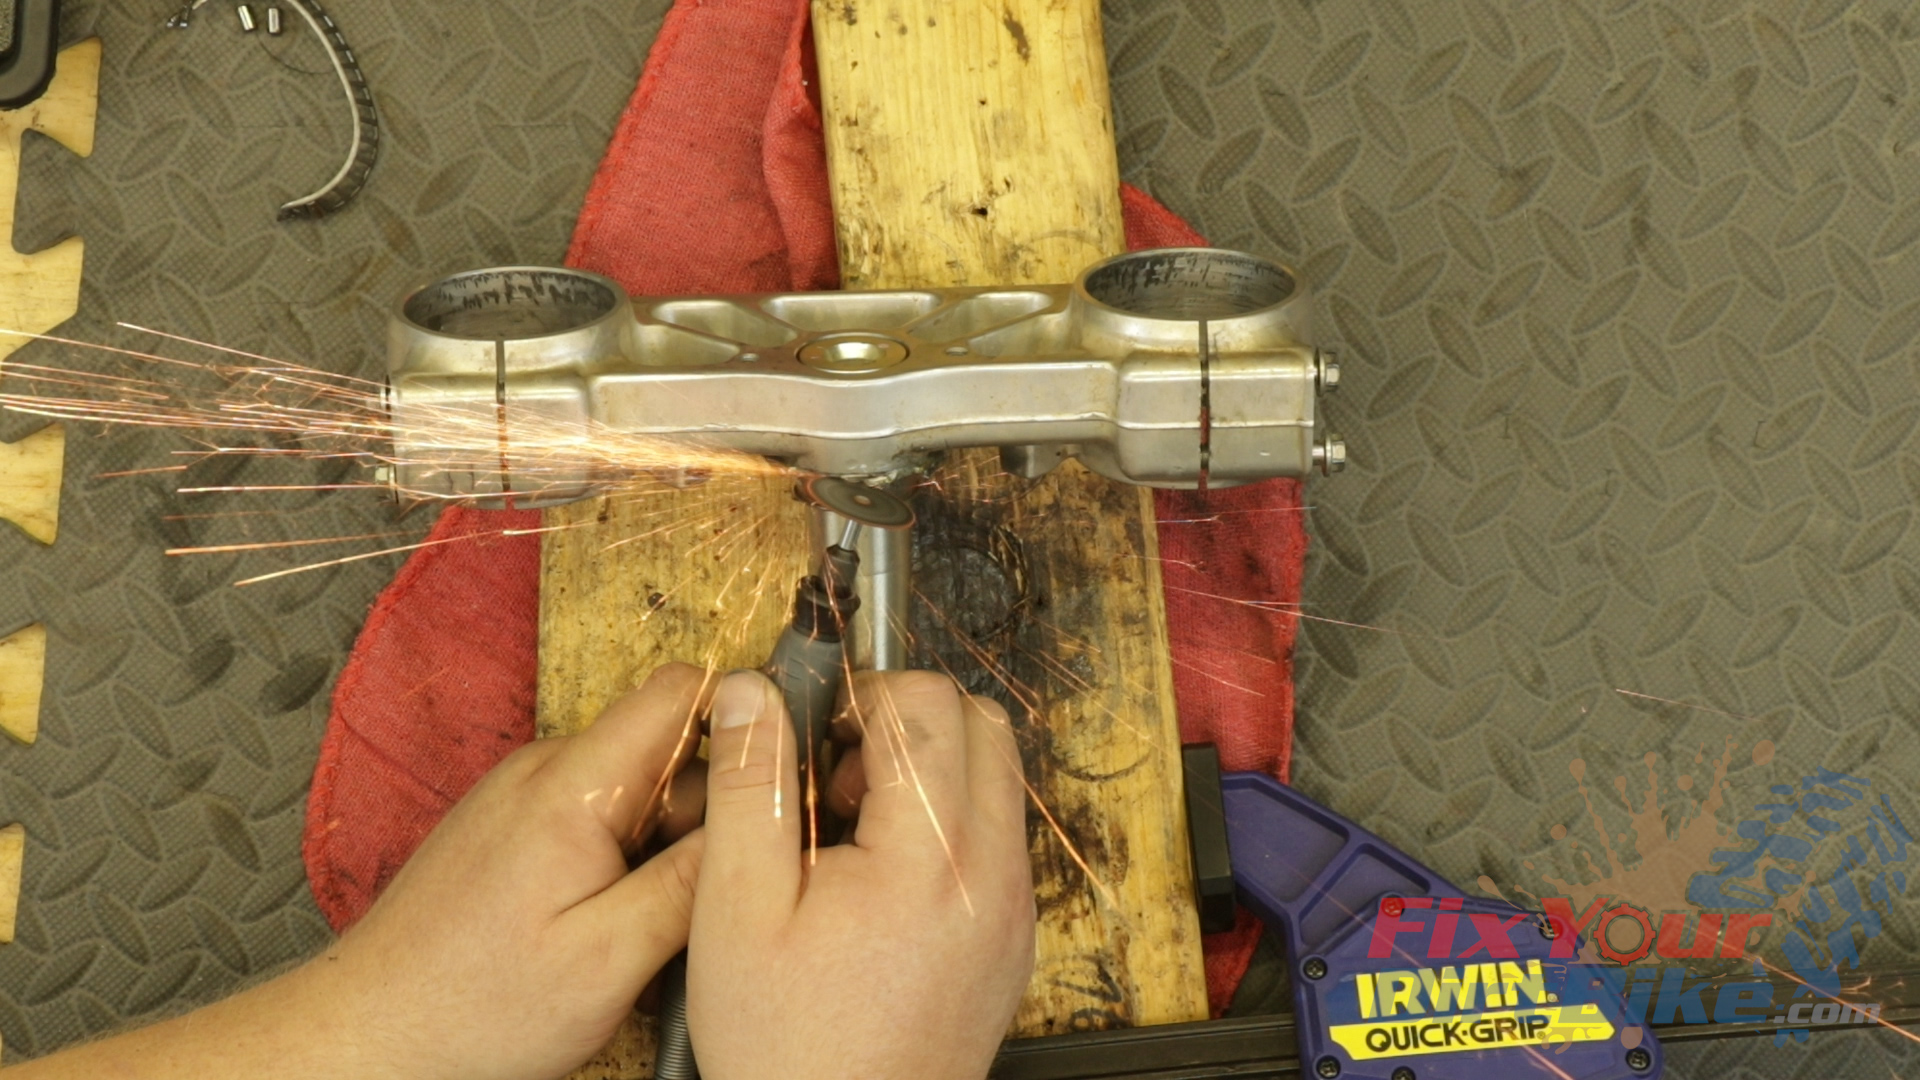
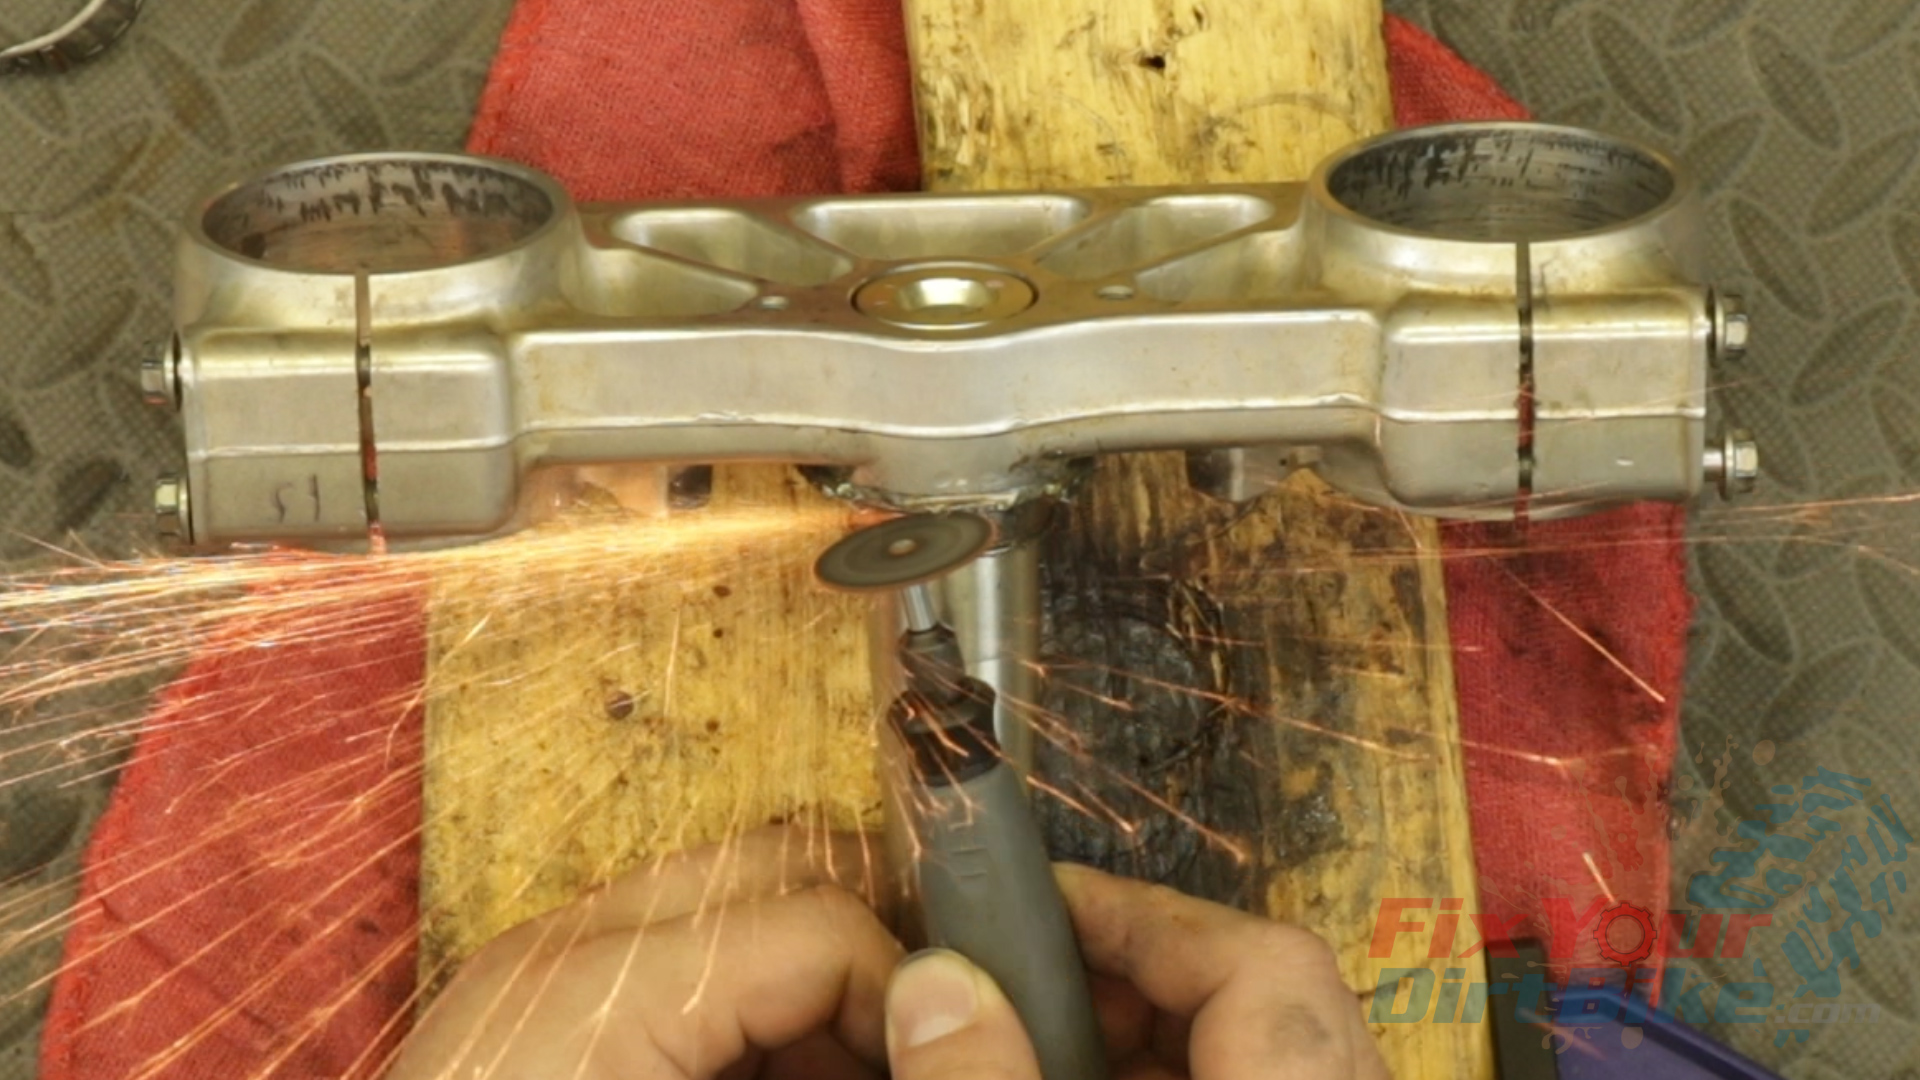
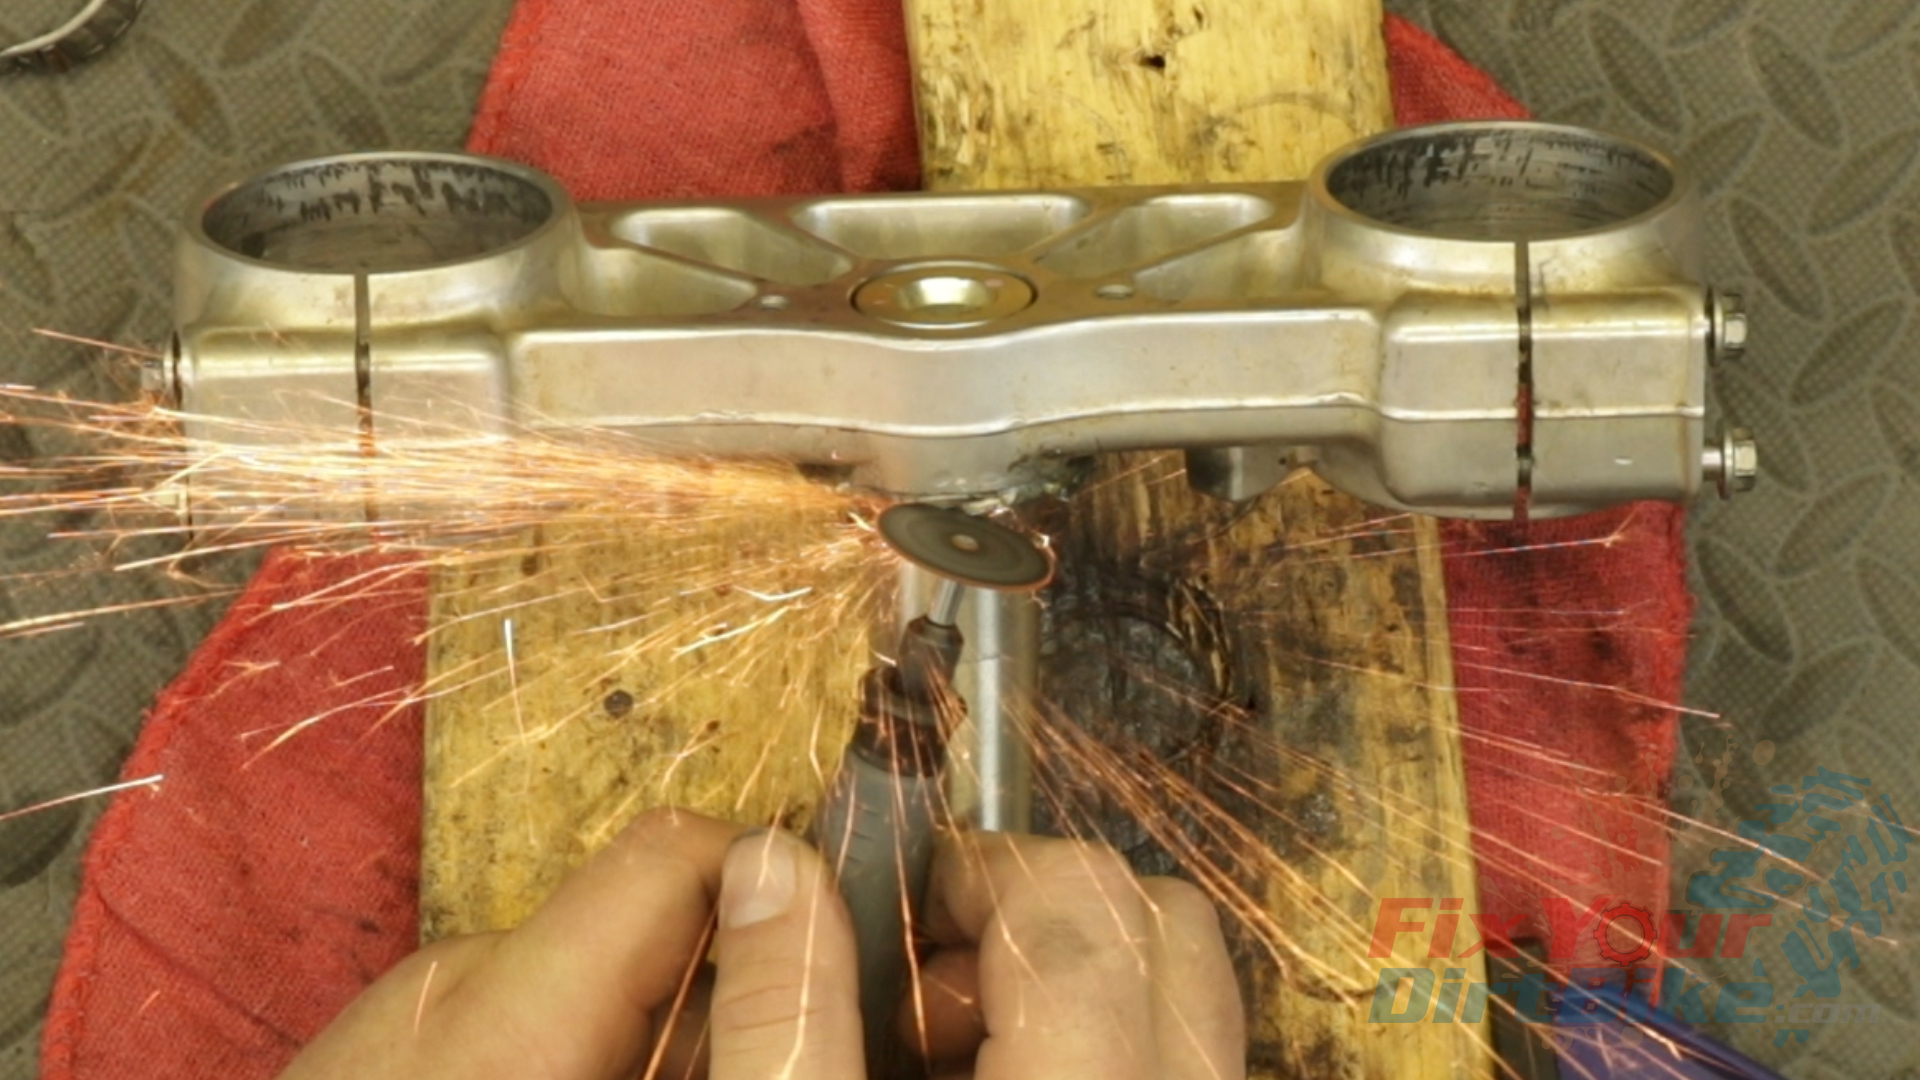
You should be able to separate the bearing from the stem with a hammer and chisel. The hammer and chisel never work for me, so I went straight to the cut off wheel. This cut is a three-part cut because you can not get a perpendicular angle to the bearing. So start with a parallel cut about 2mm from the bridge, then make two cuts in a V shape between the edge of the bearing and the parallel cut.
Make sure to take your time and watch your depth, and you will be fine. I got a little too deep on my angle cuts, but it buffed right out.
Outer Steering Stem Race Removal
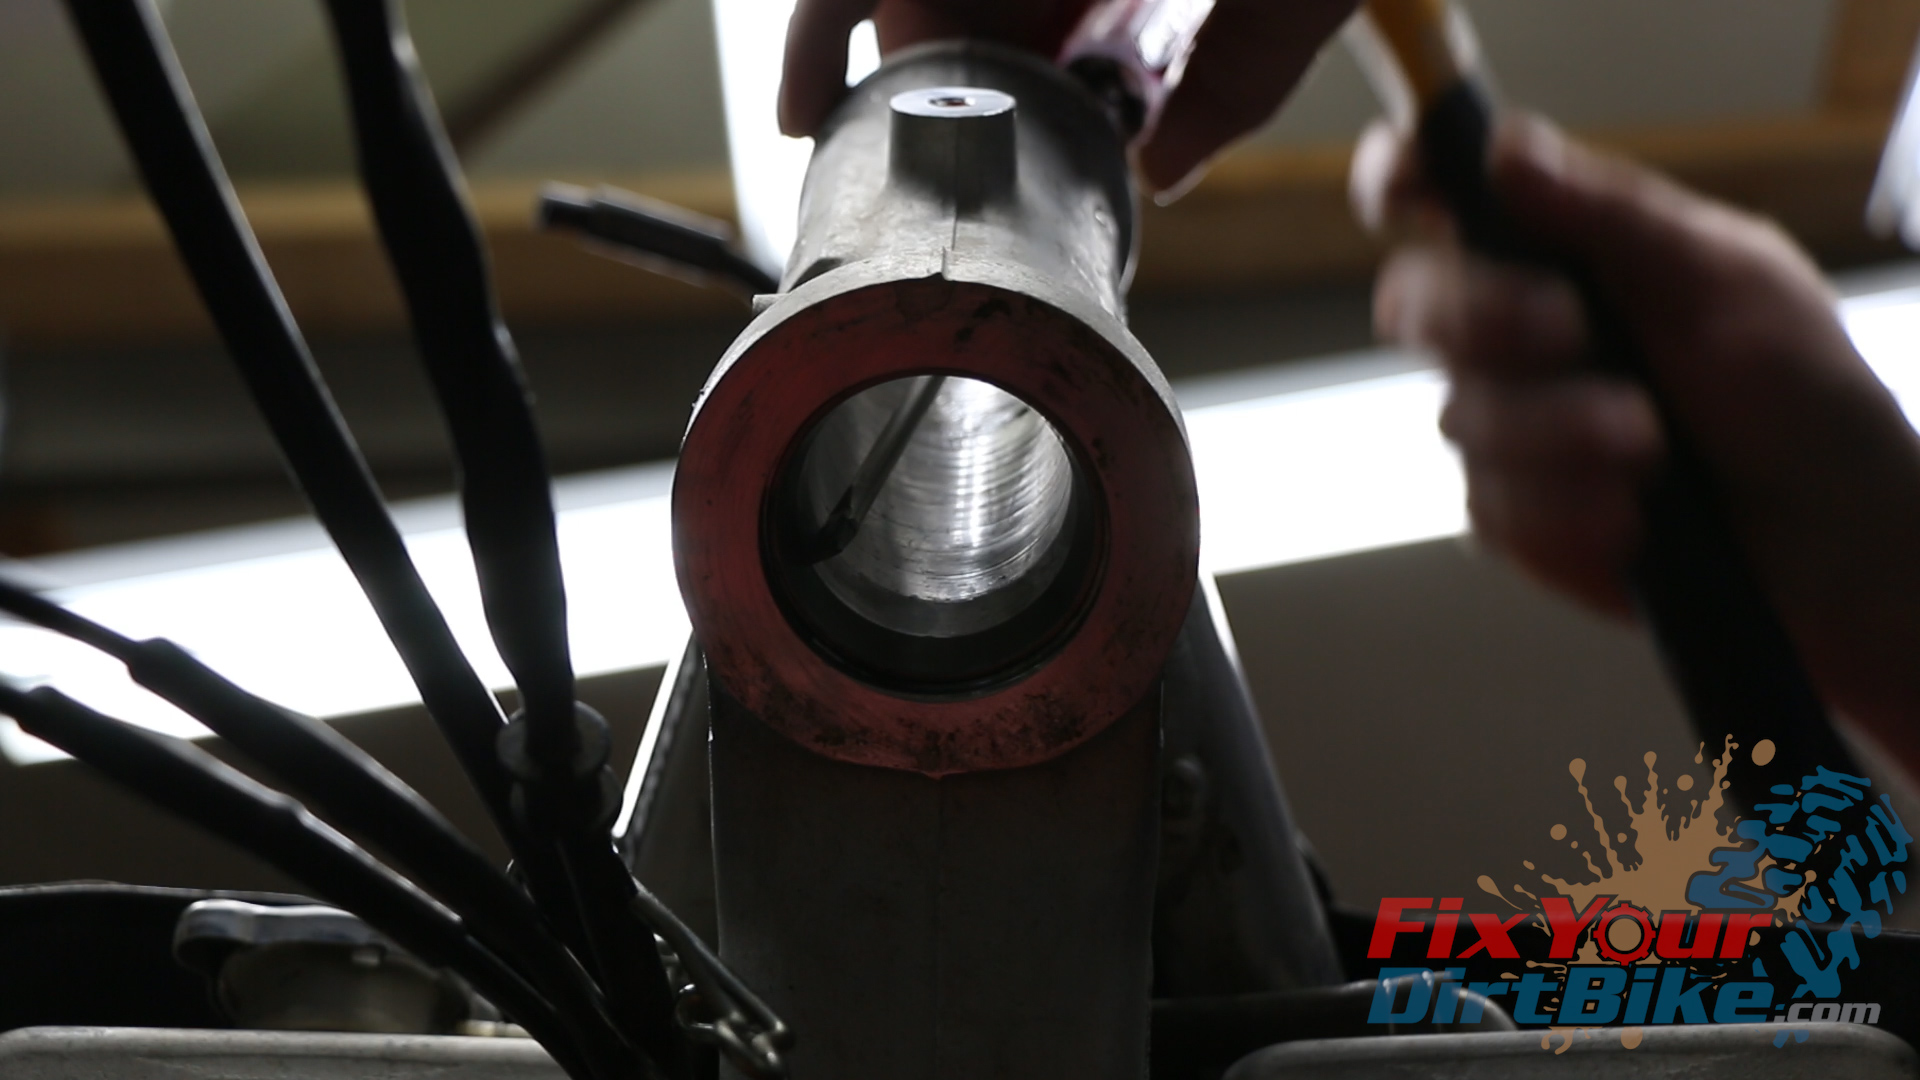
The outer bearing races have a small lip that sticks out inside the steering head.
Take a screwdriver, or another long flat tool, and hammer the race out of the steering head, working around the race as you go.
My outer races were not cooperating, so I used a blind bearing puller to avoid damage to the steering head.
If you don’t have a blind bearing puller set, most chain auto parts stores have loaner tools available with a refundable deposit.
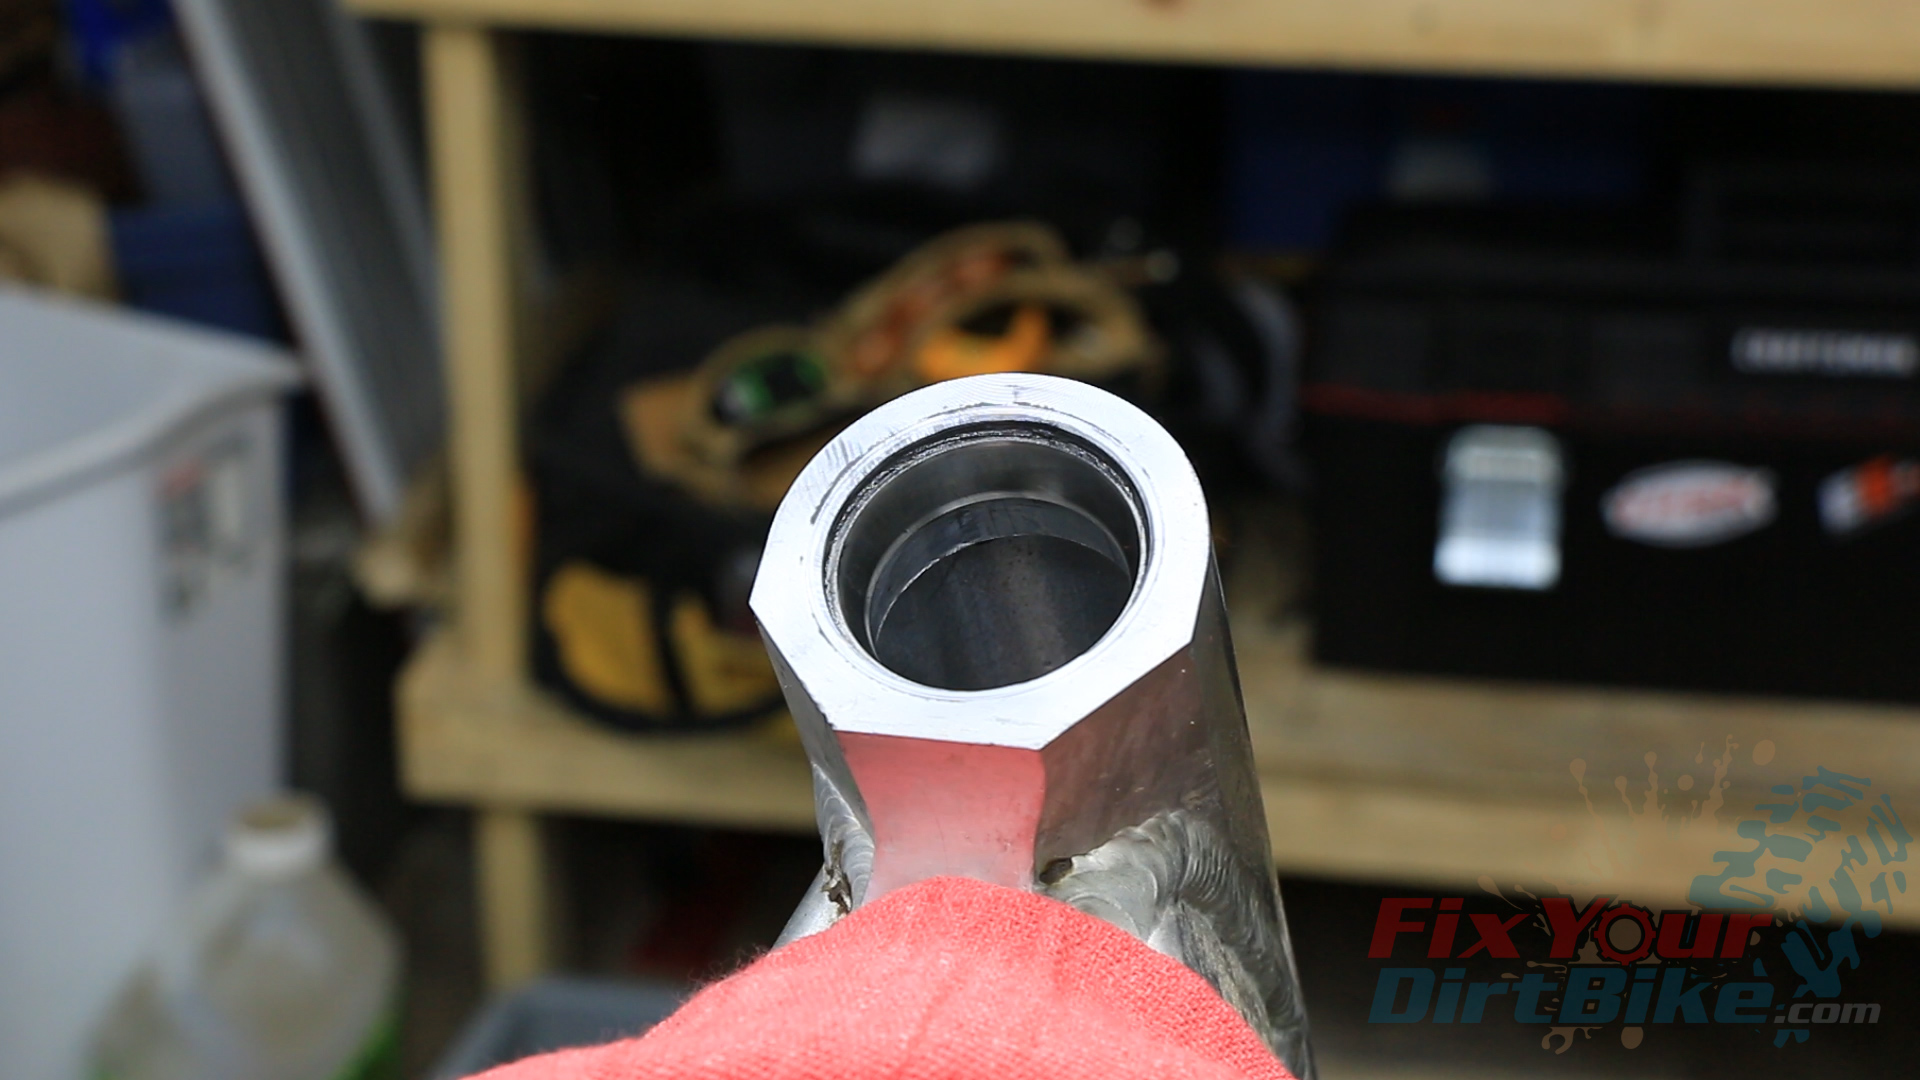
Inspect the race bores and correct any damage before installing the new races.
Take a screwdriver, or another long flat tool, and hammer the race out of the steering head, working around the race as you go.My outer races were not cooperating, so I used a blind bearing puller to avoid damage to the steering head.Inspect the race bores and correct any damage before installing the new races.
New Steering Stem Bearing
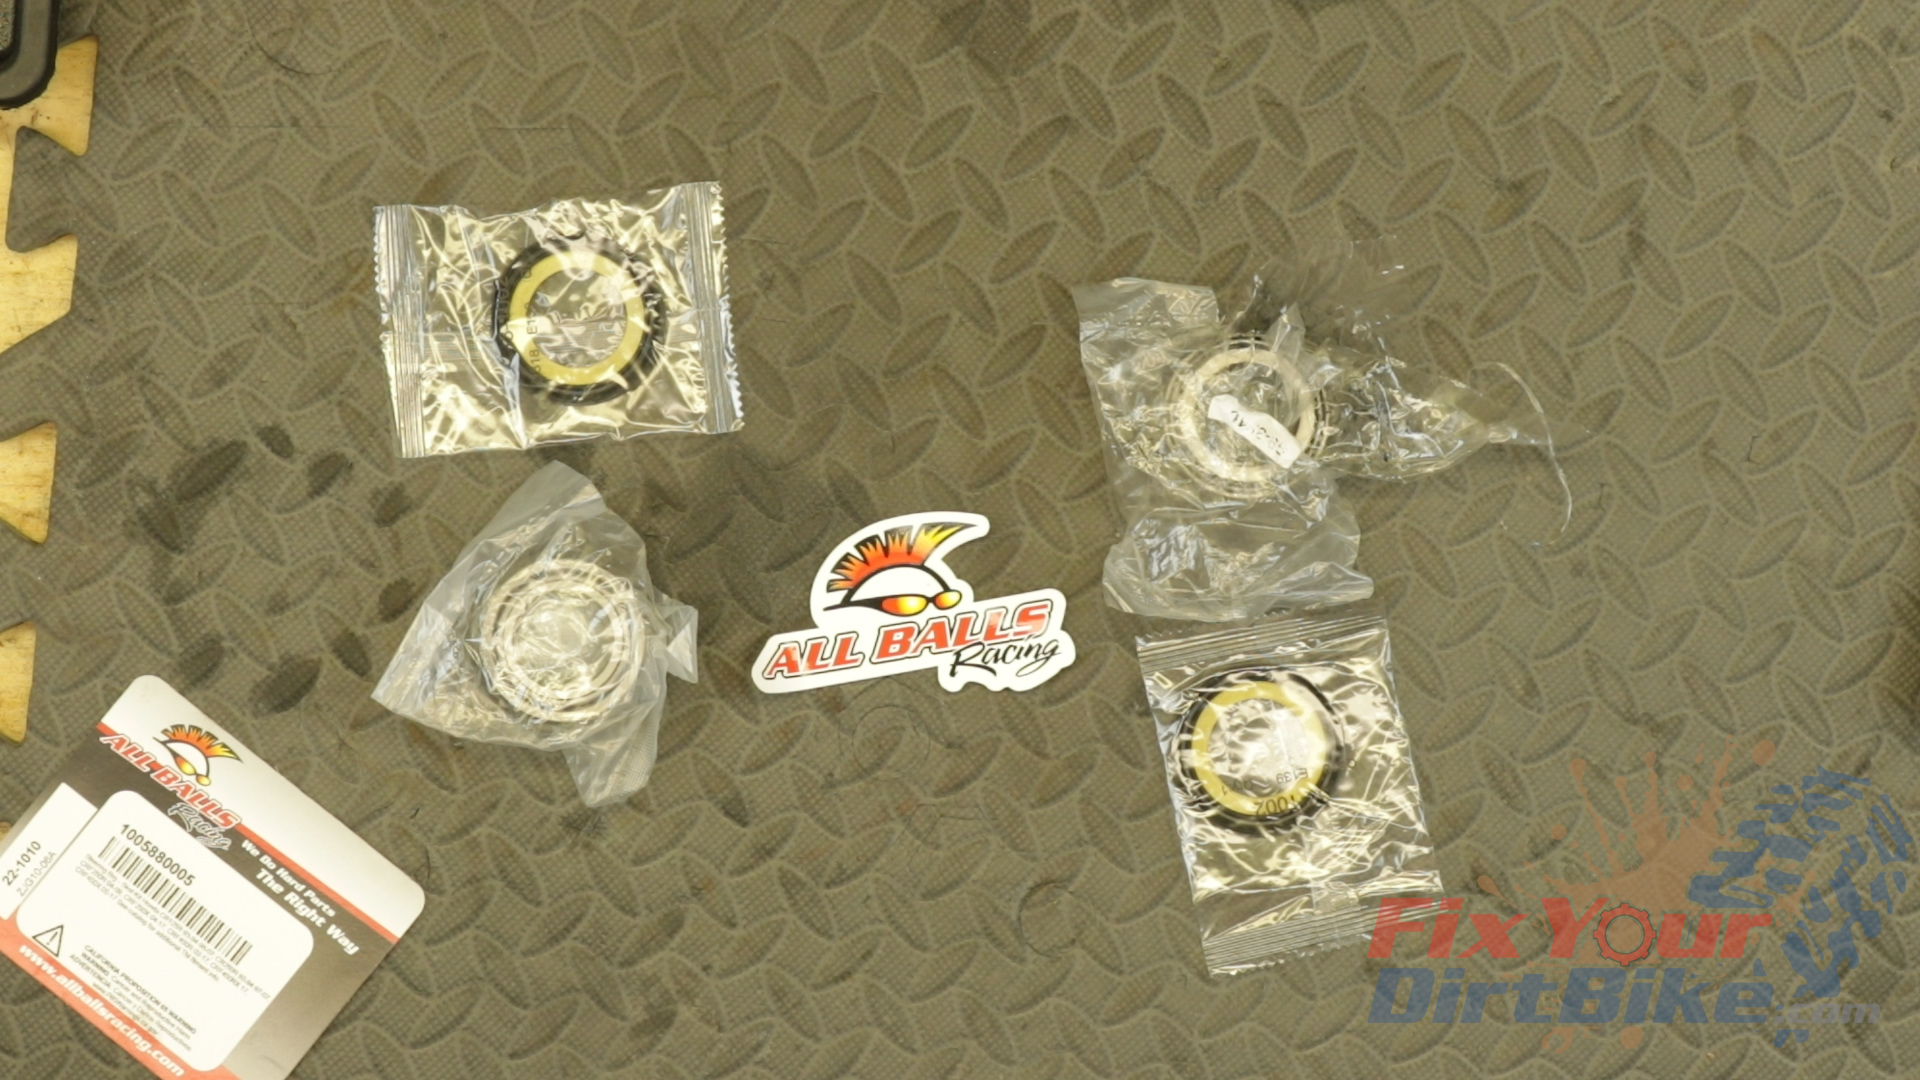
I will be installing a new All Balls steering stem bearing kit for this 2009 through 2010 Honda CRF450r. This kit includes new bearings, outer races, and seal washers. Steering Stem Bearing Installation
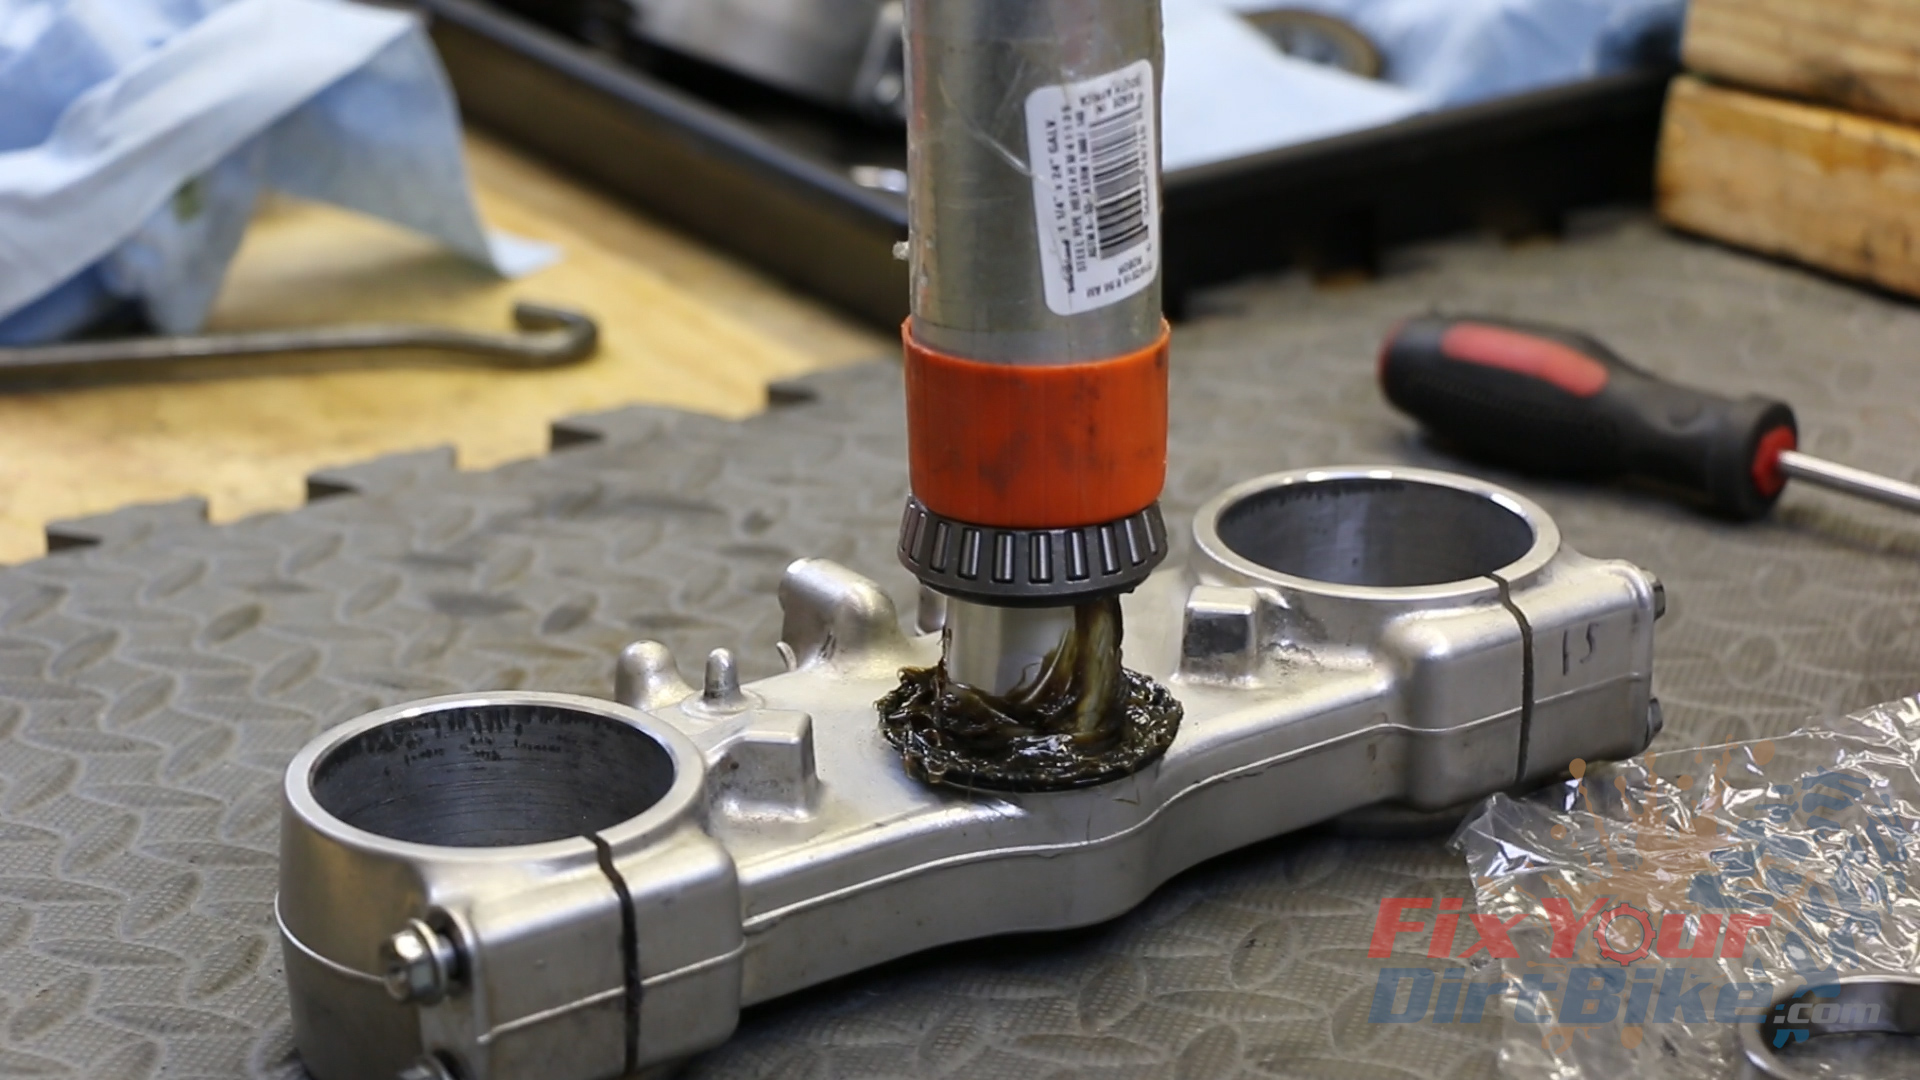
Slide the new seal washer onto the steering stem with the broad side facing away from the bridge, followed by a thick layer of grease. Place the bearing on the steering stem with the small side facing away from the bridge and drive the bearing home with your metal pipe and hammer over a solid surface.Related:How the rear wheel hub works on your dirt bike.
Outer Race Installation
Place your new bearing race in the bore with the broad side facing out. Assemble your bearing press with the bolt head on the pressing side.
I like to use the top bridge as a spacer because it rests flat on the bottom of the steering head. On the bolt side, you need to find a washer that will fit over the race but still clear the outer bore.
As with most bearings, some adjustments may be necessary to keep everything aligned.
Press the bearing race into the bore.
These steering stem bearing races are NOT an interference fit so that they will press in quickly. If you are forcing them in, something is wrong, so check your angles and try again.
Run your fingernail along the bottom side of the race to check for any gaps. My outer race did not press into the bore completely, but I was able to correct this with a socket and hammer.
Repeat with the bottom race.
Place your new bearing race in the bore with the broad side facing out. Assemble your bearing press with the bolt head on the pressing side.I like to use the top bridge as a spacer because it rests flat on the bottom of the steering head. On the bolt side, you need to find a washer that will fit over the race but still clear the outer bore.
Press the bearing race into the bore.Run your fingernail along the bottom side of the race to check for any gaps. My outer race did not press into the bore completely, but I was able to correct this with a socket and hammer.
Steering stem bearings require Extreme Pressure grease. There is very little heat generated in the steering head, so the grease can’t be too thick, or it will not move around the bearings.
Moly-based greases provide the best protection under extreme load, but they are also incredibly thick. General-purpose grease is the right consistency but provides very little pressure protection. I find that a Lithium-based EP grease offers the proper level of protection at the right consistency.
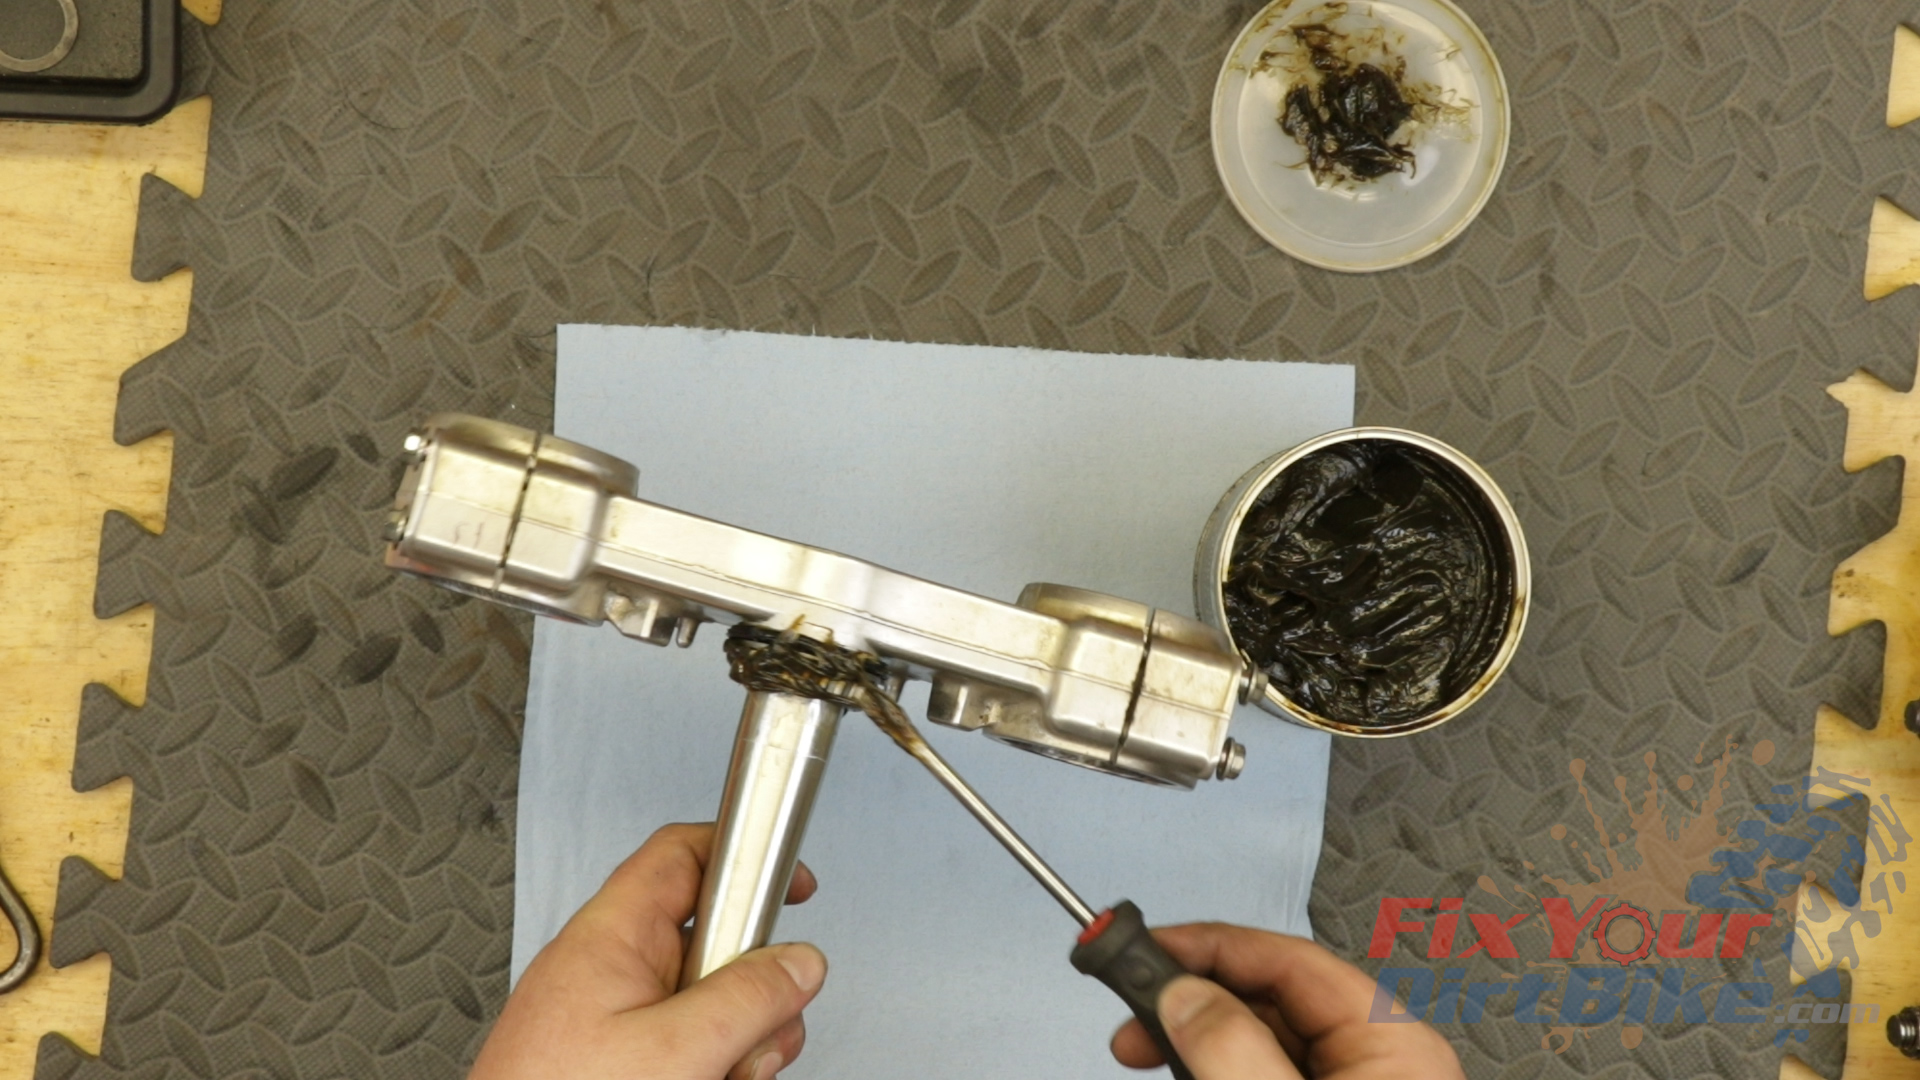
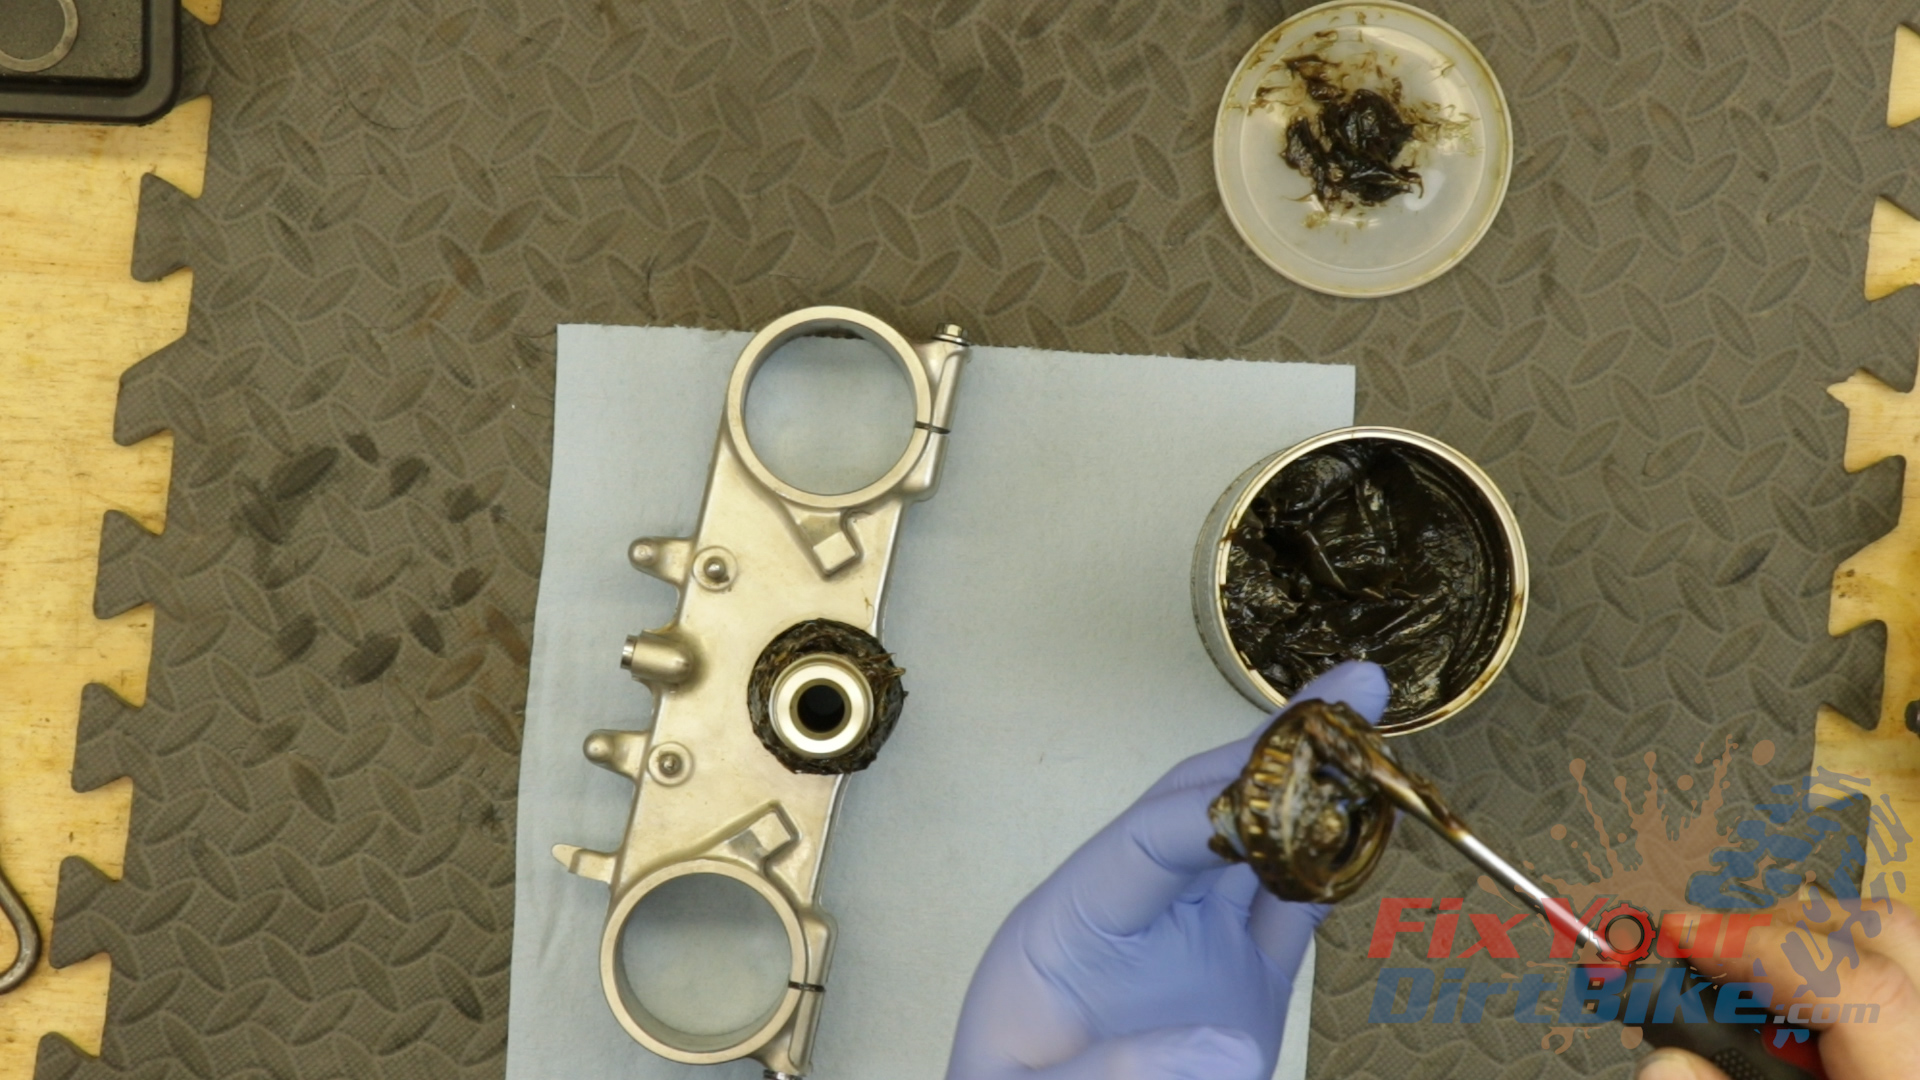
Apply a thick layer of grease around each bearing and outer race. You want as much grease in those rollers as possible, so don’t be stingy.
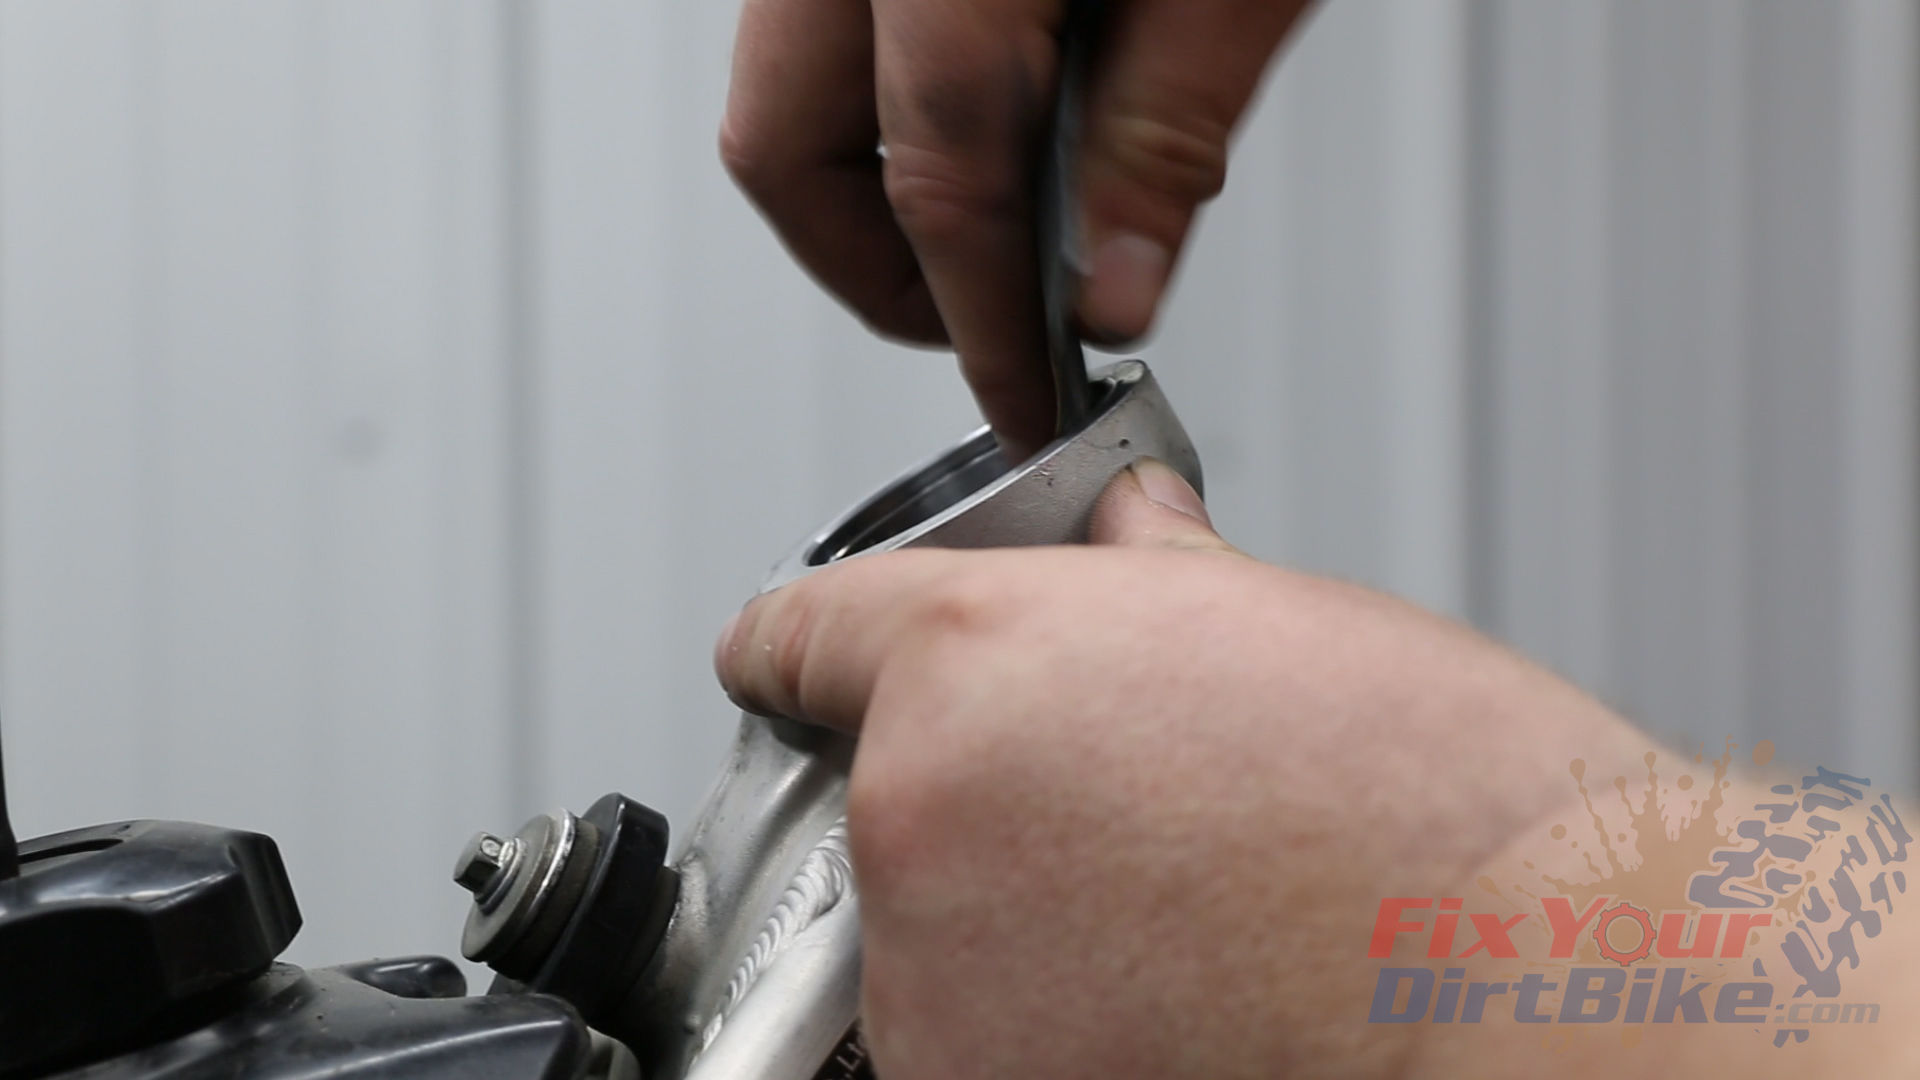
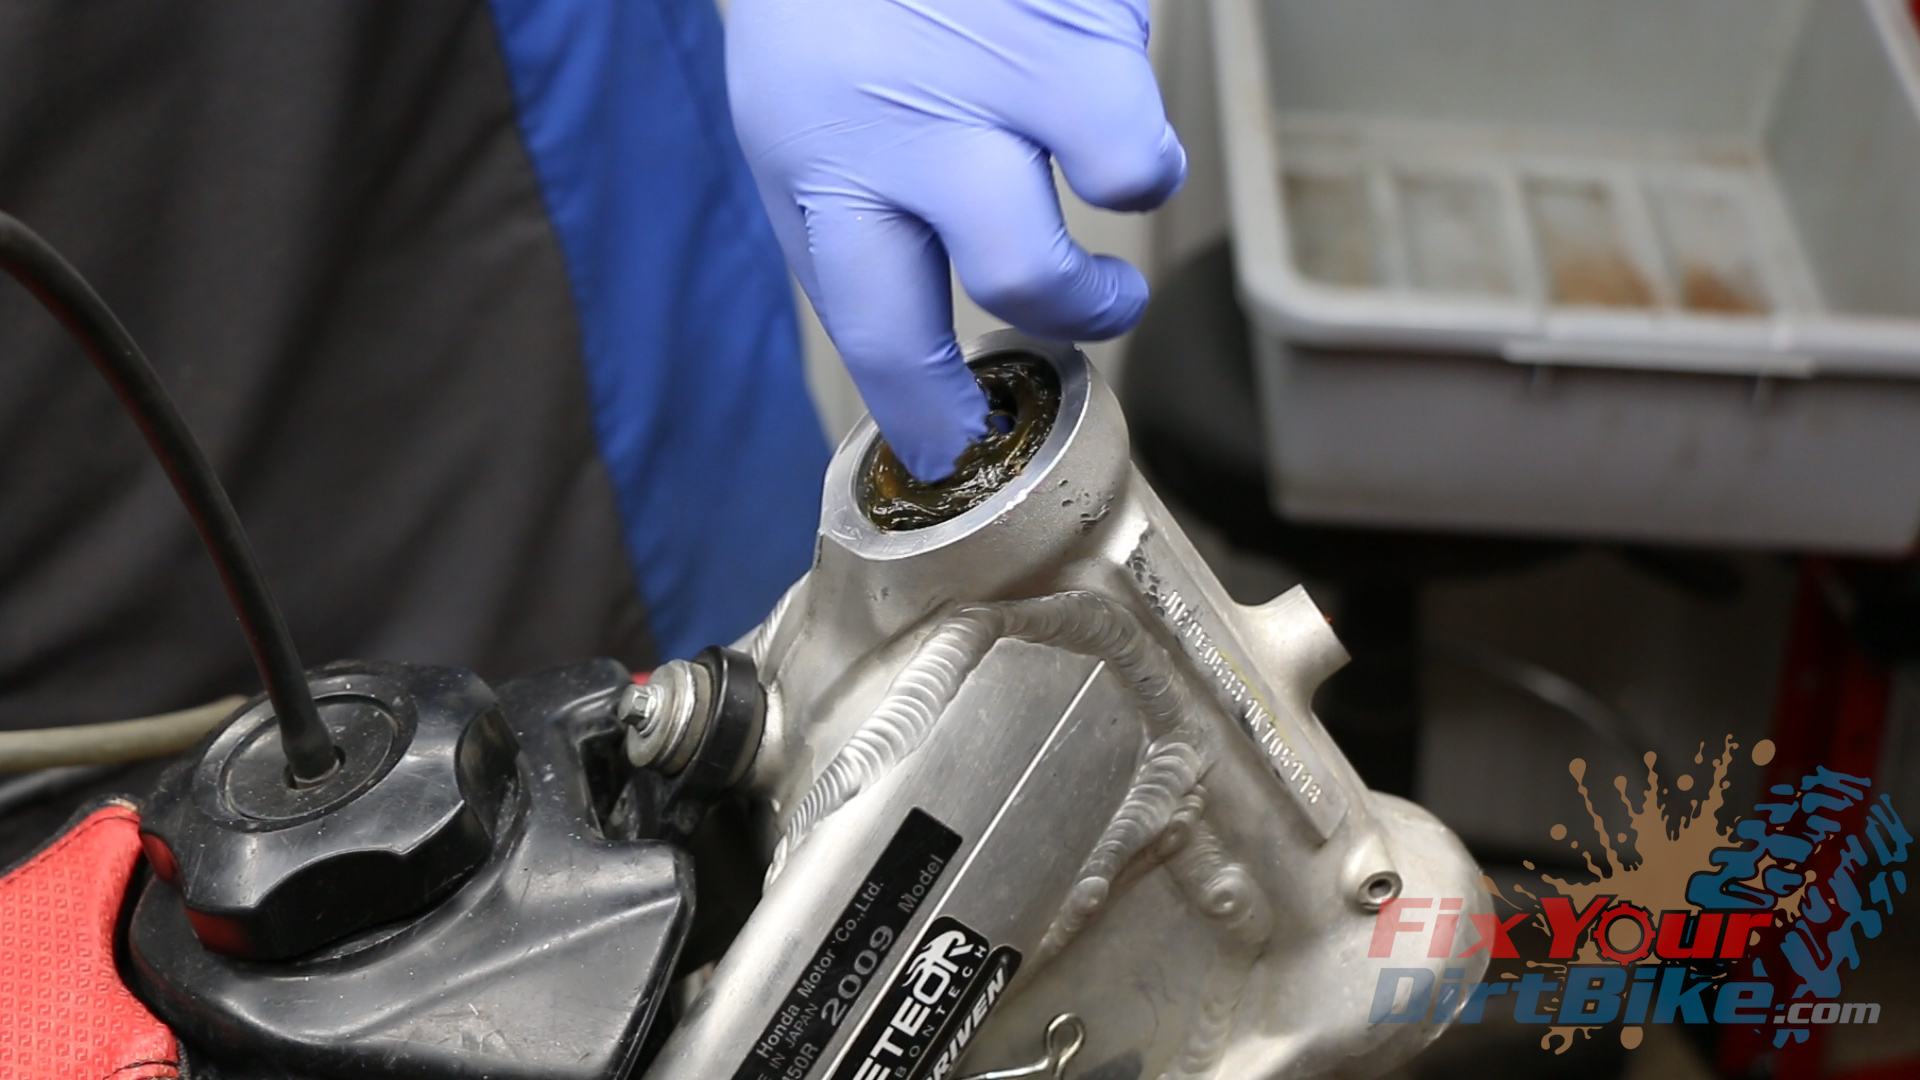
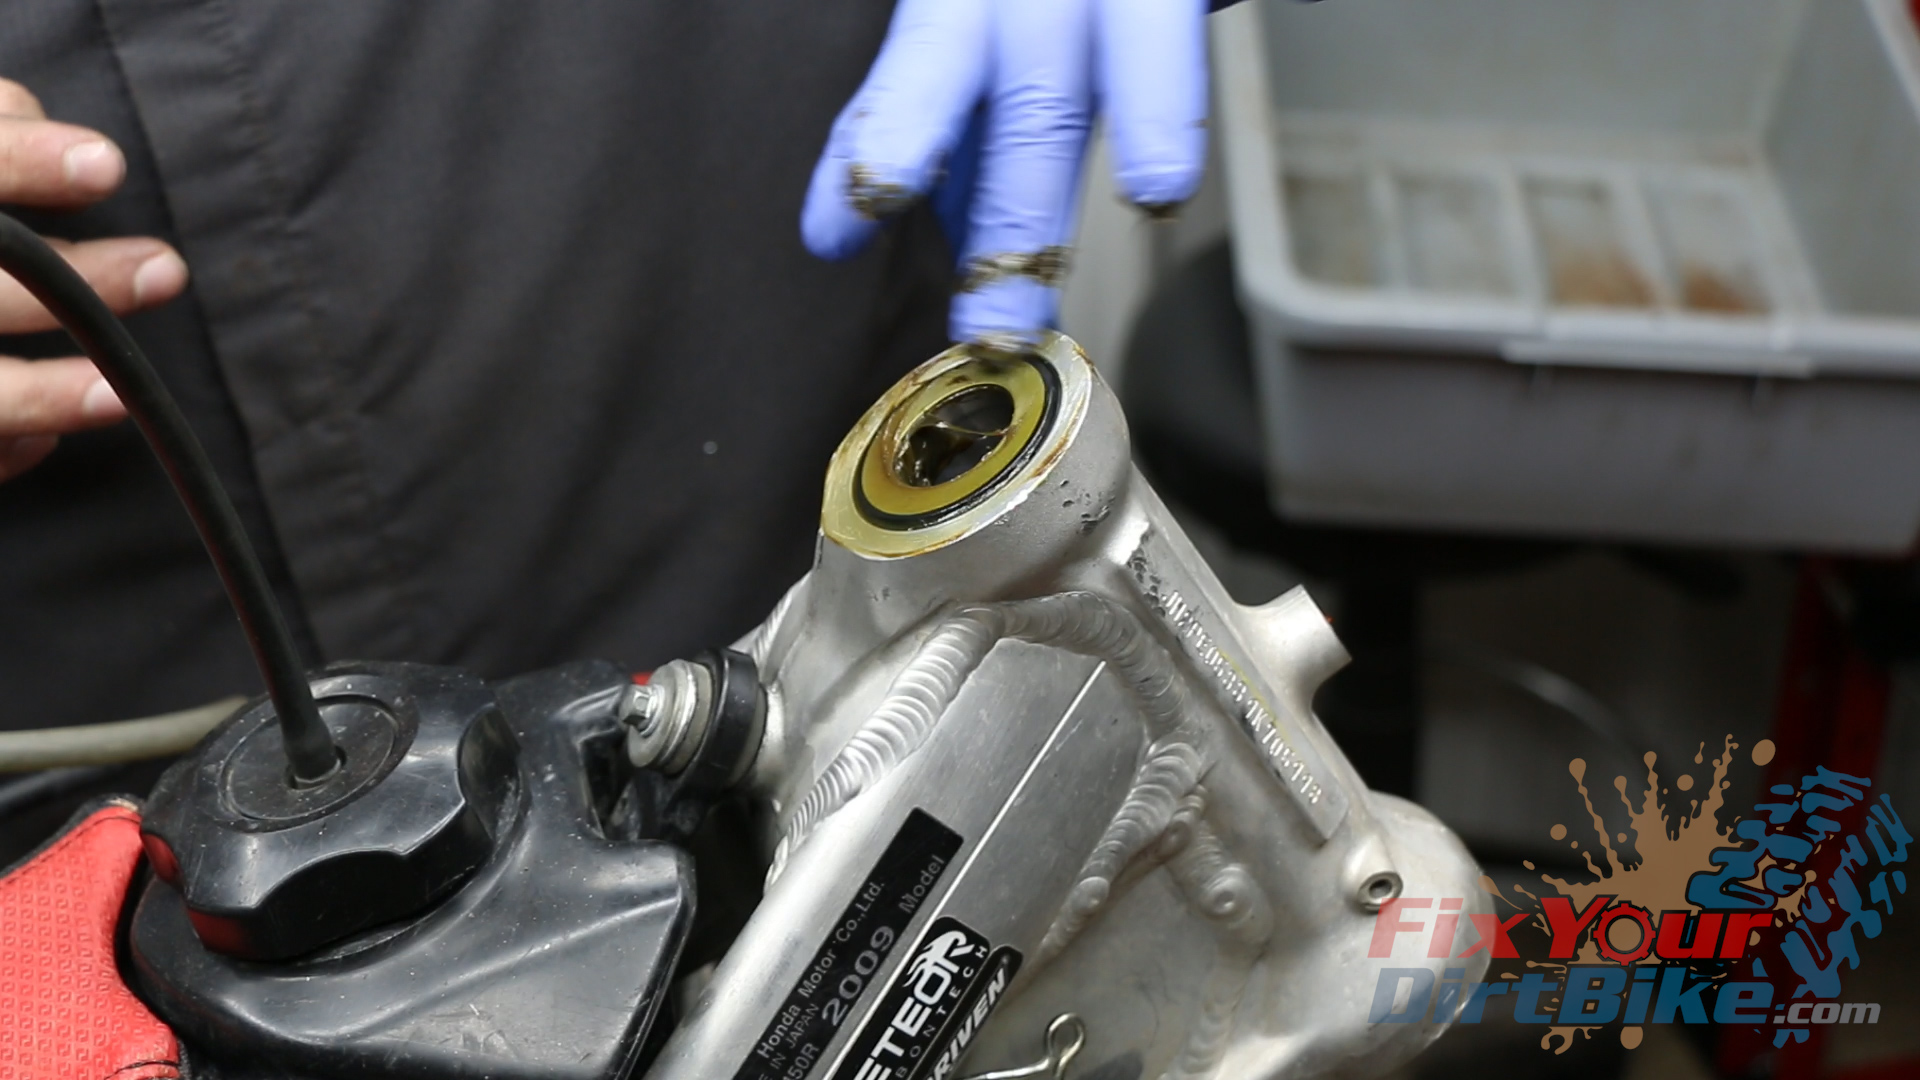
Install the top steering stem seal washer with the broad side facing down.
Install the adjustment nut tight to the steering head, then work the stem back and forth. The force of the tight adjustment nut will disperse the grease, and allow you to check for any rough spots.
Loosen the nut to the point where the steering stem rotates freely with no play.
Install the forks, but only tighten the upper pinch bolts.
Install the steering stem nut and torque to 108-foot pounds.
Recheck the steering action; You should still be able to rotate the stem freely with no play.
Assemble your front end without the steering stabilizer, and ride around for about 30 minutes.
Check your steering action, adjust if needed, then install your stabilizer, and number plate.
Apply a thick layer of grease around each bearing and outer race. You want as much grease in those rollers as possible, so don’t be stingy.THICC
Install the top steering stem seal washer with the broad side facing down.Install the adjustment nut tight to the steering head, then work the stem back and forth. The force of the tight adjustment nut will disperse the grease, and allow you to check for any rough spots.
Loosen the nut to the point where the steering stem rotates freely with no play.Install the forks, but only tighten the upper pinch bolts.Install the steering stem nut and torque to 108-foot pounds.Check your steering action, adjust if needed, then install your stabilizer, and number plate.
If you have any questions about this steering stem bearing service, please let me know in the comments or on social!
How To Service The Steering Stem Bearings On Your 1997 – 2001 Honda CR250.
You will need three specialty tools for this service: a steering stem nut adjustment wrench, a bearing press, and a metal pipe that matches the diameter of the inner bearing race but still fits over the steering stem.
You can pick up a wrench for around $13. You can make your bearing press out of grade 8 bolts and washers for about $15, and the pipe will cost between, $10 to $25, depending on the store.
How To Service The Steering Stem Bearings On Your 97-01 Honda CR250
You will need three specialty tools for this service: a steering stem nut adjustment wrench, a DIY bearing press, and a metal pipe that matches the diameter of the inner bearing race but still fits over the steering stem.
A steering stem wrench goes for around $13. You can make your bearing press out of grade 8 bolts and washers for about $15, and the pipe will cost between, $10 to $25, depending on the store.
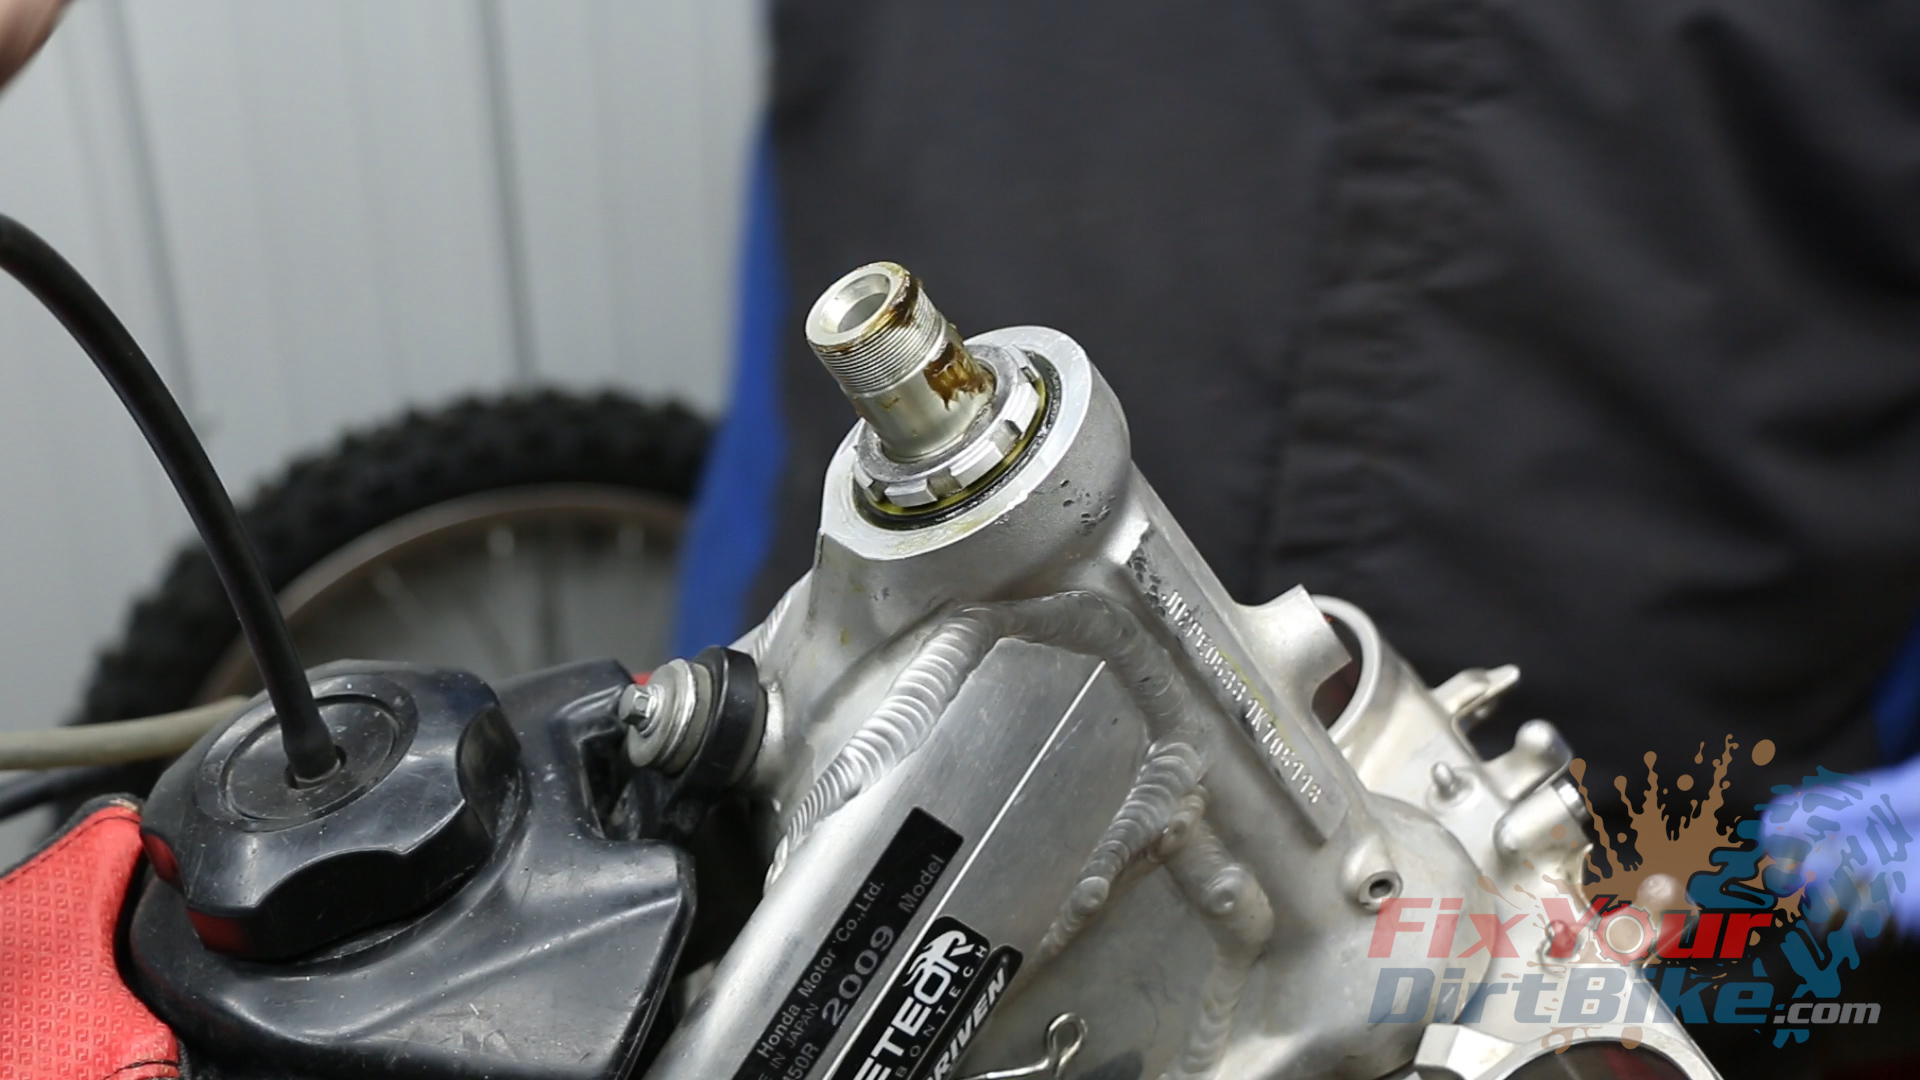
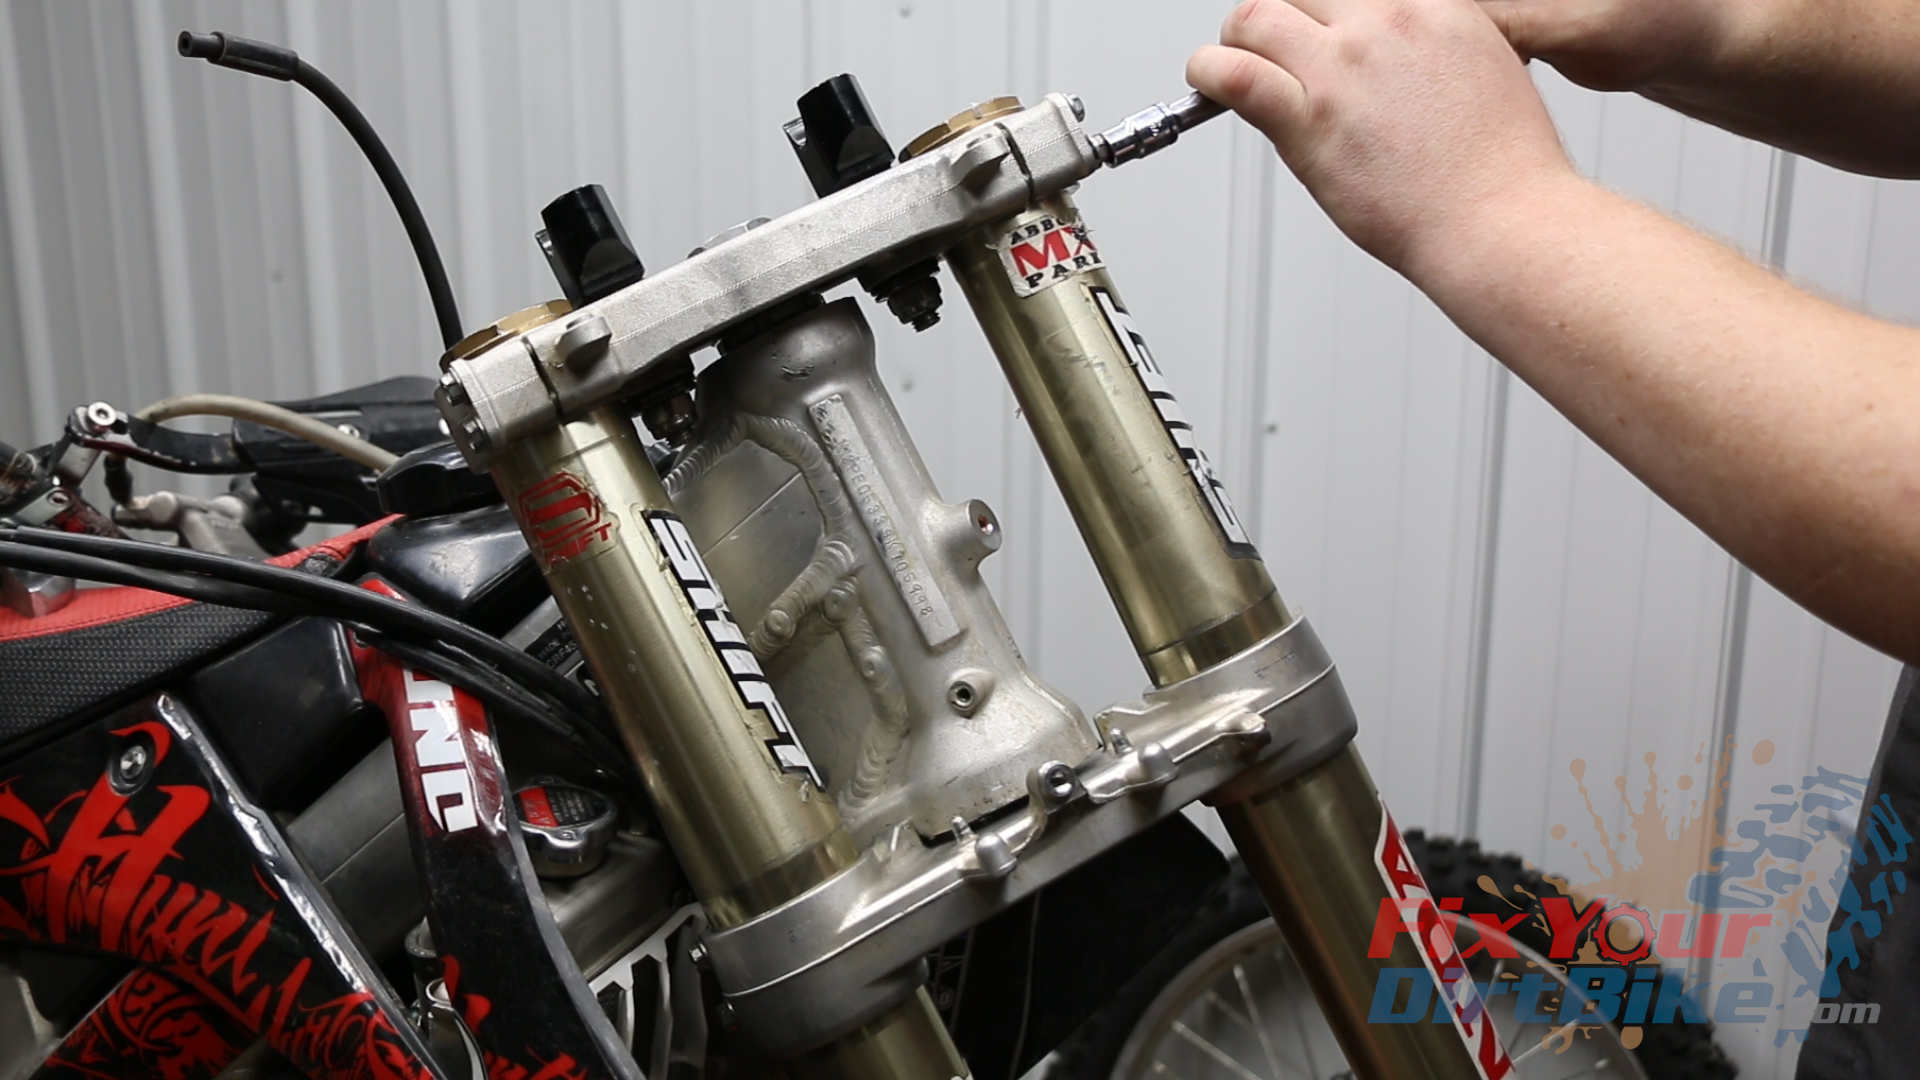
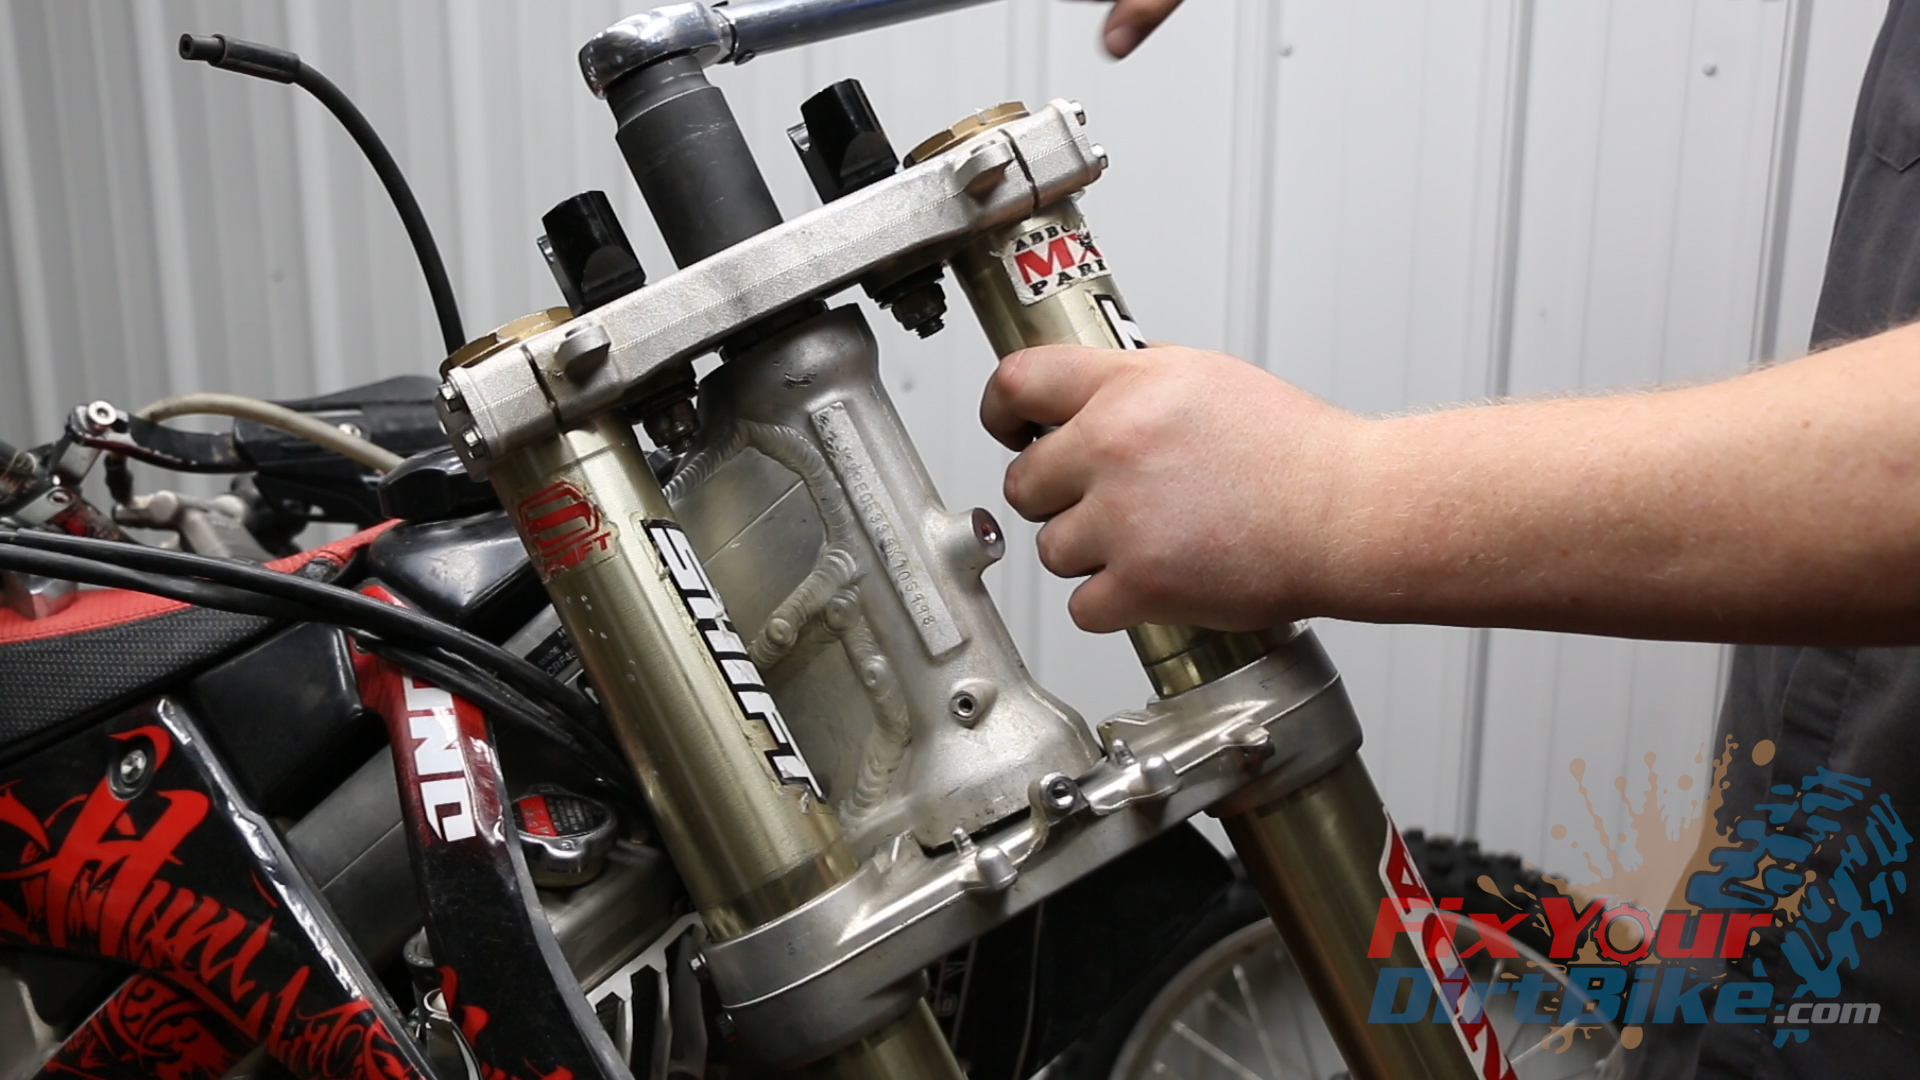
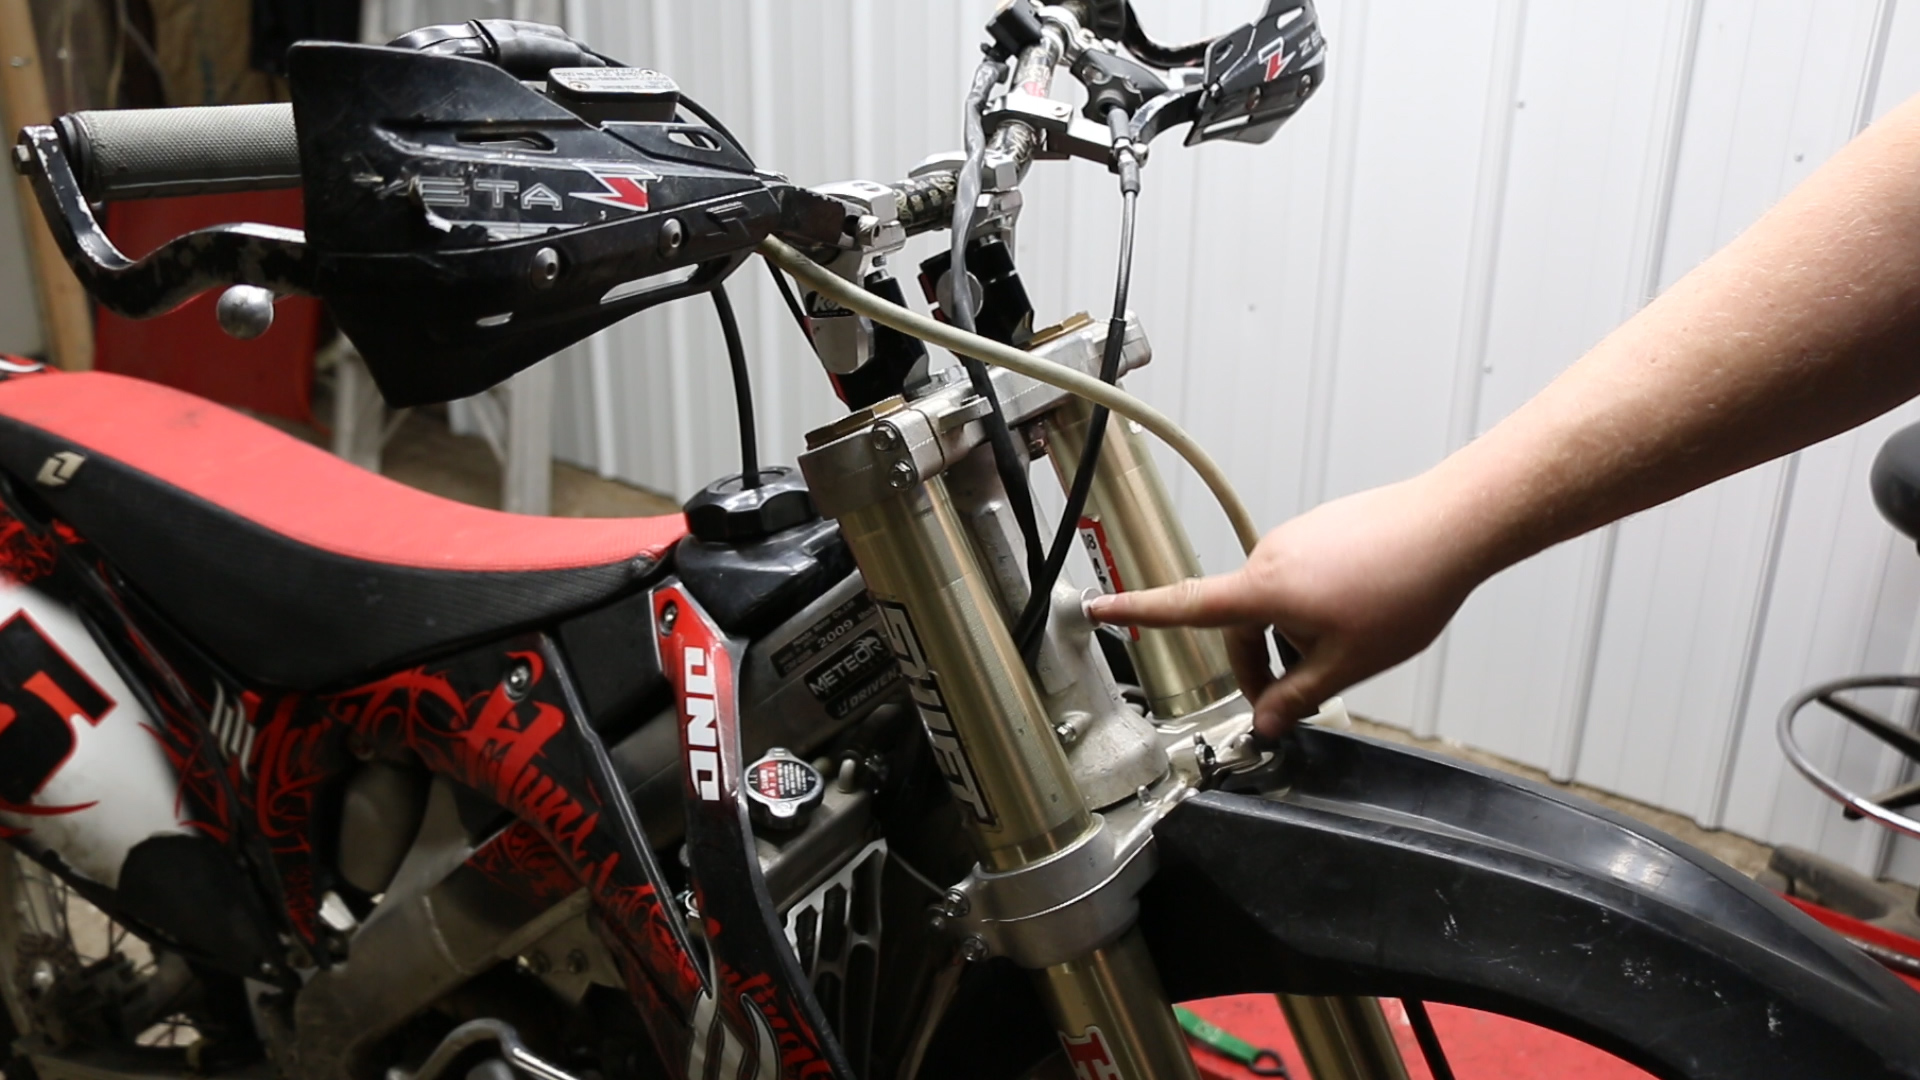
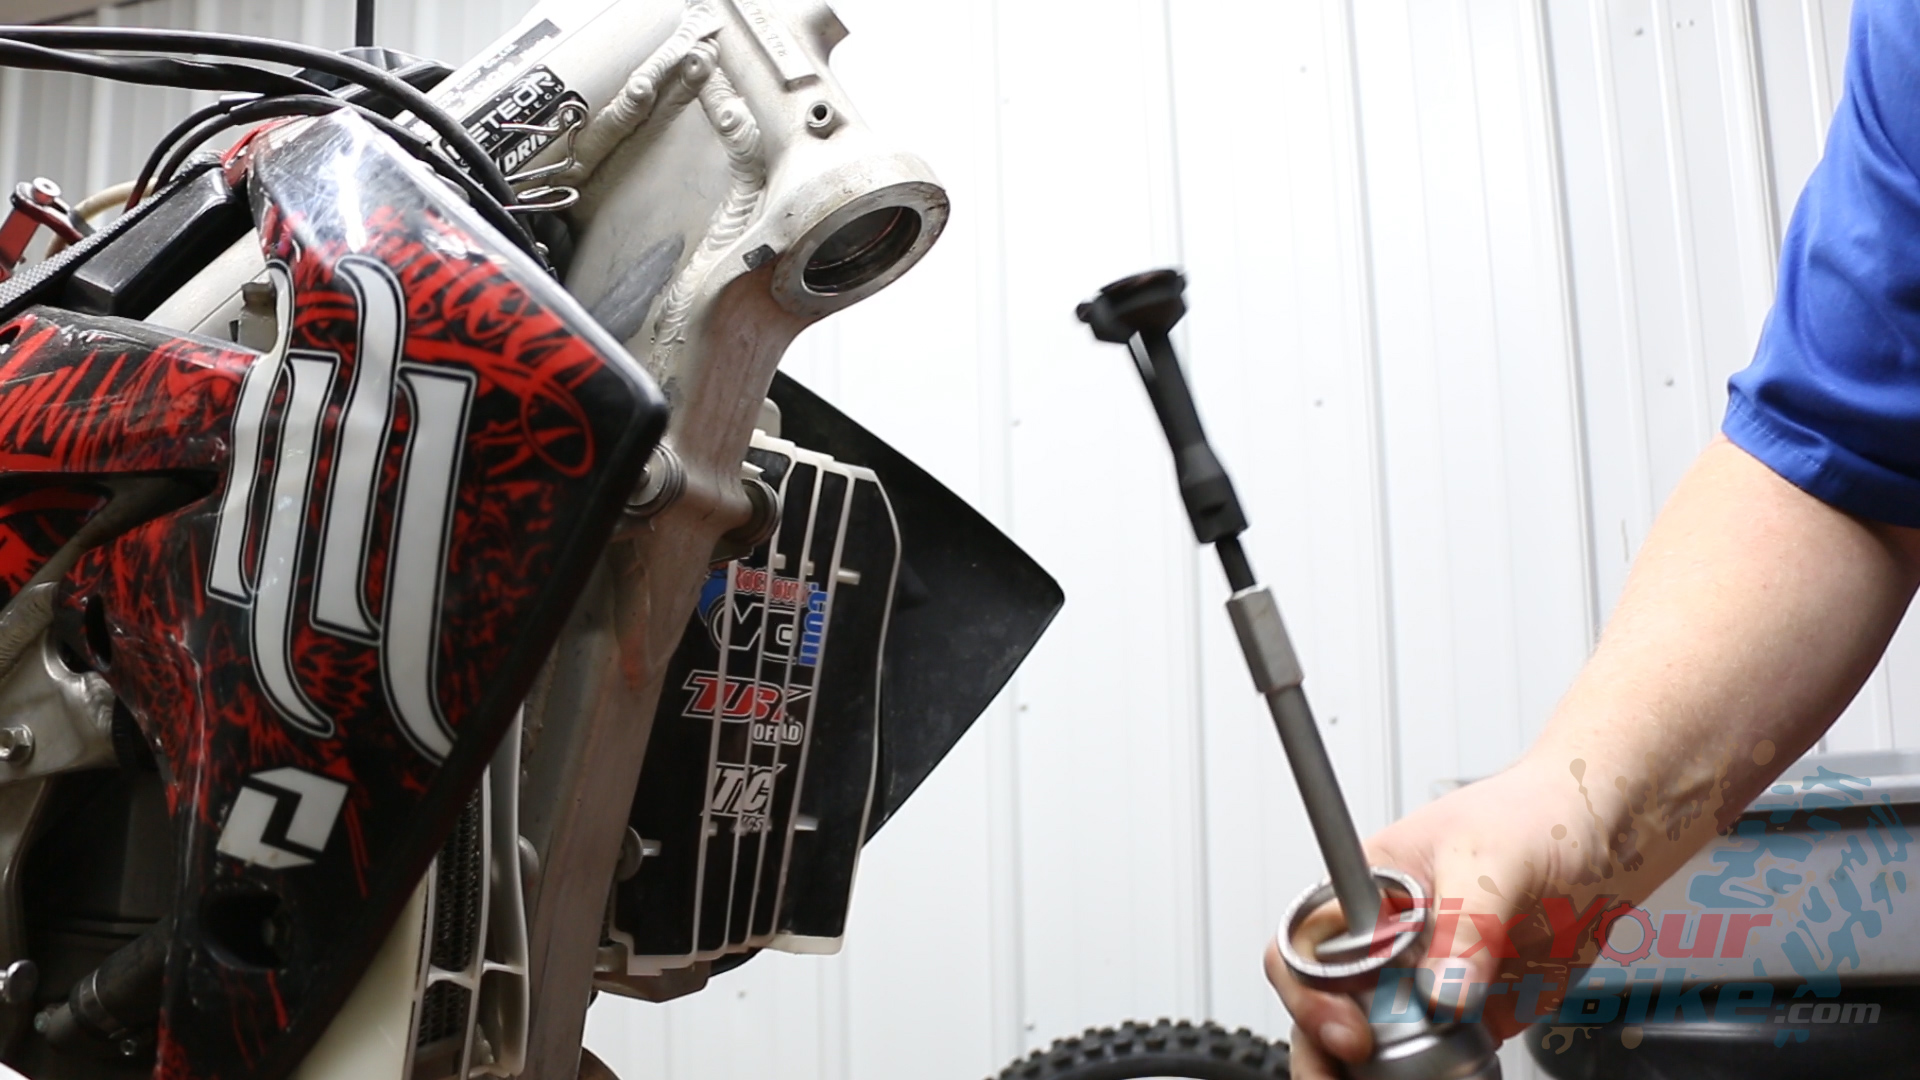
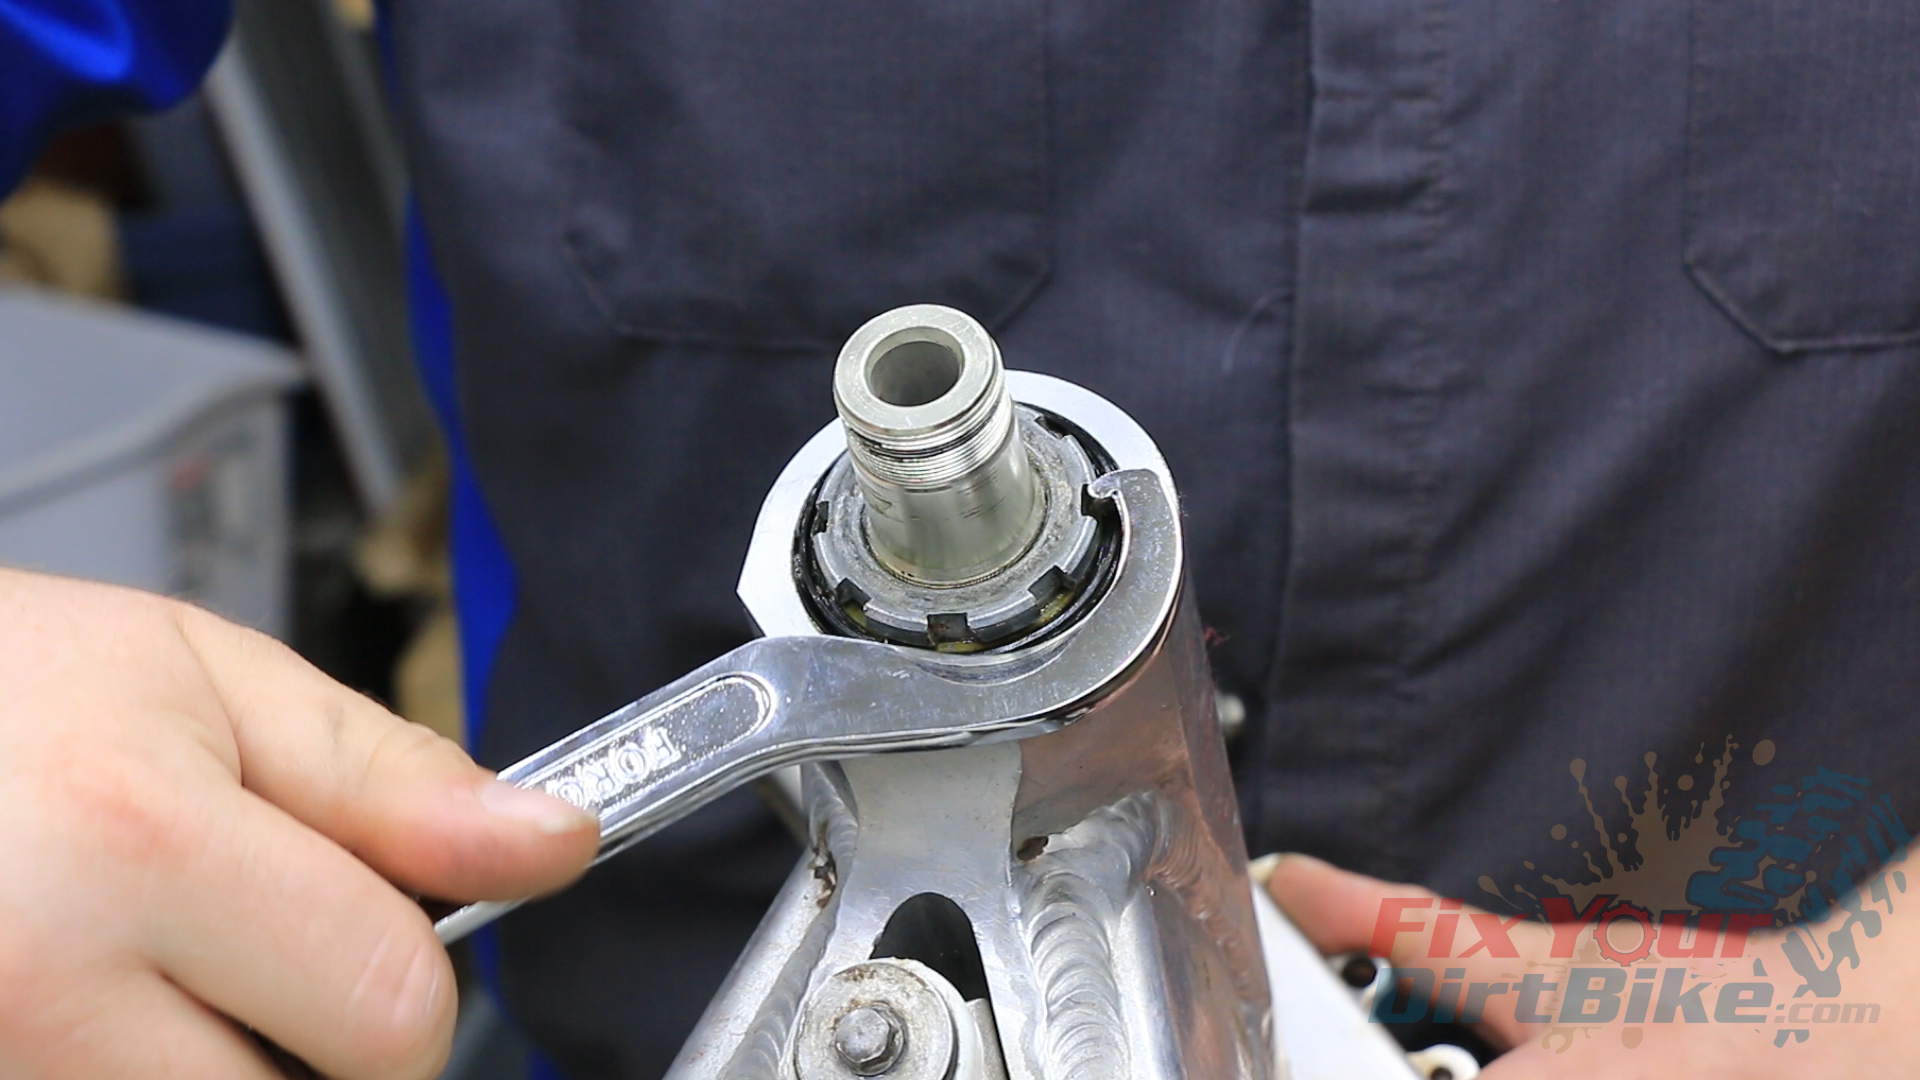
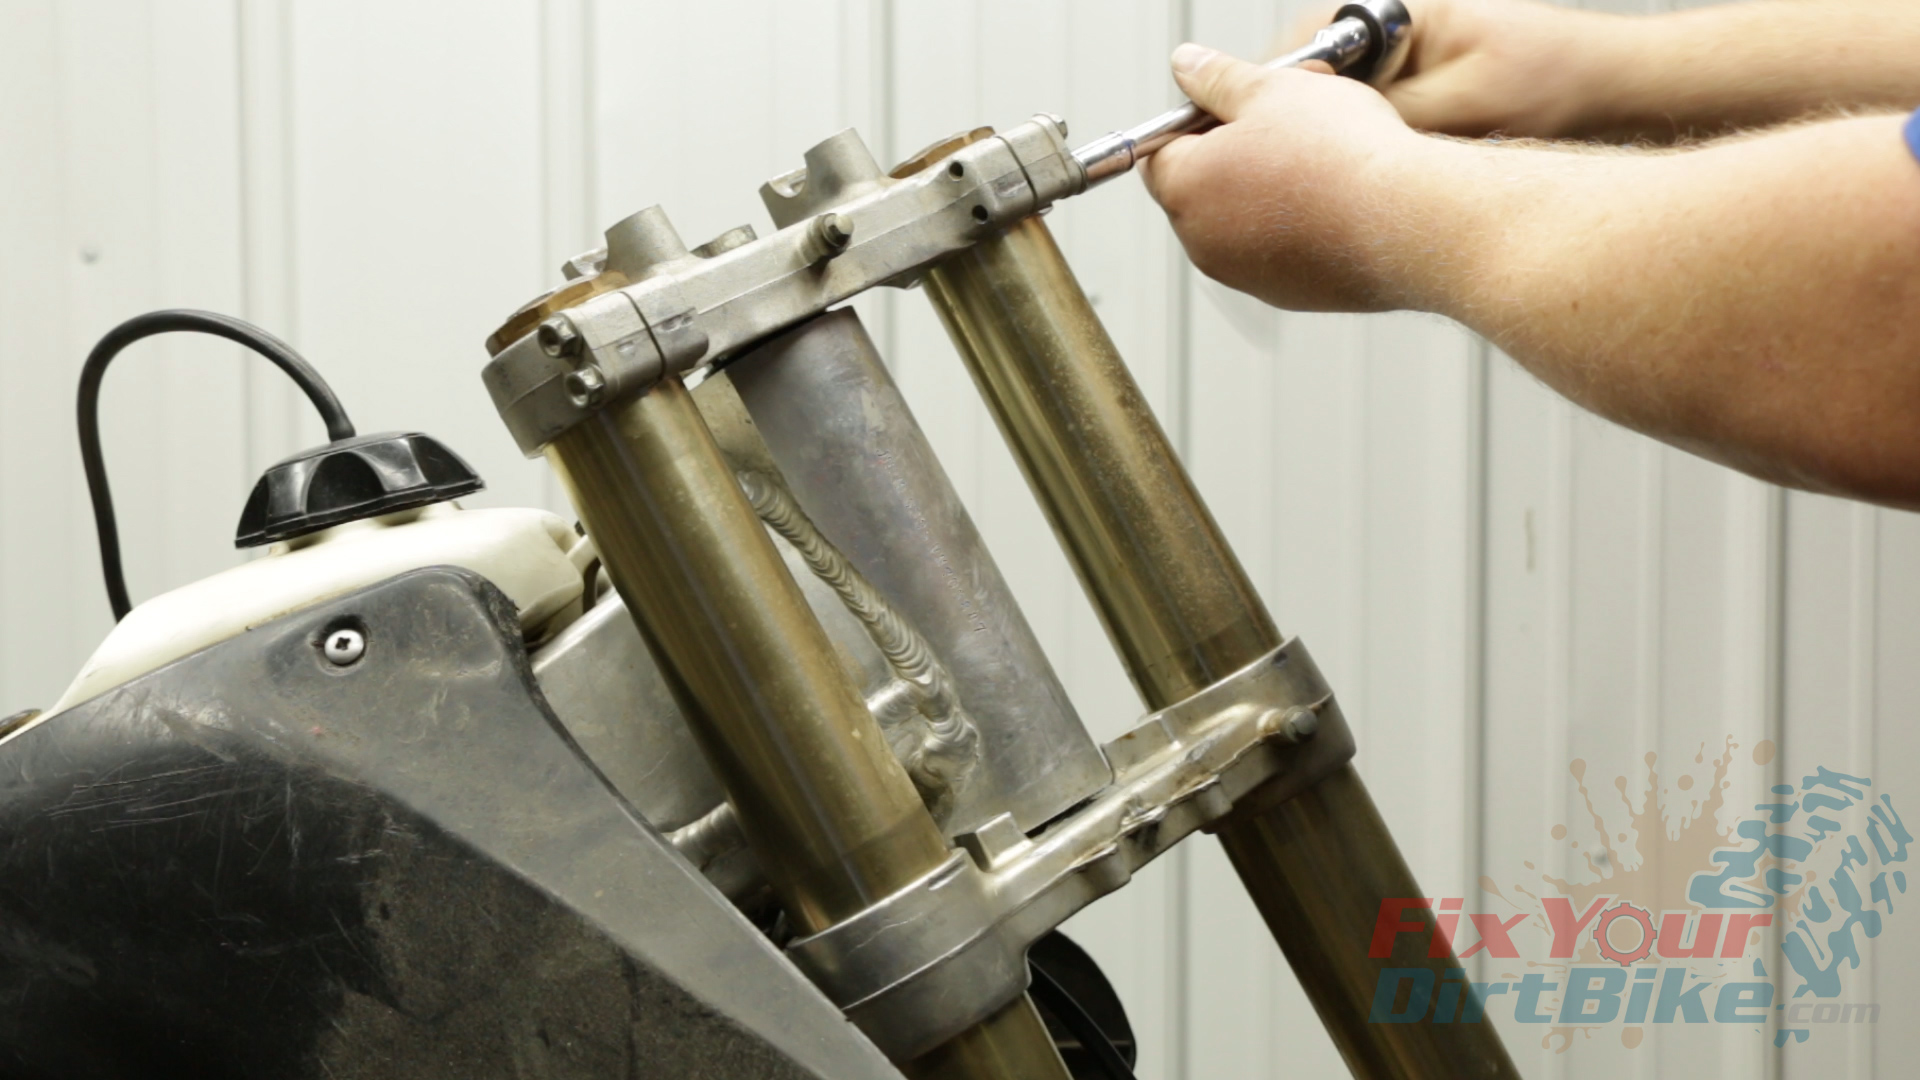
Loosen and remove the steering stem nut and washer, then remove the other fork.
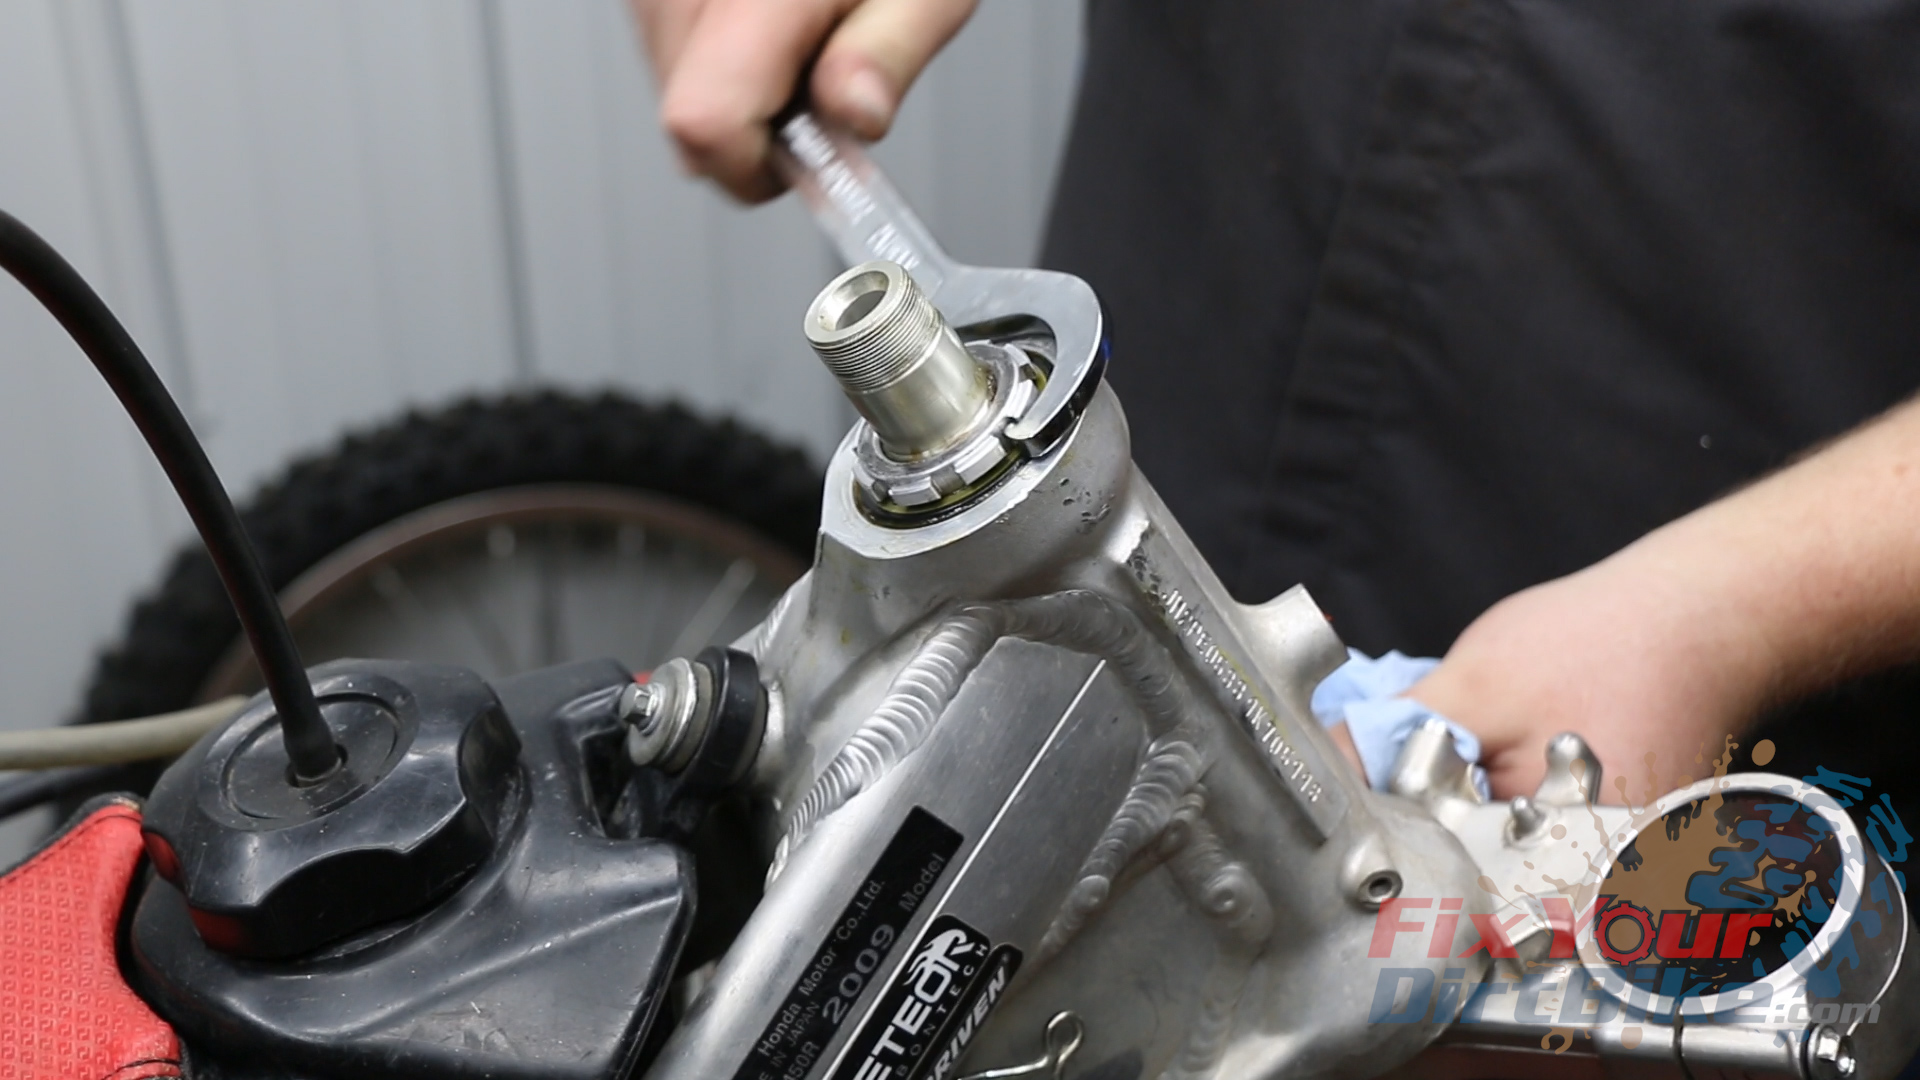
Loosen and remove the steering stem adjustment nut, and lower the steering stem out of the steering head.
Loosen and remove the steering stem nut and washer, then remove the other fork.Loosen and remove the steering stem adjustment nut, and lower the steering stem out of the steering head.
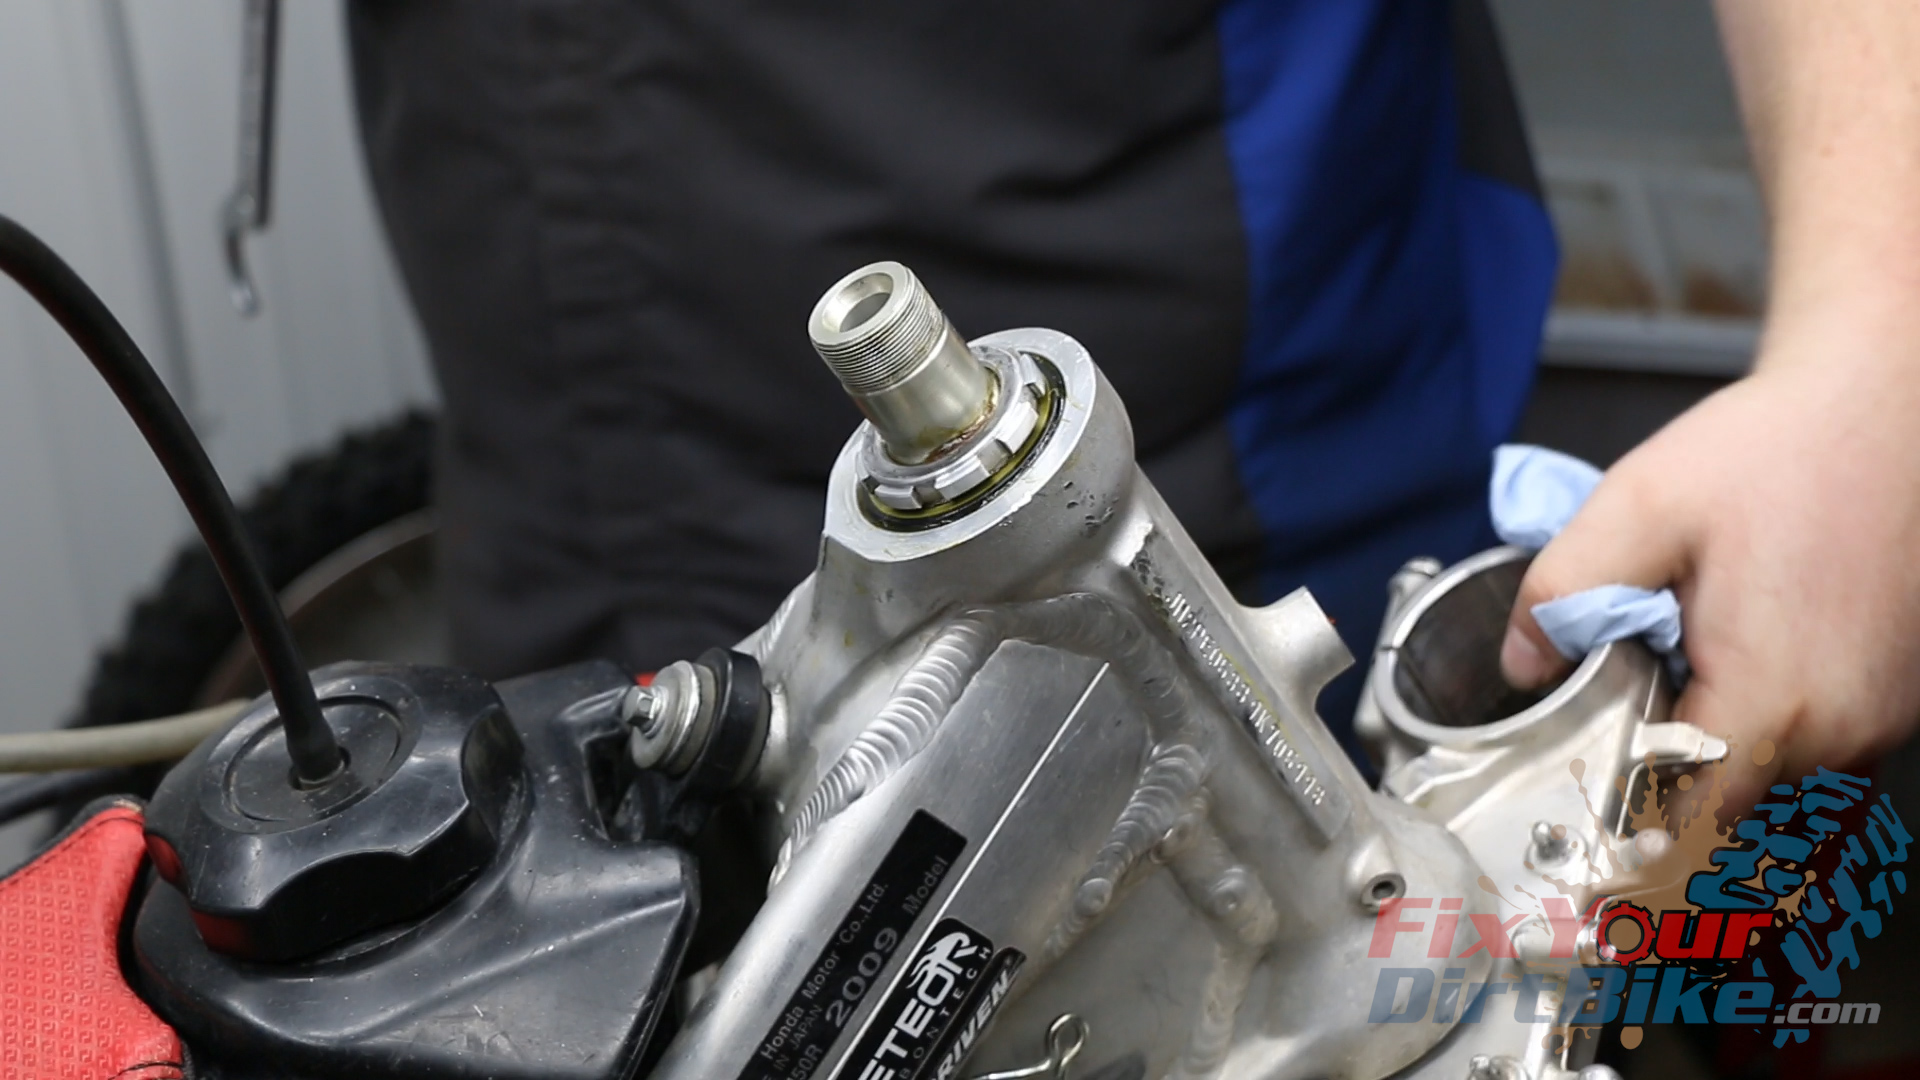
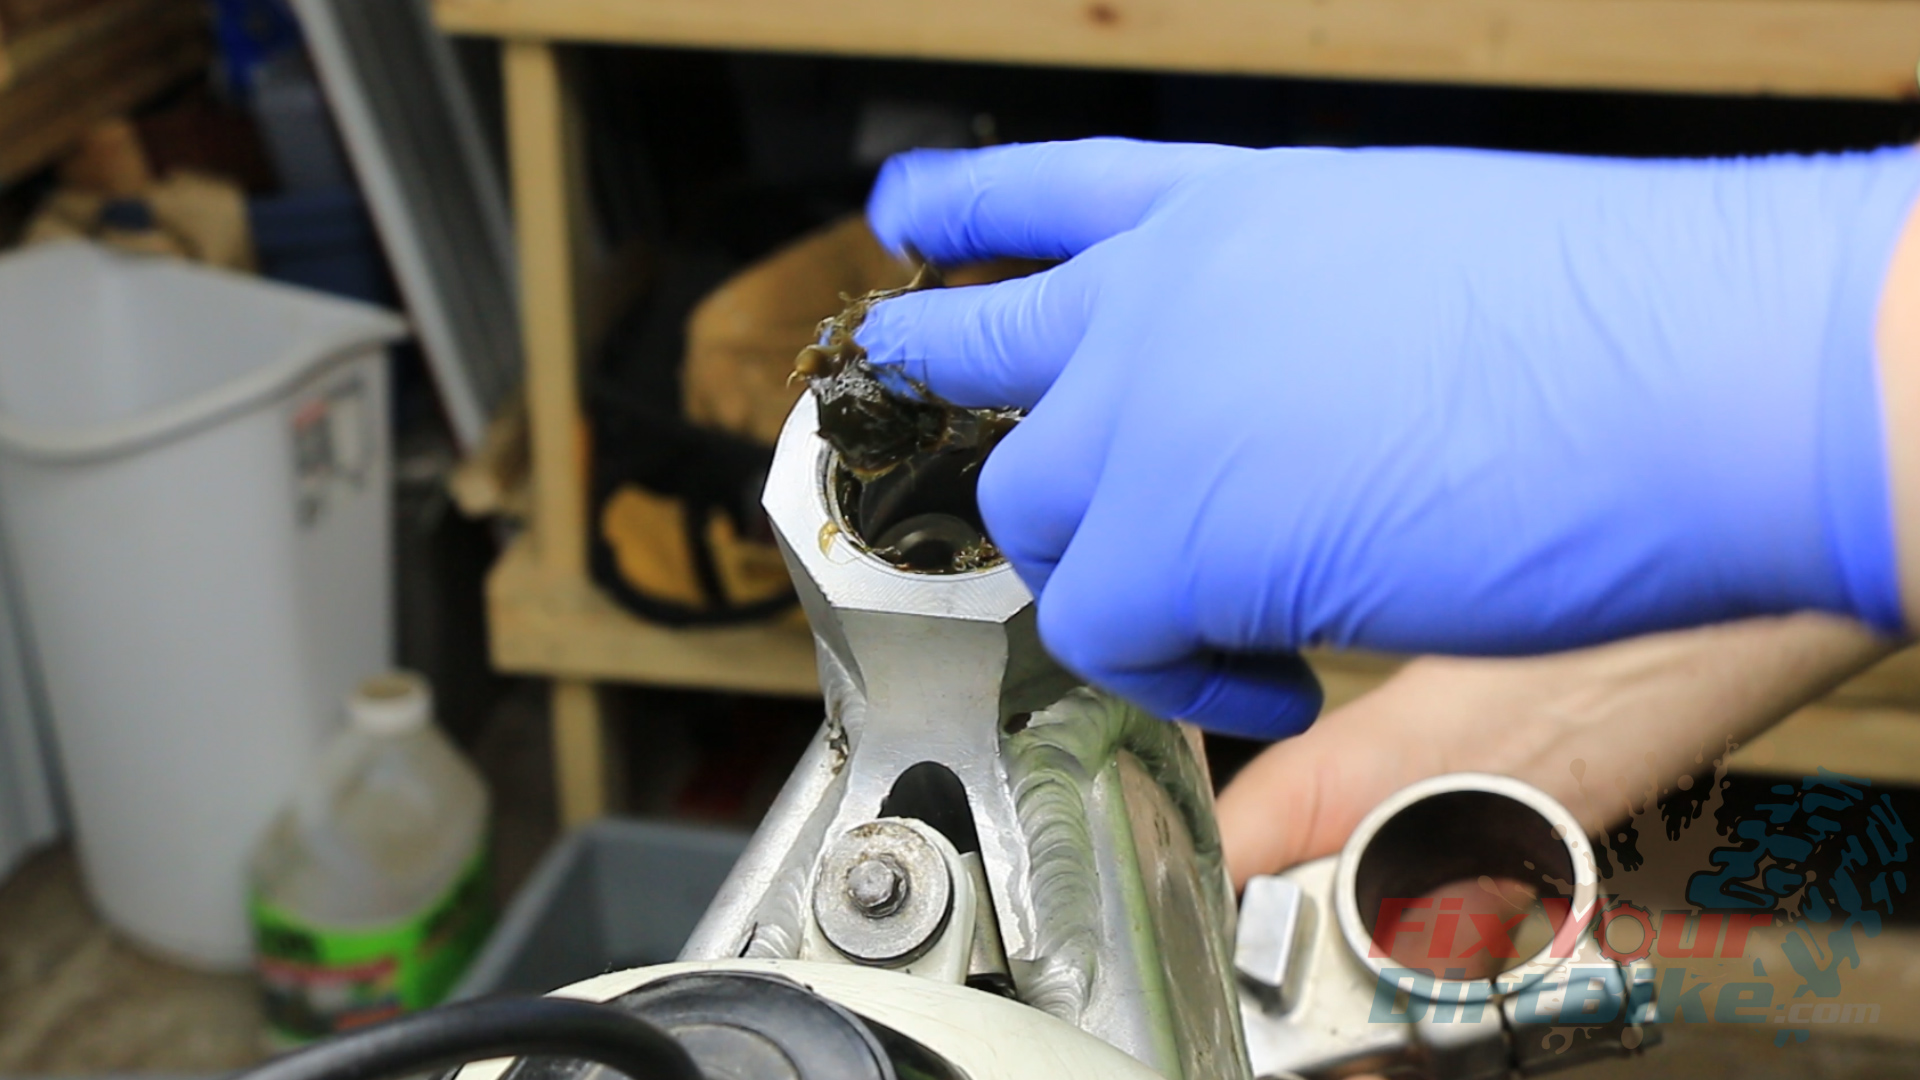
Clean all components and check for obvious damage or wear to the bearings and welds.
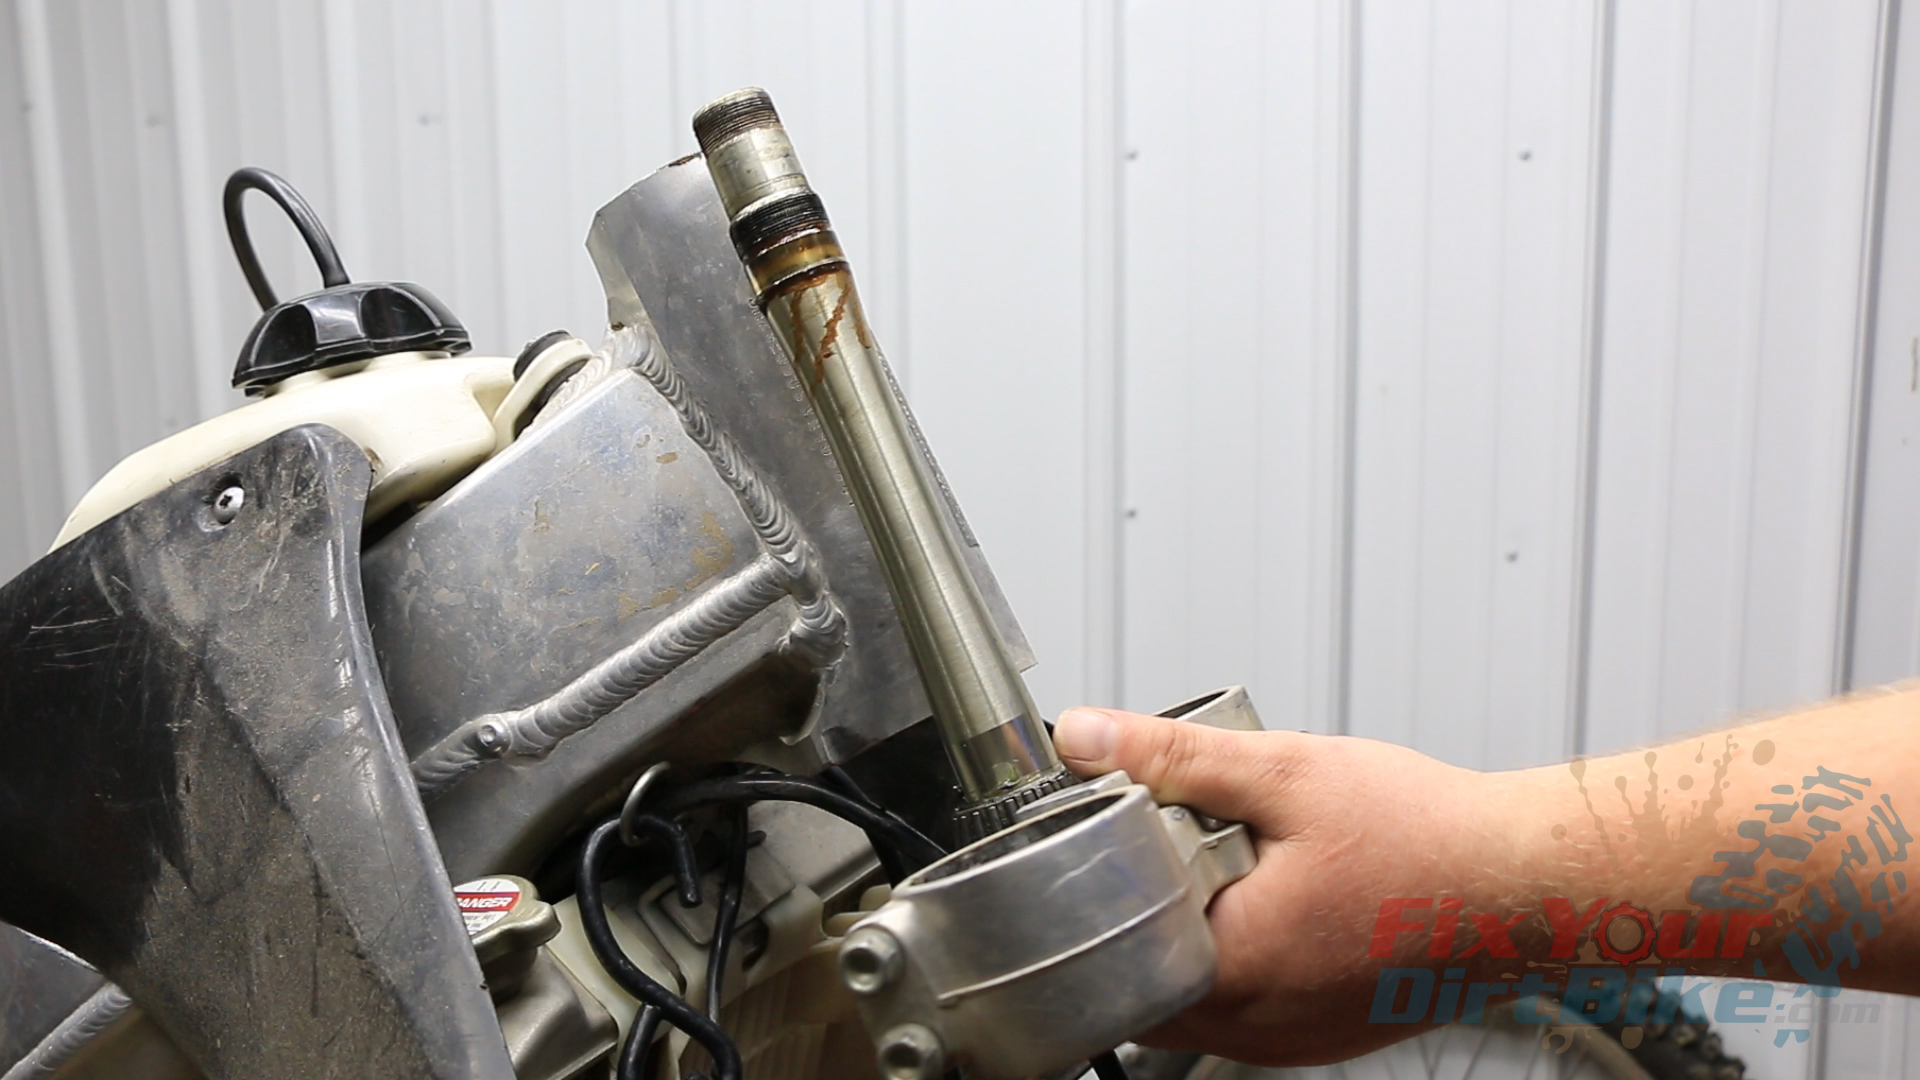
DO NOT REMOVE THE LOWER BEARING until you have cleaned and inspected it. Clean and inspect the steering head. The bearings are two pieces, with the outer race mounted inside the steering head.
DO NOT REMOVE THE OUTER RACES FROM THE STEERING HEAD until you inspect them. You want to look for damage in the bearing races, and the welds connecting the head to the frame.
Clean all components and check for obvious damage or wear to the bearings and welds.DO NOT REMOVE THE OUTER RACES FROM THE STEERING HEAD until you inspect them. You want to look for damage in the bearing races, and the welds connecting the head to the frame.
Steering Stem Bearing Replacement
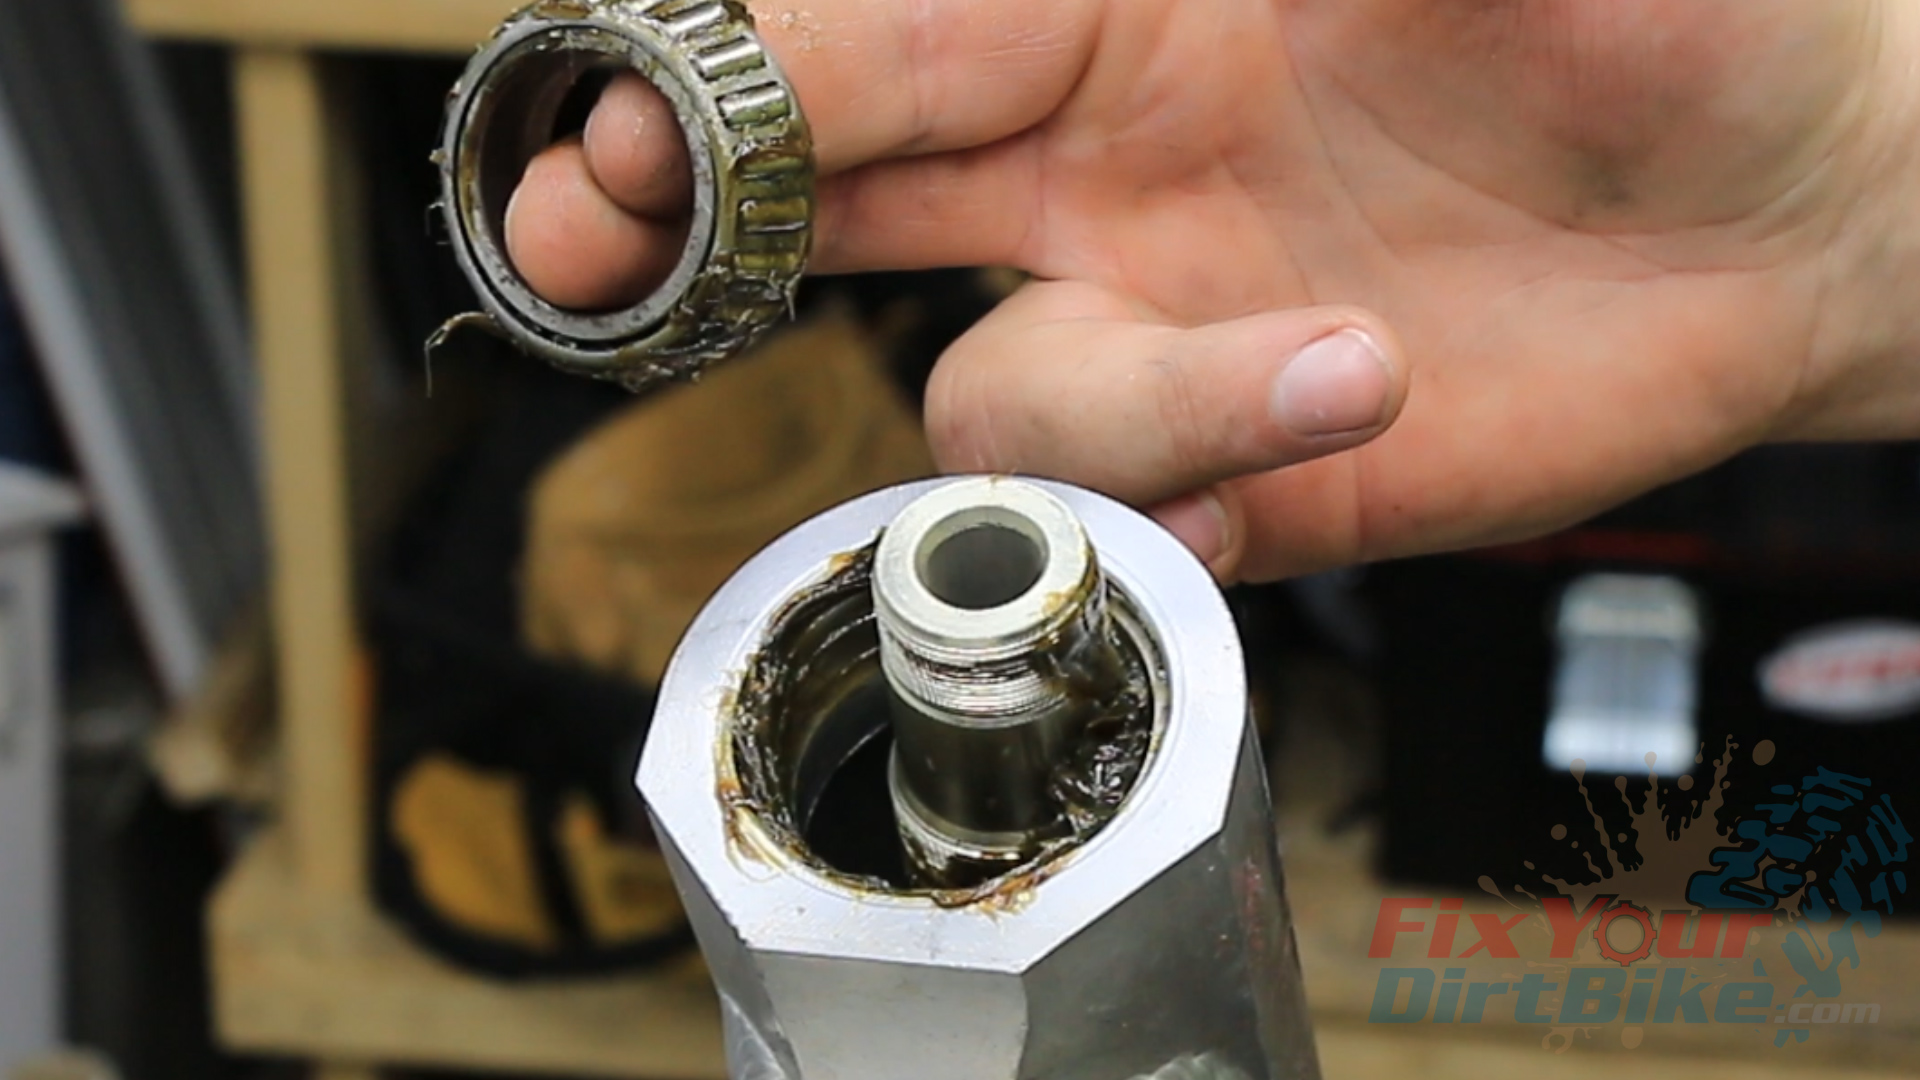
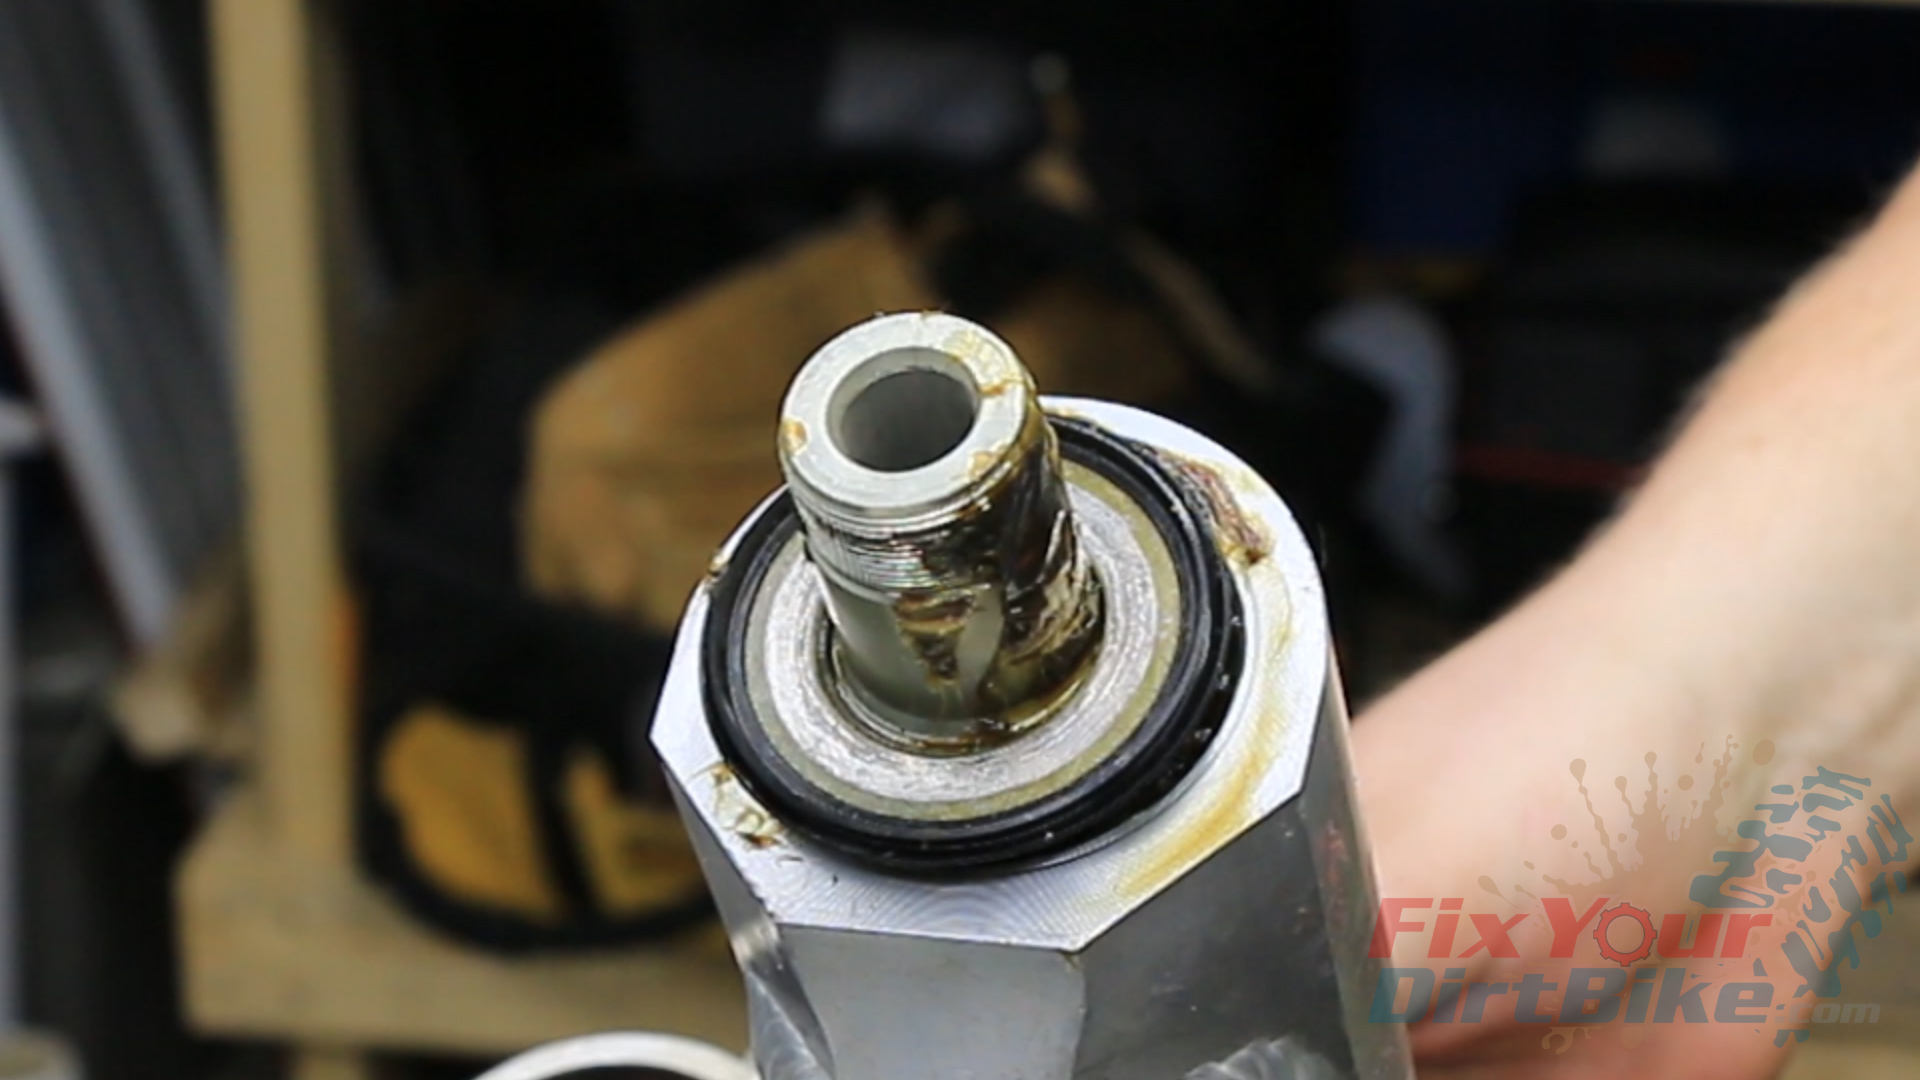
These bearings and races on my 1997 Honda CR250 are in surprisingly good condition, so I am not going to replace them. Instead, I’m going to show you on my 2009 CRF450r. While the bearings are slightly different, the procedure is the same.
The outer races are pressed into the steering head, and the lower bearing is pressed onto the steering stem.
Bearing Removal
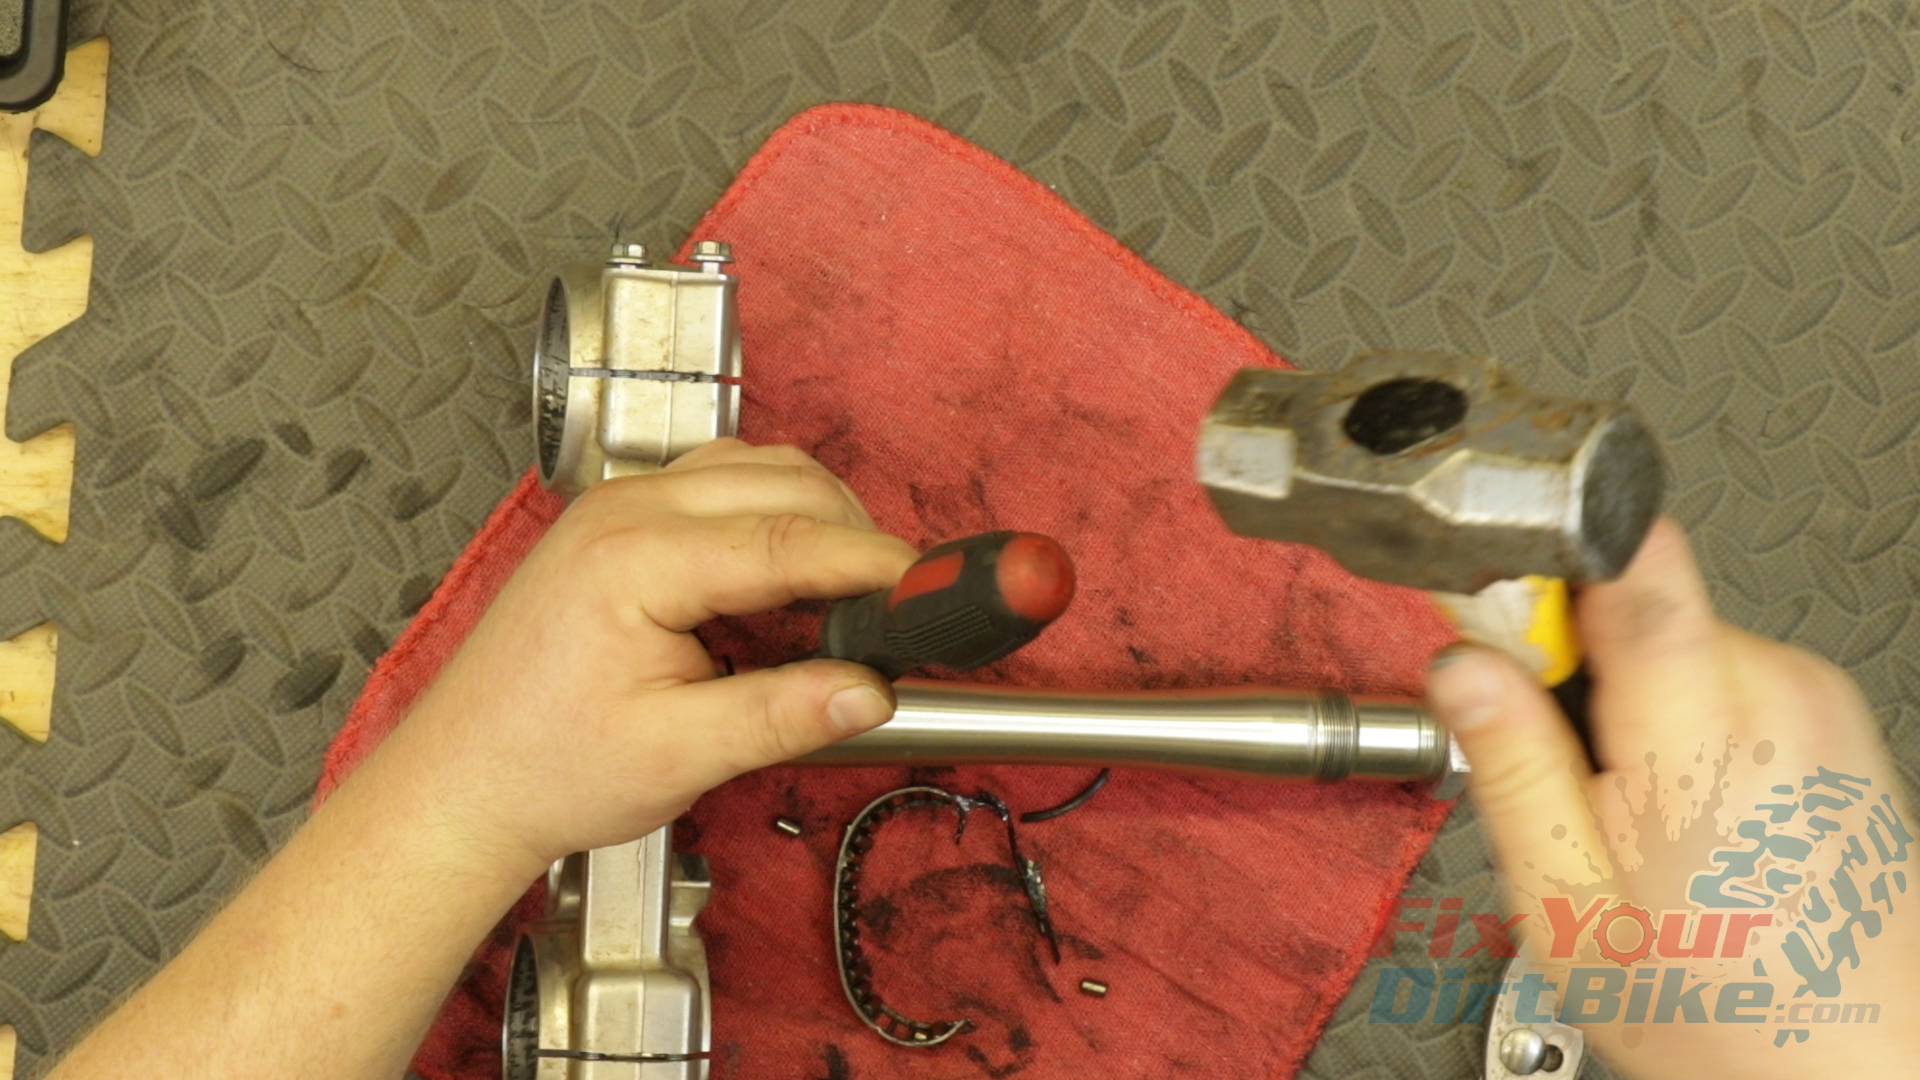
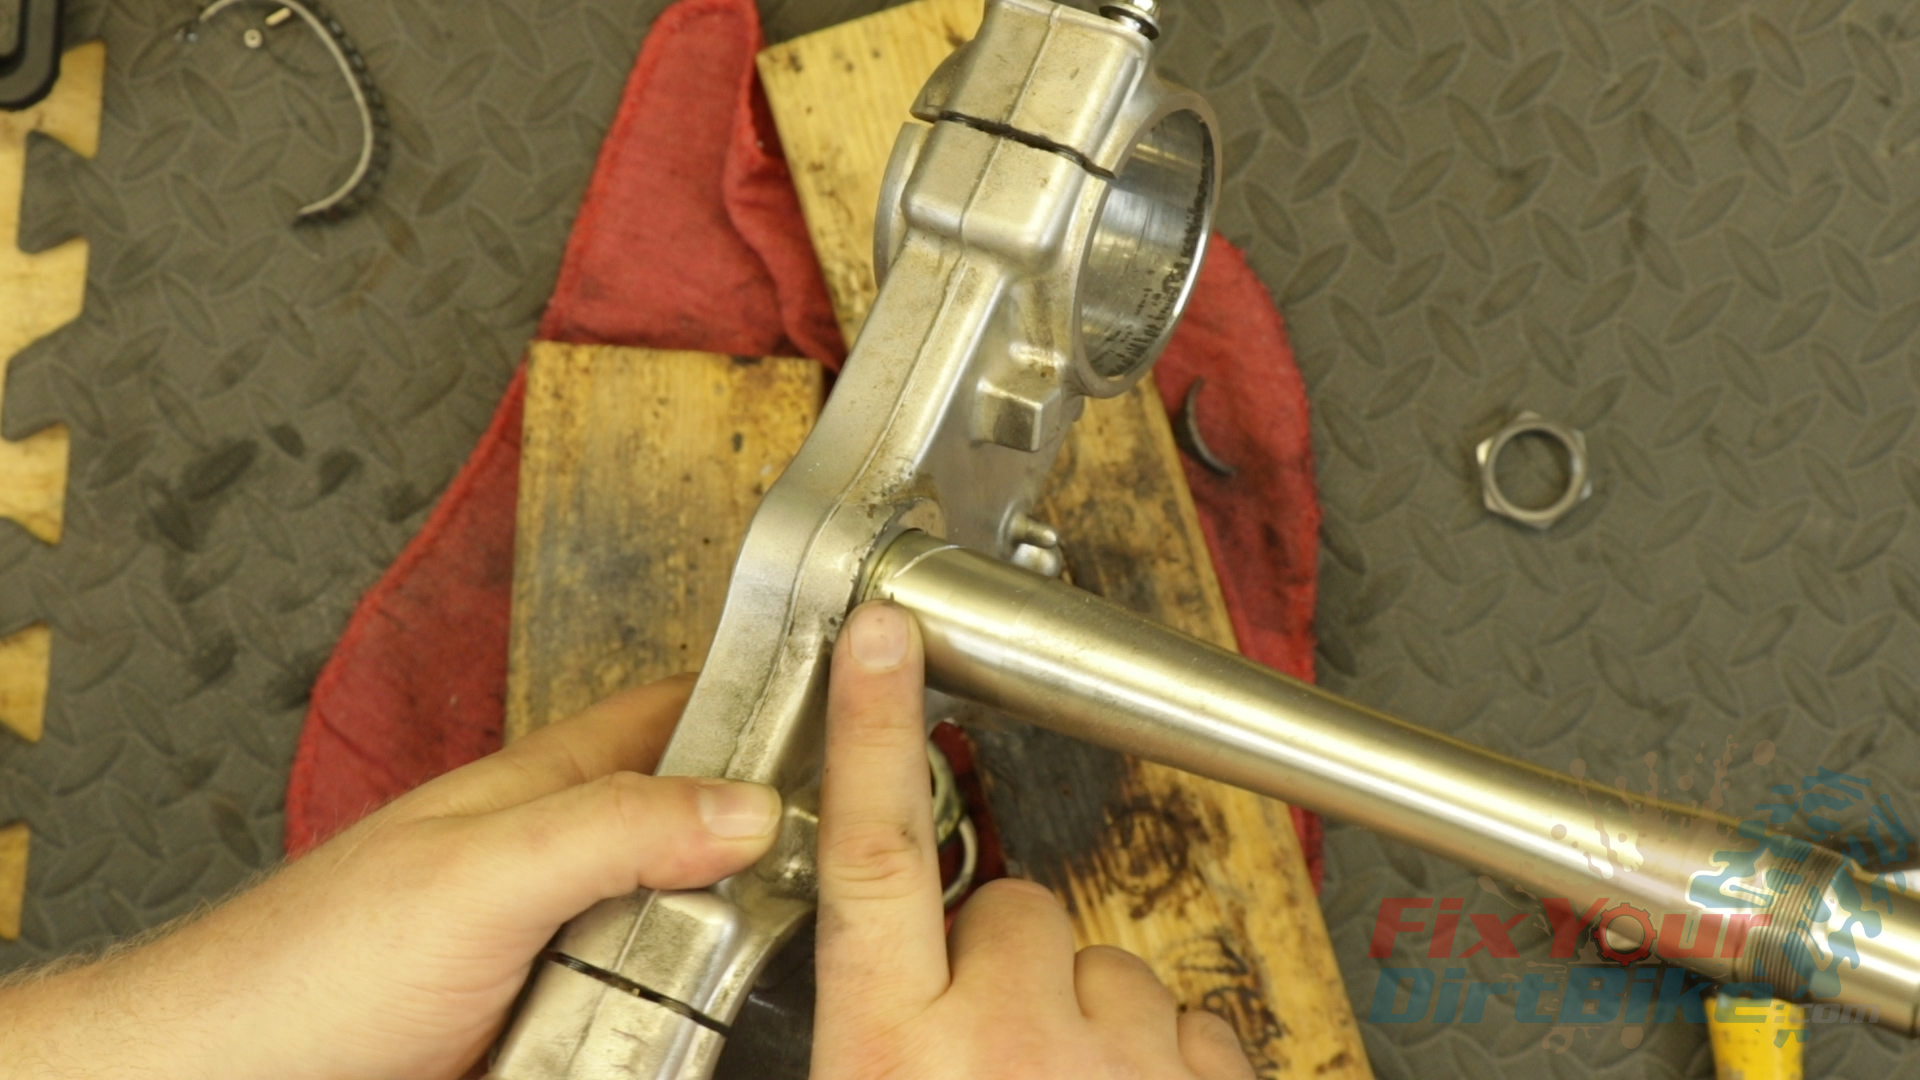
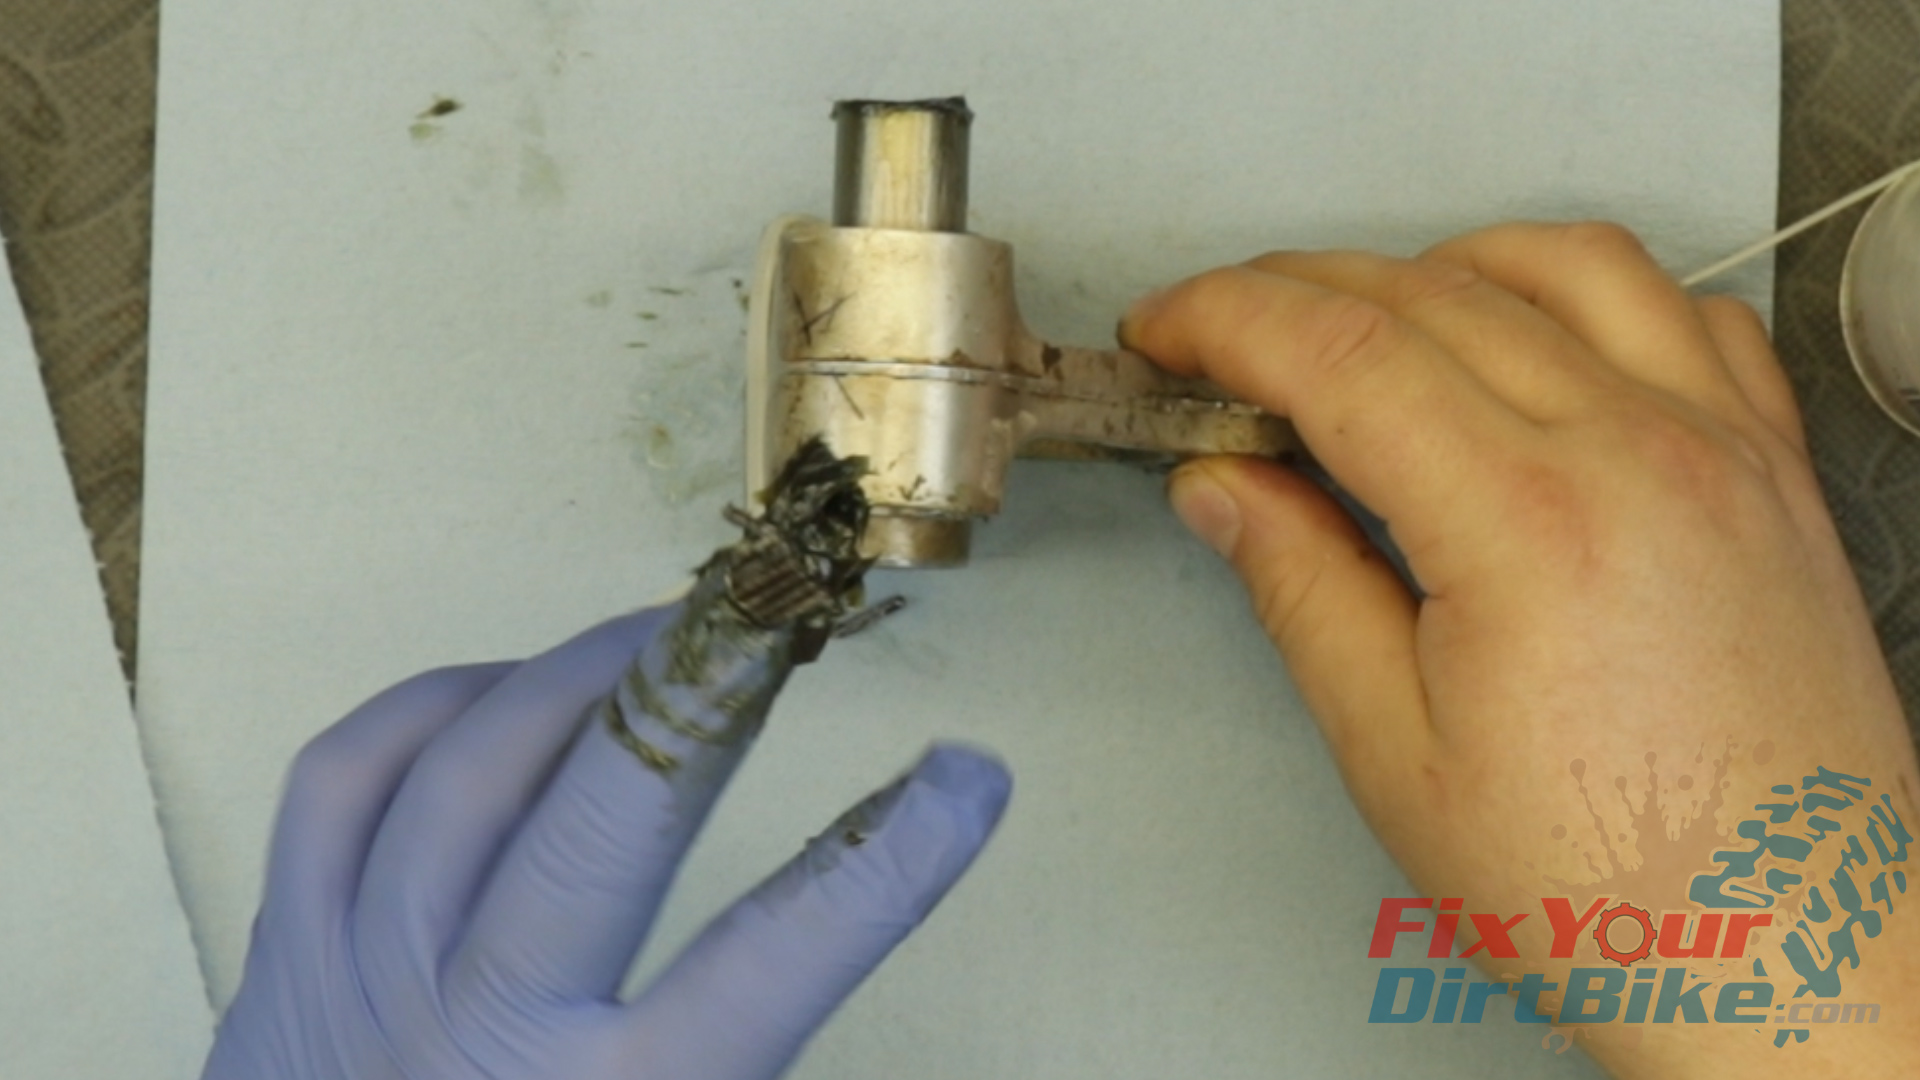
You will need a sharp screwdriver or chisel to remove the lower bearing from the stem.
If you try to hammer the bearing down off the stem, you will only catch the seal ring or crush the outer cage. Instead, hammer your chisel between the bridge and the bearing, and work your way around.
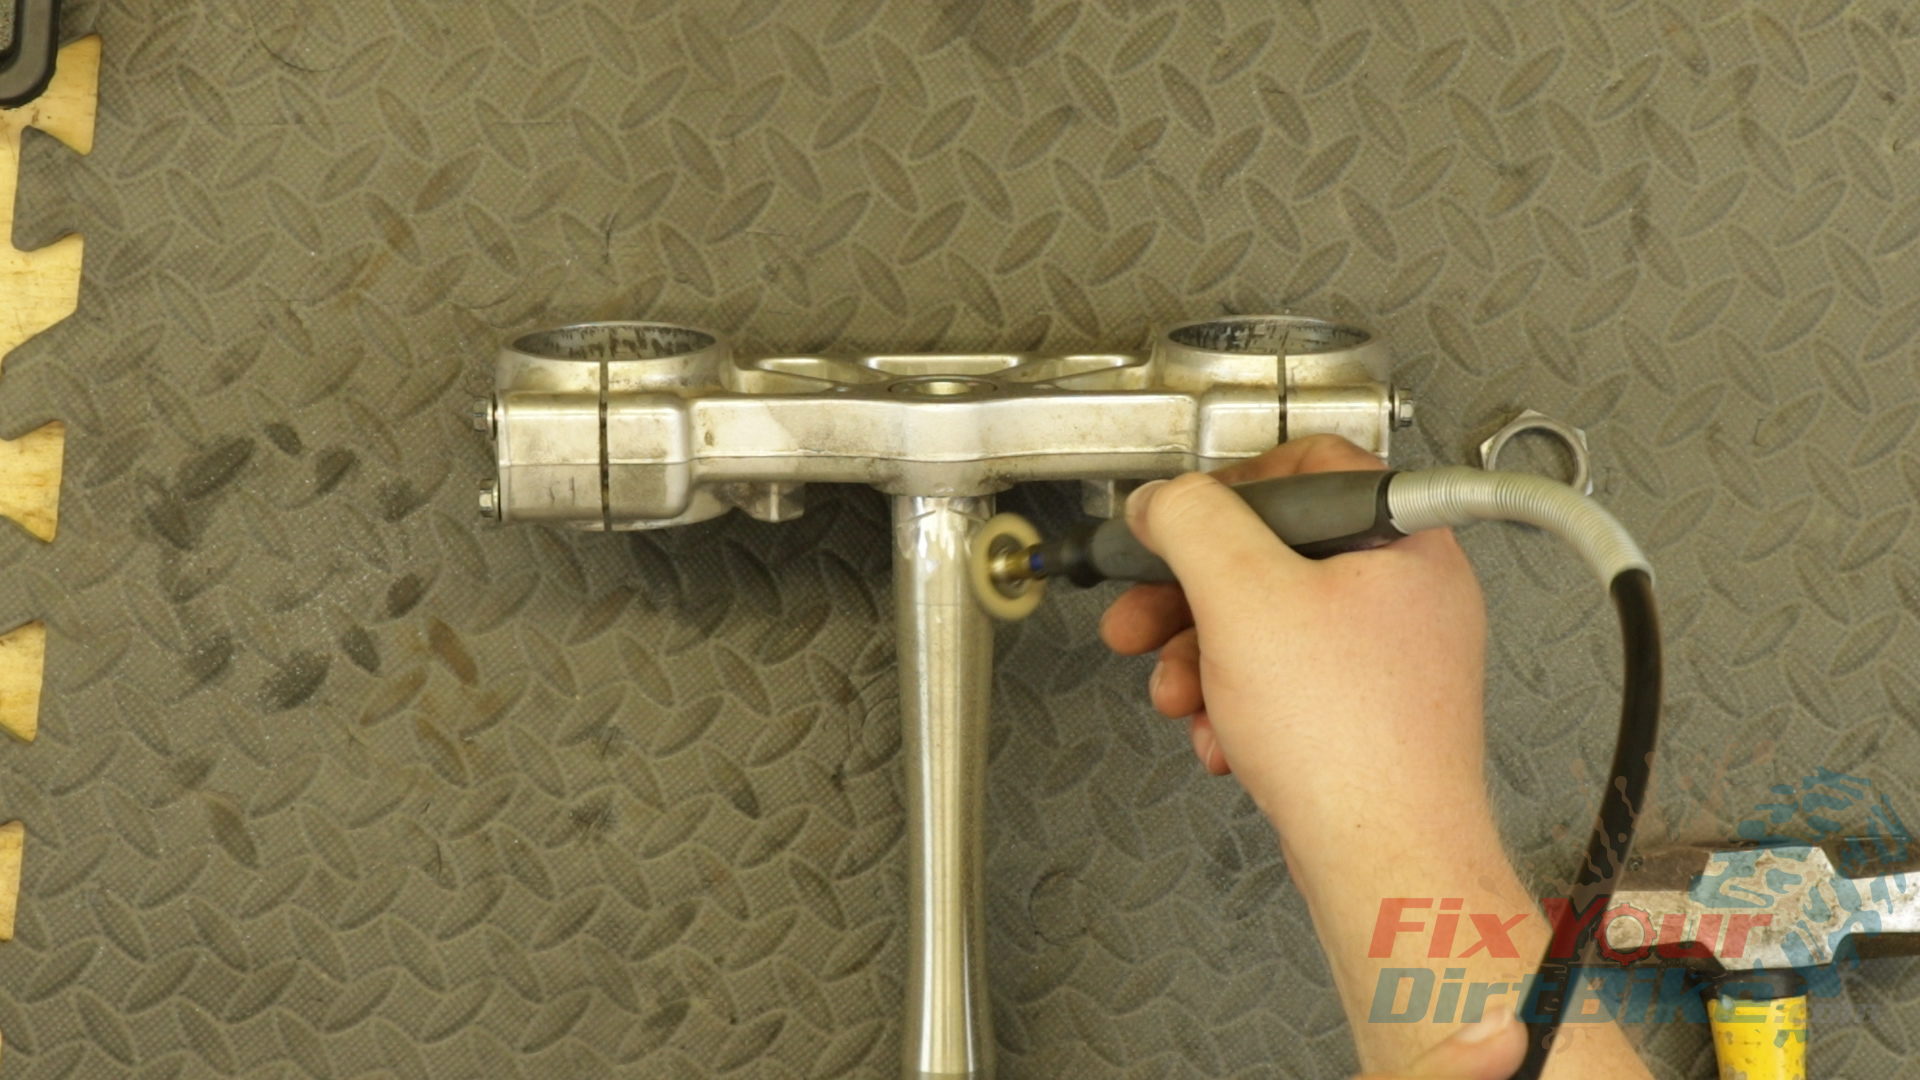
The chisel and hammer should separate the bearing from the bridge, but it probably won’t. As with most worn out parts, this bearing refused to budge, so I moved to a Dremel with a cut off wheel.
This cut is tricky because you can not get a perpendicular angle to the bearing. So start with a parallel cut about 2mm from the bridge, then make two cuts in a V shape between the edge of the bearing and the parallel cut.
Obviously, this is not ideal, but if you take your time and watch your depth, you will be fine.
I got a little too deep on my V cuts, but it wasn’t anything some light sanding and polishing couldn’t fix.
If you try to hammer the bearing down off the stem, you will only catch the seal ring or crush the outer cage. Instead, hammer your chisel between the bridge and the bearing, and work your way around.This cut is tricky because you can not get a perpendicular angle to the bearing. So start with a parallel cut about 2mm from the bridge, then make two cuts in a V shape between the edge of the bearing and the parallel cut.Obviously, this is not ideal, but if you take your time and watch your depth, you will be fine.
I got a little too deep on my V cuts, but it wasn’t anything some light sanding and polishing couldn’t fix.
Outer Race Removal
The outer bearing races have a small lip that sticks out inside the steering head.
The outer race is another example of old parts not cooperating, so I used a blind bearing puller to remove these.
If you don’t have a blind bearing puller set, you do not need to buy one. Most chain auto parts stores have loaner tools available with a refundable deposit.
With the outer race removed, inspect the race bores. If the edges and surfaces are anything but smooth, correct the damage before installing the new races.
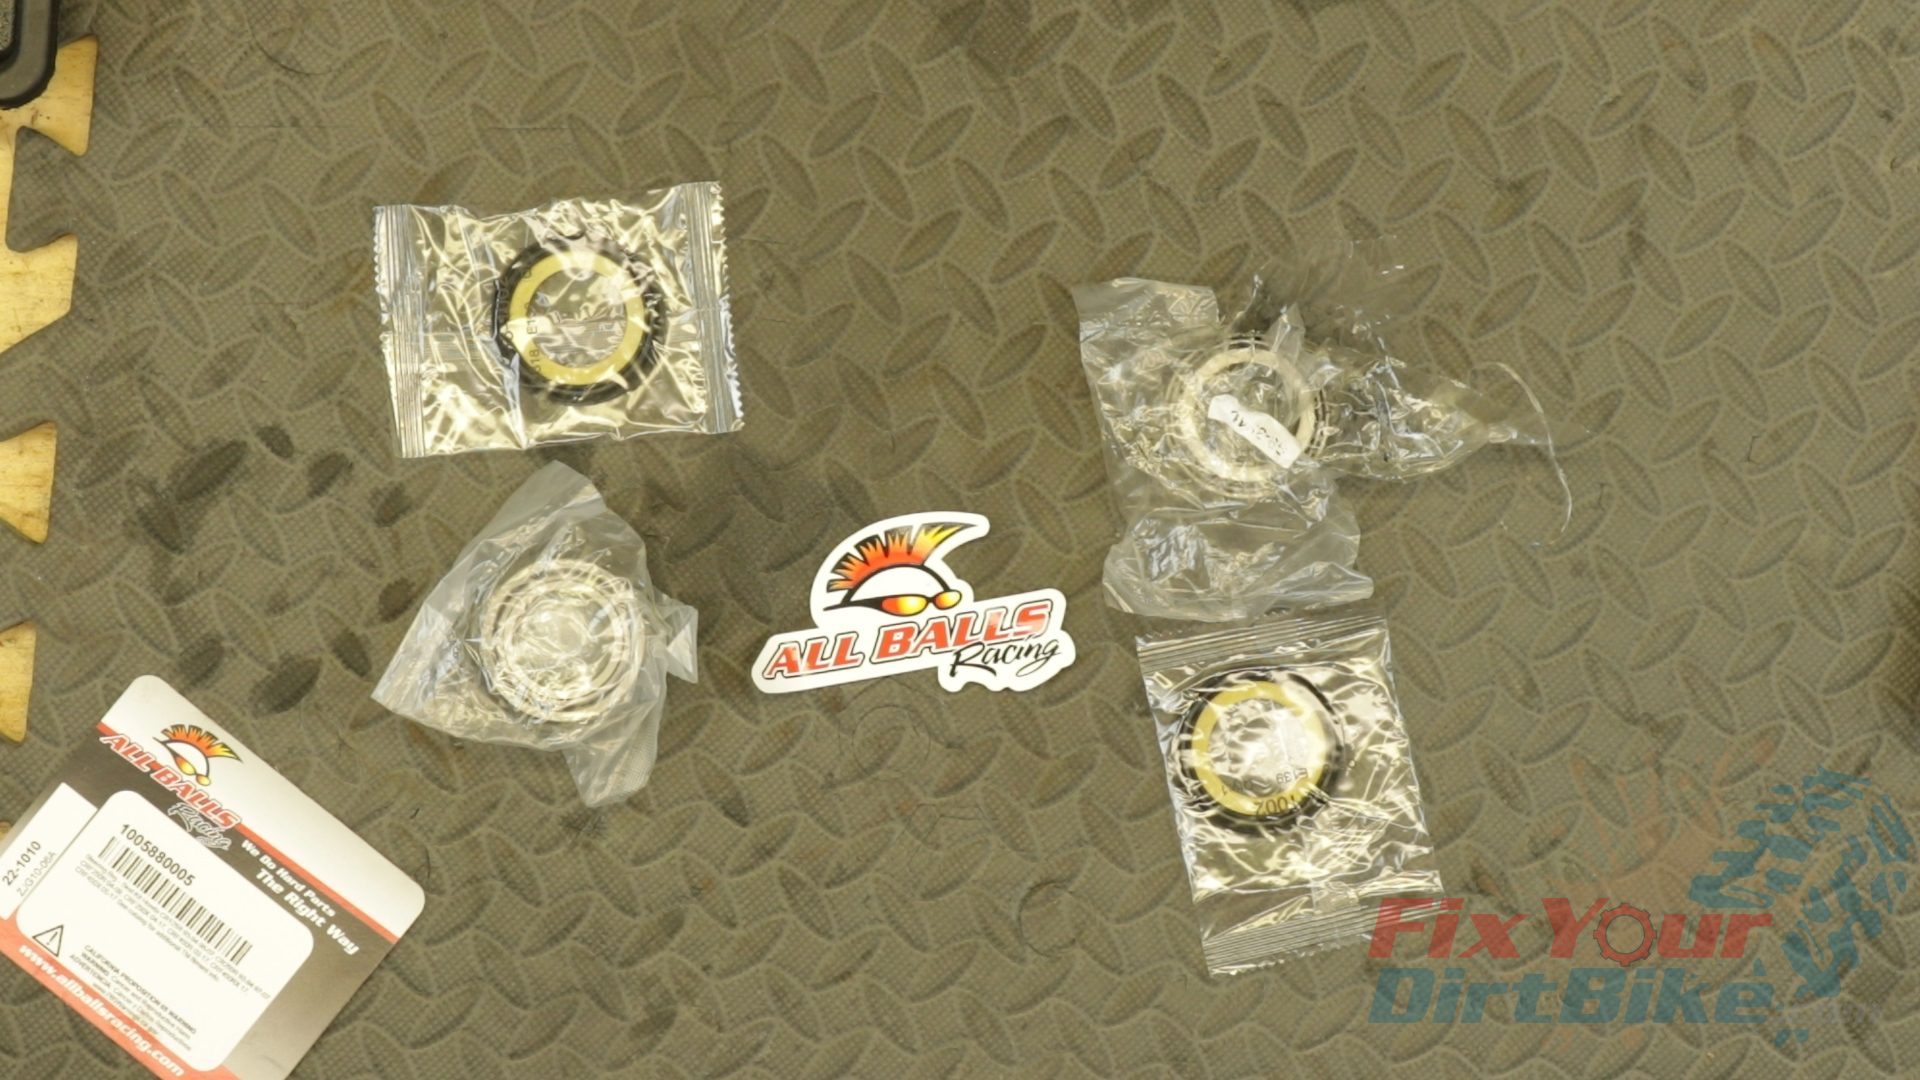
I will be installing an All Balls bearing kit. This kit includes new bearings, outer races, and seals.
Bearing Installation
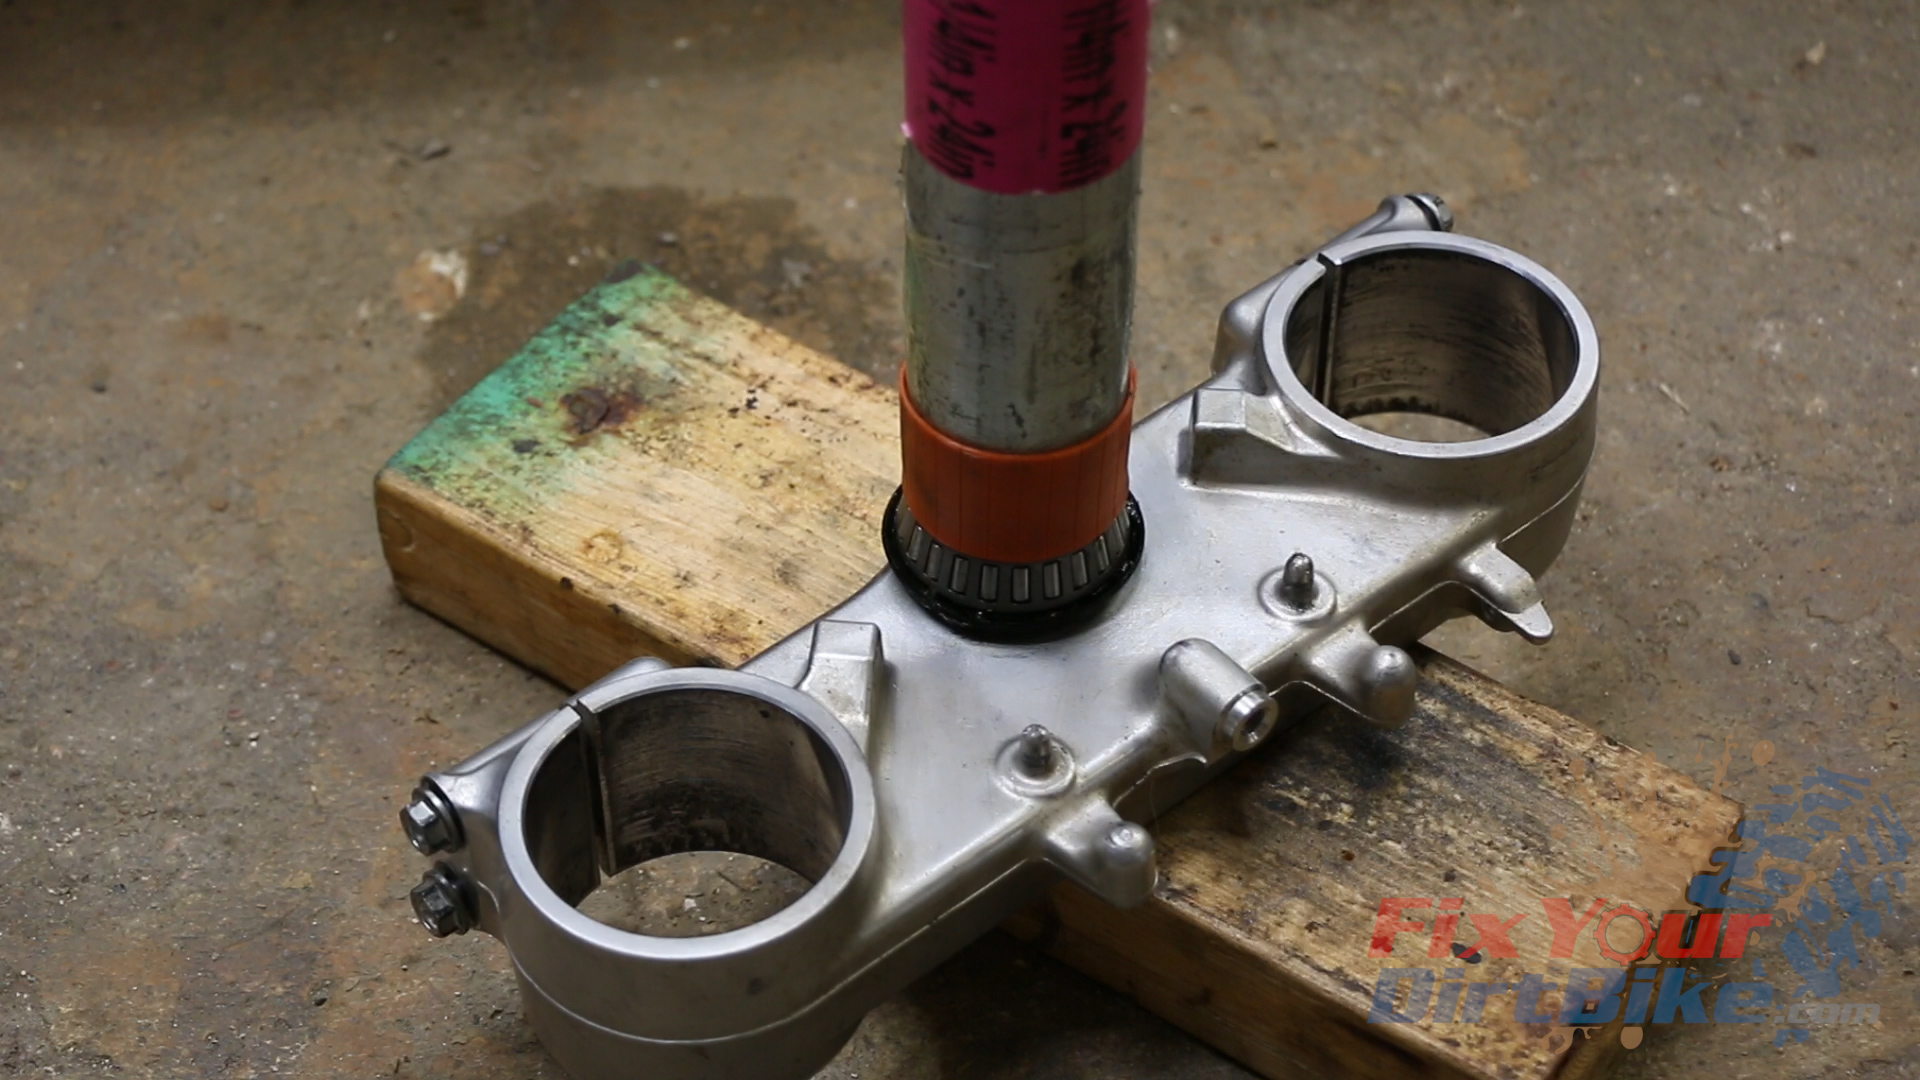
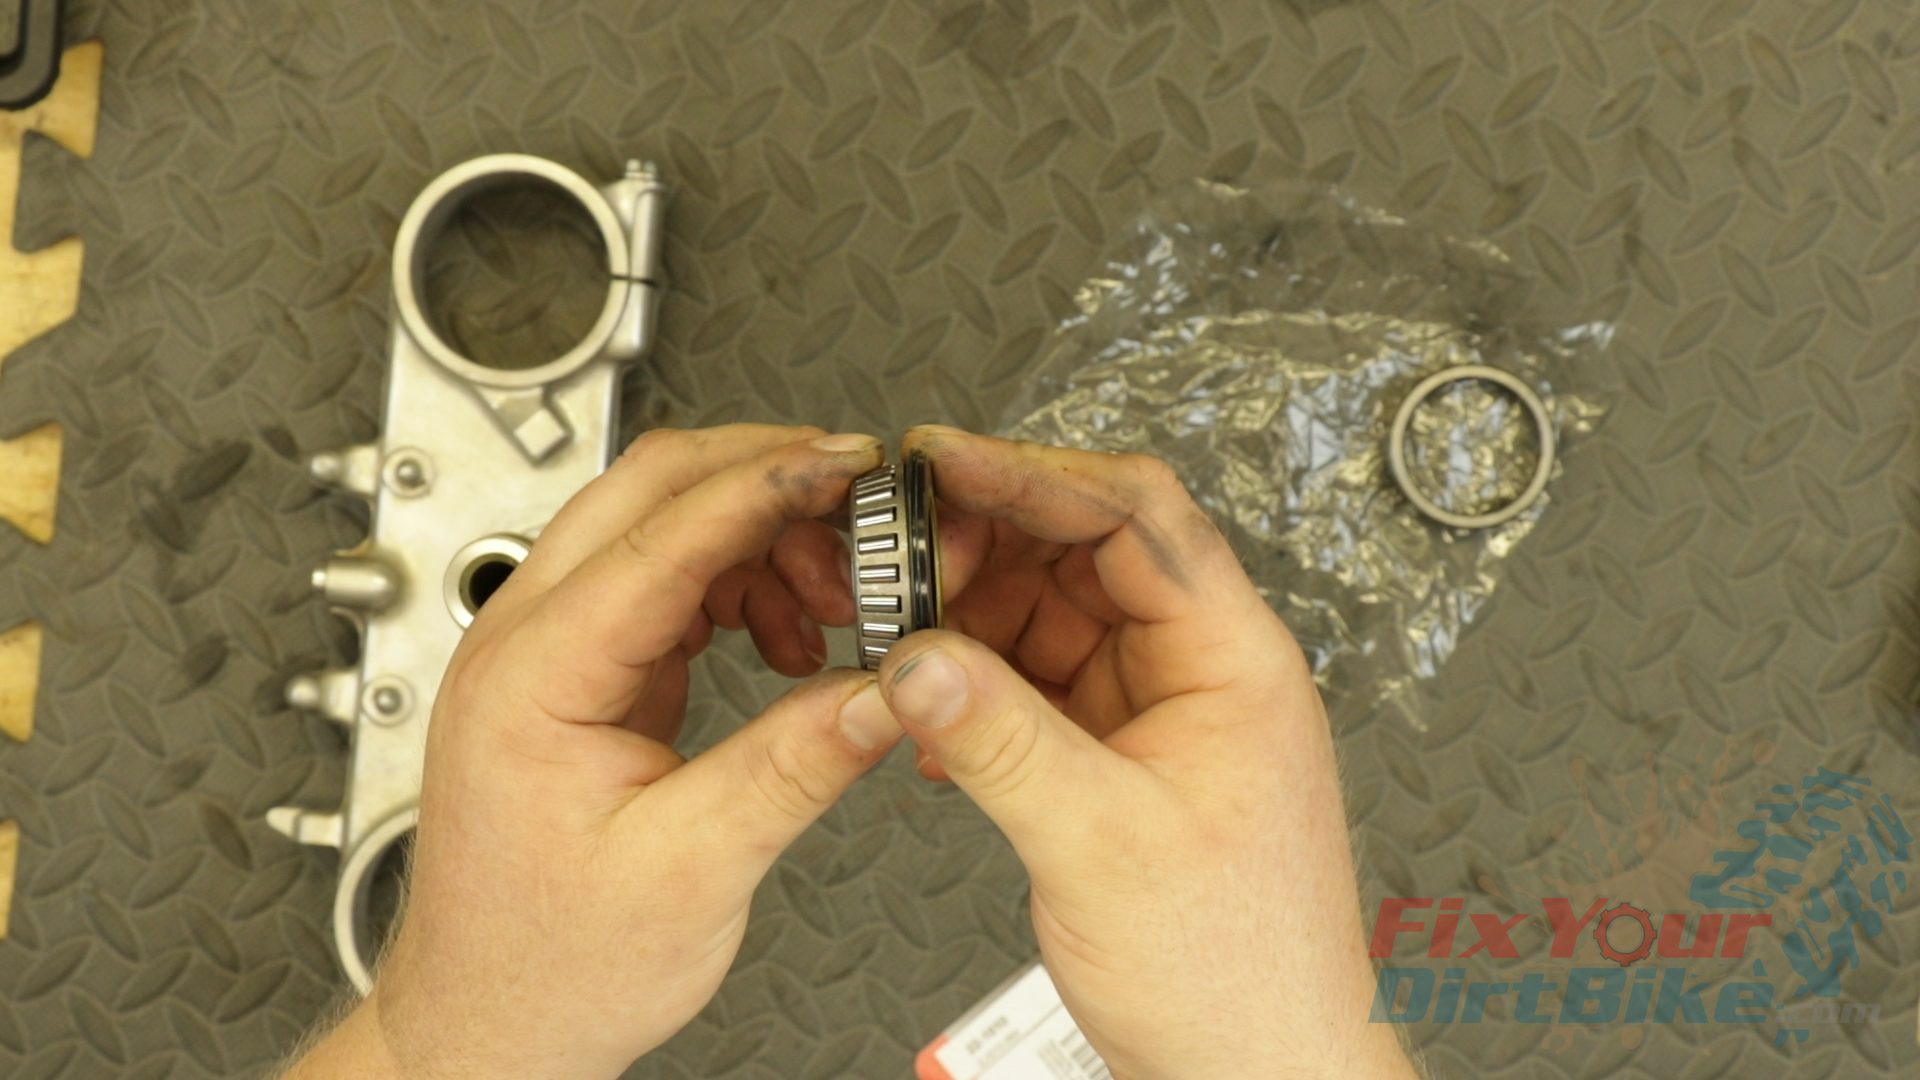
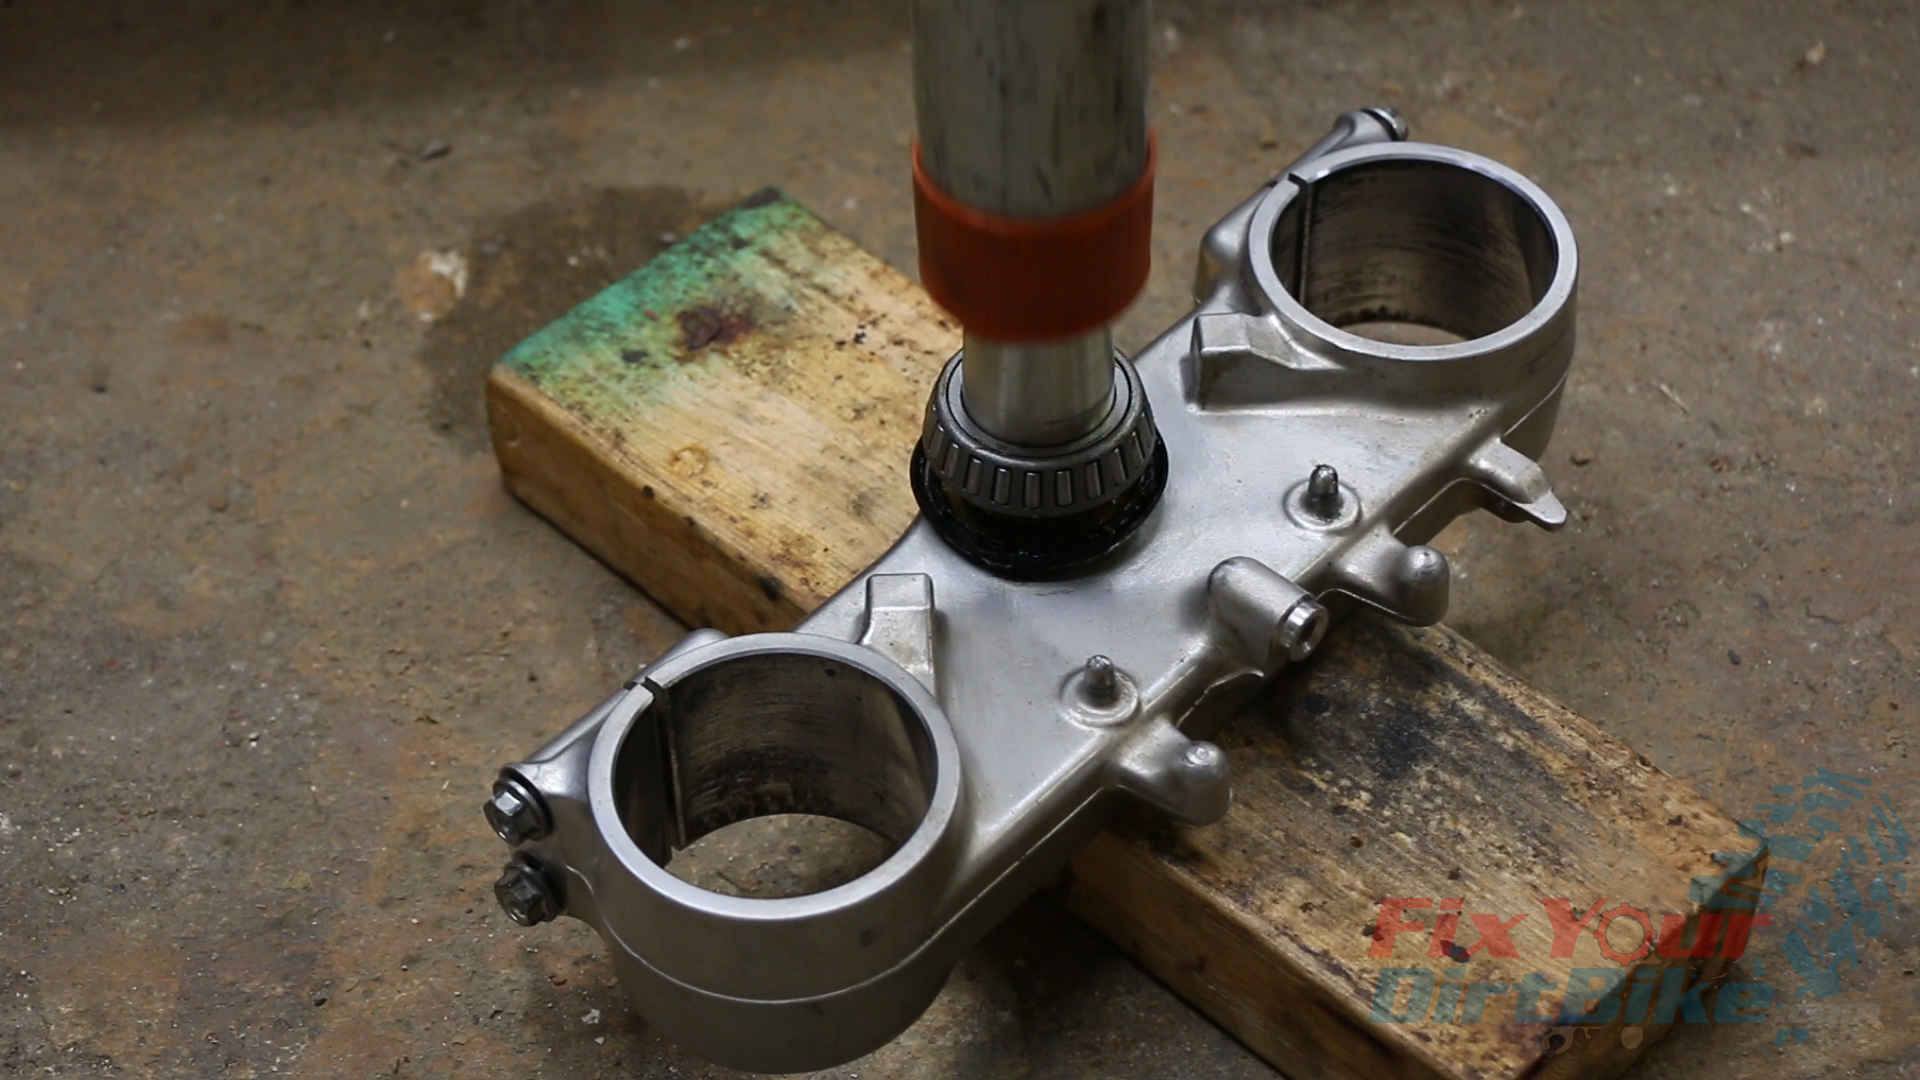
Slide the new seal onto the steering stem with the wide side facing away from the bridge, followed by the bearing with the small side facing away from the bridge.
Drive the bearing home with your metal pipe and hammer.
Slide the new seal onto the steering stem with the wide side facing away from the bridge, followed by the bearing with the small side facing away from the bridge.Drive the bearing home with your metal pipe and hammer.
Outer Race Installation
Place your new bearing race in the bore with the wide side facing out.
Assemble your bearing press with the bolt head on the side you are pressing. You will have to get creative with the spacers on the nut side. For example, I like to use the top bridge as a spacer because it rests flat on the bottom of the steering head.
On the bolt side, you need to find a washer that will fit over the race but still, clear the outer bore. As with most bearings, some slight adjustments may be needed to keep everything aligned.
Press the bearing into the bore.
These bearing races are NOT an interference fit so that they will press in easily. If you are forcing them in, something is wrong, so reset and try again.
Run your fingernail along the bottom side of the race to check for any gaps. My race did not press into the bore completely, but I was able to correct that with a large socket and hammer.
Repeat with the bottom race.
Place your new bearing race in the bore with the wide side facing out.Assemble your bearing press with the bolt head on the side you are pressing. You will have to get creative with the spacers on the nut side. For example, I like to use the top bridge as a spacer because it rests flat on the bottom of the steering head.Press the bearing into the bore.Run your fingernail along the bottom side of the race to check for any gaps.
Steering stem bearings require an EP grease. The EP stands for Extreme Pressure.
But since there is very little heat in the steering head, the grease can’t be too thick, or it will not move around the bearings.
Moly based greases provide the best protection under extreme load, but they are also incredibly thick.
General-purpose grease is the right consistency but provides inadequate pressure protection under load.
I find that a Lithium-based EP grease provides the proper level of protection at the right consistency.
Install The Stem
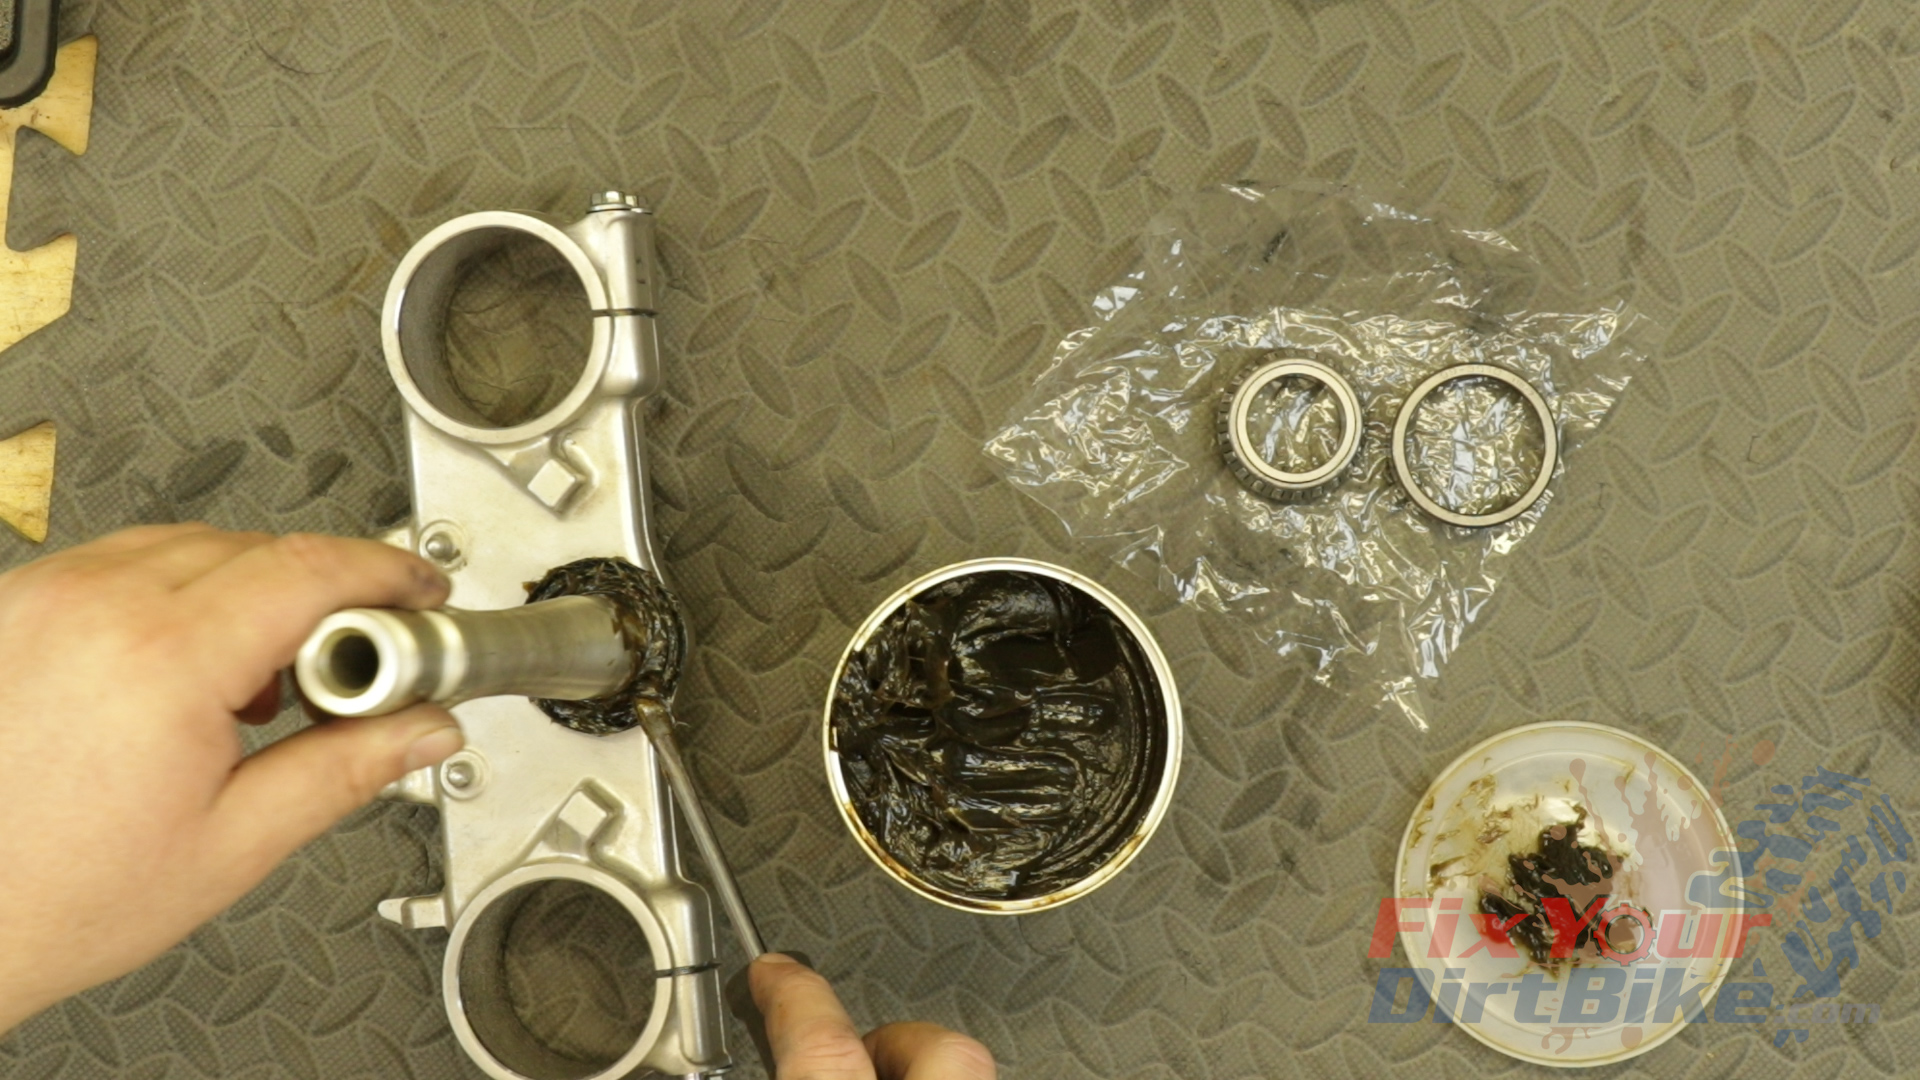
Apply a thick layer of grease around each bearing and outer race. When I say thick, I mean THICK, you want as much grease in those rollers as possible.
Install the top seal with the wide side facing down.
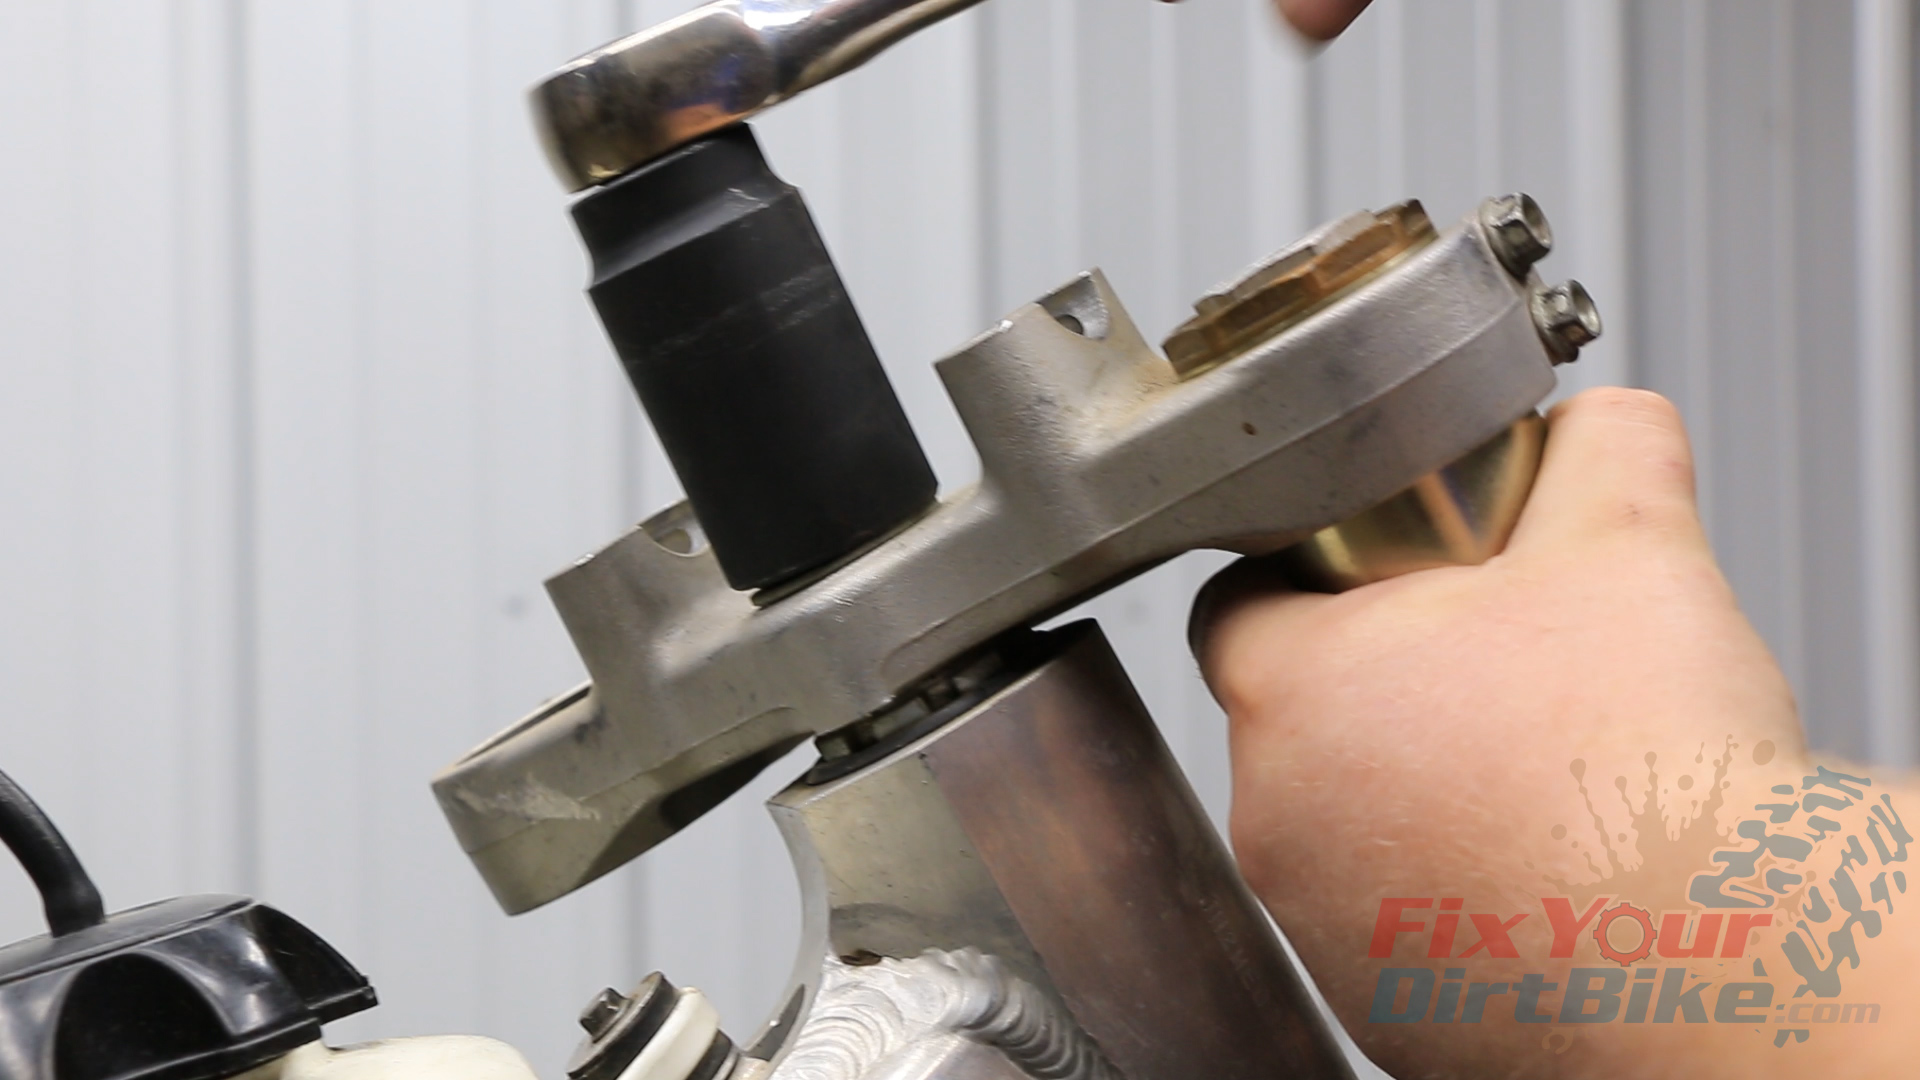
Install and tighten the adjustment nut until it is bottomed out.
With the nut tight to the seal, work the stem back and forth. This will disperse the grease, and allow you to check for any rough spots.
Loosen the nut to the point where the steering stem rotates freely with no play.
Install the forks, but only tighten the upper pinch bolts.
Apply a thick layer of grease around each bearing and outer race. When I say thick, I mean THICK, you want as much grease in those rollers as possible.
Install the top seal with the wide side facing down.Install and tighten the adjustment nut until it is bottomed out.Install the forks, but only tighten the upper pinch bolts.
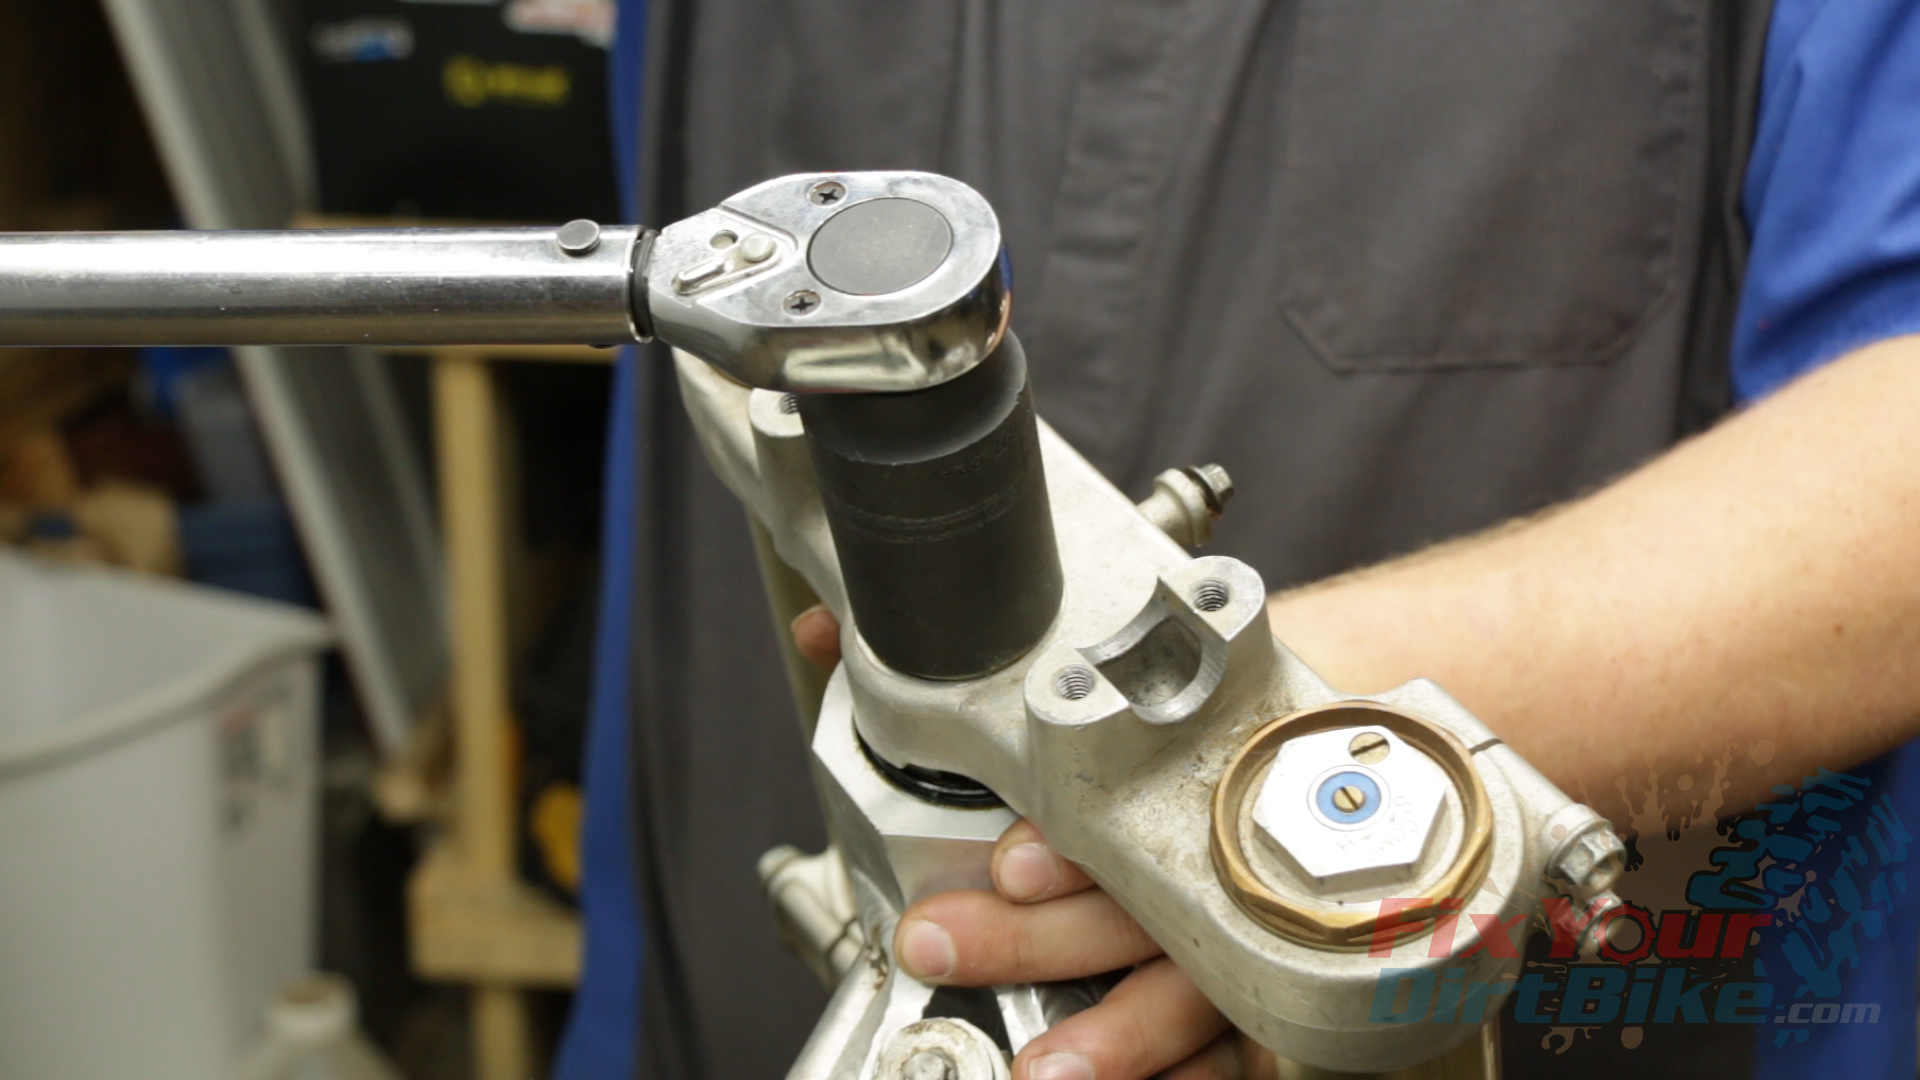
Install The Steering Stem Nut; Torque To
108 ft-lbs on 97-2000 models
80 ft-lbs for 2001 models
Recheck the rotation; You should still be able to rotate the stem freely with no play.
Assemble your front end and ride around for about 30 minutes.
After your break in ride, put your bike on a stand and check your steering stem bearing adjustment.
With the wheel facing forward, you should be able to tap the fender left or right with front end rotating to lock under its own weight. This is the correct adjustment.
If the front end does not turn freely, the adjustment nut is too tight.
Push and pull the forks; if you feel anything moving in the steering head, the adjustment nut is too loose.
To correct the adjustment, loosen the lower fork pinch bolts, loosen the steering stem nut, and turn the adjustment nut ¼ turn, then re-torque the steering stem nut.
Repeat this process until you reach the proper adjustment, the re-torque your lower bridge pinch bolts.
If you have any questions about this shock link service, please let me know in the comments or on social!
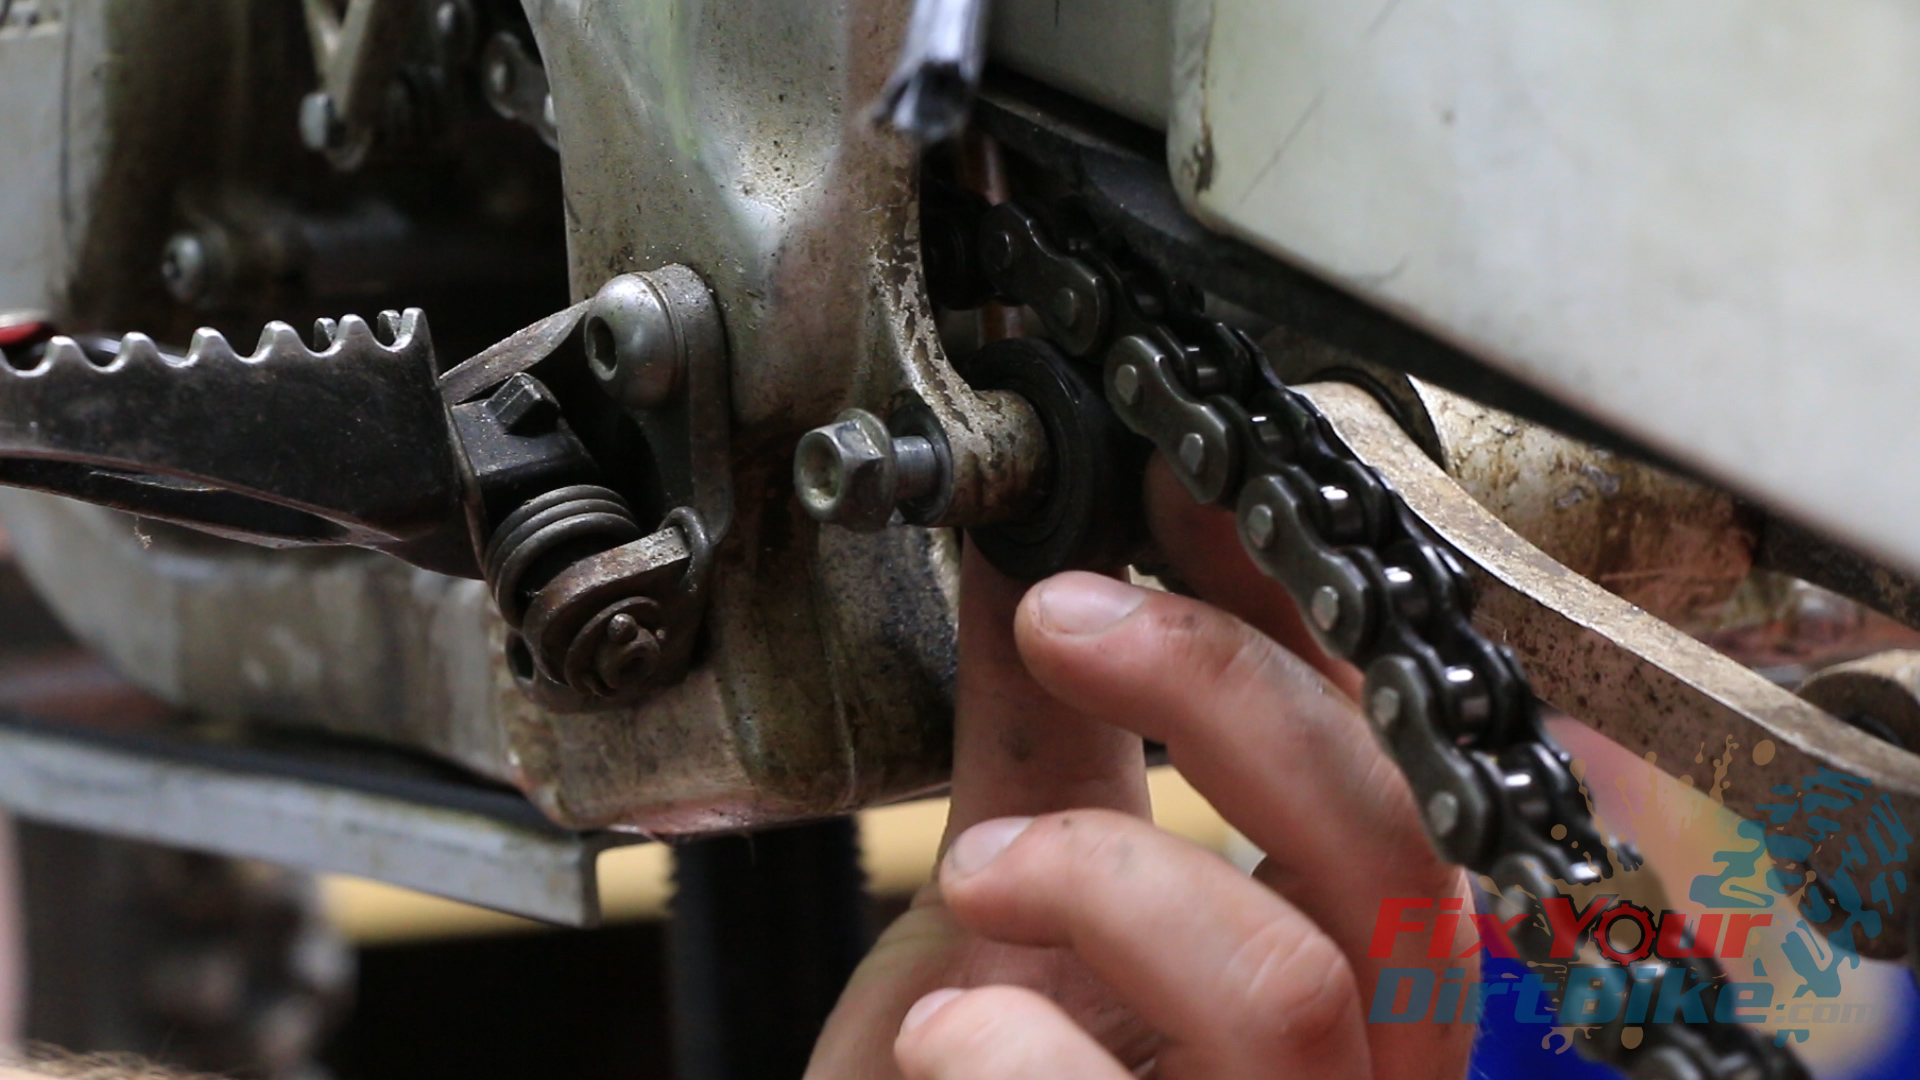
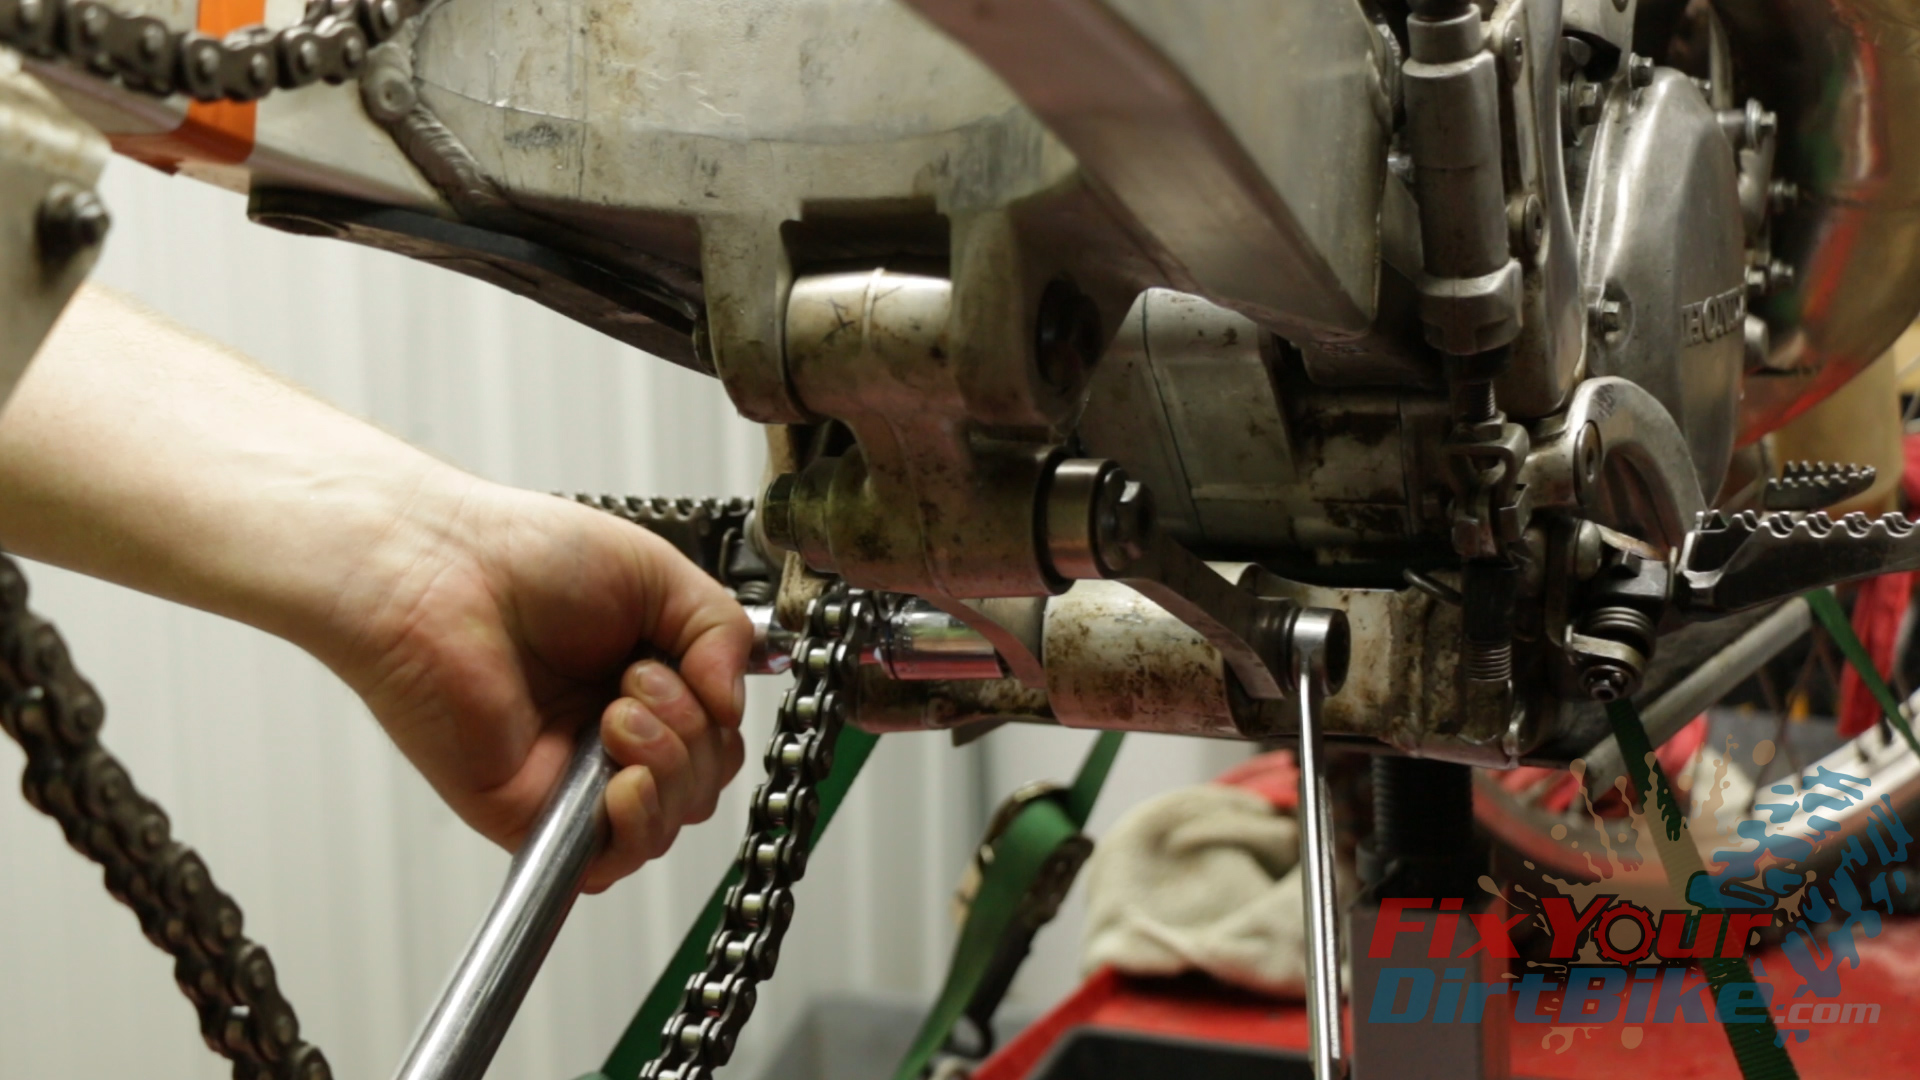
Remove the lower chain roller to make room for the frame side connecting bolt.
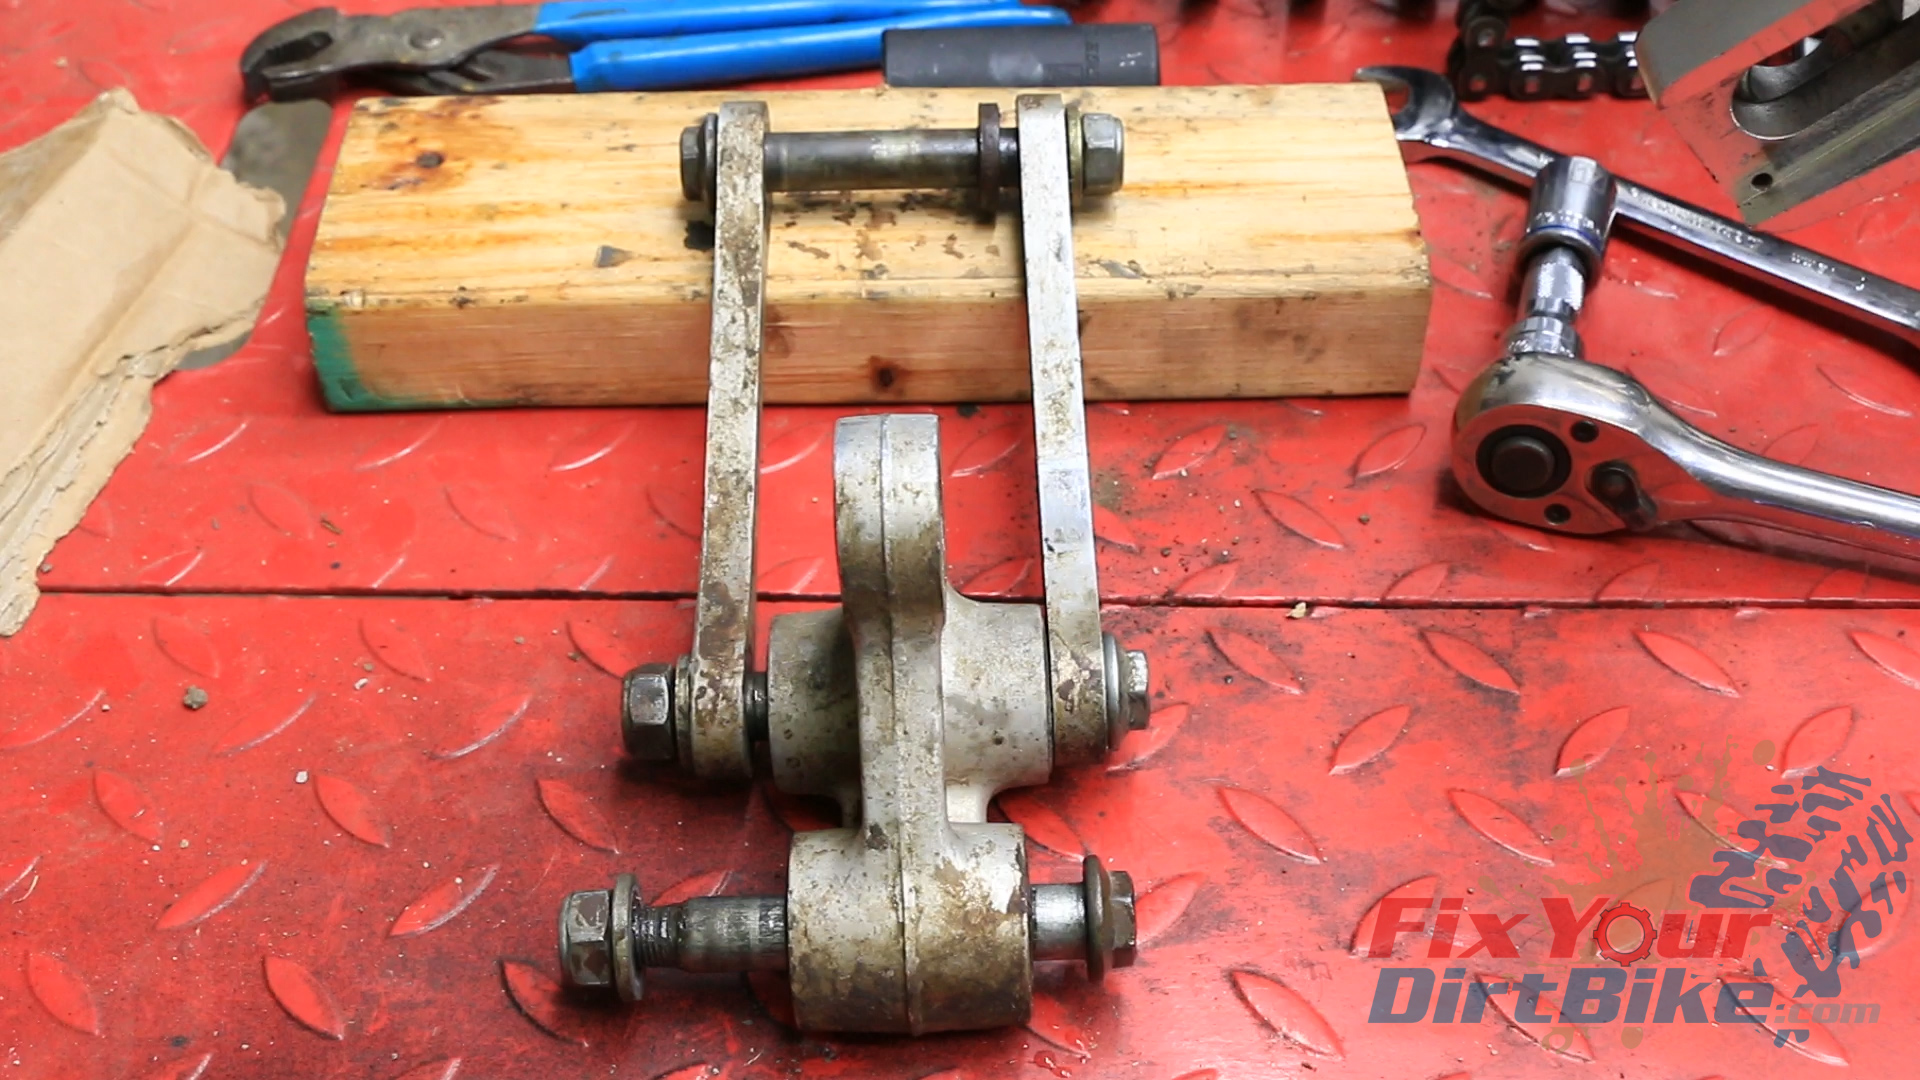
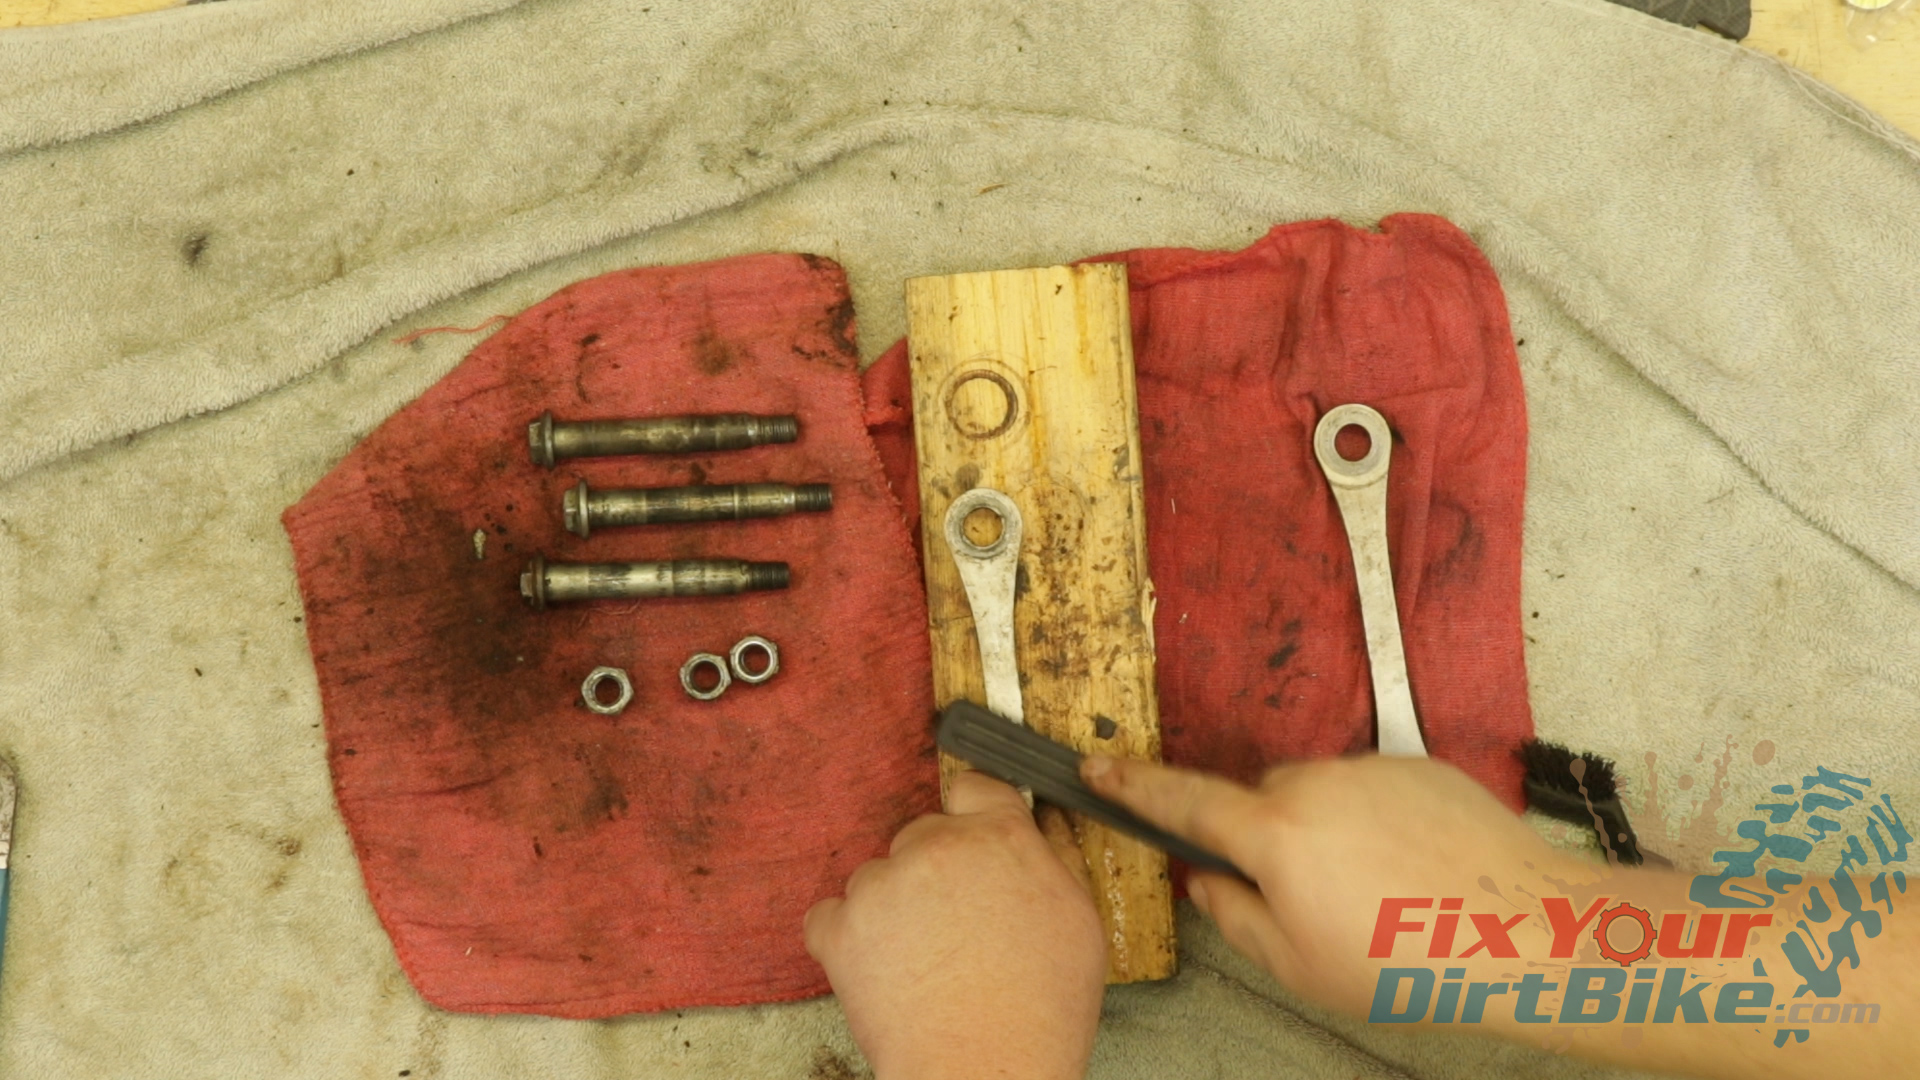
Remove the bolts and washers from the frame and swingarm.
Reassemble your shock linkage and check that all bolts, washers, and pivot collars are accounted for.
Remove the lower chain roller to make room for the frame side connecting bolt.Reassemble your shock linkage and check that all bolts, washers, and pivot collars are accounted for.
Linkage Disassembly
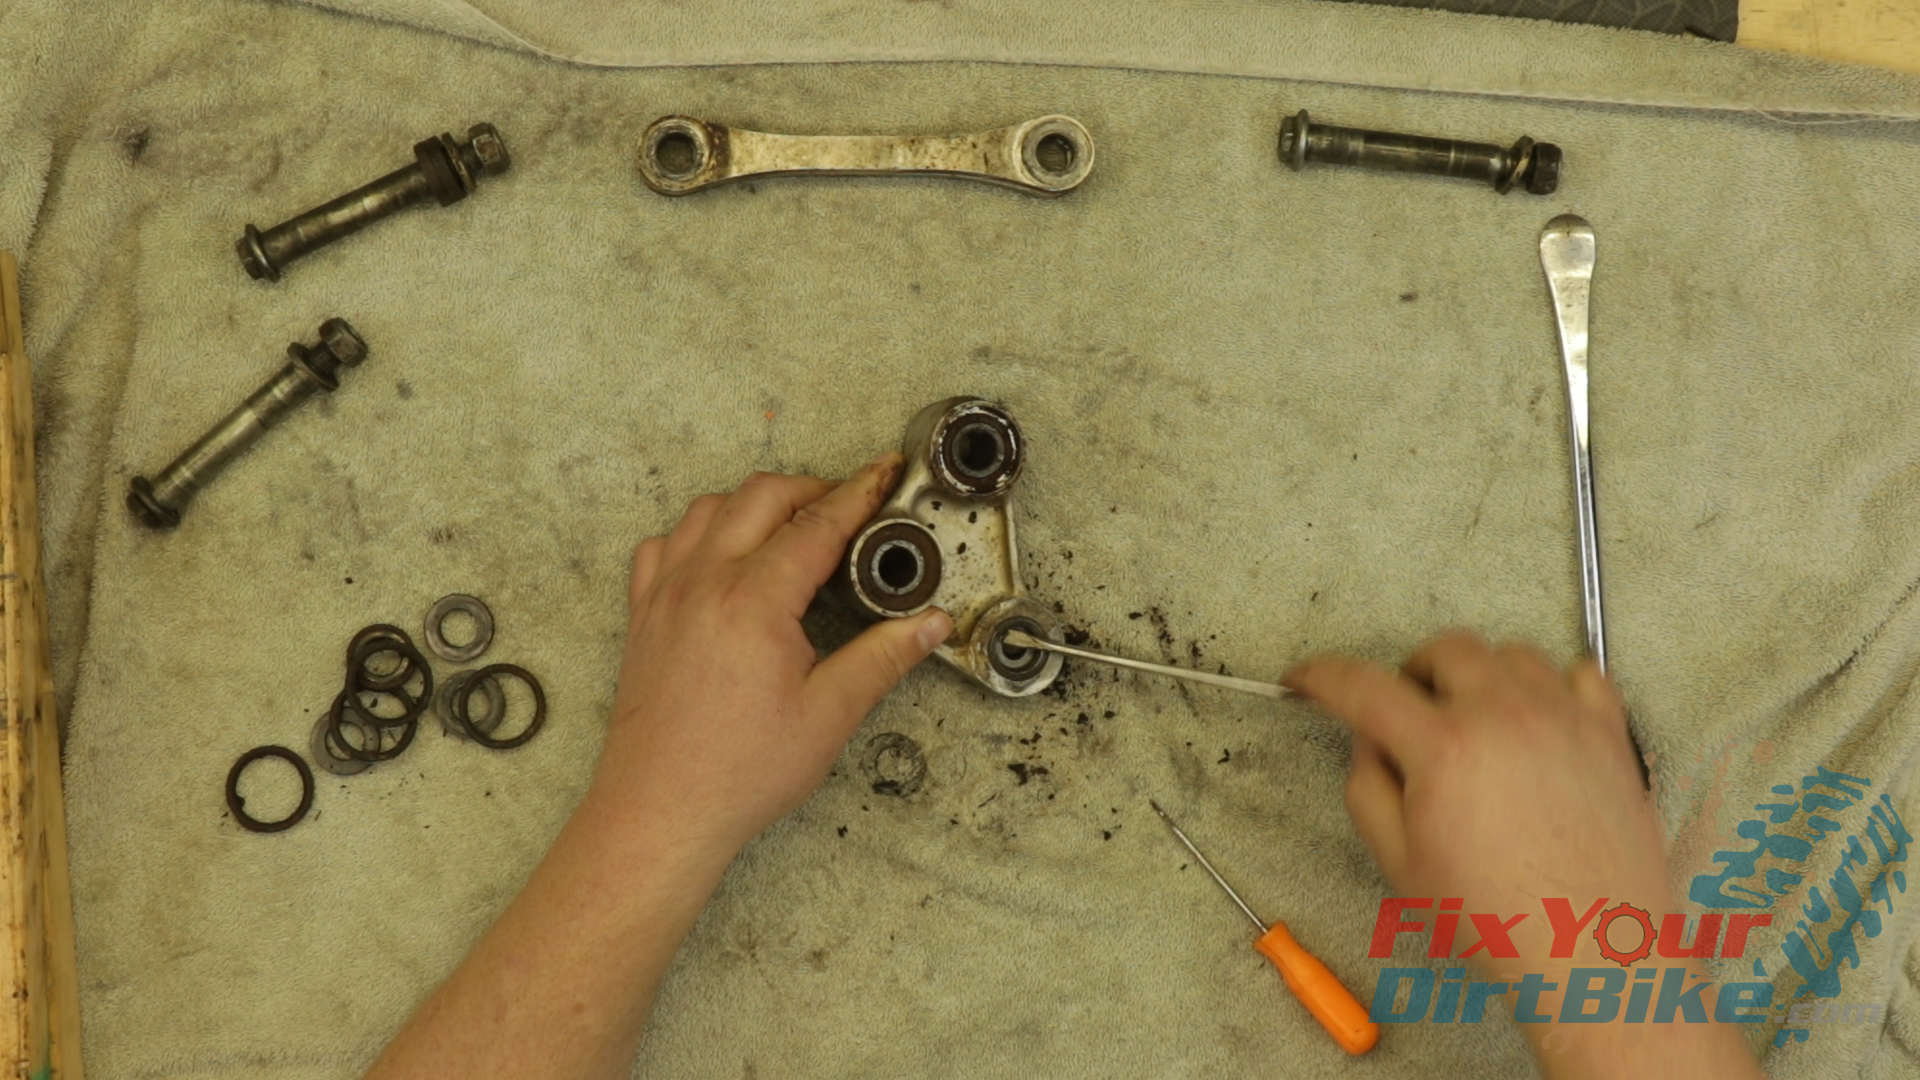
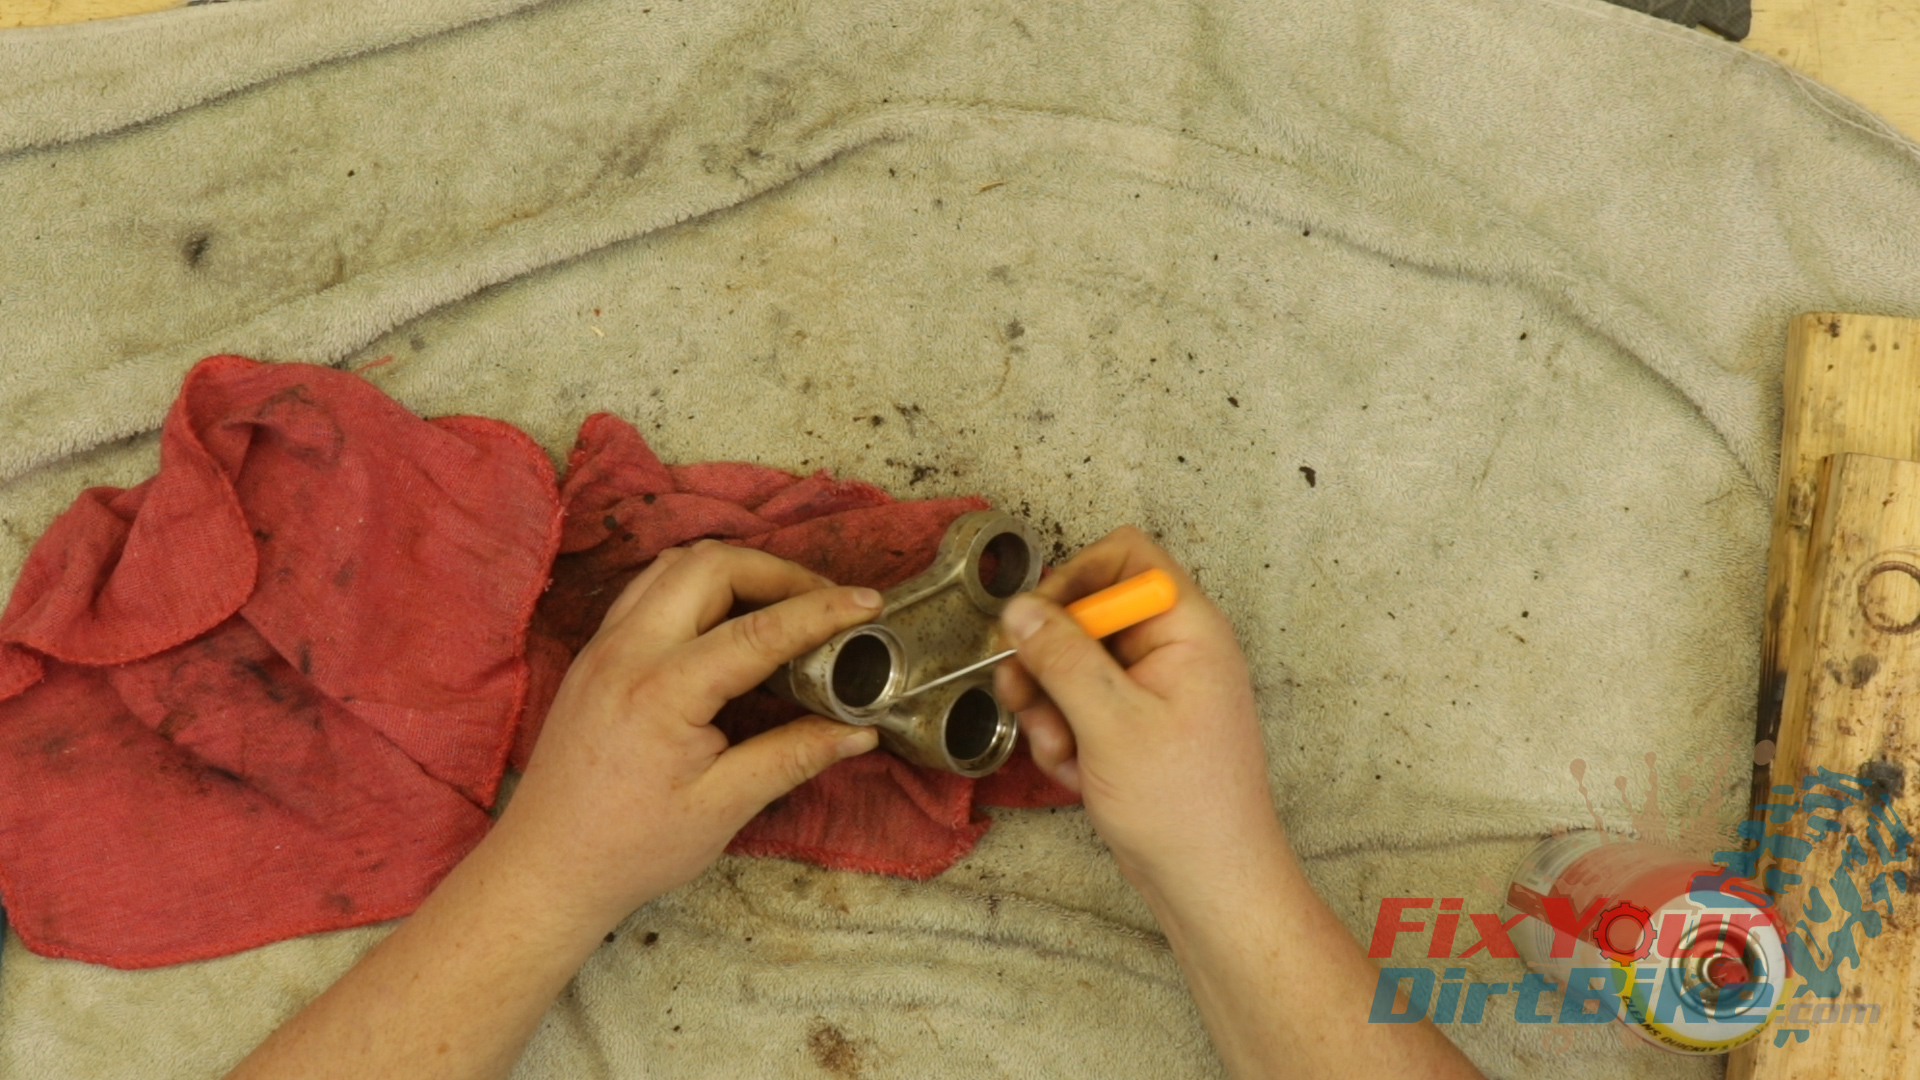
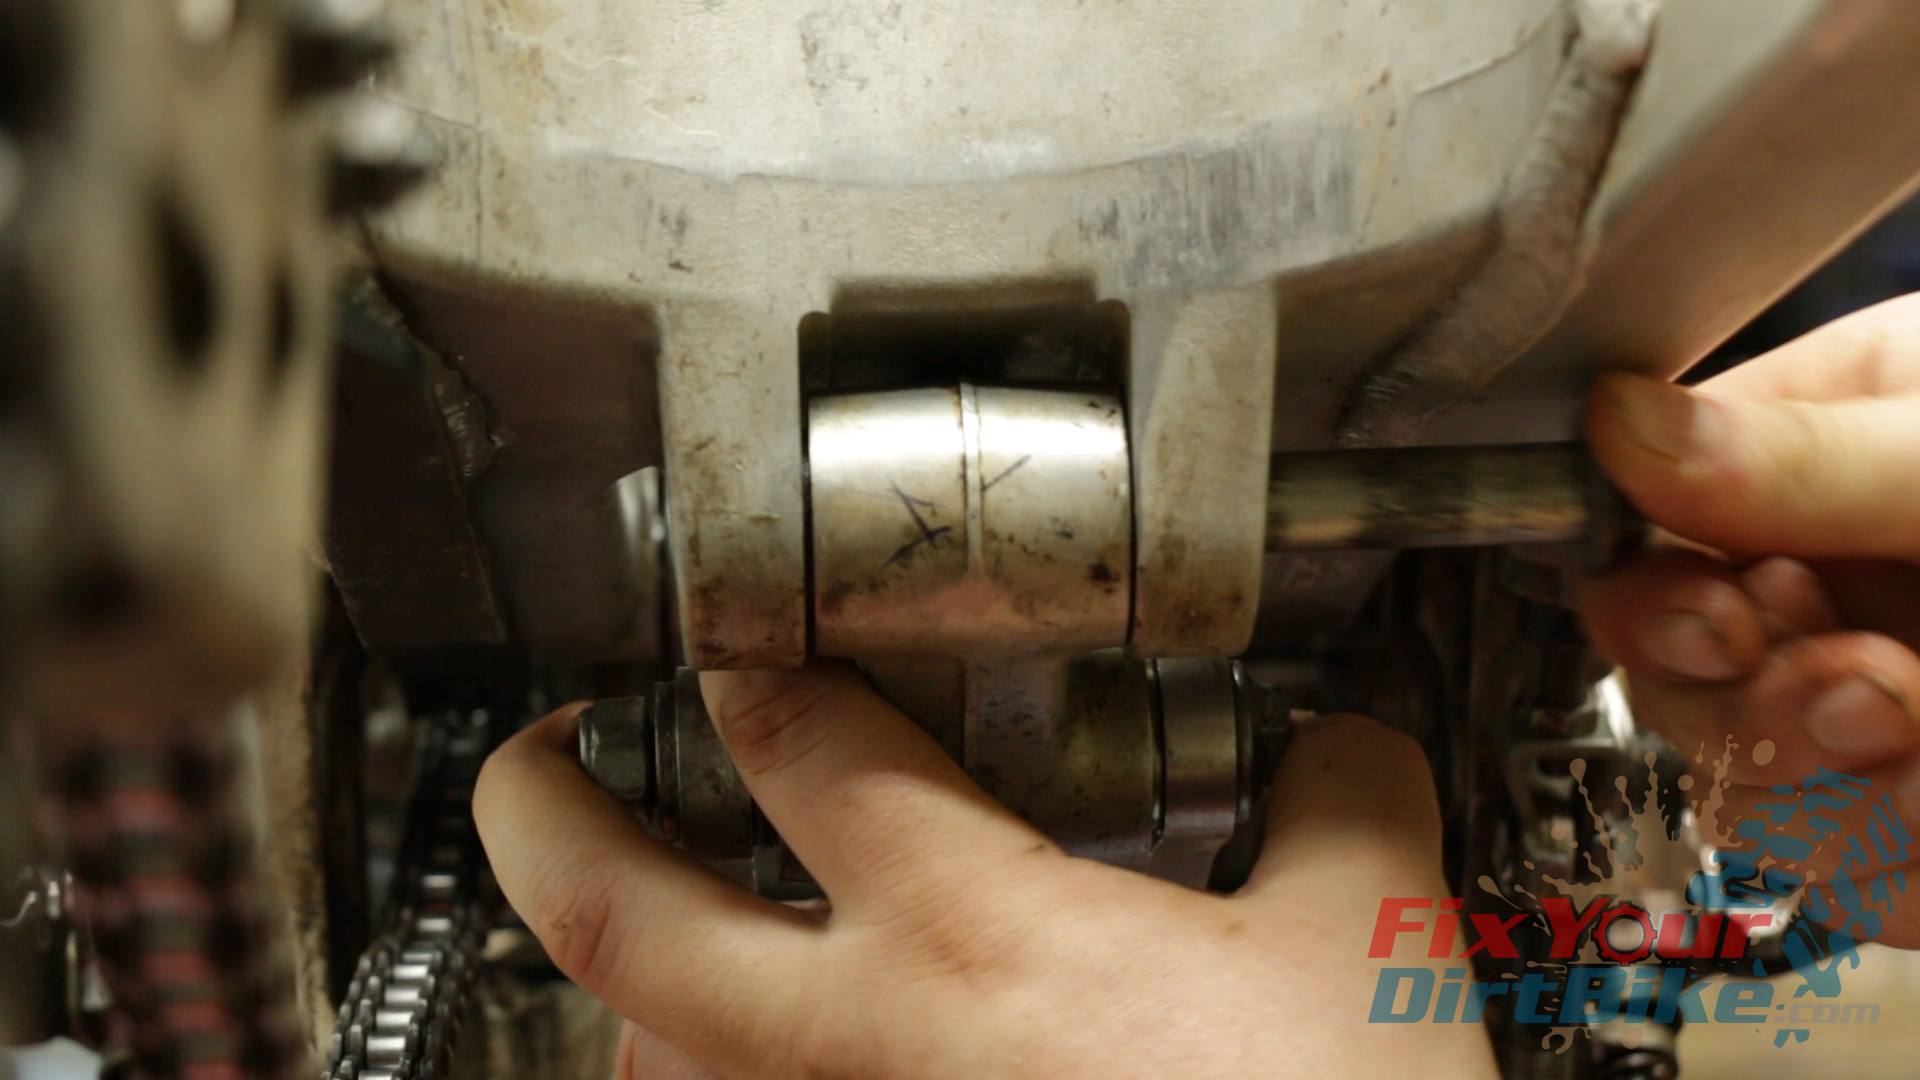
Remove the side collars and seals, followed by the inner bearing races. The inner races should slide out, but they won’t, so find a socket that fits over the inner race only and drive it out.
Remove the old needles.
Removing the outer bearing race from the shock linkage requires a blind bearing puller. If you don’t have one, don’t bother buying one because they won’t budge anyway if they are contaminated.
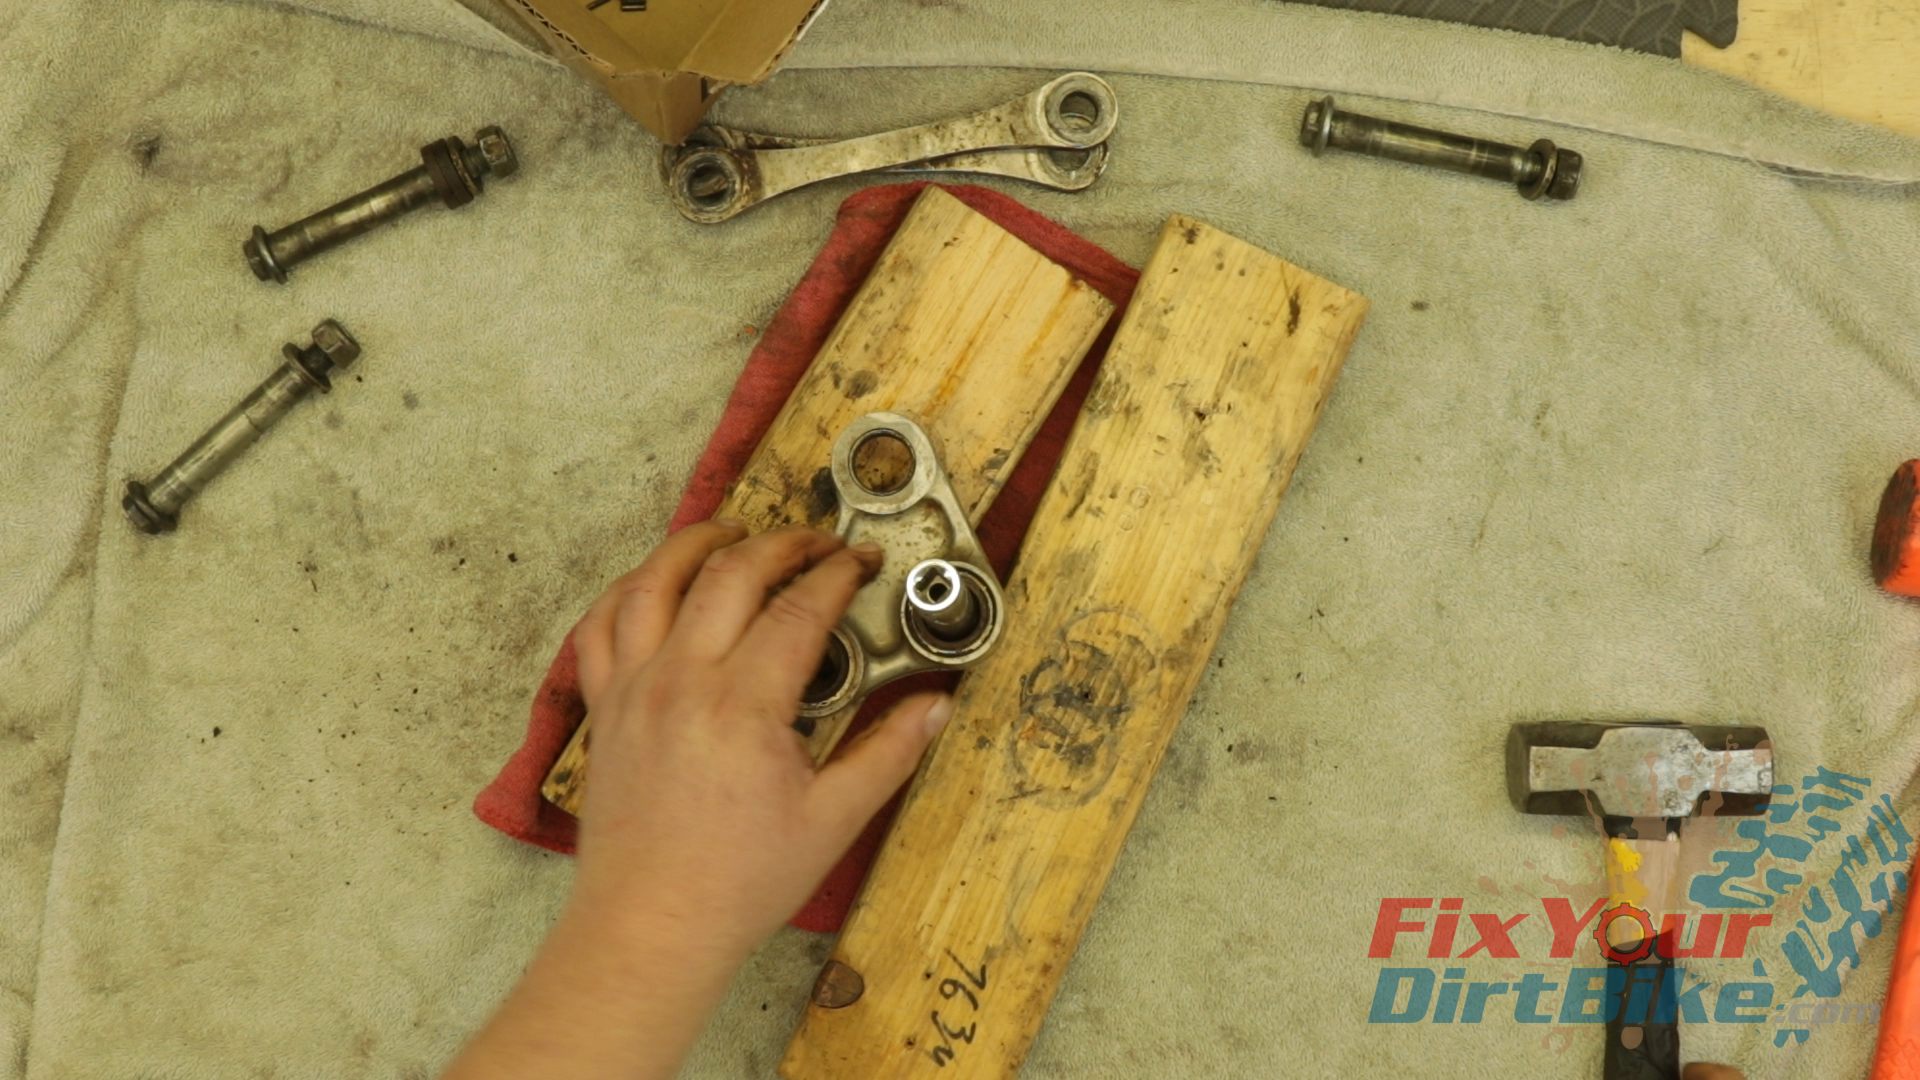
That’s why I went straight to the heat and beat method to remove them.
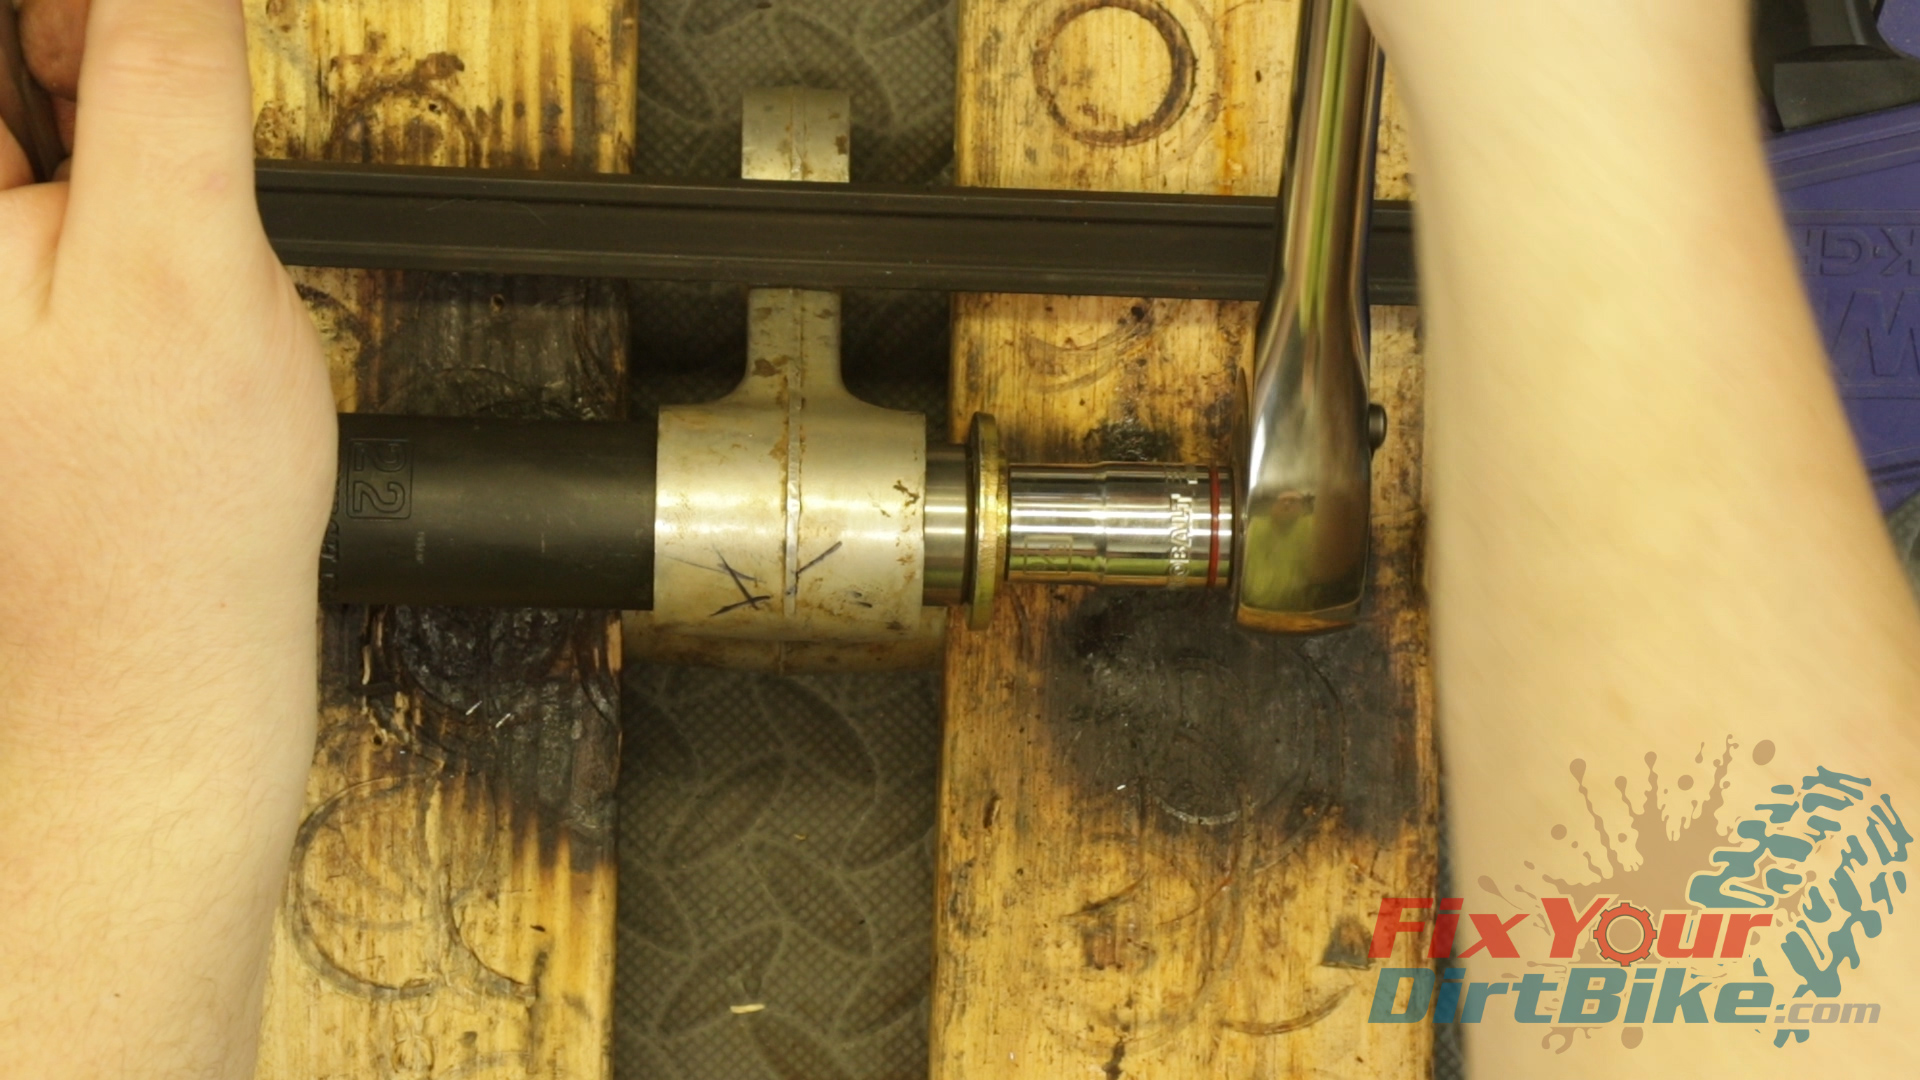
The outer bearing race consists of two separate races mounted on each side of the bore, with a gap in the middle. This means you need to heat and drive one side in slightly to break it free, then drive the other side into the bore, to drive both bearings out the same direction.
You may need to get creative with your sockets and clamps.
On the 1997 model year, the link bearings are mounted in the frame, and the 1998-2001 models have bearings mounted in the link, which makes more sense.
Remove the side collars and seals, followed by the inner bearing races. The inner races should slide out, but they won’t, so find a socket that fits over the inner race only and drive it out.Removing the outer bearing race from the shock linkage requires a blind bearing puller. If you don’t have one, don’t bother buying one because they won’t budge anyway if they are contaminated.
You may need to get creative with your sockets and clamps.If you have a 1997 model, you will need to take extra care when you heat and beat the frame bearings because the angle of attack is not square.
Clean your linkage parts as thoroughly as you can and inspect for damage.
If the link is damaged, it will need to be replaced. If the bearing bores are damaged, do what you can to smooth the surface. Due to the bearings used in the linkage, you should be fine unless the bores are cracked or broken.
New Shock Linkage Parts
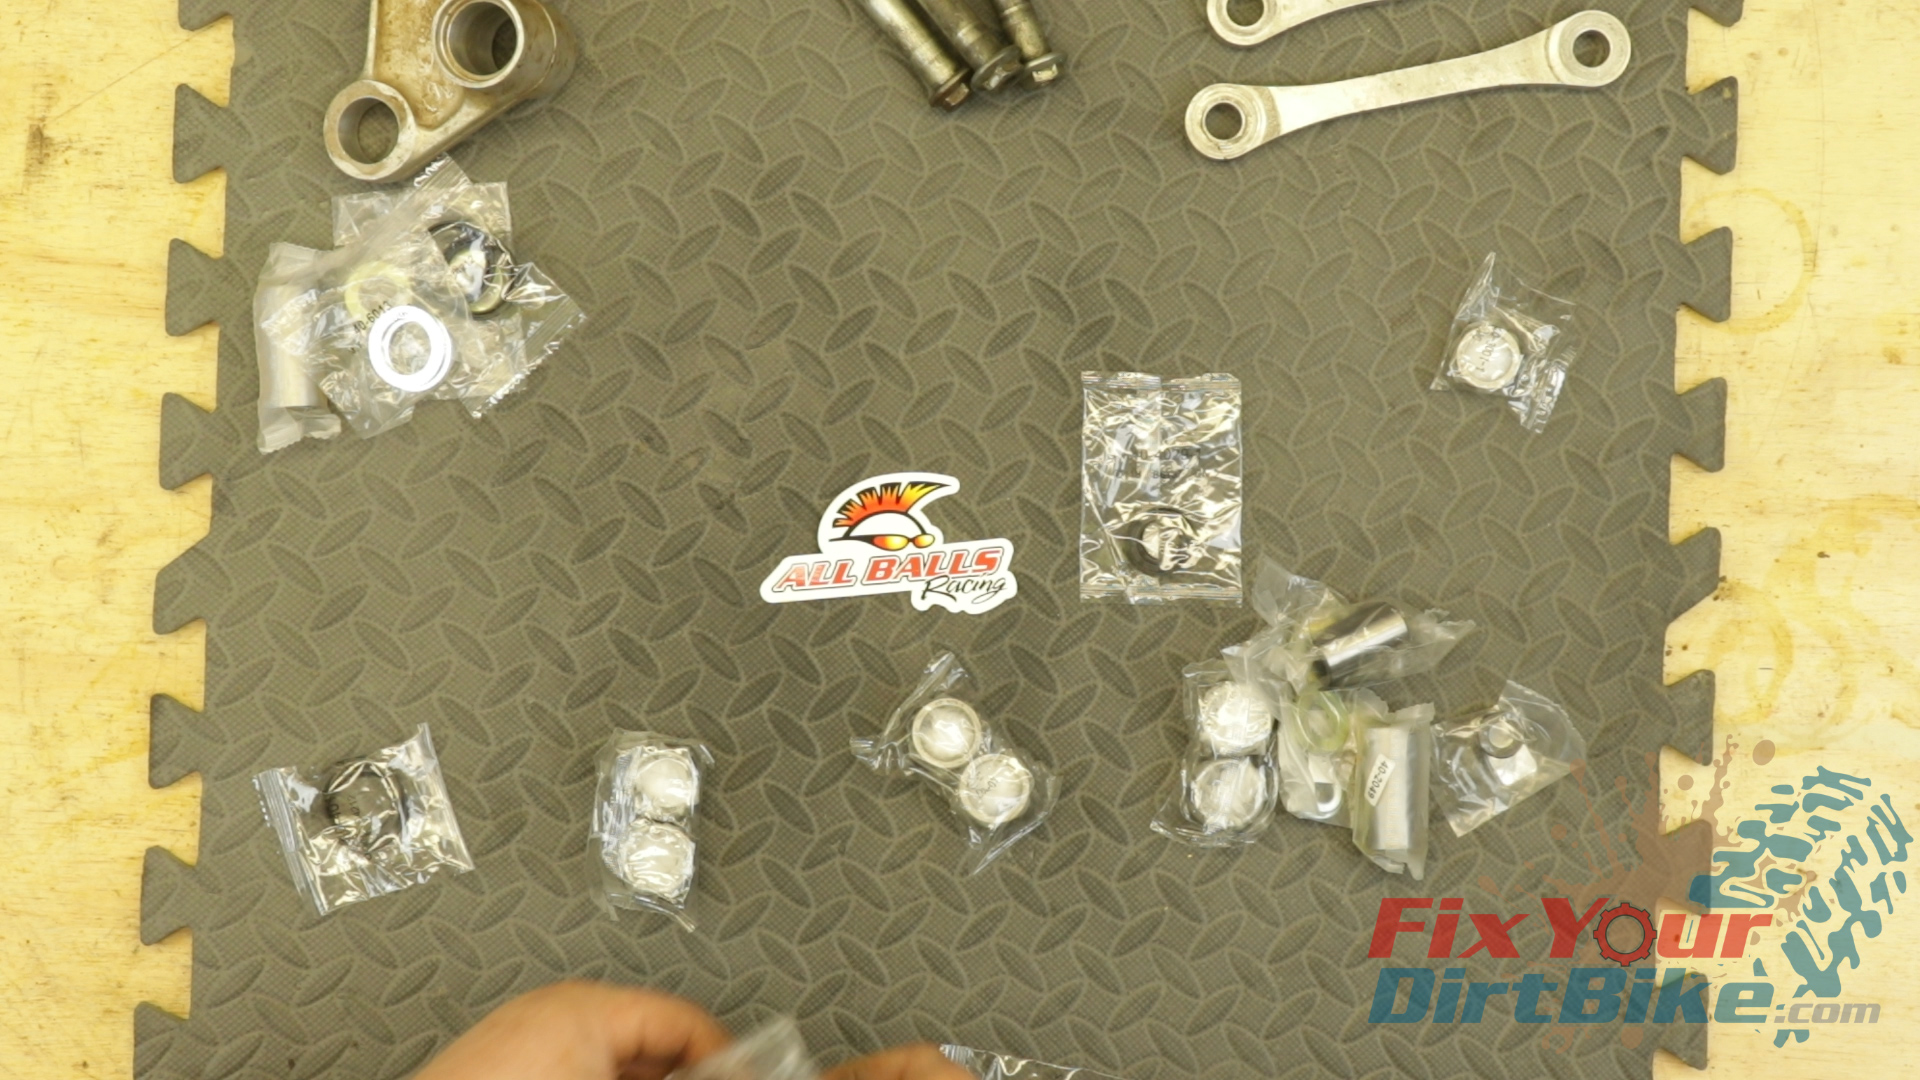
For this service, I am using an All Balls complete bearing kit.
This kit includes all bearings, pivot collars, seals, and washers you need for a full service.
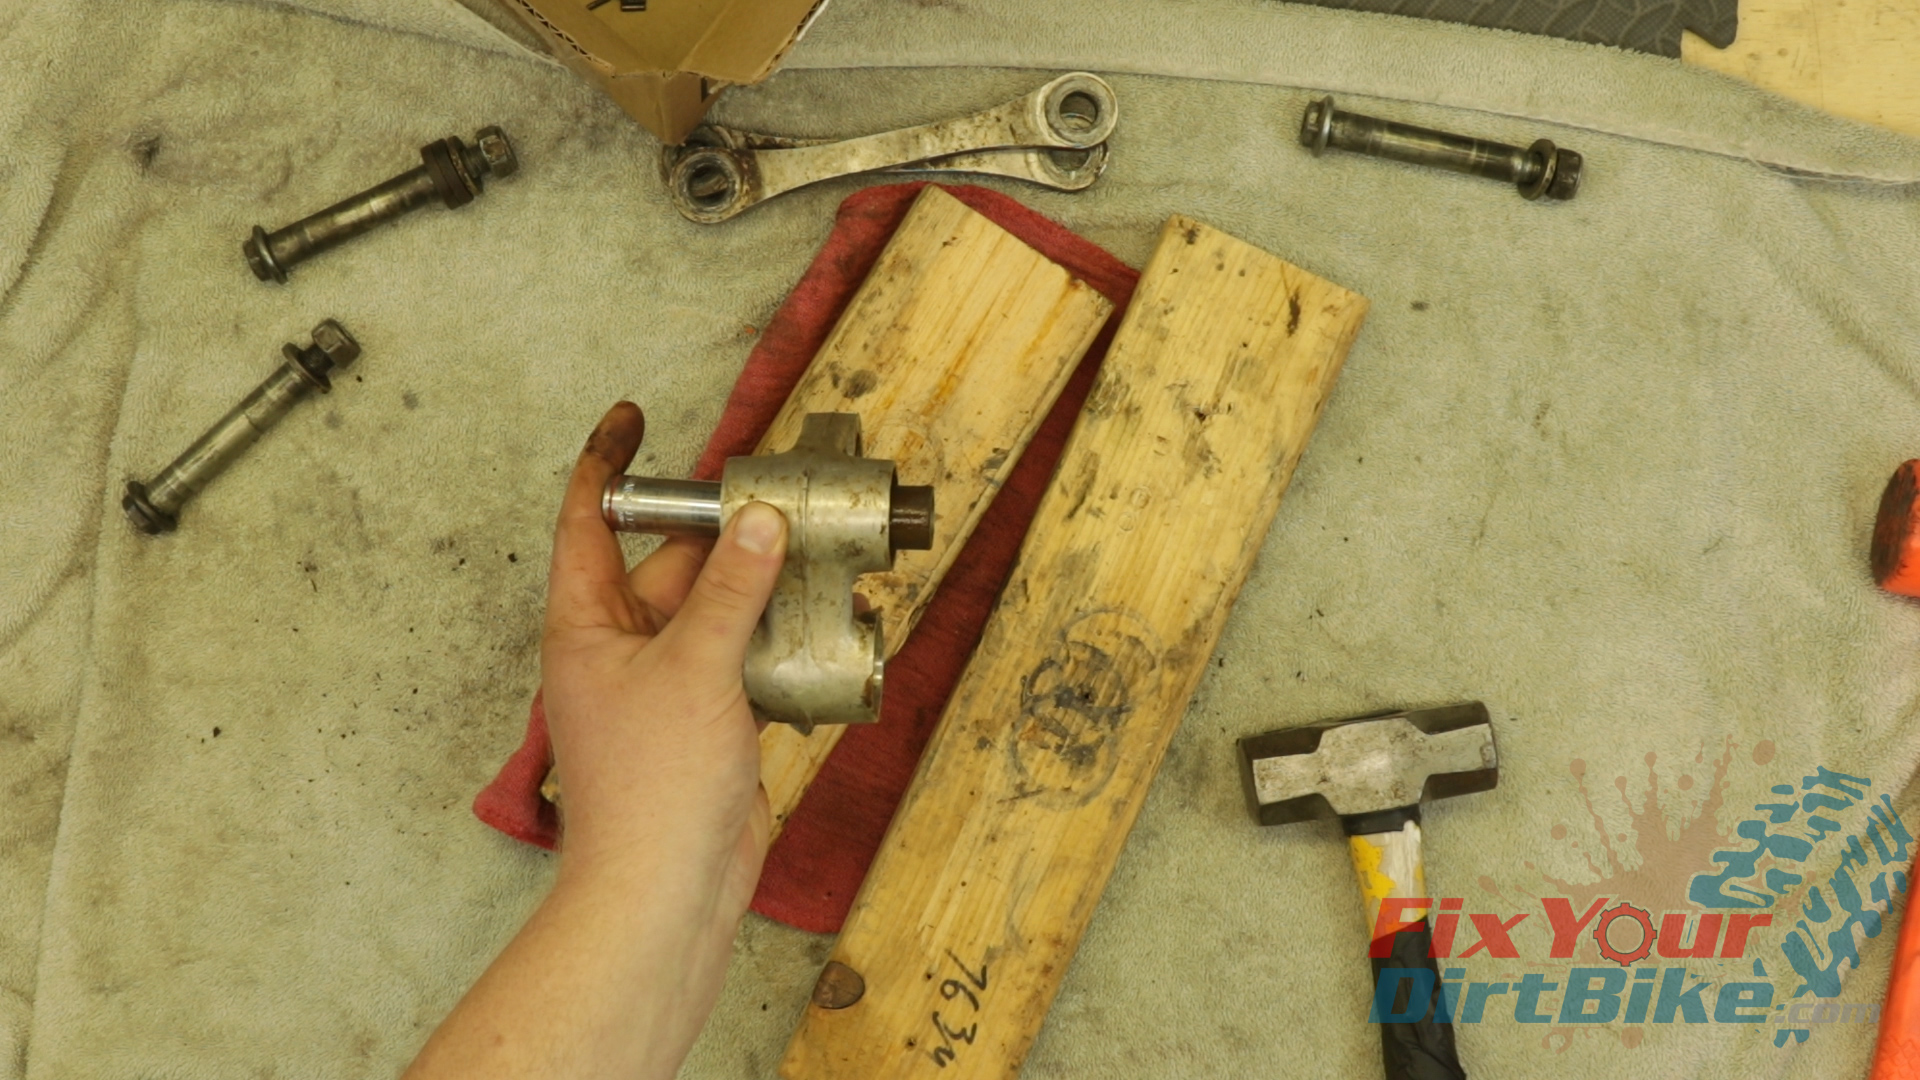
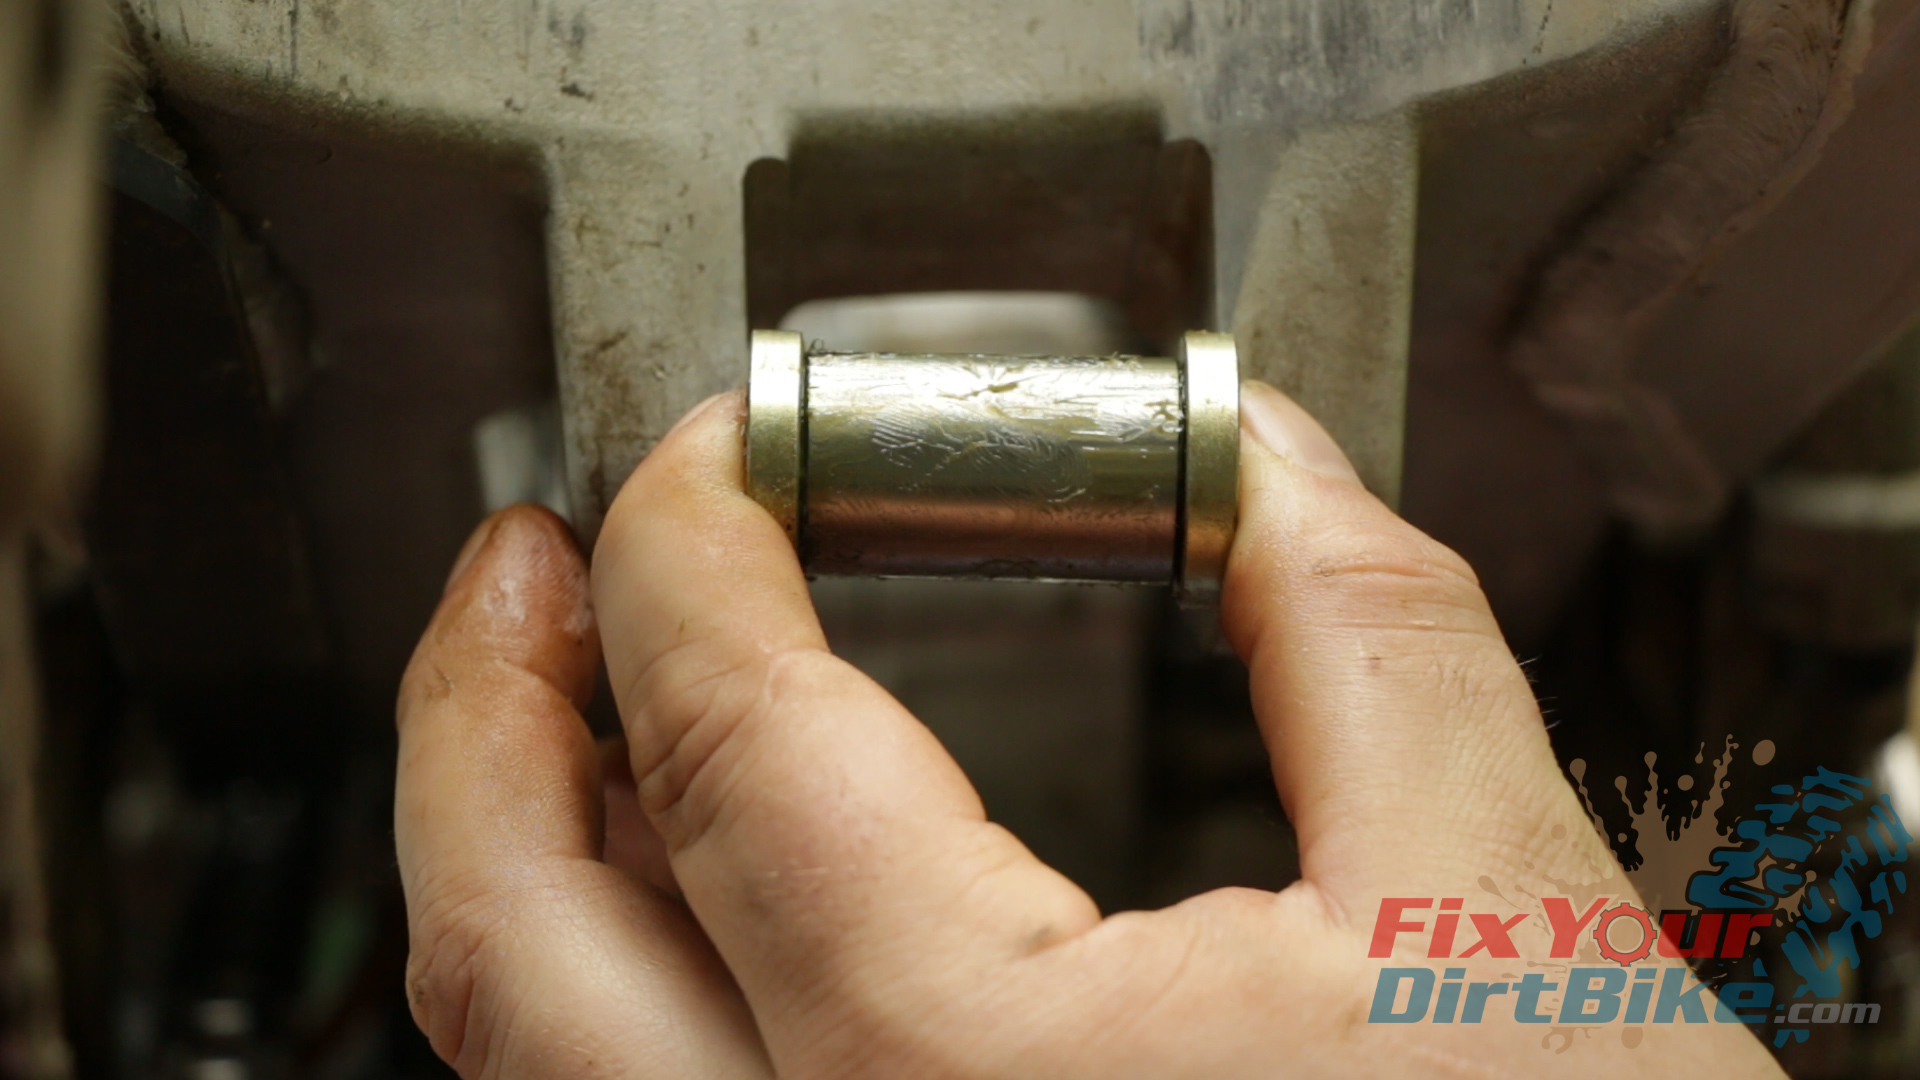
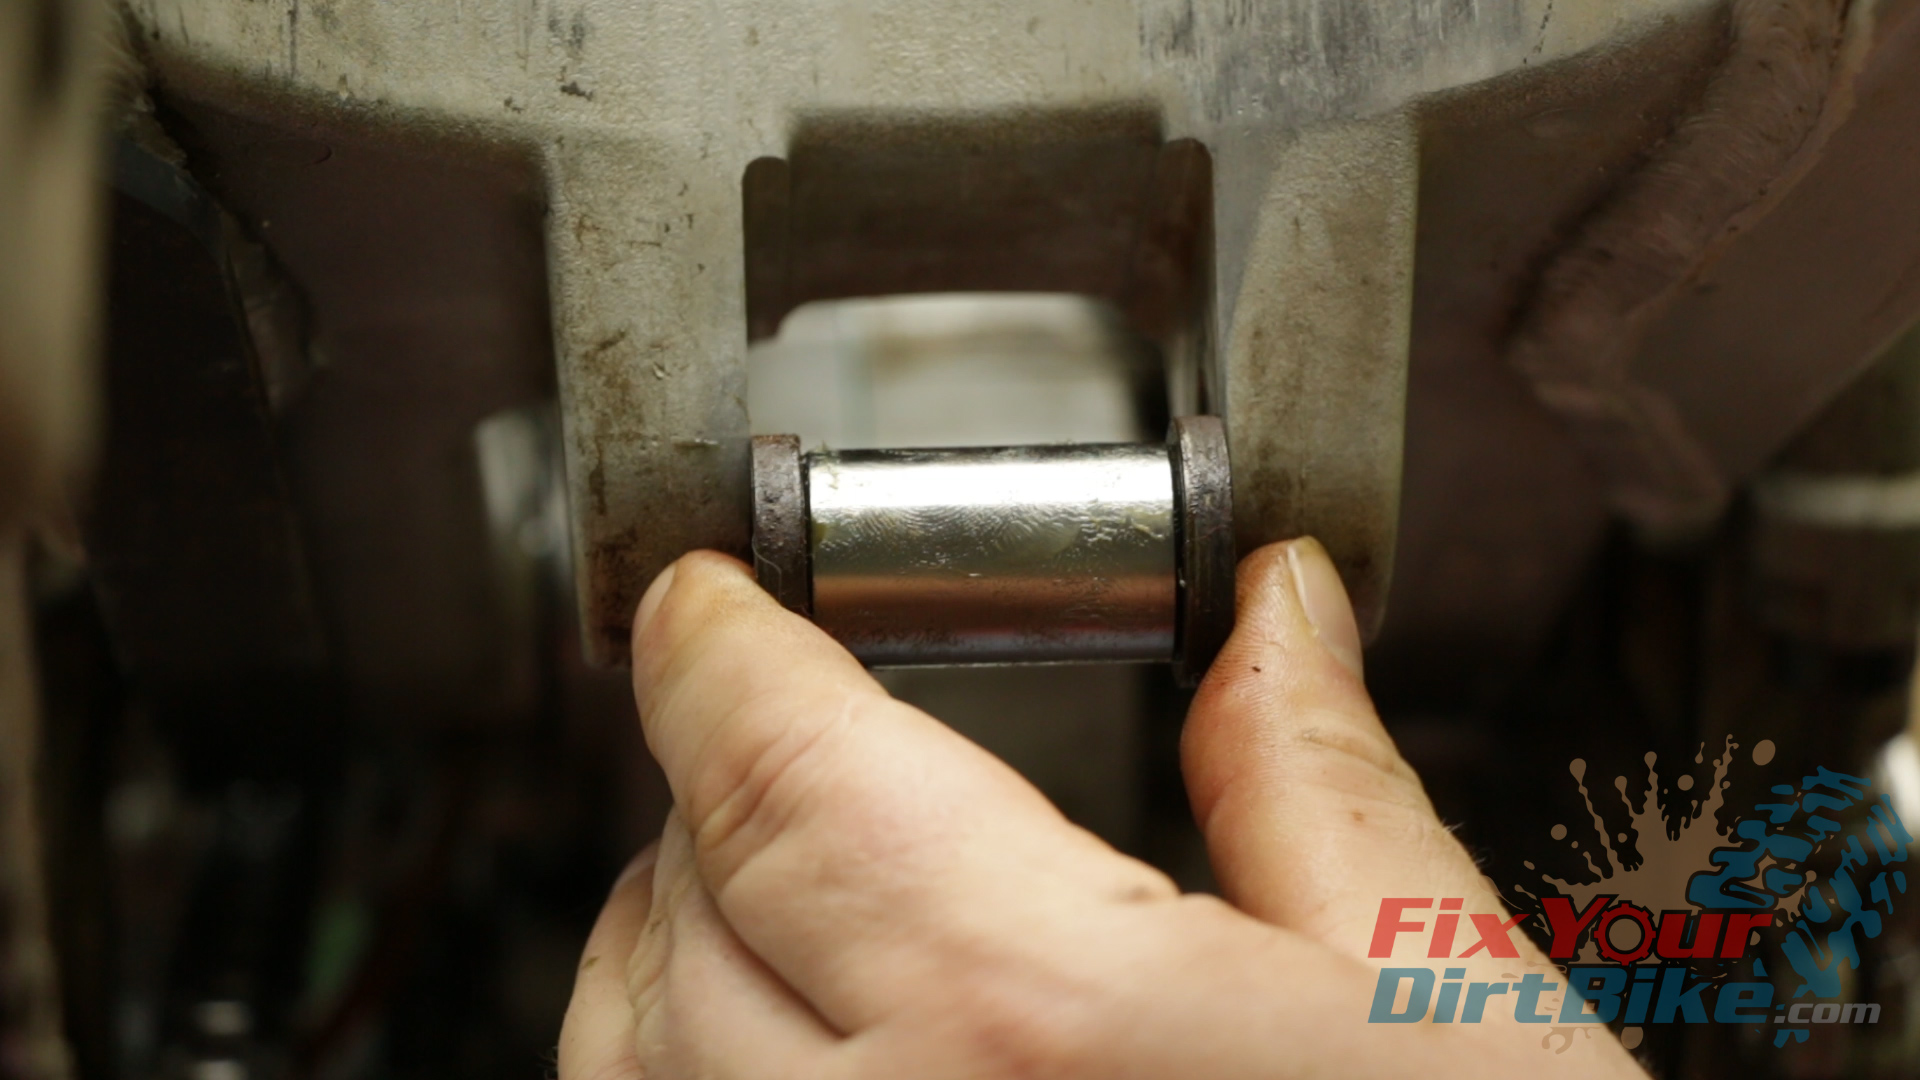
However, when installing the swing arm end of the linkage, I ran into a fitment problem.
The new pivot and side collars were just a little too long to fit between the mounts on the swingarm, so I ended up cleaning and re-using the old side collars.
For this service, I am using an All Balls complete bearing kit.However, when installing the swing arm end of the linkage, I ran into a fitment problem.The new pivot and side collars were just a little too long to fit between the mounts on the swingarm, so I ended up cleaning and re-using the old side collars.
These bearings are designed with a very thin outer race, so if you try to drive them with a hammer and socket, the chance of damage is very high.
These bearings need to be pressed in using a hydraulic press or a bolt and nut press. You can buy a proper bearing press kit for $150, or you can make one for $20 out of grade 8 bolts and washers.
Again, you will need to get creative with your sockets and washers.
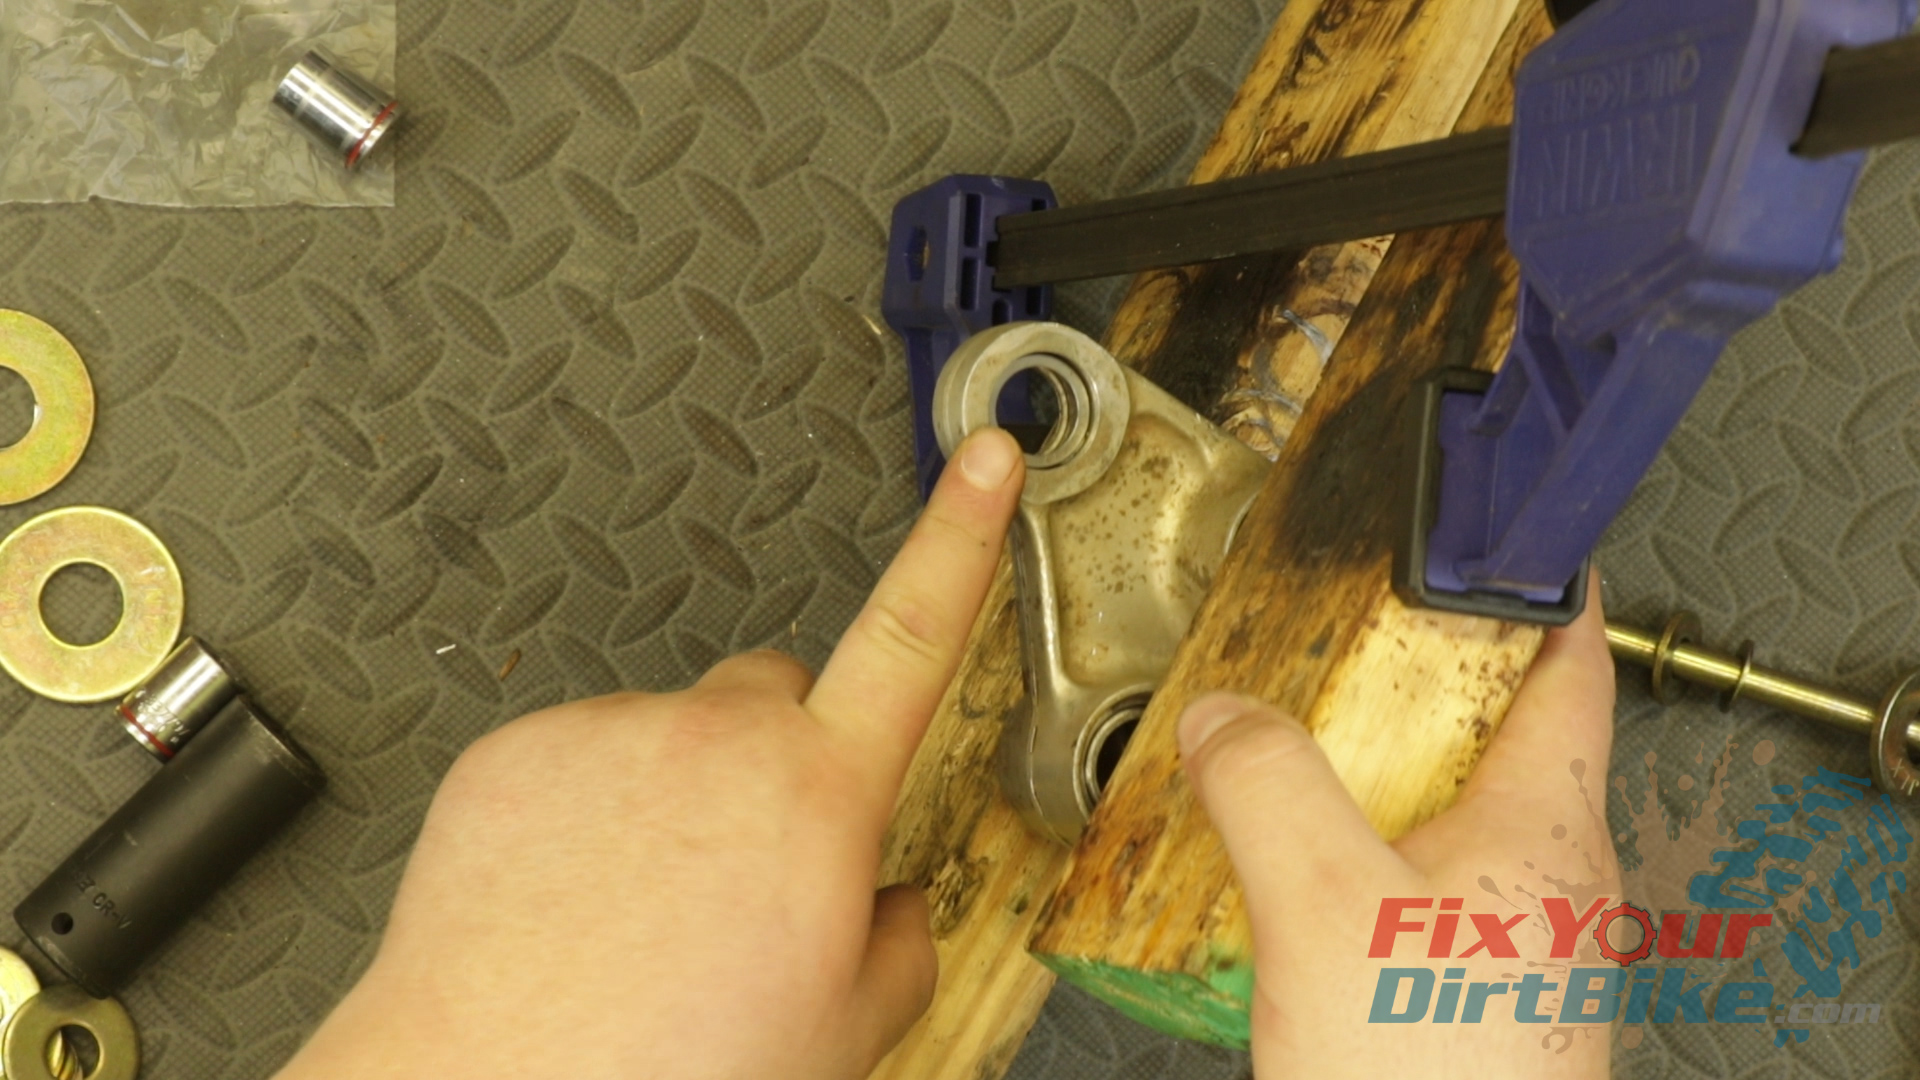
Before you install the outer bearing race, remove the bearing needles, and set them aside.
I like to insert a small socket inside the bearing race to help with alignment, but some aggressive adjustment is usually necessary. The thin outer race is very forgiving so that hammer adjustments won’t hurt it, just don’t go crazy.
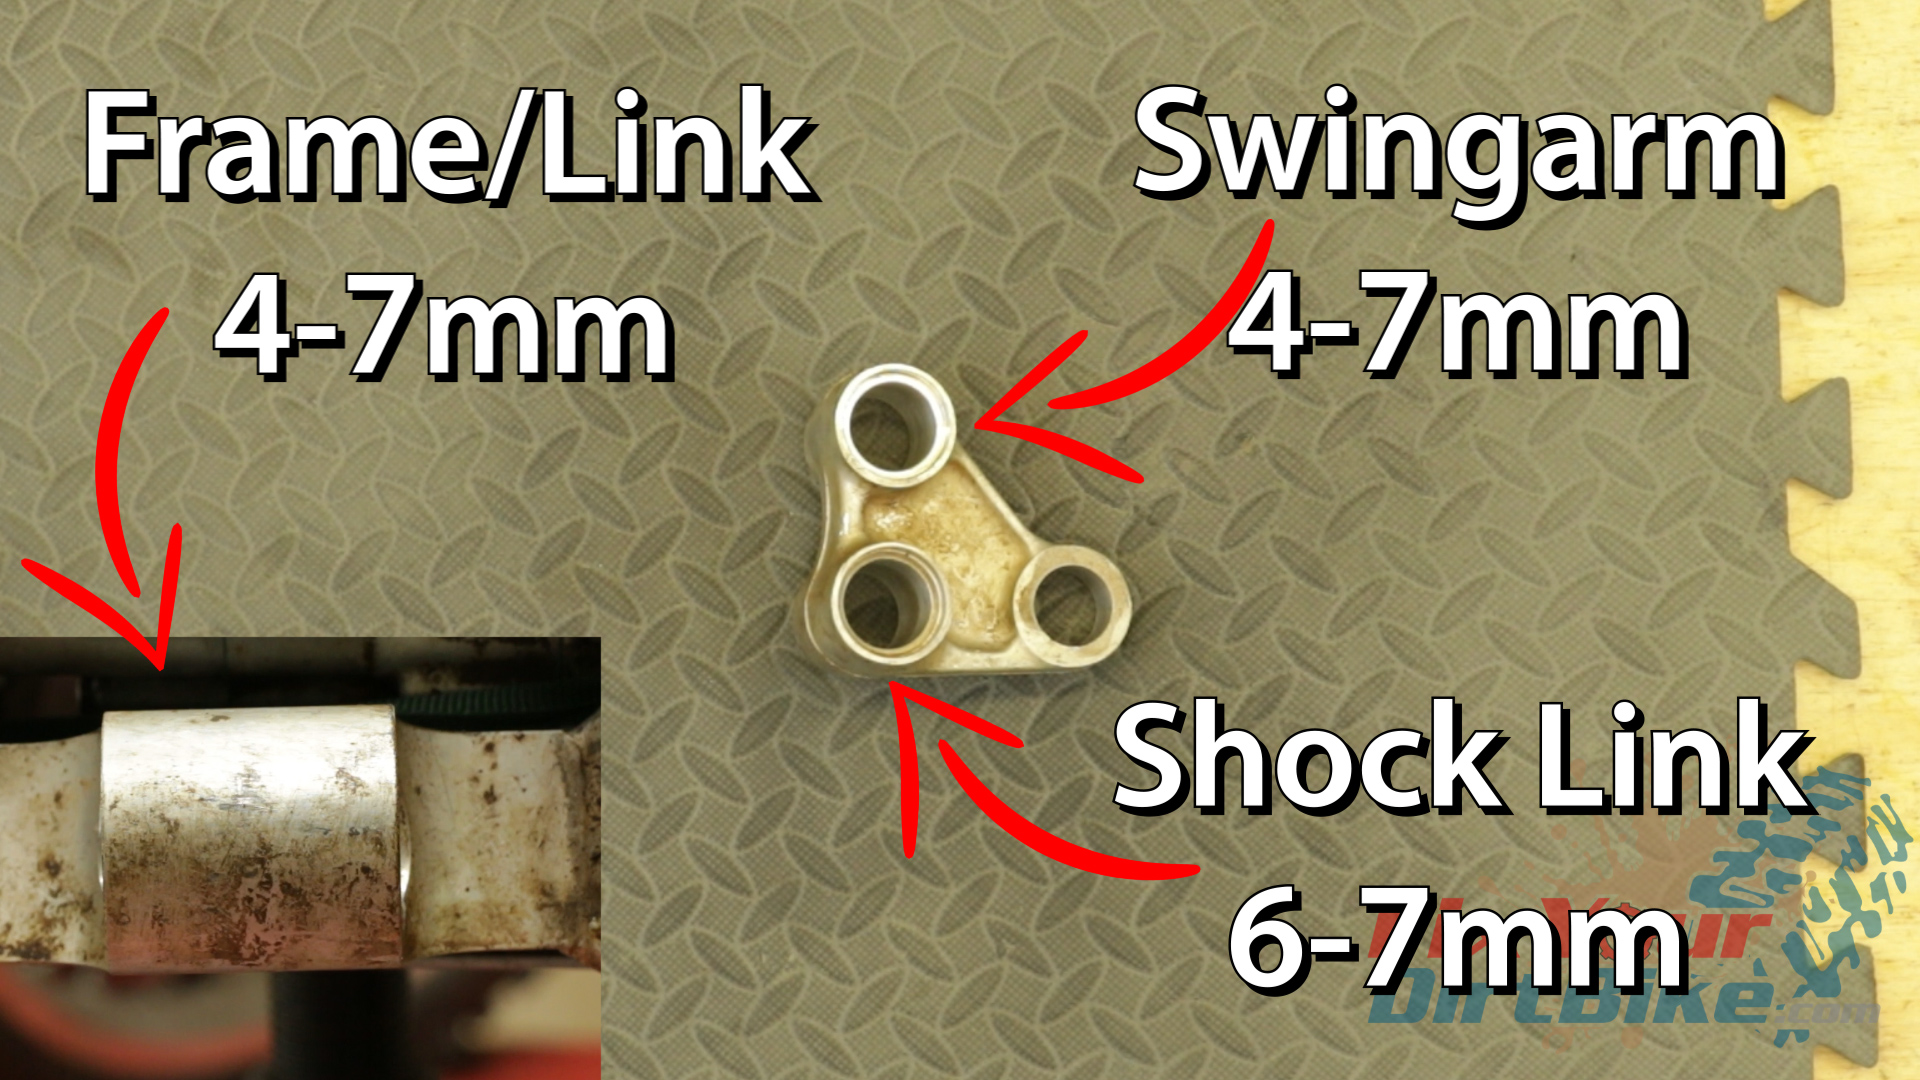
The bearings in the swingarm bore, in the frame on 97s, and the shock link on 98 to 02s need to be driven into the bore 4 to 7 mm.
Press the shock link bearing into the bore 6 to 7 mm.
The shock absorber mount is the one small bearing and needs to be centered in the bore.
Press the outer race into the shock linkage like the others, then carefully drive or press the race to the center, measuring as you go.
Before you install the outer bearing race, remove the bearing needles, and set them aside.
The bearings in the swingarm bore, in the frame on 97s, and the shock link on 98 to 02s need to be driven into the bore 4 to 7 mm.The shock absorber mount is the one small bearing and needs to be centered in the bore.
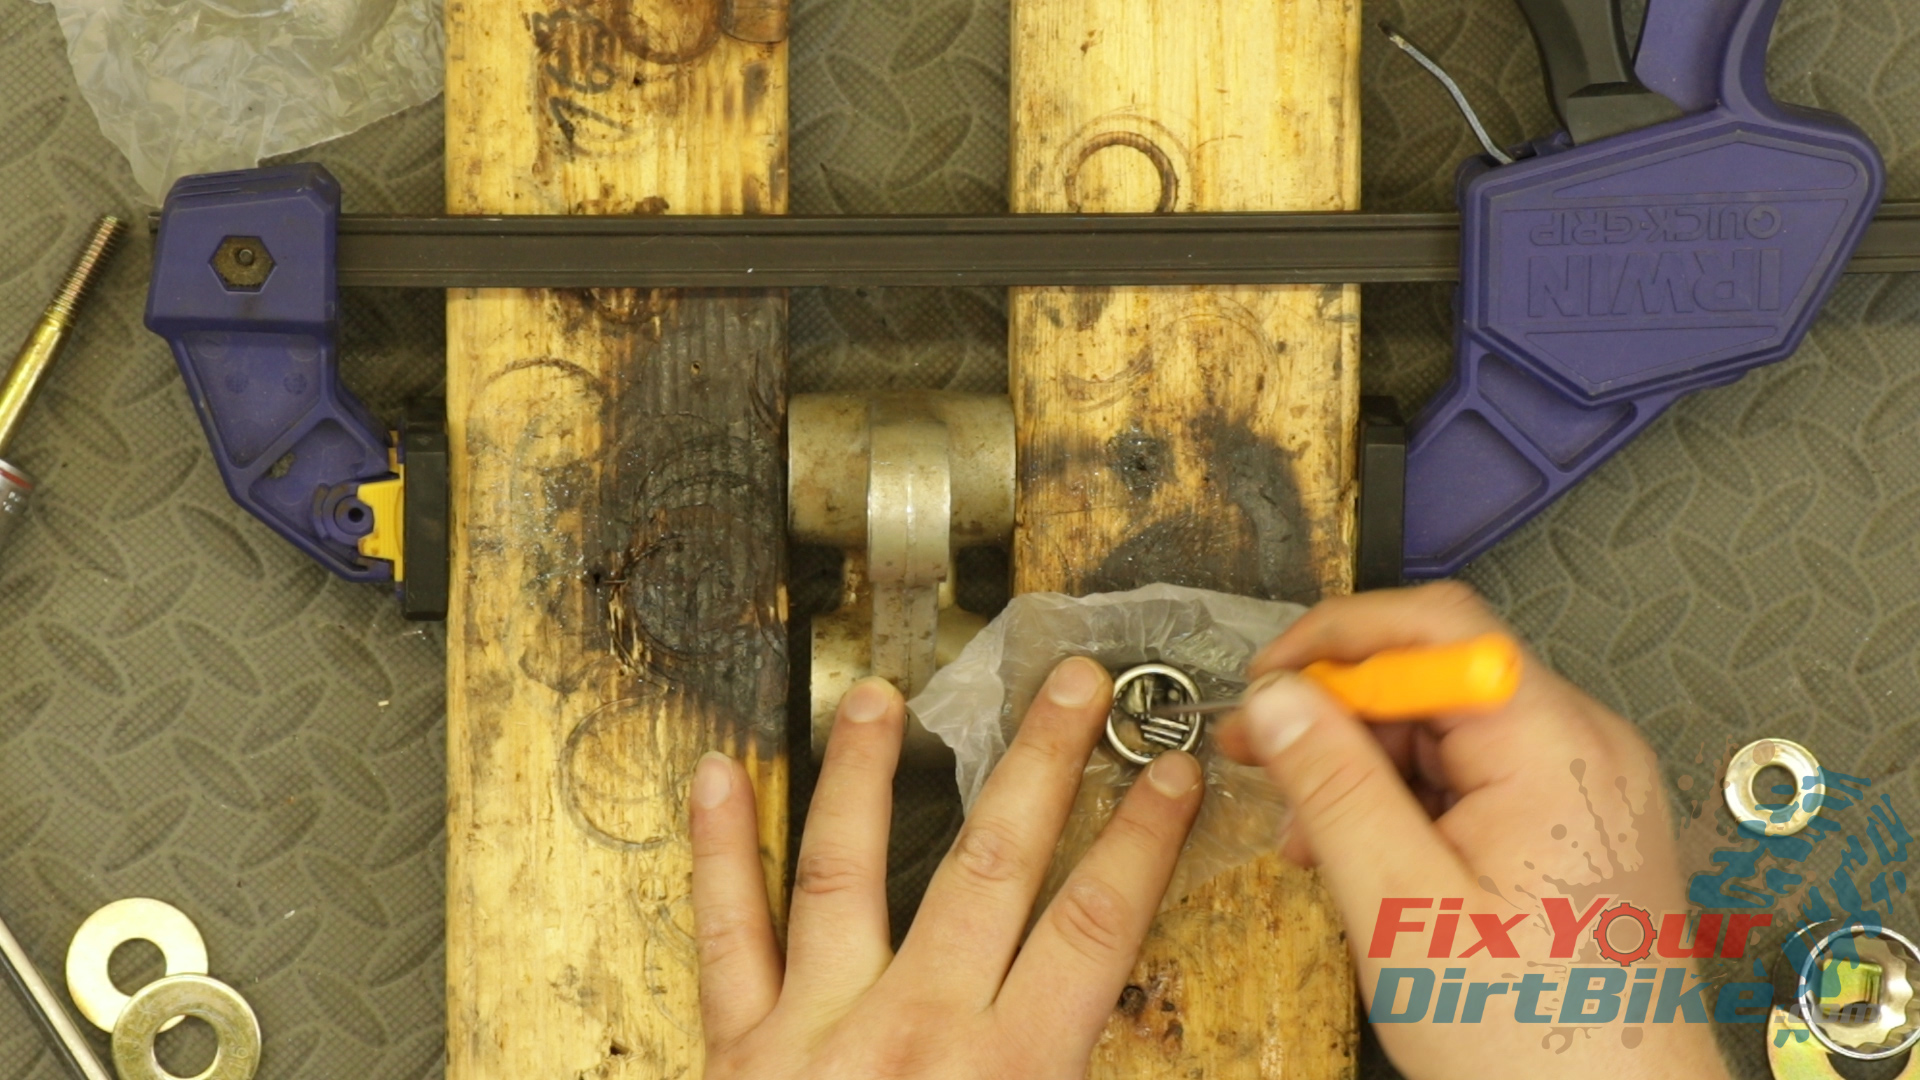
Bearing Needles
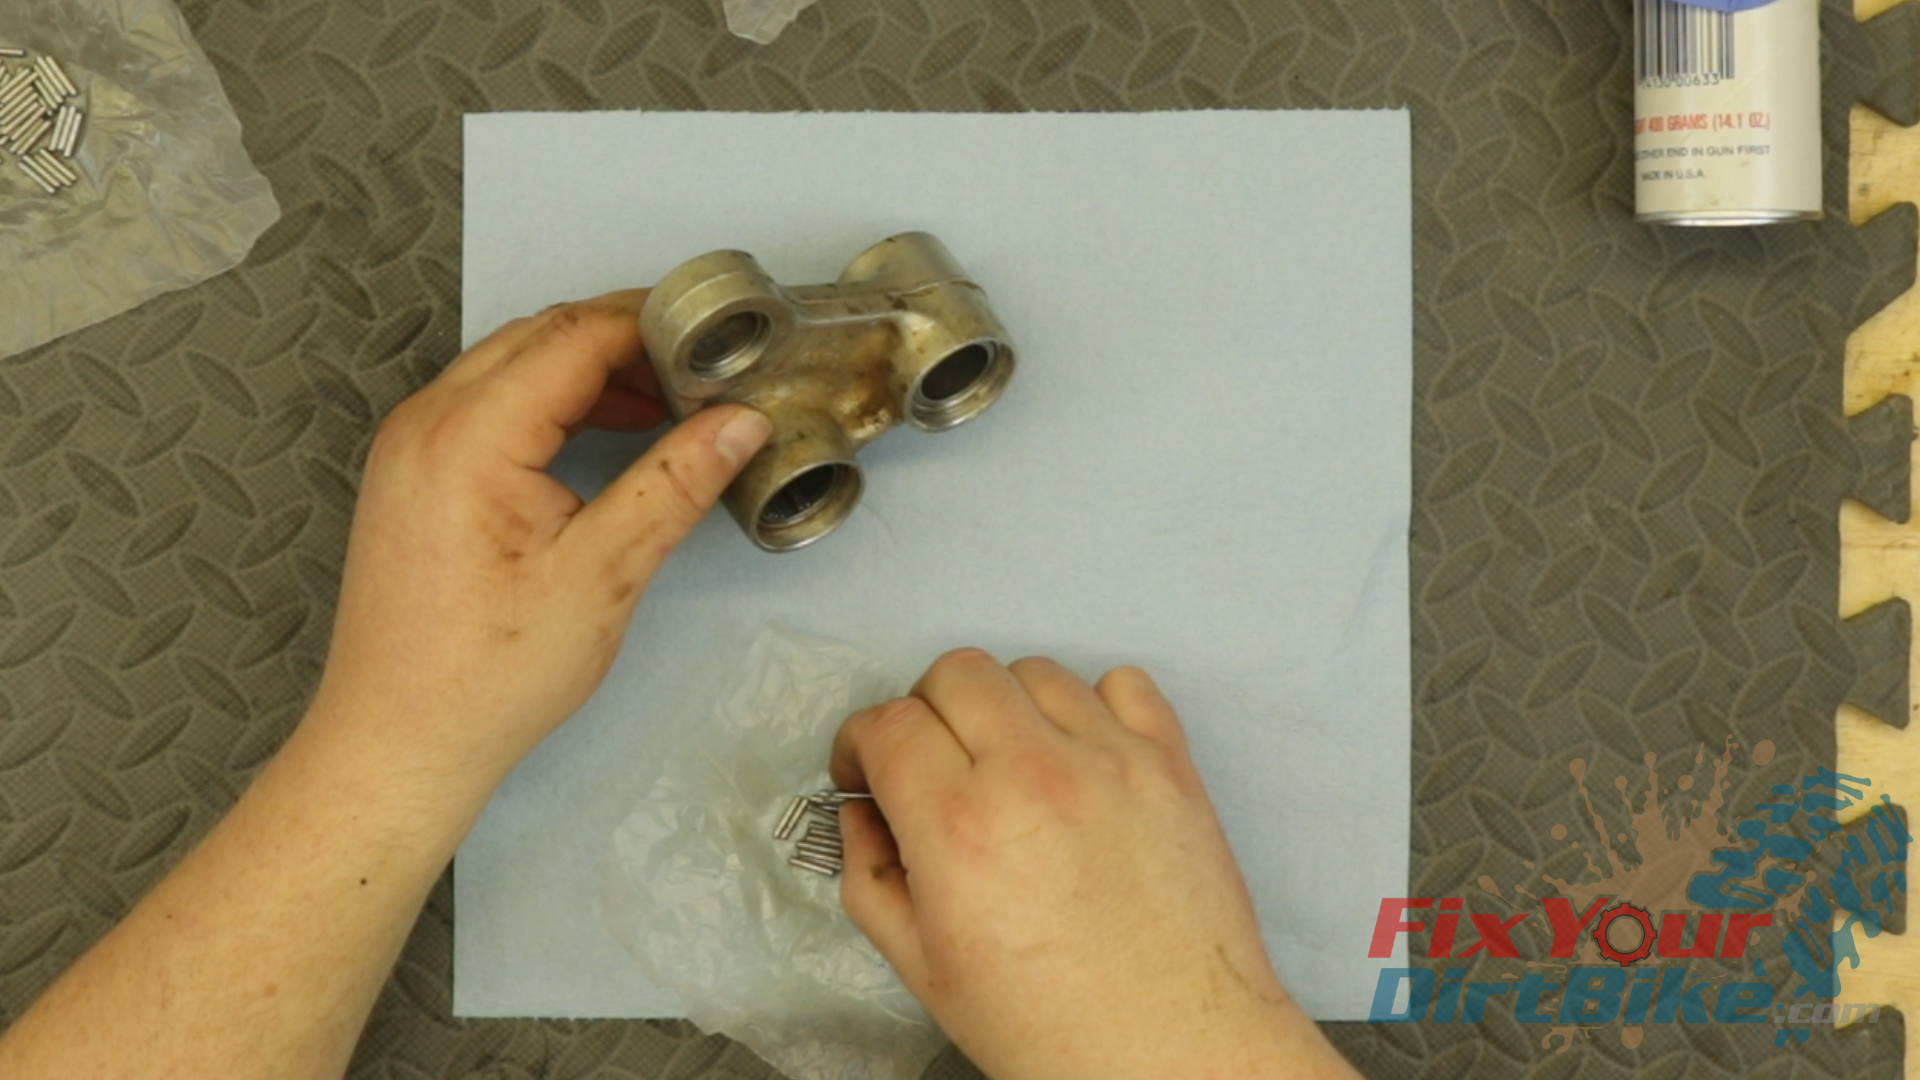
Carefully install the needles in the bearing race. They should be coated in a light layer of grease from the factory, so they stick together in the bore. If your needles aren’t sticky enough, some white lithium grease will do the trick.
Your needles should sit evenly with no gaps.
With one side done, install the inner pivot collar to keep them in place as you do the opposite side.
With both sides assembled and the pivot collar in place, secure the assembly with a zip tie.
Grease
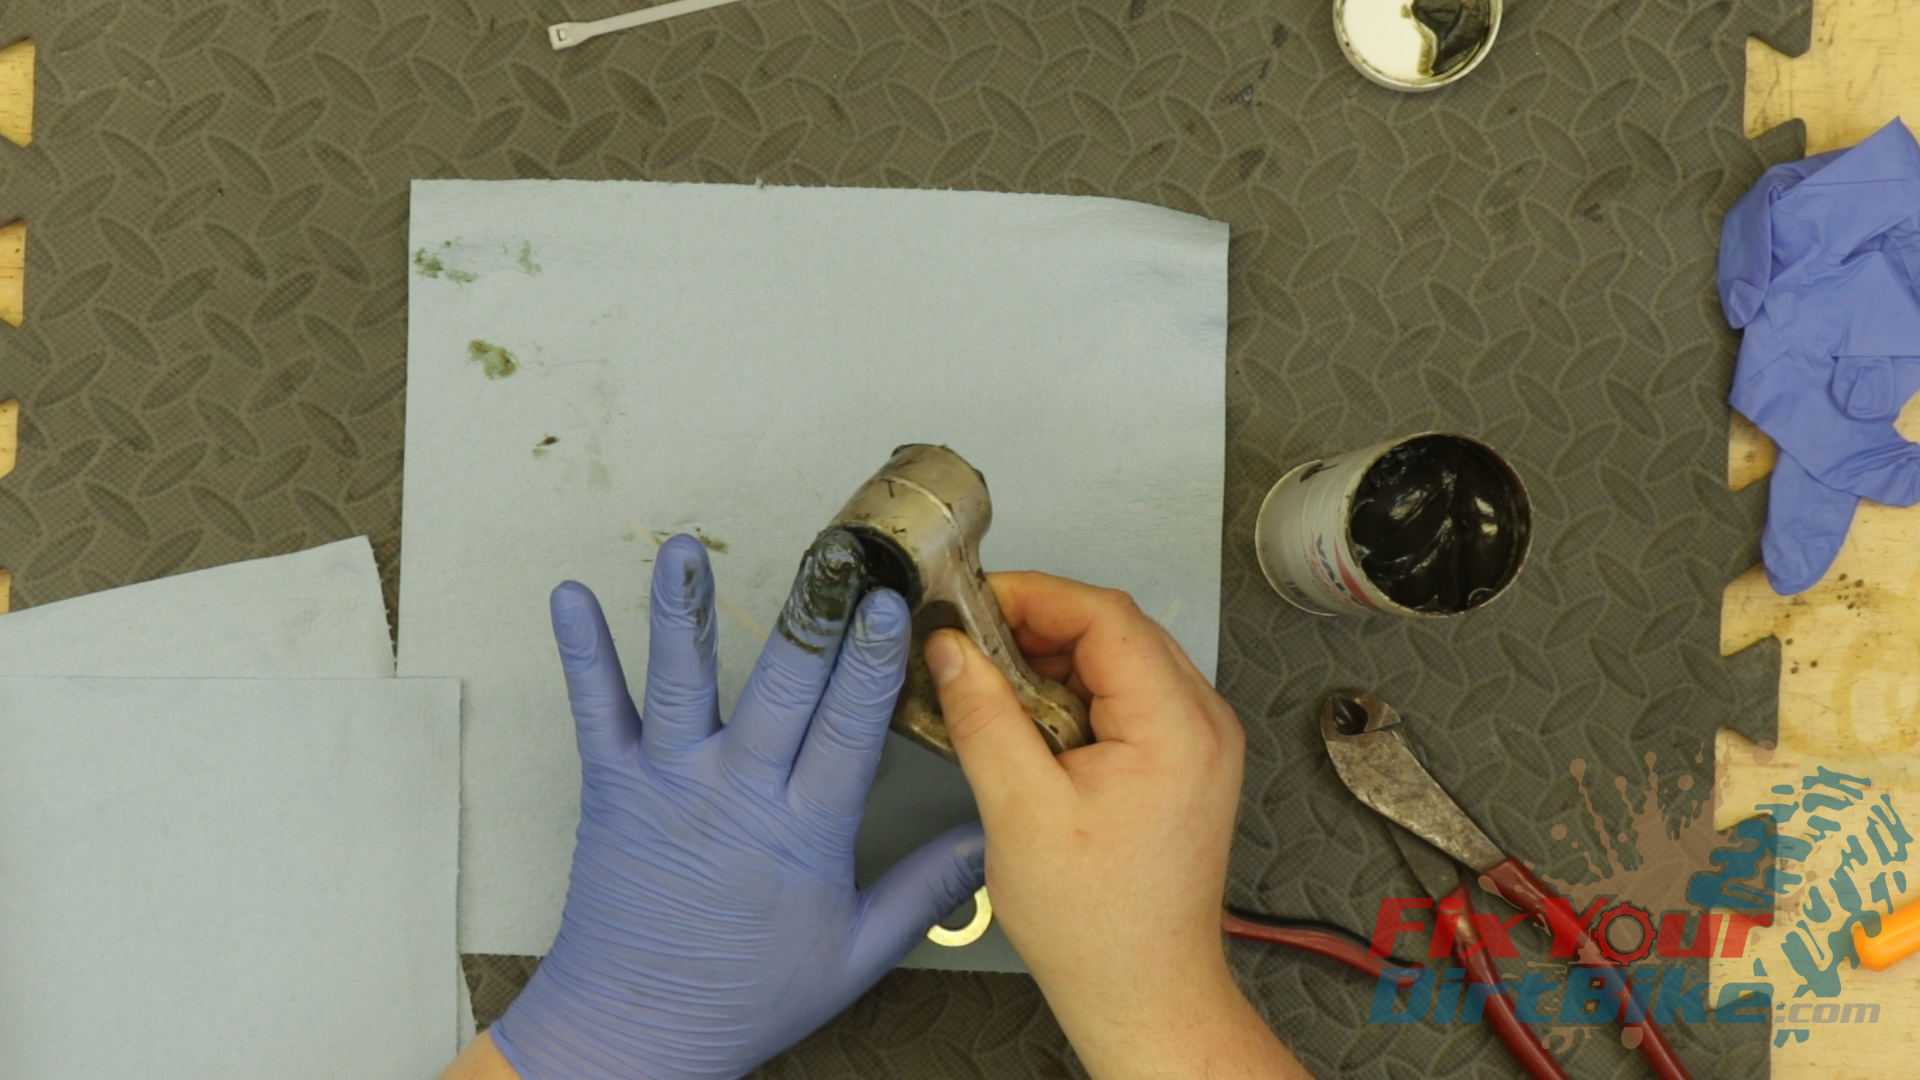
Apply a thick layer of moly based grease to the bearings.
Remember, the shock absorber mount is the only one-piece bearing. There is a gap between the bearings inside swingarm and frame bores of the shock link body, so get as much grease as you can between them.
Work the grease around the bearing into the needles, but be very careful. If you pull away from the bearing like this, the needles will stick to the grease and come out. So work your finger around the needles, then slowly slide your finger out of the bore while keeping the pressure on the needles.
Grease each side, then install the seals with another coating of grease, followed by the pivot collar.
On the widest bore, install the two large washers, followed by the seal and pivot collar.
Secure the bearings with a zip tie again when you are done with each set.
Apply a thick layer of moly based grease to the bearings.Work the grease around the bearing into the needles, but be very careful. If you pull away from the bearing like this, the needles will stick to the grease and come out. So work your finger around the needles, then slowly slide your finger out of the bore while keeping the pressure on the needles.Secure the bearings with a zip tie again when you are done with each set.
When installing the linkage assembly, make sure the shock arm is oriented correctly, with the small end facing forward.
With the link attached to the frame and the arm attached to the link, swing them around to make sure everything is rotating smoothly.
If everything feels smooth, attach the shock arm to the swingarm.
Torque all three bolts to 59 ft-lbs.
Install the lower chain roller, and torque to 106 in-lbs.
When installing the linkage assembly, make sure the shock arm is oriented correctly, with the small end facing forward.Torque all three bolts to 59 ft-lbs.Install the lower chain roller, and torque to 106 in-lbs.
If you have any questions about this shock link service, please let me know in the comments or on social!
Fix Your Dirt Bike might use cookies to improve your experience, but you can always opt-out if you want! Cookie settingsACCEPT
Privacy & Cookies Policy
Privacy Overview
This website uses cookies to improve your experience while you navigate through the website. Out of these cookies, the cookies that are categorized as necessary are stored on your browser as they are essential for the working of basic functionalities of the website. We also use third-party cookies that help us analyze and understand how you use this website. These cookies will be stored in your browser only with your consent. You also have the option to opt-out of these cookies. But opting out of some of these cookies may have an effect on your browsing experience.
Necessary cookies are absolutely essential for the website to function properly. This category only includes cookies that ensures basic functionalities and security features of the website. These cookies do not store any personal information.
Any cookies that may not be particularly necessary for the website to function and is used specifically to collect user personal data via analytics, ads, other embedded contents are termed as non-necessary cookies. It is mandatory to procure user consent prior to running these cookies on your website.


 The Tools You Will Need
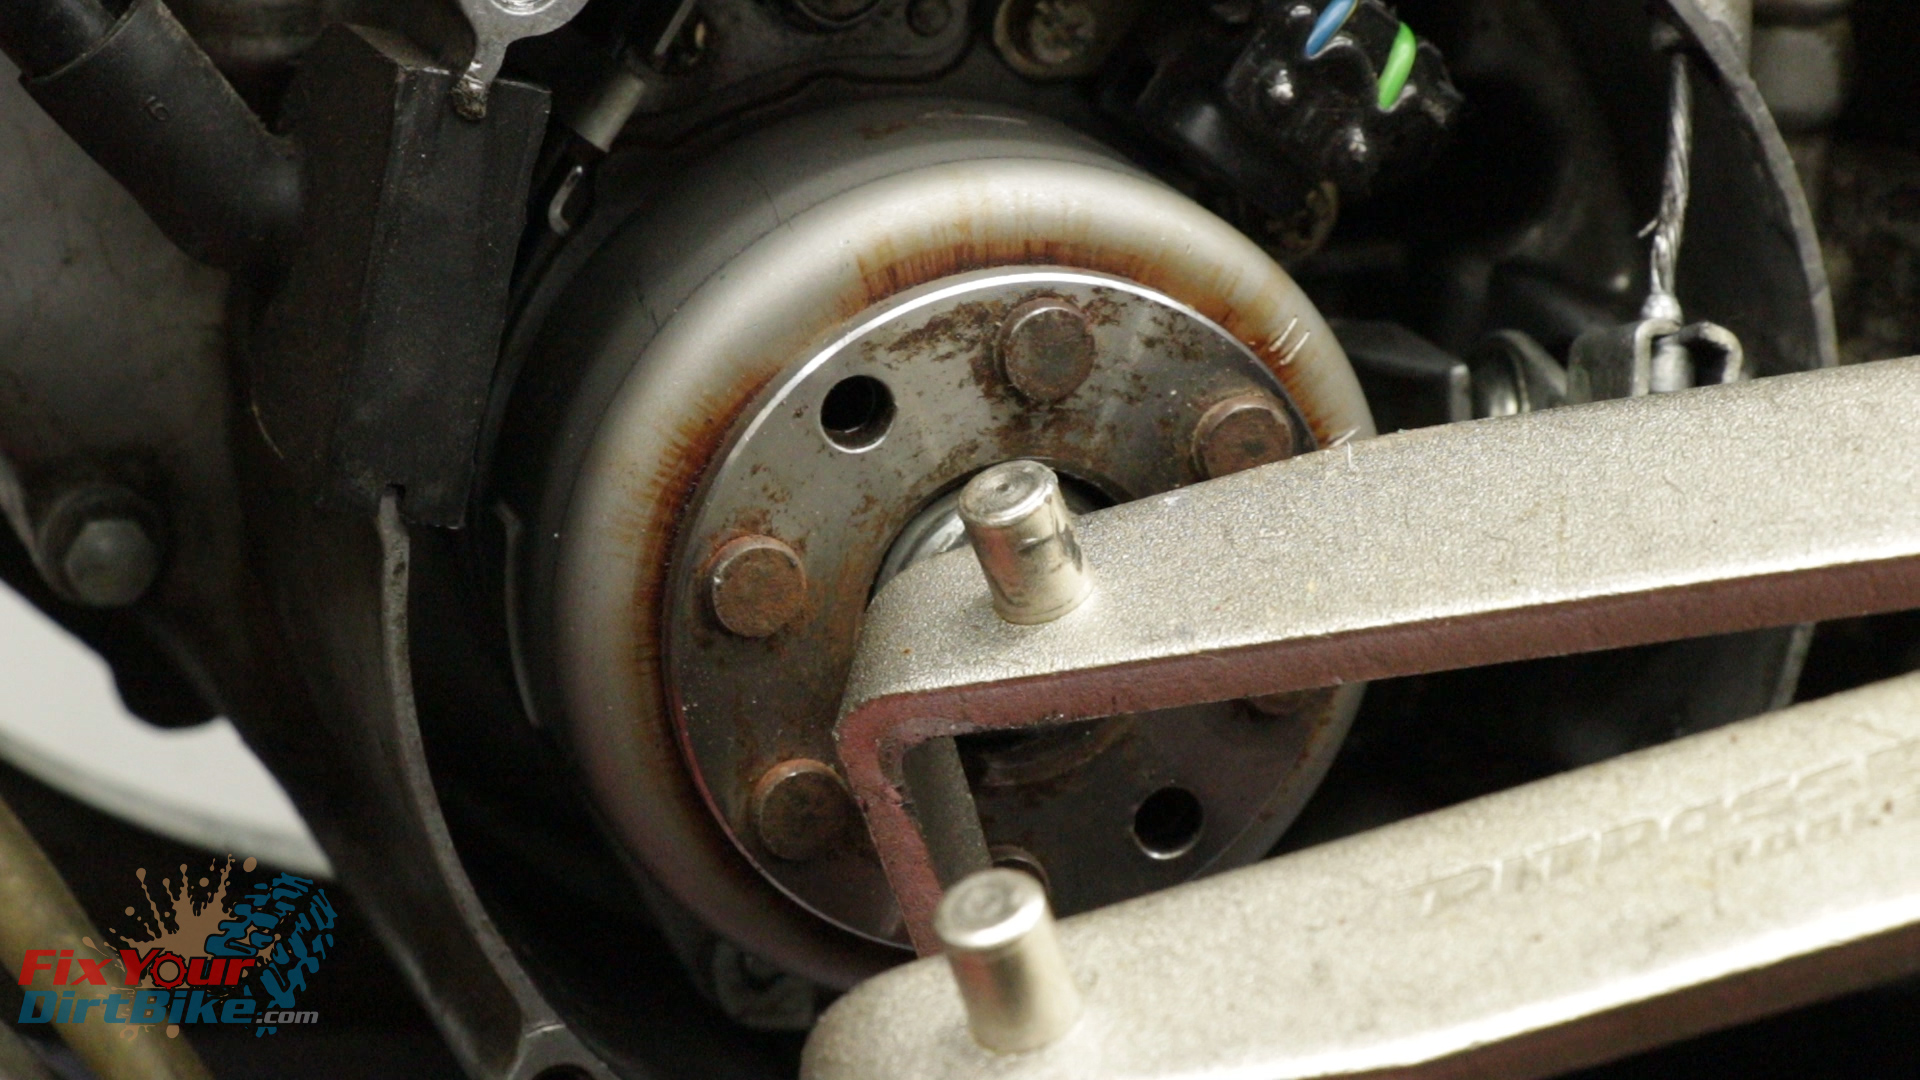


 Soaking your Carburetor In Pine-Sol is a cheap alternative to Chem-dip. We know Berrymans Chem-Dip works for heavy cleaning jobs, but it also costs around $30 gallon, and if all you are doing is cleaning the varnish out your carburetor, it’s extreme overkill.