Home Blog Page 42

What is Oil Film Strength & Why It’s Important To Your Dirt Bike

0

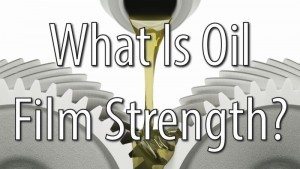
What Is Oil Film Strength? Why Do I Care?

What is Oil Film Strength & Why It’s Important To Your Dirt Bike
What is Oil Film Strength

Film strength.  We’ve all heard of it at some point, but most of us aren’t exactly sure what it is, or what it does for our dirt bike engines.  We know that it has something to do with oil, but that’s about it.  In this article, I’ll try to answer the previous questions and take the mystery out of oil film strength.

What Is Film Strength?

The simple answer is that film strength is protection for the components of your engine.

The more in-depth answer starts with a basic definition of film strength.  Oil film strength is a measurement (in psi) of a lubricant’s strength, or its ability to not break under pressure.  Oil’s primary job is to prevent the various components of engines from rubbing against each other. When oil doesn’t do its job, friction is created, and the parts of your engine can become damaged over time as a result.  However, if an oil has a high film strength, it can sustain its position between the two components without being squeezed out, hence giving the components the necessary protection they need from each other.

Film Strength & Bubble Gum

Bubblicious Watermelon Wave
*Do not put in engine

I like to relate the properties of film strength with that of blowing bubbles with bubble gum.  A low oil film strength is like trying to blow a bubble with just one piece of bubble gum.  The pressure from the air used to blow the bubble will only allow the bubble to barely start to take form before it pops. The layer of gum is too thin to sustain higher pressures of air.

Now, imagine taking five pieces of bubble gum in your mouth at one time and then attempting to blow a bubble with them.  That bubble is going to be able to withstand a lot more pressure without breaking than the single piece of bubble gum could.  The reason it’s able to do that is that it’s more resistant to the pressure, due to the thickness provided by combining five pieces of gum into one.  This is similar to oil with a high film strength.  It can tolerate a lot more pressure before breaking and being squeezed out from between the two metal components.

Strength Of Various Oil Types

Film strengths vary in different oils.  Some oils have ridiculously high film strengths, while other oils have ridiculously low oil film strengths.  It’s important to take each into account when choosing an oil type for your bike.

Full Synthetic Oil

Full synthetic oils have the highest film strengths from 2000 psi to 5000 psi.  This is because synthetic oils are chemically constructed. This means that certain “modifications” can be made to alter the oils’ film strength during production.

Film Strength Diagram
*not to scale

Blended-Synthetic Oil

It follows close behind its cousin (full synthetic) in film strength, sometimes reaching the same measurements.
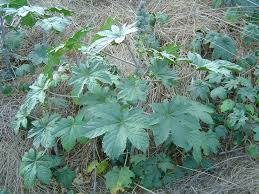
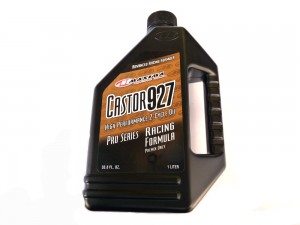
Castor Oil

Castor oil is another oil that possesses very high oil film strength measurements. However, the unfortunate by-product of castor is that you get some wax and sludge build-up as well.

Related: Make sure you are using the right oil, not knowing could cost and engine!

Mineral Oil

Mineral oil is the one dominant type of oil that continually sees low marks in the film strength category.  Typical, straightforward mineral oil will measure between 500 – 900 psi.

A good rule of thumb to take into consideration when figuring out how high the film strength measurements would be without knowing the exact number is to look at the oil’s viscosity and thickness.  Higher viscosity and thickness translates into higher oil film strength, A lower viscosity and thinness translates into lower film strength. But remember, when comparing motorcycle oil to car oil, everything changes because car oil is designed to serve an entirely different purpose.

Final Thoughts

Just like with any mechanical marvel, a dirt bike’s engine has to operate at optimal levels at all times to ensure longevity and excellent performance.  A key component to achieving that is making sure you’re putting the best oil possible into your motor, whether it is a 2-stroke or 4-stroke.

Oil film strength is just one of the many components of oil that can’t be overlooked when deciding on which type/brand to use on your bike.  It is decisions like these that can make all the difference when its time for a rebuild, because replacing your whole dirt bike engine is a lot more expensive than a routine rebuild.

If you have any questions or anything to add, please leave them in the comments or on our FaceBook page!

Keep Reading – Can You Trust Your 2-Stroke Injection System?

Fix Your Dirt Bike Logo

Trail Tech Ride Leader Tutorial

The Trail Tech ride leader is an excellent program for downloading and sharing your trail maps.  I installed the Trail Tech Voyager on my KTM 450 XC-F, and so far I love it.  You can read the entire Voyager review here, and you can also see the Voyager install video and walkthrough here.

Make sure to check out Trail Tech’s YouTube channel for loads more videos!

If you have any questions or anything to add, please leave them in the comments or on our FaceBook page!

Is Biodegradable Engine Oil Worth The Investment In The Long Run?

0

In this article, I’m going to give you a brief introduction of what biodegradable engine oil is, how they’re being used in today’s performance engines, and give you some guidance on whether they’re ultimately worth the investment.

In today’s environmentally conscious society, biodegradable resources have become more popular than ever before. And one of the leading pioneers of the biodegradable market is oil and lubricants. But while it’s nice to be able to help save the environment by being conscious of what we use in our engines, at the end of the day, we’re dirt bike enthusiasts; so naturally, performance is going to be one of the most critical factors.

What Is Biodegradable Engine Oil?

maxima Biodegradable Engine OilFirst, we need to define the term biodegradable. Biodegradable means that the substance (or object) can be broken down and consumed using bacteria or other living organisms. In other words, if something is biodegradable, it can be reabsorbed into the environment.

As far as biodegradable oil is concerned, there are two major types: animal fats and vegetable oils. And of those two, vegetable oils are by far the more popular types used for biodegradable oil manufacturing.

Vegetable oils have been used as forms of biodegradable engine oil for several years; however, they didn’t hit the “limelight” until the First World War (and World War II) where, due to oil shortages, vegetable oils were adopted for use as oil, fuel, and various other lubricants.

After the wars were over, it’s mineral cousins, then petroleum-based, and then synthetic oil overshadowed vegetable oil. But now vegetable oil is making a comeback, and here’s why…

The Advantages Of Using Biodegradable Oil (Vegetable Oil)

It’s hard to imagine that vegetable oil can possess its own set of advantages over other higher performance-based oils, but it does. Here are three of its main advantages:

They maintain excellent lubricity. Vegetable oils’ lubricity is much better than mineral oil.

They have a high viscosity. Just like synthetic oil (and synthetic blends), vegetable oil has a high viscosity index, which means that its viscosity index doesn’t change much when it’s either exposed to hot temperatures or cold temperatures.

They have a high flashpoint. Vegetable oils are much more combustible than mineral oils.

The Disadvantages Of Using Biodegradable Oil

Unfortunately, you can’t have the good without the bad. While biodegradable oils do have their own set of advantages, they also have their disadvantages about their counterparts. Here are the two most significant drawbacks of using biodegradable engine oil on your dirt bike.

They oxidize much quicker. Biodegradable oils are one of the fastest oxidizing oils available. And I’m sure you already know that oxidization leads to sludge and gunk build-up — two things you never want in your engine.

They do poorly at high temperatures. While vegetable oils may have a high viscosity index, they lose fluidity when met with high temperatures.

They are expensive. Current biodegradable engine oils aren’t cheap, rivaling the price of full synthetic options.

Is It Worth The Investment?

While the lure to be environmentally conscious is a strong one, performance still takes top priority for my riding. And for that reason, I would still use either a full synthetic oil or synthetic oil blend before a biodegradable oil, at least for now.

While they do have their fair share of advantages, high oxidization and poor performance in high temperatures are two reasonably significant disadvantages. Add to that the current price of biodegradable engine oil, and the fact I still have to dispose of it like any other oil, and it’s just not worth it.

If you have any questions or anything to add, please leave them in the comments or on our FaceBook page!

Keep Reading – Types of 2-Stroke Oil

Fix Your Dirt Bike Logo

Product Review: Trail Tech Voyager GPS Enduro Computer

Hands-On Review Of The Trail Tech Voyager GPS

Trail Tech Voyager In BoxShort Review:

I am thrilled with my purchase of the Trail Tech Voyager, and I look forward to getting better and faster with its help. If you are serious about how, where, and why you ride, then this is the absolute best purchase you can make, hands down. Get Yours Here.

Full Review

I recently installed the Trail Tech Voyager GPS on my 2013 KTM 450 XC-F.  I like to think of myself as a serious rider in that I want to know exactly how I am riding, then ask myself if I can do it better. I’ve been looking into the Voyager for a while now because of what it can tell me about how I am riding and how my bike is reacting to me.  Also, I don’t like getting lost so that the GPS will come in handy there!

The first thing I realized about this Trail Tech computer is that you don’t have to hook it up to use it because almost everything is self-contained. The built-in battery lets you use the Voyager without having to connect to the bike battery. Without vehicle power, you can still use the GPS for trail mapping, speed, altitude, and compass. I find this very useful because now I can use the Voyager for multiple bikes. This also means that you can mount the Voyager Trail Computer and be riding within 10 minutes of opening the box!

To get the most out of your Trail Tech Voyager, you will need to do a full install to get measurements for wheel speed, engine temperature, RPMs, and vehicle power. Fortunately, a full install of the Voyager is relatively simple and only requires basic hand tools. You can find the Trail Tech Voyager install walkthrough HERE.

Related: These Micro Bleeders are a must-have in the mountains!

What Do You Get With the Trail Tech Voyager Trail Computer?

What’s in the box:
Moto-GPS computer
Temperature sensor
Wheel sensor
Ignition Sensor
Vehicle power harness
Ride Leader GPX Editor (CD)
⅞” handlebar mount
1-⅛” handlebar mount
Rechargeable lithium-Ion battery.
MicroSD memory card (with USB adapter)
User’s Manual (CD)
Install Instructions for various models

What Does It All Do?

Voyager Speed Sensor
Trail Tech Voyager Speed Sensor (KTM)

Bike and Wheel speed: While the GPS will tell you how fast you are going, it’s not going to be as accurate as the wheel sensor. This will be important if you plan on going on long rides frequently. When the computer is logging time and distance, the numbers will not be as accurate because it can’t account for slight elevations in the trial that the wheel will see. This may not seem like a big deal, but over time, the difference will just get bigger and bigger, resulting in inaccurate data, which can then lead to missed maintenance.

Distance: The GPS can also calculate your distance, but again, the wheel sensor will give you a more accurate measurement. The more accurate the distance measuring, the better if you plan on going on long rides and want to get back on the same tank of gas.

Compass: In case you don’t have a map loaded on the TT Voyager, it does come equipped with an easy-to-read compass. I find the compass especially useful when I’m in a new park that looks small but has trails that keep branching off until you’re deep in the dense trees and you didn’t think you needed to load a map because the park looked small and I can’t get back to my truck, and I’m late for dinner!

Trail Tech Rev Sensor
Trail Tech Voyager Engine Sensor

Altitude: Another benefit of the GPS is the built-in altitude meter (altimeter). The altimeter probably won’t come into play while you are riding, but the data it provides is useful before and after. If you travel to a new place to ride, chances are your altitude related to sea level will change. This is where you can use the altitude meter to adjust your bike accordingly. Then after your ride, you can use the logged data for ride analysis.

Tachometer: The tachometer is easy to install, and is pretty accurate. I don’t look at the RPM readout much since I listen to the bike, but it’s nice to have while practicing to see what your bike is doing and what you should be doing.

Hour Meter: The Voyager comes with three different hour meters and a stopwatch. The three different hour meters are accumulated engine hours that can’t be reset easily, and two user-controlled ride times. I use the accumulated engine time for longer maintenance intervals, one user engine time for oil changes, and the other for daily use.

Volt Meter: Keep an eye on your battery. (Only works when connected to the battery)

Voyager Temperature Sensor
Trail Tech Voyager Temperature Sensor (KTM)

Engine Temperature: I have already saved my engine and clutch a few times with this feature when pushing too hard or when I get lazy. The TT Voyager also logs engine temperature over time for ride analysis.

Air Temperature: This is a great feature for keeping yourself safe and hydrated when riding. I also use the ambient air temp to adjust my riding, because if I’m hot, I know my dirt bike will be too.

Related: Another great upgrade to your dirt bike is a Steahly Flywheel Weight!

It’s an Easy Read!

Colossal LCD Screen: I like the giant screen on the Trail Tech Voyager. It’s easy to read in any light and can take a beating. I tested the toughness of this trail computer when I smashed my helmet into the screen on a hill climb. The screen didn’t even have a scratch.

LED Alerts: There are 2 LED lights on the top front of the Voyager, one yellow and one red. These are temperature alert lights that can be set manually. Both colors have settings for solid color and flashing. I set the yellow LED solid for when I am at riding temp, then flashing when I’m getting hot. I then set the red to solid when I need to back off, and flashing red means it’s time for a break.

Li-ion Battery or External Power Option: You can run this computer off of its internal rechargeable battery, but a quick connection to the positive of the battery and ground to frame, and you’ll never have to worry about it.

Trail Tech Micro SD Card and USB Adapter
Trail Tech Voyager Micro SD Card and USB Adapter

High Sensitivity Internal GPS Antenna: The built-in GPS antenna is very accurate. When you go back to study the GPS logs, you can zoom in and see the slightest curves in the trail. This accuracy is important when using the GPS with a loaded trail map, or making a one to share.

Joystick Navigation: This trial computer uses three buttons (menu, return and enter) and a joystick for easy menu navigation when wearing gloves.

Micro SD Memory Card: The supplied microSD memory card is for uploading and downloading trail maps from your Trail Tech.

Ride Leader: This is the supplied program that lets you view, organize, edit, and share your trail maps.

Final Thoughts On The Trail Tech Voyager GPS

The Voyager from Trail Tech will give you all the information you need to become a better rider. When you know what your dirt bike is doing, you can then learn to ride with it, not just on it. When you and your machine are working together, riding will become much safer, and you will get much MUCH faster.

The trick is reading the data the voyager gives you. Earlier I mentioned ride analysis, this is not a Voyager feature, but something you must do on your own. By looking back at all the logged information, you can see when you were, what you were doing there, and how your bike was reacting to your input.

Example: Let’s say you have a set circuit you are riding with various obstacles such as rocks, logs, mud, hills, etc. You can look back at how long each lap took using your stopwatch, then judging by that you will know when you got to the obstacle. Let’s say it’s rocks, did your temperature spike? That means you were working the clutch too hard.

Even if you don’t have a dedicated training lap and you are just out for a ride, look back at your altitude. Did you see a sudden spike? That was a hill you climbed that you can cross-reference with your temperature readout to see if you were too hot, if you were, maybe you were in the wrong gear? At the end of the day, what you do with the information the Voyager GPS gives you is up to you.

The Trail Tech Voyager costs between $240 to $600 on Amazon depending on your bike’s make and model. I am very happy with my purchase of the Trail Tech Voyager, and I look forward to getting better and faster with its help. If you are serious about how, where, and why you ride, then the Trail Tech Voyager GPS is the absolute best purchase you can make, hands down.

If you have any questions or anything to add, please leave them in the comments or on our FaceBook page!

Next Review – Renthal R3-2 O-Ring Chain

Fix Your Dirt Bike Logo

Trail Tech Voyager Install (KTM 450 XC-F)

The Trail Tech Voyager Is The Top Dog Of GPS Trail Computers. That’s Why I decided I wanted one for my KTM 450 XC-F!

In a different article, I wrote a Trail Tech Voyager review and (spoiler alert). I like it.

KTM 450 XC-F Cuchara Recreation Area Distant PeakInstalling the Voyager was straightforward and only required basic hand tools. Overall the install of the Voyager computer took about an hour.

Trail Tech Voyager Mounting

  1. Test fit the mounting arm
  2. Screw mounting plate to the back of the computer
  3. Screw backing plate to the mounting arm
  4. Attach the mounting arm to the handlebar

The Voyager comes with all the mounting hardware required – ⅞” and 1-⅛” handlebar mount arms and a backing plate for the computer. You will get three different-sized screws, two short screws for the backing plate, one medium screw to mount the backing plate to the arm, and the longest secures the mounting arm to the handlebars. You may need to remove safety foam from the handlebars to mount the Voyager in the center.

Trail Tech Handlebar Test Fit
Trail Tech Mounting Plate
Trail Tech Handlebar mounting
Trail Tech Voyager Handlebar Mounts

Battery Connections

  1. Run power connection to the Trail Tech, making sure to avoid heat sources
  2. Connect the black lead to vehicle GROUND
  3. Connect the red lead to battery positive +

Although the TT Voyager comes with a built-in Lithium-Ion battery, you will still need to connect to the vehicle battery to charge it. If you don’t have a battery on your bike, you will need to get the Trail Tech wall charger (not included).

Never connect positive and negative, always positive and ground!

Trail Tech Wheel Sensor Mounting

  1. Connect the sensor to the brake caliper
  2. Run line up fork alongside the brake line
  3. Mount the magnet inside the disc brake

The wheel sensor provided for my KTM was designed to work with the factory mounting hole on the front caliper. Other brands will require you to mount a sensor to the brake caliper, then replace a disc bolt with a magnetic one.

Trail Tech Voyager Speed Sensor MagnetTrail Tech Voyager Speed Sensor Threads
Speedometer Magnet Mount ClipSpeedometer Magnet Mount Hole (KTM)
Speedometer Sensor Mount (KTM)Speedometer Sensor Mount Cable (KTM)

Engine Sensor (RPM)

  1. Unplug spark plug boot from the plug
  2. Peel back dust cover
  3. Wrap ignition sensor lead around spark plug wire five times
  4. Replace dust cover
  5. Trim Excess wire

If the ignition sensor cable is too long, you can trim it by stripping the black protection layer and cutting the red wire to the length you need it. The engine sensor must be installed between the ignition coil and the spark plug. If your bike has the coil directly attached to the spark plug, you will need to pull back the water weal and wrap the lead around the plug.

Trail Tech Voyager Rev SensorTrail Tech Spark Plug Boot
Trail Tech Spark Plug Boot ReplaceTrail Tech Engine Sensor Wrap

Coolant Temperature Sensor

  1. Locate the radiator hose leaving the engine (out of water pump)
  2. Splice in temperature sensor with supplied hardware.*

Different bikes will have various sensors. My KTM used a square sensor that needed to be mounted; other sensors were spliced directly in line with the hose.

*Because my KTM is the new model of the XC-F, I had to use a bit of extra hose and a few more clamps to make it fit.

Trail Tech Voyager Temperature SensorTrail Tech Voyager Temperature Sensor Clamps and Hose
Engine Tempurature Sensor InstalledEngine Tempurature Sensor - Not Pretty But It Works!

Connections & Cable Management

  1. Once you have all of your sensors connected to your dirt bike, make sure you have enough slack at the handlebars to allow for free turning motion.
  2. Connect the sensors
  3. Zip Tie cables to existing lines for a clean look and go ride!
  4. Connect Leads To GPSZip Tie Connections
    Bundle Messy Cables With A Zip TieZip Tie Cables To Frame

Now that you see how easy it is to install the Trail Tech Voyager, get yours today on Amazon!

If you have any questions or anything to add, please leave them in the comments or on our FaceBook page!

Keep Reading – Motion Pro Micro Fork Bleeders

Fix Your Dirt Bike Logo

A Brief Introduction To Castor Motor Oil, One Of The Most Prolific Oils In History

0

Castor Motor Oil: A Brief Introduction

Castor motor oil was once the undisputed king of motor oils. It proved to be a shining star in a sea of inferior quality crude oils and was commonly used in not only combustion engines but transmissions as well. But besides being popular motor oil, do you know much else about this oil that comes from a plant?

A Brief Introduction To Castor Motor Oil, One Of The Most Prolific Oils In History
What is castor motor oil

In this article, we’re going to get into castor oil to find out exactly what it is, how it came to be used in combustion engines, and a few of its most significant advantages and disadvantages.

What Is Castor Oil?

Castor oil is derived from the seeds of the… you guessed it… castor oil plant. Its appearance can range from a pale yellowish color to colorless. Its boiling point is a whopping 595°F (313°C)!

It’s first known use dates back to around 4000 B.C., where the Egyptians used it to fuel their lamps. Cleopatra herself was known to have used it uniquely – to help brighten the whites of her eyes.

Since then, castor oil has gone on to be used in more practical ways. Besides being used as motor oil and premix, castor oil has also been used as:

  • A food additive and preservative
  • Laxative
  • Skin ulcer ointment
  • Antifungal ointment
  • The main ingredient in cosmetic products
  • Feedstock for biodiesel

But of course, we’re more interested in how it became a premium motor oil for combustion engines. So how did that come to pass?

How Castor Motor Oil Came To Be Used in Combustion Engines

Throughout all of its years in existence, castor oil did not find its way into an engine until the start of the First World War in 1914.

Caster Oil Plant
Castor Oil Plant

Airplane production significantly increased as a result of the war. Engineers were looking for ways to make the planes lighter while increasing available space. Naturally, that led to an inspection of the planes’ engine. And as a result, the radial engine was born and equipped on the aircraft of that era.

However, there was one problem. The radial engines were designed in a way that they relied on oil splashing around the crank chamber and then removing itself from the engine via the exhaust to work correctly. There existed no built-in mechanism that was able to make this happen, and other oil types were too heavy to be reliable.

Maxima Castor 927 2-Stroke Oil
Castor Oil In Use Today

Nature To The Rescue

Enter the castor bean oil. It became the premier oil used in these radial aircraft engines. It’s from this moment in history that the castor oil craze began to spread throughout the world.

Since its introduction as a combustion engine oil, castor oil has gone on to be regarded as one of the most prolific types of motor oils in history. Among high-end lubricant manufacturers such as Maxima Lubricants, the legacy of castor based oils continues.

However, over the years, other oils, such as minerals and synthetics, have been introduced that provide clear advantages over castor oil. That being said, castor oil does possess its own unique set of benefits.

The Biggest Advantages

  • Castor oil will not carbonize at high temperatures (over 700F)
  • Castor oil has a high film strength, which helps prevent metal-to-metal contact between points on an engine. This makes castor motor oil an excellent racing lubricant for high-performance engines.
  • Castor oil does not “adapt” to its surroundings. Meaning, it stays in its current form regardless of climate, temperature, location, etc.
  • Castor oil has a natural attraction to heat. It will actively seek out the hottest spots in an engine.
  • Castor oil puts off an incredible smell. A small that has acquired considerable fame ever since the first use in the early 20th century.

The Biggest Disadvantages

  • Castor motor oil is well known for leaving large “gunk” deposits behind on engine parts.
  • In premium fuel, castor oil may separate from the fuel in low temperatures.
  • Oil injection systems and castor oil don’t mix (pun intended).

While castor oil may have lost some of its prestige over the past few decades, it is still prominent and widely used today by motocross and enduro riders due to its high film strength. Regardless of what the future holds for the use of castor oil in motors, there is no denying the critical role it has played over the years in the world of combustion engines. The fact that castor oil still around is a testament to the impact it’s had on the industry.

If you have any questions or anything to add, please leave them in the comments or on our FaceBook page!

Keep Reading – Is Biodegradable Oil Worth The Effort?

Fix Your Dirt Bike Logo

O-Ring Chain VS Roller Chain: Which Chain Is Better & Which One Will Work For You?

If you’ve ever visited a dirt bike, motocross, or another motorcycle-based forum for any significant amount of time, you’ve more than likely encountered multiple threads where the following question was asked: Which chain should I use – an o-ring chain or a roller chain?

o-rings chain diagram
O-Ring Chain

This debate has been waging for years, and there will always be those who sit on either side of the fence. I don’t seek to give you a definitive answer on the matter with this article; however, I would like to explain why I feel one is ultimately better than the other.

In this article, I’ll share with you what an o-ring chain is, the key advantages of using o-ring chains over a roller chain, and which occasions warrant the use of each type.

What is an O-Ring Chain?

If you’ve ever ridden a bicycle (or any other form of manual transportation that requires a chain), you have undoubtedly encountered a roller chain. That’s because a roller chain is just another name for a standard chain.

However, it’s possible you might not have heard of an o-ring chain before (especially if you’re new to dirt bikes). And for that reason, I’ve included a brief introduction below.

The O-ring chain operates the same as a roller chain except for in a couple of very significant areas. First, the o-ring chain consists of o-shaped rubber fittings (o-rings) placed in between each link of the chain. These fittings are filled with a manufacturer-installed lubricating grease that forms a protective barrier over the entire chain.

In addition to protecting the chain, the fittings also help prevent dirt and other particles from making their way inside the chain and its links, thus drastically reducing the amount of wear on the chain.

O-ring chains have increasingly gained popularity over the years with motorcyclists. This is due to the elements that bikers are exposed to daily.

The Key Advantages Of Using An O-Ring Chain

O-ring Chain vs. Roller Chain
O-ring Chain (top), Roller Chain (bottom)

While each chain has its strengths and advantages, the O-rings advantages win over roller chains in almost all instances. Below are just a few of the main benefits of using an o-ring over a roller chain.

  •  O-ring chains have a longer operational life than roller chains, especially under off-road conditions. In some cases, they will last as much as three times longer than a standard roller chain.
  •  O-ring chains are virtually maintenance-free after installation. The only maintenance required is the occasional application of lube to the chain. However, roller chains need a lot of attention in the maintenance department (and are replaced much more frequently).
  •  O-ring chains stretch less than roller chains and require less adjustment. Roller chains are prone to stretching and need to be adjusted accordingly.

Do The Benefits Justify The Price?

What the one significant advantage of a roller chain has over an o-ring chain is its price. Roller chains are much cheaper. And as a result, some riders feel the benefits provided by the o-ring chain are not worth the significant price increase. However, when you step back and compare the two types of chains, there are several reasons why an o-ring chain is worth the investment (and might, in some cases, prove cheaper than roller chains).

For starters, standard roller chains have no built-in lubrication. This leads to two major disadvantages. The chain not only has to be maintained more diligently than an o-ring chain but also is more susceptible to dirt and other particles getting within the links of the chain, thus causing accelerated wear and tear.

O-Ring Chain Abuse
O-Ring Chain Abuse

Due to the reasons listed above, the roller chain has a much shorter life expectancy than the average o-ring chain. In some instances, the o-ring will last as much as three times longer than the roller.

Because of their longevity, O-ring chains often end up being cheaper than roller chains in the long run. If you purchase an o-ring chain at triple the cost of a roller chain, but you have to go through six roller chains before you have to change just one o-ring chain, you’re saving money.

So yes, an o-ring chain is almost always a better option than purchasing a roller chain. Not only do you get the increased protection from the o-ring, but you also get a longer lifespan, which can lead to significant savings over time.

However, there is one instance where a roller chain might prove to be a better option.

When Is A Roller Chain Recommended Over an O-Ring Chain?

Most bike enthusiasts tend to agree that if you’re running a Motocross bike or a smaller capacity bike, then a roller chain might be your best option due to its lightweight, minimal friction, and its cheap price point. While you’ll always have those that feel o-ring chains are an excellent investment and others who think they’re overpriced, what’s important is that you make the decision you feel the most comfortable with.

If you decide to go with a roller chain, then embrace that decision. Sure, you might have a little more maintenance and upkeep. You’ll more than likely have to replace it more often, but there are plenty of bikers who still use roller chains with great success.

And if instead, you choose to take the o-ring chain route… well… then you’ve just made a wise choice.

If you have any questions or anything to add, please leave them in the comments or on our FaceBook page!

Keep Reading – What Is “Shot Peening”

Fix Your Dirt Bike Logo

Video: On The Trail – Trail Tech Voyager Review

On The Trail Video Review – Trail Tech Voyager

I am very happy with my purchase of the Trail Tech Voyager.  I look forward to getting better and faster with its help. If you are serious about how, where, and why you ride then this is the absolute best purchase you can make, hands down.  I wrote a full Voyager Review with way more details!

If you want to grab one for yourself, you can find one on Amazon!

Make sure to check out the install.  The Trail Tech Voyager is super simple to install and set up, I’ll show you how!

What Does “Shot Peening” Do & How It Increases Strength In Metals

How Does The Process of Shot Peening Work?

Shot peening is a process invented in the 1930s specifically to increase the fatigue strength of various metal components that encounter high levels of alternating stress regularly (i.e., motorcycle engines and chains). In other words, it makes shot-peened parts on your bike stronger and lasts for much longer than they usually would. Below you’ll find a brief synopsis of shot peening and what it entails: from the process to its most important benefits.

Shot Peening Gear

The majority of shot peening techniques use air blasters (also called media blasters). These air blasters “blast” tiny spherical media (more on media in just a minute) at very high speeds using extremely high air pressure. When the media makes contact with the surface it is blasting it creates a small indentation in the metal from the impact.

The media used during the process is chosen based on the type of component that is being shot-peened. Media used in shot peening include ceramic beads, steel shot, and rounded cut wire.

Related: Do you run a roller or o-ring chain?

How Does It Make Components Stronger?

When the media strikes the component, it creates a small divot on the surface of the metal. The moment that the divots form, the mechanical properties of the component’s surface change.

Before peening the component, its surface contains a high level of tensile stress. Tensile stress is a significant cause of stress fractures and fatigue cracks in metal components. When shot peening, each particle of the media generates compressive stress.

Shot Peened Chains

These compressive stresses overlap each other on the surface of the component. This stress eventually covers the entire area of the surface, thus negating the tensile stress that was previously on the surface. This different type of stress makes the part much more resistant to stress cracks and fractures.

Two Other Major Benefits of Shot Peening

We’ve already established that increasing the component’s resistance to stress fractures and cracks is one of the most significant benefits to shot peening, but that’s not the only benefit this process possesses:

Shot peening also dramatically reduces the components’ susceptibility to corrosion and cracking. It also increases the overall oil retention and lubricity of engine components.

By now, you should have a decent understanding of what shot peening is, how it works, and why it makes components stronger. It’s an invaluable process for prolonging the life of specific parts on your bike.

You can purchase parts that are already processed, or you can shot peen the parts yourself. However, if you’re planning to do it on your own, please consult a professional first. It is easy to flub it up if it’s your first try.

If you have any questions or anything to add, please leave them in the comments or on our FaceBook page!

Keep Reading – Don’t Run Ethanol In Your 2-Stroke!

Fix Your Dirt Bike Logo