This Is How To Service The Shock Linkage On Your 1994 – 2001 Yamaha YZ125.
This linkage system rebuild, which includes your relay arm and connecting rod, is simpler than it sounds.
This Yamaha YZ125 shock linkage service is shown on a 1996 through 2001 model year, which has a one-piece connecting rod design. The 1994 through 1995 model year has a two-piece design. Although they are slightly different, this service applies to all model years.
For this service, you’ll need a set of new bearings and seals. Which you can buy here → https://amzn.to/43GRvBE
The tools you will need to rebuild your Yamaha YZ125 shock linkage are:
- 22mm crow’s foot socket adapter → https://amzn.to/3E9N6MW
- Foot-Pound Torque Wrench → https://amzn.to/3FVEdr3
- Safety glasses → https://bulltru.com
- Socket Extention
- 22mm Socket
- 22mm Box Wrench
- High Pressure Grease
Pre-Service Notes:
- You don’t have to remove the swingarm, but it can make this easier, and I cover that in a different video.
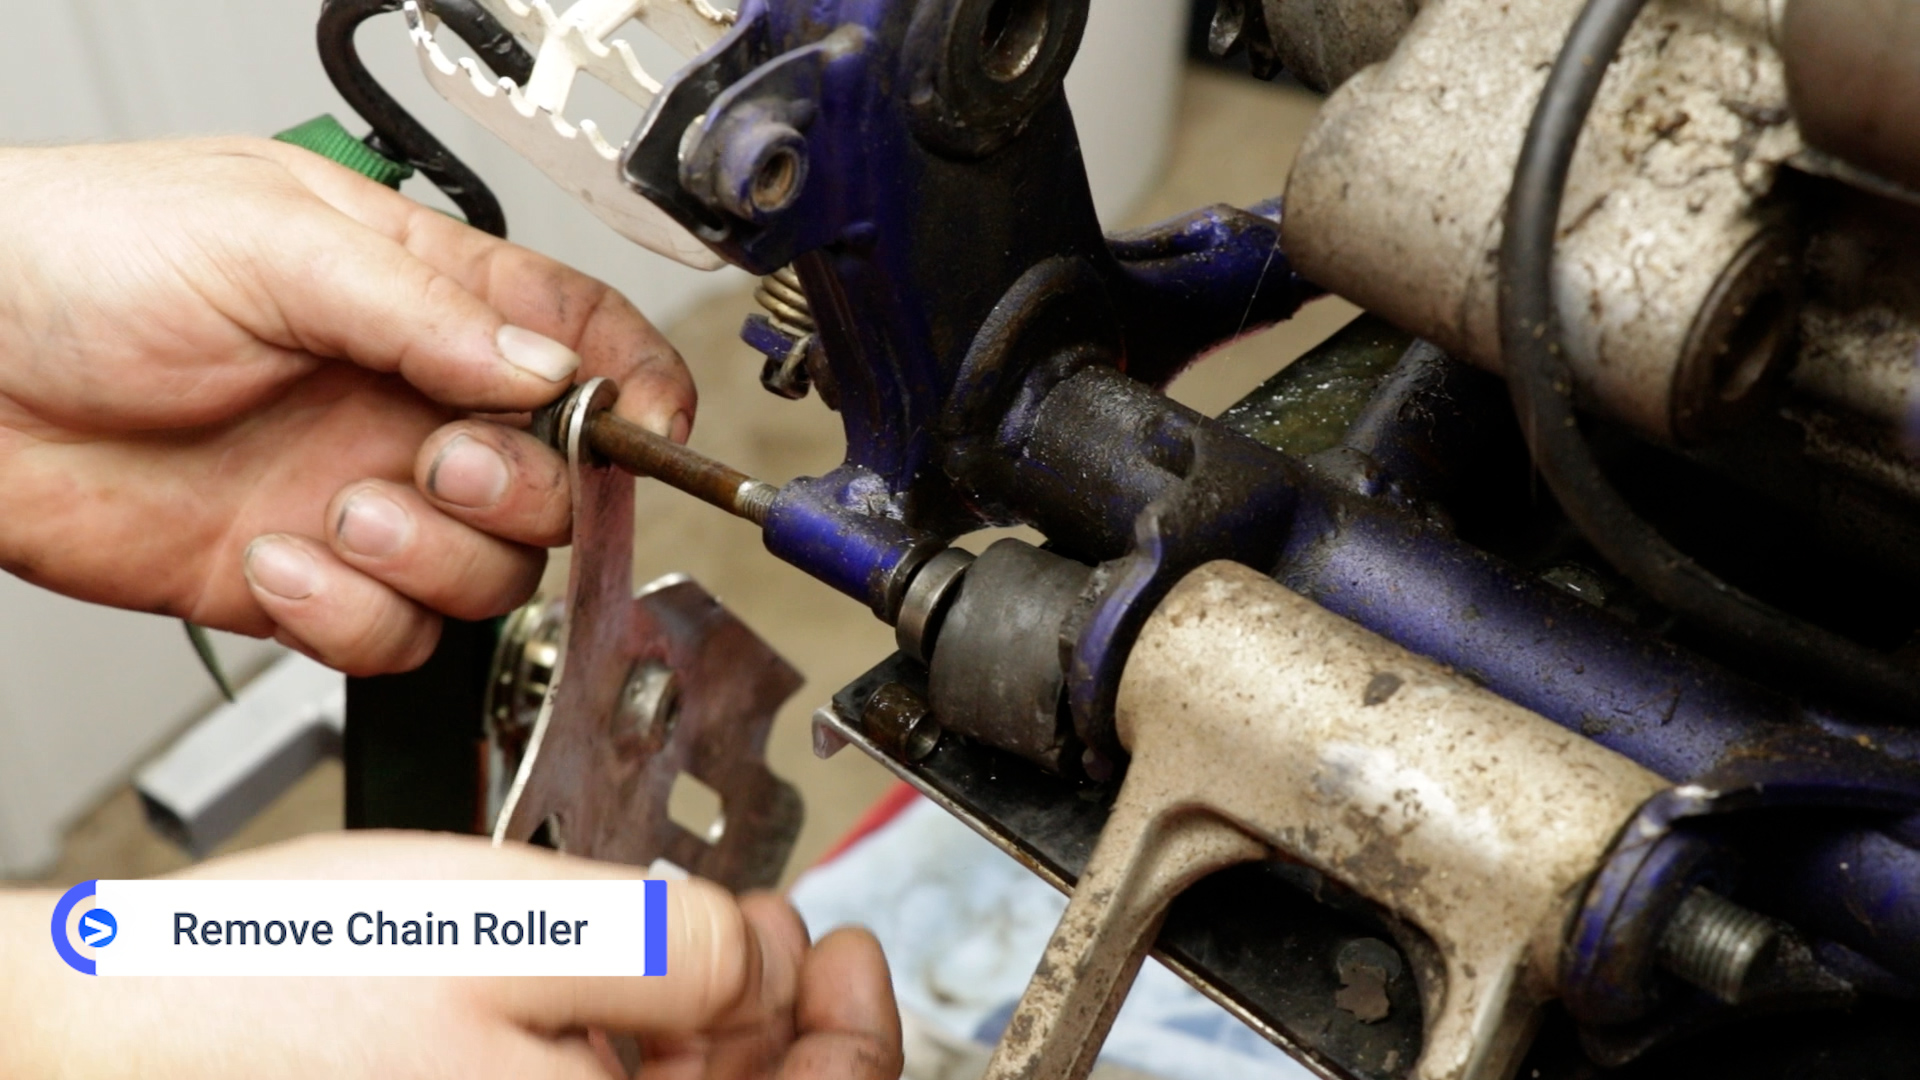
- Either way, you will need to remove the chain roller to remove the frame side connecting rod bolt.
- Your Yamaha YZ125 shock linkage is exposed to everything you ride through, so it may be corroded entirely like mine, which you will see me fighting with later.
- The only specialty tool you will need is a bearing driver, which you can make with grade-8 hardware and sockets. When you see what I’m using, you can easily recreate it.
Connecting Rod and Relay Arm Removal
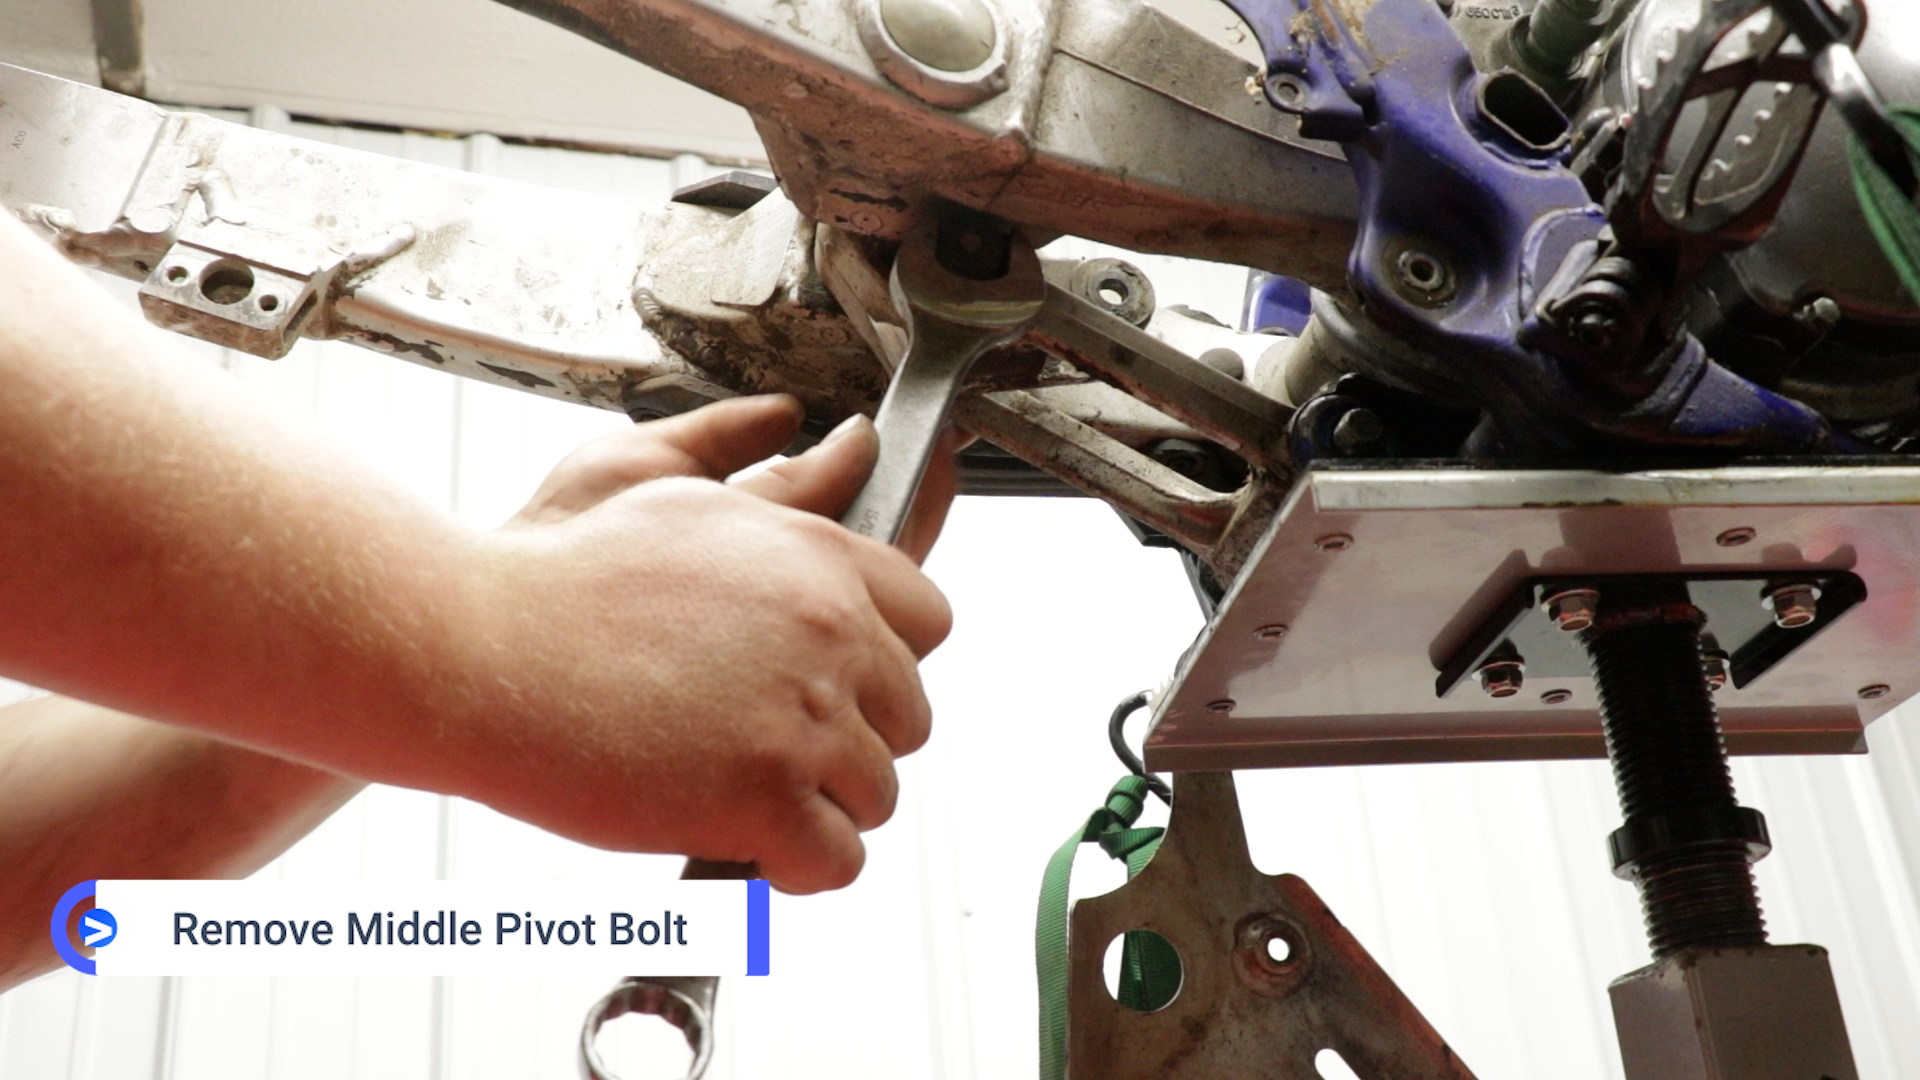
The Yamaha YZ125 shock linkage assembly is secured with three pivot bolts and nuts.
- Remove the middle bolt connecting the connecting rod to the relay arm to free up the other two bolts.
- As I mentioned earlier, you will need to remove the rubber chain roller to access the frame-side connecting rod bolt.
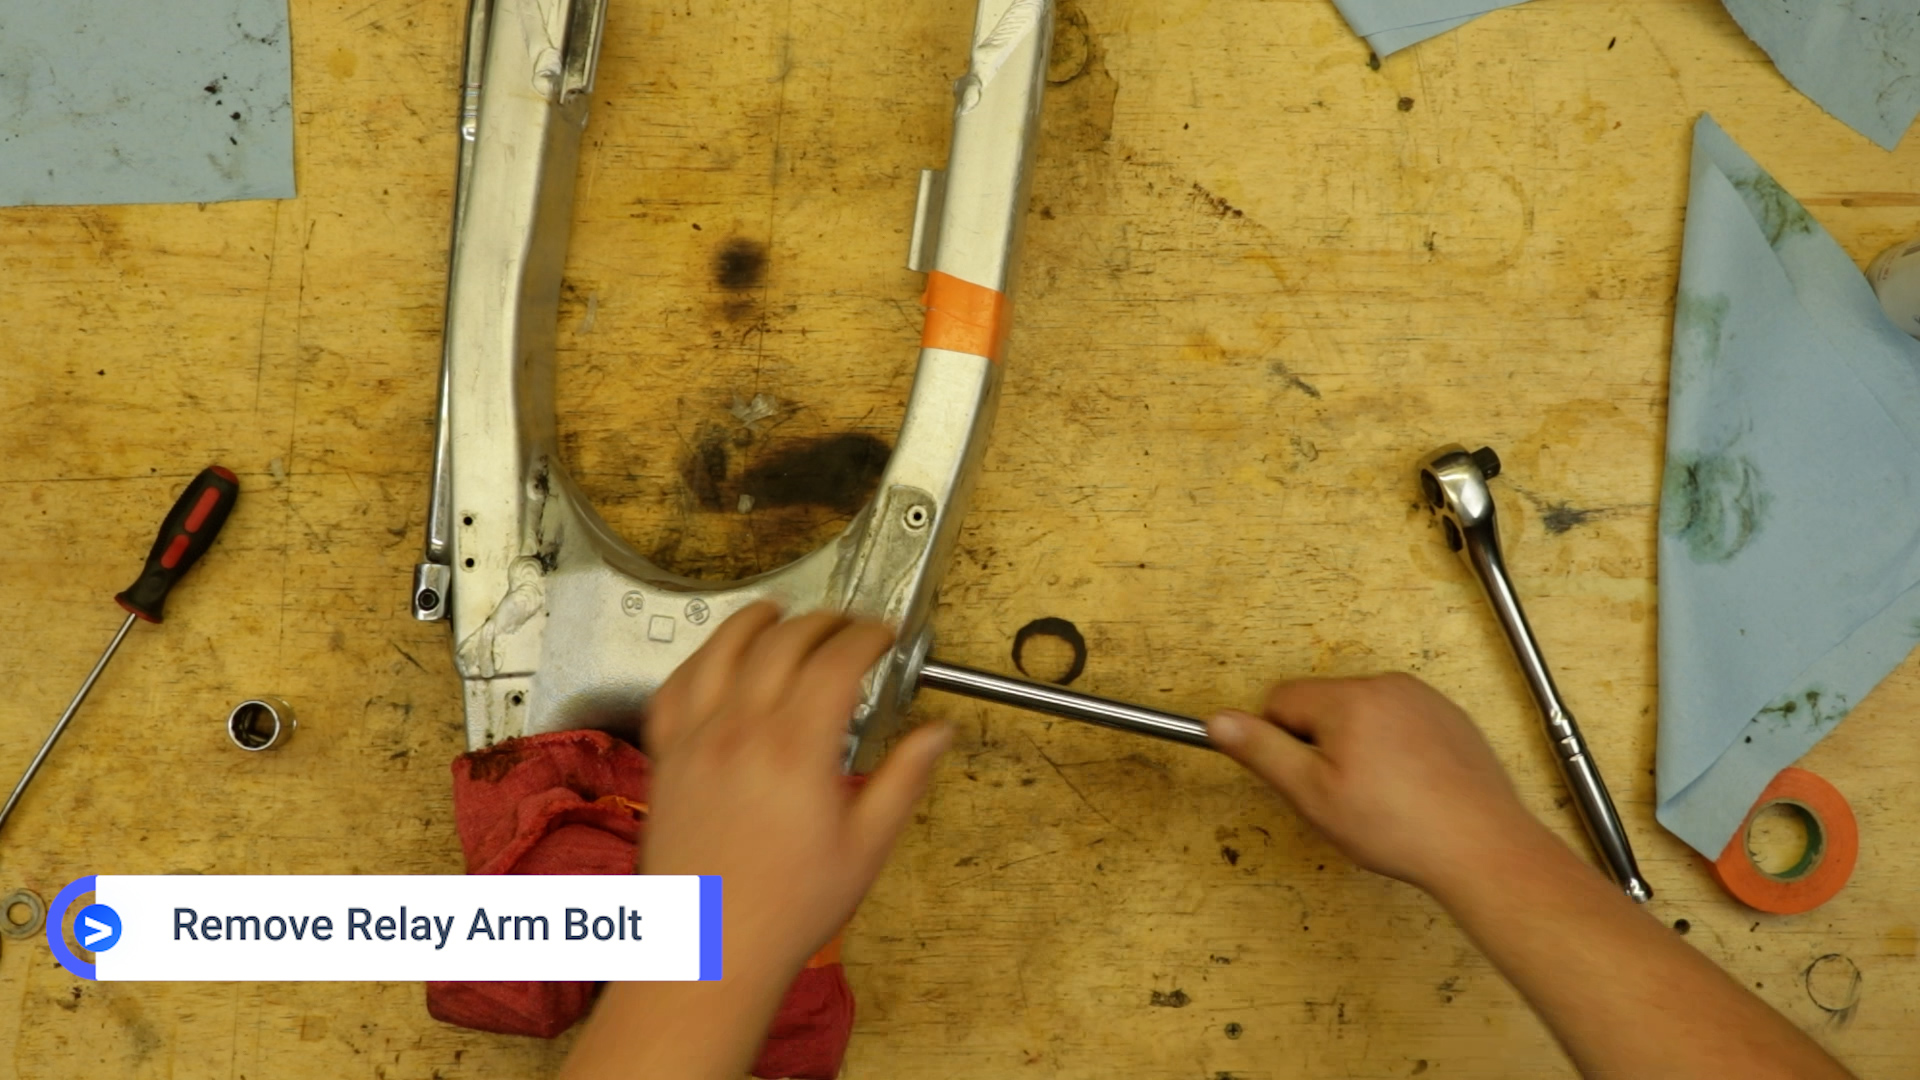
- The relay arm bolt is behind the plastic caps on the swingarm. Since I am rebuilding this bike completely, I have removed my swingarm, and it’s just easier to show on camera.
Relay Arm and Connecting Rod Inspection
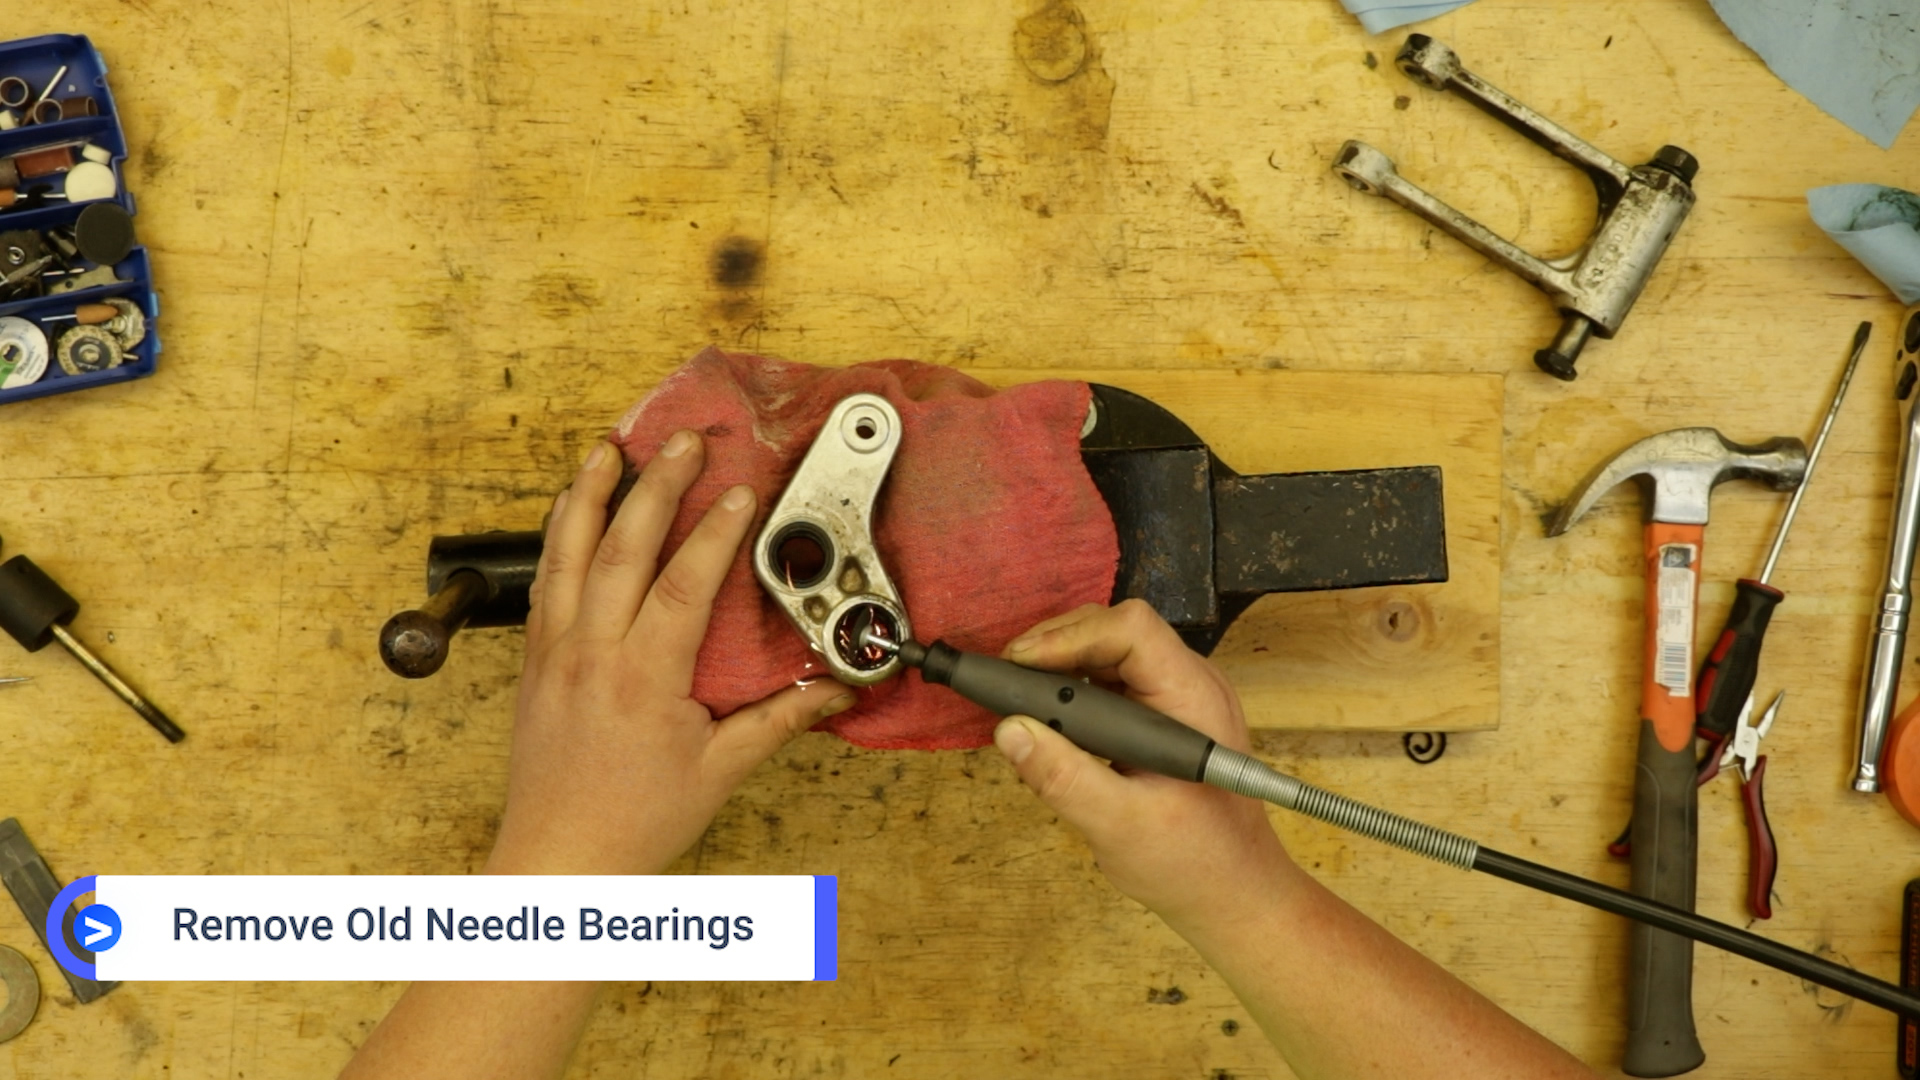
- A quick finger check will tell you if your needle bearings need to be replaced. They need to be replaced if they are anything but smooth and free-rolling.
- Carefully remove collars and seals to access the needle bearings.
If, by some miracle, your needle bearing is in good condition, clean everything with solvent and dry it with compressed air. - Inspect the relay arm for cracks and check the pivot bolts for runout. Replace anything cracked, bent, or broken.
- The collars ride directly on the needles, so if they are anything but smooth, they need to be sanded smooth or replaced.
Yamaha YZ125 Relay Arm Bearing Replacement
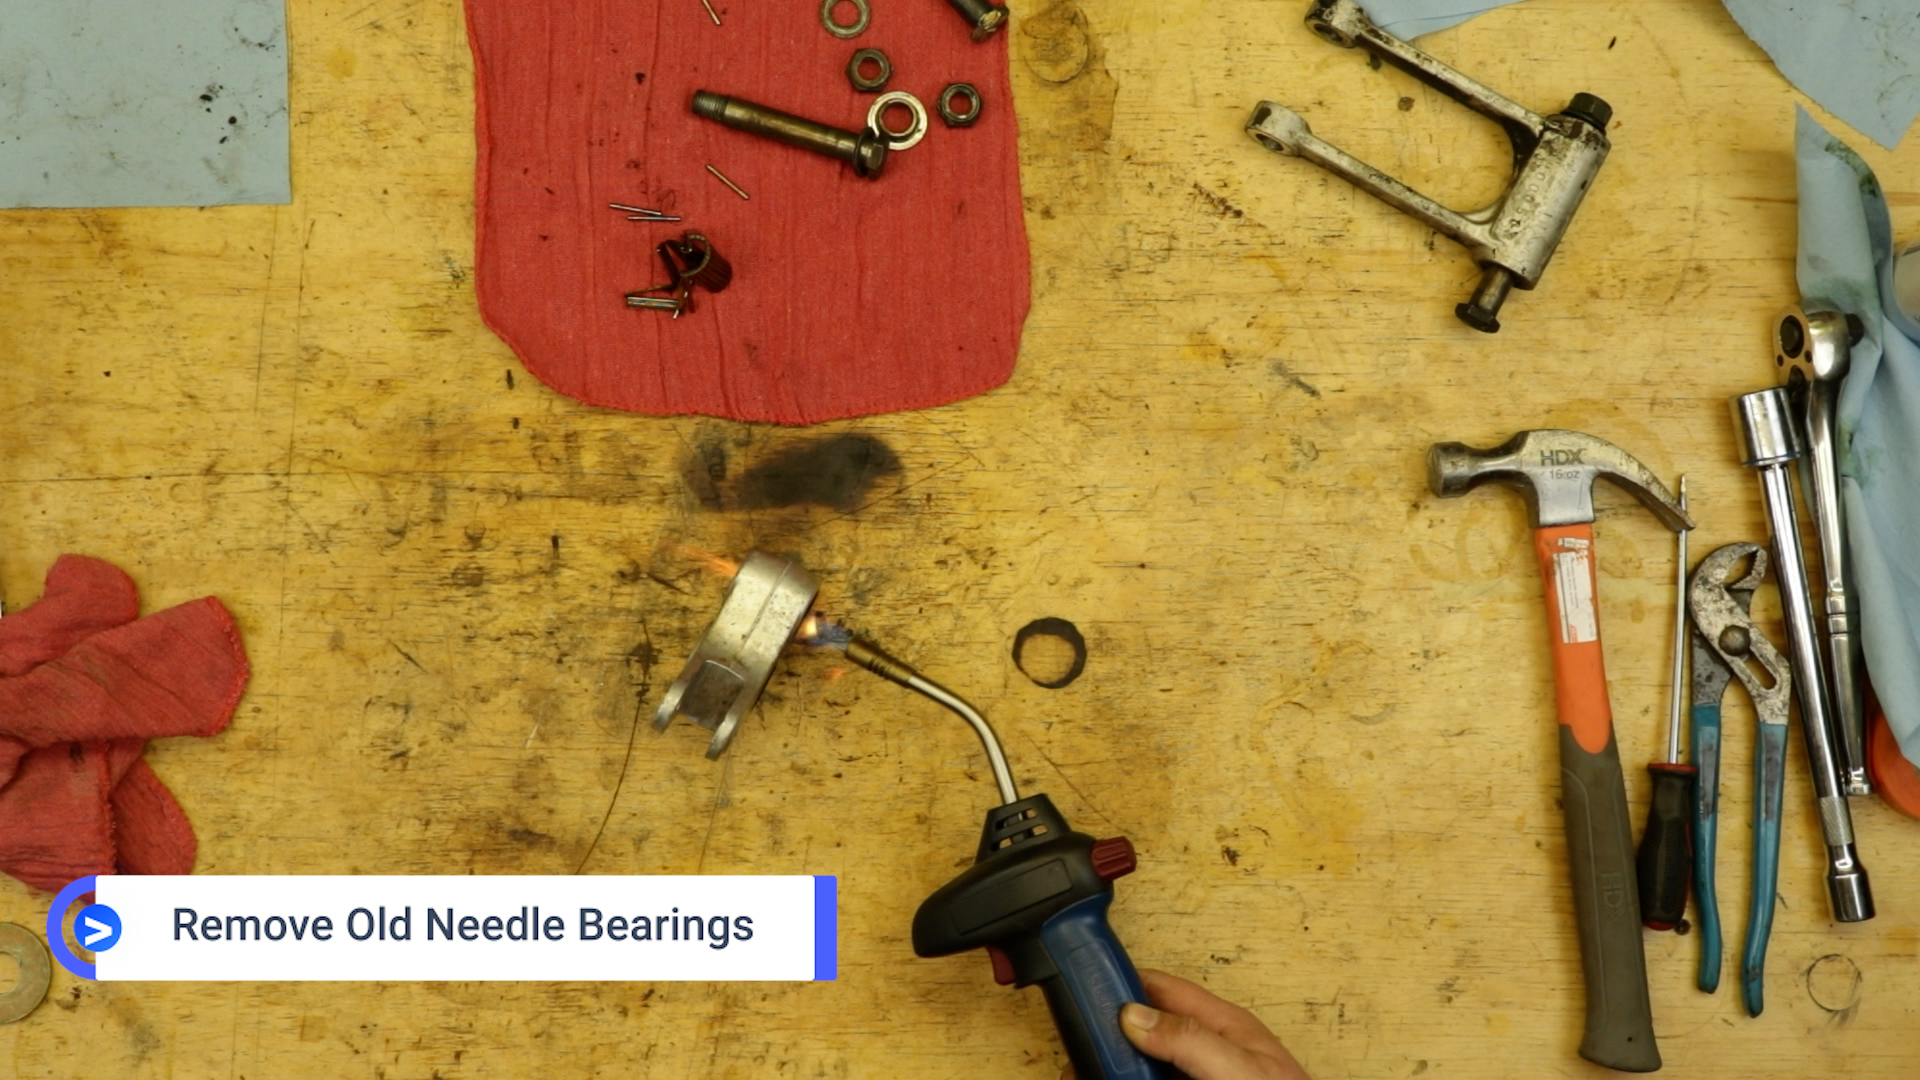
- Remove your old needle bearings:
- Assemble your DIY bearing driver with whatever sockets fit, and drive the bearings out of your relay arm.
- My needle-bearing race was corroded into the relay arm, so I had to pry out the needles and grind the bearing race just enough to break it out, but not enough to damage the bearing race bore. This took me about… a while, but take your time and be careful if you have the same issue.
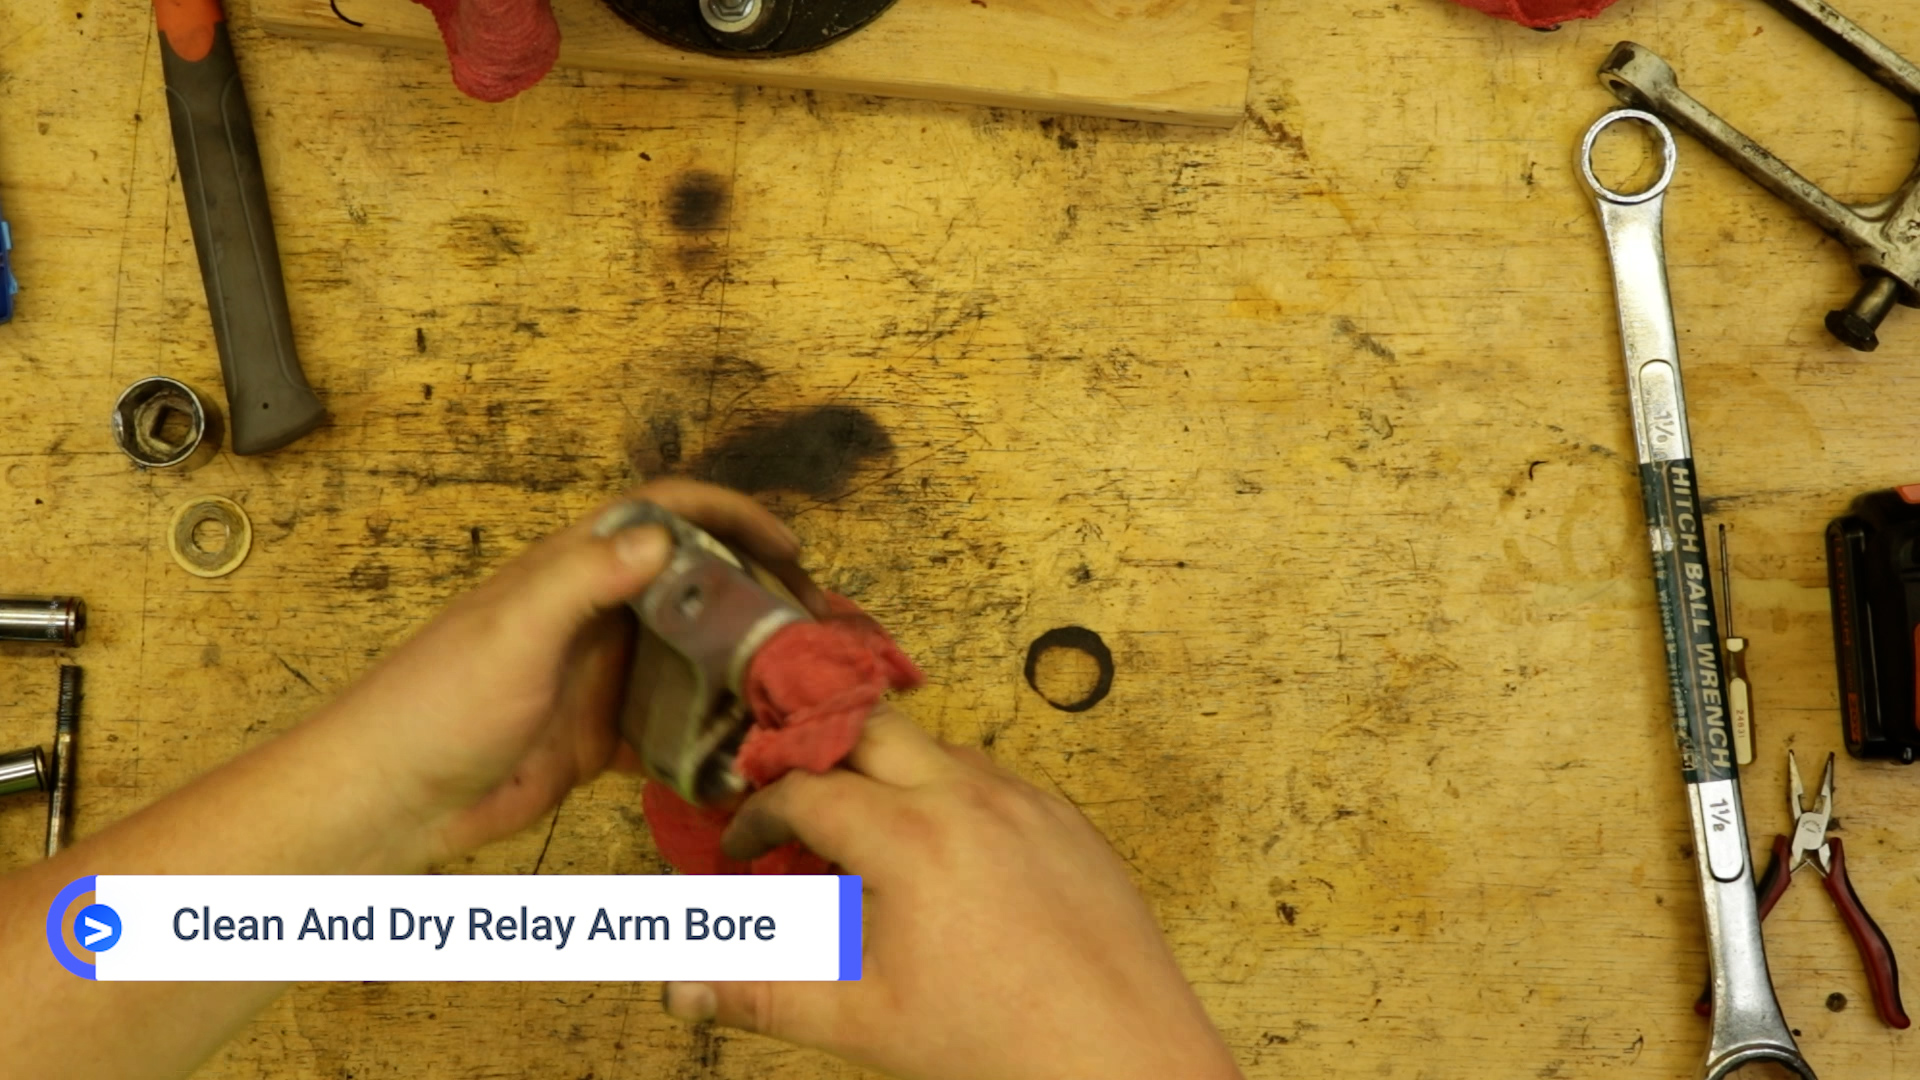
- With your needle bearing successfully removed, clean and dry the relay arm bores.
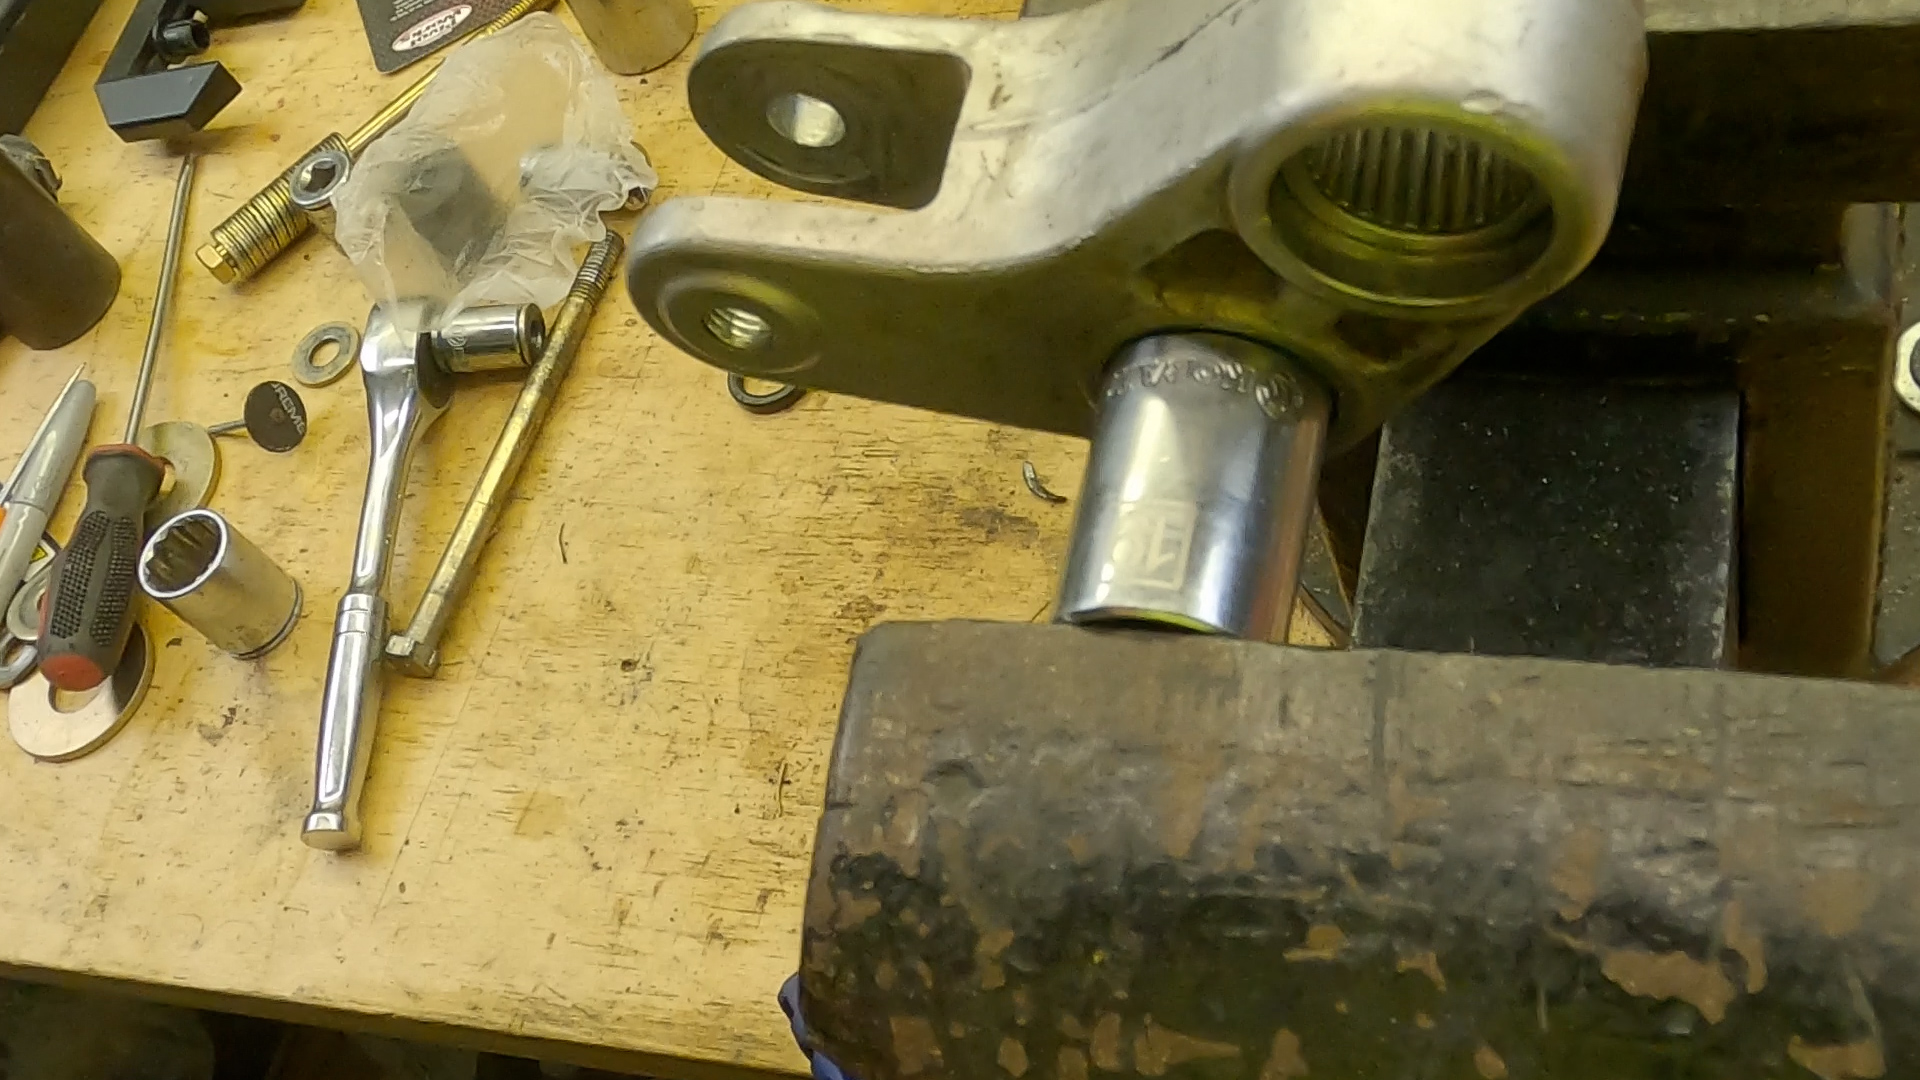
- Install your new needle Yamaha YZ125 shock linkage bearings.
- You need to start your bearing as flat as possible.
- I am lucky enough to have this gigantic 100-year-old bench vise, but you might need to get creative.
- Once your new bearings are installed, center them in the relay arm using a socket that fits inside the bore.


Connecting Rod Bearing Replacement
I don’t know how, but the needle bearing for the connecting rod was in perfect condition, so I didn’t replace it.
- If yours needs to be replaced, the procedure is similar to that of the relay arm, except there are two needle bearings with a gap in the middle.
- Measure and record the bearing depth from each end before you start.
- You will have to drive both bearings in the same direction.
- Then, you must install the bearings separately from each end, matching the depth you recorded before.
Grease and Seals
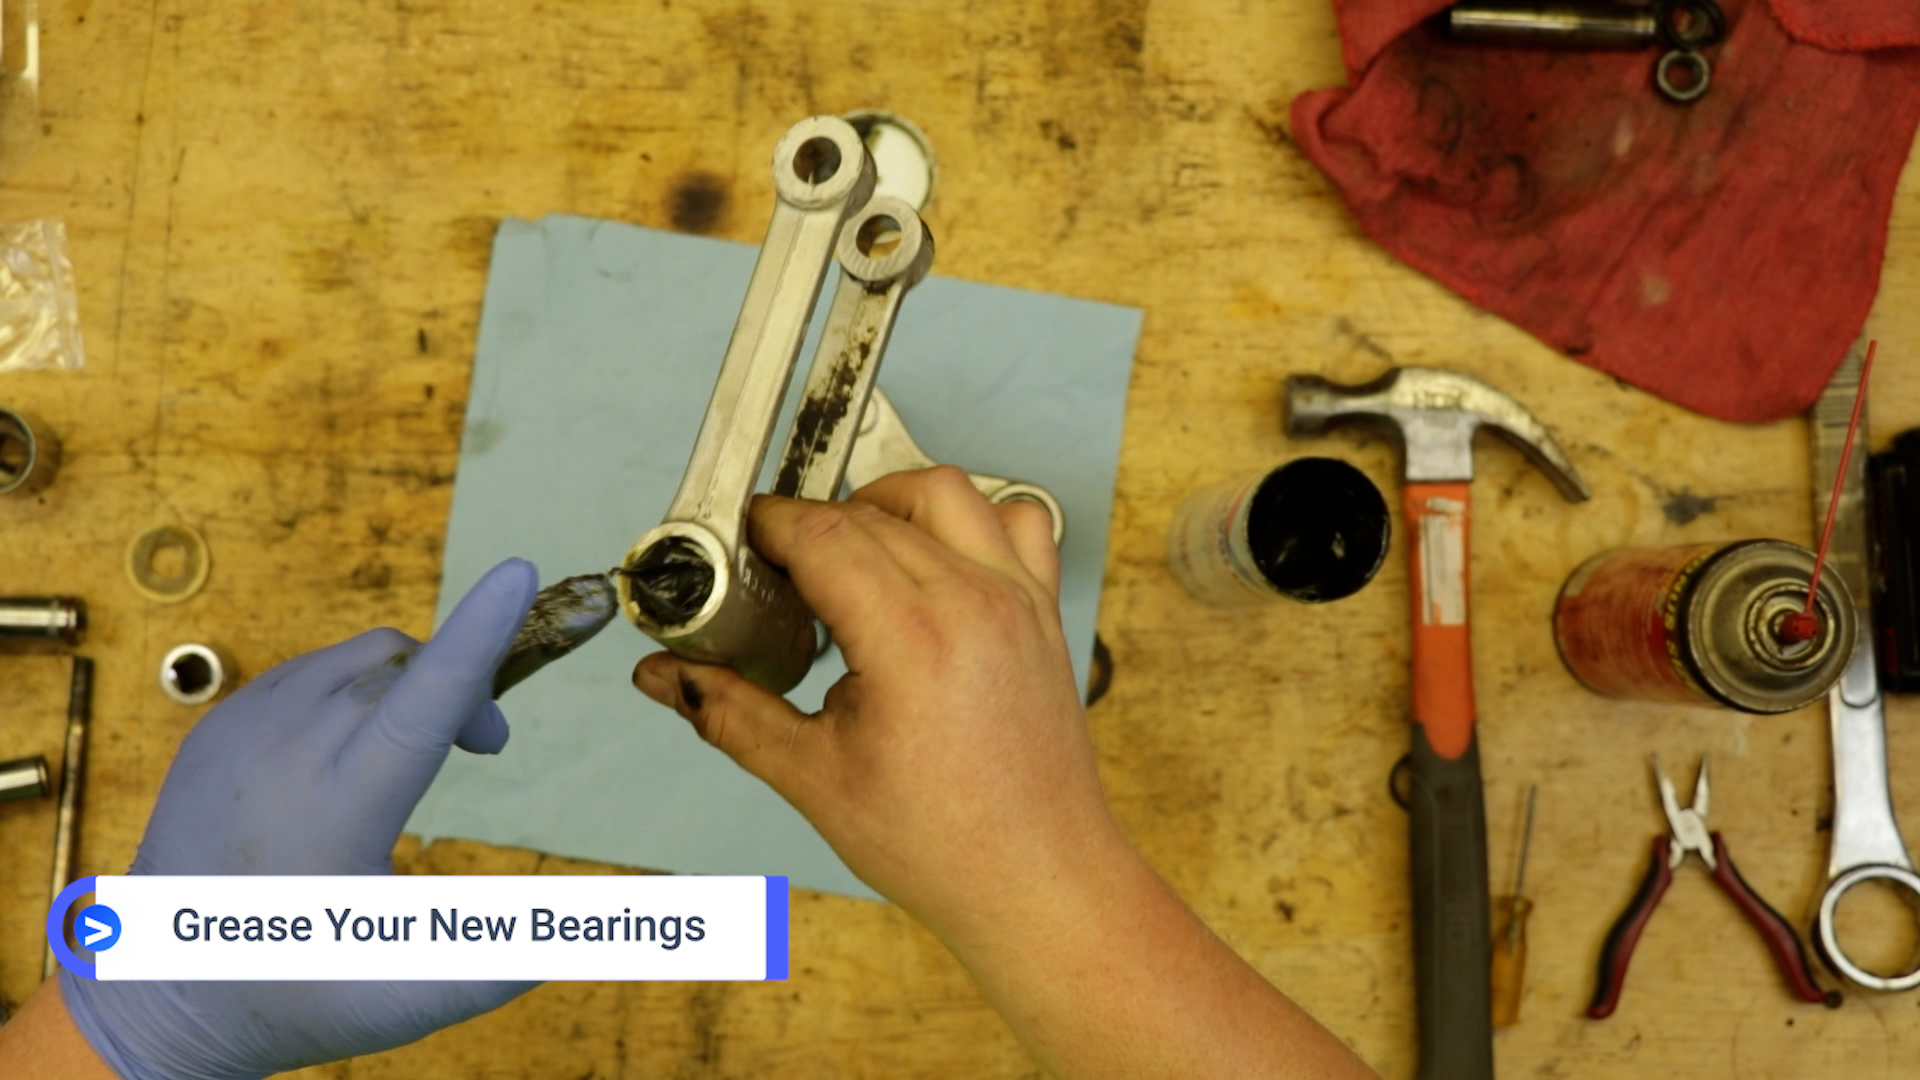
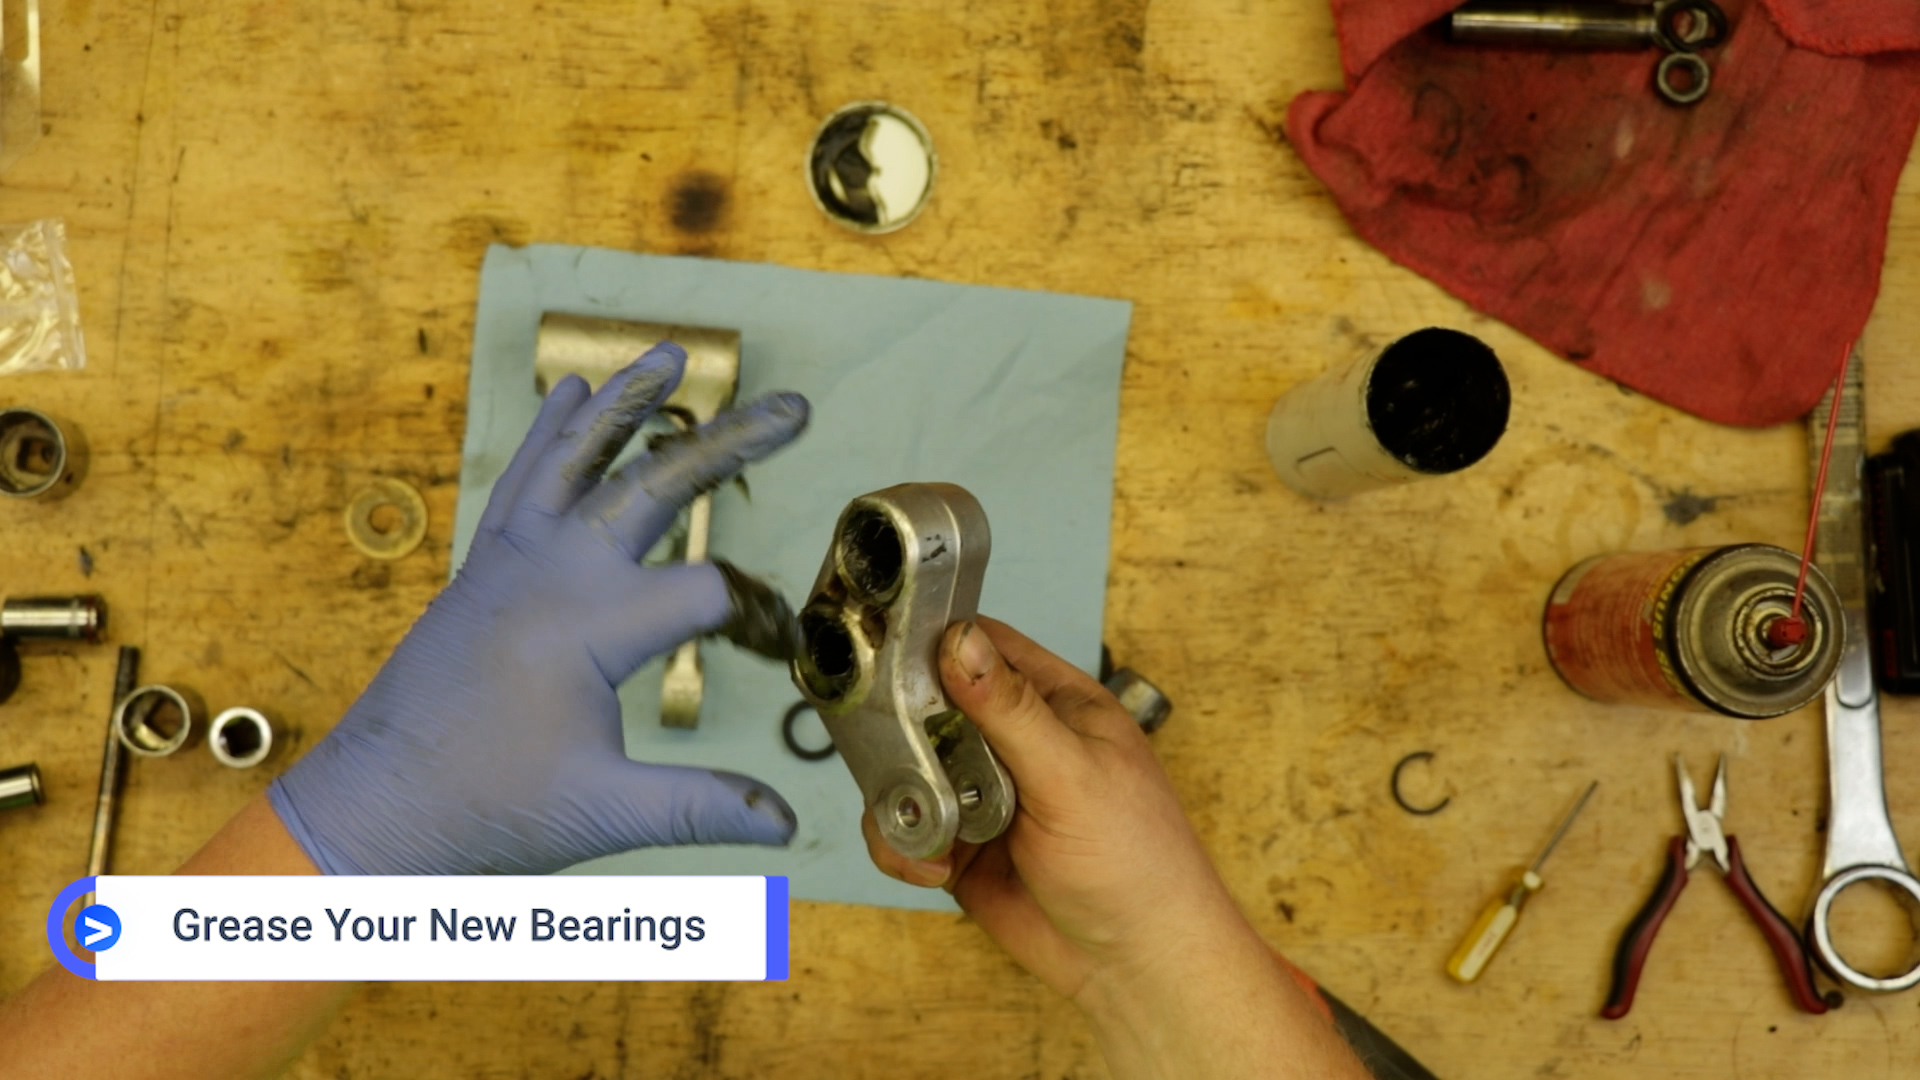
- Lubricate everything with too much high-pressure grease. If you think you’ve used enough grease, add more grease.
- Carefully work the grease into the needle bearings with your finger and a rubber glove.
BE CAREFUL! The grease will stick to everything, and if you lift your finger off the needles, you will pull them out, so always drag your finger out of the bore. - The gap between the needle bearings is there on your connecting rod for a reason: MORE GREASE!
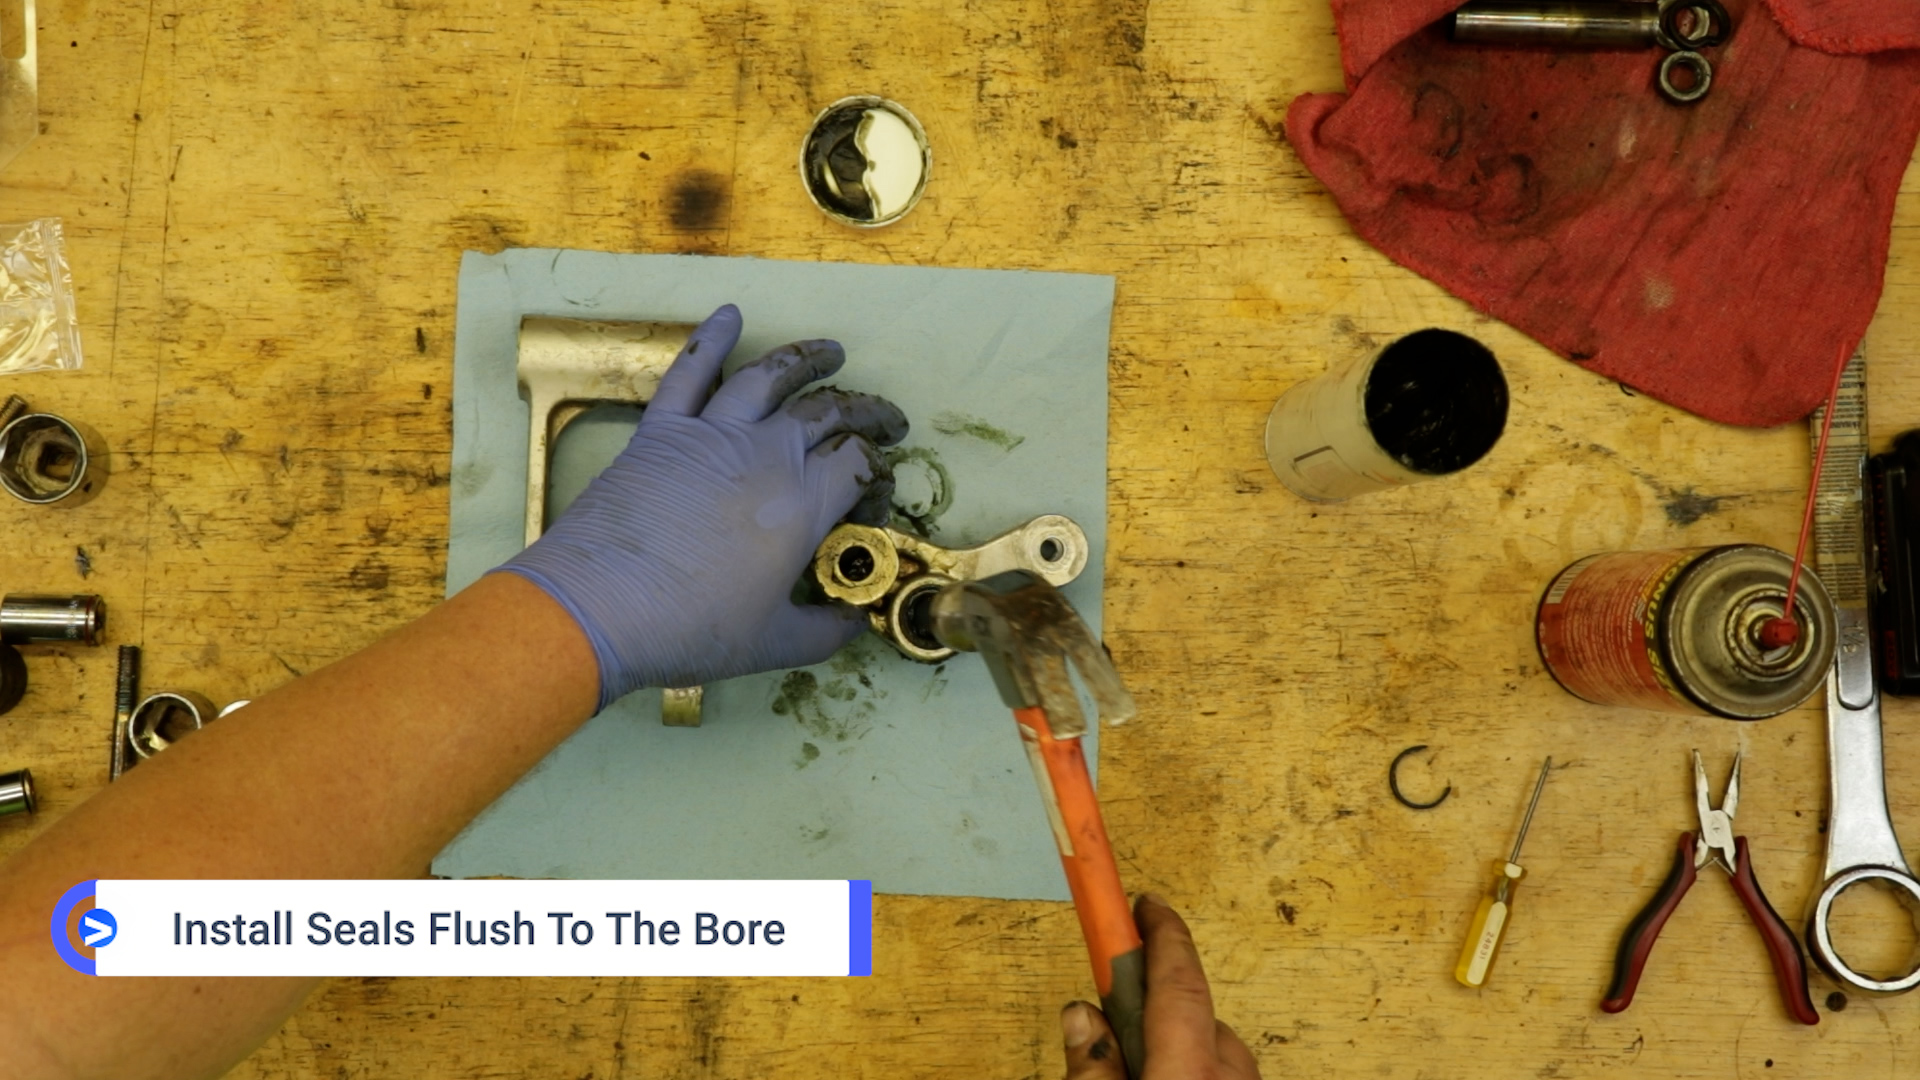
- With your bearing sufficiently greased, install the seals flush to the bore using a large washer.
- You will need to drive the seals into the bore, so be very gentle.
Relay Arm Installation
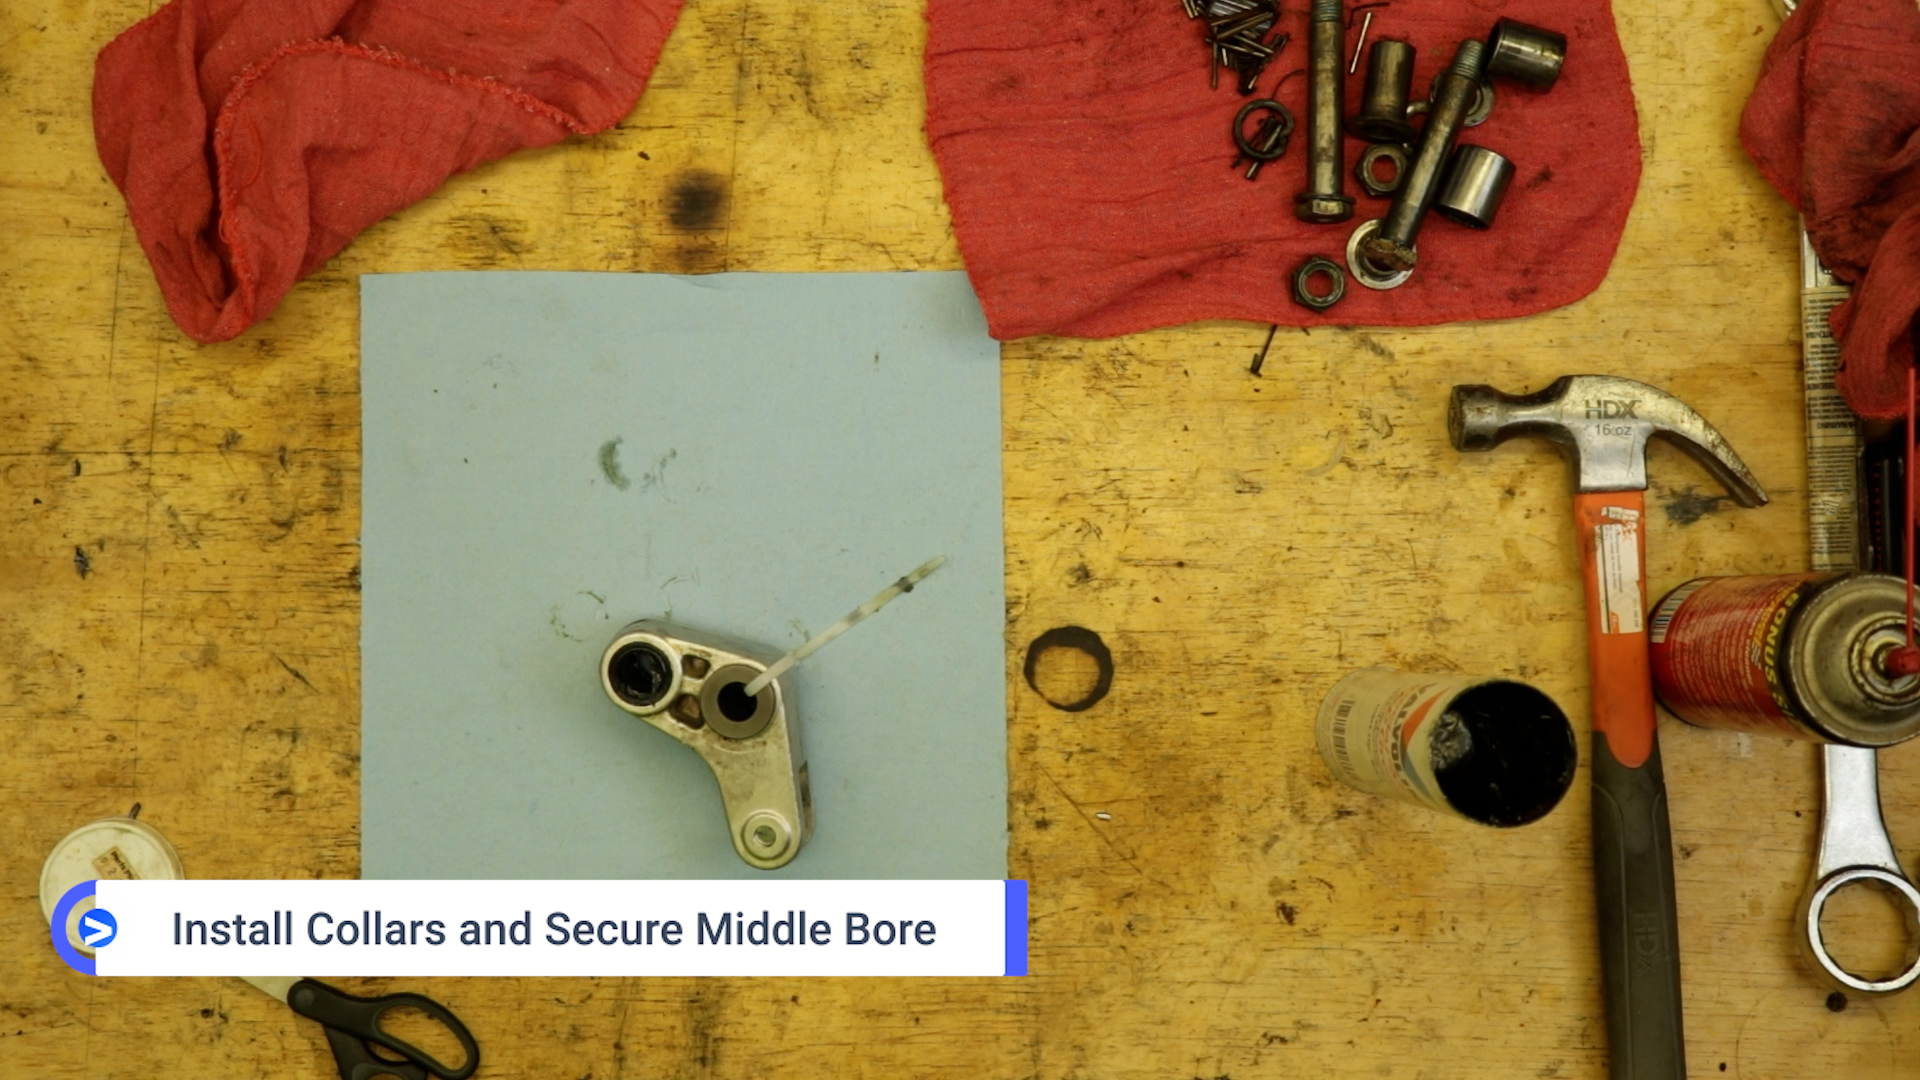
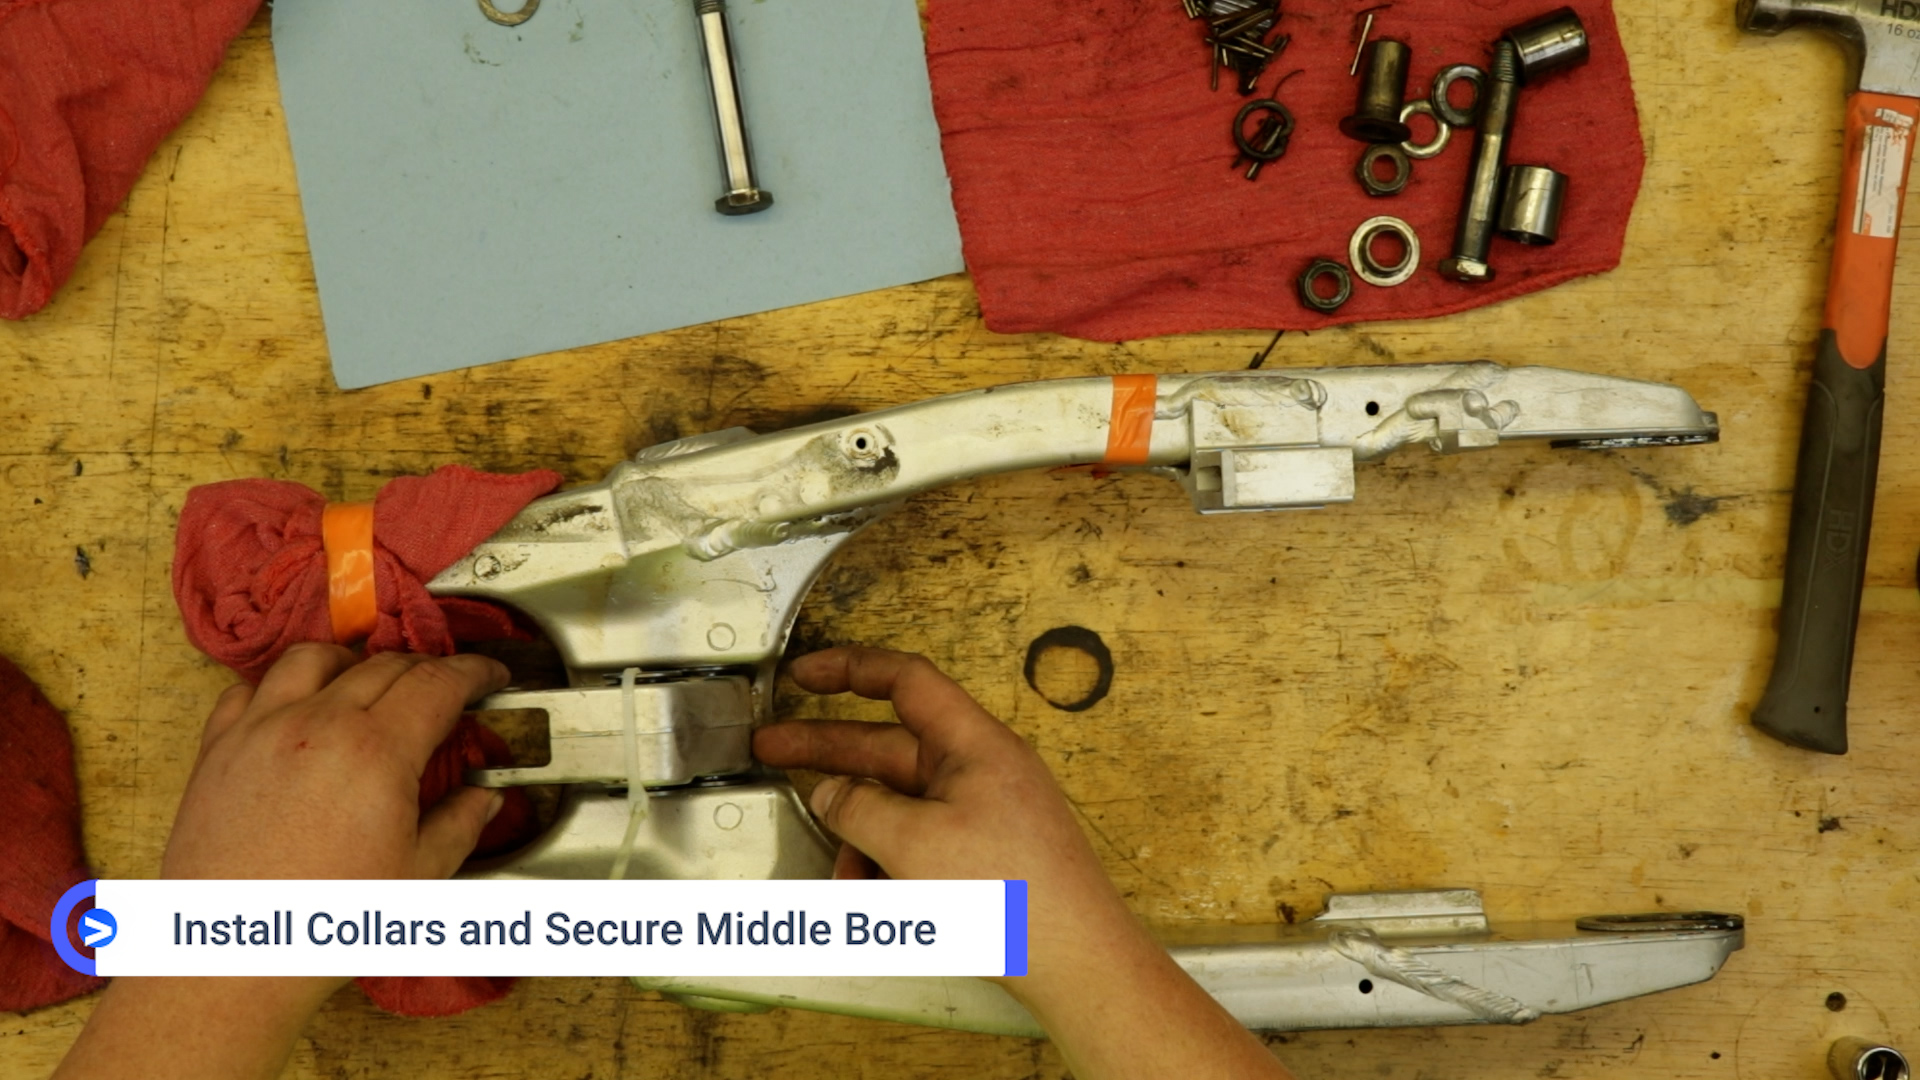
- Install relay arm collars and secure the middle bore with a zip tie.
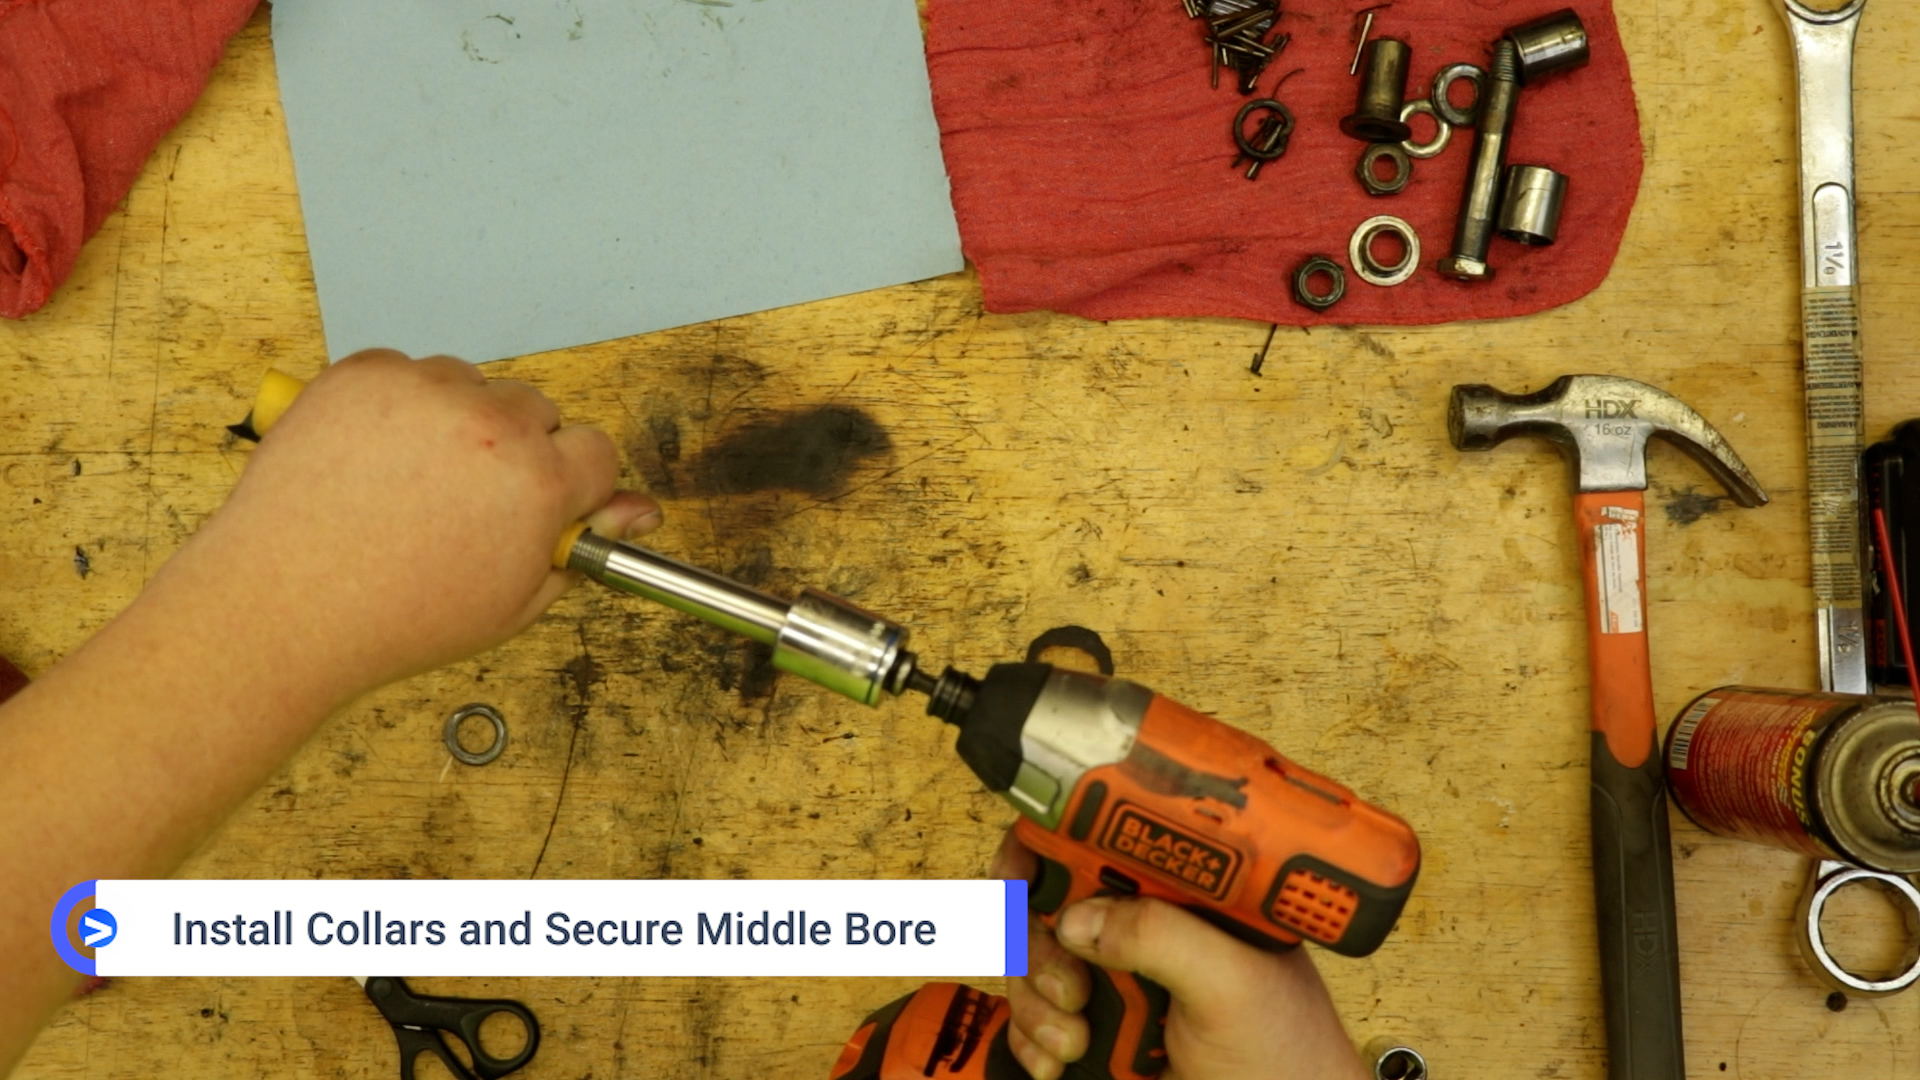
- Before you start bolting everything together, give your bolts a quick polish with 600-grit sandpaper and an impact driver.
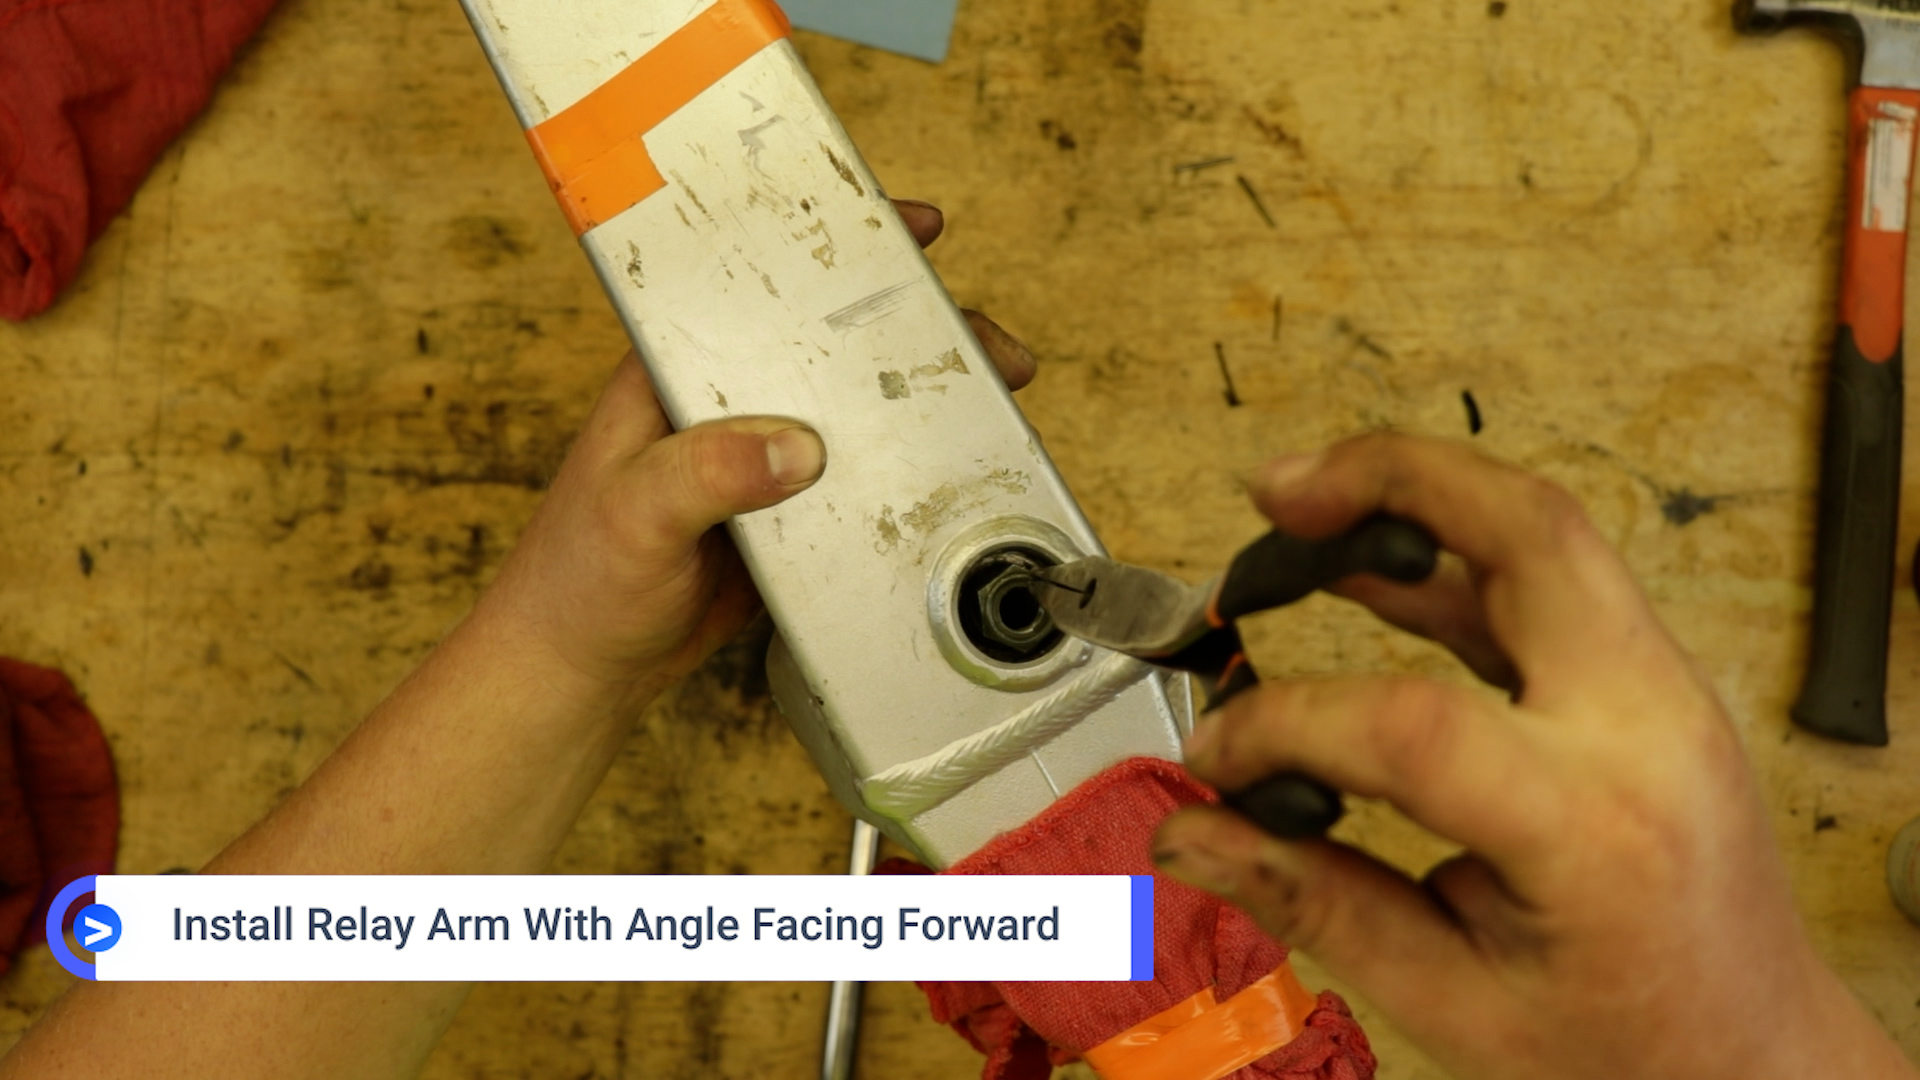
- When installing the Yamaha YZ125 shock linkage relay arm into the swing arm, make sure the angle faces forward.
- My swingarm is upside down on the bench, and orange tape marks the left side of my bike.
- A pair of long-nose pliers is extremely helpful when installing the relay arm bolt.
- Grease and install your bolt.
- Use your socket extension to hold the bolt in place as you flip your swingarm on its side.
Use your long-nose pliers and install the washer and nut. - Torque the relay arm bolt to 59 Ft-lbs.


Yamaha YZ125 Shock Linkage Connecting Rod Installation
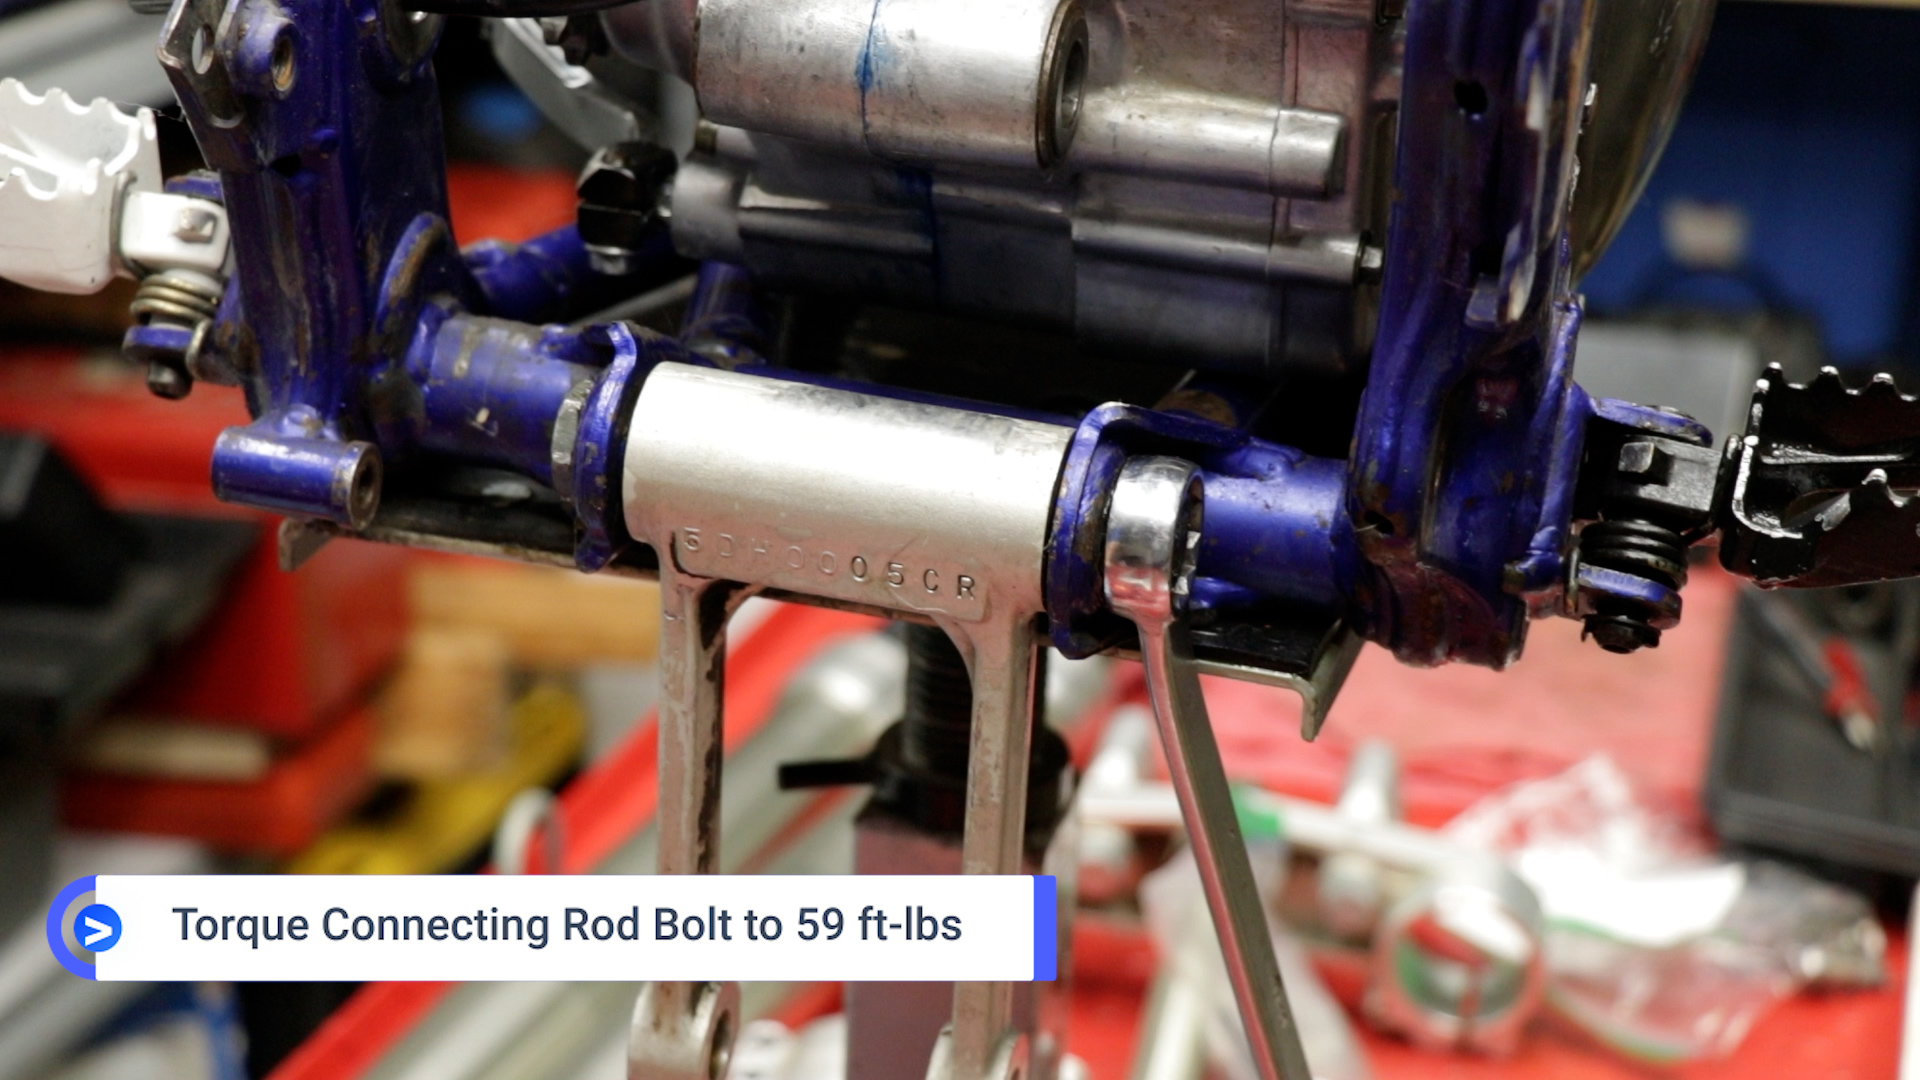
- Grease the connecting rod bolt, and install the connecting rod to your frame.
- Torque the connecting rod bolt to 59 Ft-lbs.
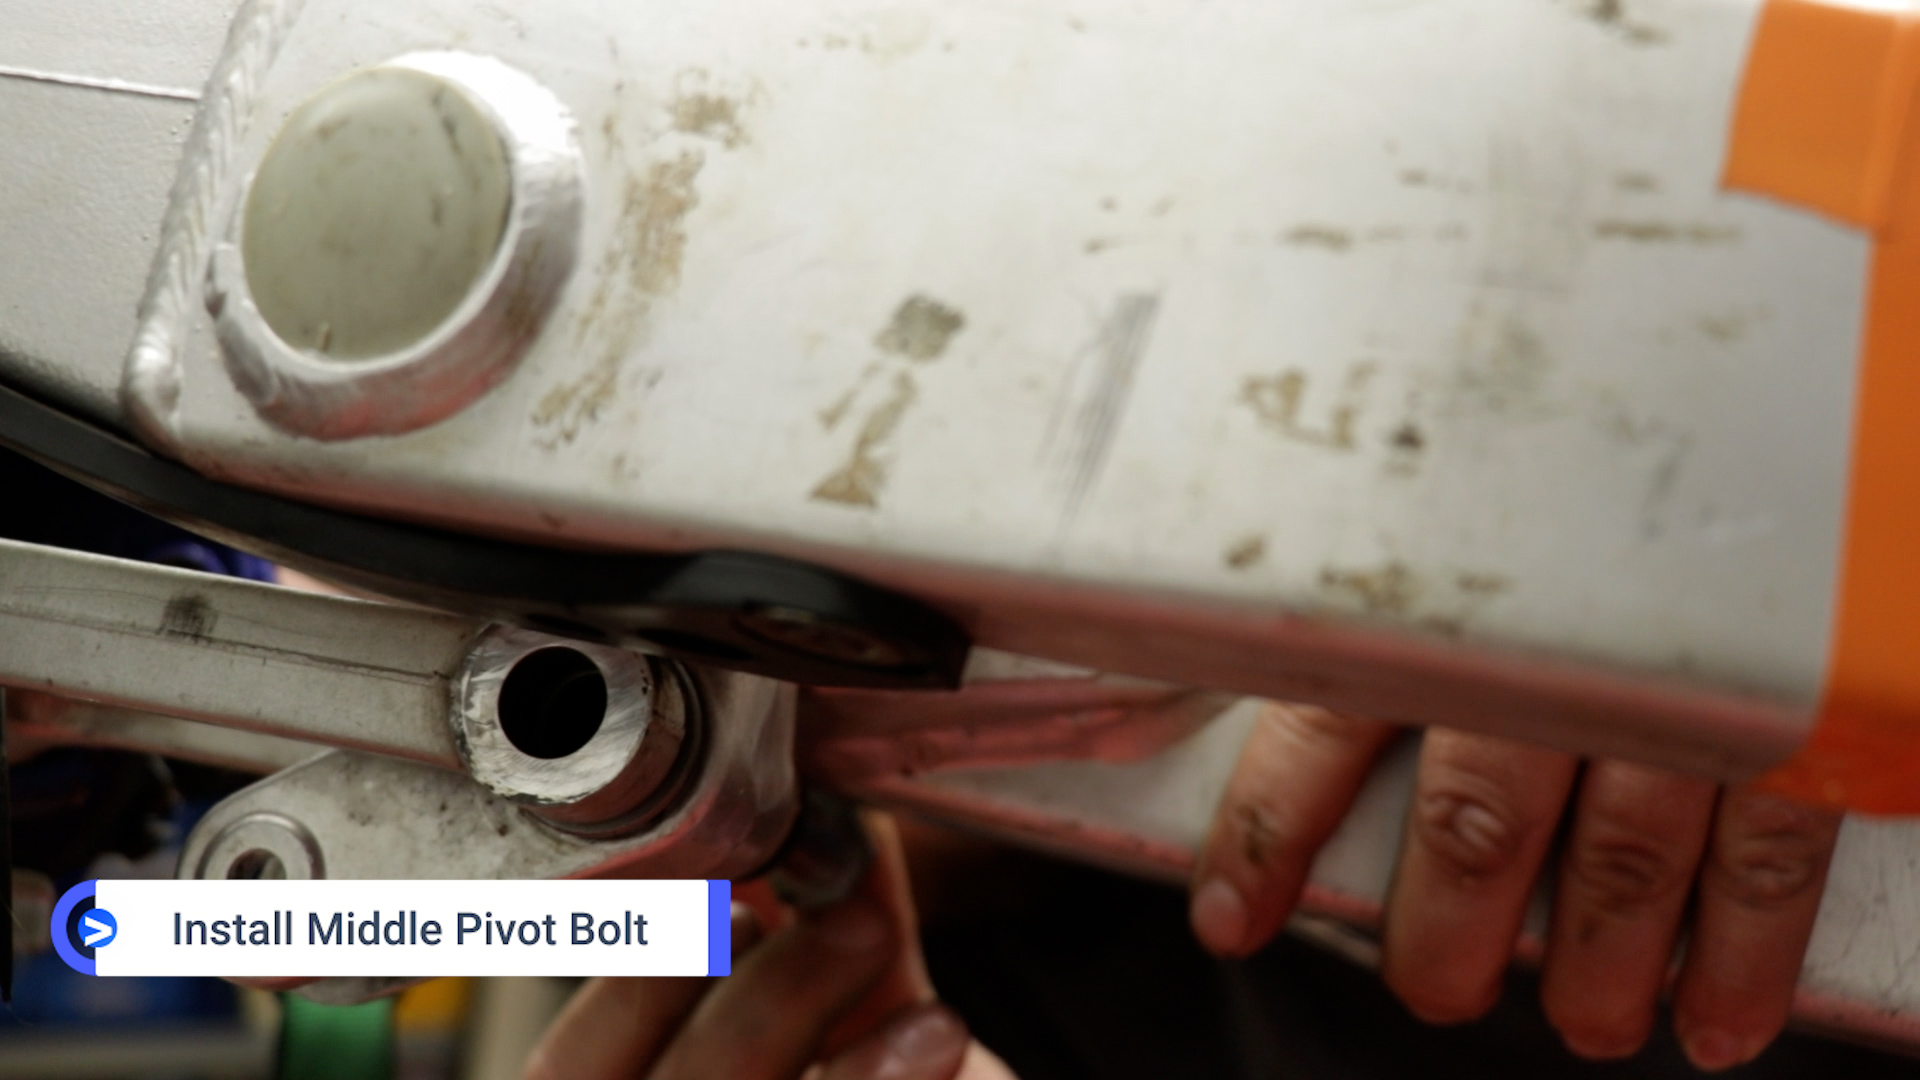
- With your swingarm installed, grease and install the middle pivot bolt.
Torque the pivot bolt to 59 Ft-lbs.


If you have any questions, please let me know in the comments or DM me!