This is how to rebuild the rear shock on your 1994 – 2001 Yamaha YZ125.
Rear Shock Service Notes:
- Do not use an air compressor to fill your shock; you have to use nitrogen. Air expands when heated, and the reservoir will explode.
- This shock rebuild is fairly simple, but it is a messy process, so keep lots of towels handy.
- There will be times when you use aggressive tools to rebuild your shock. You have to be careful not to damage the shock body, shaft, seal head, valve body, and shims. You will see what I mean later.
- Your Yamaha YZ125 comes with a KYB shock, or Kayaba, if you want to be formal. If your shock is damaged beyond repair, you can pick up a used one for under $200.
- You will need a vice. If you don’t have one, wood and clamps will do the job.
- When you finish your rebuild, you will need to take your shock to a powersports shop to be filled with 165 psi of nitrogen.
Nitrogen!
1994-2001 Yamaha YZ125 – Rear Shock Rebuild Tools
- Heat Gun
- Picks
- Flat head screwdriver
- Long, thin Philips head screwdriver
- Soft mallet
- Hammer
- Punch
- File
- Dremmel
- Shock Spanner Wrench → https://amzn.to/4k54iCy
- Hand pump
- Safety Glasses → https://bulltru.com
Specialty Tools:
- You will need a Schrader valve core removal tool for the shock bladder. → https://amzn.to/3EVJGOf
- You will need two specialty tools to rebuild your shock. As much as I encourage using DIY tools and problem-solving, THIS IS NOT THE TIME.
- You will need a seal head bullet to install the seal head onto the shaft, and a seal head driver to push the seal head into the body to remove the stop ring.
- IF you try to drive the seal head into the body without even pressure, you will damage the shock bore.
- IF you try to install the seal head without the seal head bullet, you will tear the seal and need to buy another seal head.
- Considering the seal head is half the cost of the kit, you will be saving money
- Seal Head Bullet – https://amzn.to/3EYrIe1
- Seal Head Setting tool – https://amzn.to/42JUQih
Rear Shock Rebuild Parts:
- The only parts you will need are a new shock rebuild kit. → https://amzn.to/4jEH1aN
- And some fresh shock fluid. Pro tip: buy more shock fluid than you think you need. → https://amzn.to/3GGzWYQ
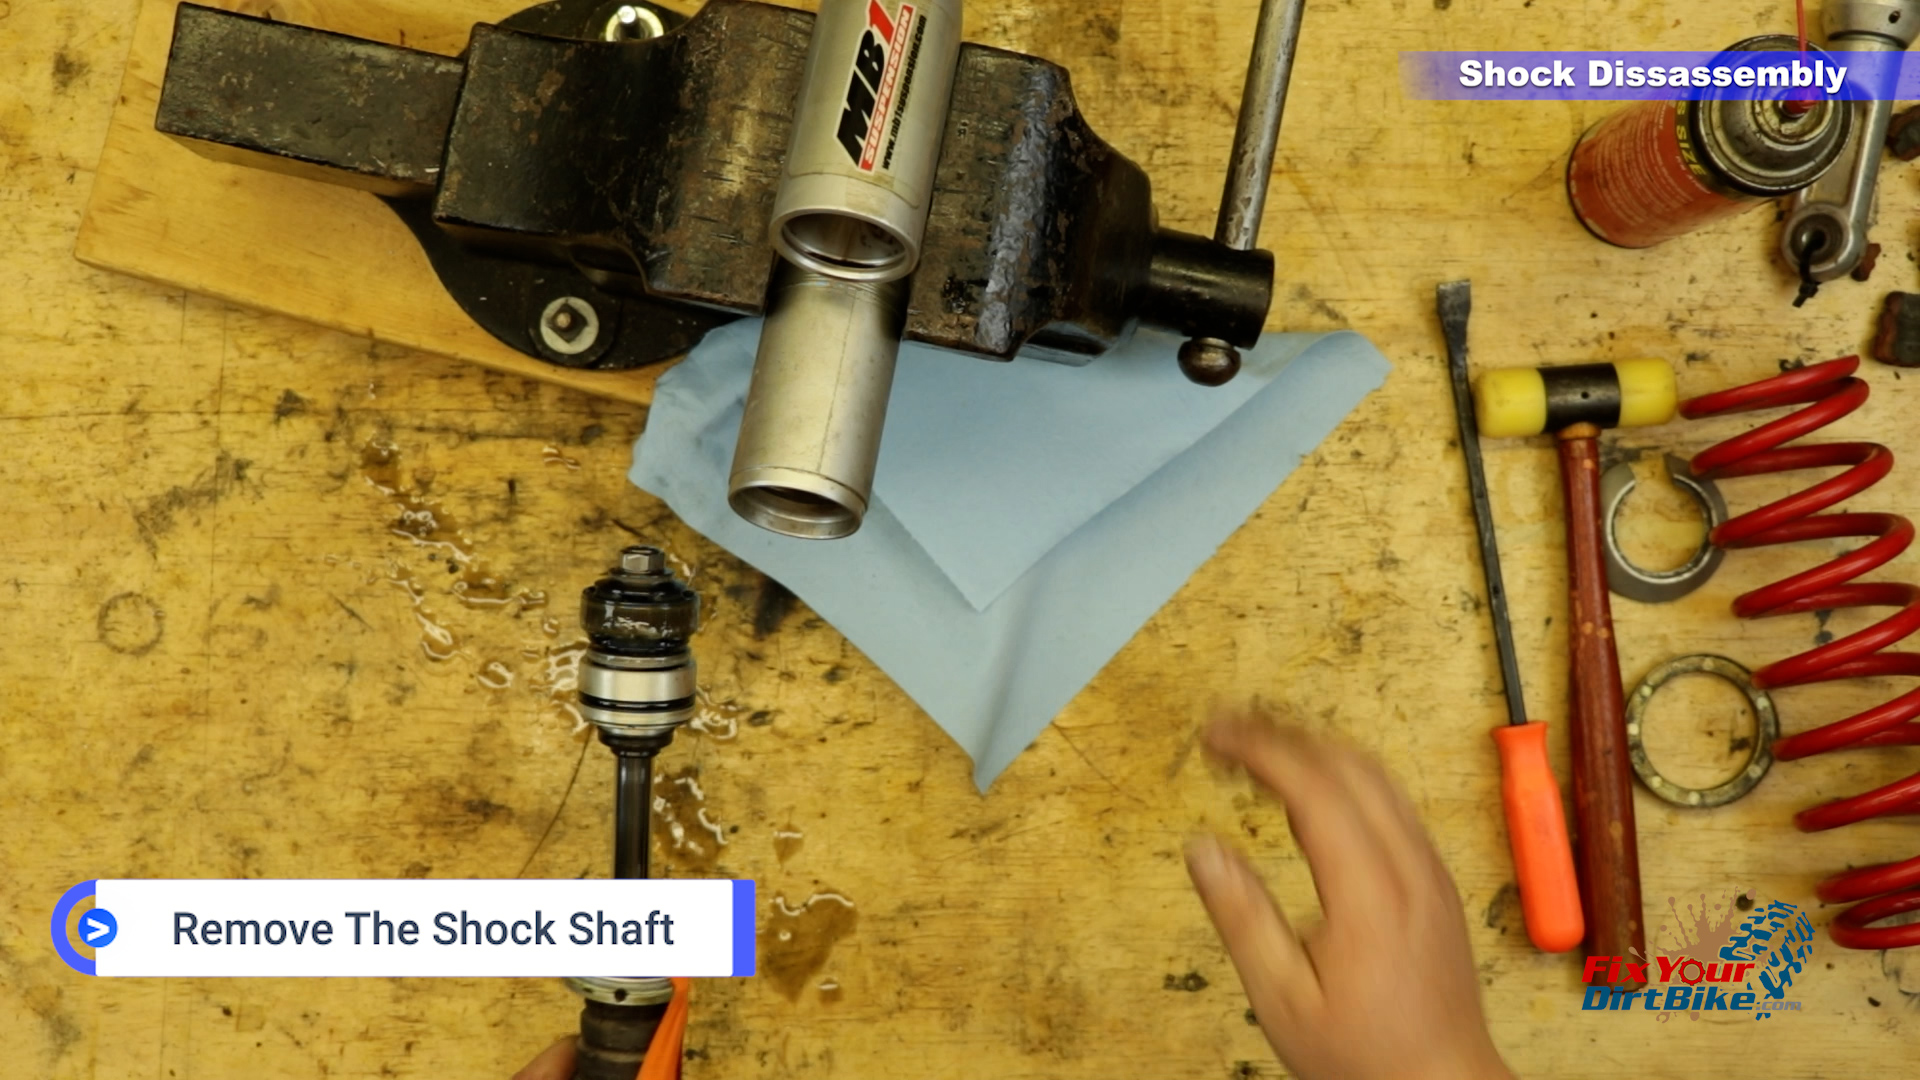
Shock Dissassembly
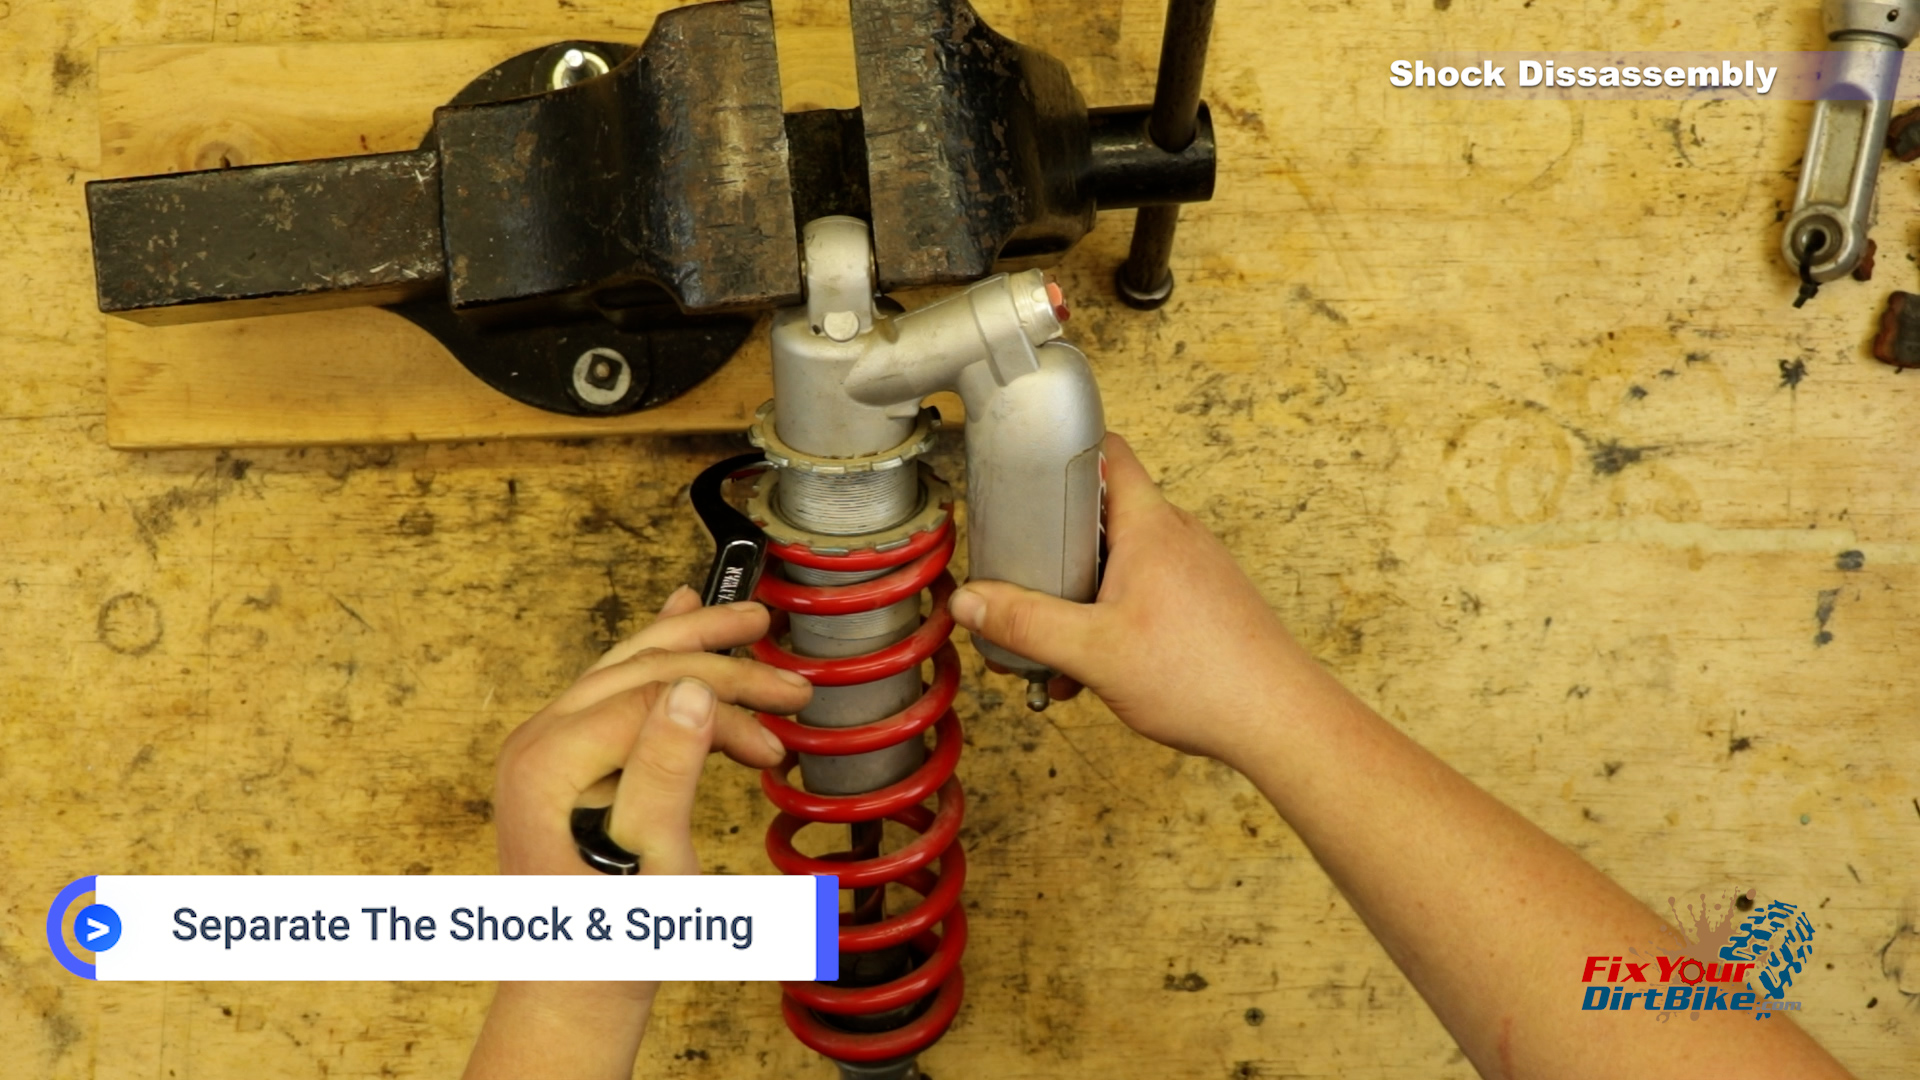
- Start by separating the shock and spring.
- Back the lock rings all the way out and remove the spring guides.
- Remove the spring.
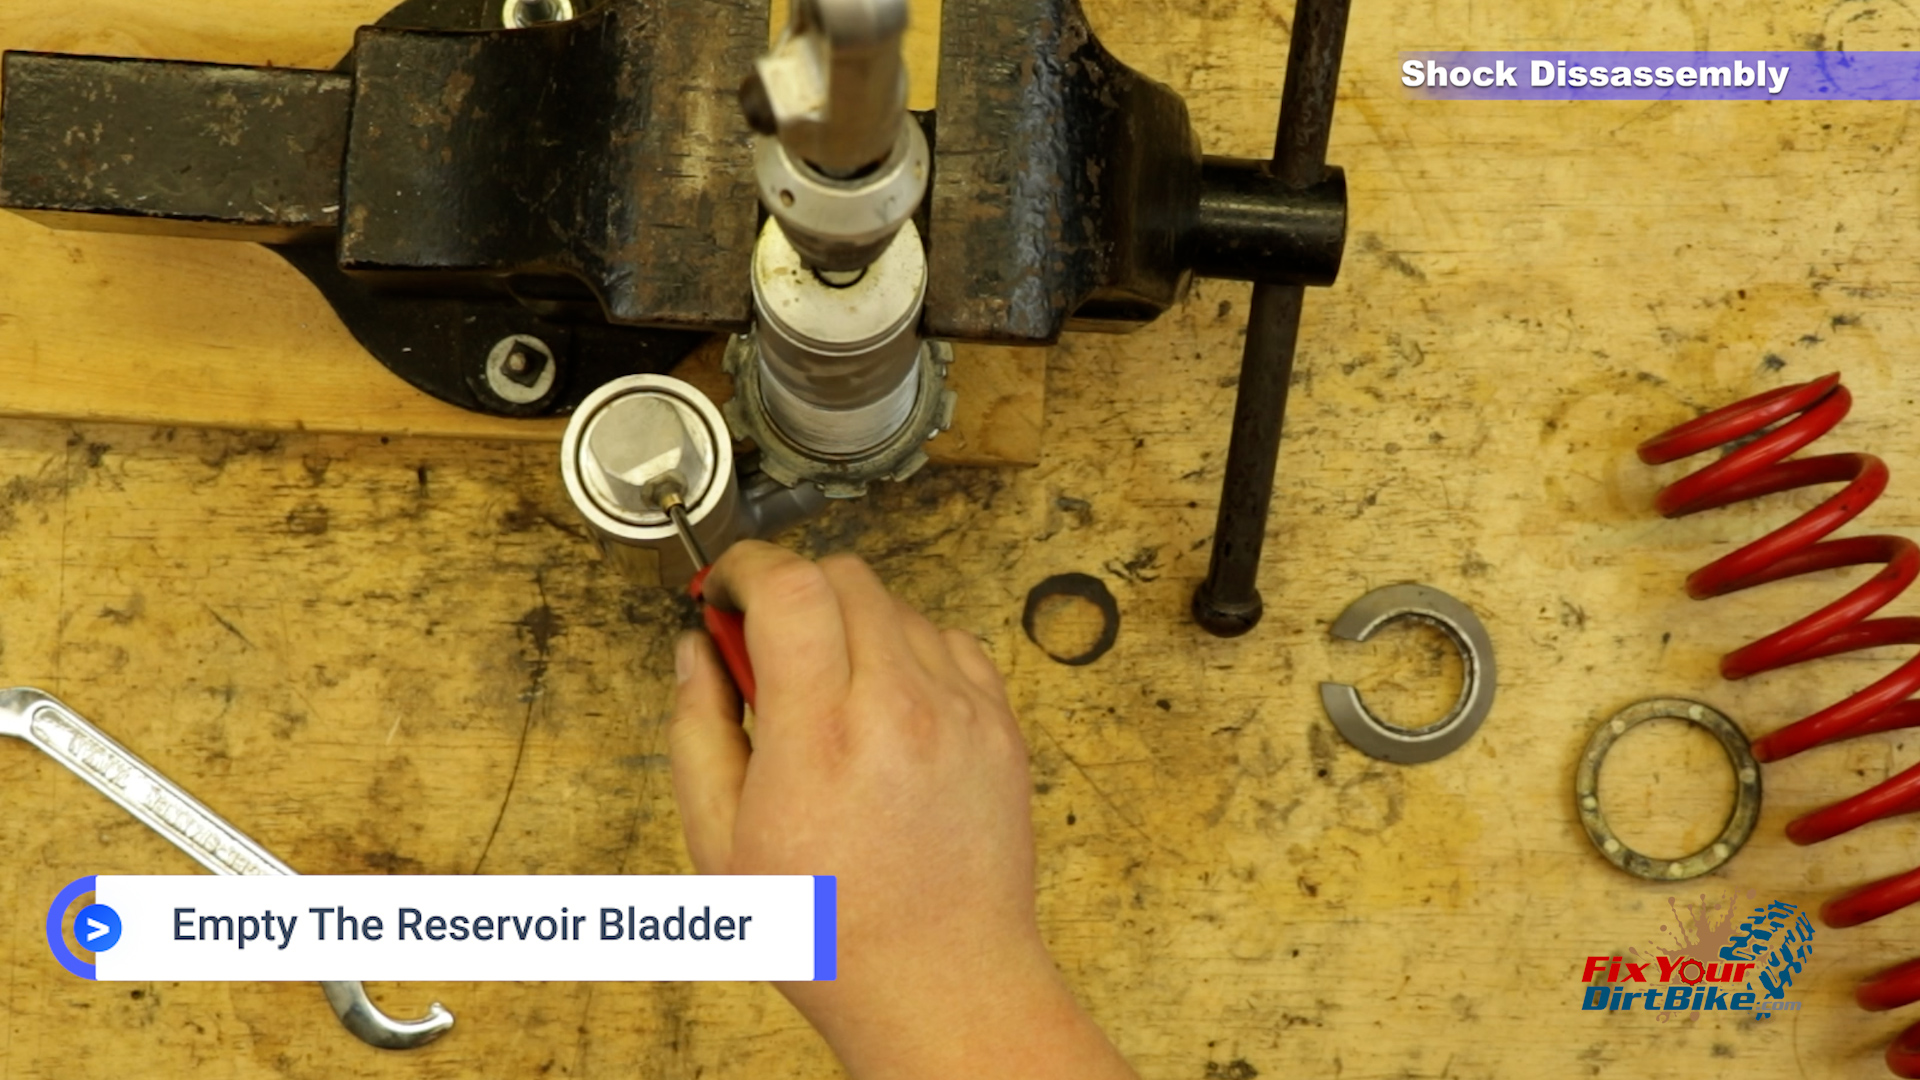
- Remove the valve core to empty the reservoir bladder.
- The bladder is filled with 165psi, so keep the core pressed into the valve while it drains.
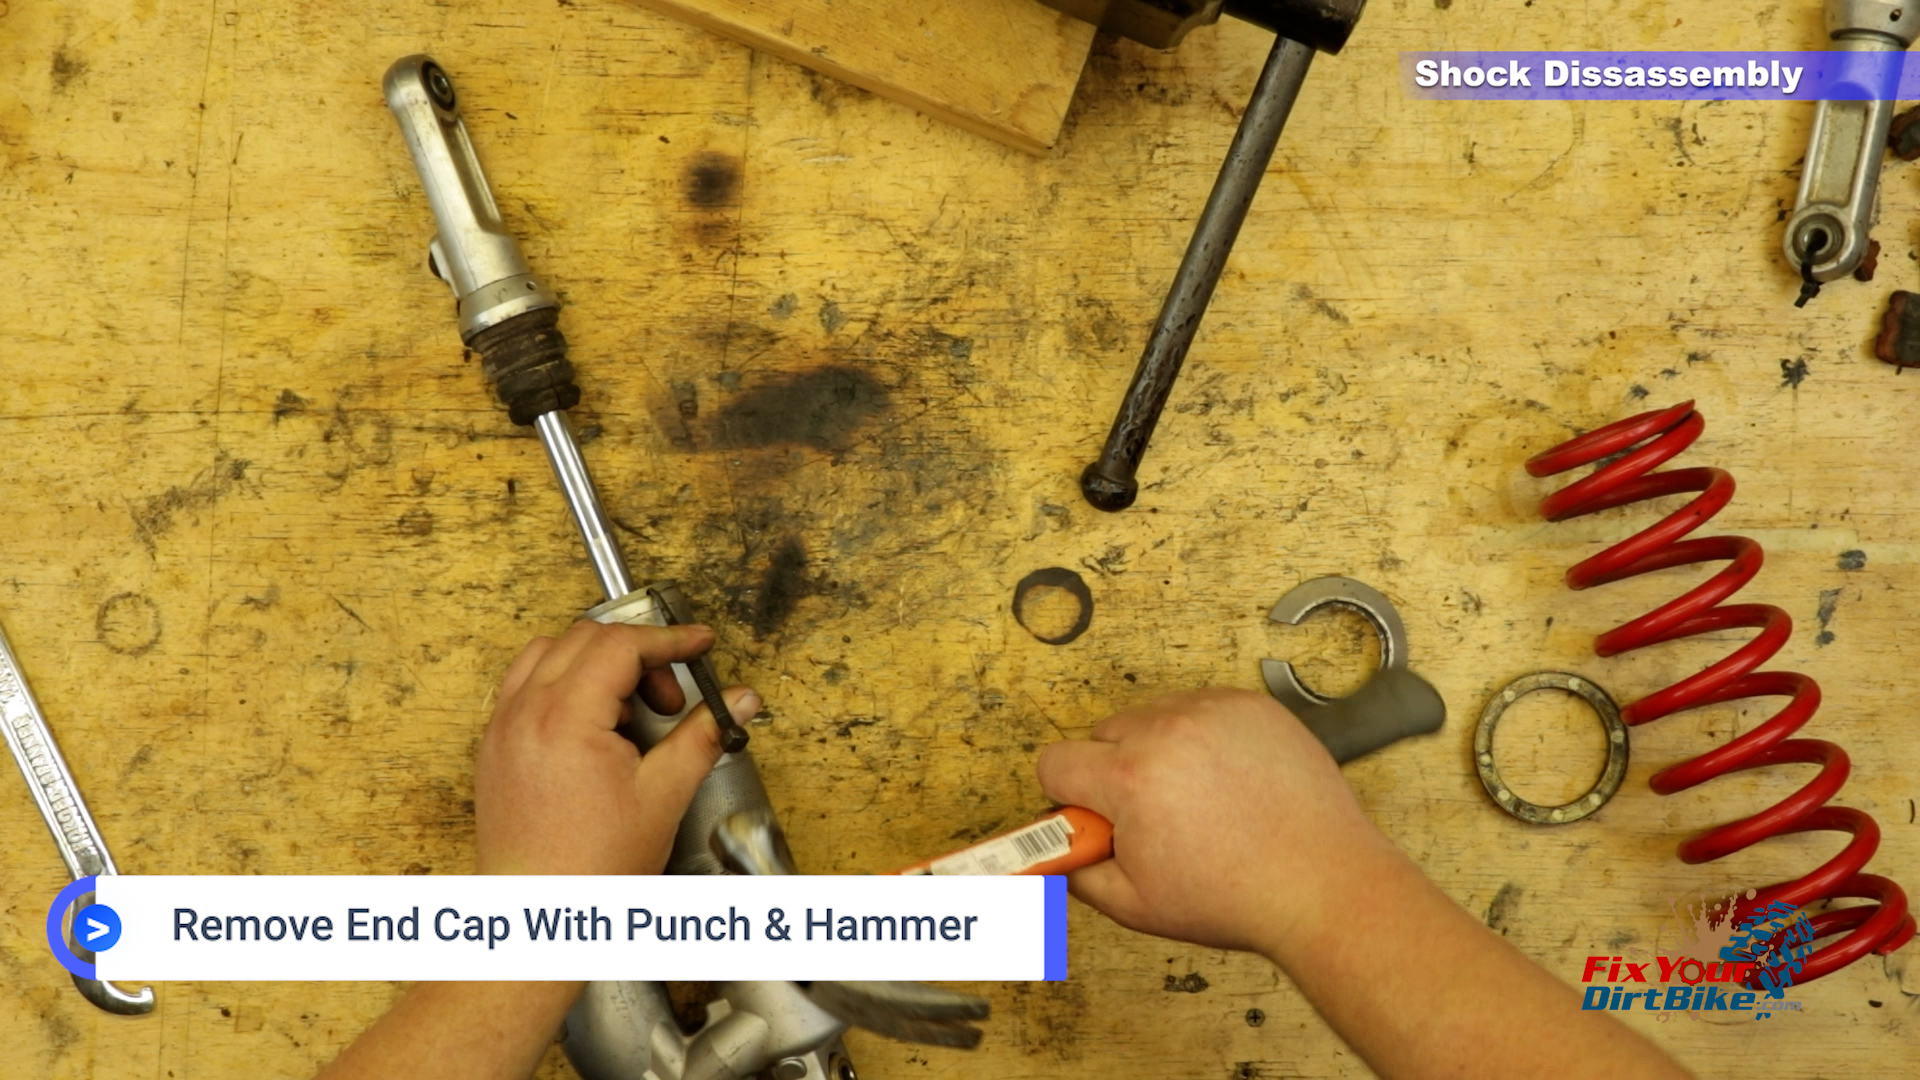
- Using your punch, tap the end cap weep holes while continually flipping your shock.
- This might take a while, or not, I got lucky here.
- Back out your rebound adjuster and both compression adjusters.
- Secure the shaft components with electrical tape.
- Using your seal head setting tool and mallet, drive the seal head into the bore past the stopper ring.
- It shouldn’t take much force.
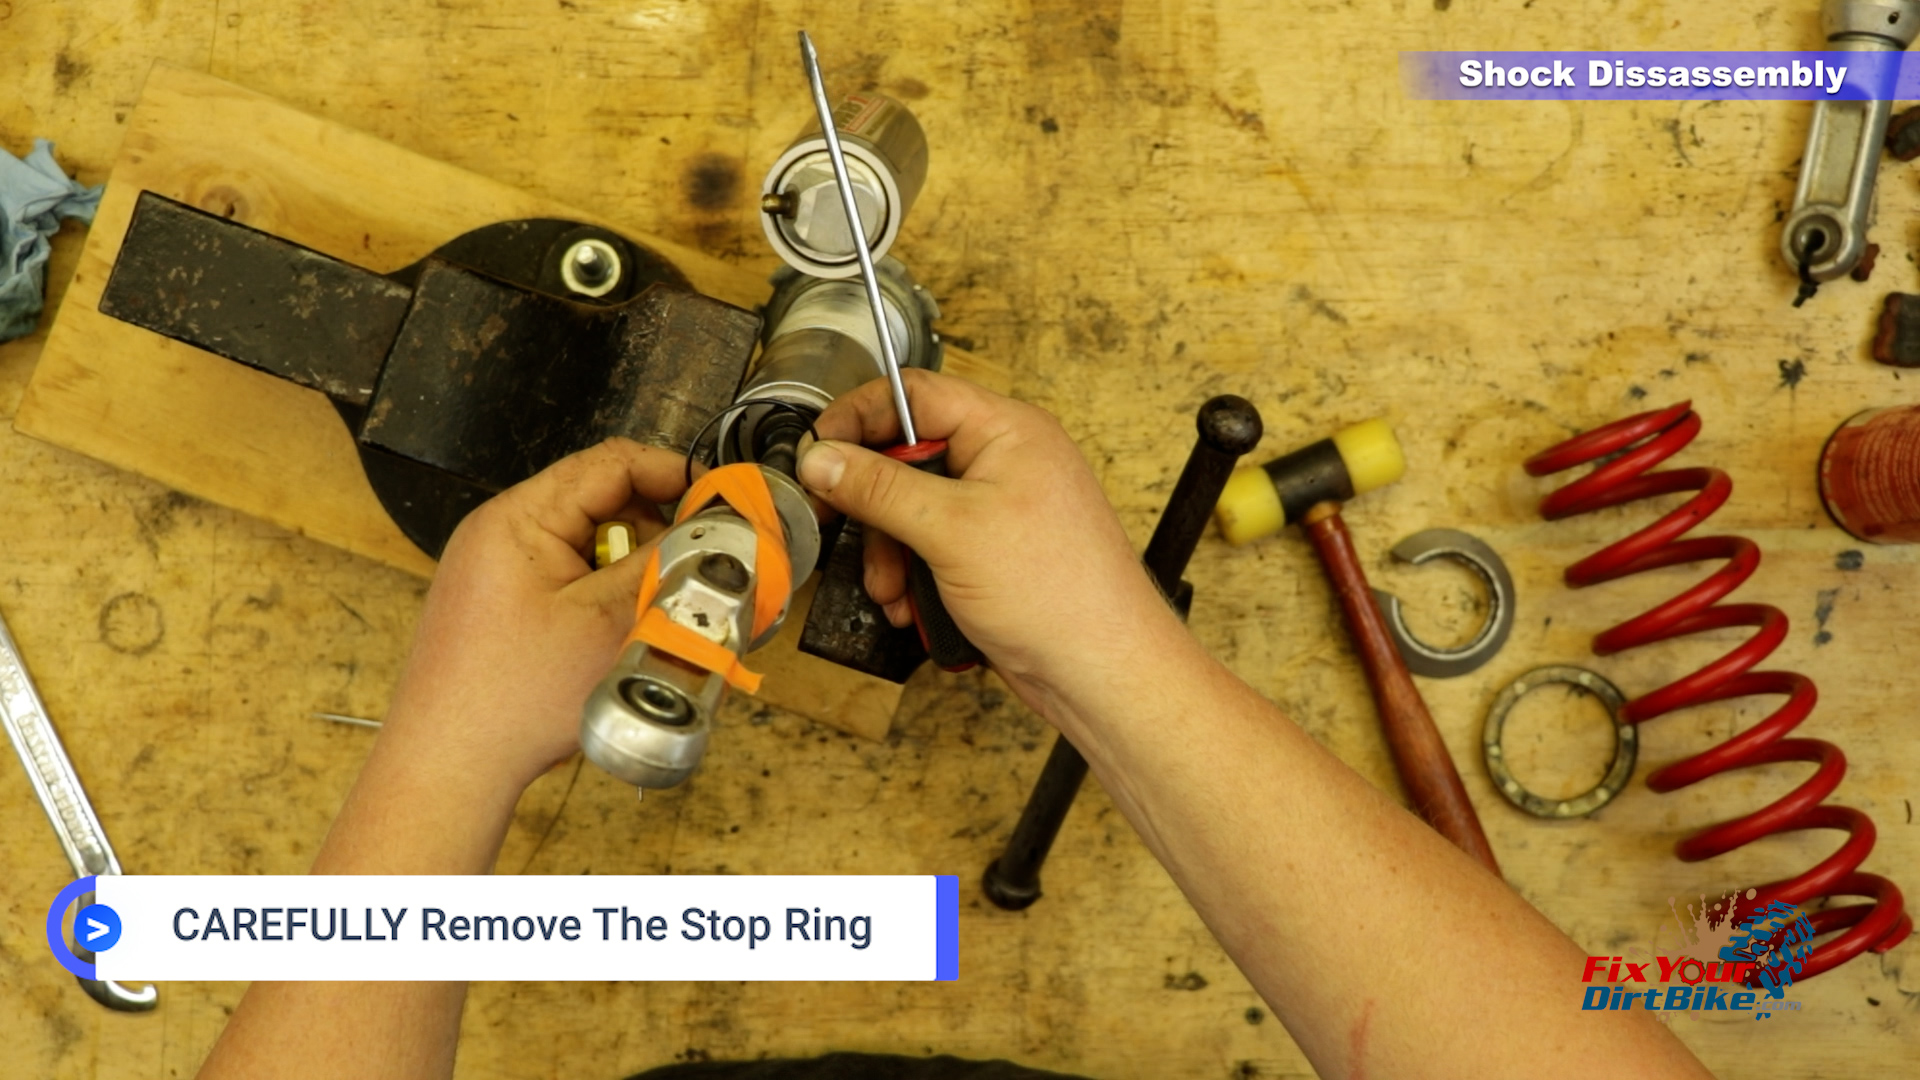
- CAREFULLY remove the stop ring from the shock bore.
- Tap the reservoir cap into the bore, and remove the stop ring CAREFULLY.
- You will need to remove the shock reservoir cap and bladder before you can pull the seal head from the body.
- Mine was dirty, so I used a pry bar to push it away from the ring.
- Remove the reservoir cap and bladder, and make a mess on your workbench.
- Drain your shock, and remove the shock shaft.
- This may take some force, but DO NOT try to pry or wiggle the shaft out.


Clean & Inspect
- Clean and inspect the shock body and spring components.
- Replace any worn or broken parts.
Shock Shaft Disassembly
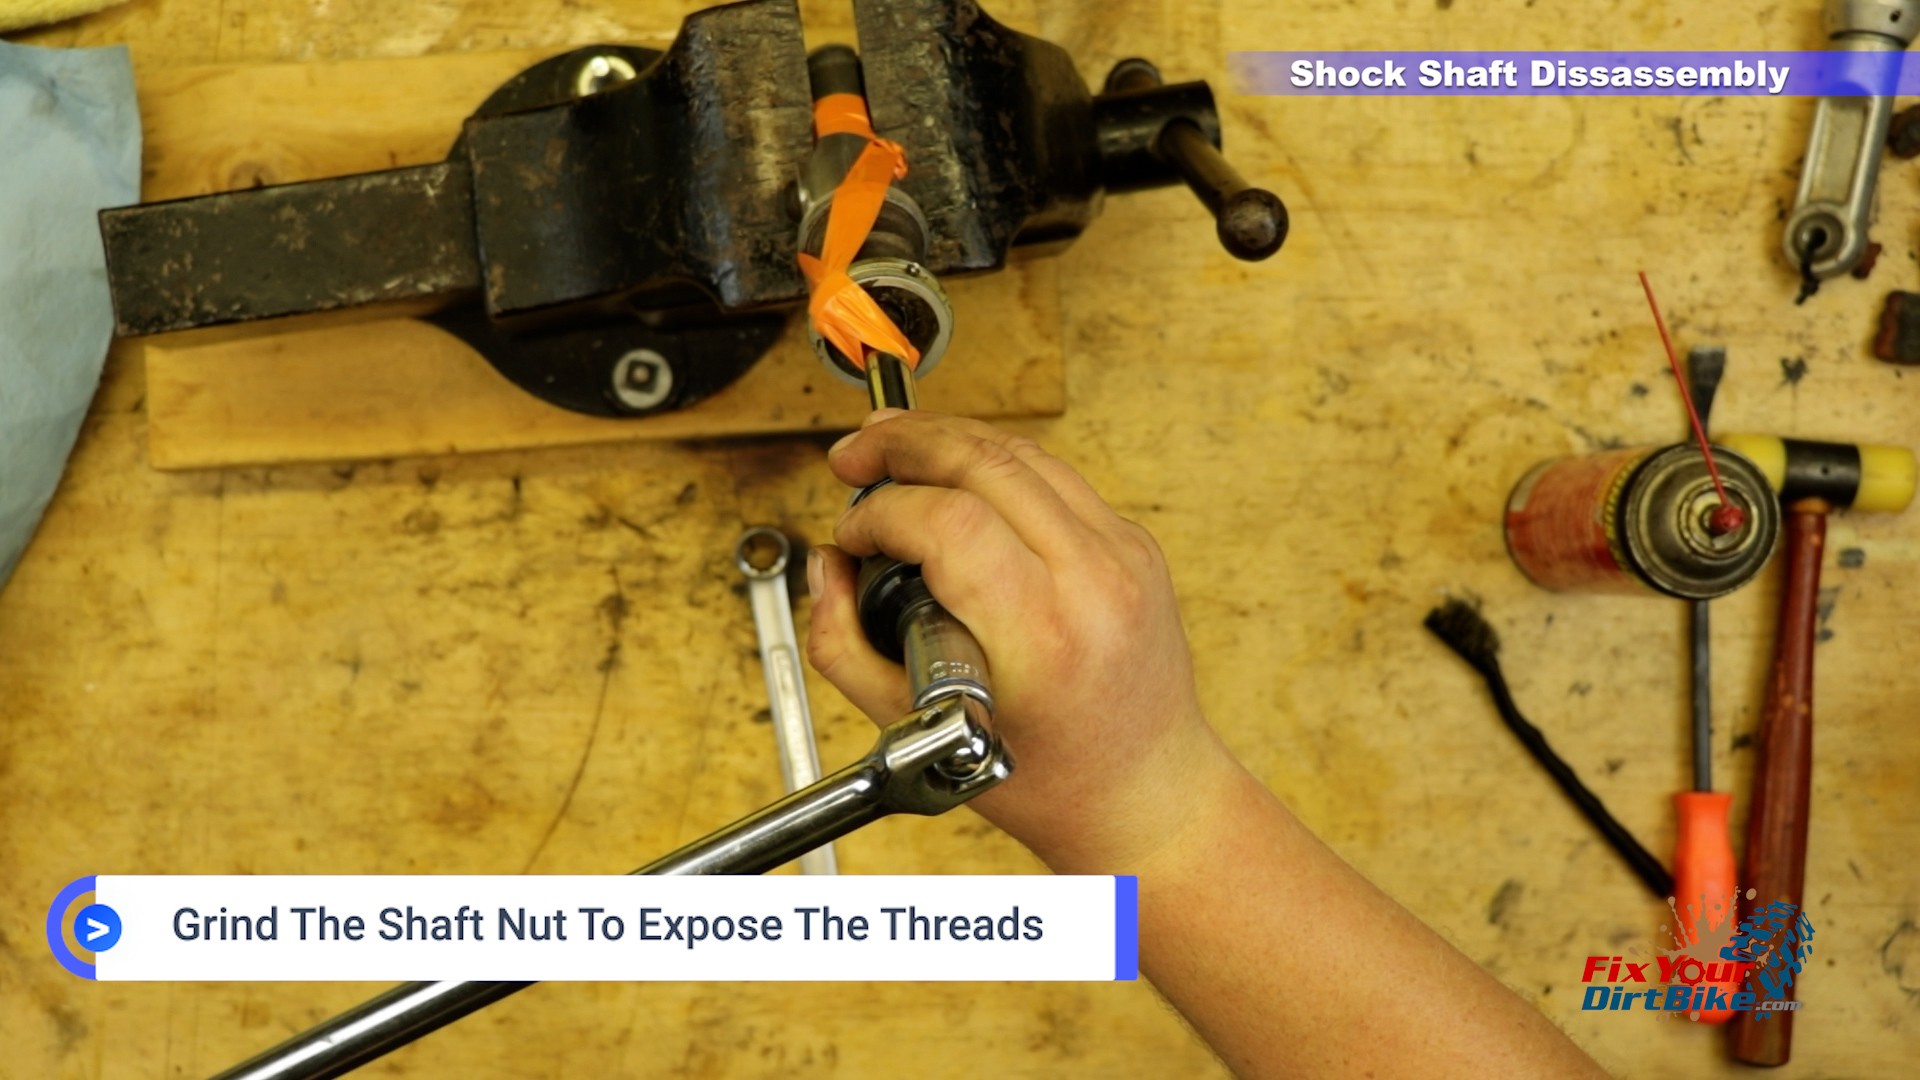
- This is where your vice comes in. I do NOT recommend doing this while your shaft is flopping around everywhere.
- Start by grinding the nut to expose the shaft threads.
- This shock was rebuilt incorrectly. There are no peen marks on the nut. Instead, they mushroomed the shaft threads over the nut. Yes, it worked, but now I have to deal with this.
- Ideally, your shaft and nut will be peened with three punches that lock the nut to the shaft, which we will cover during assembly.
- But now, I have to cut and smooth these threads before removing the valve body.
- With your nut removed and your shaft smooth, transfer the valve stack onto a long Phillips head screwdriver.
- Remove and clean the remaining shaft components, and check the shaft for uneven wear or damage.
- Install the spring stop, new bumper, and end cap.


Shock Shaft Assembly
- Install your seal bullet, and give it a coat of shock fluid.
- Lubricate and install your new seal head, with the small end facing DOWN.
- This is why you need the seal bullet. You only need some plastic wrap with fork bushings, but the seal head is a much tighter fit.
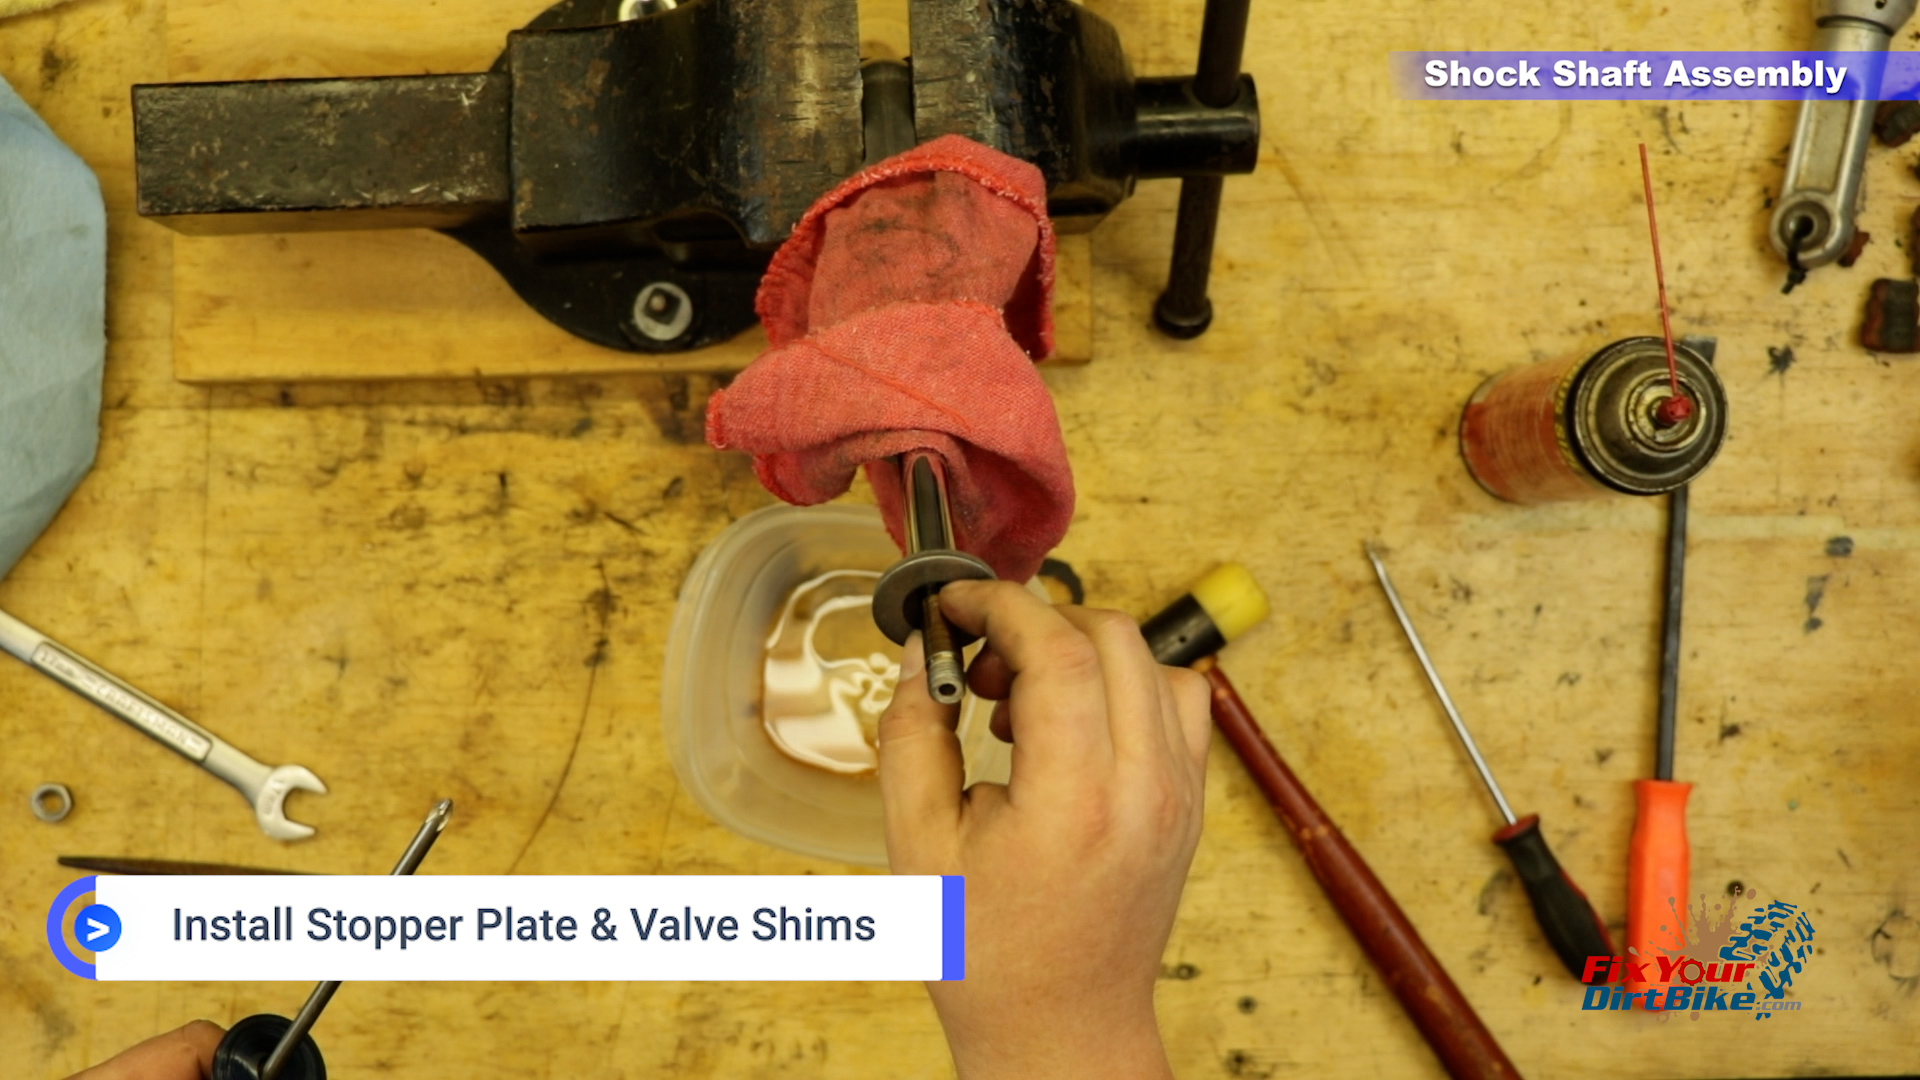
- Install the stopper plate and the first stack of valve shims.


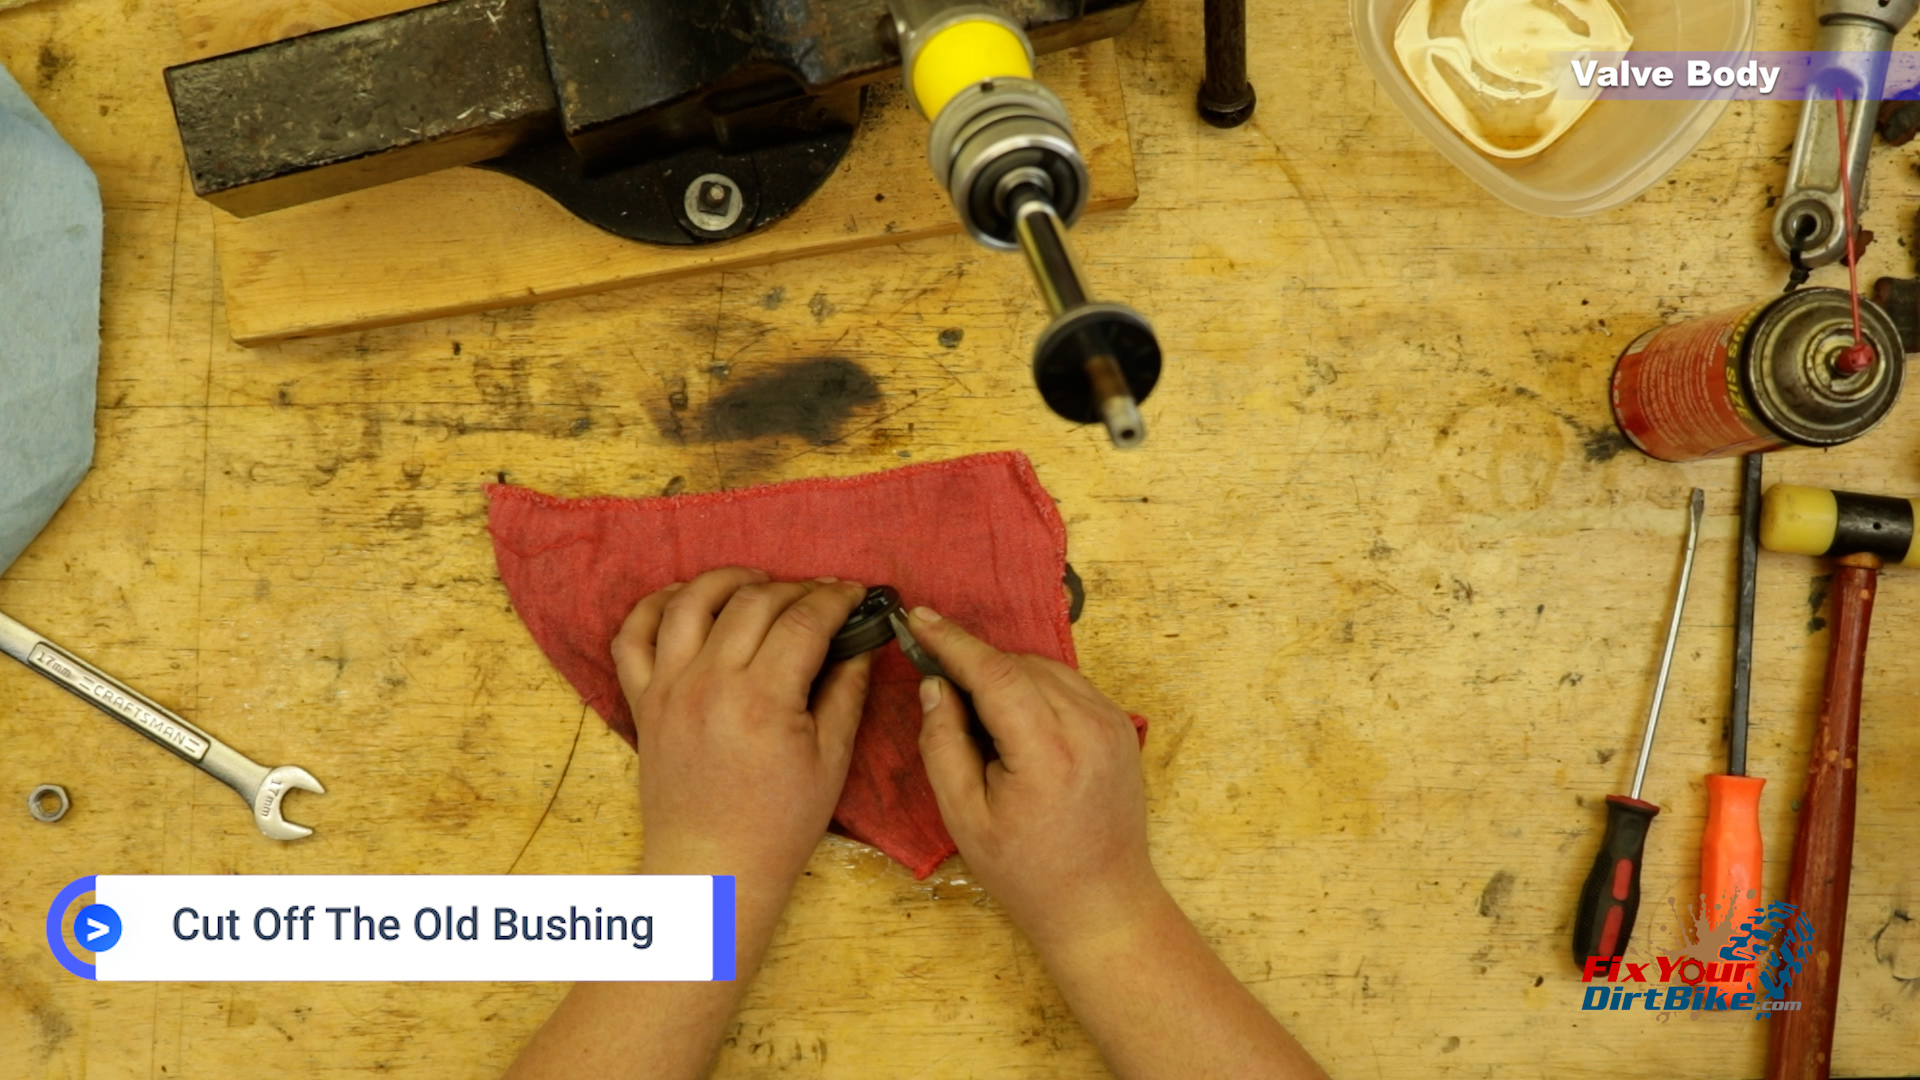
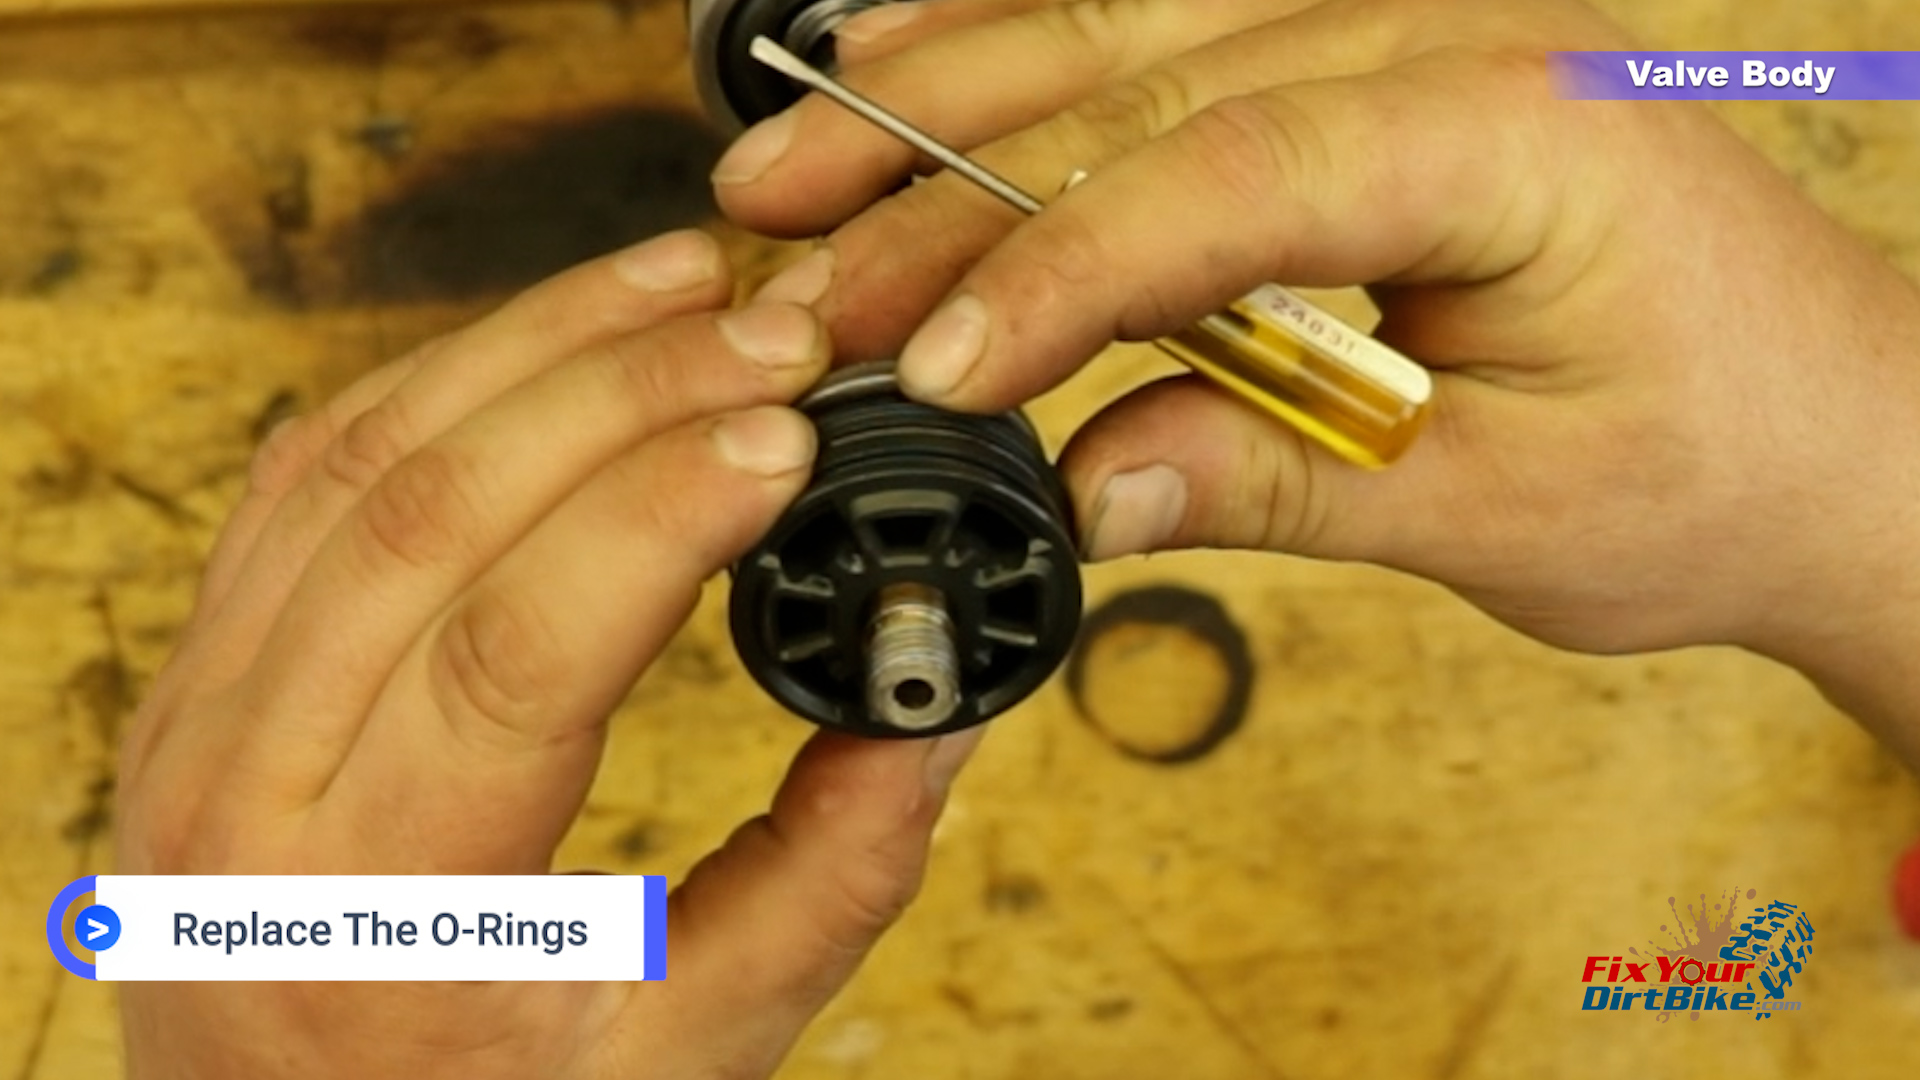
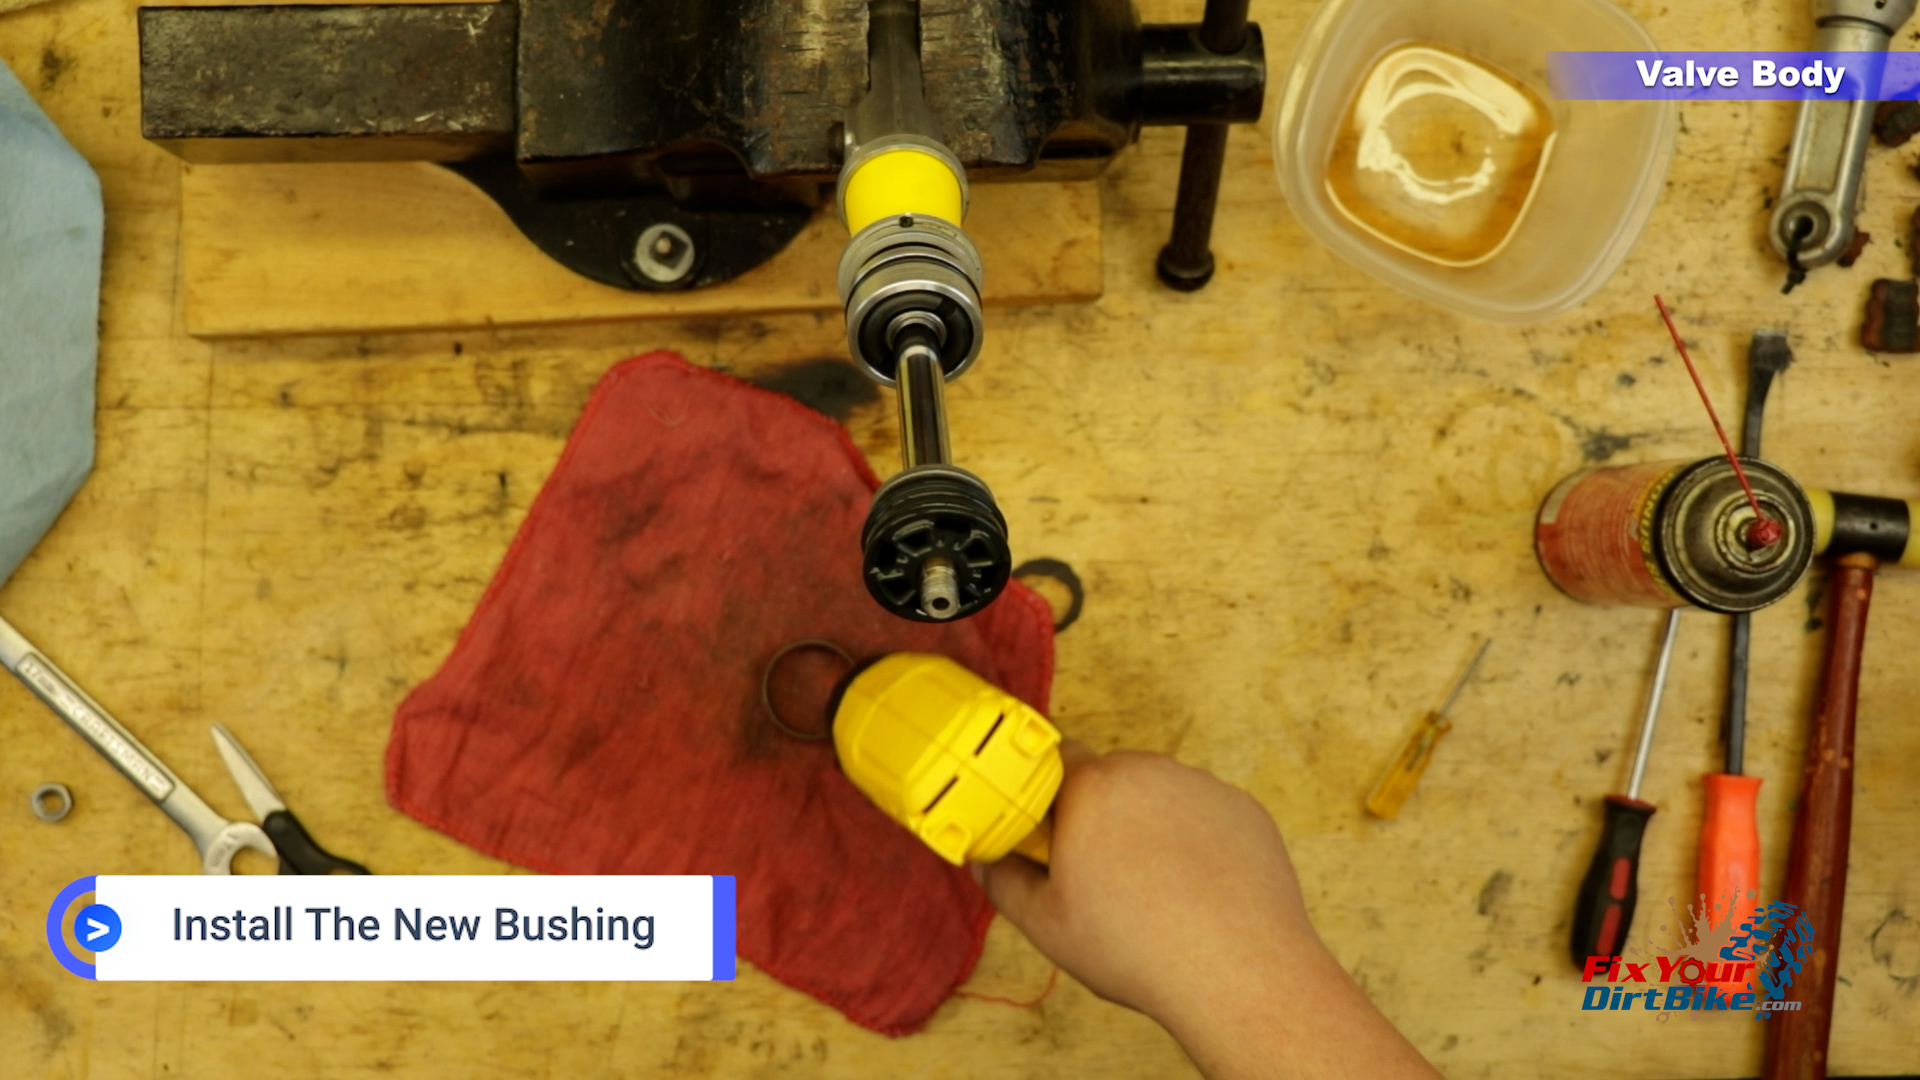
Shock Shaft Assembly – Valve Body
- The valve body bushing is a real motherf****r, and I mean that with all sincerity.
- The o-rings aren’t that bad; all you need is lubrication and heat.
- The bushing is SMALLER THAN THE VALVE BODY!
- Don’t even TRY to remove the old bushing; instead, use the smallest, sharpest razor you have to carefully cut off the old bushing, without damaging the valve body.
- Mount your valve body on the shaft, and swap out the o-rings.
- The only way to install the bushing is to get it hot enough to just barely stretch over the valve body.
- And by hot enough, I mean you can barely handle it!
- I used every tool I had on hand, and a lot of patience, to get that bushing installed.
- I believe in you.
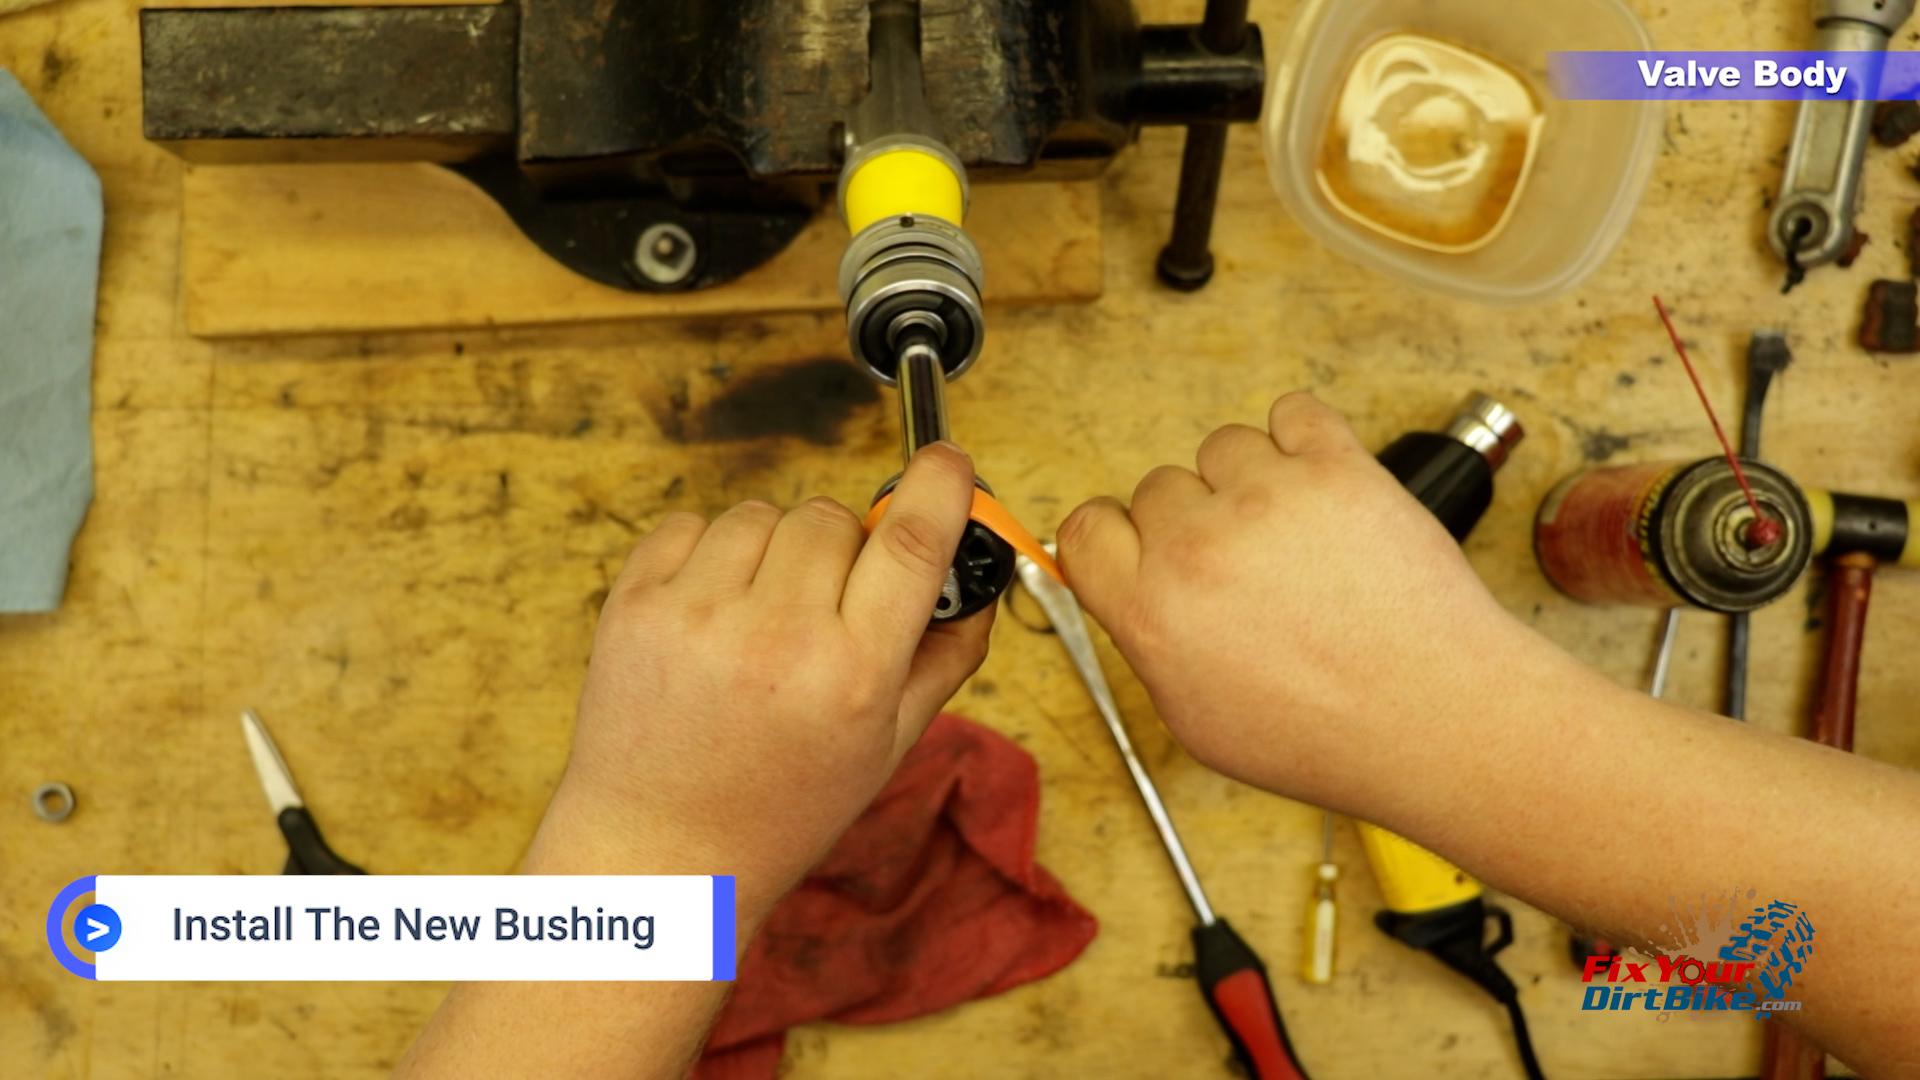
- Tightly wrap the bushing with electrical tape and wait for it to cool before proceeding.
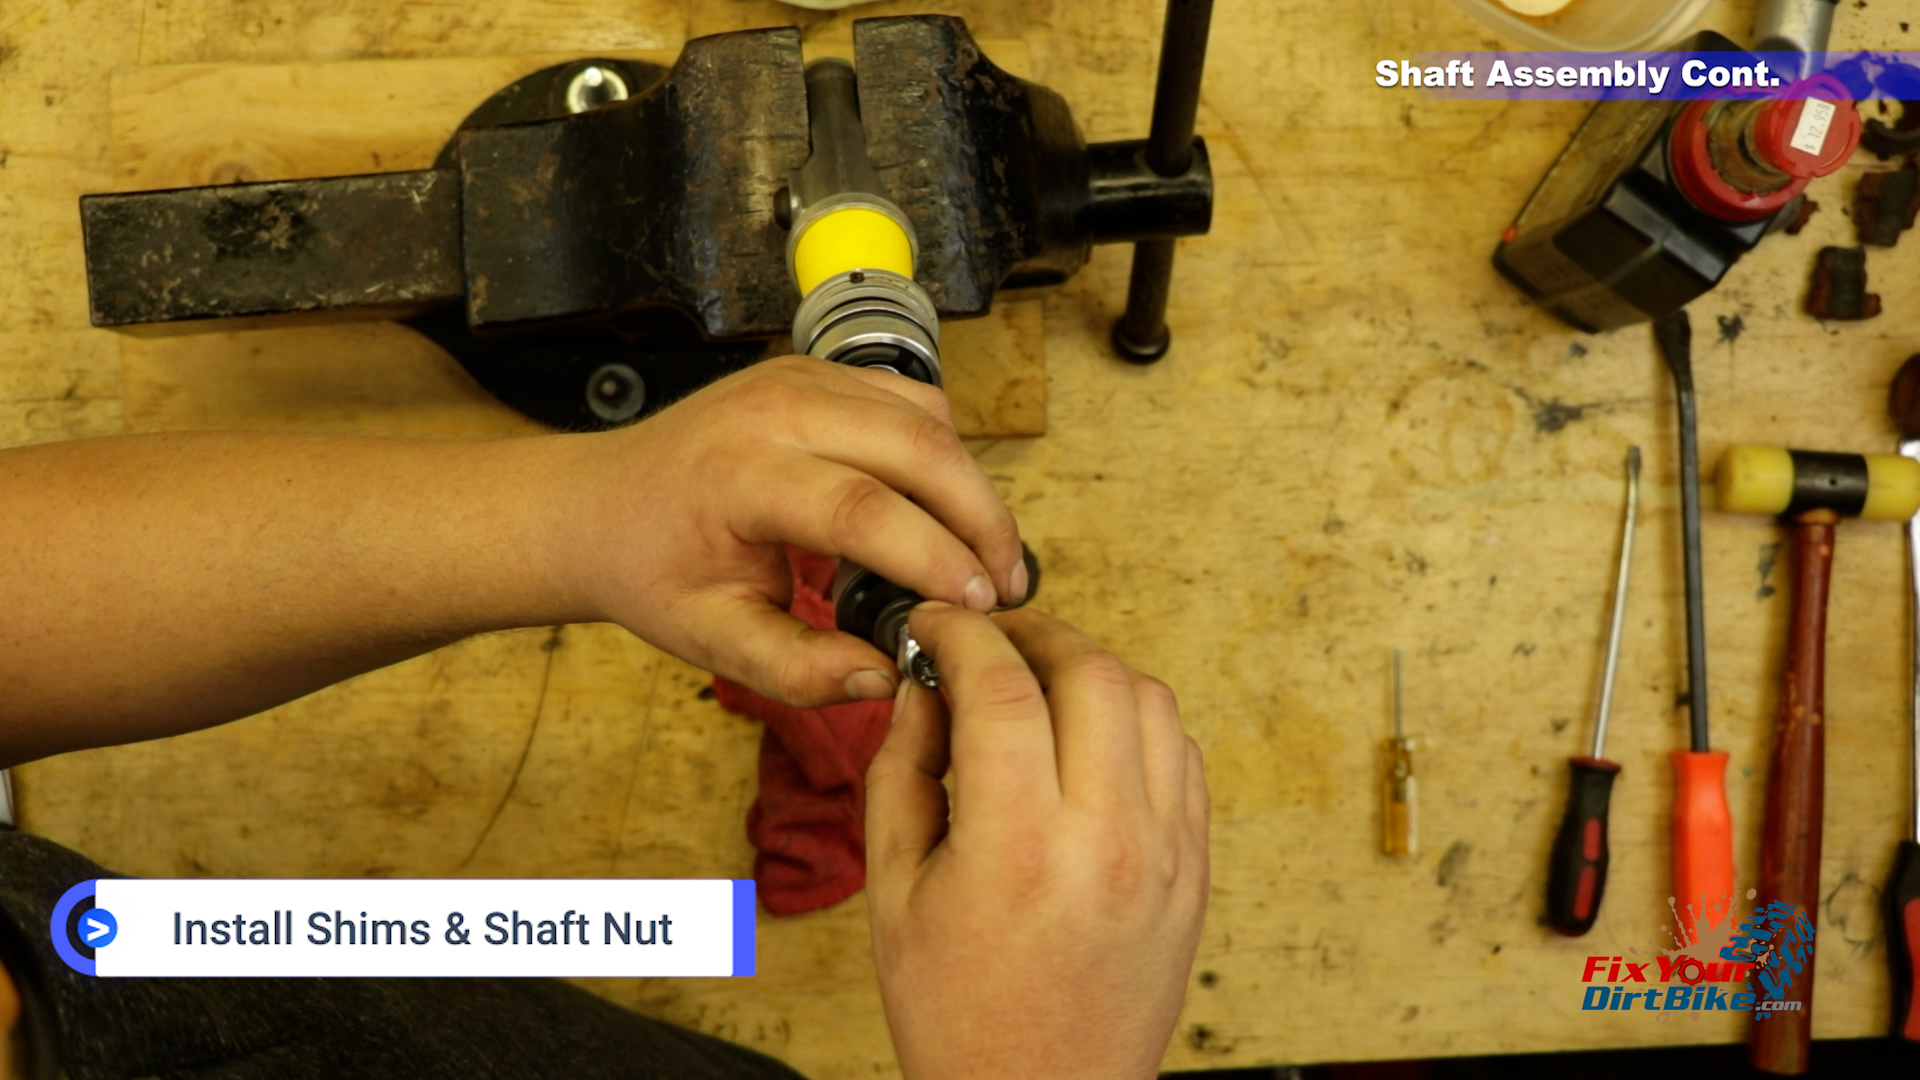
Shock Shaft Assembly – Cont.
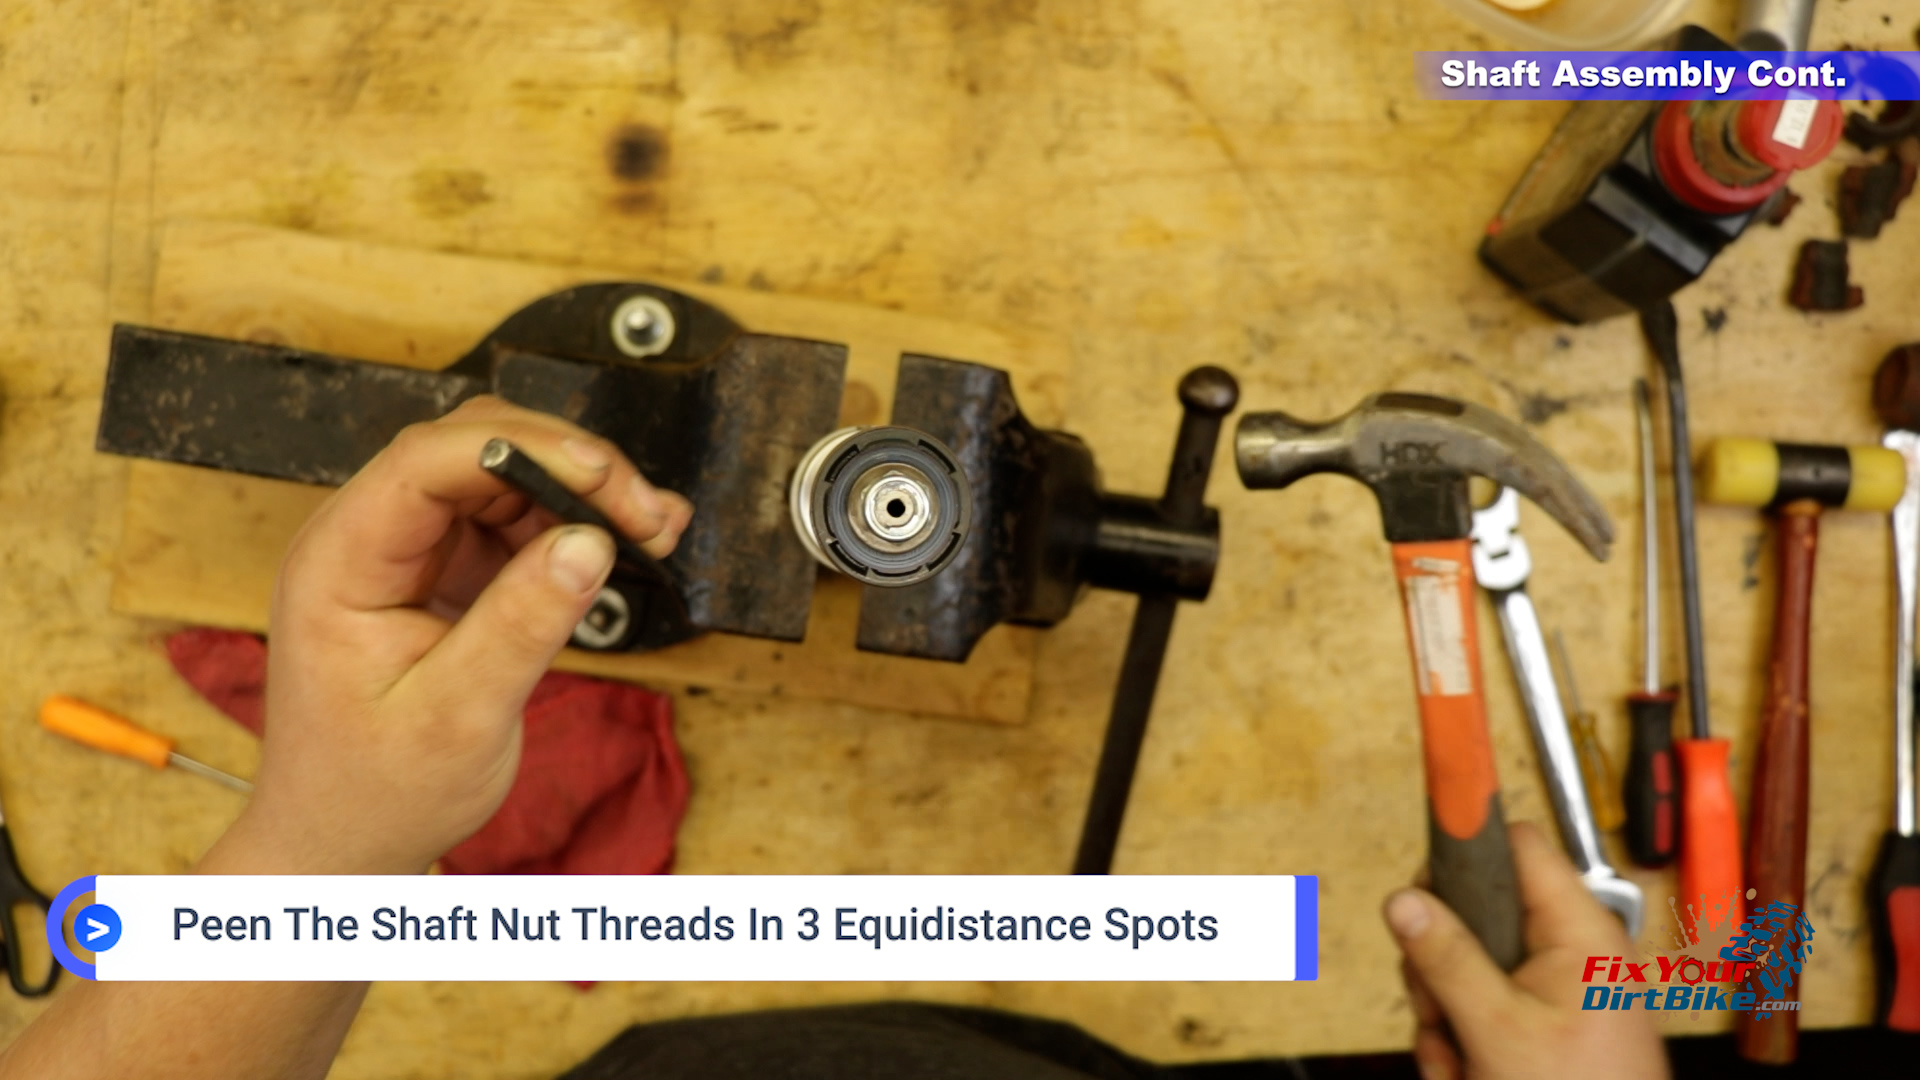
- Install the second shim stack and shaft nut.
- Torque the shaft nut to 25 foot pounds.
- While I can’t find an exact torque specification for this shock, the “standard” is around 25 foot-pounds.
- The torque value isn’t important, considering the nut will be peened to the shaft.
- What does peen mean? I’m glad you asked!
- Peening is when you put a small dent in something.
- In this case, we use a punch to deform the nut and shaft threads, which locks them together.
- Why is this better than mushrooming the shaft threads?
- As you saw earlier, mushrooming deforms the entire shaft end, resulting in frayed threads. When you peen, you only have to grind the end past the peens, avoiding major thread damage. This isn’t just annoying; it significantly reduces the service life of the shock shaft, because you have to take off way more material every time you do a rebuild.
- Using your punch, peen the threads together in three equidistant spots.
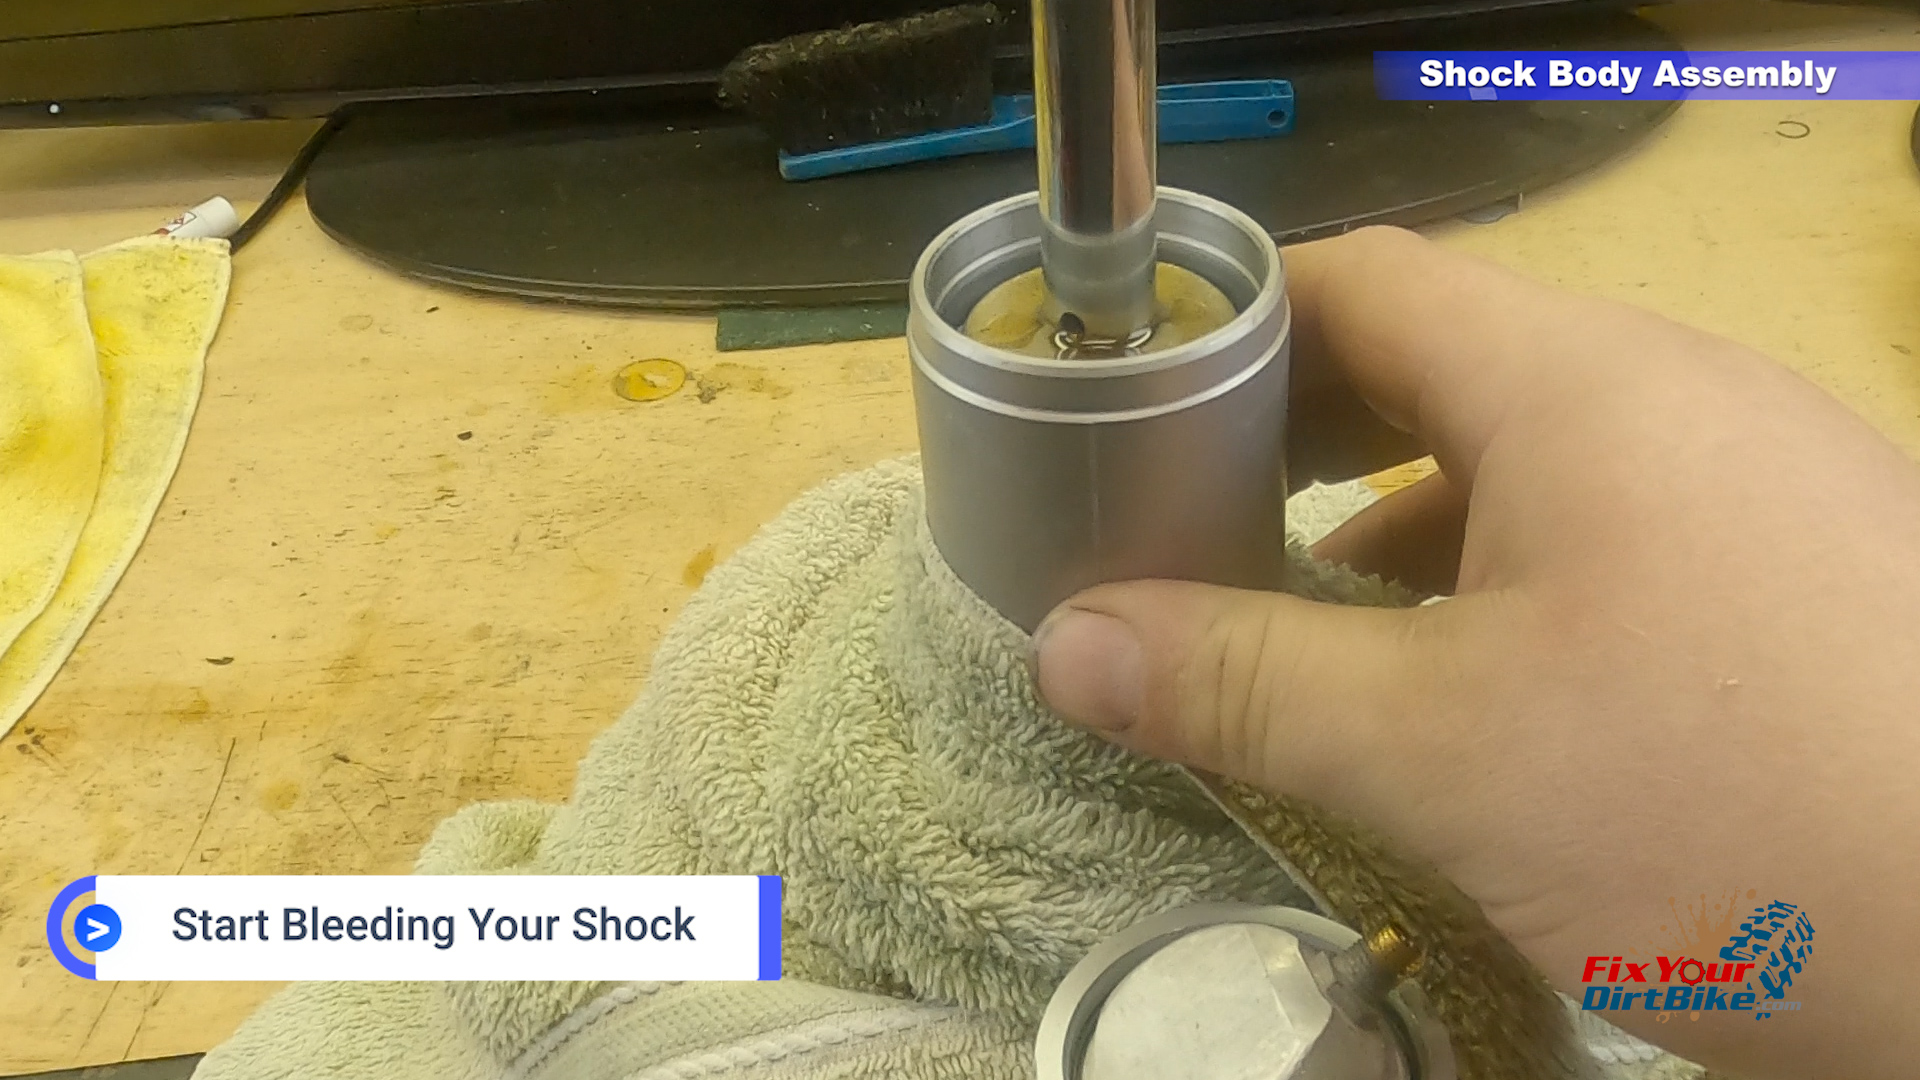
Shock Body Assembly
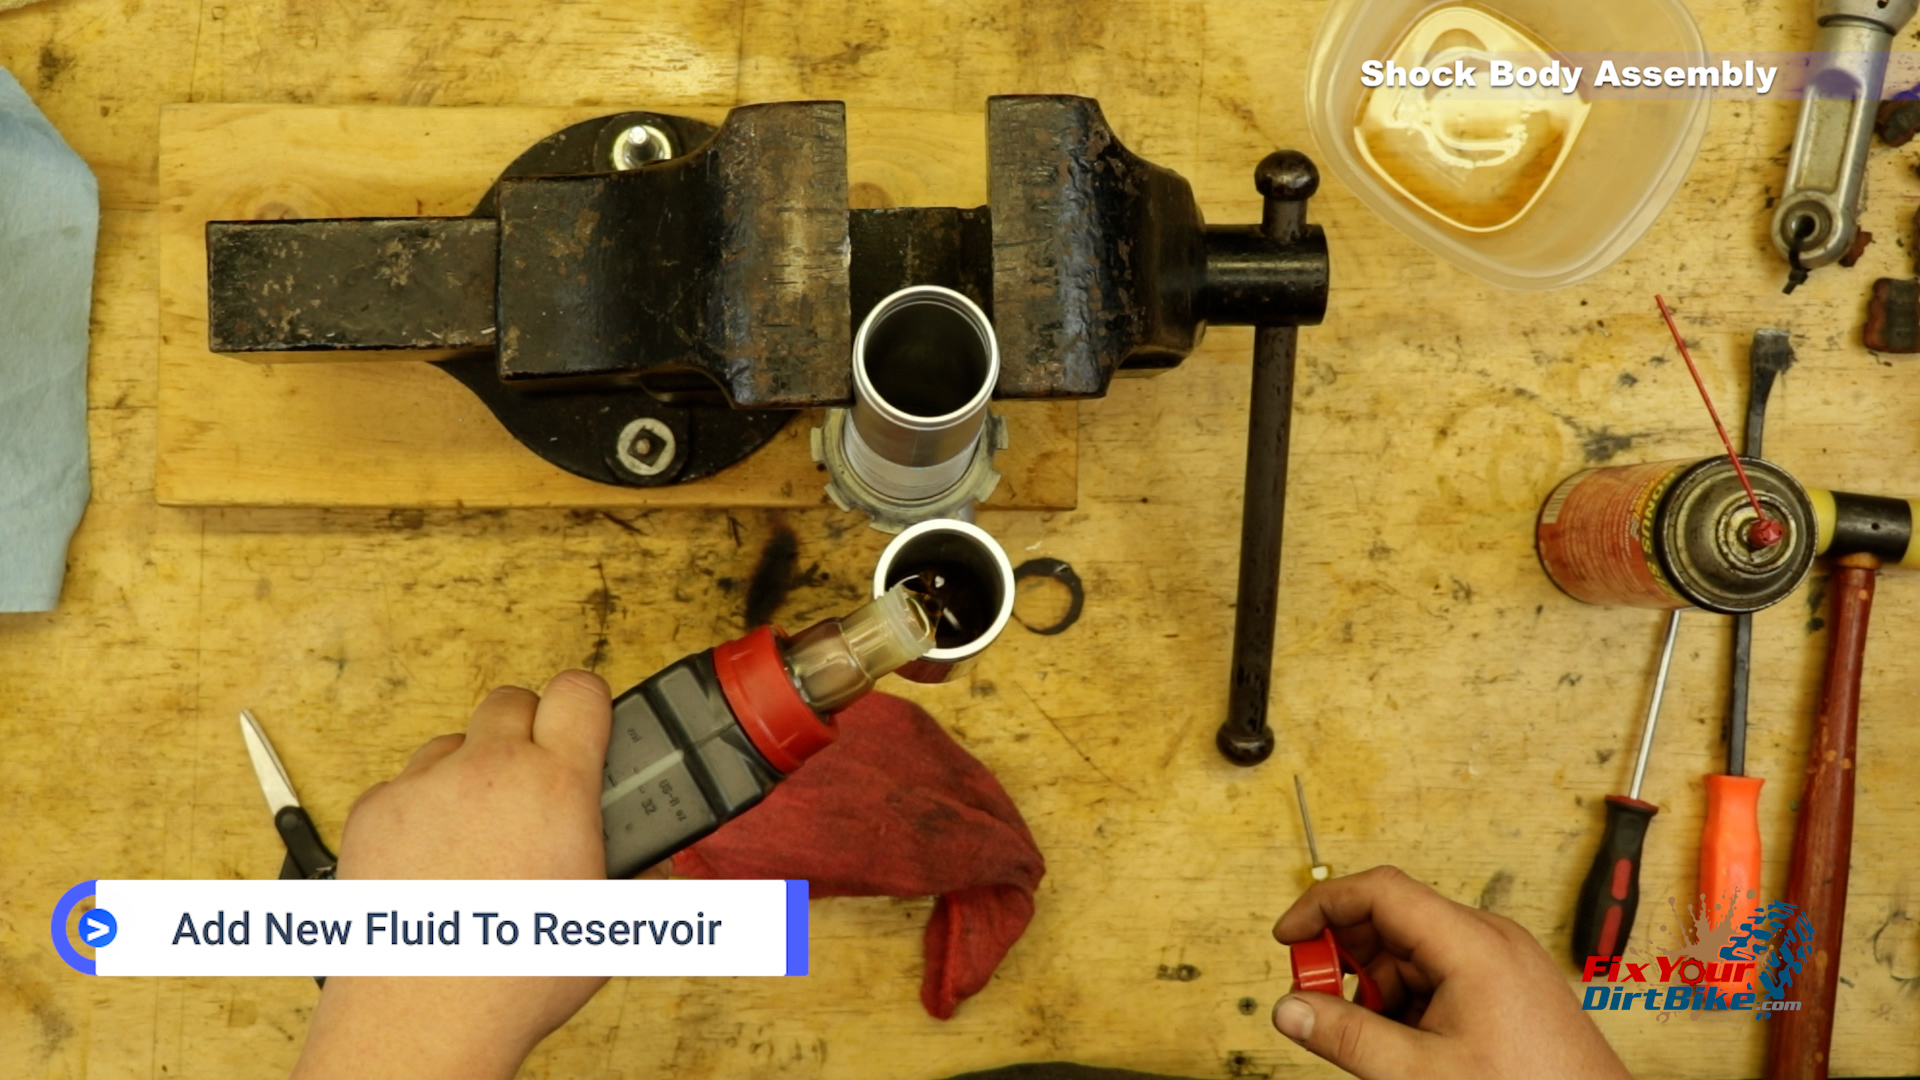
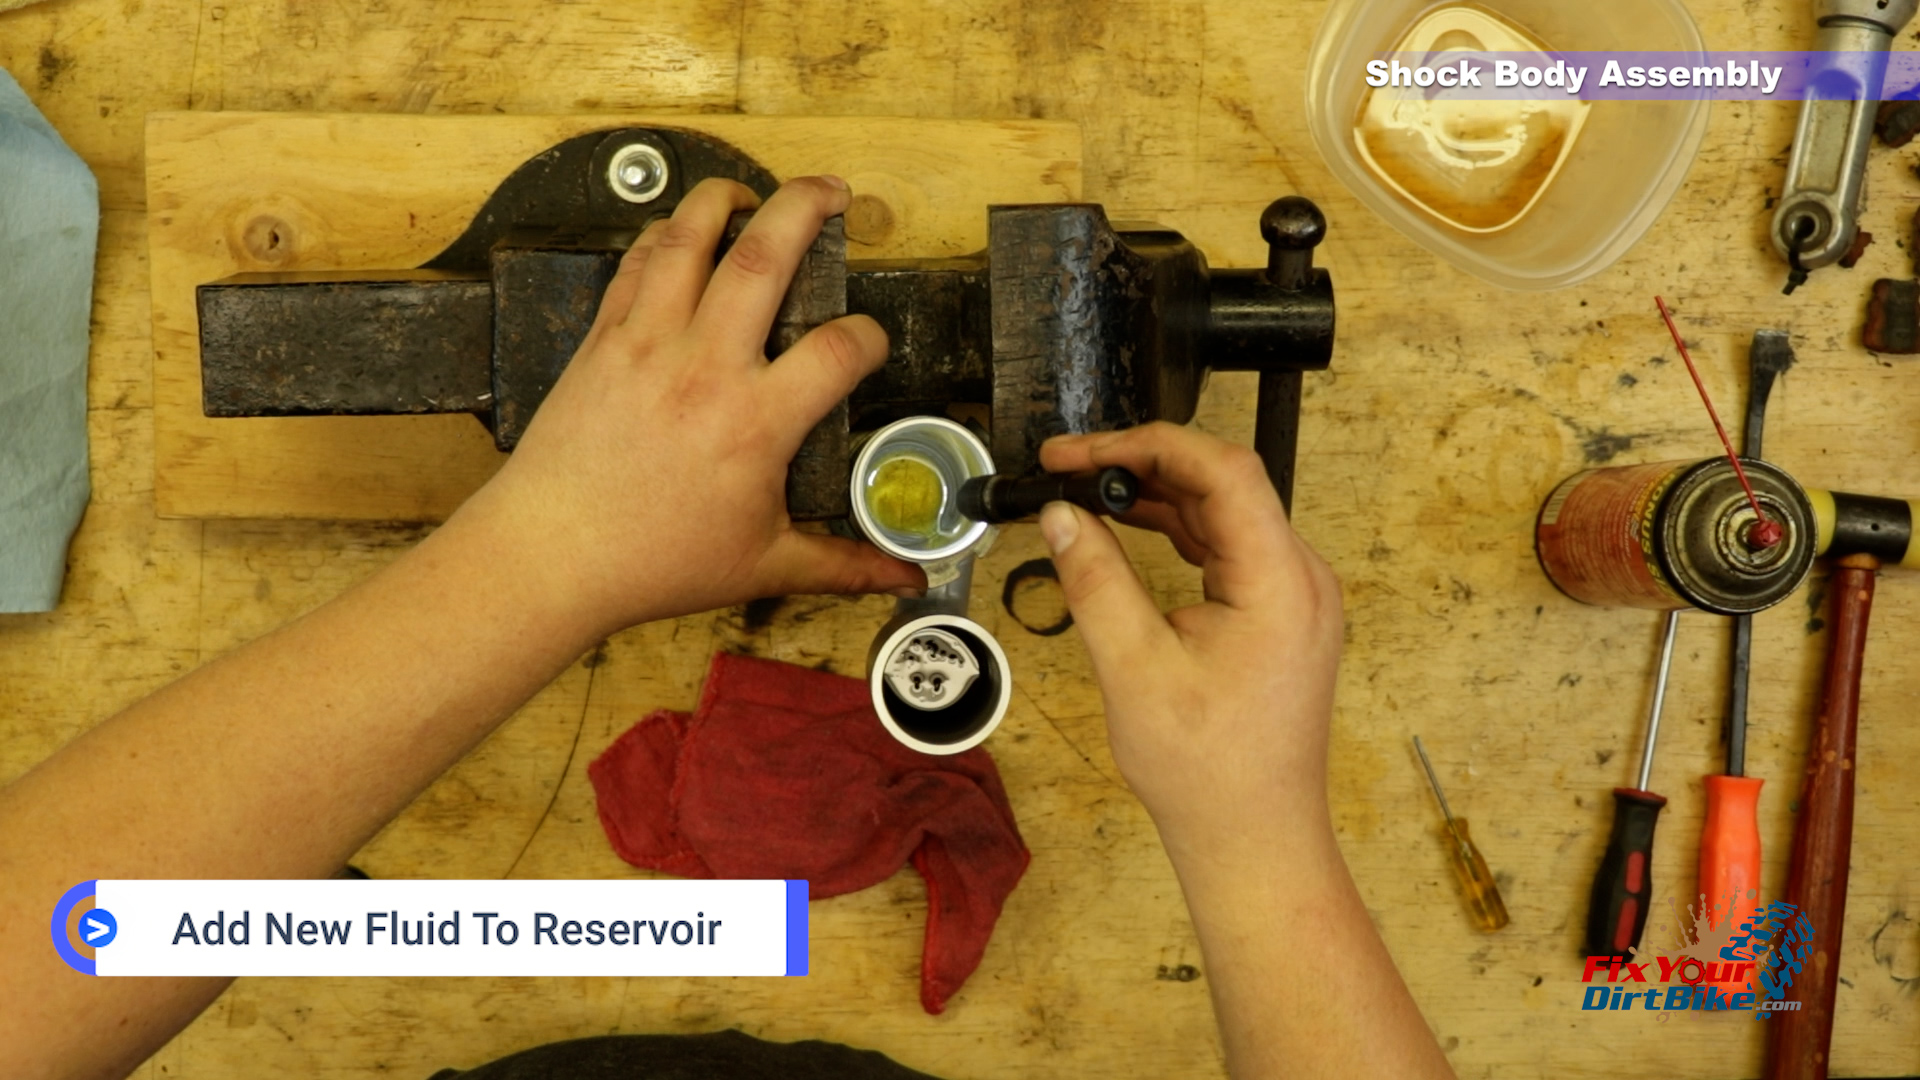
- Mount your shock body vertically, and add some shock fluid to the reservoir.
- You should see fluid transferring into the main bore.
- Install the new bladder onto the reservoir cap, and install the reservoir cap assembly past the stop ring groove.
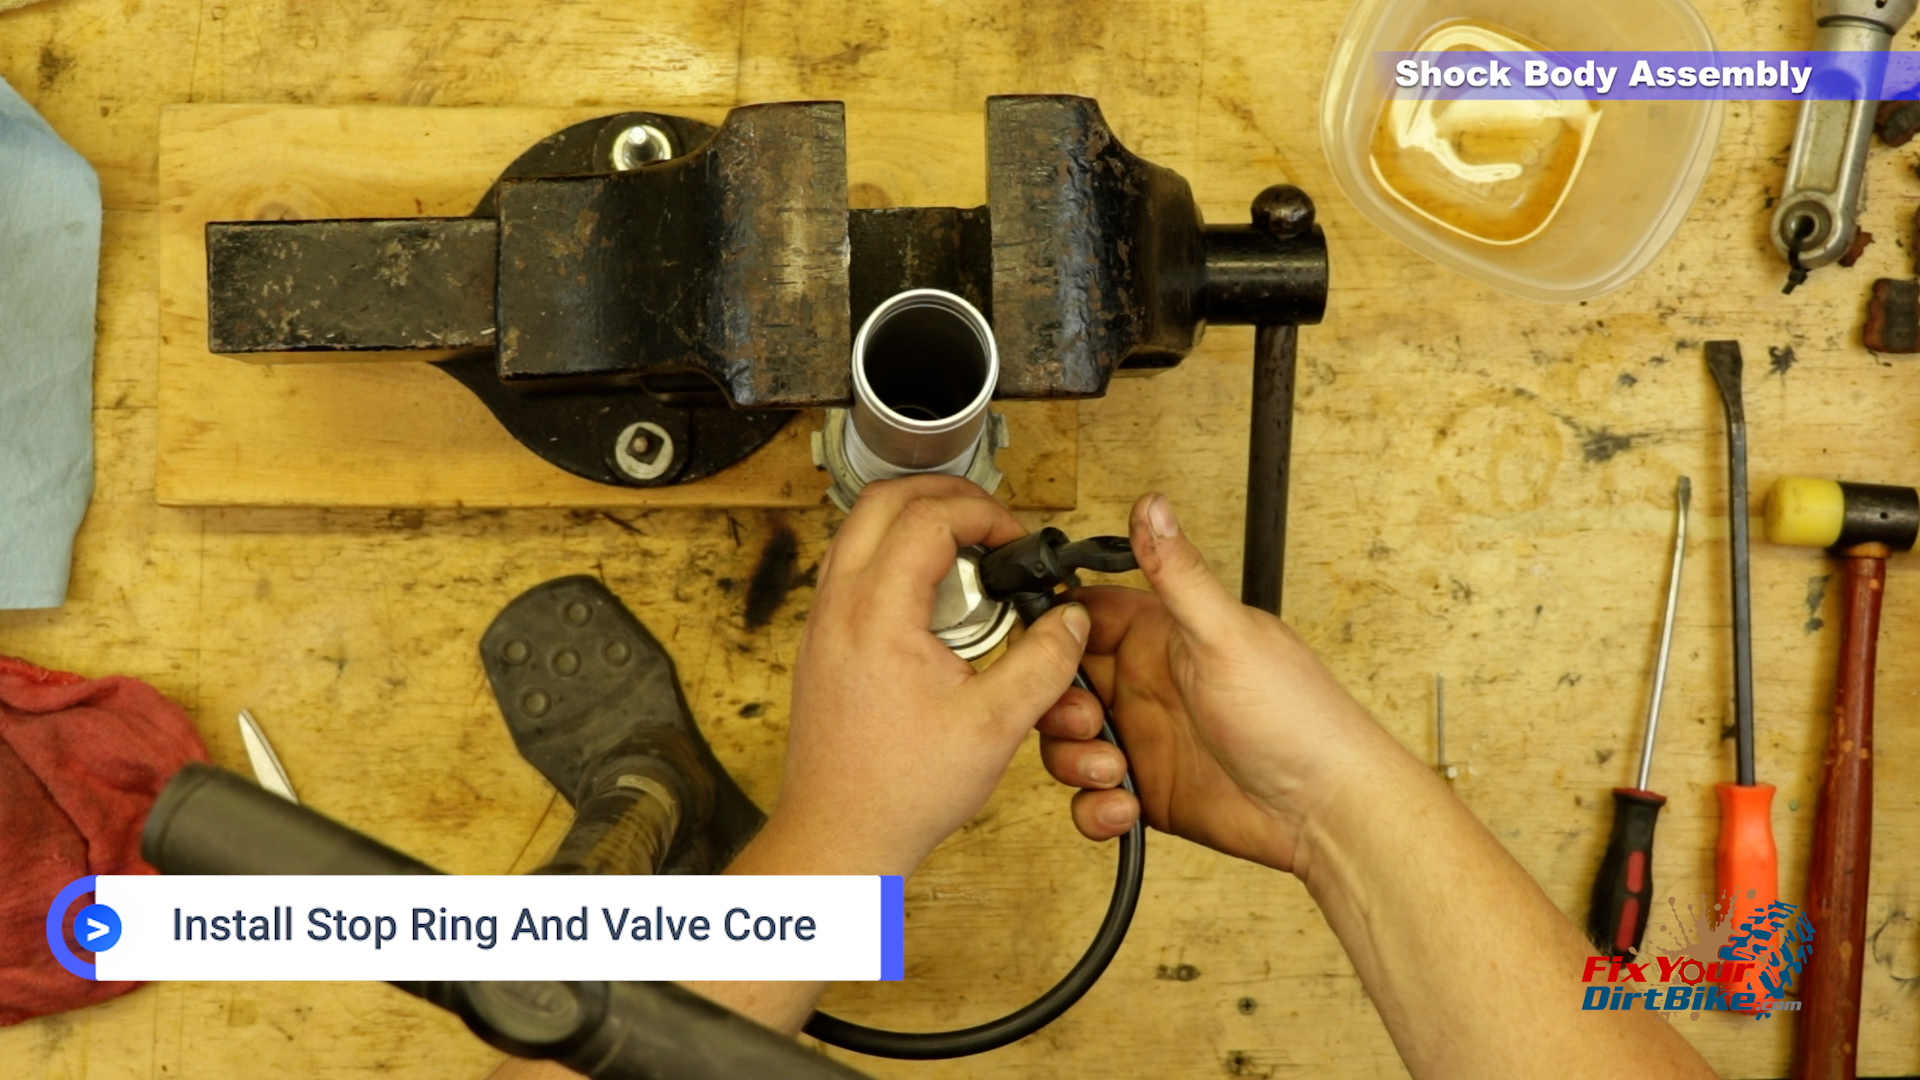
- Install the stop ring and valve core.
- Pull the reservoir cap up agains the stop ring, and fill the bladder with about 10psi from a hand pump to seat the cap to the ring.
- Leave the air in the bladder to bleed the shock fluid.
- Fill the shock body with fluid to about 2 inches from the top.
- Carefully install the shock shaft, and start pumping out the trapped air. – Have your towels ready.
- Pump and fill the shock until the fluid is almost overflowing.
- Install the seal head.
- You should barely be able to seat the seal head, and the body should overflow with fluid.
- At this point, bleed some air out of the reservoir bladder until you can press the seal head just below the stop ring groove.
- Install the stop ring.
- Use your hand pump to fill your reservoir bladder with as much air as possible, seating the seal head against the stop ring.
- DO NOT USE AN AIR COMPRESSOR
- Push your shaft in, and it should push itself back out.
- Pump the shock shaft all the way in and out, feeling for catches, resistance, or low-pressure spots. If your action is anything but smooth and consistent all the way in and out, re-bleed your shock.
- Turn your shock over and let it sit for a while, ideally, overnight.
- When you come back, if you do not see any fluid leaking from the seal head or reservoir cap, you’re good to go!


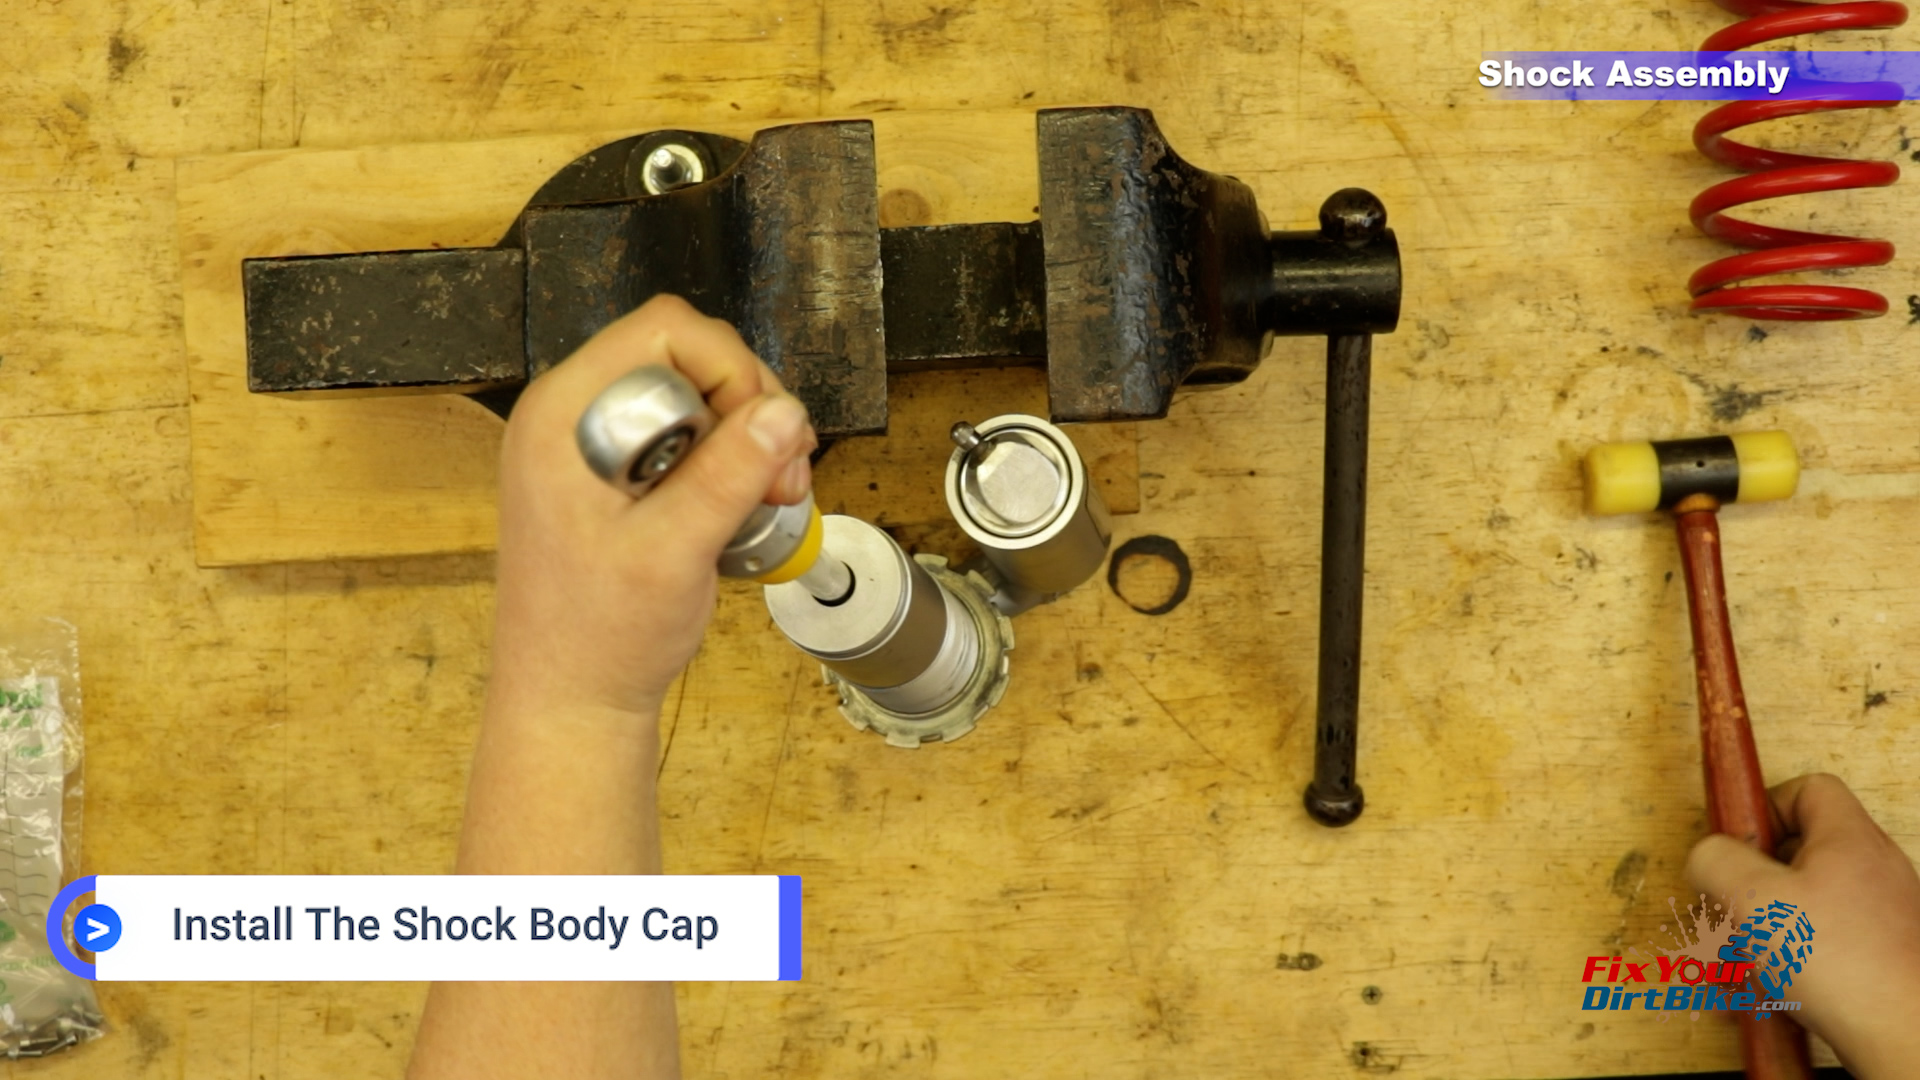
Shock Assembly
- Install the cap with a mallet, tapping evenly all the way around until it is seated.
- Reinstall the spring.
- Take your shock to a powersports shop and fill it with 165 psi of Nitrogen.
165 psi of Nitrogen
If you have any questions, please let me know!