How to Inspect your 1994 through 2001 Yamaha YZ125 Piston
The Tools You Will Need
- Safety Glasses → https://bulltru.com
- Dremel with Sanding Disc → https://amzn.to/407t6l3
- 2-Stroke Oil → https://amzn.to/3WnyXSl
- Assembly Lube → https://amzn.to/4ar8mty
- Calipers → https://amzn.to/3BRoCXX
- Brake Cleaner → https://amzn.to/4jv9v7a
- Socket Extension
- Feeler Gauge → https://amzn.to/4nrpkwx
The Parts You Will Need
- New Piston Kit → https://amzn.to/3KXHY1w (Check Your Size)
- Piston Ring → https://amzn.to/47cDyLx
- Wrist Pin Clips → 93450-16068-00
- Top End Gasket Set → https://amzn.to/4hlHG0D
Pre-Service Notes
- I recommend opening the Service & Torque Specs in a new tab for easy reference.
- If you need parts and tools, make sure to buy them here! → https://amzn.to/4h4lDKq
- Pictures with captions are below after step.
- If you need any help don’t hesitate to ask!
Yamaha YZ125 Piston Inspection
- Before purchasing a new piston, ensure that yours needs to be replaced. And if you do need a new piston, follow the same inspection steps before installation.
- You never know if there’s a flaw, and taking 10 minutes to measure beats the hell out of grenading your freshly rebuilt engine.
- If you need a new piston, just get a stock replacement. With this small of an engine, you won’t see any advantages of an ultralight forged aluminum race piston from Wiesco, or a heavy cast Pro-X piston for trail riding. The only time an aftermarket piston is needed is when your engine has undergone significant modifications.
- This piston exhibits perfect carbon buildup, indicating that the pre-mix ratio is correct, the carburetor is tuned correctly, and the transfer ports are flowing freely.
- This piston made contact on the intake side of the cylinder, indicating that the piston warmed up before the cylinder and expanded too quickly.
- This is what happens when you don’t let your engine warm up.
- I have to replace this piston, but if your piston still looks good, it may still be within spec, and if it is, all you need are new rings.
- Your piston must be in perfect condition to reuse it; if one thing is wrong, it needs to be replaced.
- You will, however, need new wrist pin clips regardless of your piston’s condition.
Piston Measurement
- Before you bother cleaning your piston, make sure it’s within spec.
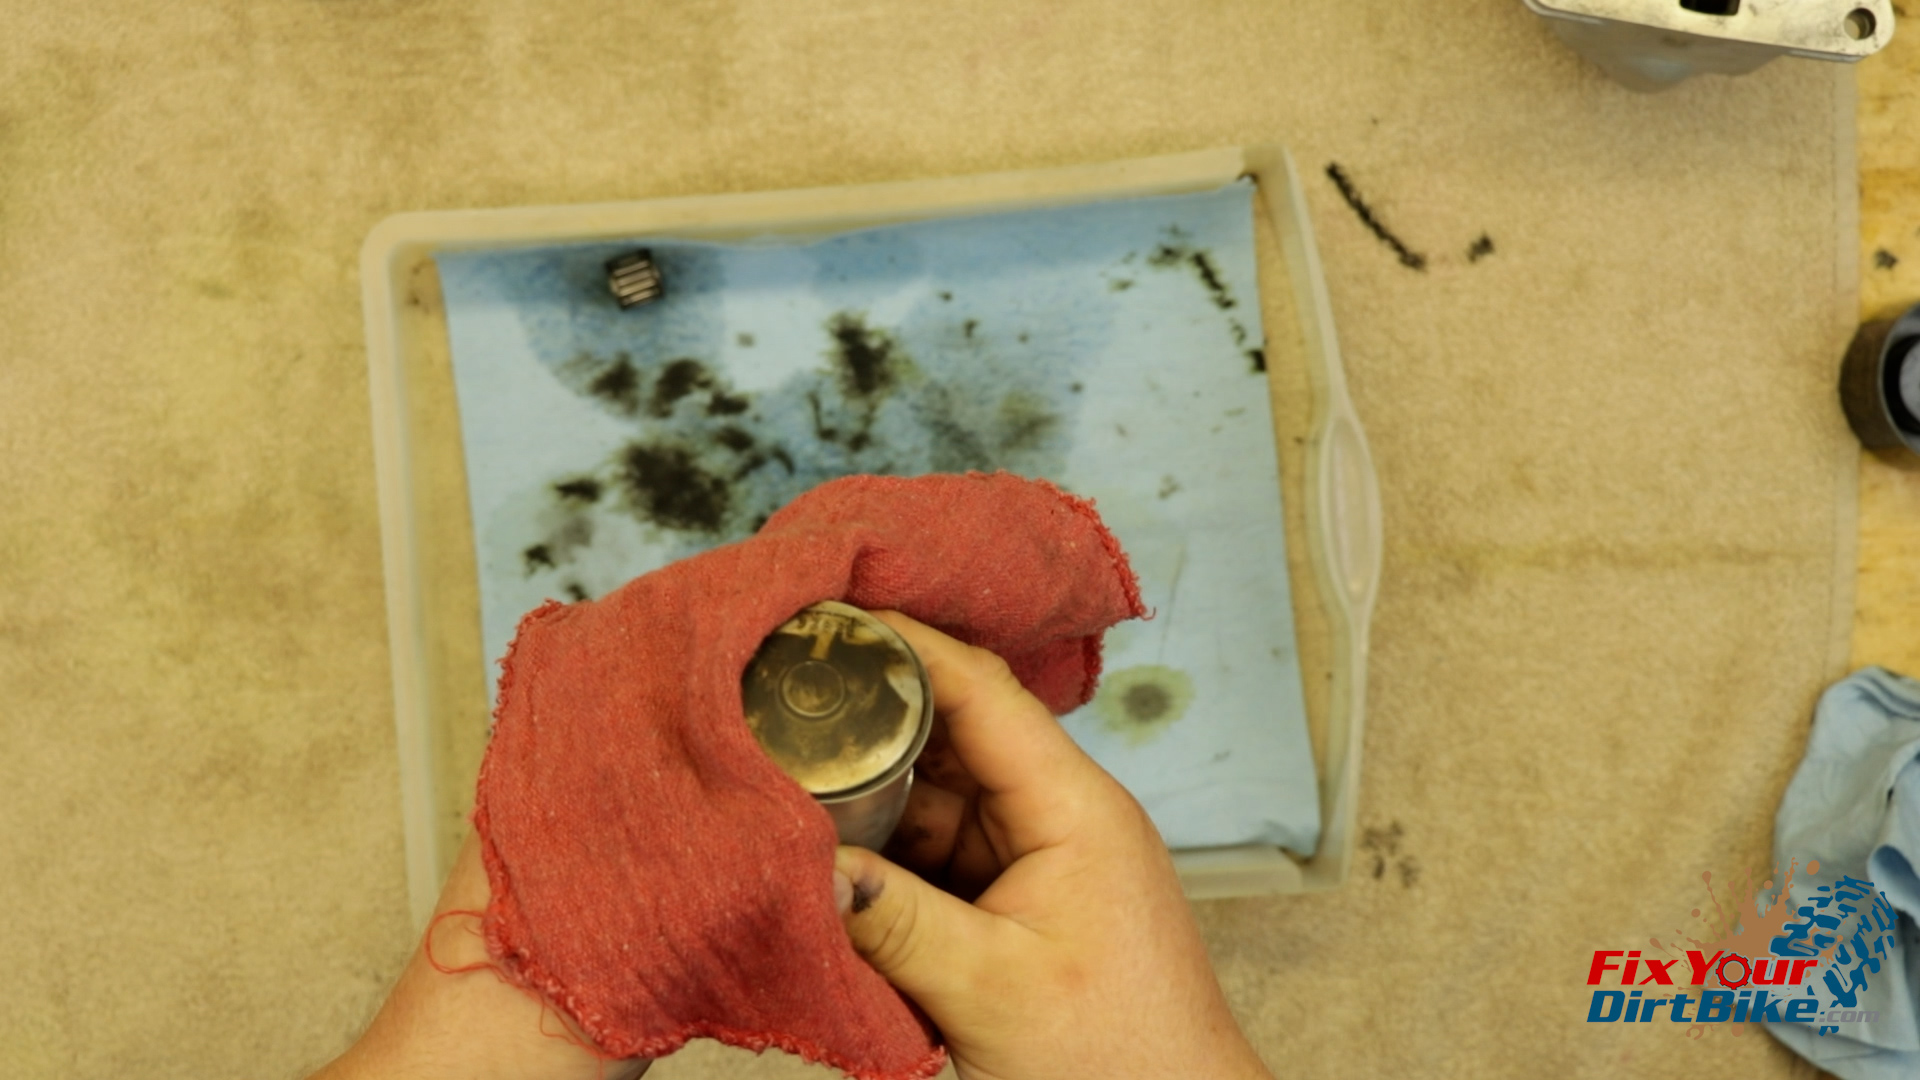
- Measure your piston 10mm from the skirt and 90° to the wrist pin.
- This measurement should be between 53.957 and 53.972 mm.
- If your piston is out of spec, it will need to be replaced, but don’t throw it out just yet.

Piston Inspection
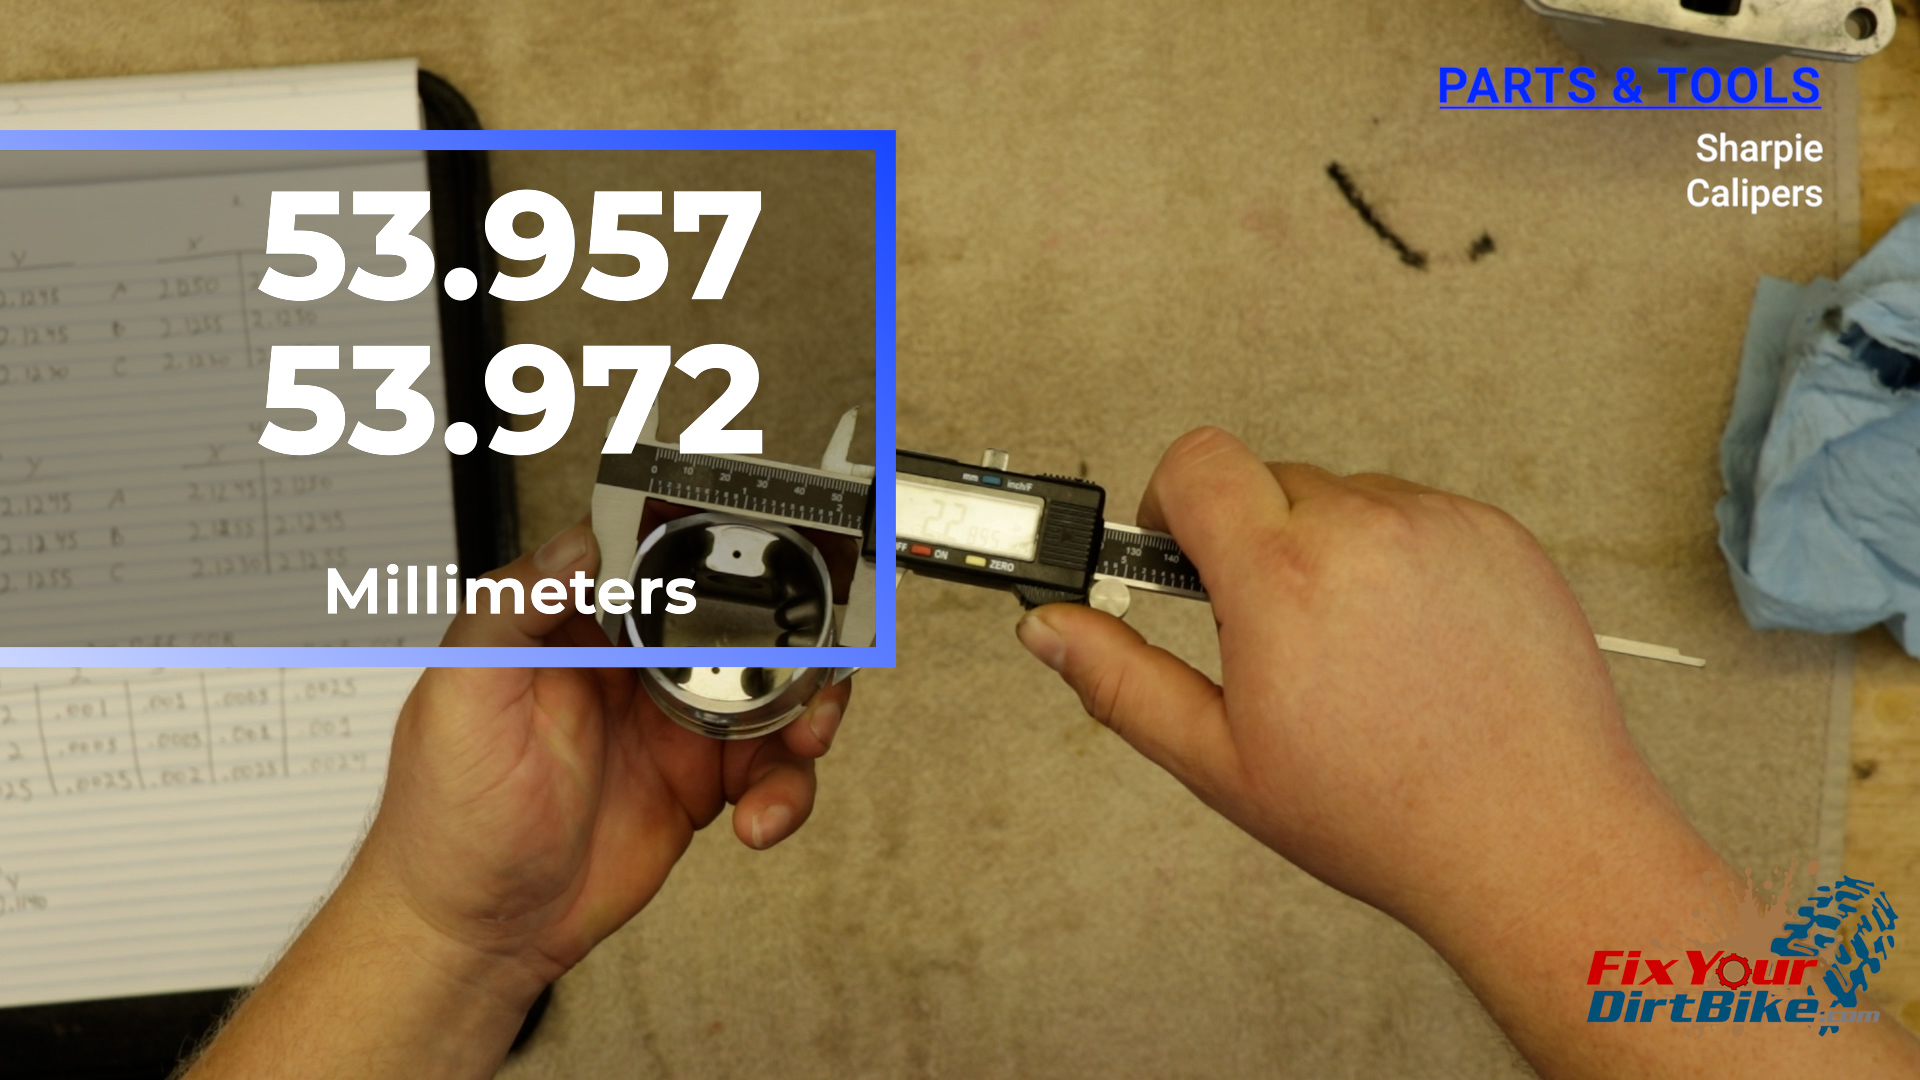
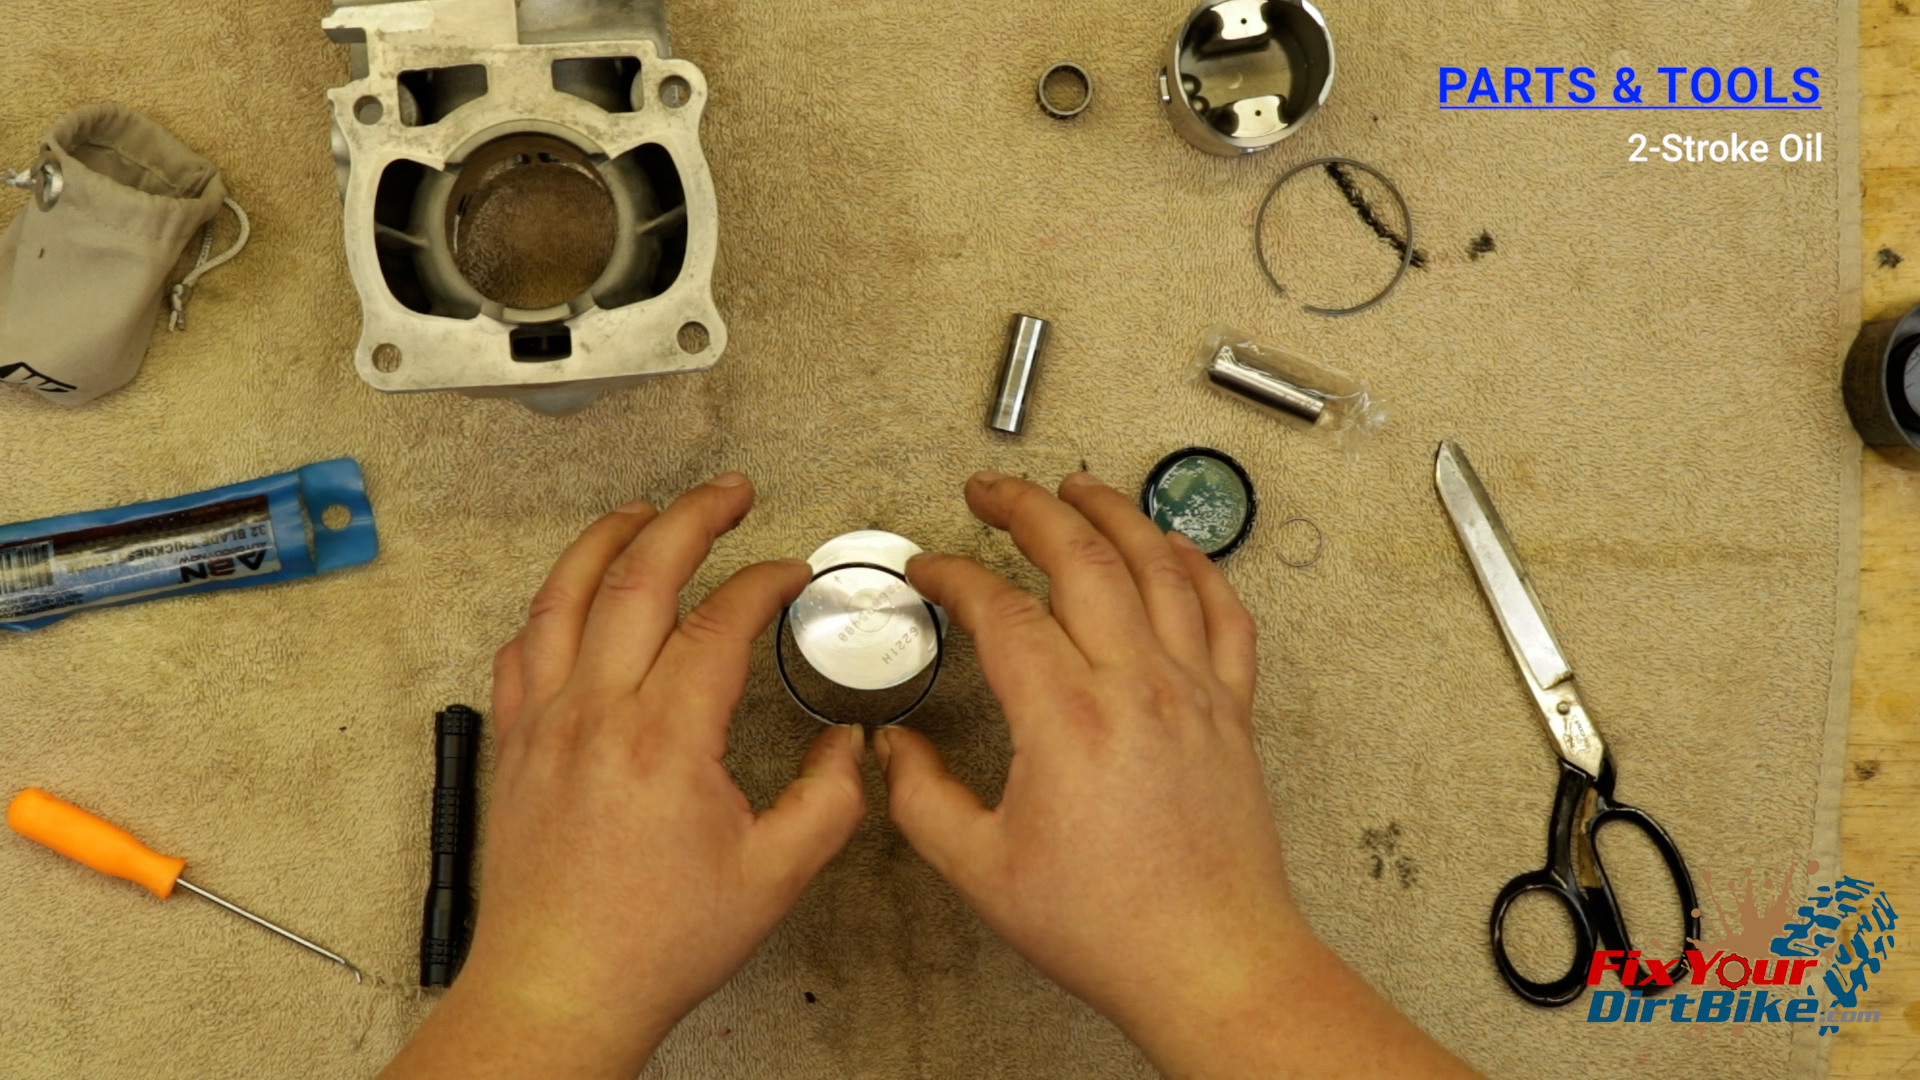
- Expand the piston ring and move it straight up off the piston.
- Do not try to “unwrap” the ring.
- You can use a ring spreader, but your fingernails will work just fine.
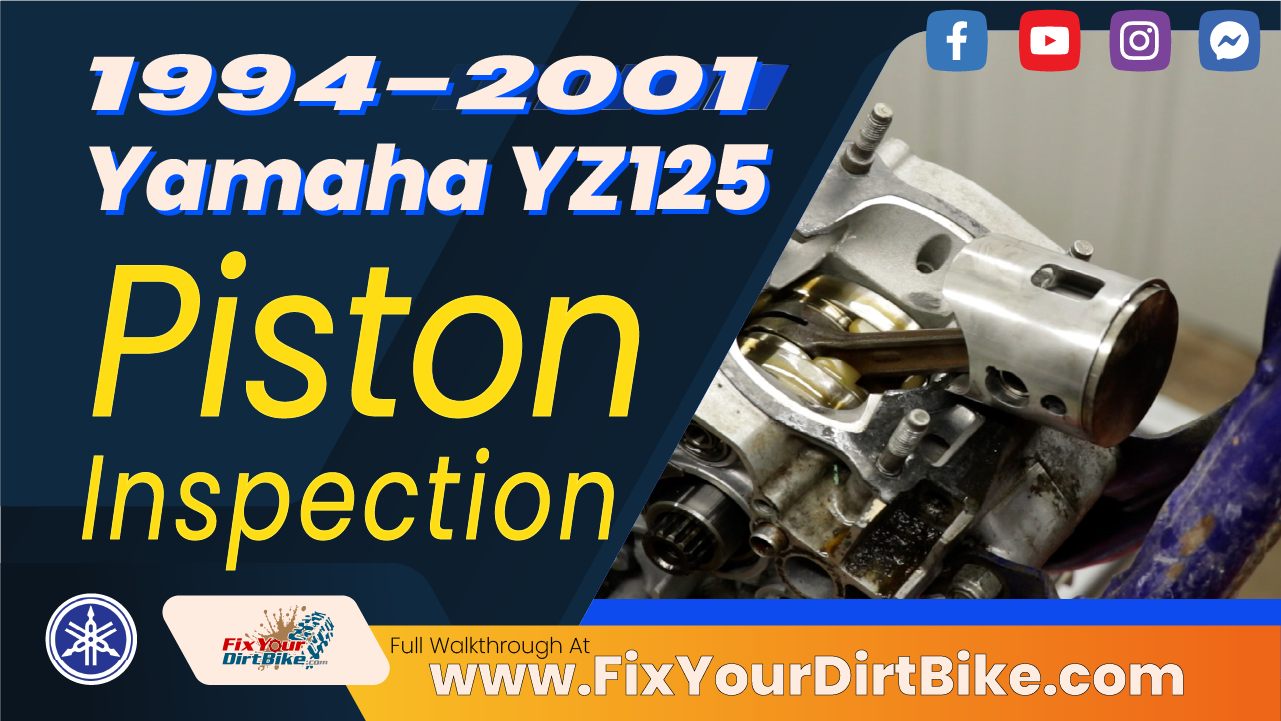
- Clean the carbon from the crown of the piston with parts cleaner and a plastic scraper.
- Clean the pin bore and ring grooves with a soft brush and a pick.
- Inspect the piston crown for damage. If you find any, replace the piston.
- Inspect the ring grooves and locating pin; if the pin is damaged or missing, replace the piston.
- Inspect the piston skirt; if you find any abrasions or cracking, replace the piston.
- Inspect the interior of the piston and pin bore for wear or cracks. Guess what you need to do if you find any?
- Measure the piston diameter perpendicular to the wrist pin bore 10mm from the bottom of the piston skirt, and record that number for your clearance calculations.
Piston Ring Inspection
- Even though you will not be reusing your piston ring, we can use it to see what the engine has been up to.
- Take the old ring and roll it around the piston in its groove, and feel for any snags or binding.
- Reinstall the piston ring.
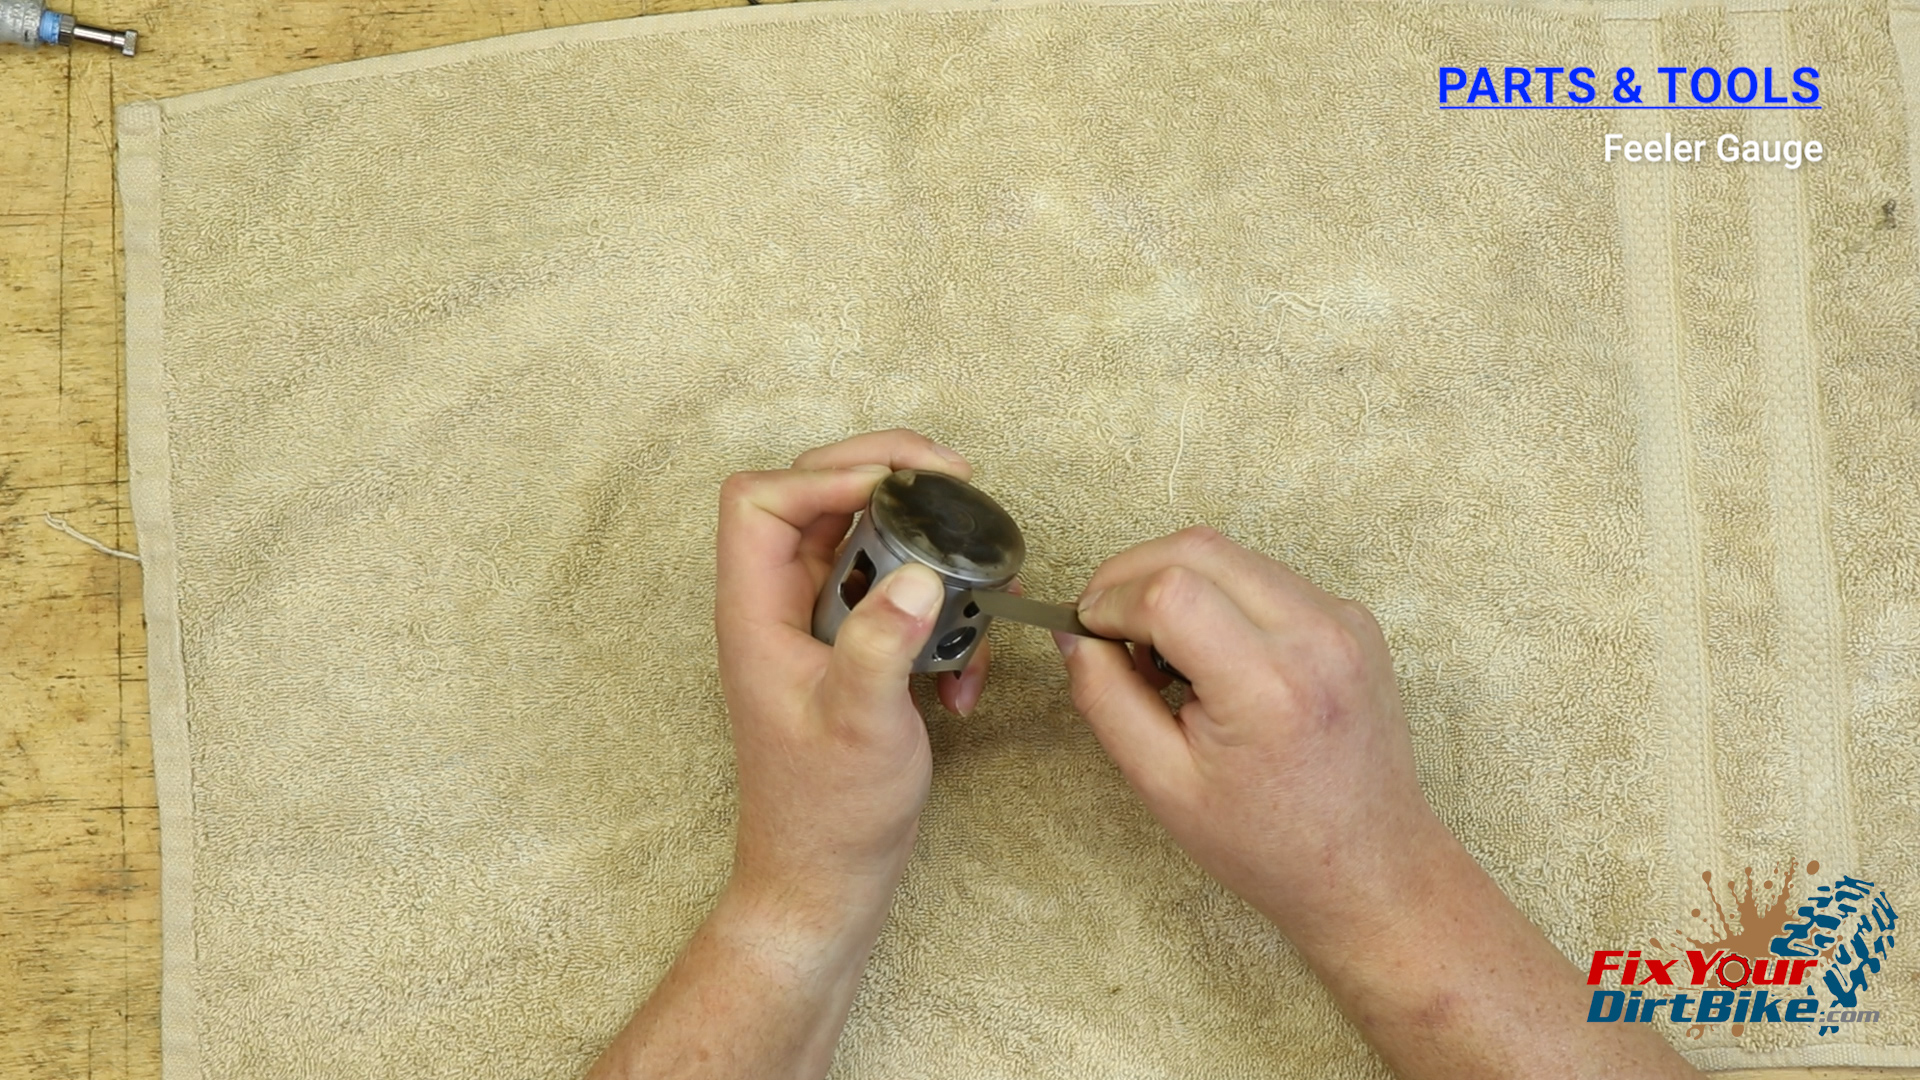
- Press the ring into the groove, and then measure the ring-to-groove clearance with a feeler gauge.
- The ring should have a clearance no greater than .004 inches.
- If the ring-to-piston clearance is out of spec, the piston is most likely worn, not the rings.
- Repeat this process with the new ring.
- If the clearance exceeds spec with the new ring, the piston must be replaced.
- This type of wear is caused by ring deflection, which occurs due to improper lubrication from a poor air-to-fuel ratio, incorrect premix ratio, engine braking, or a combination of all three.
Pin, Needle Bearing & Connecting Rod Inspection
- Clean and dry the wrist pin and bearings, and check for excessive wear or damage.
- Measure the pin at the three contact points and the pin bore.
- There is no manufacturer service limit for the pin, piston bore, connecting rod bore, or clearance limits. If it’s tight, use it; if it’s not tight, don’t use it.
- Insert the needle bearing into the rod bore. If there is play, the needle bearing needs to be replaced.
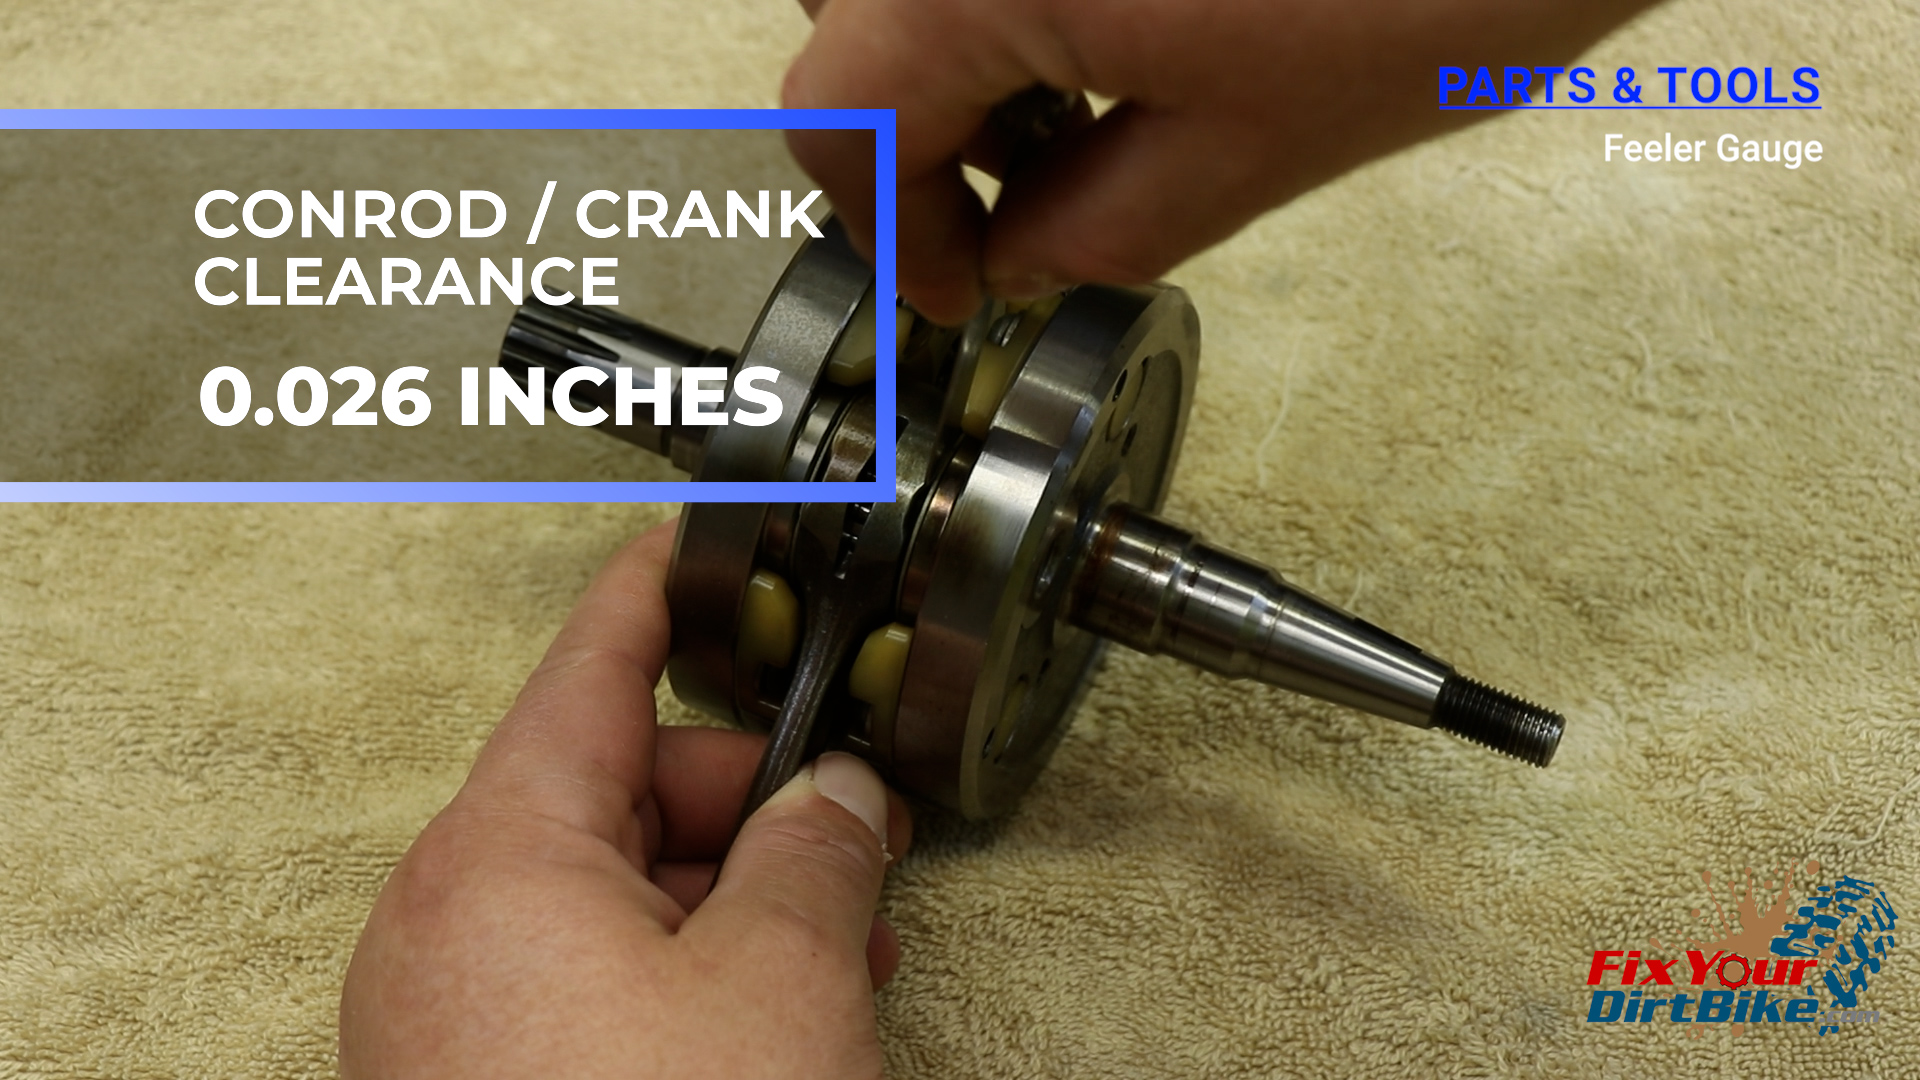
- Inspect the crankshaft side clearance by inserting a feeler gauge between the crankshaft and connecting rod.
- My crankshaft has been removed for the rebuild, but it can be easily accessed inside the engine.
- The connecting rod to crankshaft clearance should be no more than 0.026 inches.
Piston Assembly
Gap New Rings
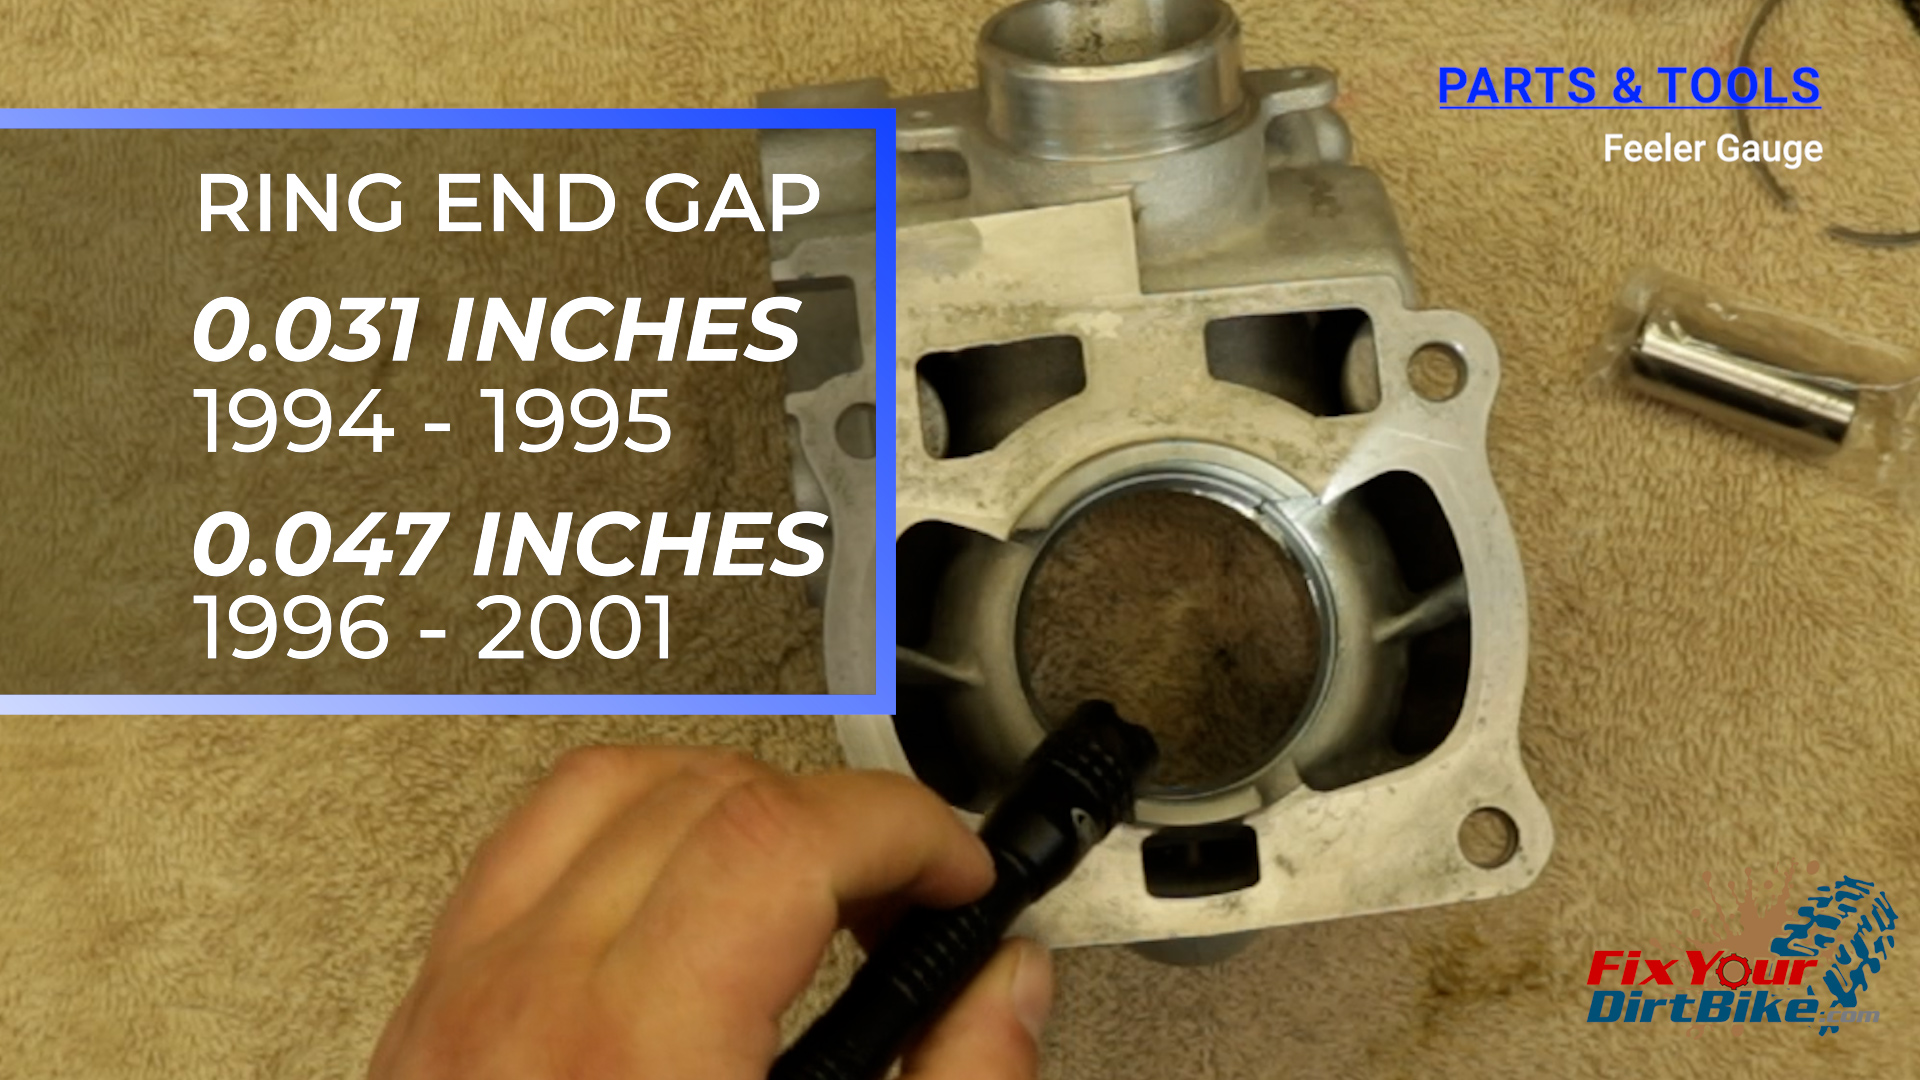
- Before installing the piston ring, we need to ensure that the installed end gap is within spec.
- Insert the piston ring in the bottom of the cylinder and push it down with the piston so it inserts evenly.
- Measure the ring gap with a feeler gauge.
- The end gap should be no greater than
- 0.031 inches on 1994 – 1995 model years
- 0.047 on 1996 – 2001 model years
- If the rings are too tight, you can file the ends with a fine metal file or sandpaper until they are within spec.
Piston Pin Clip
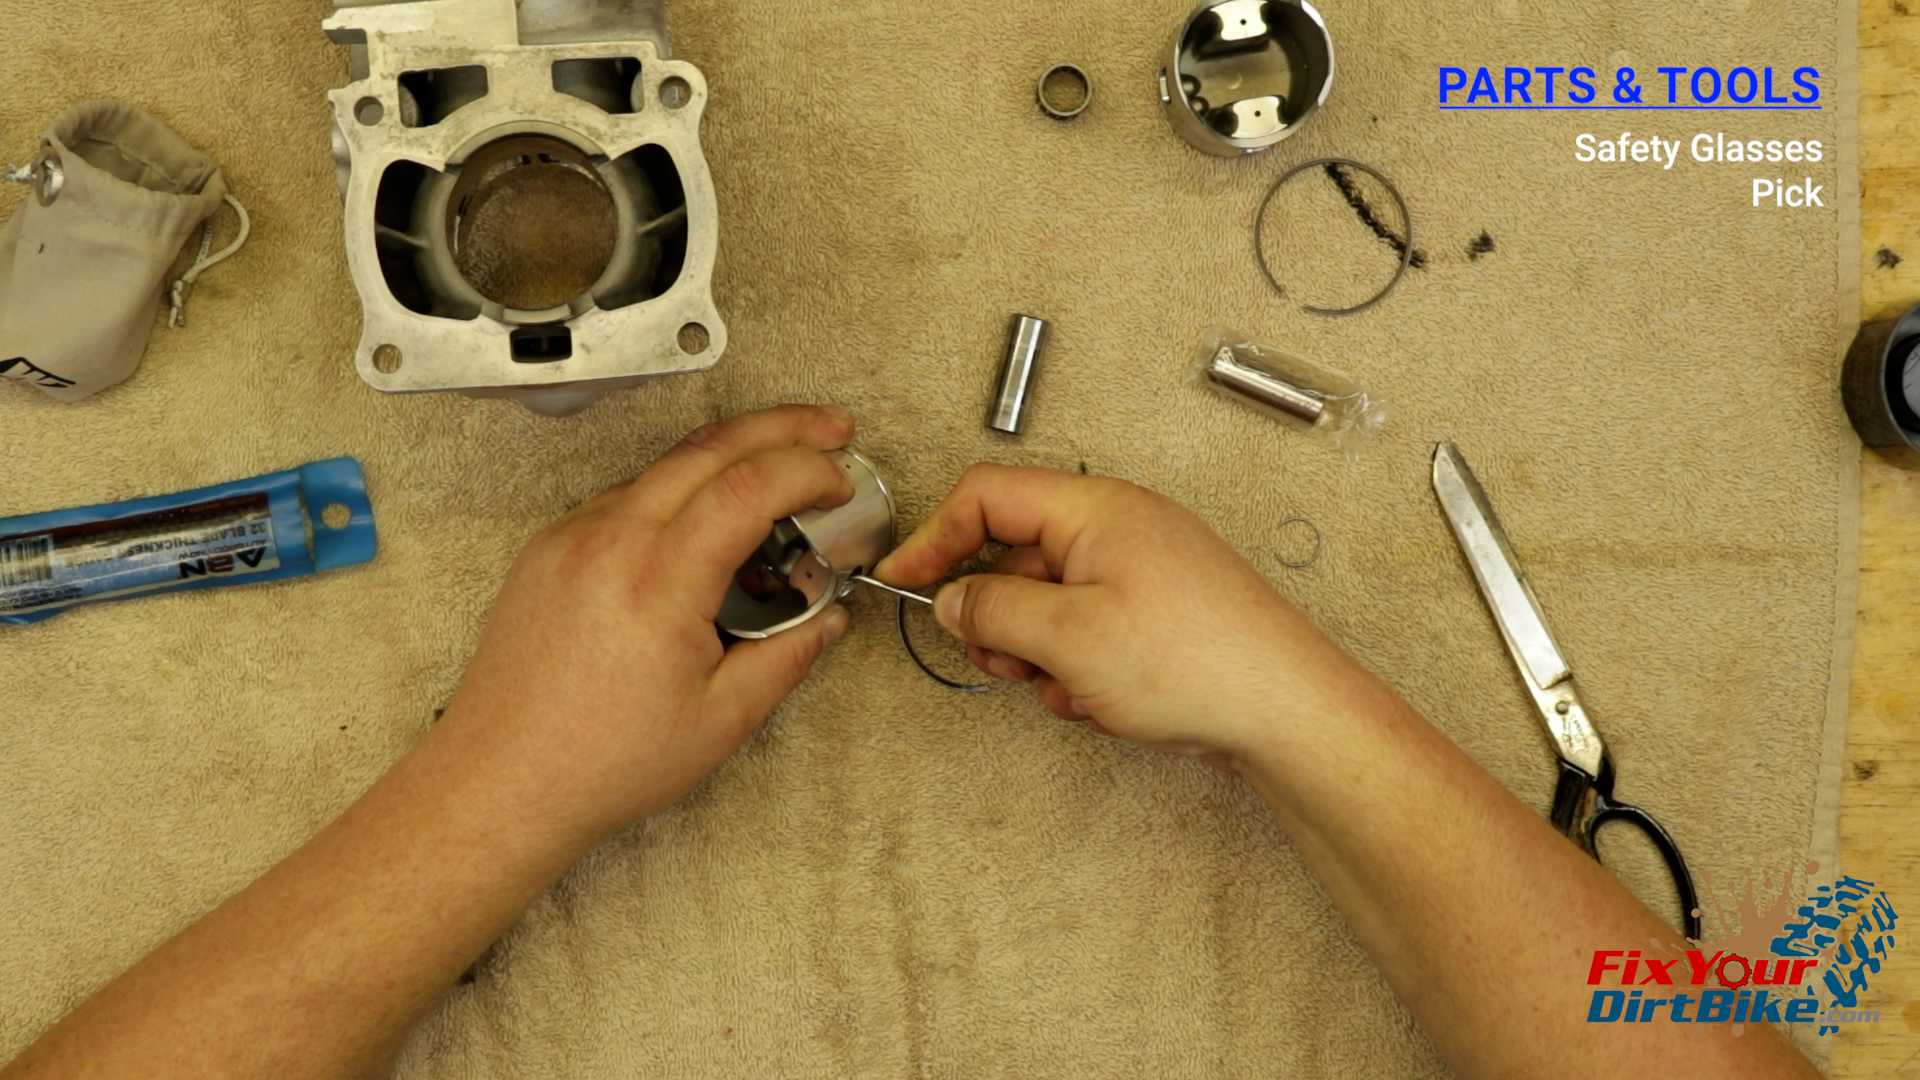
- Begin by installing your safety glasses.
- Install the first piston pin clip into the pin bore groove.
- Your thumbs and a small pick should work just fine, but be careful not to gouge the cylinder with the end of the clip.
- Rotate the clip so the opening faces up.
Piston Ring Installation
- Double-check that the ring is clean and dry.
- Lubricate the piston edge and ring grooves with 2-stroke oil.
- If your ring has any markings, install it with the markings facing up.
- Spread the ring just enough to clear the piston, and install straight down; do not try to wrap the ring into the groove.
- Align the ring with the alignment pin.
- Check that the ring is free in the groove.
- Place your piston, pin, clip, and bearings in a ziplock to keep them clean and organized.
If you have any questions, please let me in the comments, or send me a DM!
| ← Cylinder Inspection | Exhaust Valve Install → |
Follow Fix Your Dirt Bike!