
How To Replace Your Rear Wheel Bearings And Service The Hub
Changing the rear wheel bearings on your dirt bike is relatively easy. The only tricky part is that the bearings are a pressed fit, so to remove them from the hub, you will need fire and a precision sledgehammer.
The Tools You Will Need To Replace Your Rear Wheel Bearings
- A garage floor
- Two long 2x4s
- Socket and breaker bar for the axle nut
- Wrench for chain adjuster jam nut
- Wrench for chain adjuster
- A block of wood
- Tire Spoons → https://amzn.to/4aqlHCj
- Bearing retainer tool (more info below)
- A drift
- A socket that matches the inner bearing race
- A socket that matches the outer bearing race
- Socket wrench extension
- Propane Torch
- Hammer
- Finishing file
- Parts cleaner
- Clean towel
- Safety Glasses → https://bulltru.com
- Gloves
The Rear Bearing Parts You Will Need:
A new set of bearings and seals are the only parts you will need.
I installed a new set of Factory Links bearings and seals for this bearing change.
I use Factory Links because their bearings are double-shielded. That means I don’t have to pre-grease them, and since they are sealed, they will resist water contamination better than single-shielded bearings.
Get your new set of rear wheel bearings here → https://amzn.to/4ar5Nr6
Specialty Rear Bearings Tools
A bearing retainer tool is the only specialty tool you need to pick up. I would normally make a homemade tool for this kind of thing, but there is a really good reason not to.
The bearing retainer is made of thin and brittle metal, so a DIY tool could easily break it. A retainer tool costs around $15, but the retainer costs around $20, depending on the make and model.
Not only will damage to your retainer cost more money, but you will also have to buy a new one and sit around while your buddies go riding without you.
Related: Here’s how to remove and install your front wheel, too, just in case you need a refresher.
Pre-Service Notes
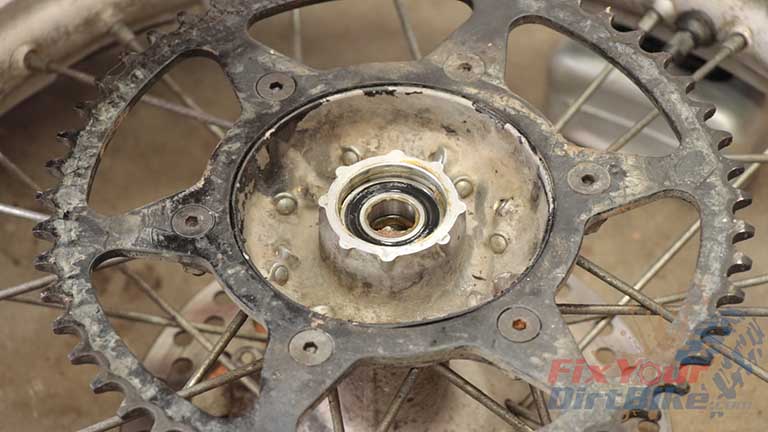
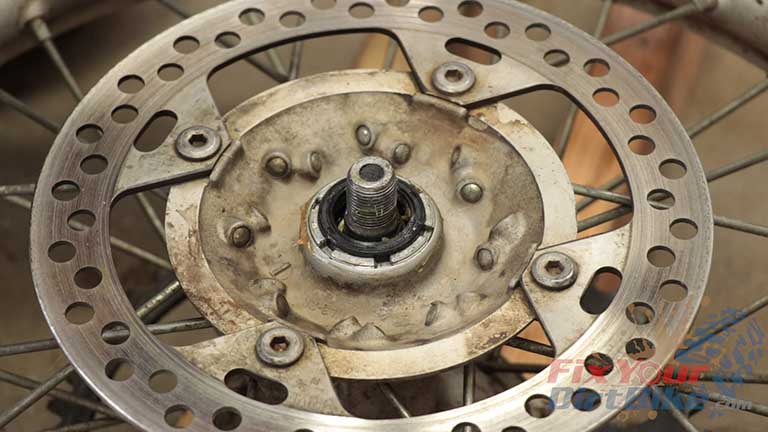
- Your rear wheel has three bearings: two on the sprocket side and one on the brake side. Always start and end with the brake side bearing. Learn how your rear wheel hub works first to get a better idea of what you’re working with.
- If you need parts and tools, make sure to buy them here! → https://amzn.to/40uWvWN
- Pictures with captions are after the steps below.
- If you need any help, don’t hesitate to ask!
Removing Your Rear Wheel Bearings
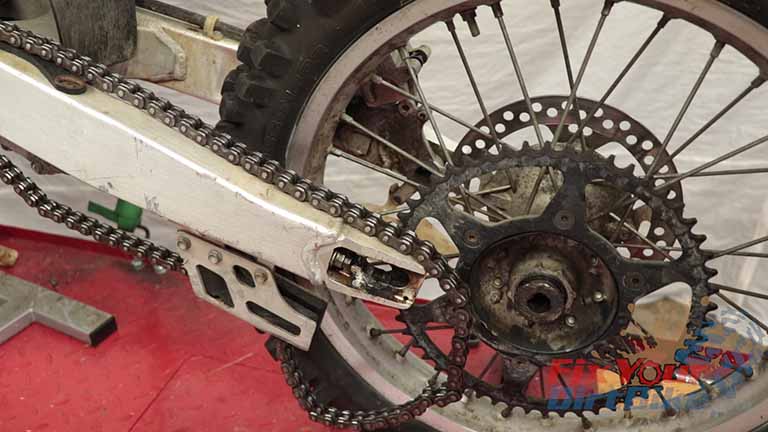
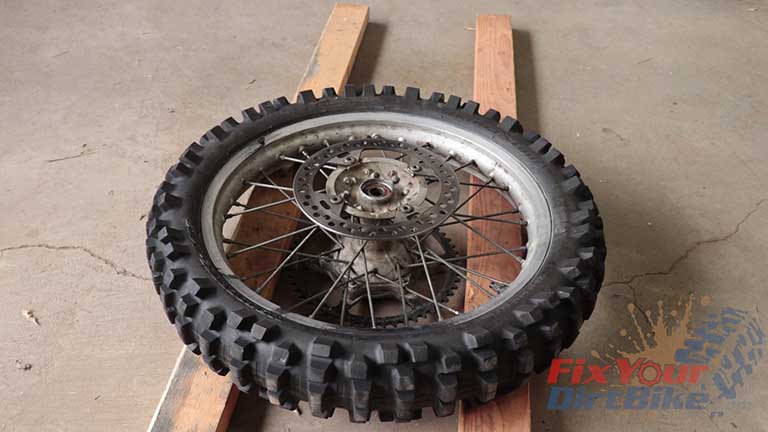
- Remove The Rear Wheel
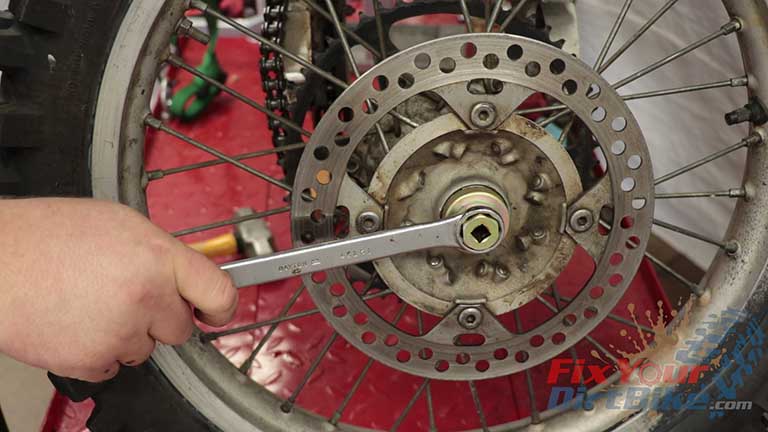
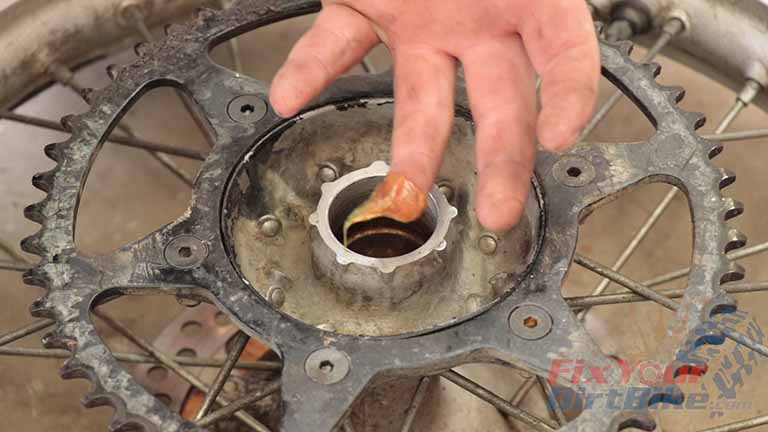
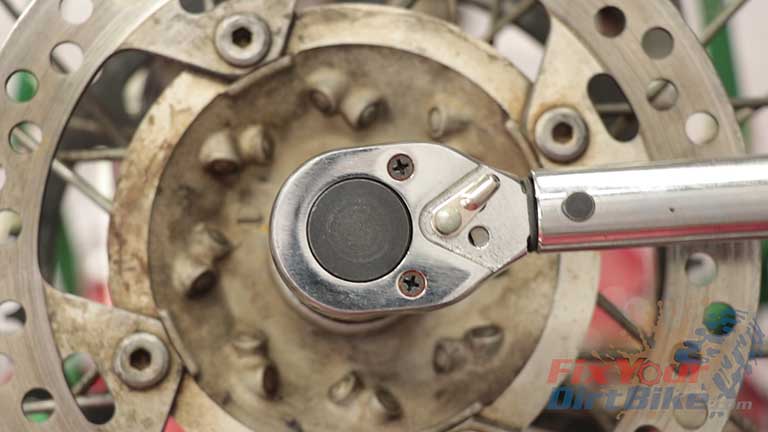
- Remove The Bearing Retainer
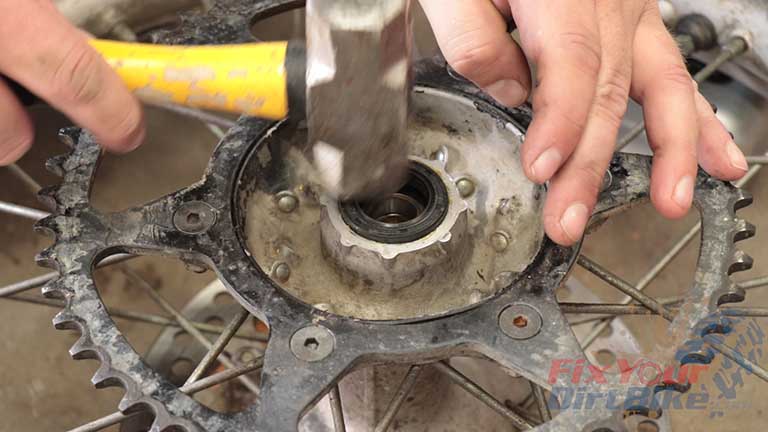
- Align your bearing retainer tool with the teeth on the bearing retainer and gently loosen it. Do not force it if it does not turn; you could break it.
- Tap the end of your wrench with a hammer until you see the retainer turn.
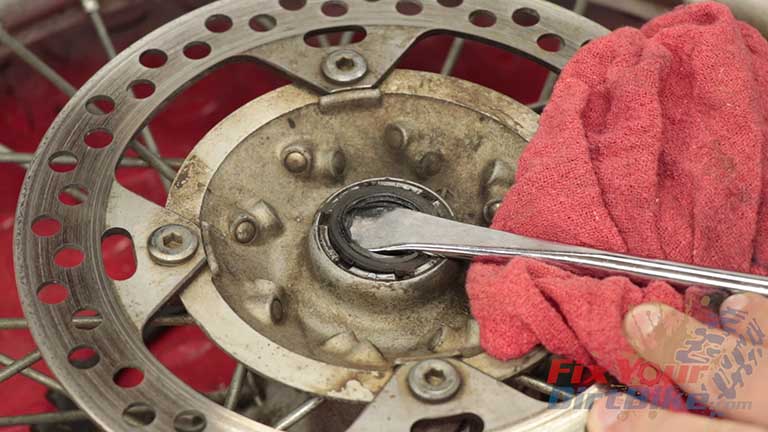
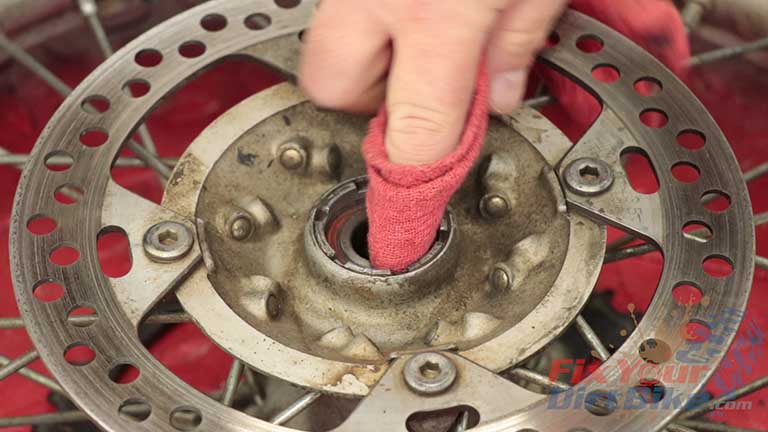
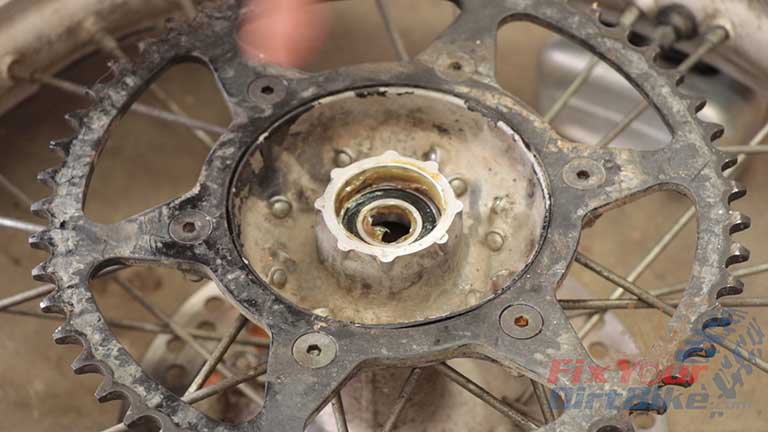
- Pry Out The Old Seals
- There should be a small grease lip inside the rear wheel bearing seal. Pry the seal out by hooking it with your tire spoon.
- When the old seals come out, clean the seal bore.
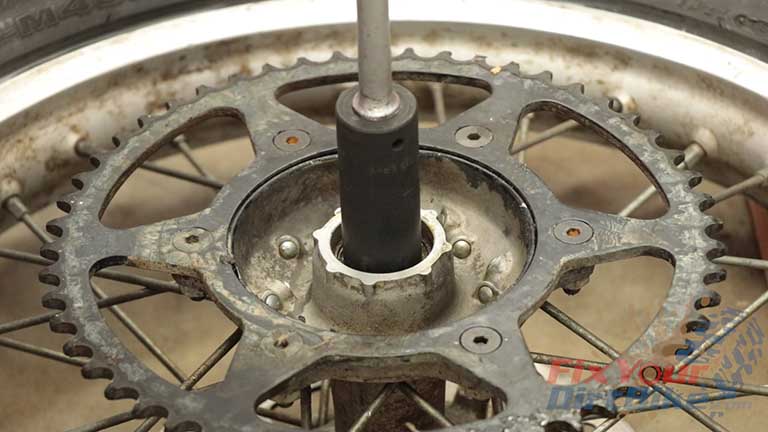
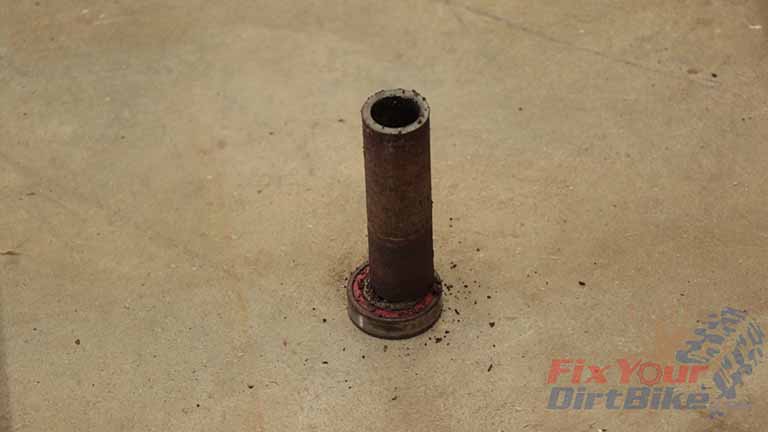
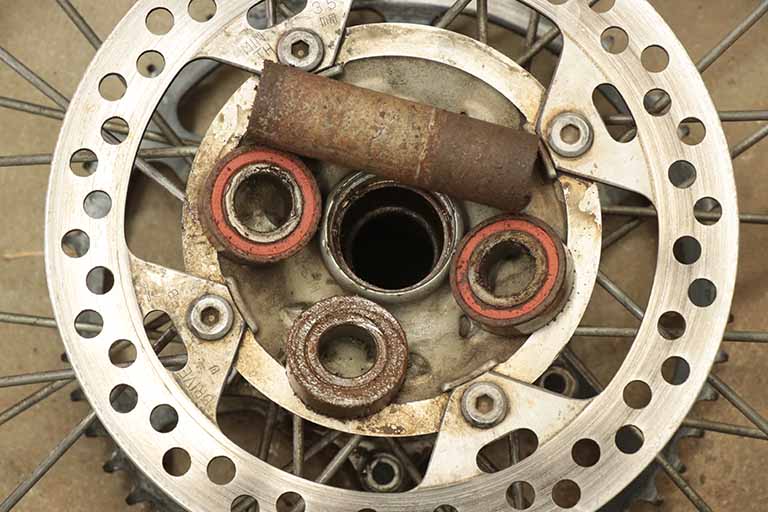
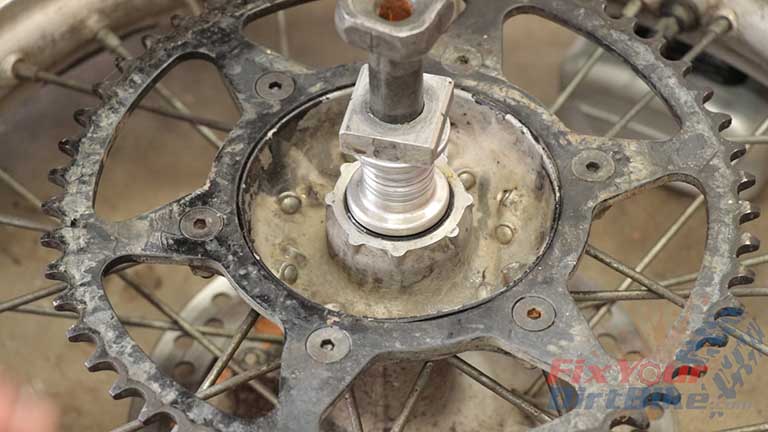
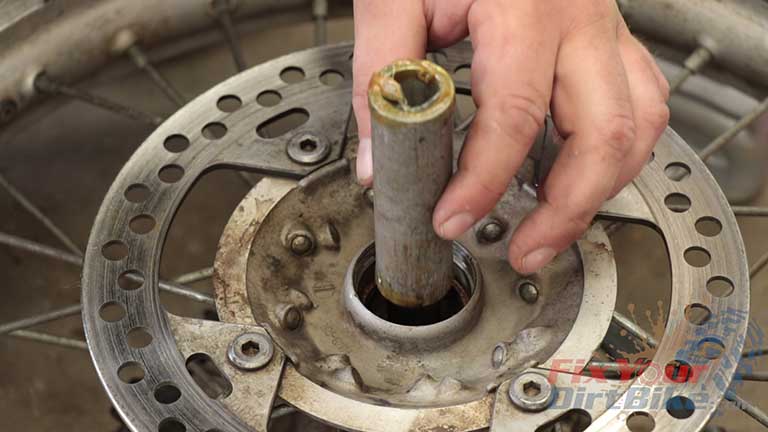
- Dislodge The Distance Collar
- Insert your drift from the sprocket side up to, but not touching, the brake side bearing. Work your drift up and down to pull the distance collar away from the bearings.
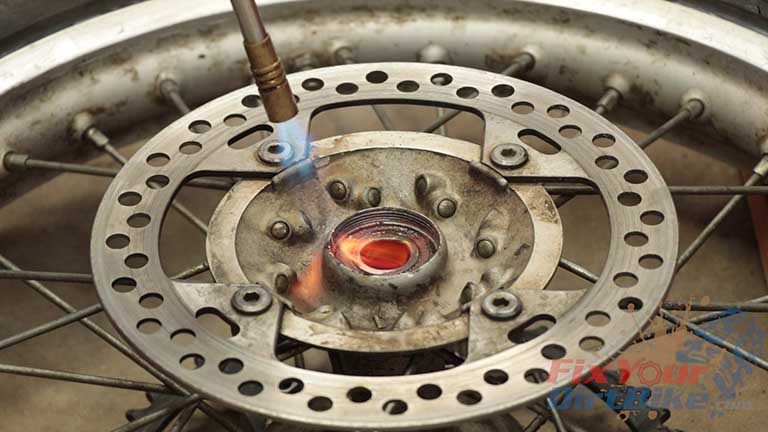
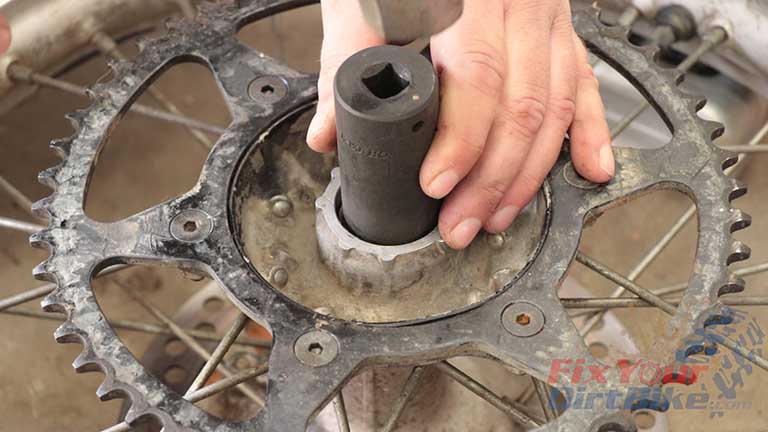
- Remove the Brake Side Rear Wheel Bearing.
- Place your wheel on your 2x4s with the brake side up so only the rim and tire support it.
- Heat the hub, not the bearing, for 60 seconds. This expands the hub slightly, releasing the pressure on the bearing.
- Flip your wheel over, align your socket to the inner bearing race, and tap until the brake side bearing falls out.
- Do not strike the bearing too hard! The sprocket side bearings are seated against a lip inside the hub.
- Striking the inner bearing race too hard will break the sprocket side bearings, and then you must chip the outer bearing race out of the hub.
- This is annoying, and you could damage the hub.
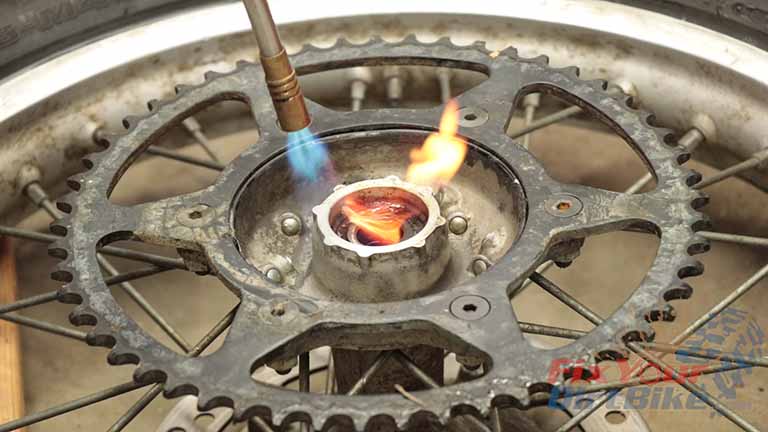
- Repeat this process on the sprocket side rear wheel bearings.
How To Service Your Rear Hub
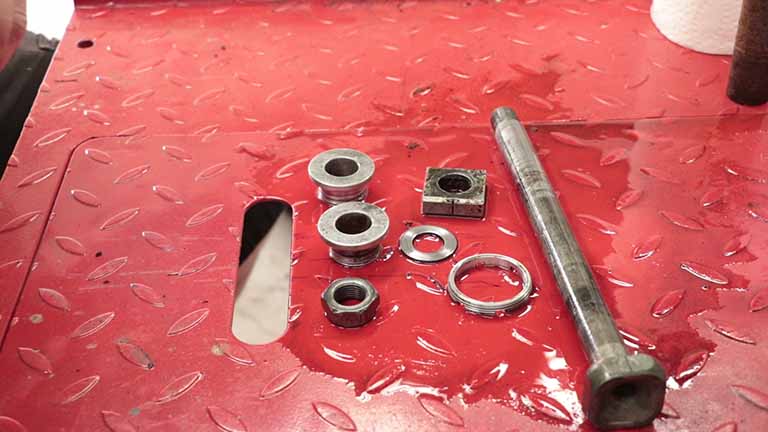
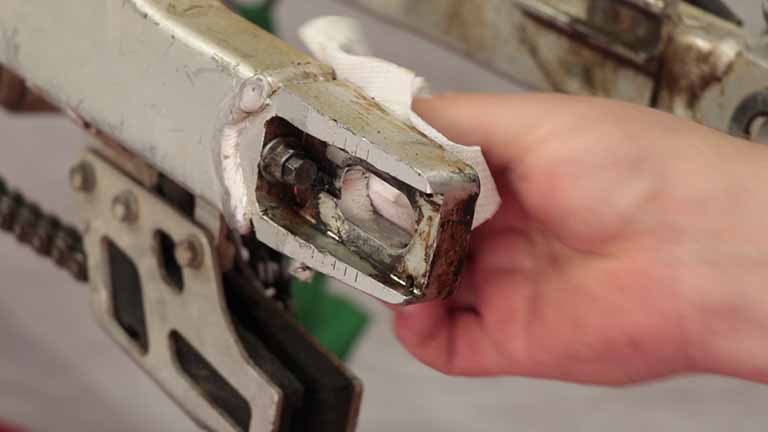
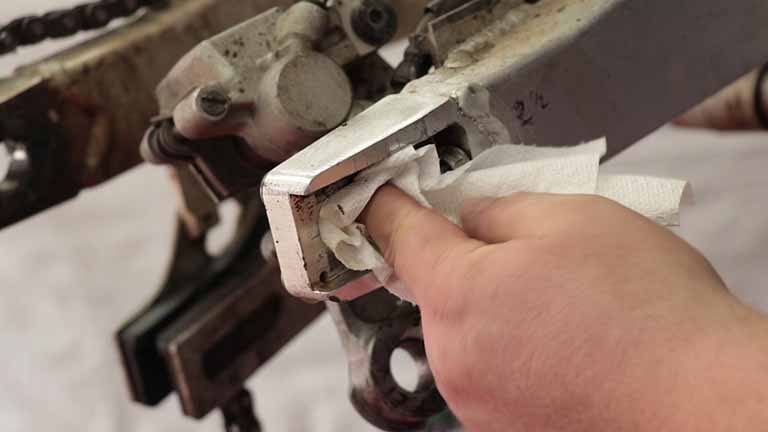
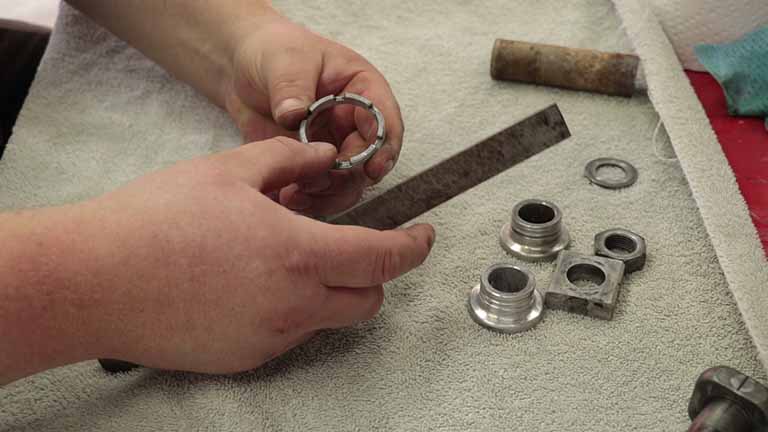
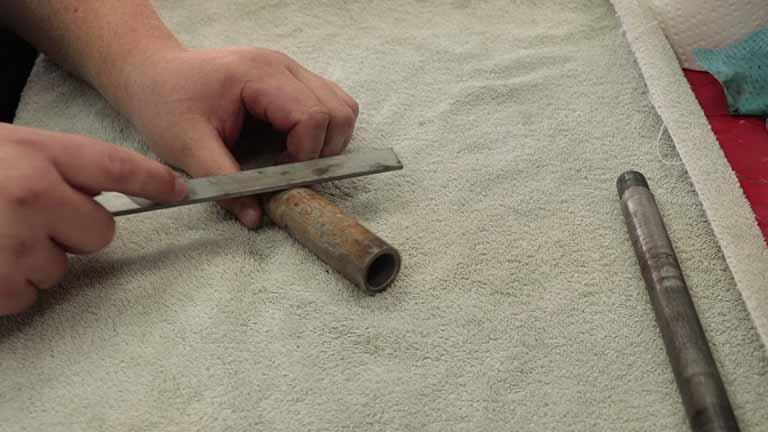
- Clean and then inspect the hub components and swing arm mounts for any signs of excessive wear or damage.
- File off any burrs or chips.
- Do not remove any metal when smoothing the ends of the hub components. The spacers and distance collar must be an exact length to work correctly. If the ends are damaged, they need to be replaced.
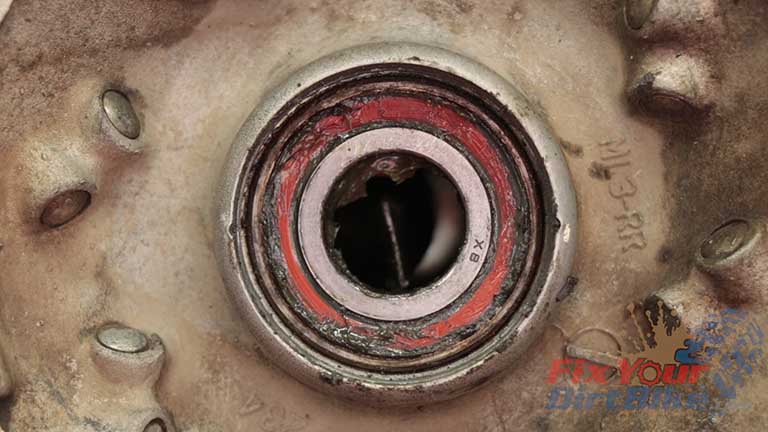
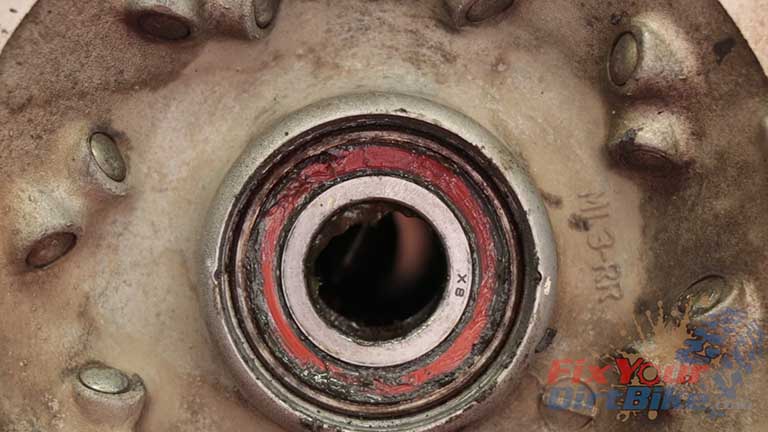
- Water has contaminated this rear hub, so the distance collar and hub have some corrosion.
- If you find this on your dirt bike, file off the corrosion as much as possible without removing too much metal, and then consider the importance of good seals and grease.
- Once everything is cleaned and inspected, test fit your new bearings in your hub. They are a press fit, so they should NOT slip into the bore on their own.
- If your bearings do slip into the bore, you must replace your hub sooner than later.
Rear Wheel Bearings Installation
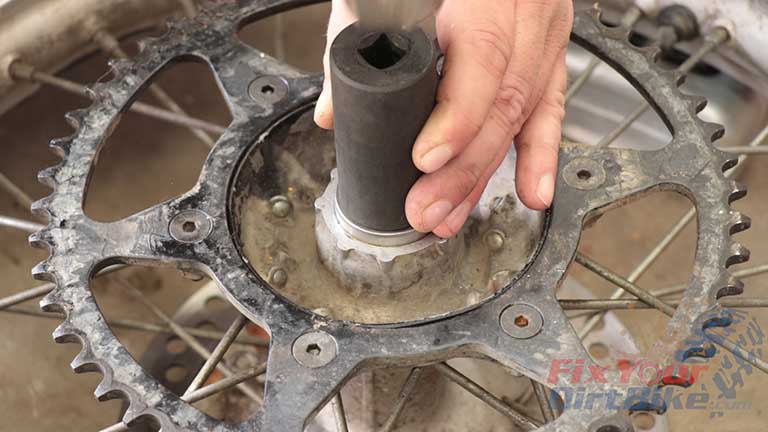
- Sprocket Side Bearing Install
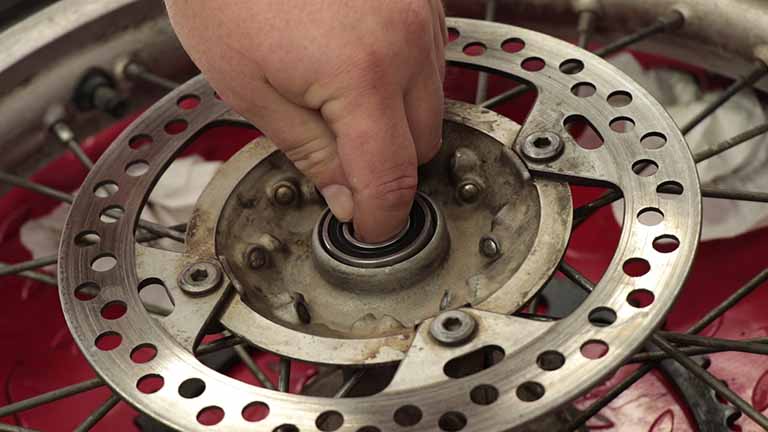
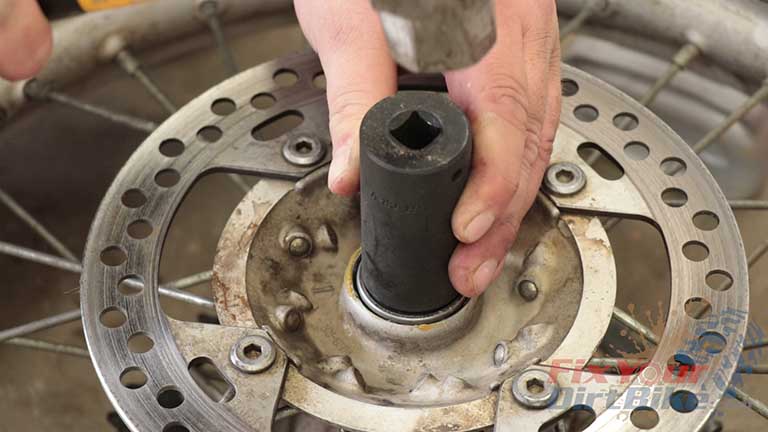
- Set your wheel on your wood block with the sprocket side up to support the hub.
- Grease the bore, then align your new rear wheel bearing flush to the hub.
- Align your large socket to the OUTER bearing race, and lightly drive the bearing into the bore.
- Apply another layer of grease and repeat the hammering process with the next bearing.
- Apply another coat of grease, drive your seal into the bore, and ensure the seal retention spring is facing in.
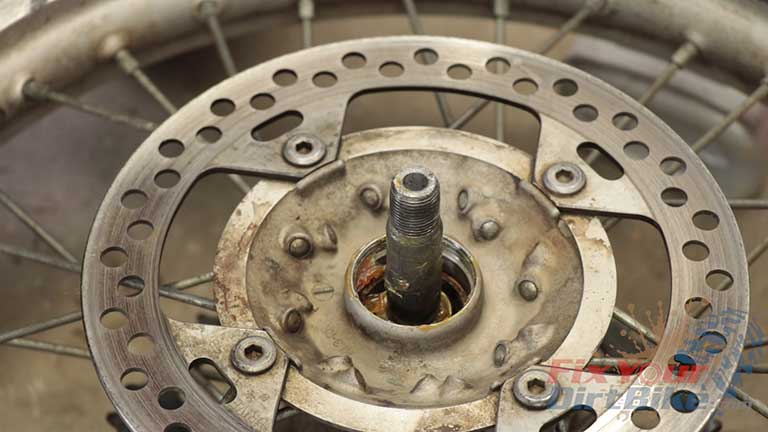
- Stack your spacers and axle block on the end of the axle, drop them into the wheel hub, and flip your wheel over.
- The axle will now guide you in aligning the distance collar with the brake side rear wheel bearing.

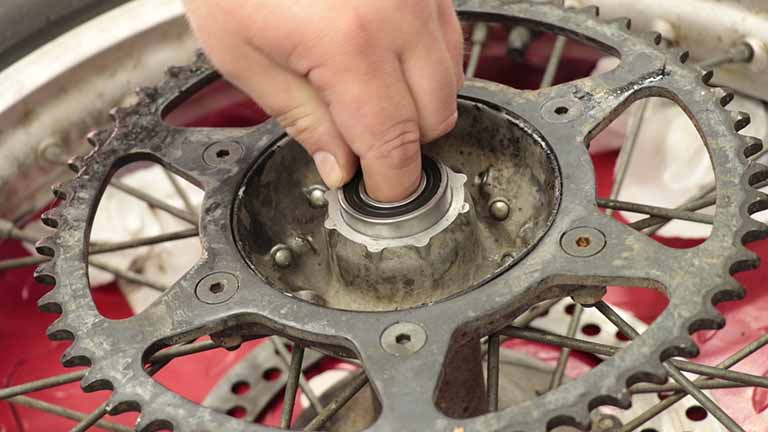
- Brake Side Bearing Install
- Apply grease to the ends of the distance collar and drop it into the hub.
- Grease the bore, and drive in your last bearing.
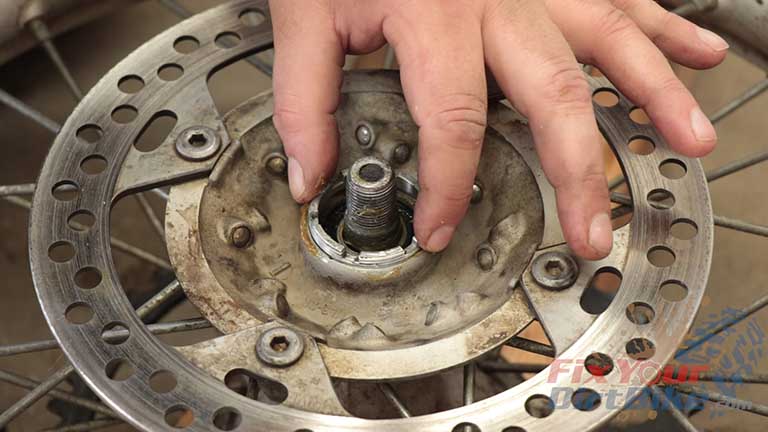
- Install the bearing retainer hand tight.
- Apply your last coat of grease, and install the rear wheel bearing seal, spring side in.
- Torque the bearing retainer according to the manufacturer’s specifications.
Remember to take your time, and your bearing replacement will be easy.
If you want to help take Fix Your Dirt Bike to the next level, check out my Patreon page!
If you have any questions or comments, please leave them in the comments or on our Facebook page!
Keep Your Dirt Bike Running Right!


