
How To Assemble And Install The Crankcase On Your 97-01 Honda CR250
Double-check all mating surfaces before assembling your bottom end, and use new gaskets, O-rings, and dowels.
Give every bearing a 2-stroke oil coating, and tape the splines of the crankshaft and transmission.
The Tools You Will Need
- Crank Puller Tool → https://amzn.to/4h5dYvq
- 8mm Socket
- 1/4 in Socket Wrench
- Seal Sized Sockets (you’ll see what I mean)
- Calipers → https://amzn.to/3BRoCXX
- Razor
- 2-Stroke Oil – https://amzn.to/4j8rh00
The Parts You Will Need
- New ’97-’01 Honda CR250 Case Gasket → https://amzn.to/4gNFi1o
- Coolant Passage O-Ring → https://amzn.to/4h7Ro5r
- Dowels → https://amzn.to/4gM8wOt
Pre-Service Notes
- I recommend opening the Bottom End Service Specifications in a new tab for easy reference.
- If you need parts and tools, make sure to buy them here!
- Pictures with captions are after the steps below.
- If you need any help, don’t hesitate to ask!
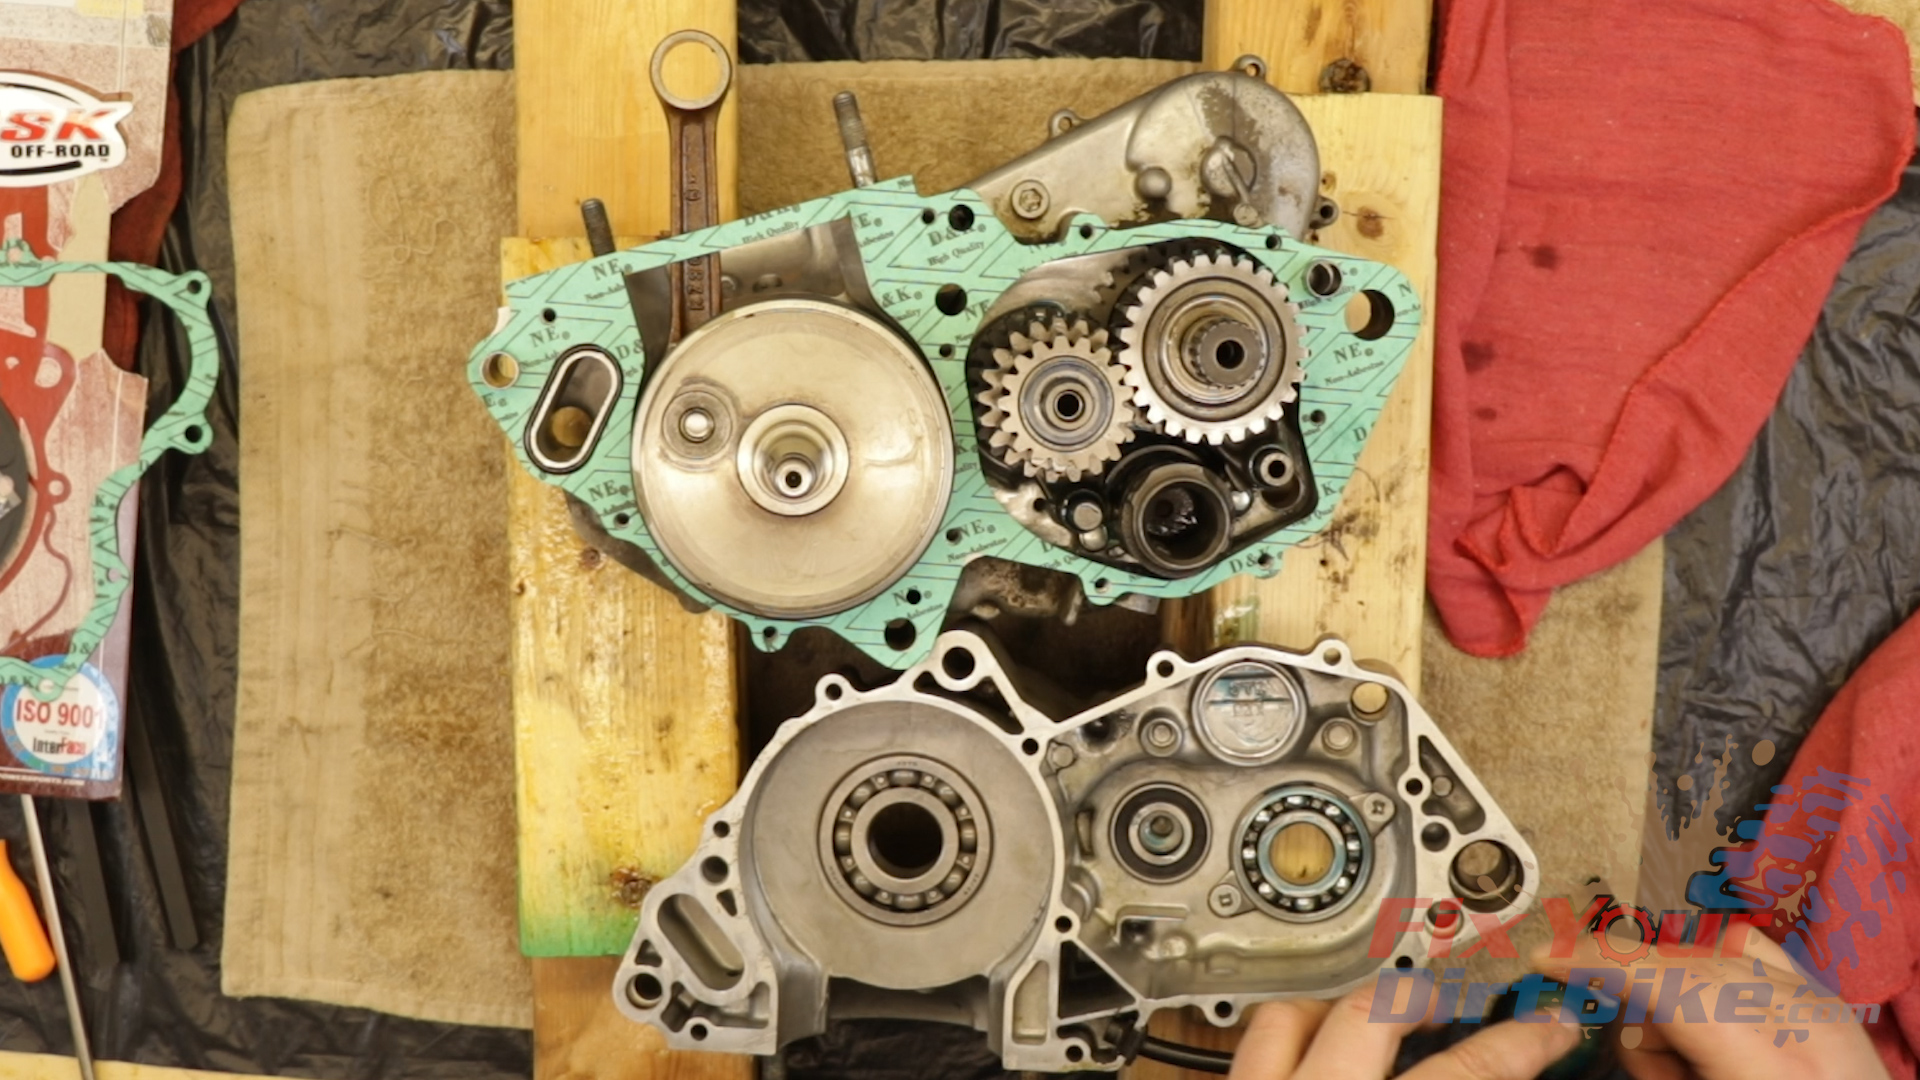
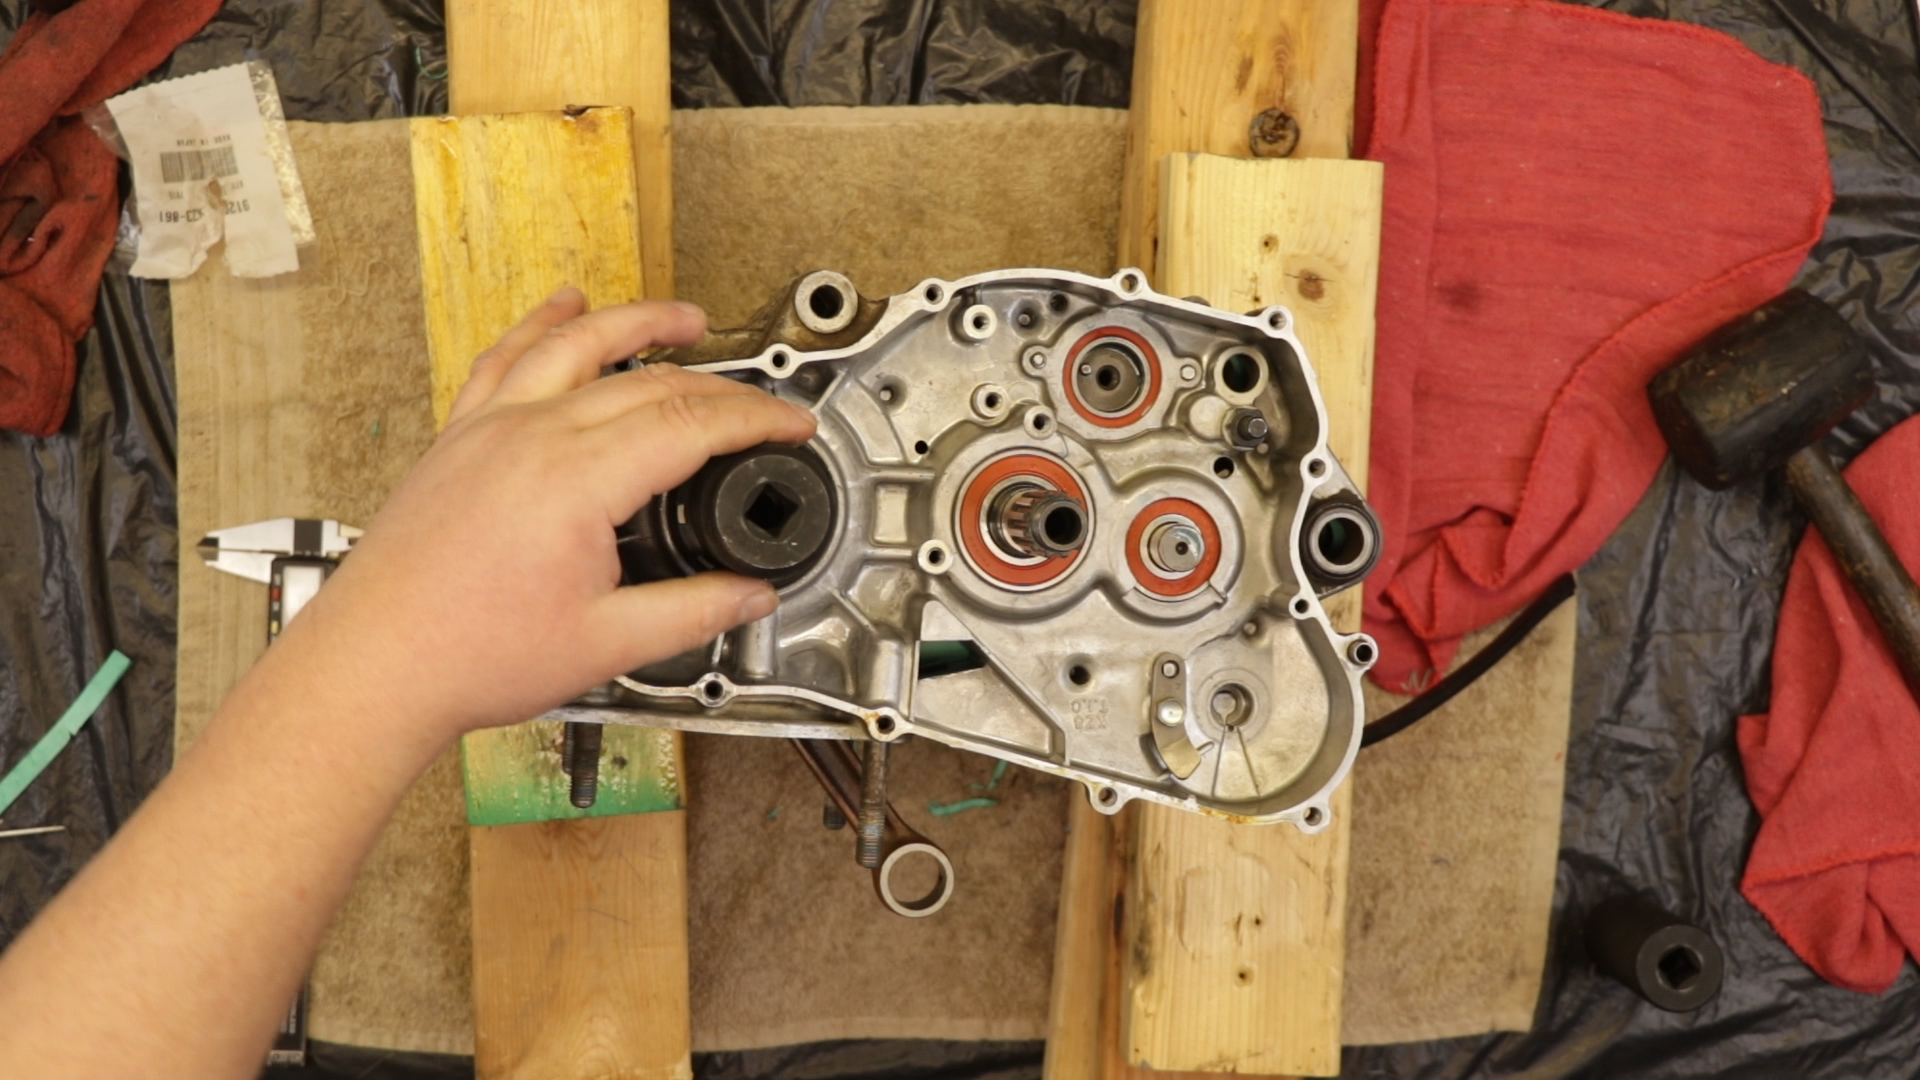
Right Case Assembly
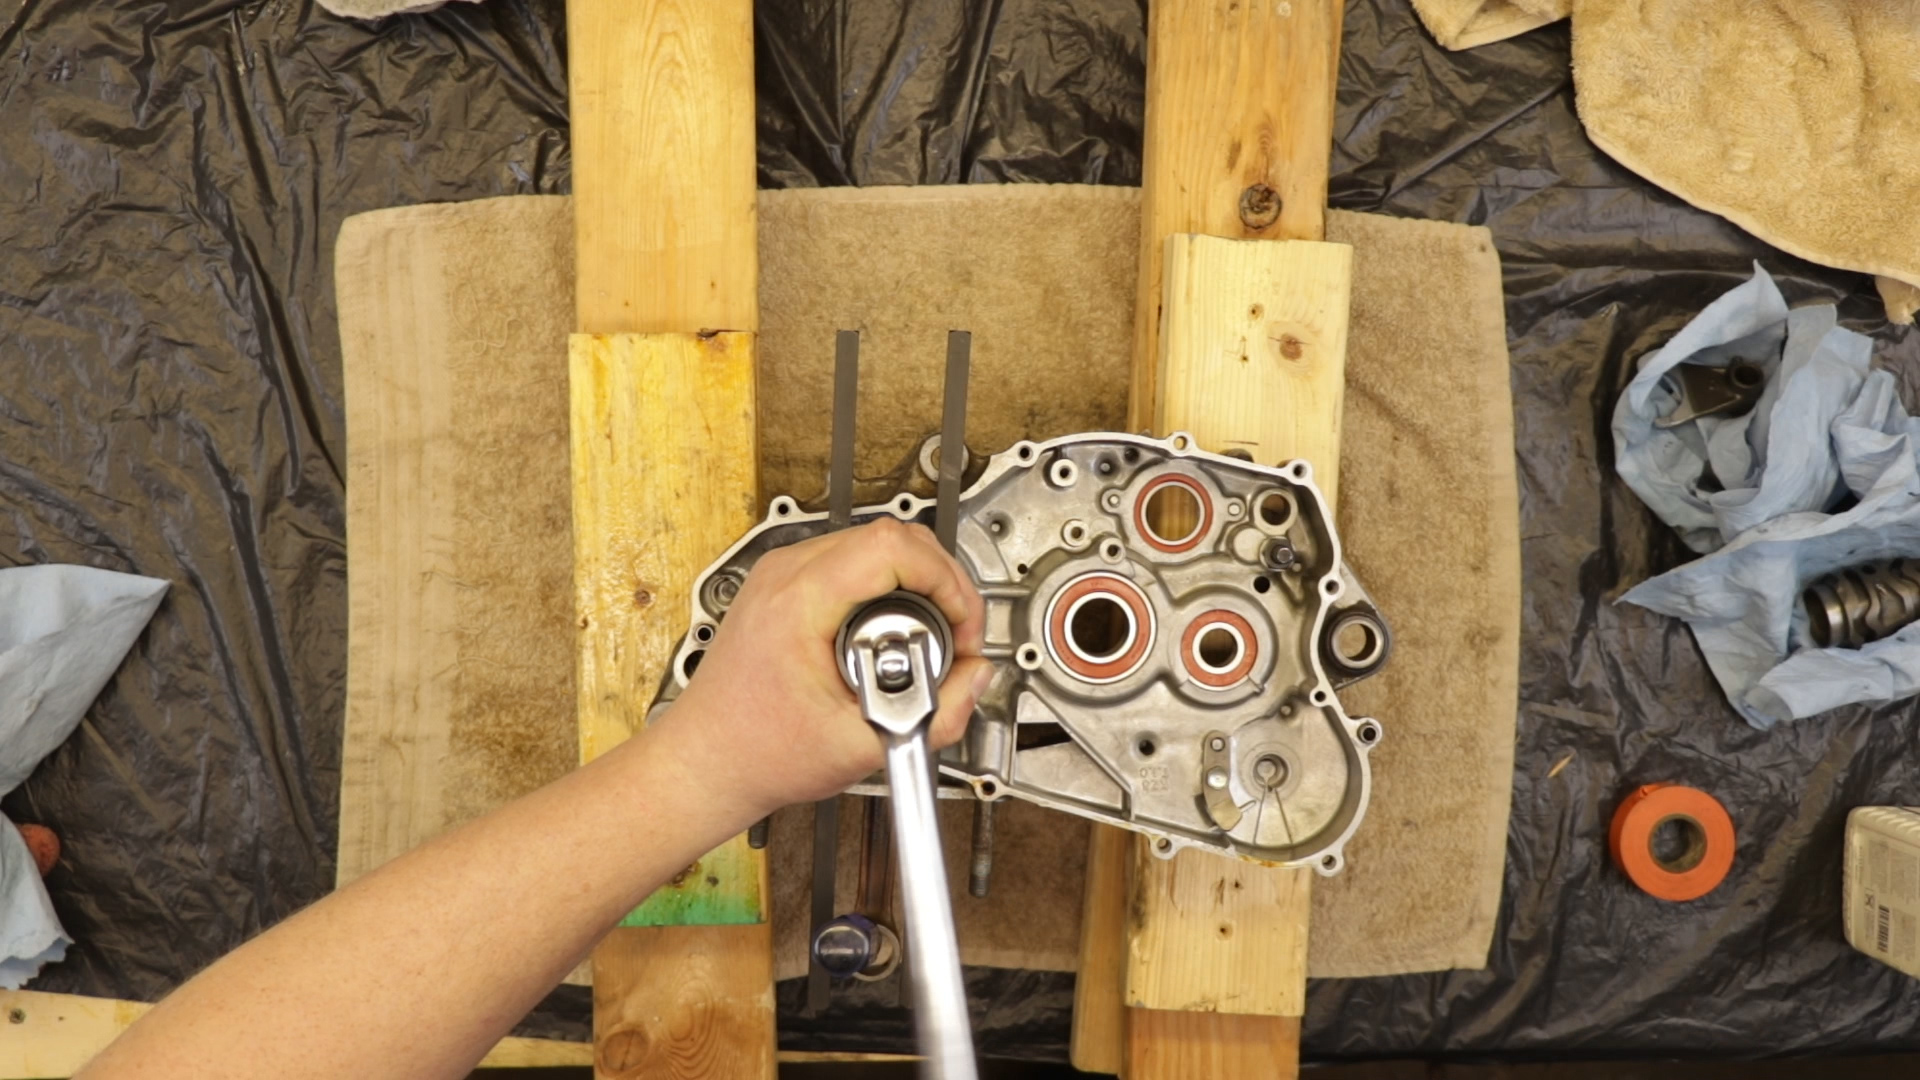
- Install the crankshaft on the right side first.
- Assemble your crankshaft puller, and tighten the nut until the crankshaft is completely seated in the case.
- The crankshaft will rotate during installation, so make sure your connecting rod stays straight.
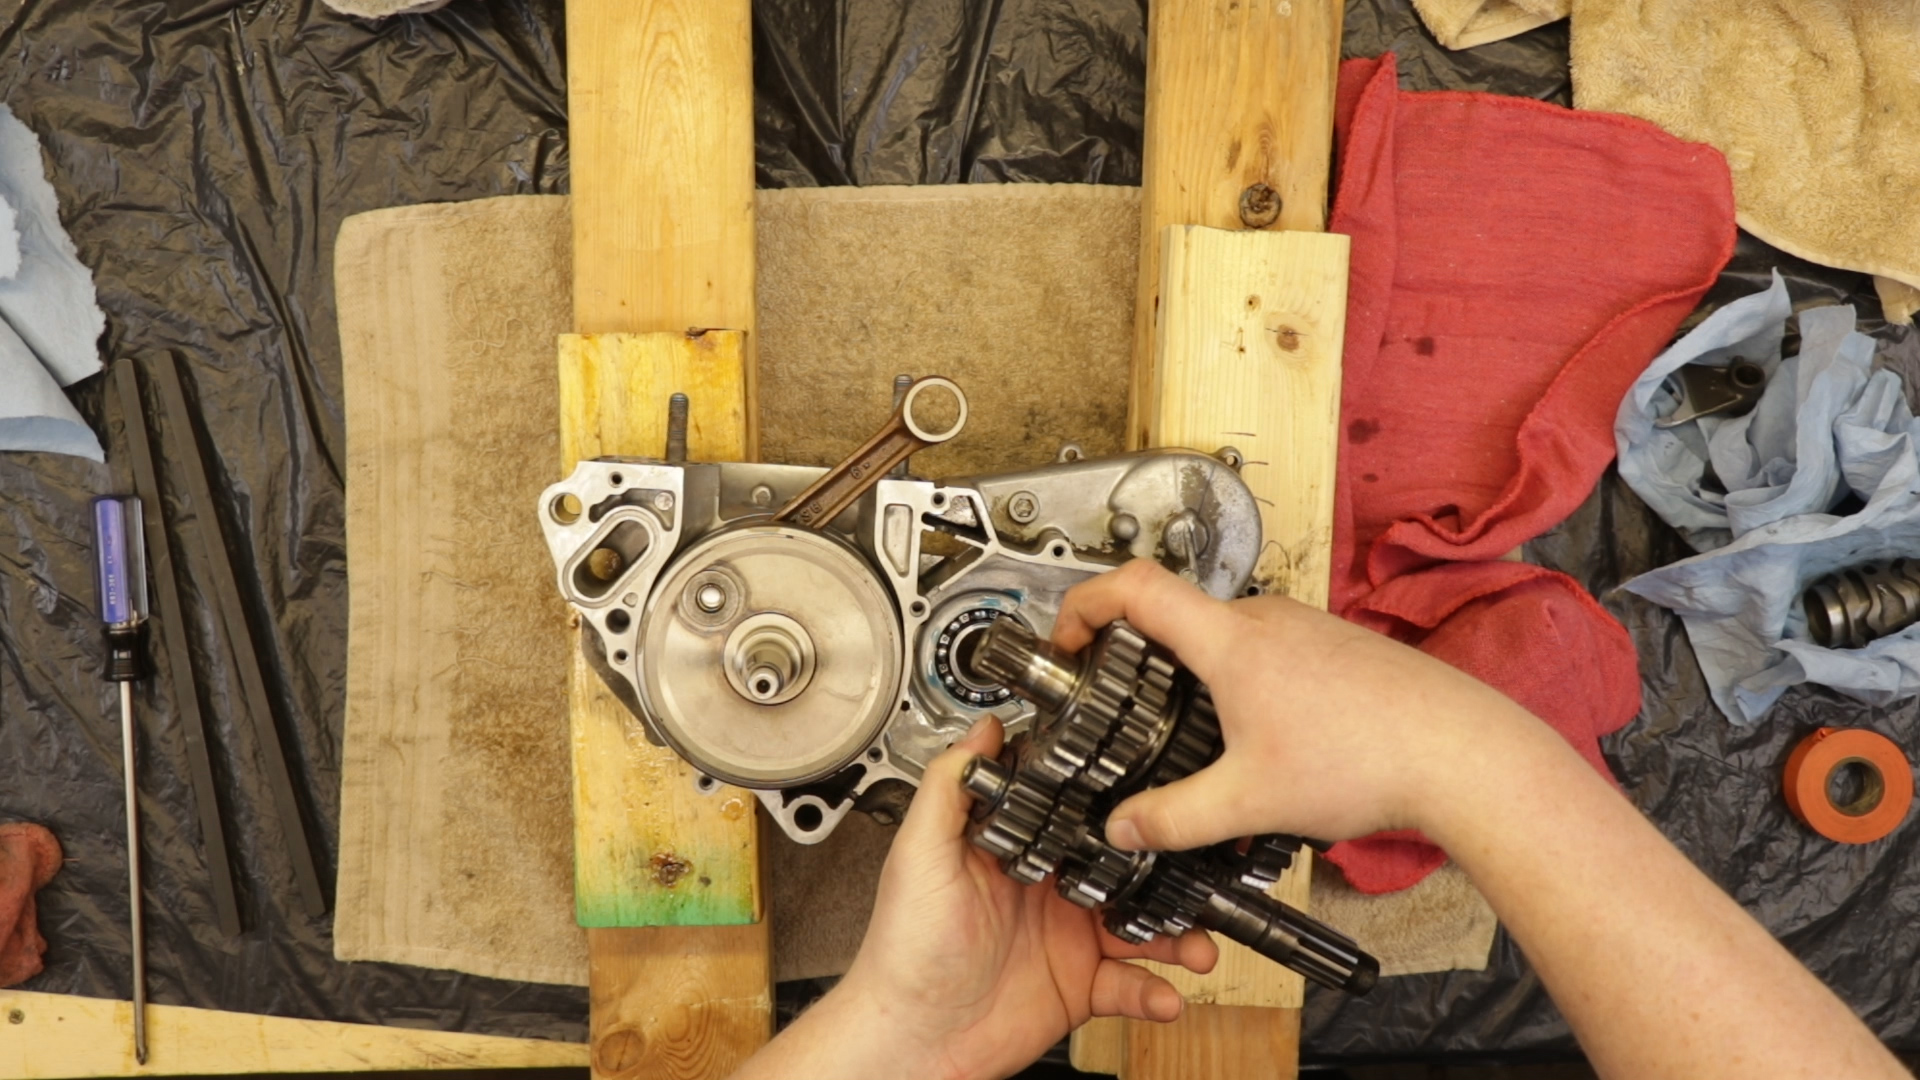
- Flip the case and oil the bearings with 2-stroke Oil.
- Mesh the transmission main shaft and countershaft, make sure the washers are still on the ends of the gear stacks, and install them into the correct case.
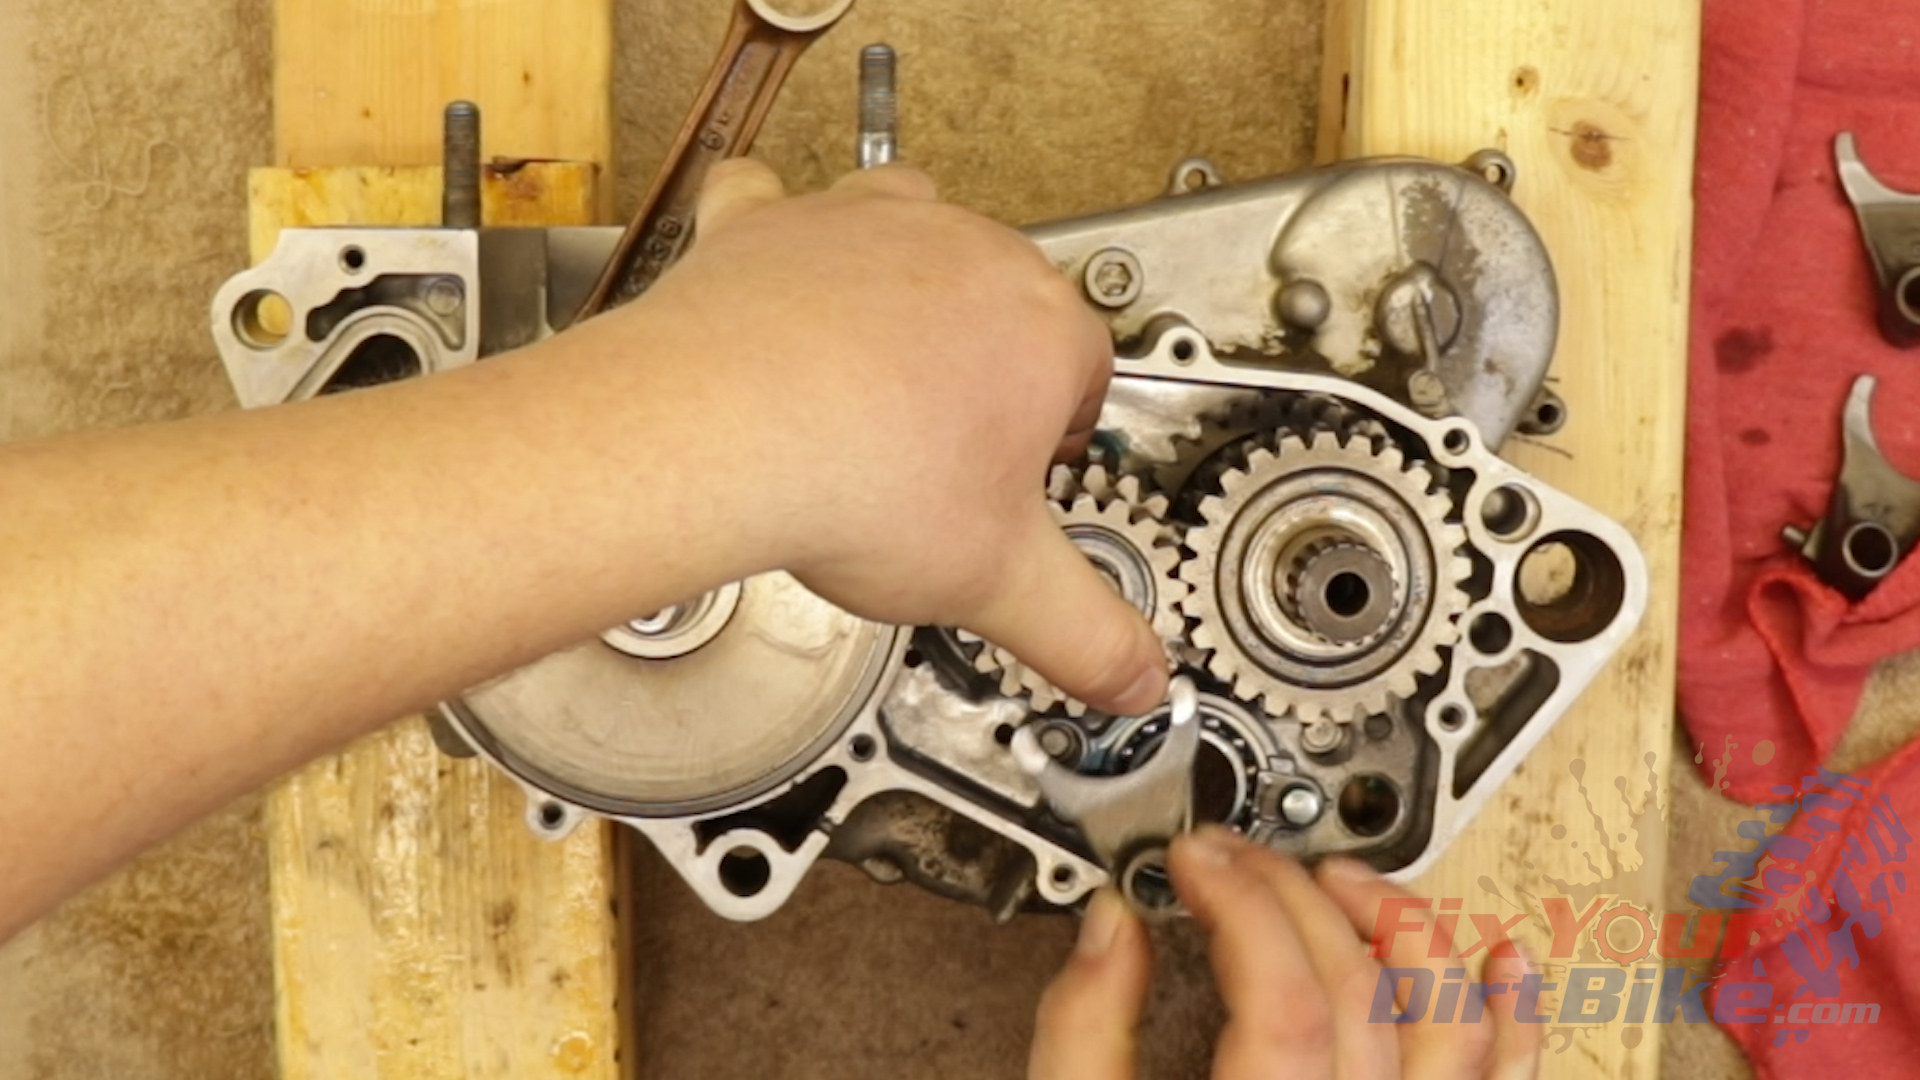
- Install the shift forks.
- The center fork goes on the main shaft, with the makings face down.
- The left fork goes on the top of the countershaft, and the right goes on the bottom of the countershaft.
- Install both forks with the markings facing up.
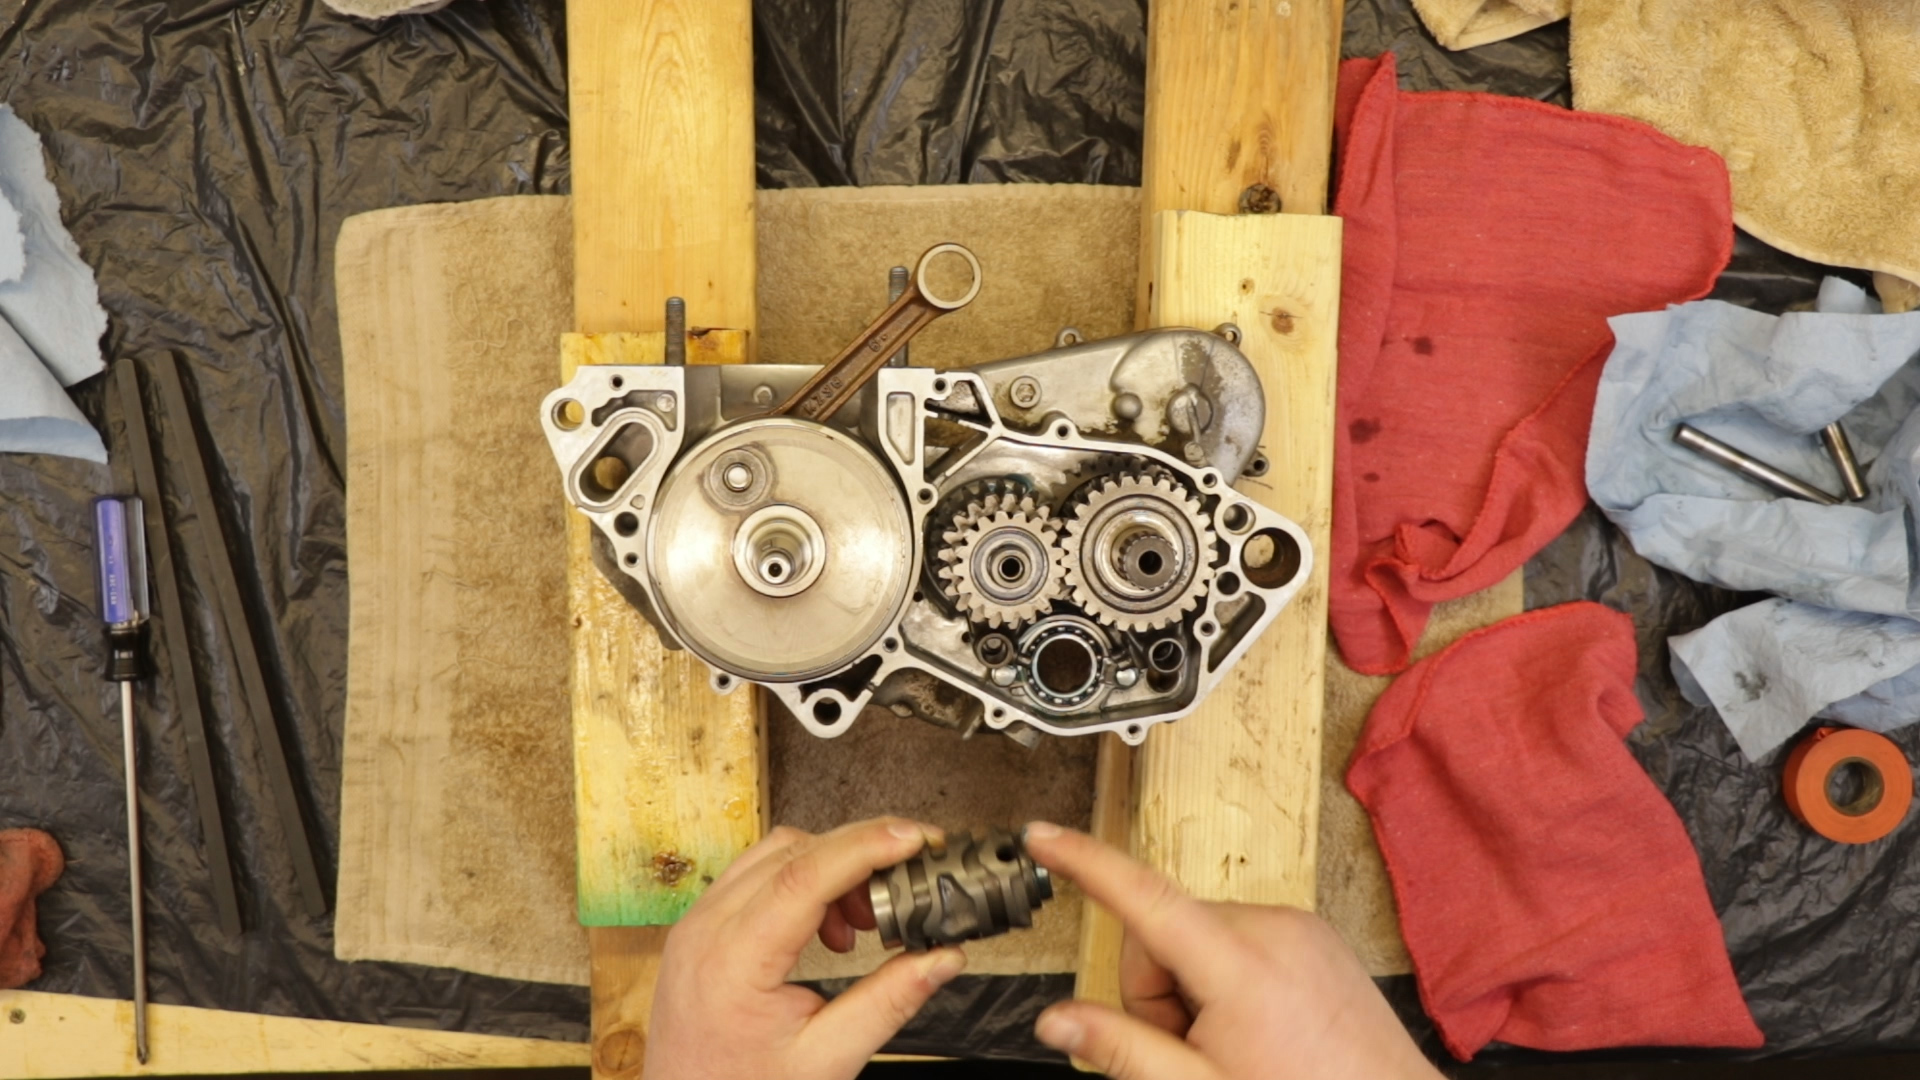
- Install the shift drum.
- Rotate the drum so it engages with the center fork pin.
- Align the fork with the case bore and install the short-shift fork shaft.
- Repeat with the left and right forks.
- Check the transmission operation by turning the countershaft and shift drum.
- The transmission may feel hard to shift but remember that you are using your hand, not your foot, and the gears are meant to move side to side, not up and down.


Related: What’s the point of rebuilding your 2-stroke engine if you don’t use a quality Premix?
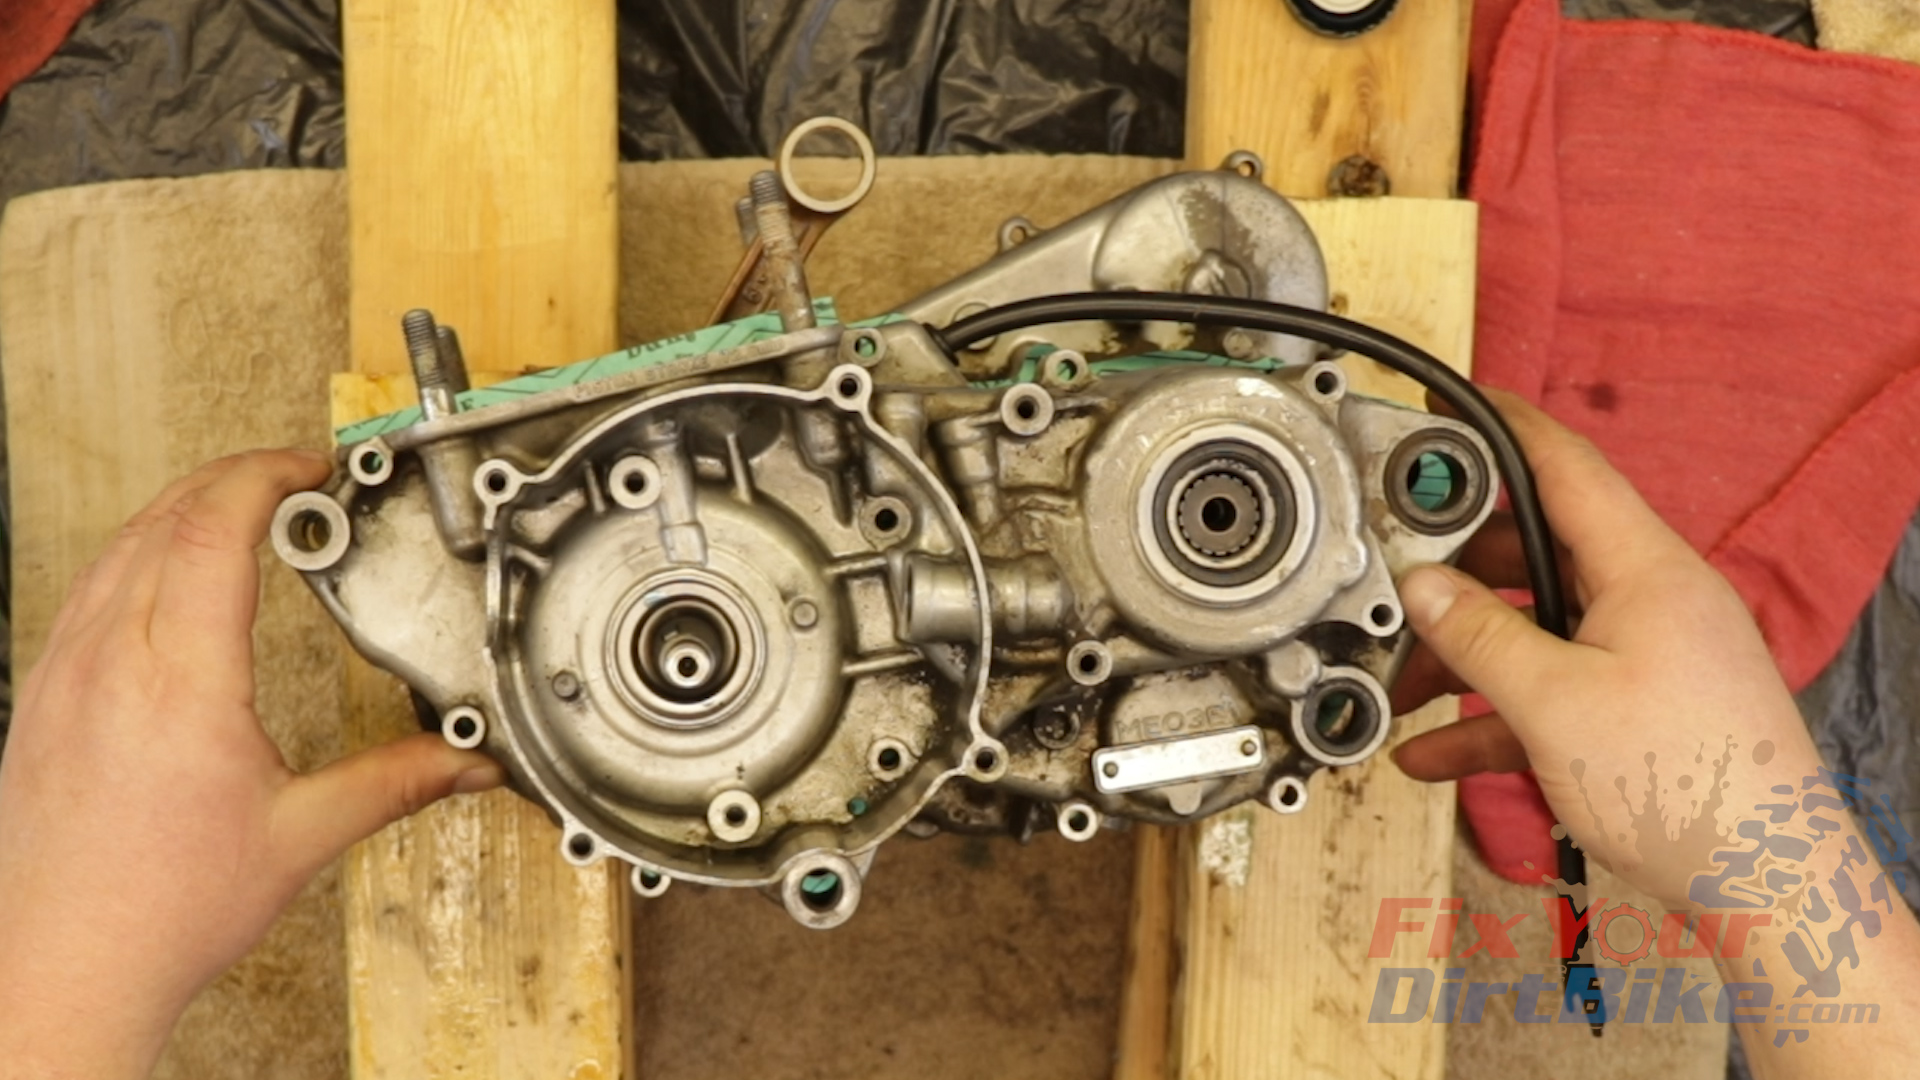
Left Case Assembly
- Install the breather tube into the left case and the block in the right case.
- Install your new dowels and lubricated o-ring.
- Place your gasket in the right case. Do not cut the top off yet.
- Apply 2-stroke Oil to the left case bearings.
- Align the left case over the crankshaft and countershaft.
- Assemble your crank puller, and begin joining the case halves. Work slowly, and use a mallet when needed.
- Make sure to keep the case halves as even as possible.

Related: Can you trust the oil injection system on your 2-stroke? I sure don’t!
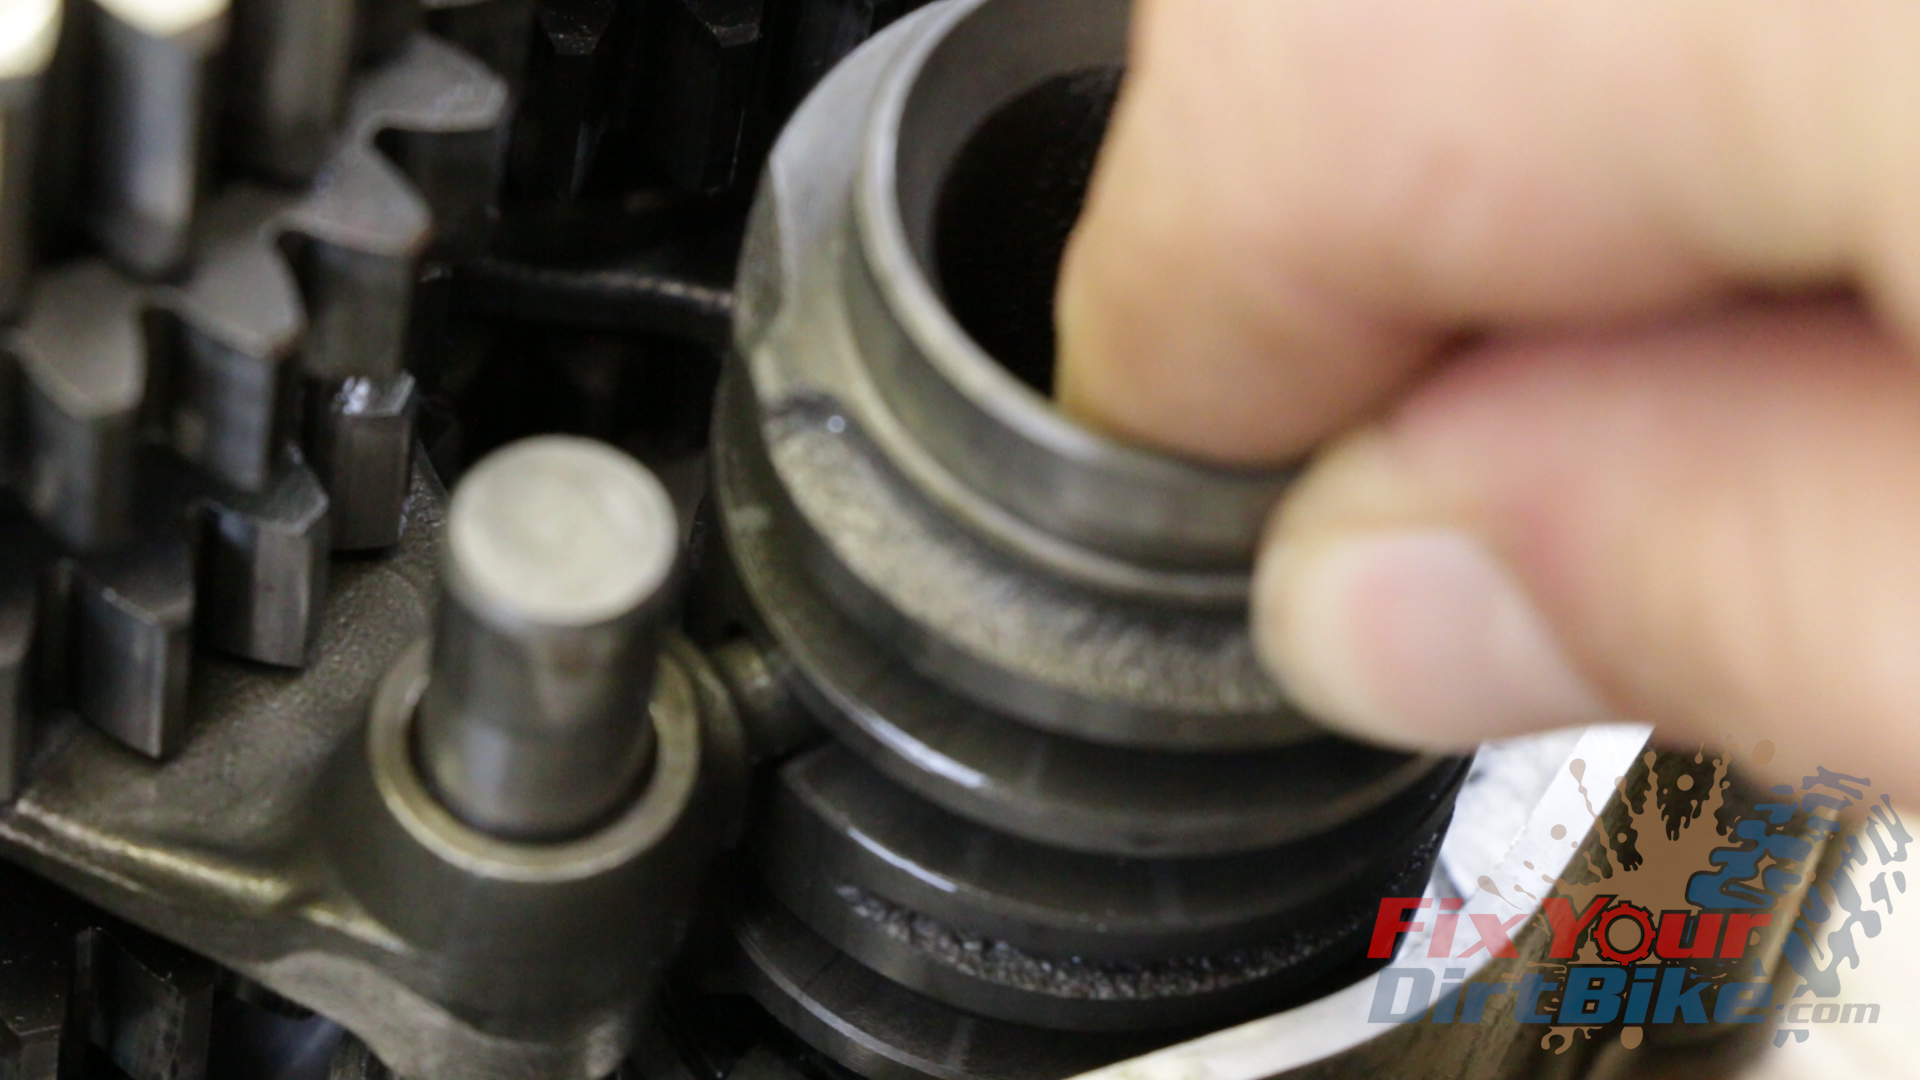
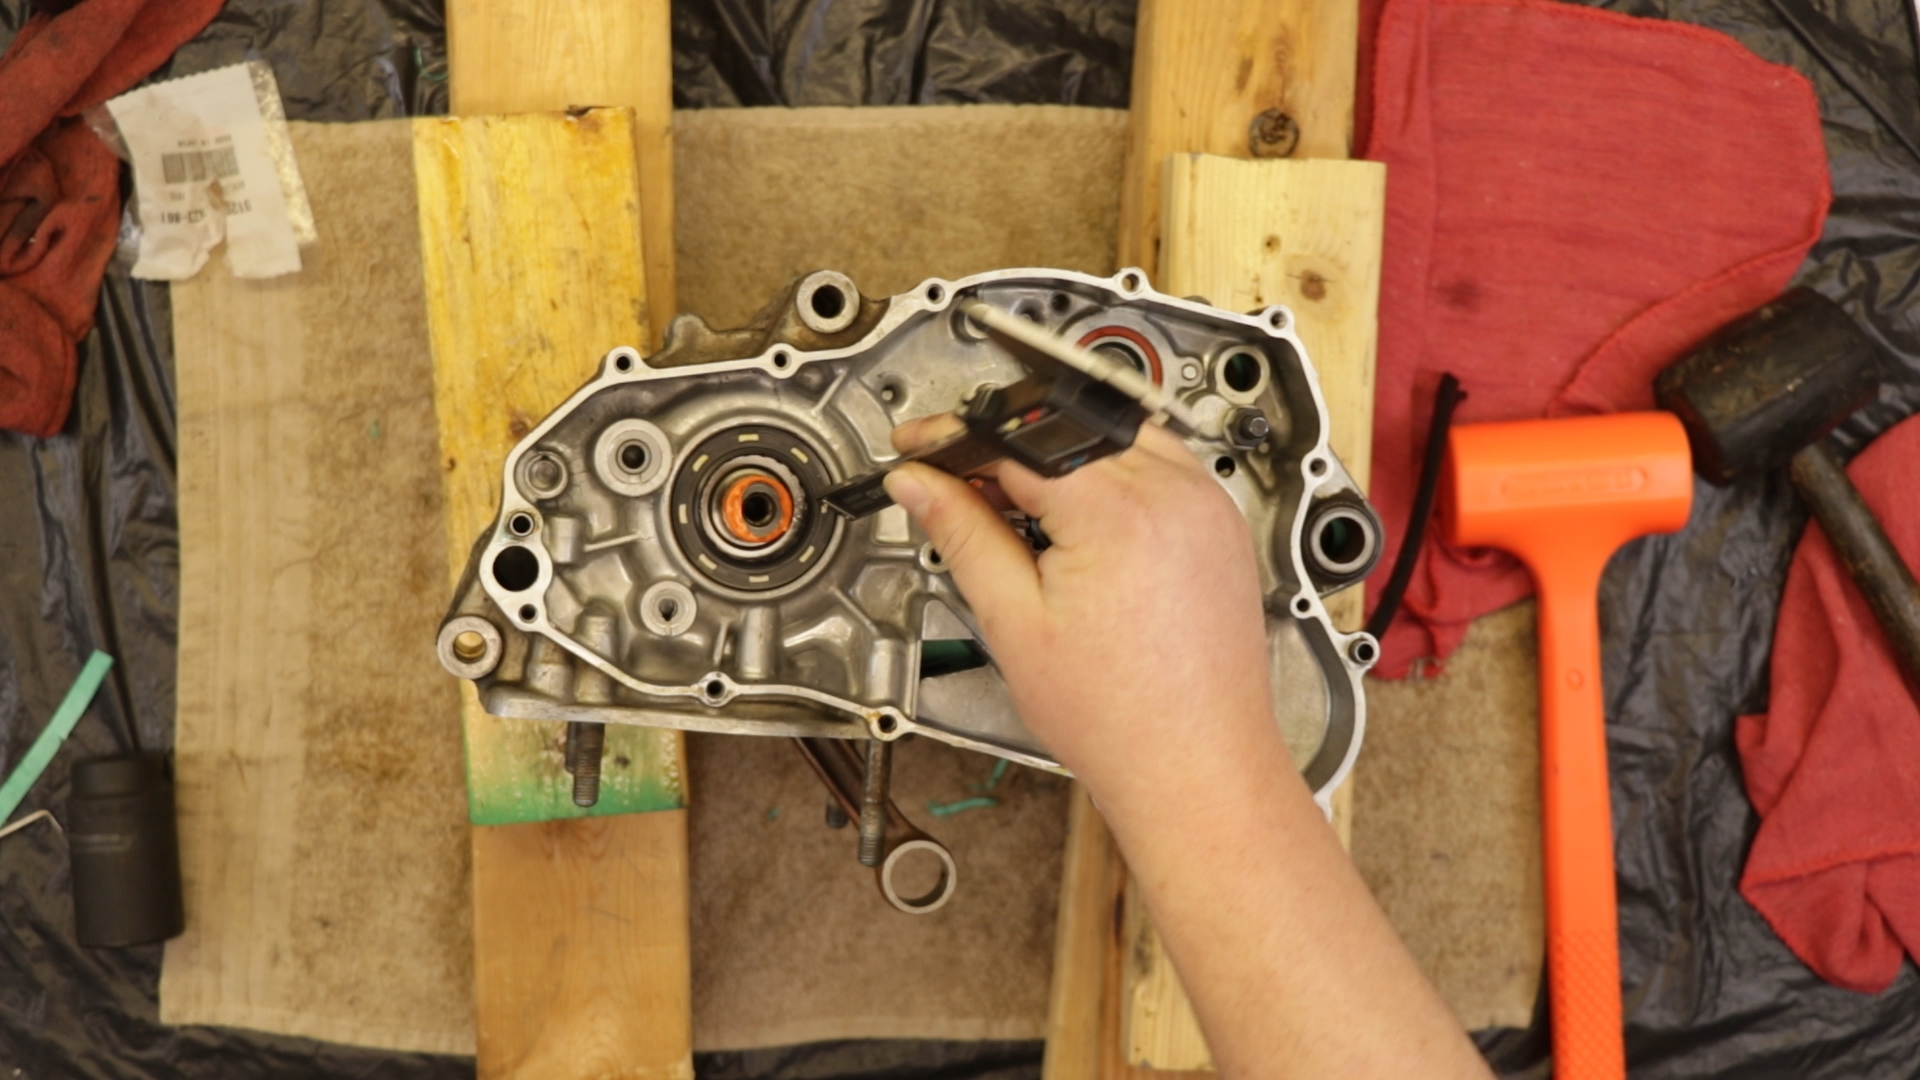
Crankshaft Seals
- With the crankshaft installed and the cases mated, install the NEW crank seals.
- You can use a combination of the crankshaft puller to install the seals flush and a large socket to seat it to the correct depth.
- To allow adequate lubrication, the left seal needs to be no more than 2 mm below the top of the bore, and the right no more than 1 mm below the top of the bore.
Crankcase Bolts
Transfer your bolts from your holder back to the case. With the bolts in the correct place, apply thread locker.
First, hand tighten the bolts, then begin tightening in a crisscross pattern, one-half turn at a time, until tight.
These bolts have no torque specifications, so use an ¼ inch ratchet to tighten them firmly; anything bigger and you risk stripping the case threads.
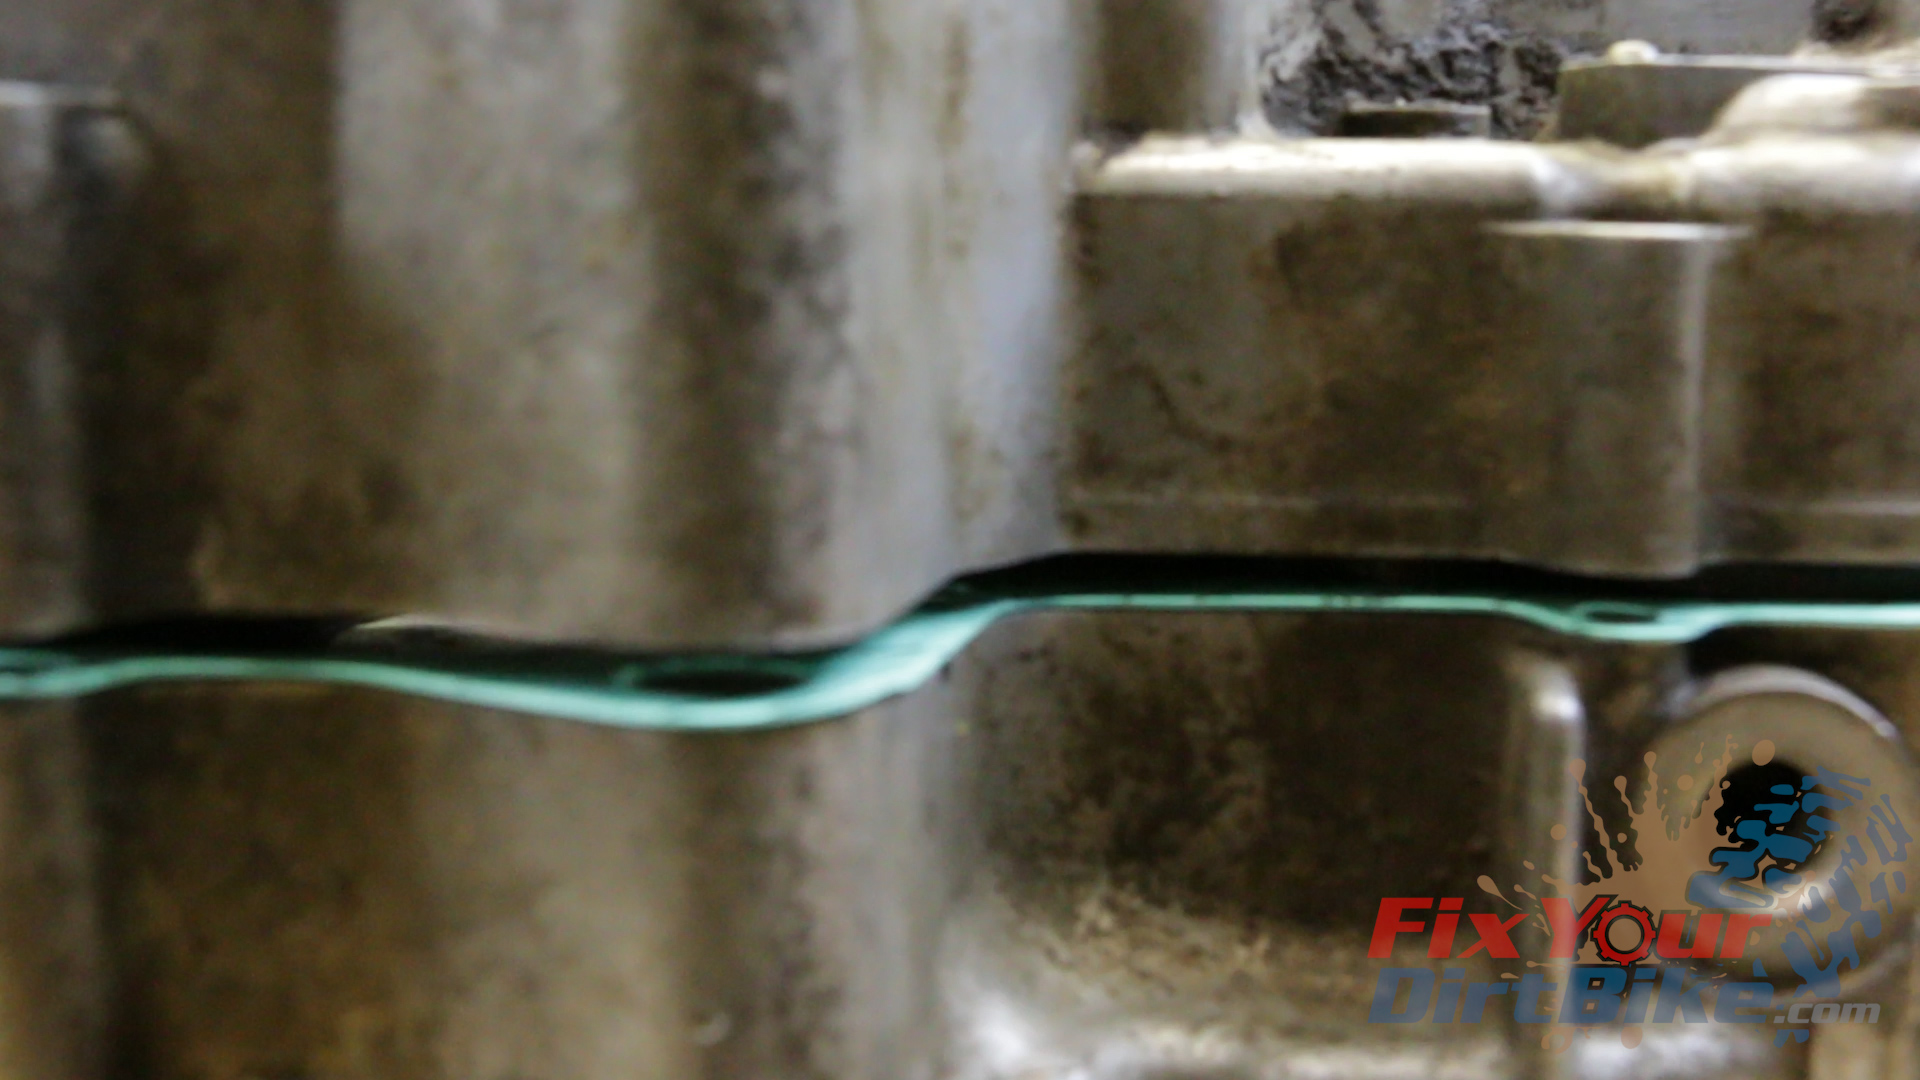
Remove excess gasket material. Be careful not to let any gasket material enter the crankcase.
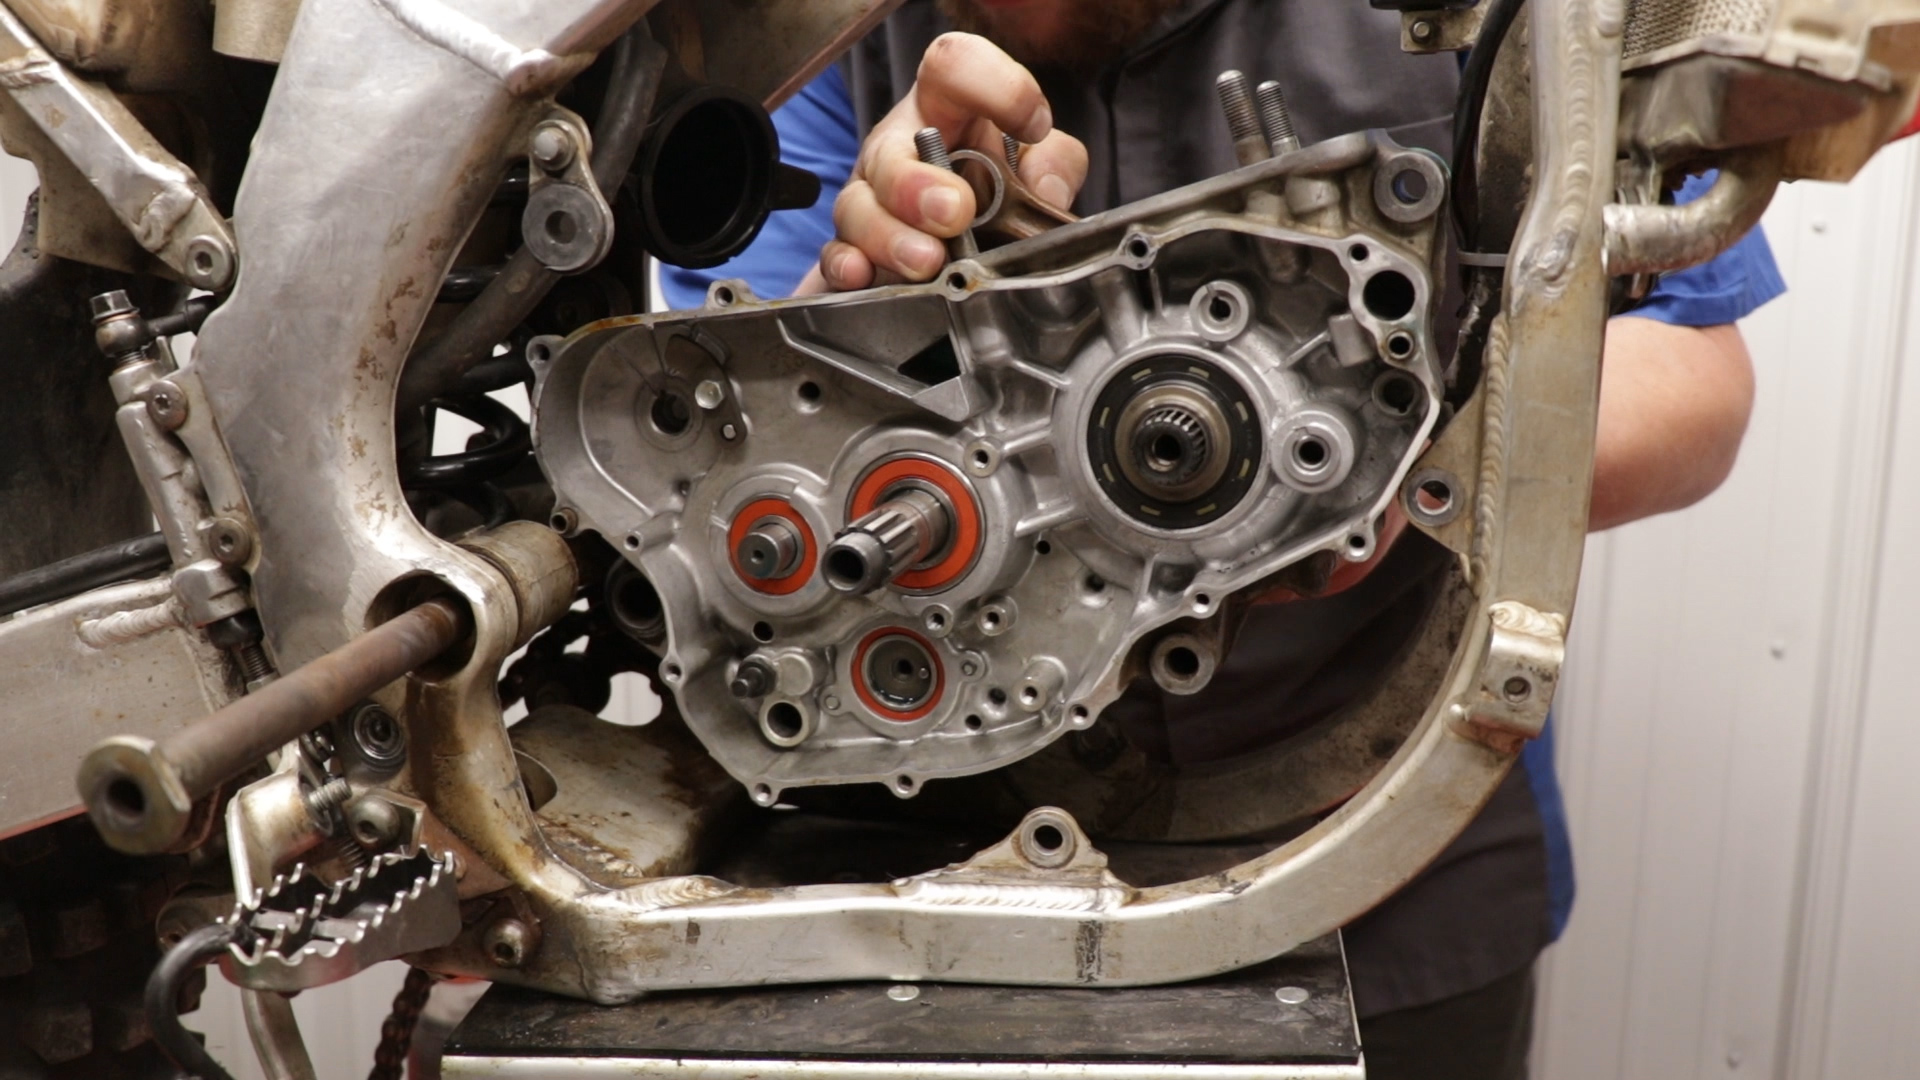
Bottom End Install
- Install the bottom end to the frame backside first. Install the two mounting bolts from the left side.
- Install the swingarm pivot shaft after you replace the swing arm bearings.
- Reassemble the external shift mechanism and double-check the transmission.
Keep Your ’97-’01 CR250 Running Right!
- Service Specification
- Clutch Replacement
- Carburetor Service
- Engine Top End
- Engine Bottom End
- Brakes
- Exhaust
- Front Suspension
- Rear Suspension
- Wheels & Tires
- Kickstarter Inspection
- External Shift Linkage


