
How To Remove And Install The Stator On Your 1997 – 2001 Honda CR250
 Do not remove your stator for testing!
All testing for the exciter coil and the ignition pulse generator is done at the ignition control module.
You will need to remove your flywheel before you remove your stator.
If you need help, check out my flywheel removal guide.
The Tools You Will Need Are:
- Tiny Flat Head Screwdriver
- Wire Cutters
- 10mm Socket
- Socket Wrench
- Dielectric Grease → https://amzn.to/4jhsmCU
- Shop Towel
If you need parts and tools, you can get them here! → https://amzn.to/4h4lDKq
Click here to open the ignition system specifications in a new window.
Stator Removal
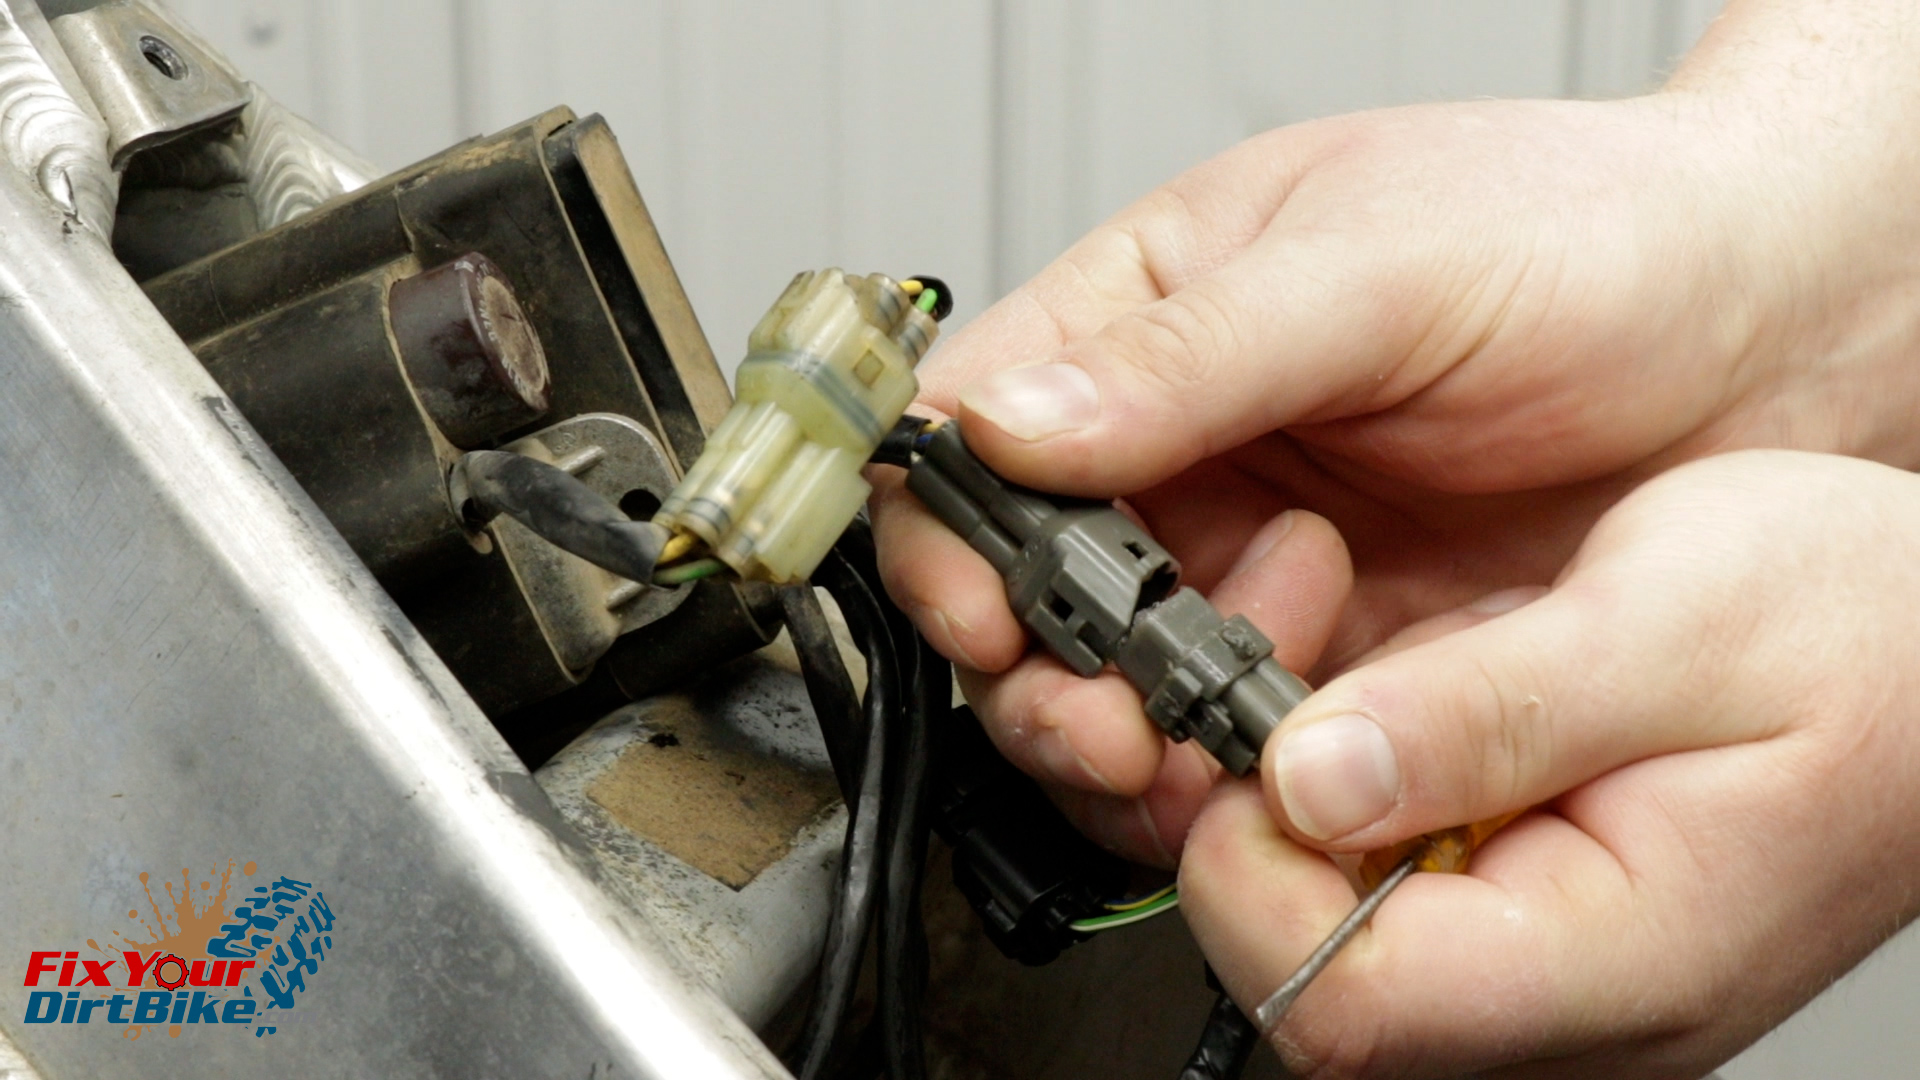
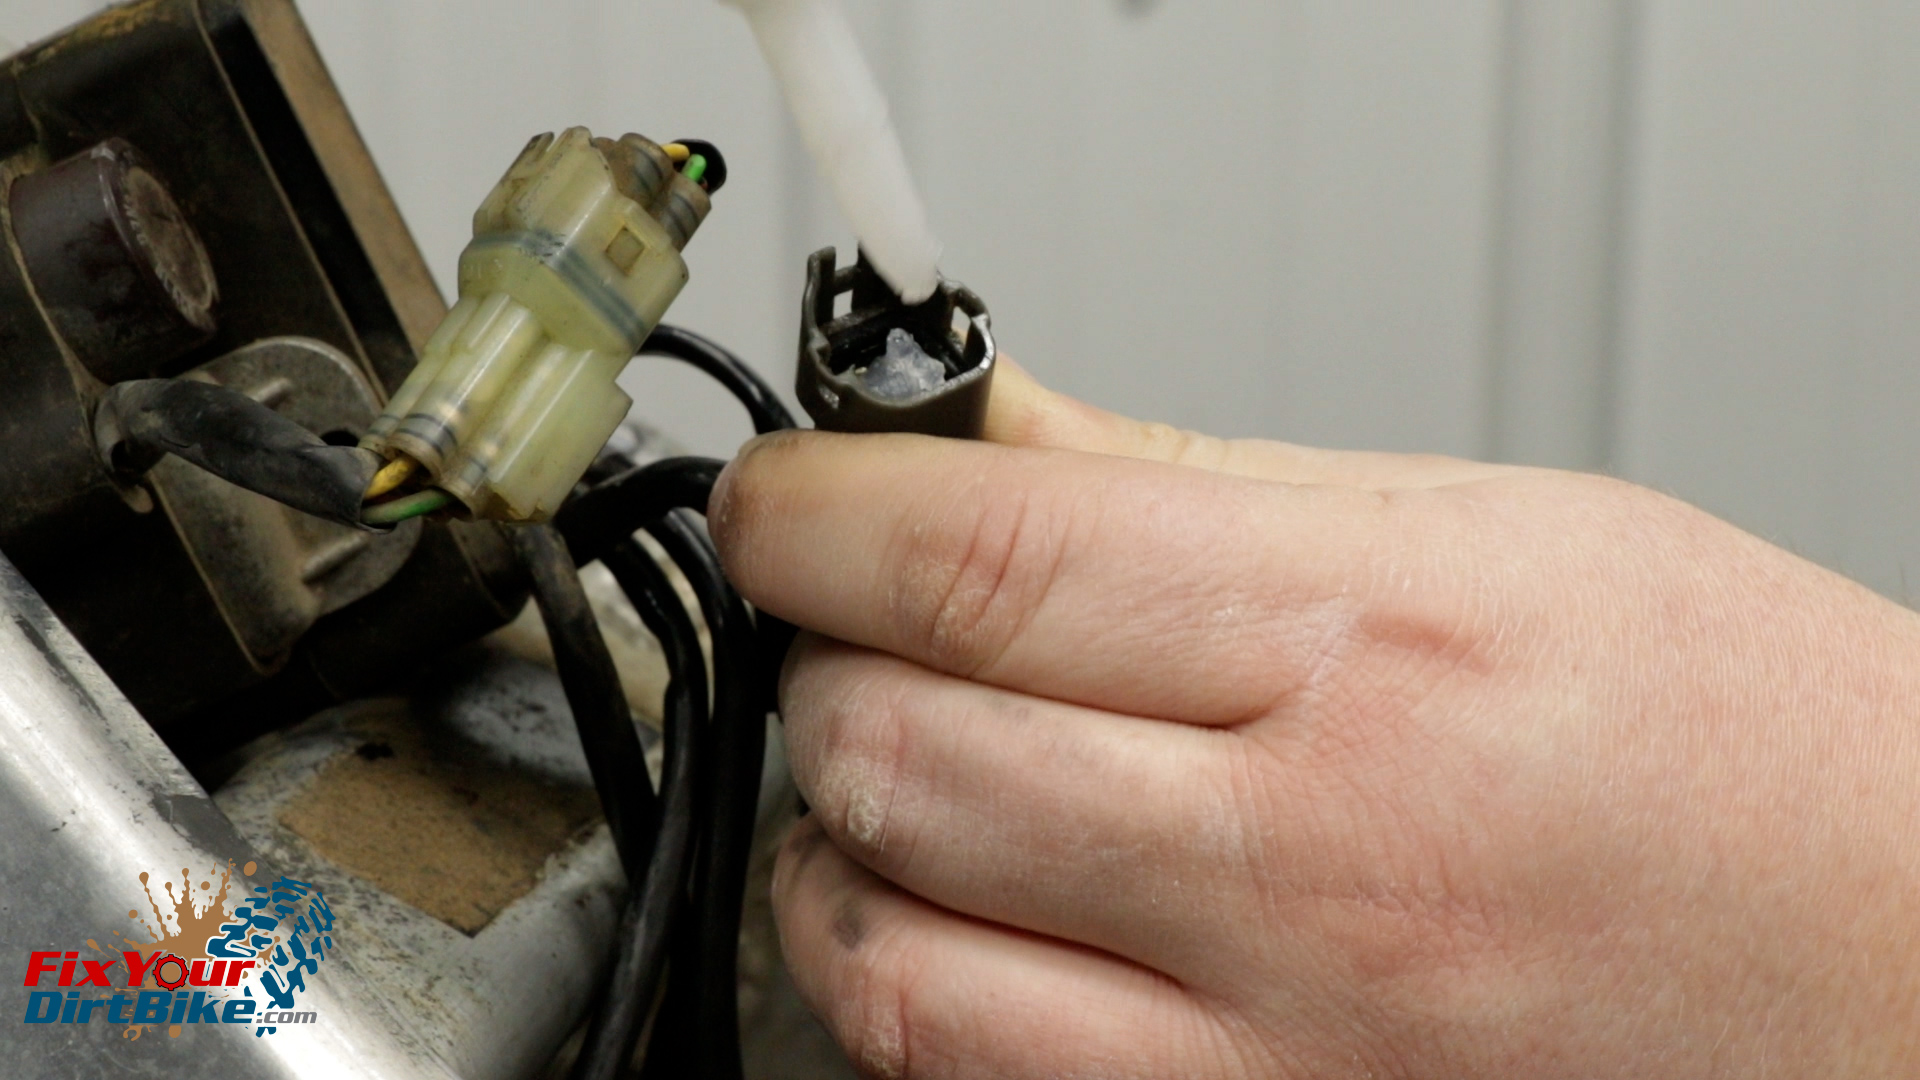
- Start by disconnecting the two wiring harnesses from the ignition control module. One has blue and white wires, and the other has blue/yellow and green/white wires.
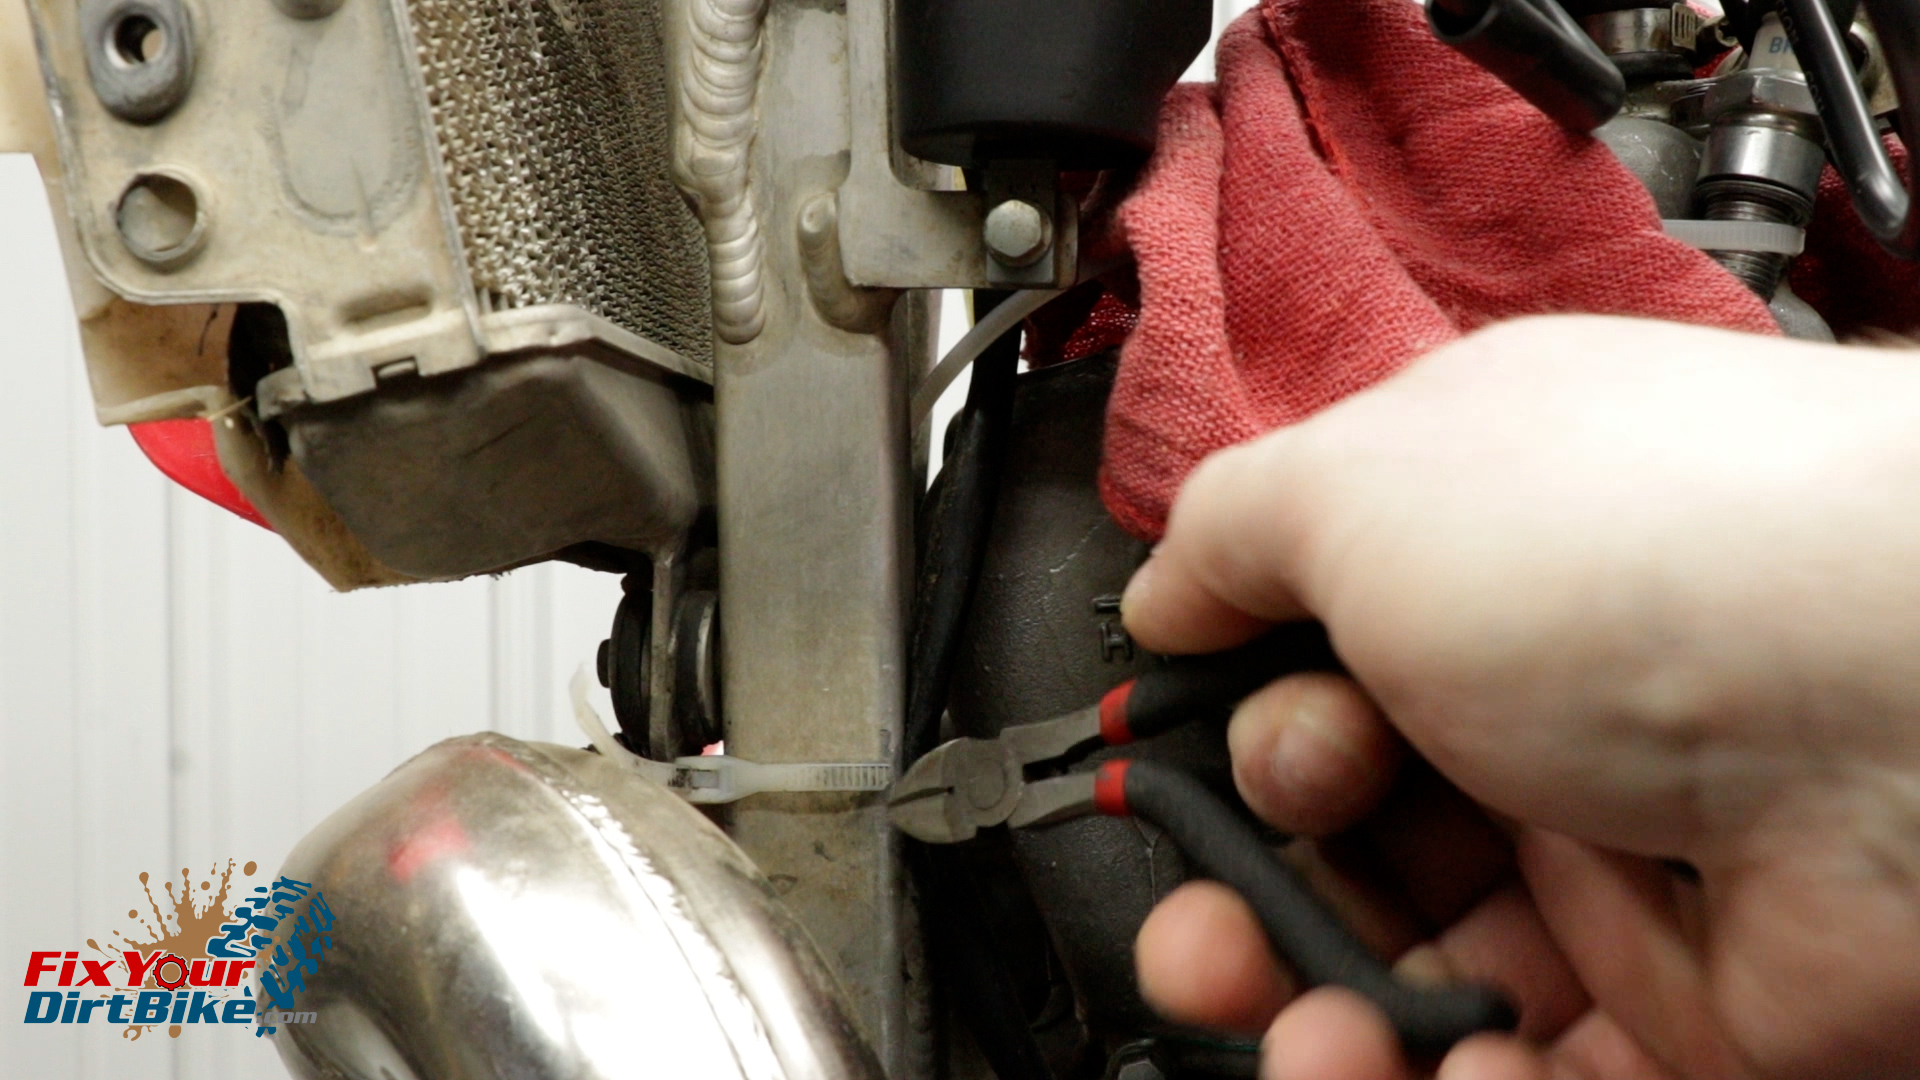
- Feed the wiring harnesses down and away from the frame. You may need to cut a few zip ties along the way.
- Pull the wiring grommet away from the case, but do not remove it.
- Remove the two mounting bolts from the top and bottom of the stator frame.
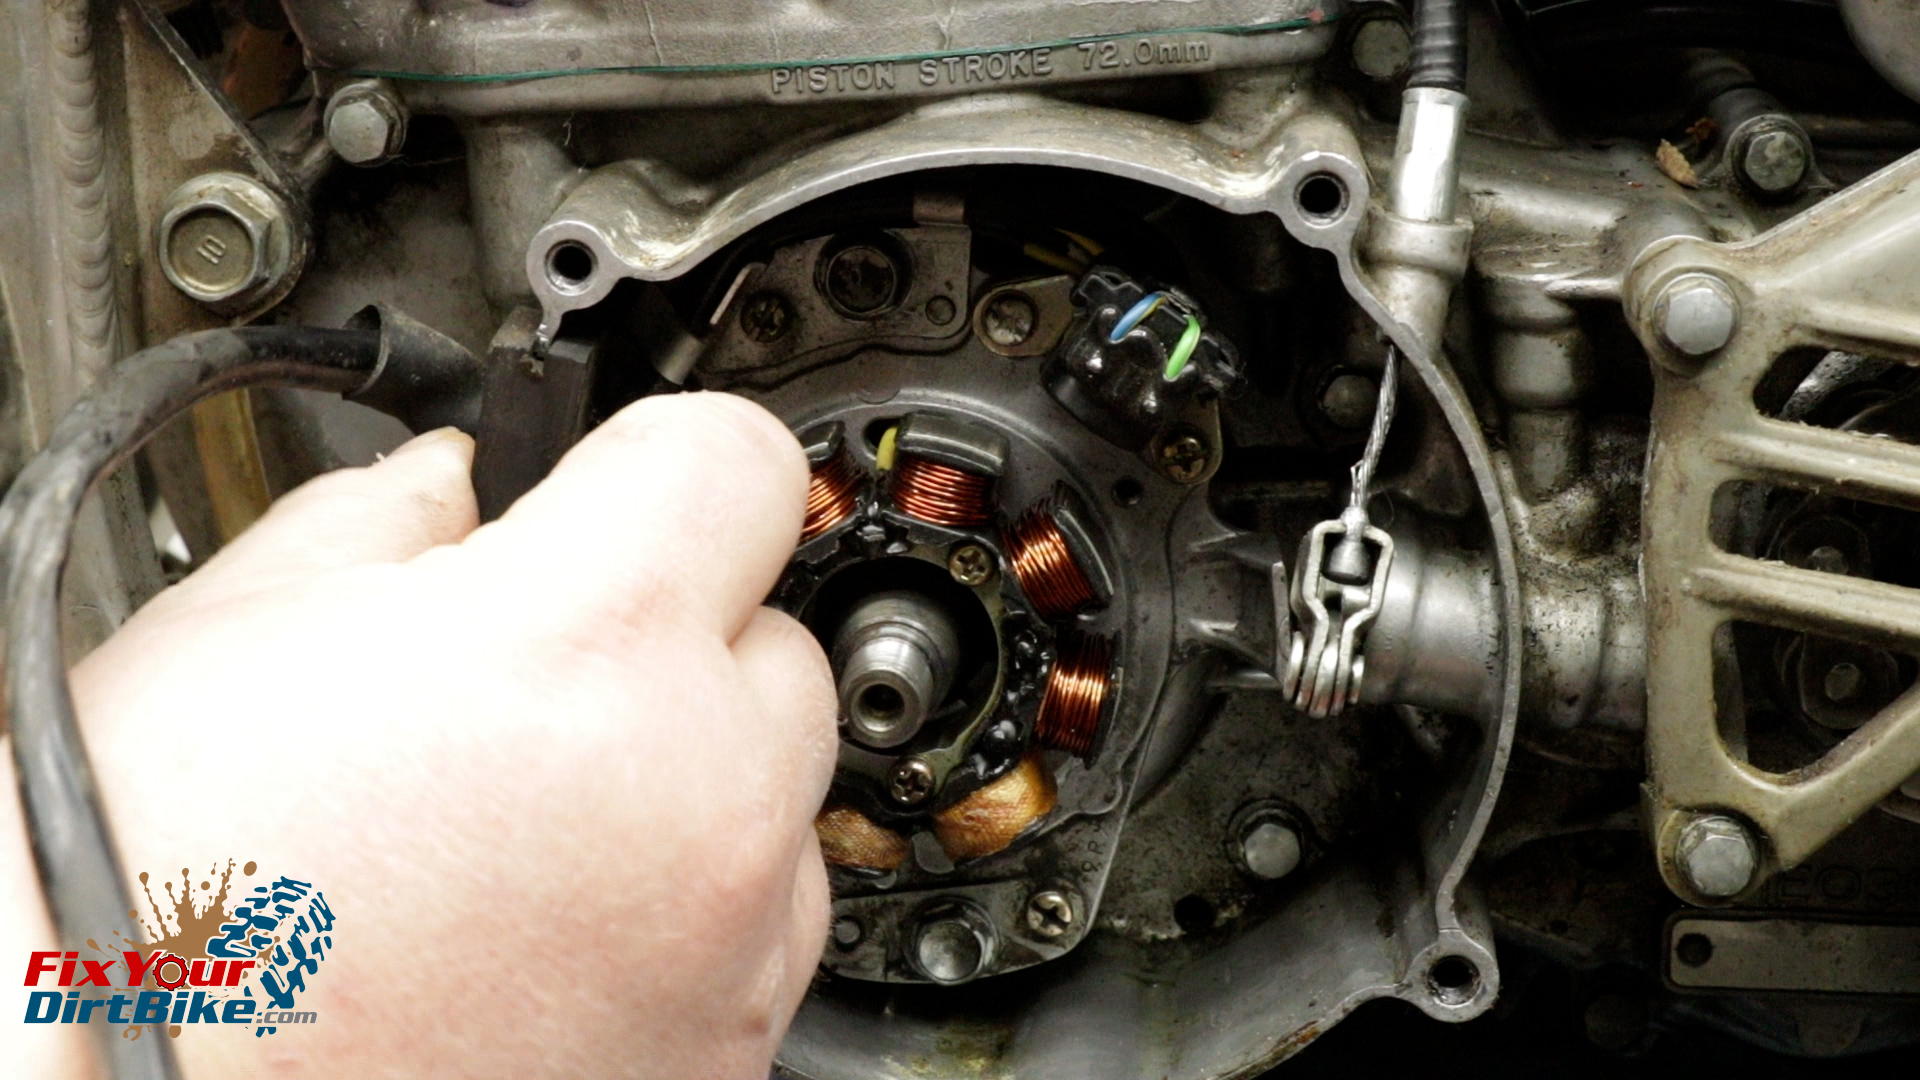
- Pull the stator and grommet from the case at the same time.
Stator Installation
- Install your stator in the reverse order.
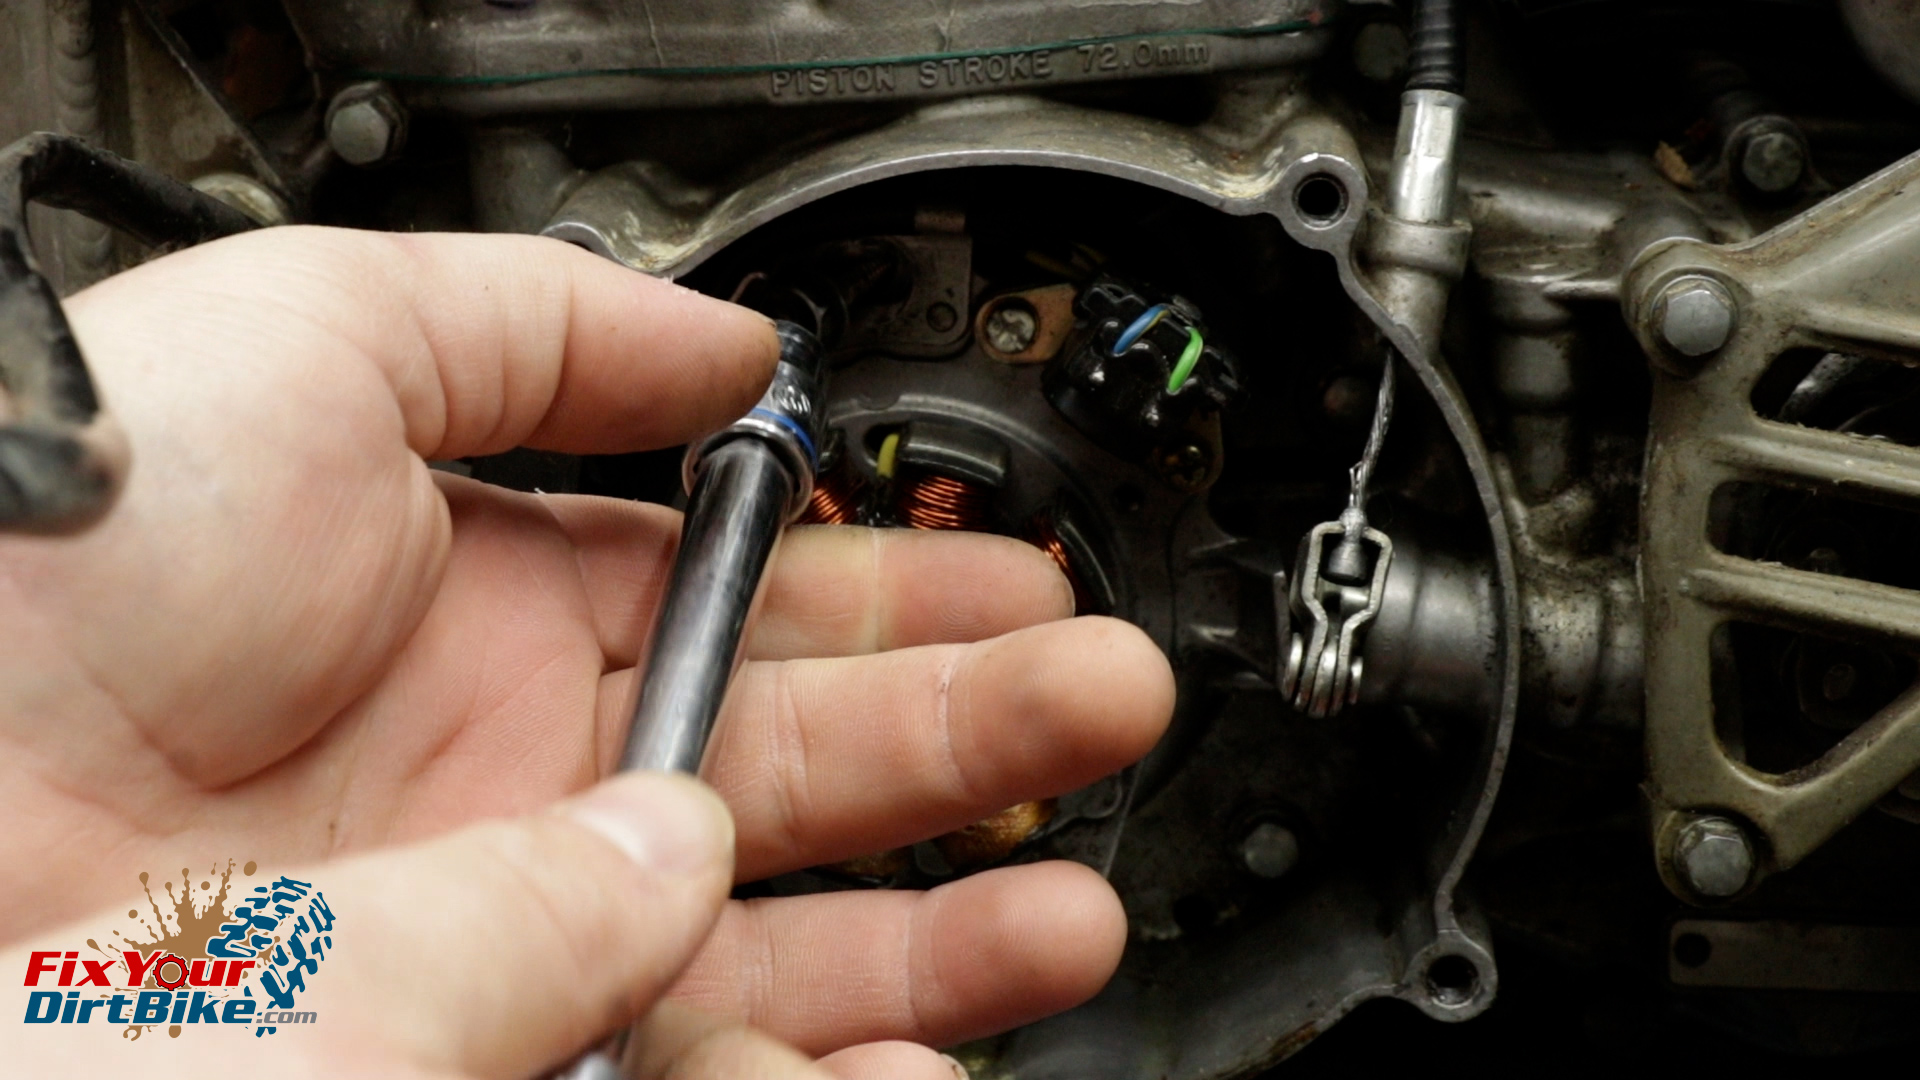
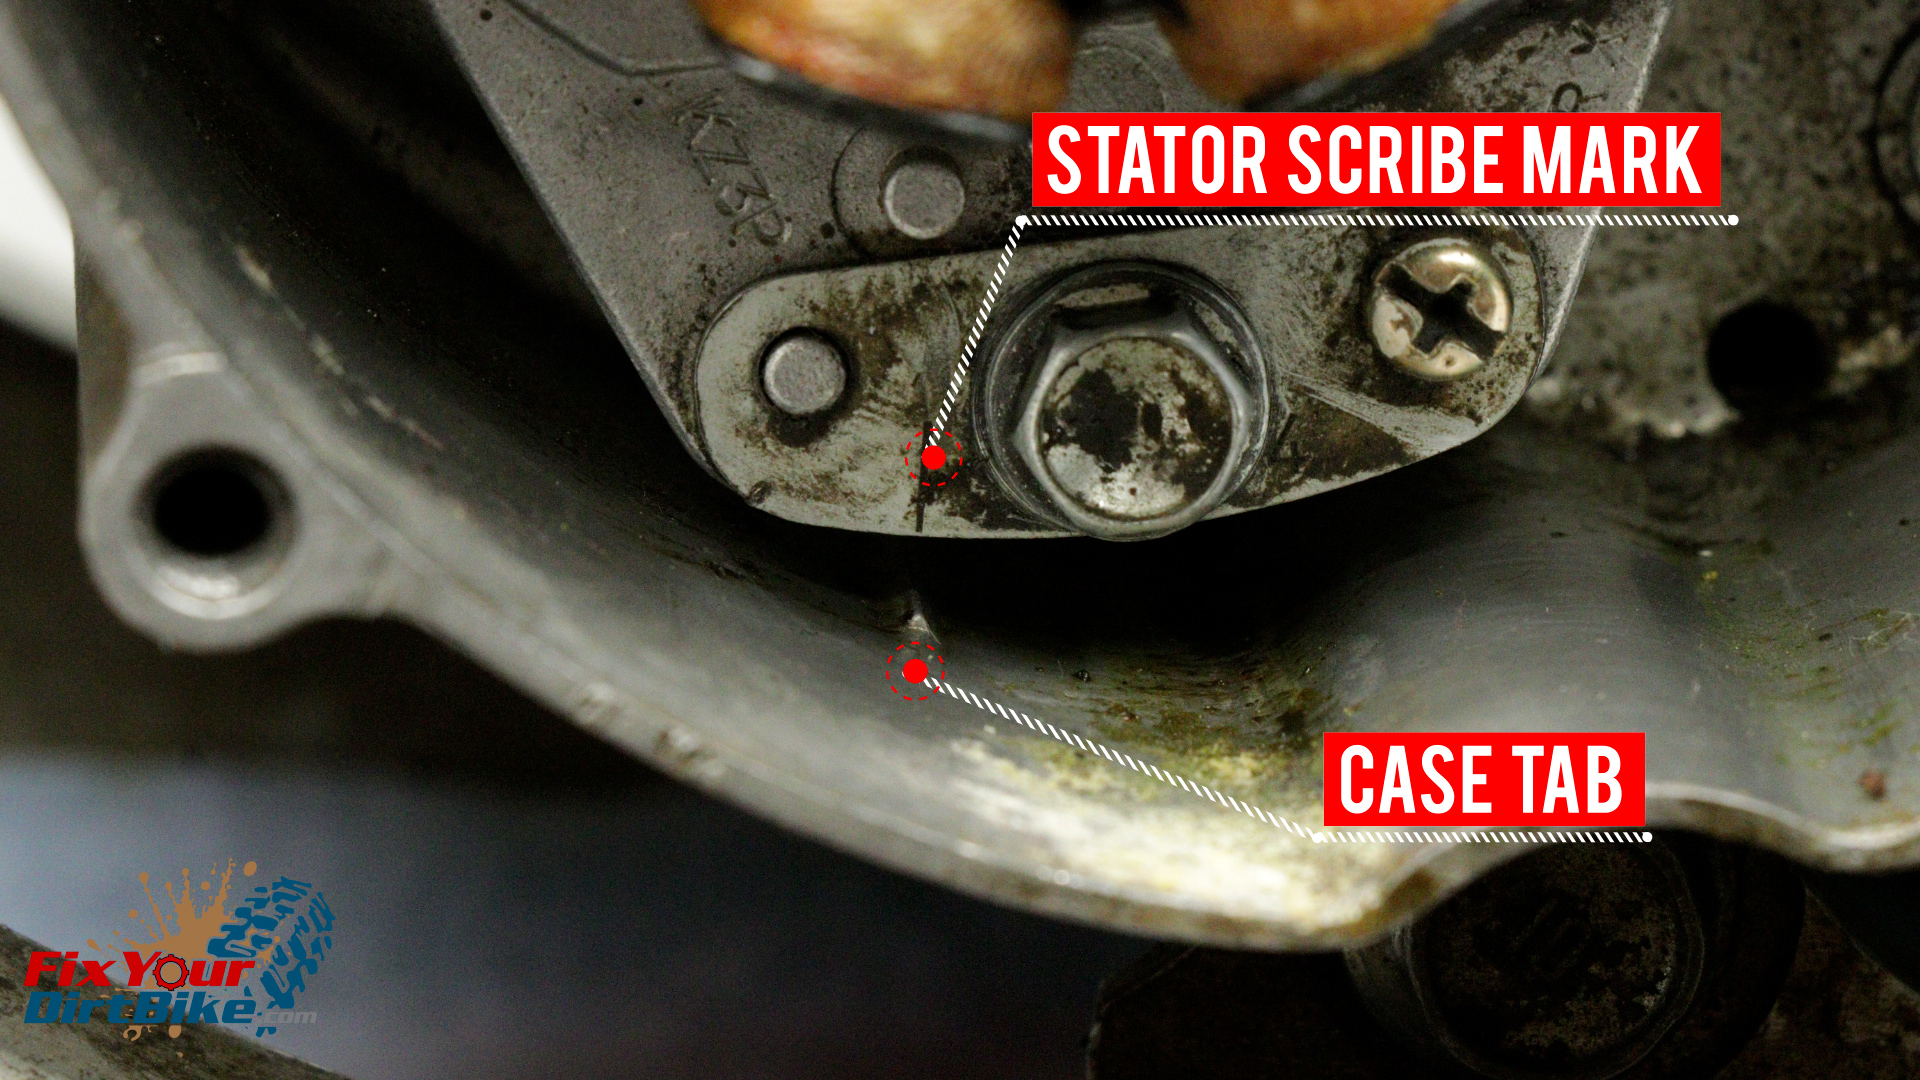
- When installing the stator frame, line up the scribe mark on the frame with the tab in the case.
- This is the stock timing setting.
- Add some dielectric grease to the harnesses before reconnecting.
- Connect the stator wires to the ignition control module.
- Secure the stator wires to the backside of the frame rails.

If you need help with your ignition system, check out my comprehensive ignition system troubleshooting guide.
If you have any questions, please let me know in the comments or on social
Keep Your ’97-’01 CR250 Running Right!
- Service Specification
- Clutch Replacement
- Carburetor Service
- Engine Top End
- Engine Bottom End
- Brakes
- Exhaust
- Front Suspension
- Rear Suspension
- Wheels & Tires
- Kickstarter Inspection
- External Shift Linkage


