
How To Service The Water Pump On Your 1997-2001 Honda CR250
What Are The Signs Of A Bad Water Pump?
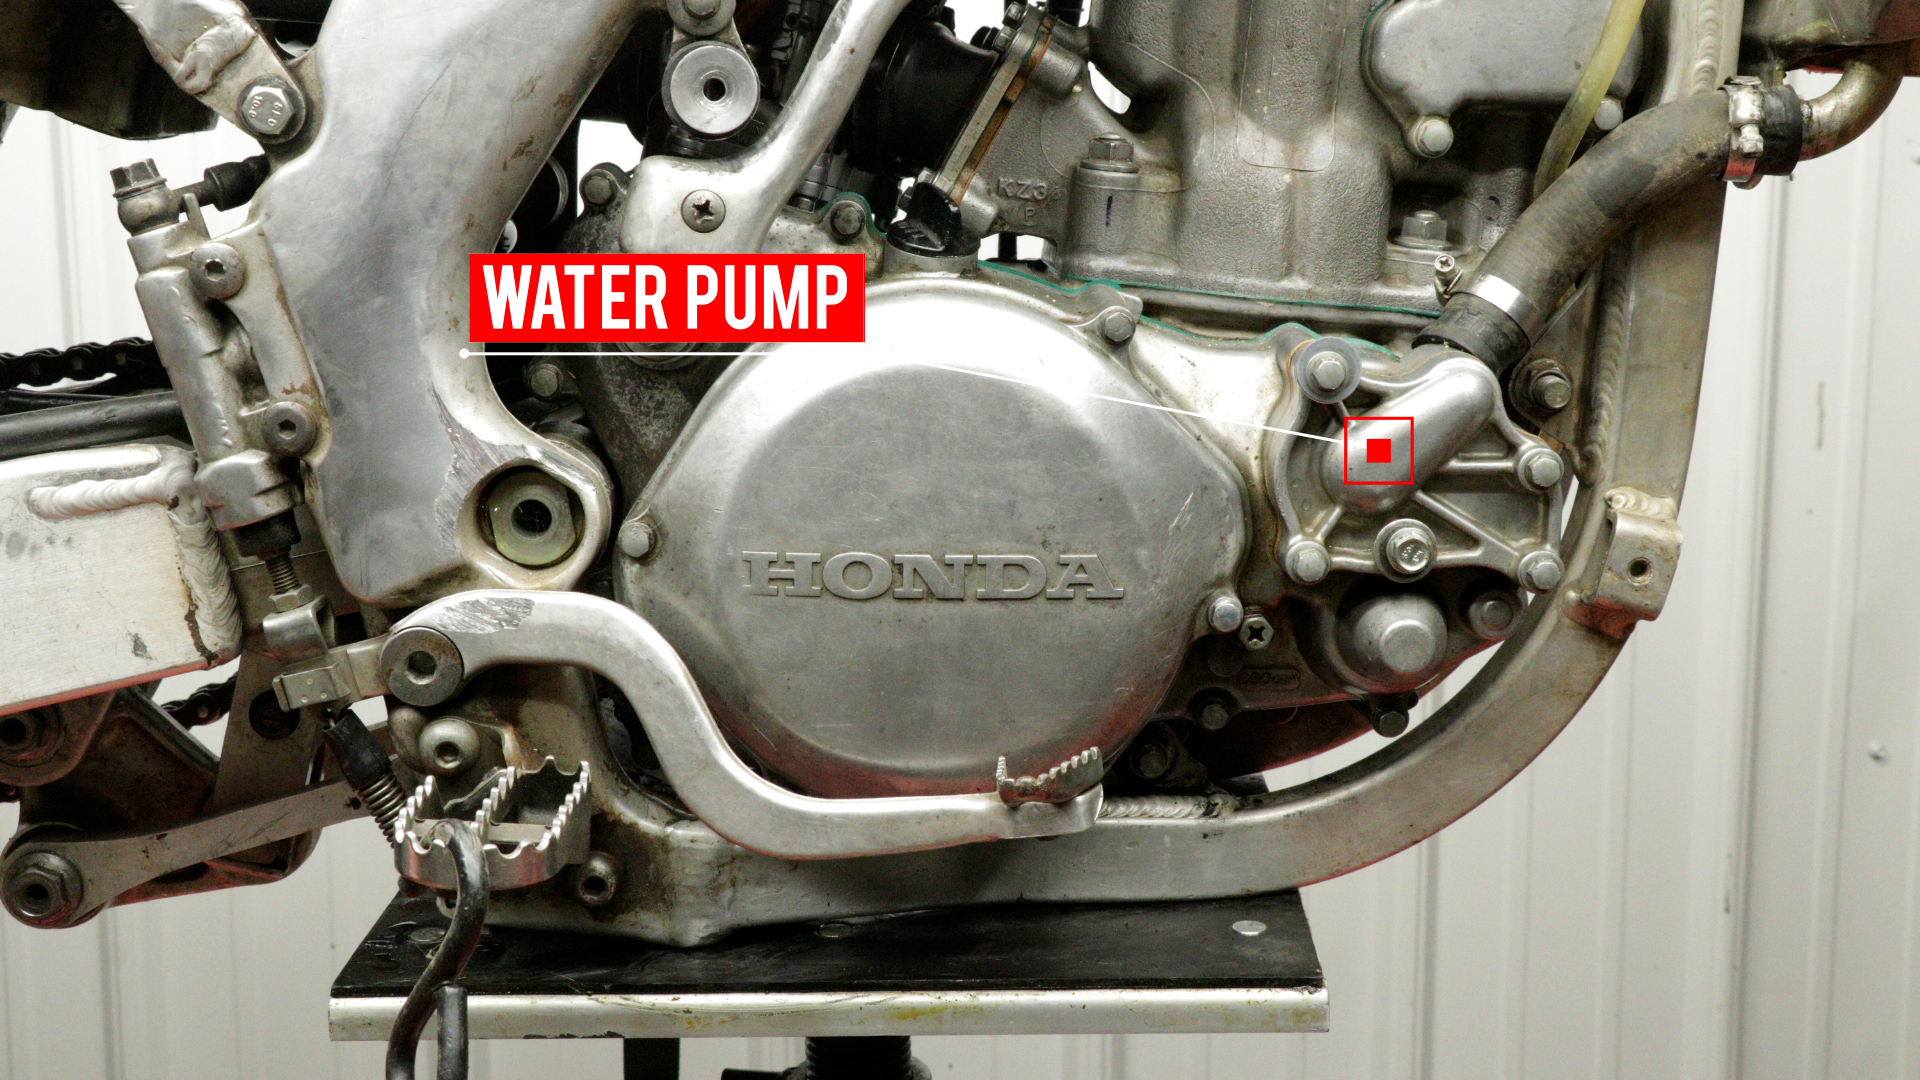
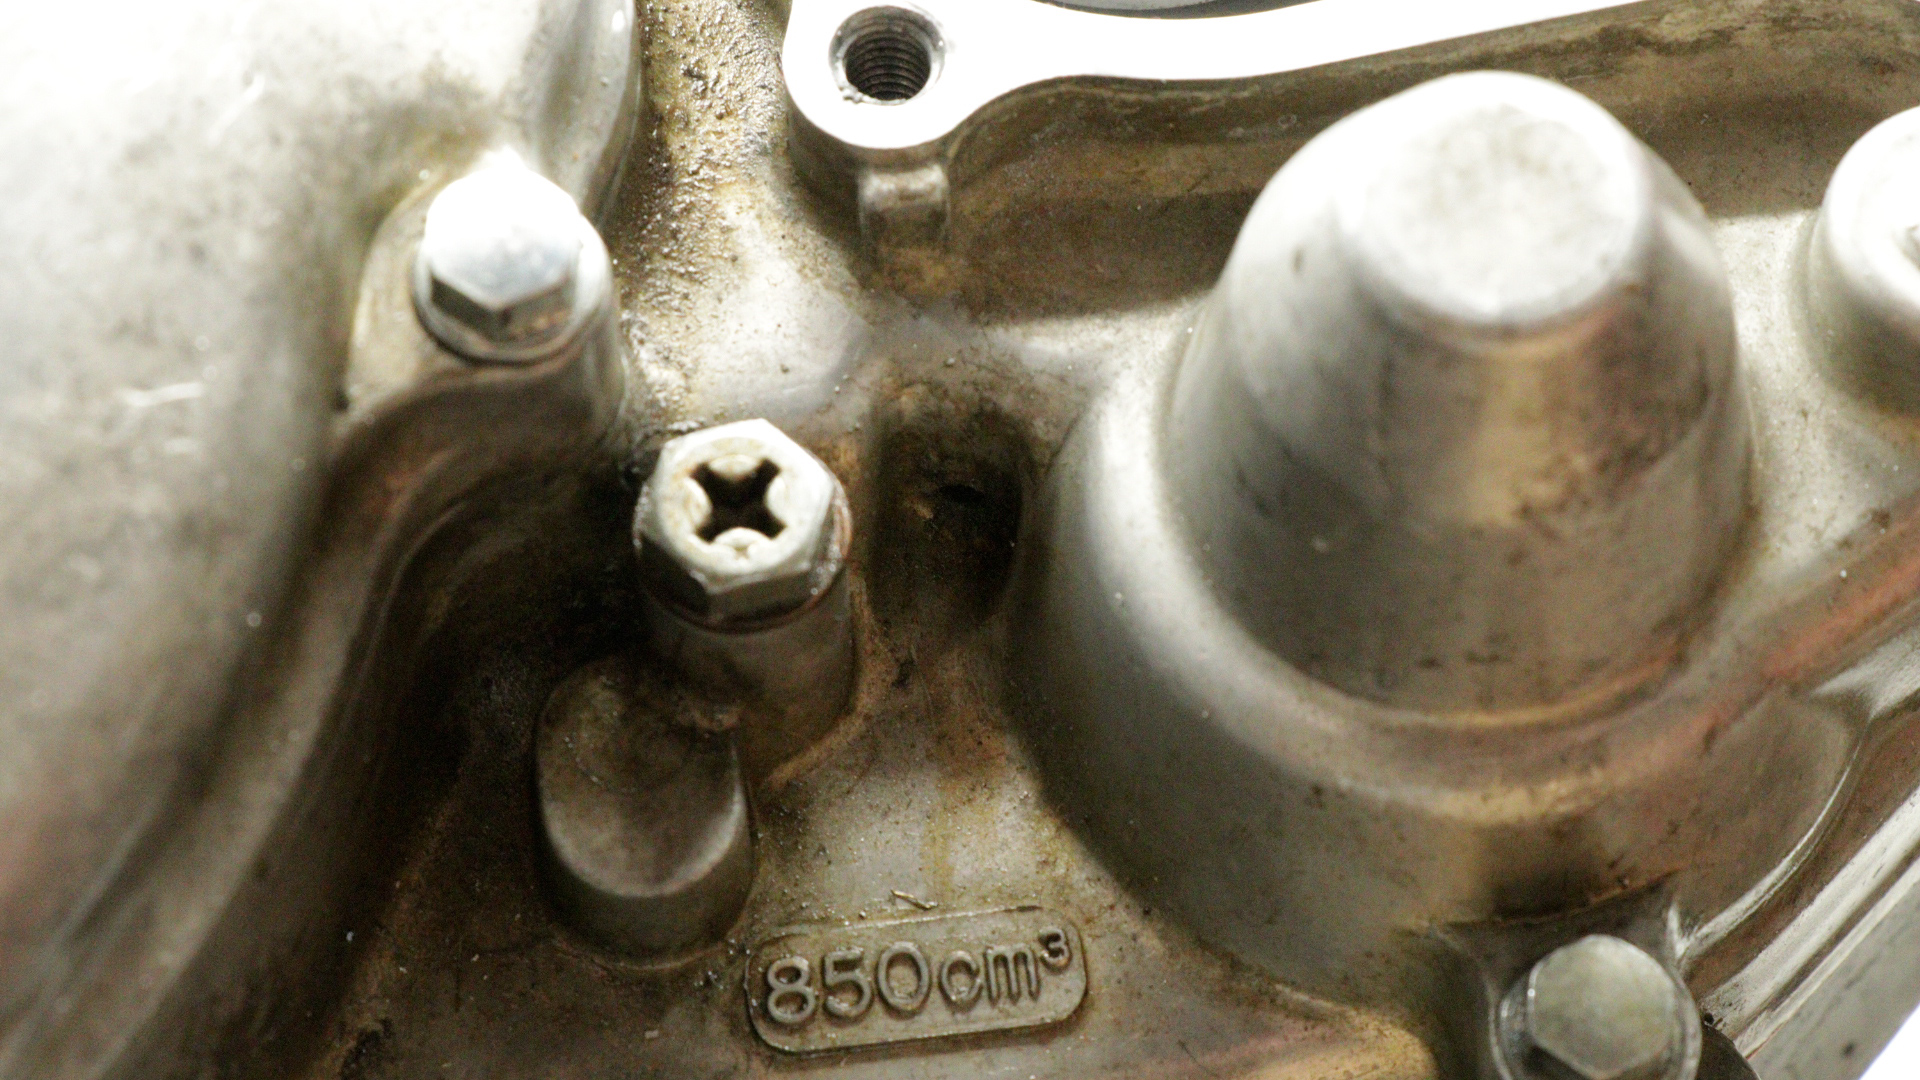
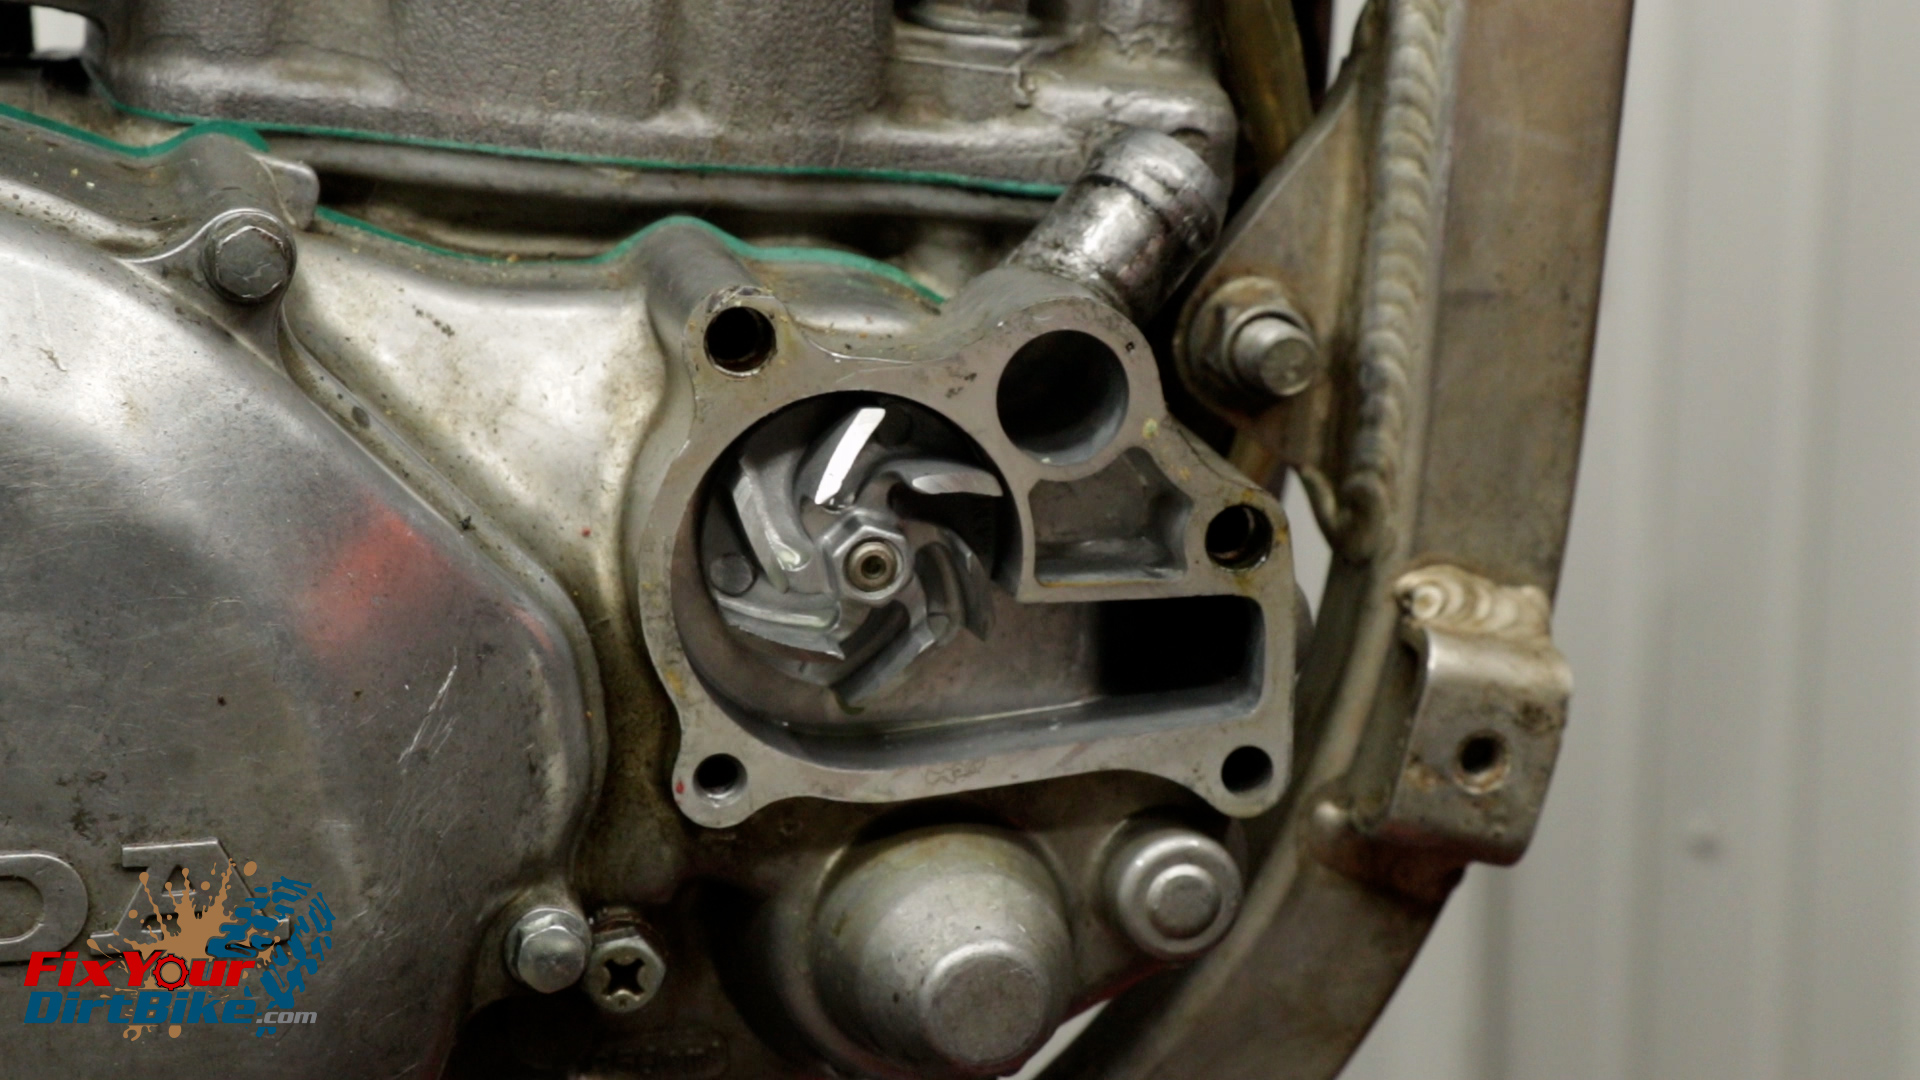
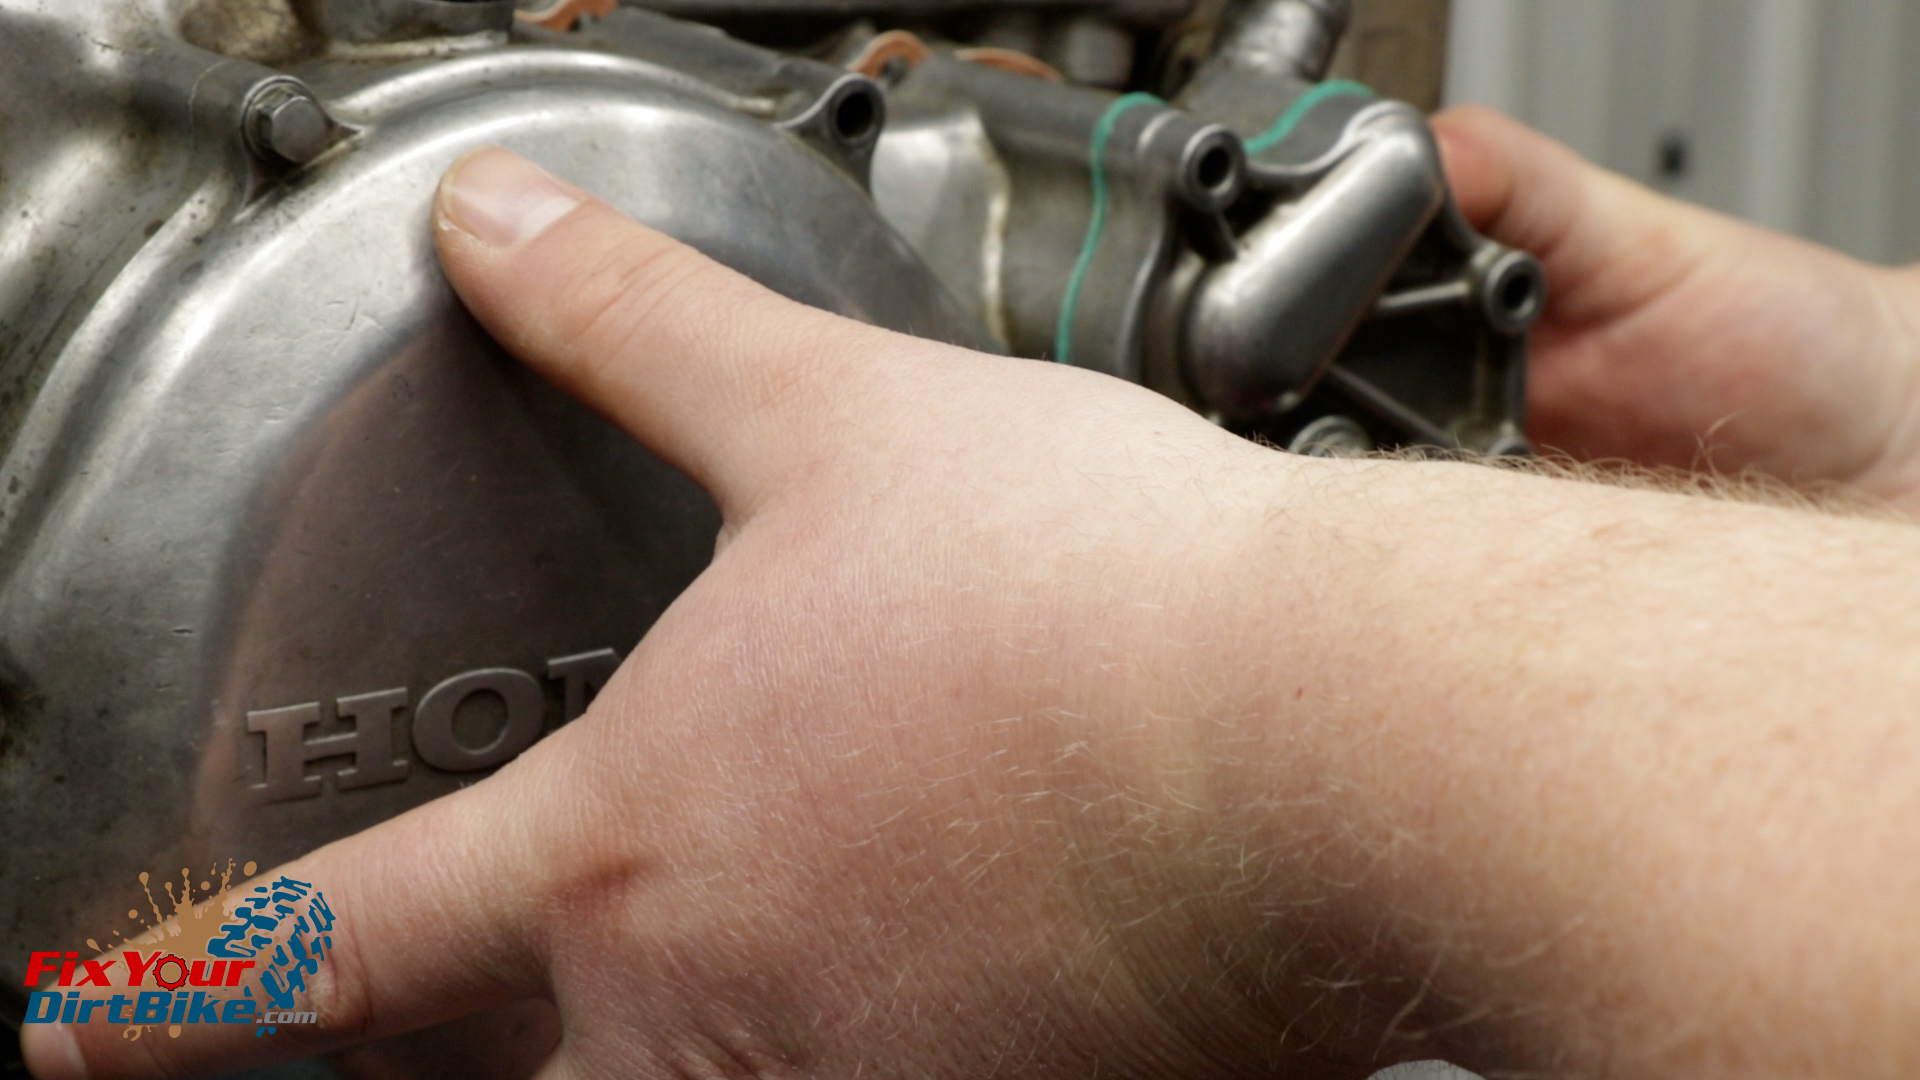
Your water pump is located on the right side of your crankcase, at the front. There is a tiny opening right next to the oil level plug.
The other side of this opening sits between the impeller shaft oil and coolant seals. If you can see oil, coolant, or both coming out of that opening, your water pump is no longer sealed and needs to be repaired.
You can change the gasket on your water pump without removing the right crankcase cover. However, if you need to change the seals, bearing, or impeller, you must remove them.
The Tools You Will Need Are
- 8mm socket
- Socket Wrench
- Inch-Pound Torque Wrench → https://amzn.to/4j9LDpC
- Blind Bearing Puller → https://amzn.to/3Wmkl5B
- Socket For Oil Seal
- Socket For Water Seal
- Flat Head Screwdriver
- Lithium Grease → https://amzn.to/3ChhKTB
- Scraper
- Dremel with Sanding Disc → https://amzn.to/407t6l3
- Parts Cleaner
- Shop Towels
- Safety Glasses → https://bulltru.com
- Mallet
- Small Pick
Pre-Service Notes
- You can buy all the parts and tools you need here → https://amzn.to/4h4lDKq
- Click here to open the specifications table in a new window.
- Service pictures with captions follow the steps below.
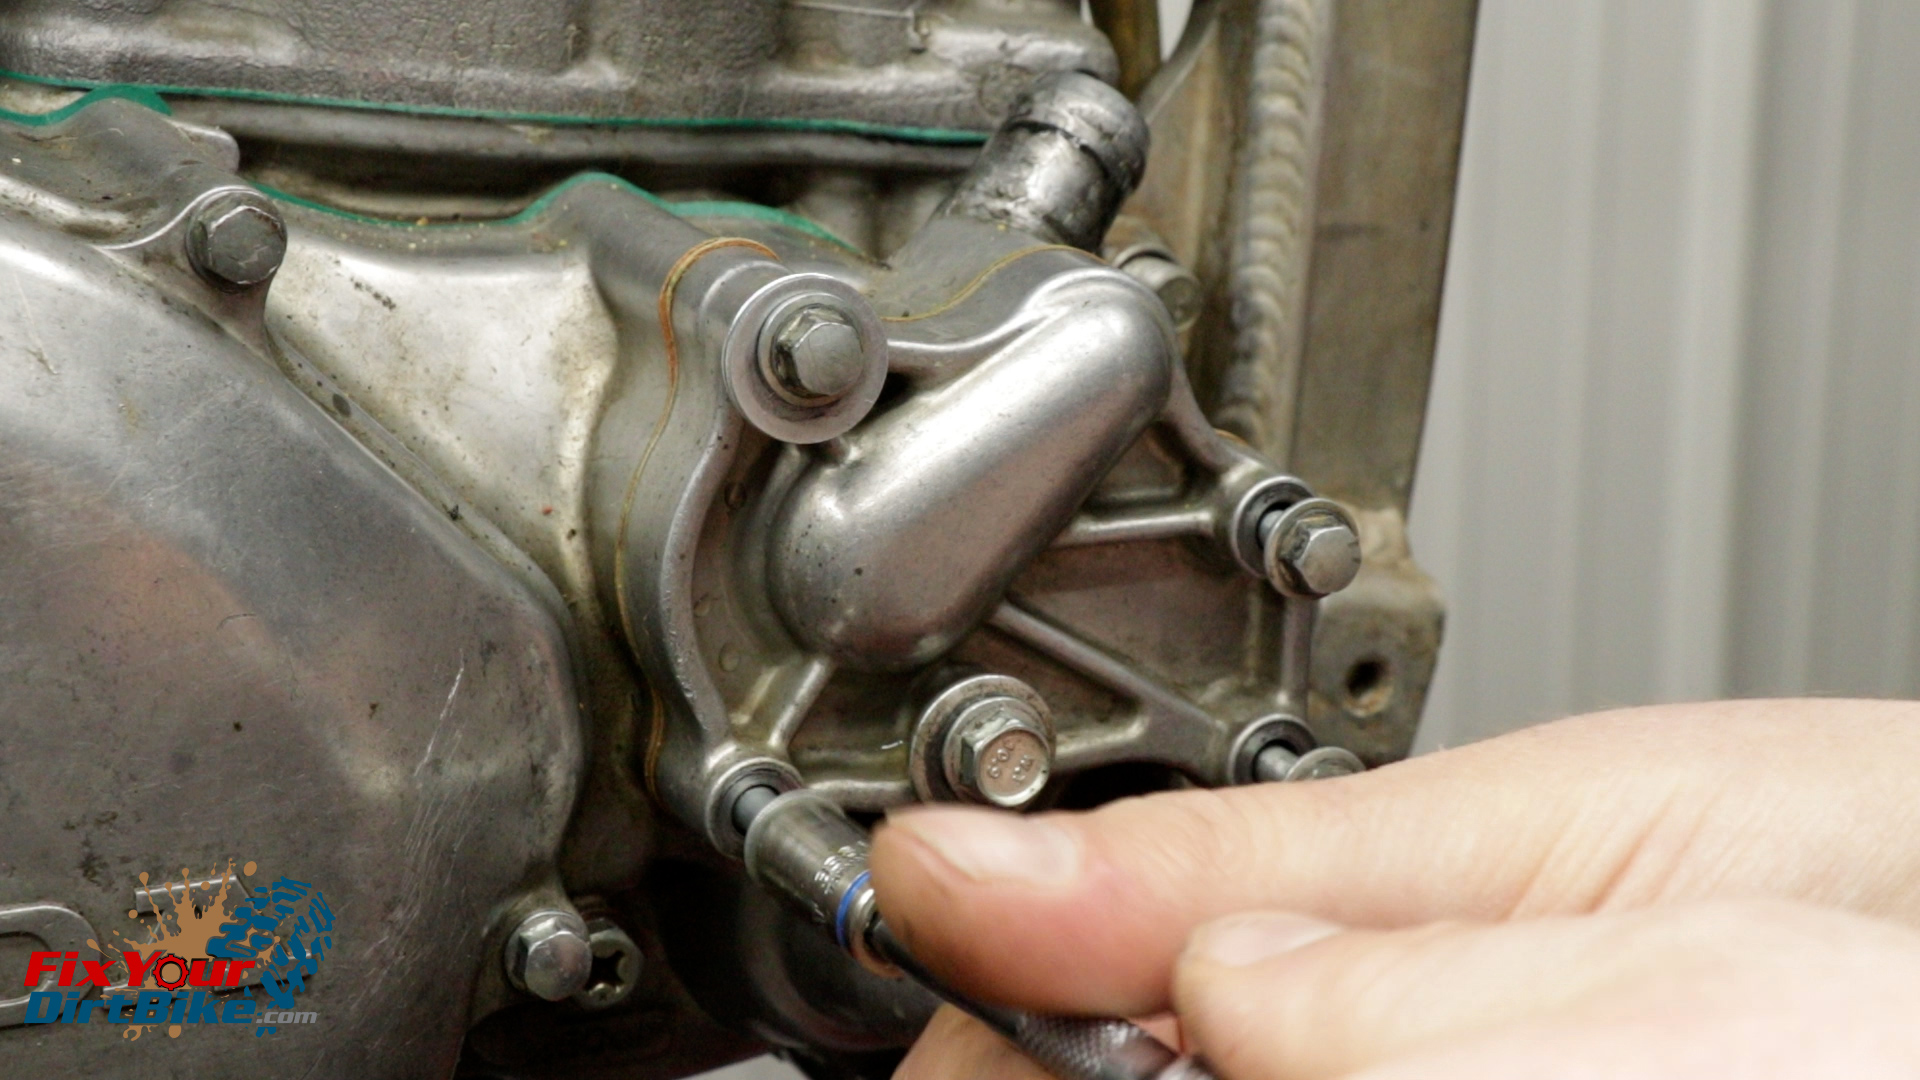
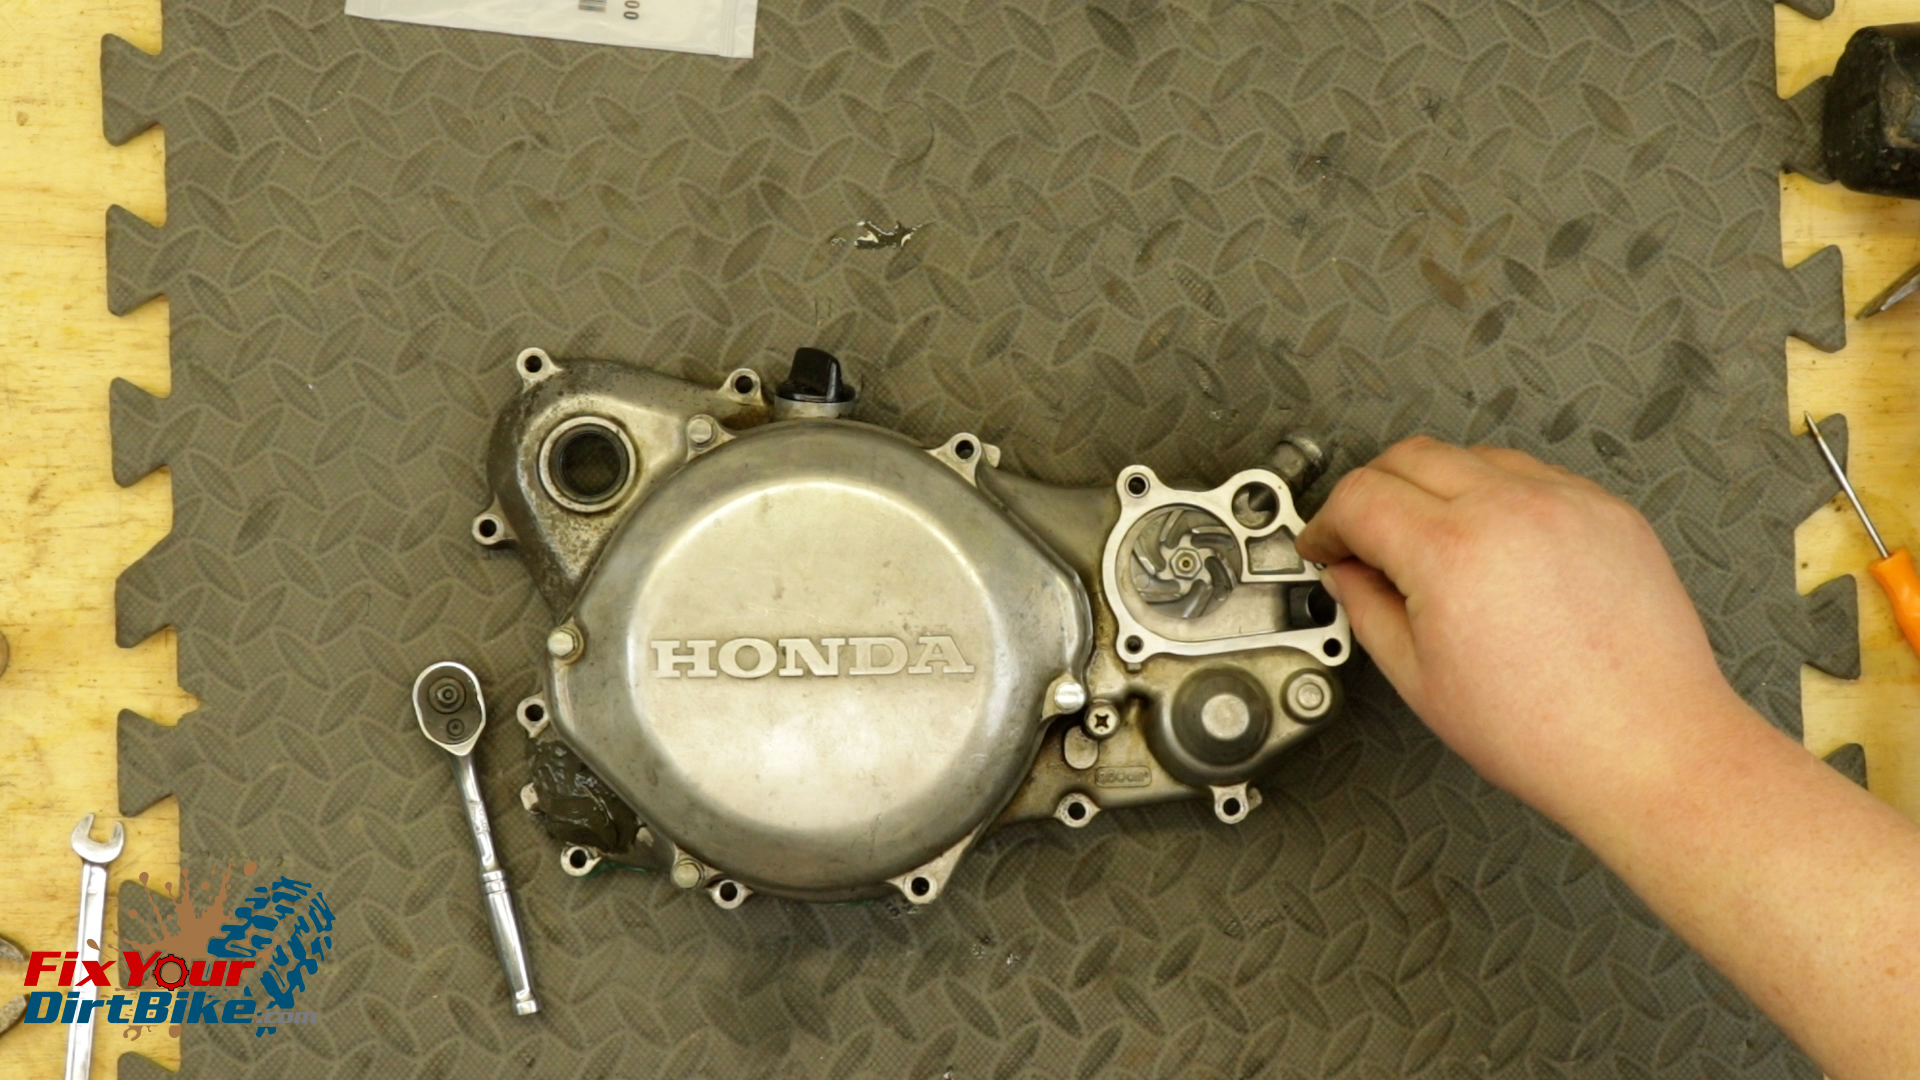
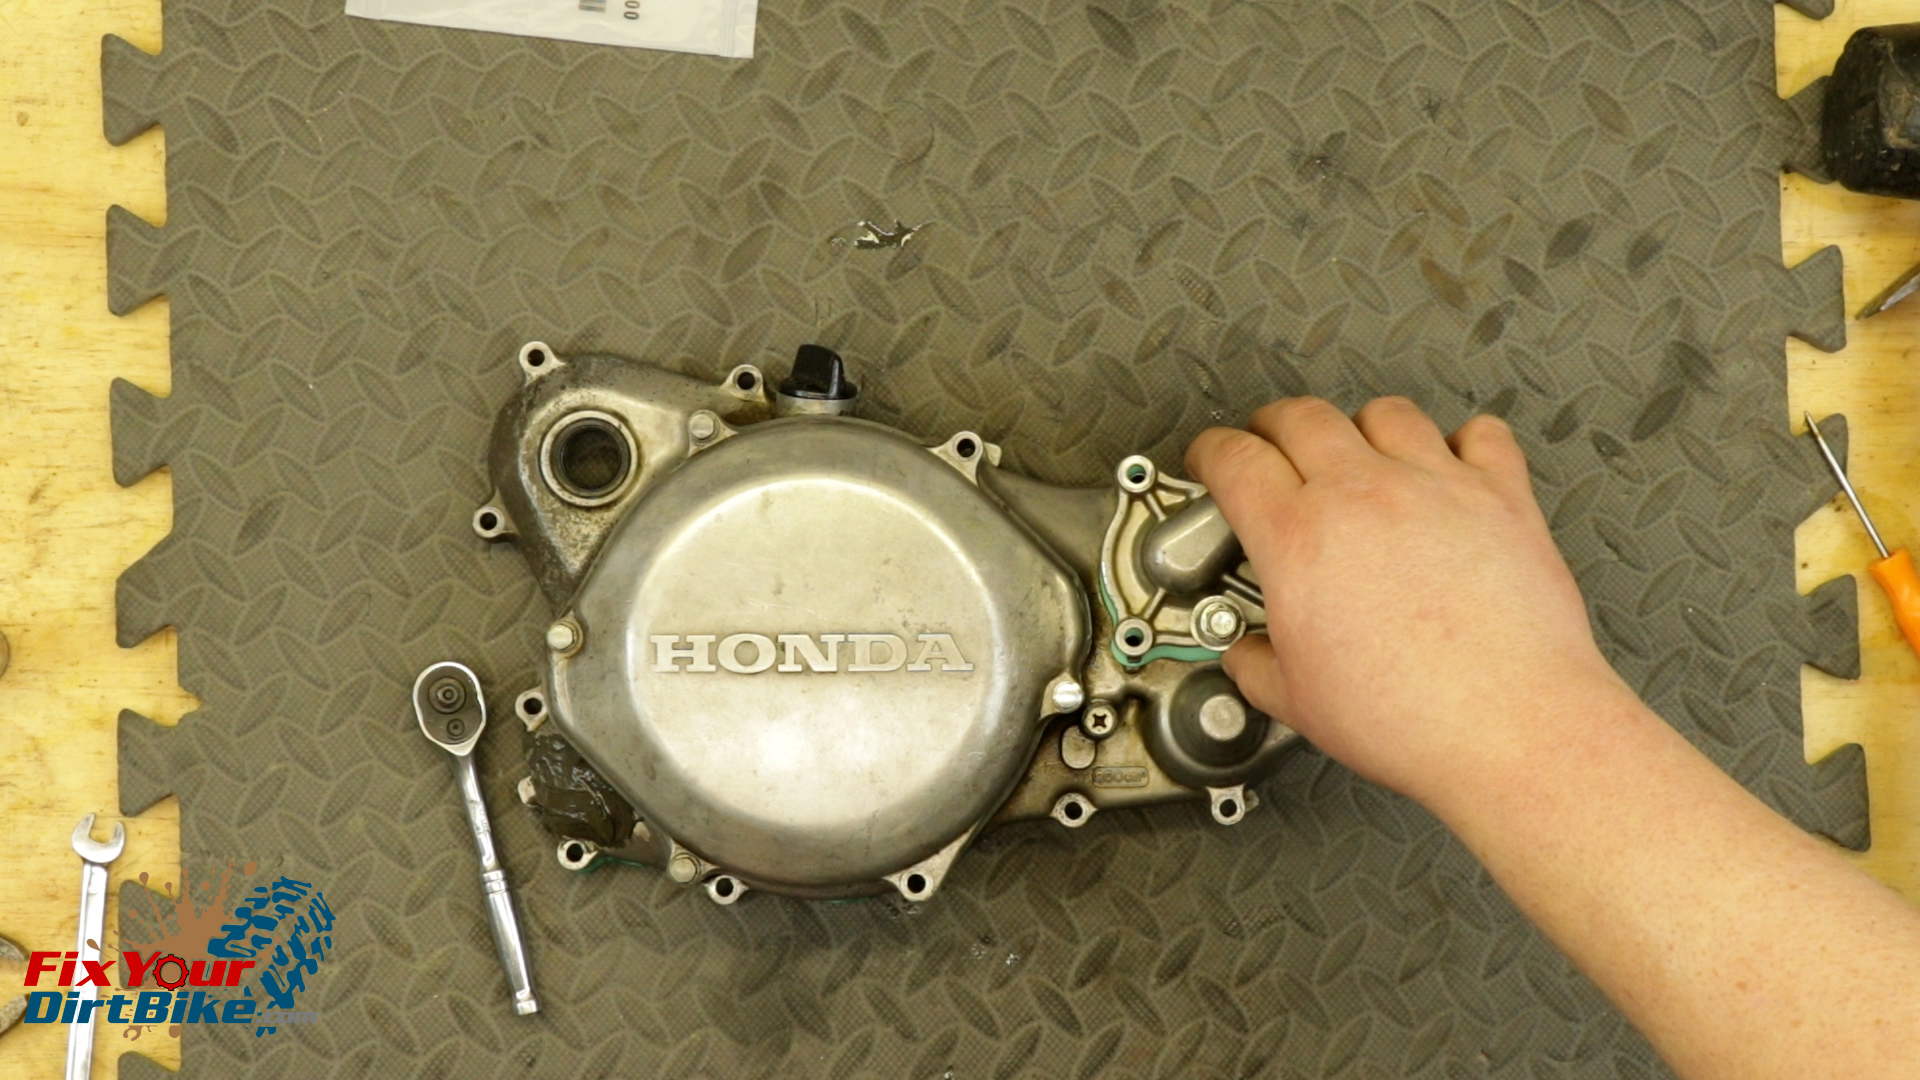
Water Pump Removal
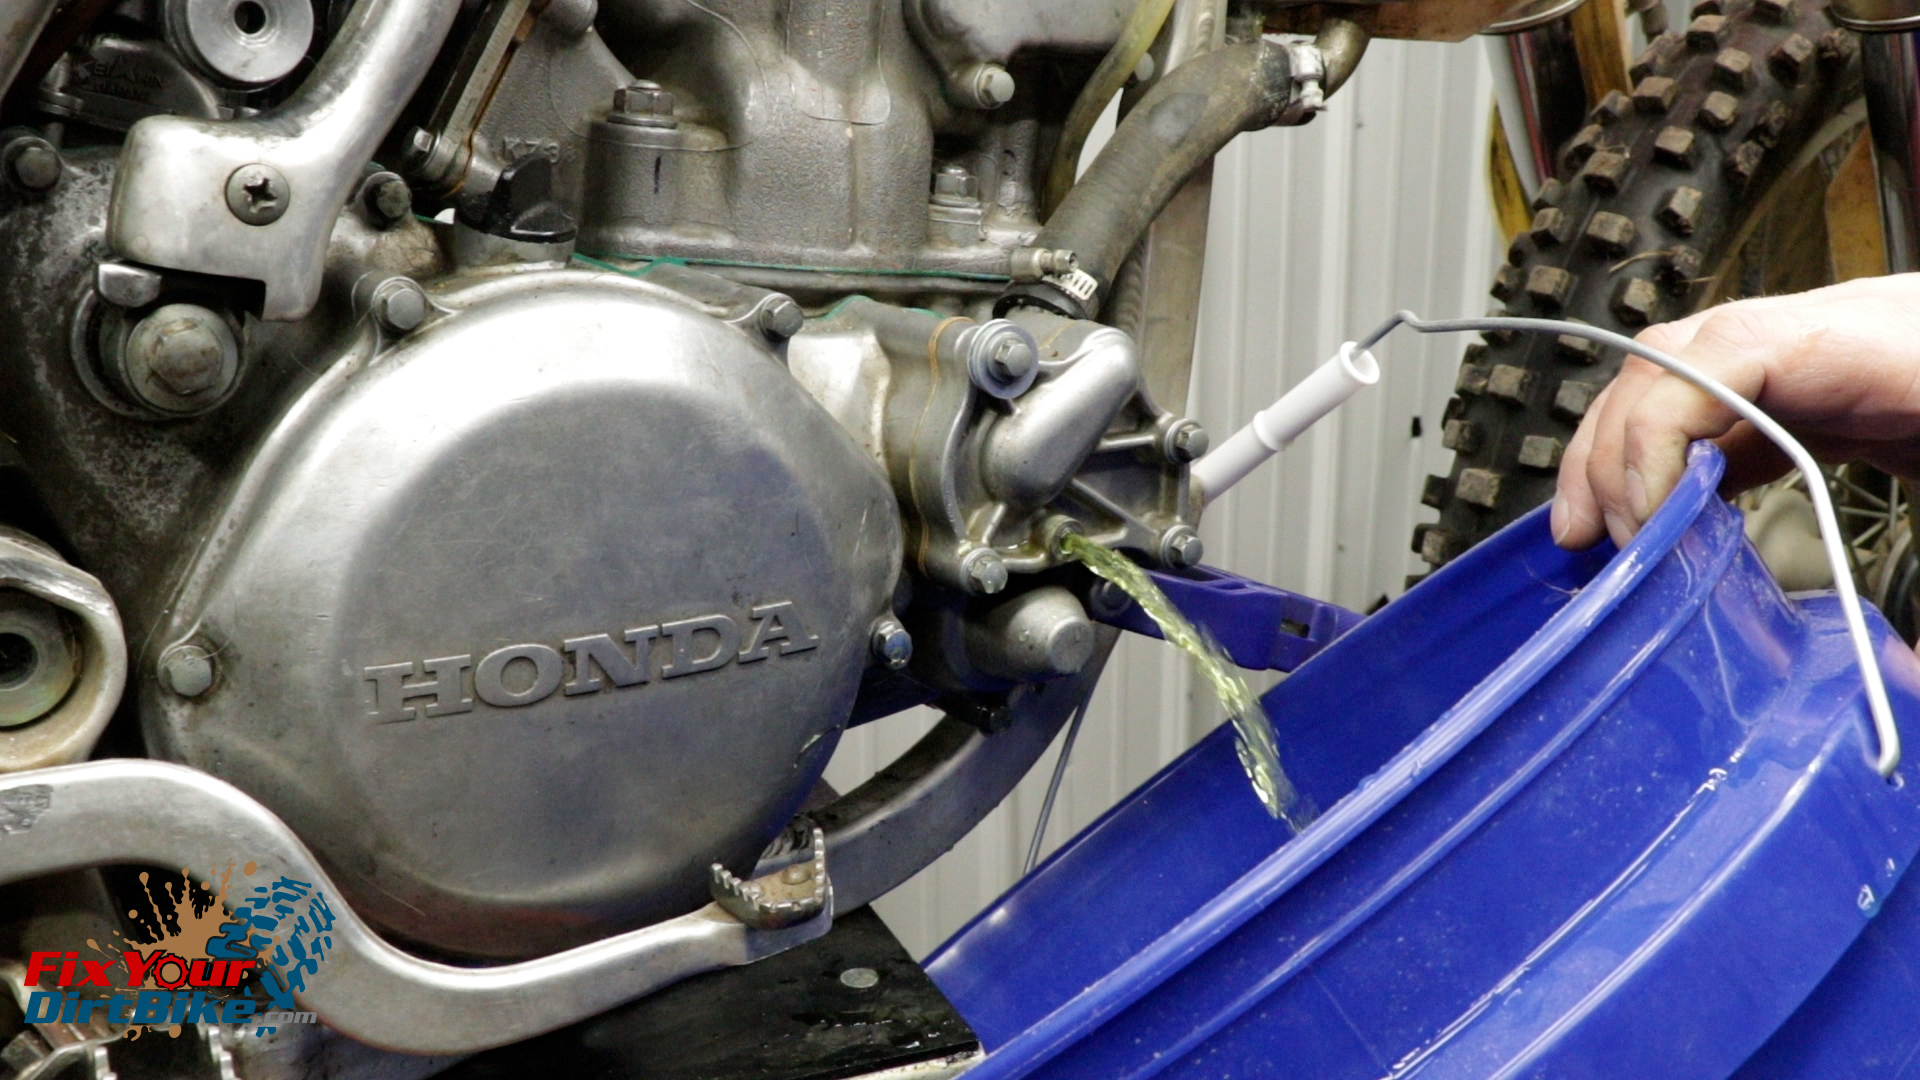
- Start by draining your coolant and oil.
- I recommend removing the water pump cover while still mounted because it might put up a fight.
- A few taps with a mallet should release the gasket but DO NOT hit it very hard or repeatedly in the same spot.
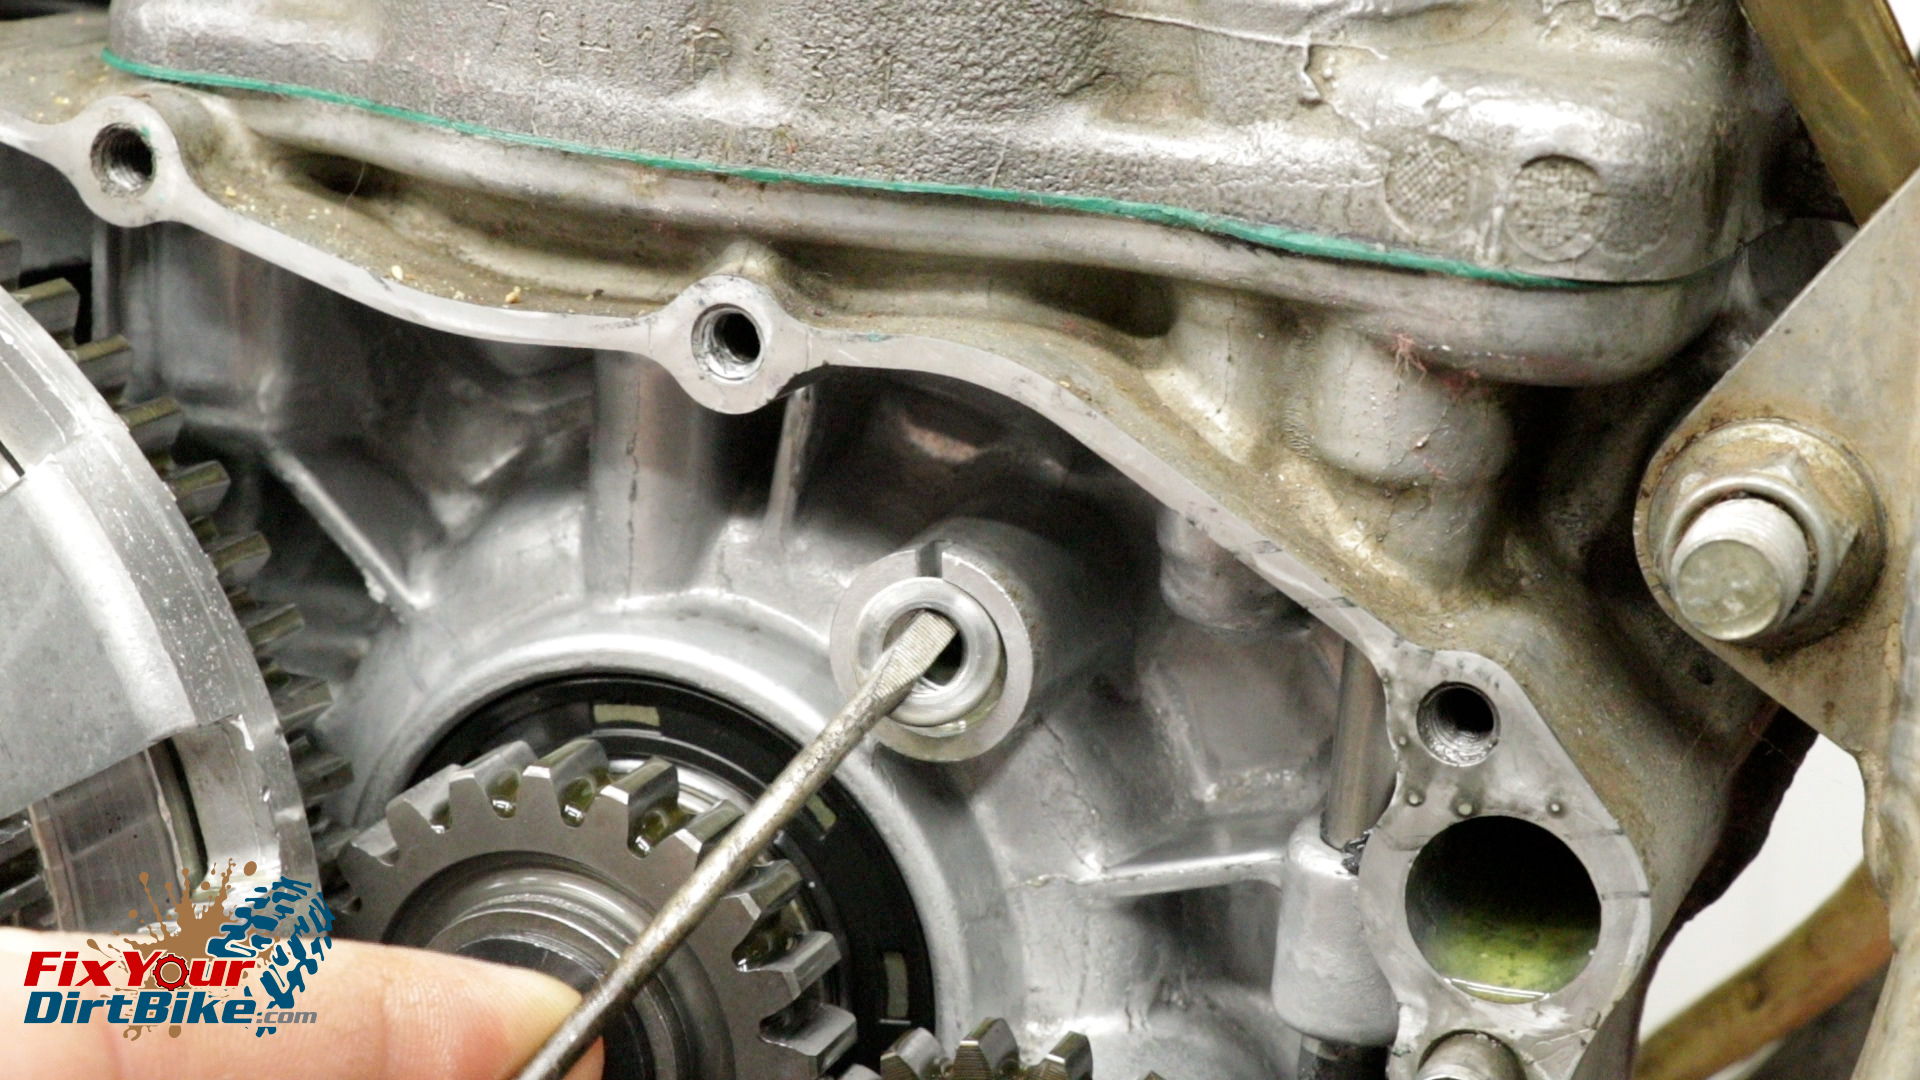
- Remove the right crankcase cover, and keep the bolts organized because length and placement are critical.
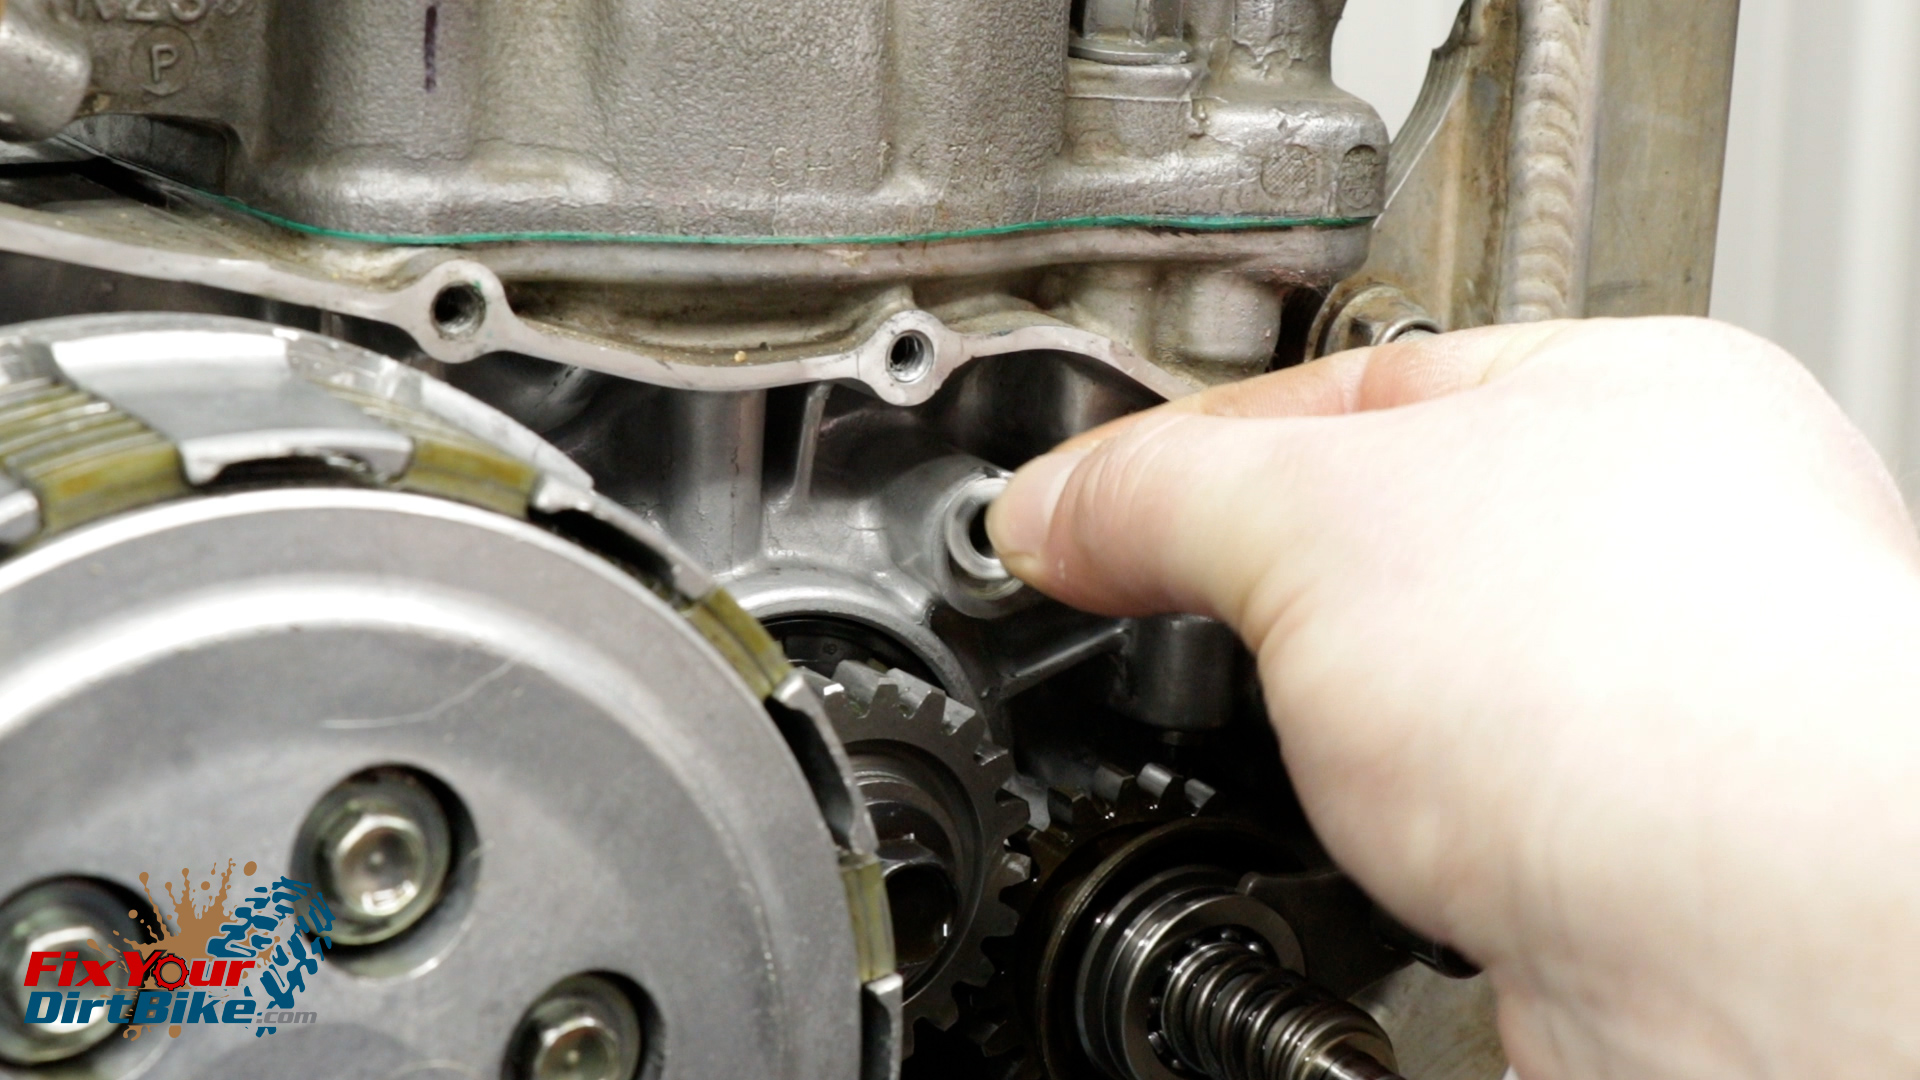
- Remove the shaft side washer from the case and ensure that the exhaust valve governor washer stays in place.
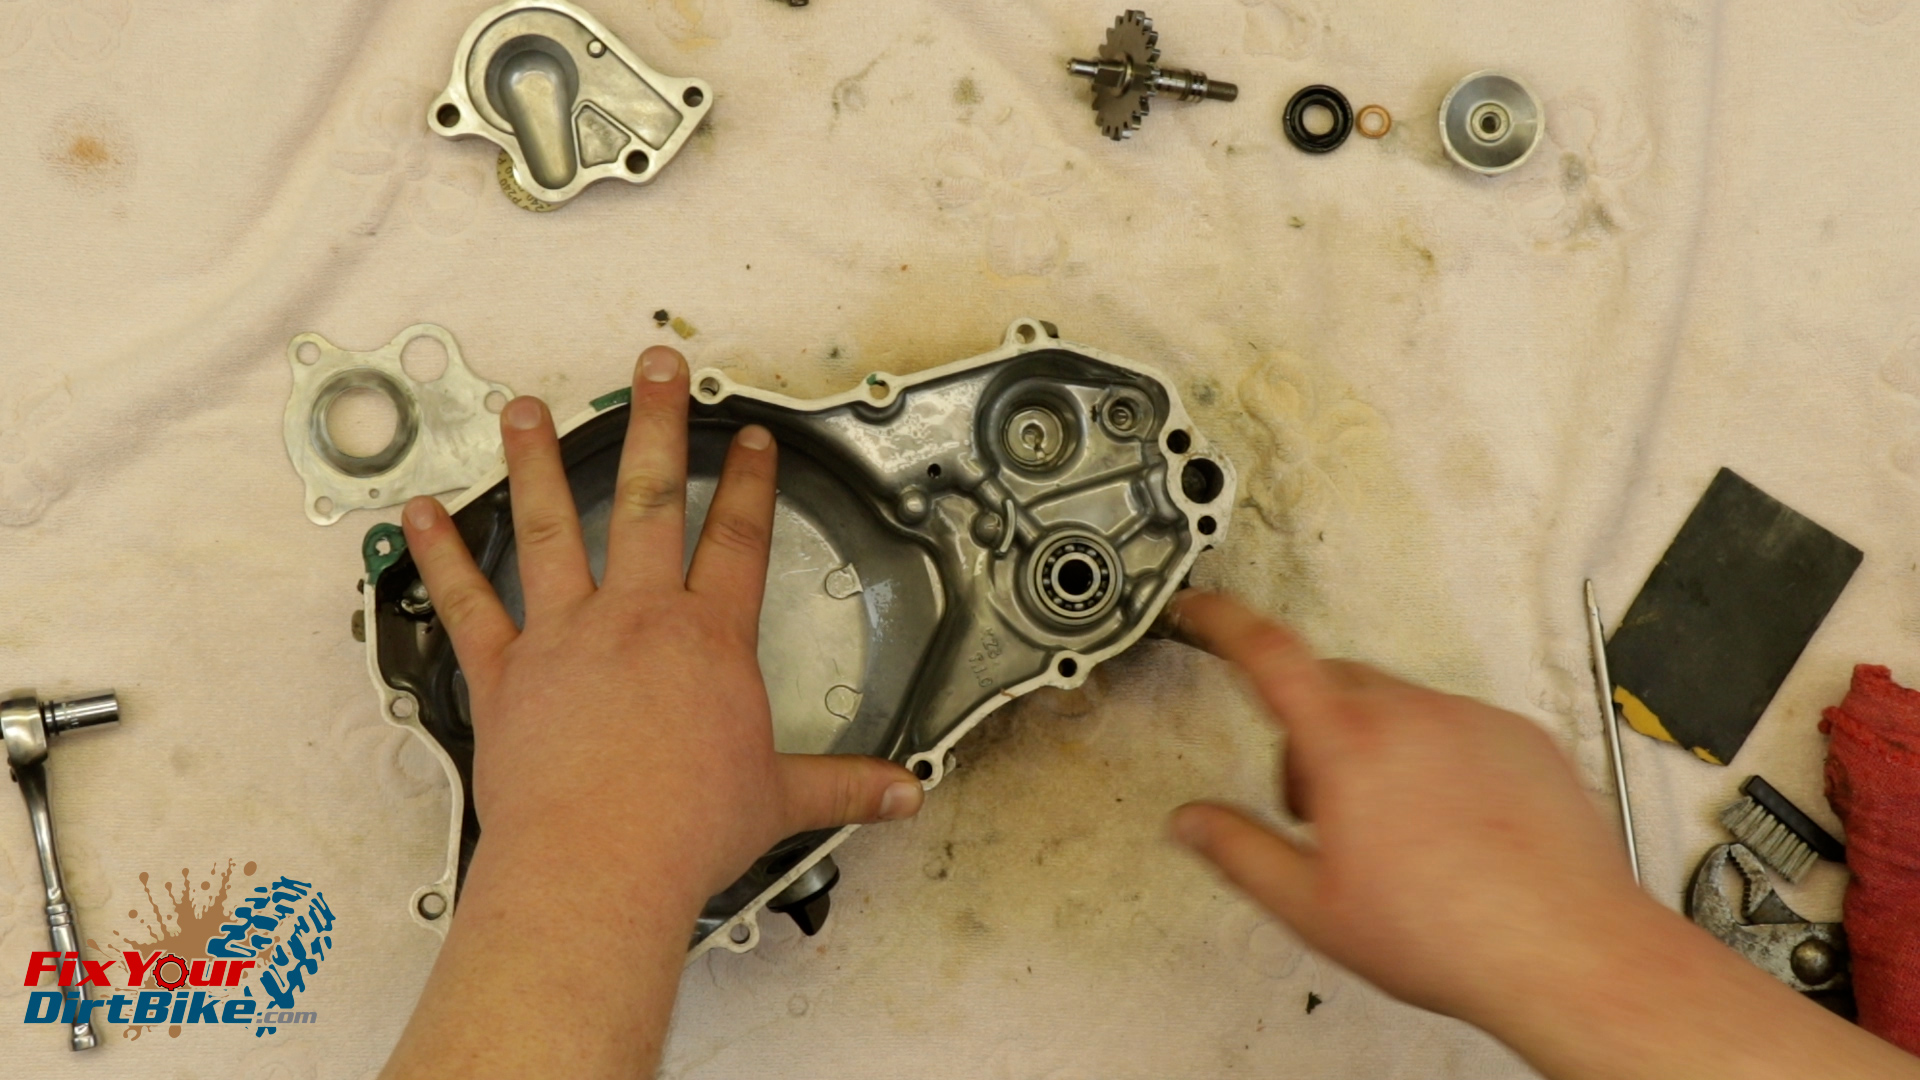
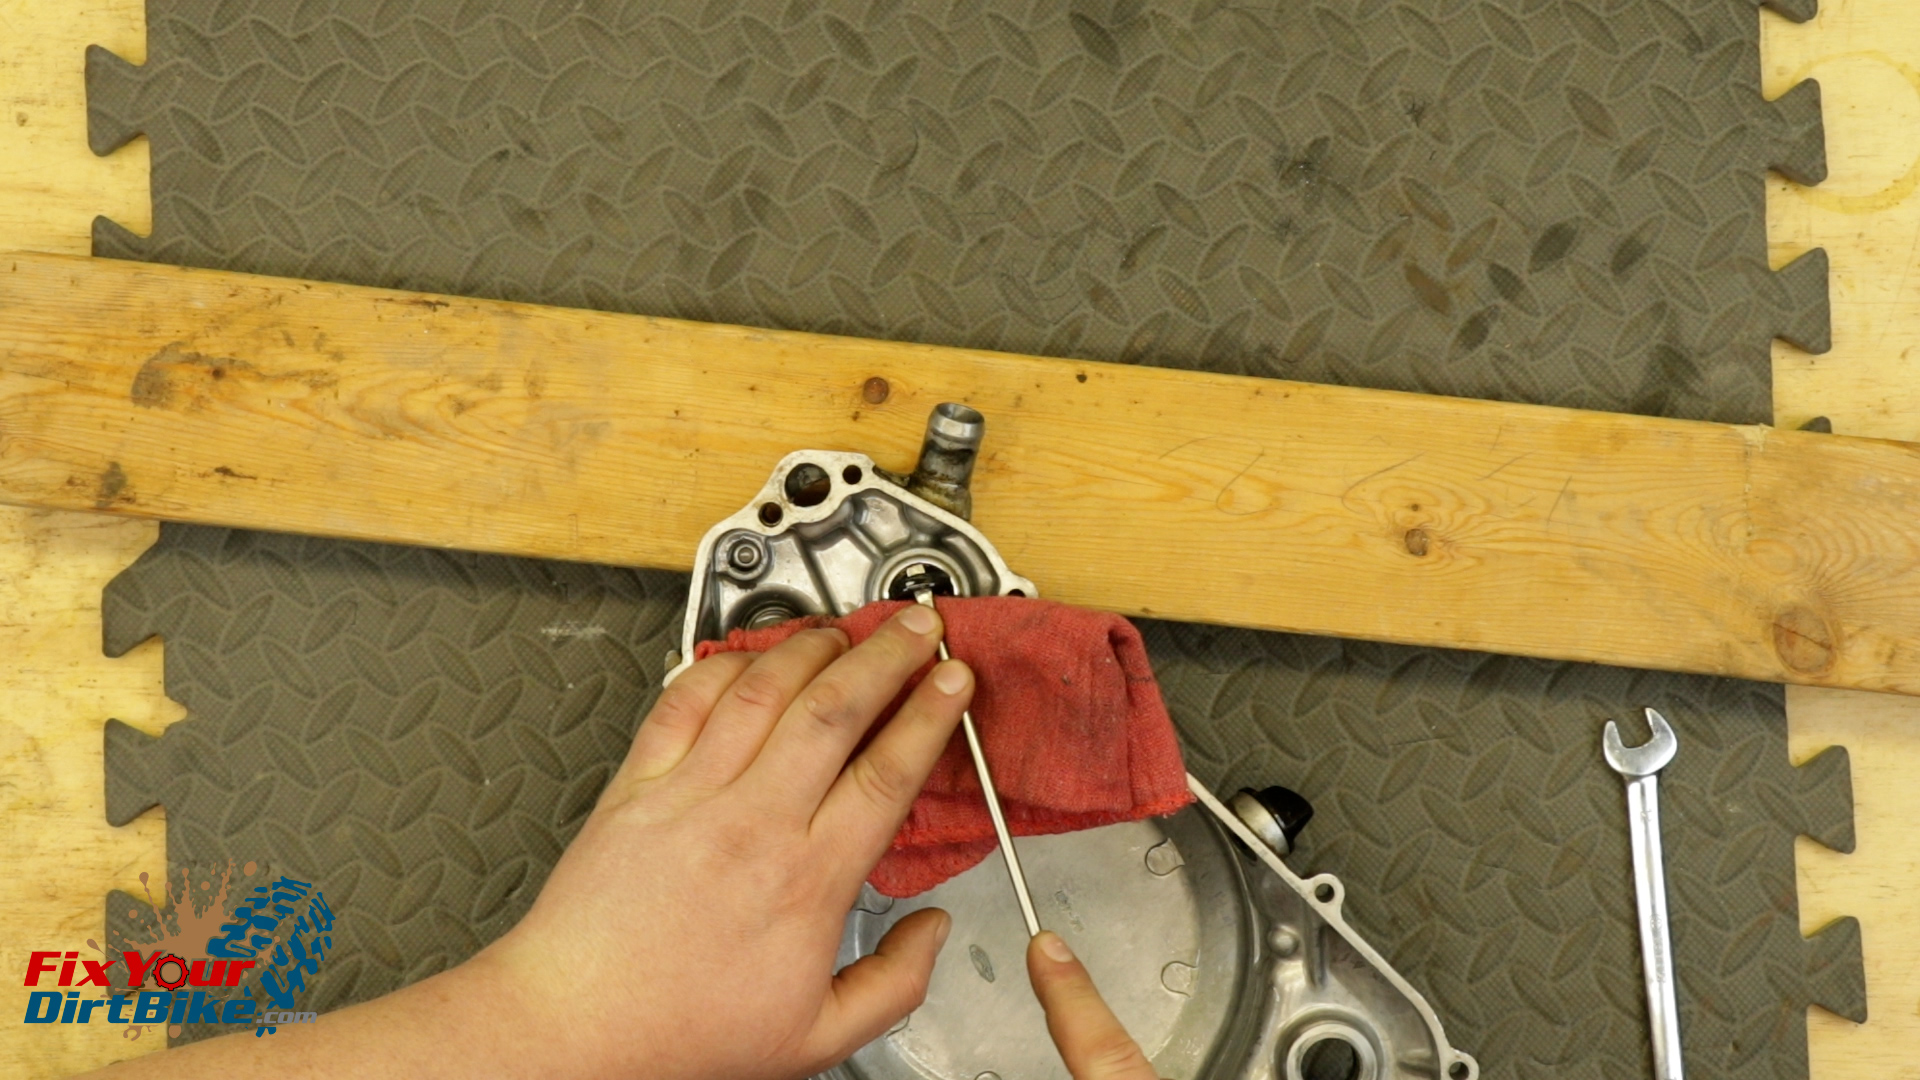
Clean And Inspect
Thoroughly clean the mating surfaces and housing first for two reasons.
- First, cleaning will save you time and money in the long run if you find damage and need to replace or fix the housing.
- Two, you can see if anything was damaged during service.
Related: When was the last time you serviced your external shift linkage?
Water Pump Disassembly
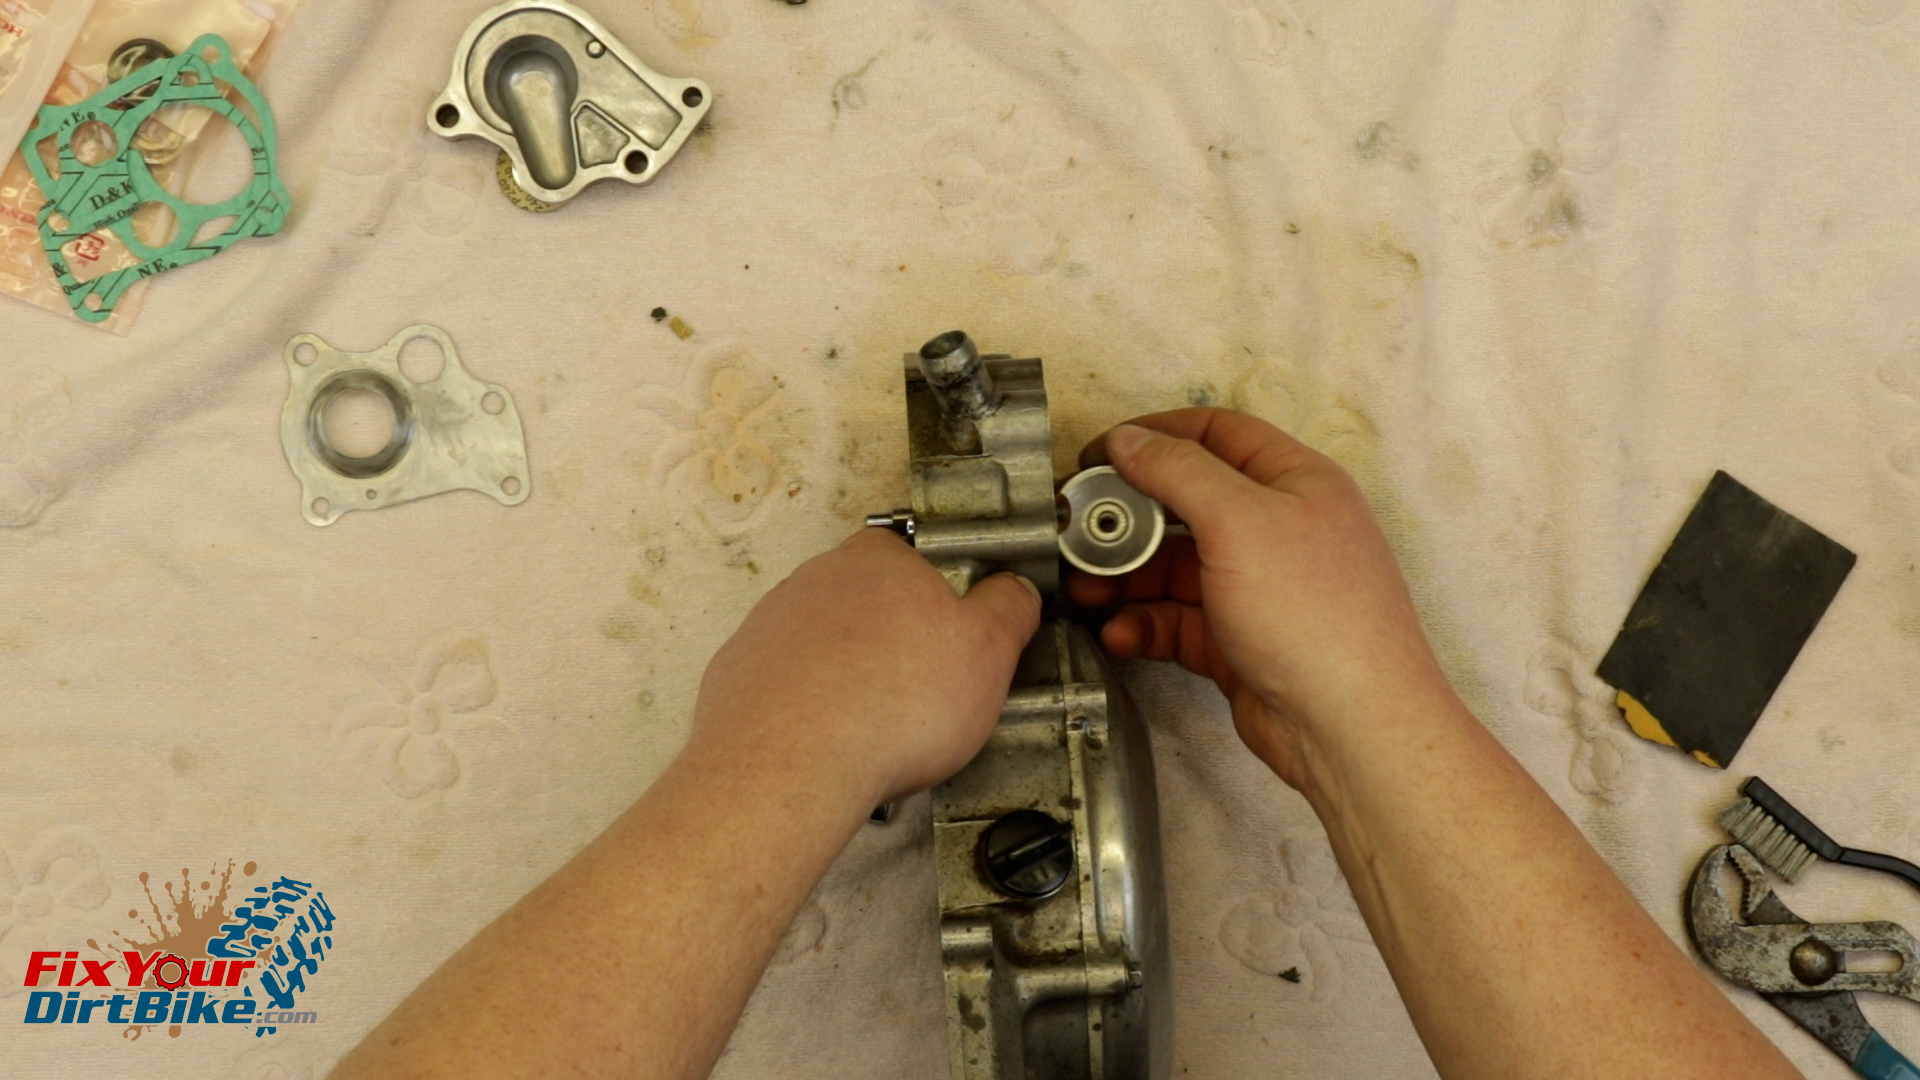
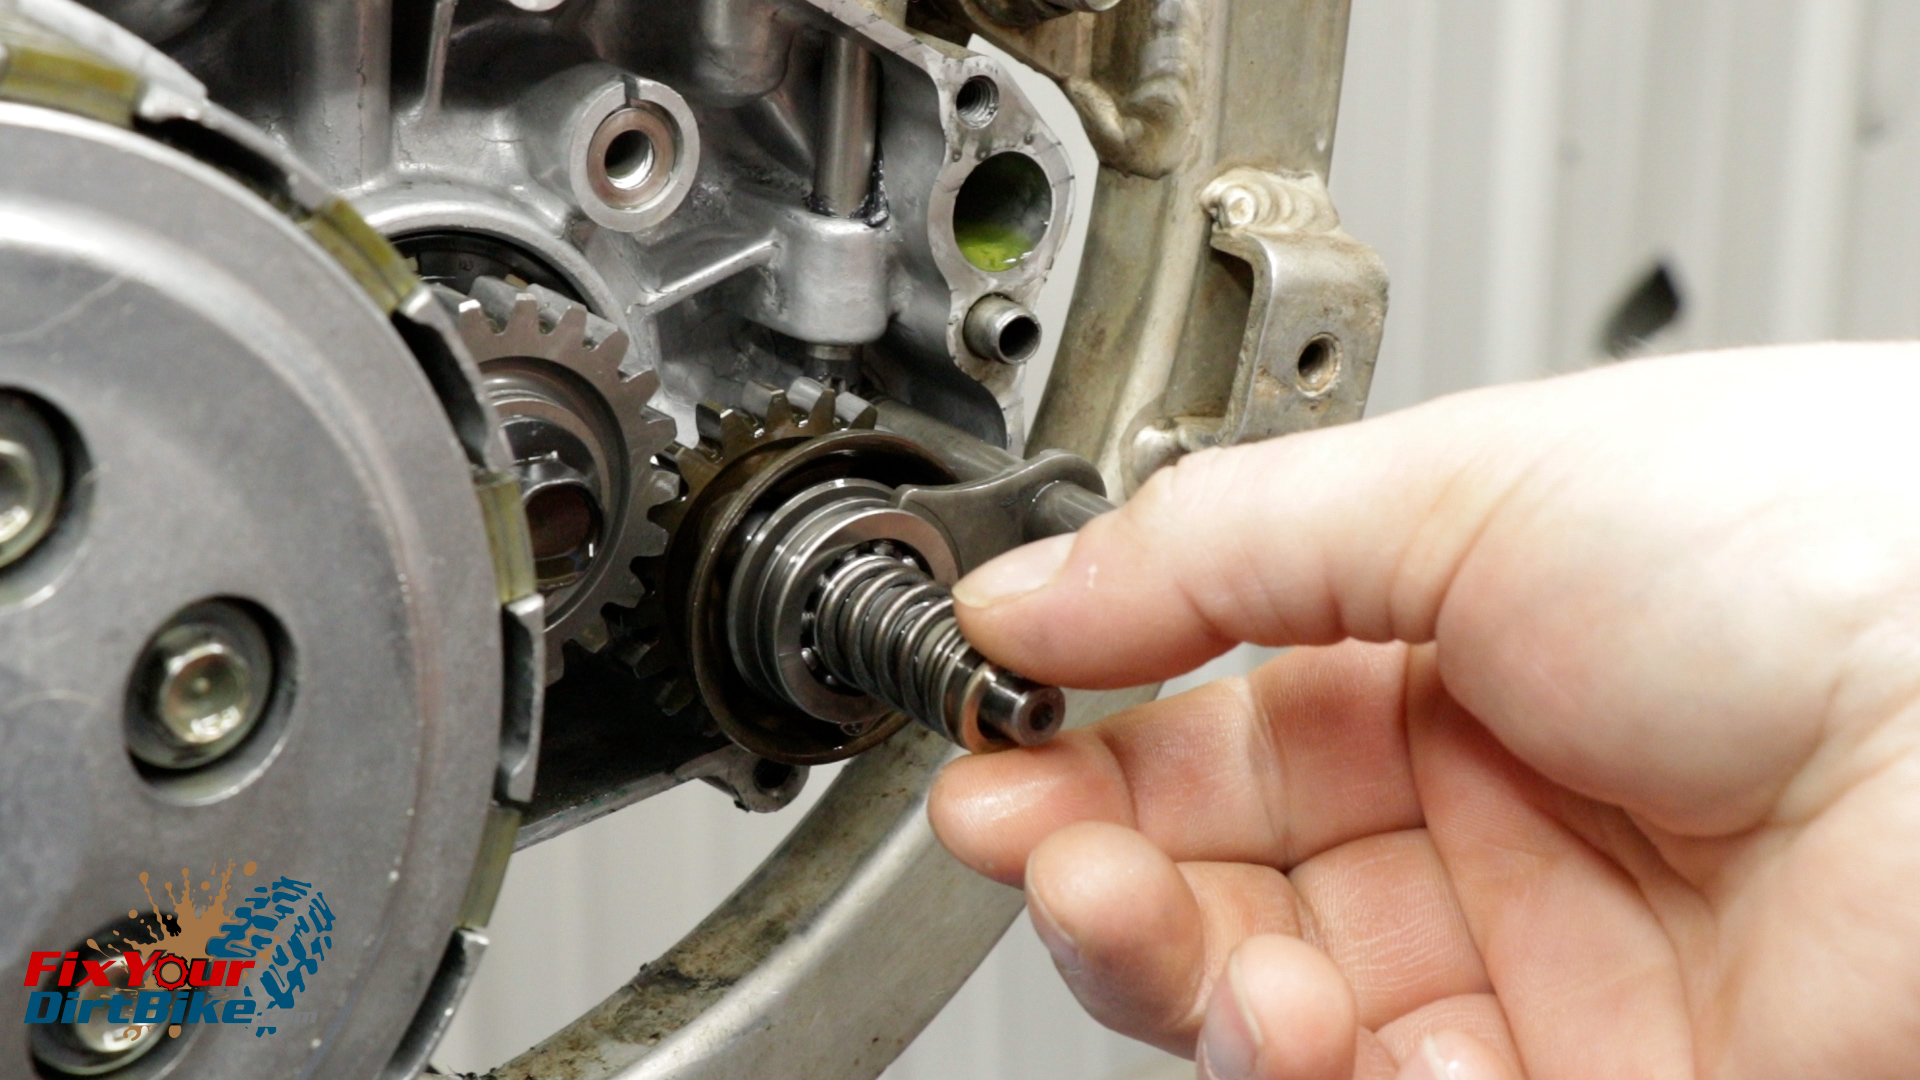
- Hold the impeller shaft with a box wrench, and loosen the impeller with an 8mm socket.
- The impeller looks like it is secured with a hex nut, but it is all one piece.
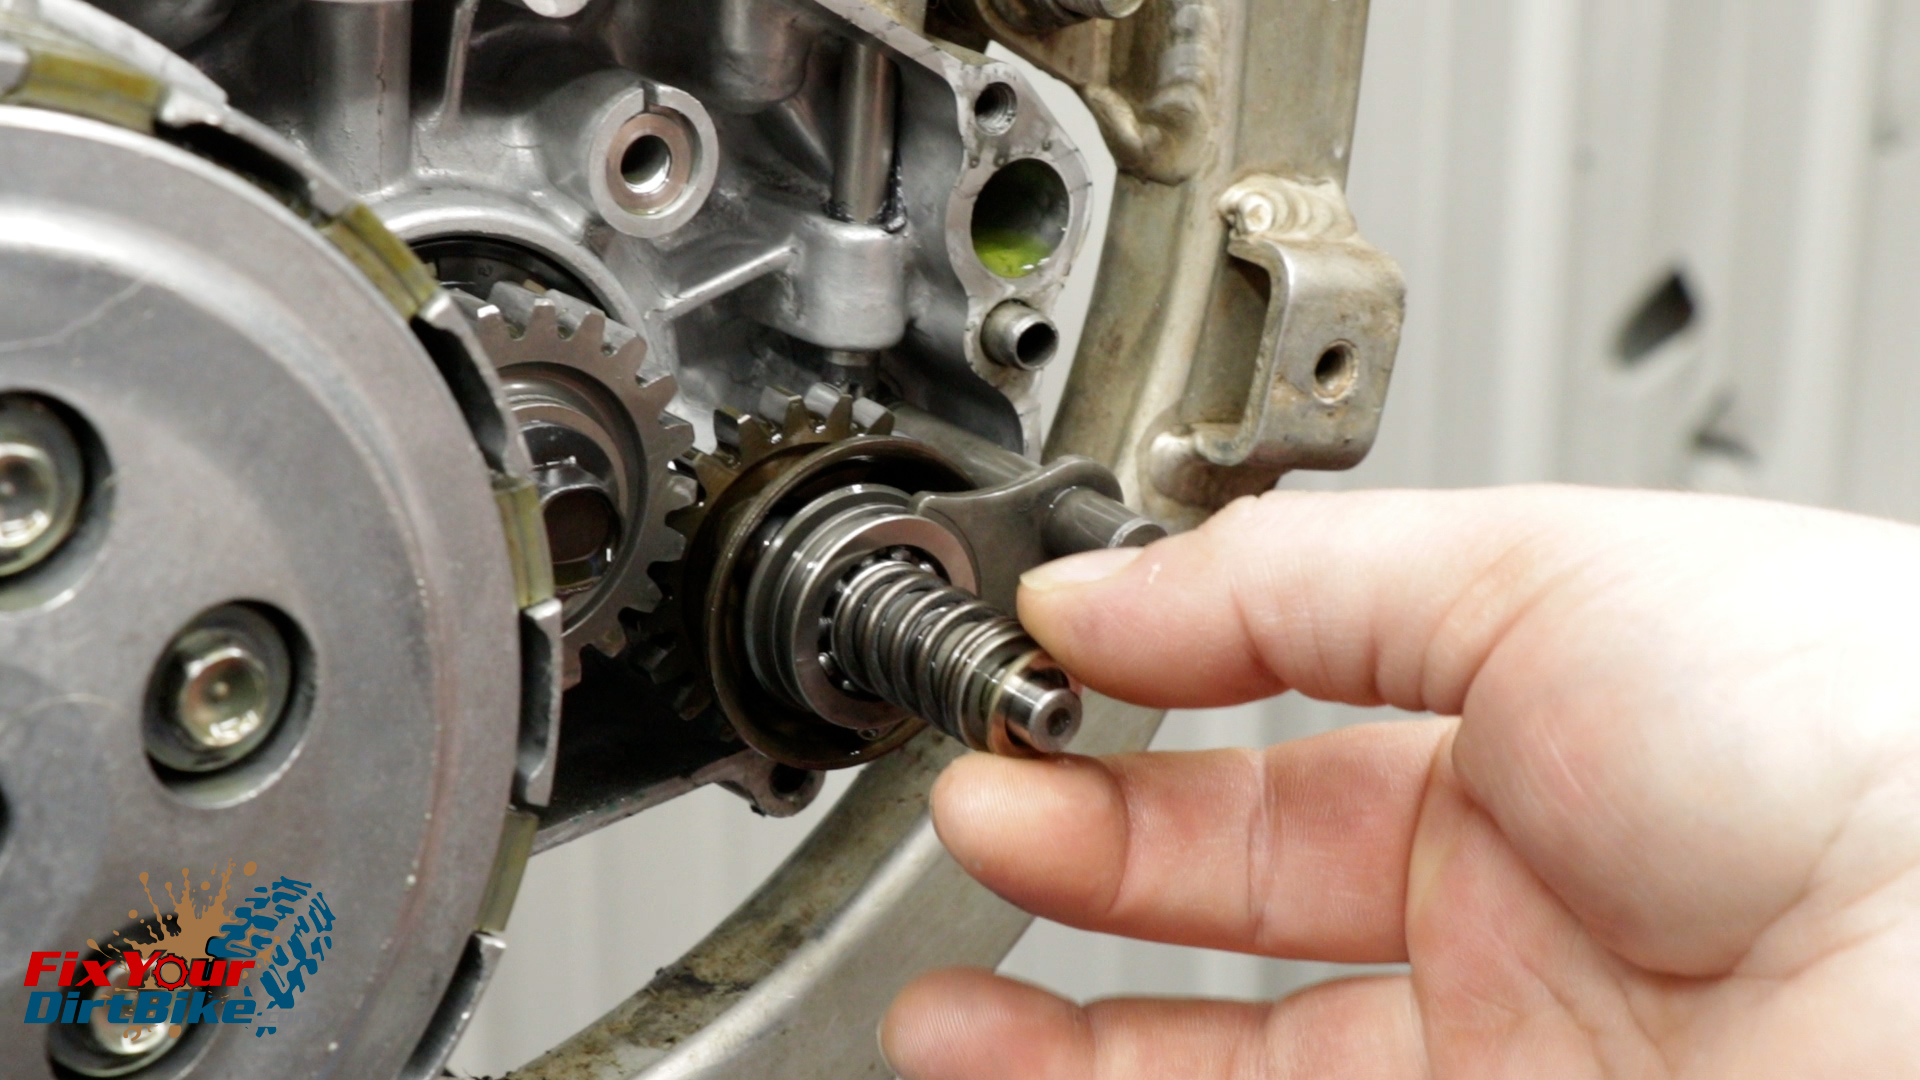
- Remove the impeller and copper washer, followed by the impeller shaft.
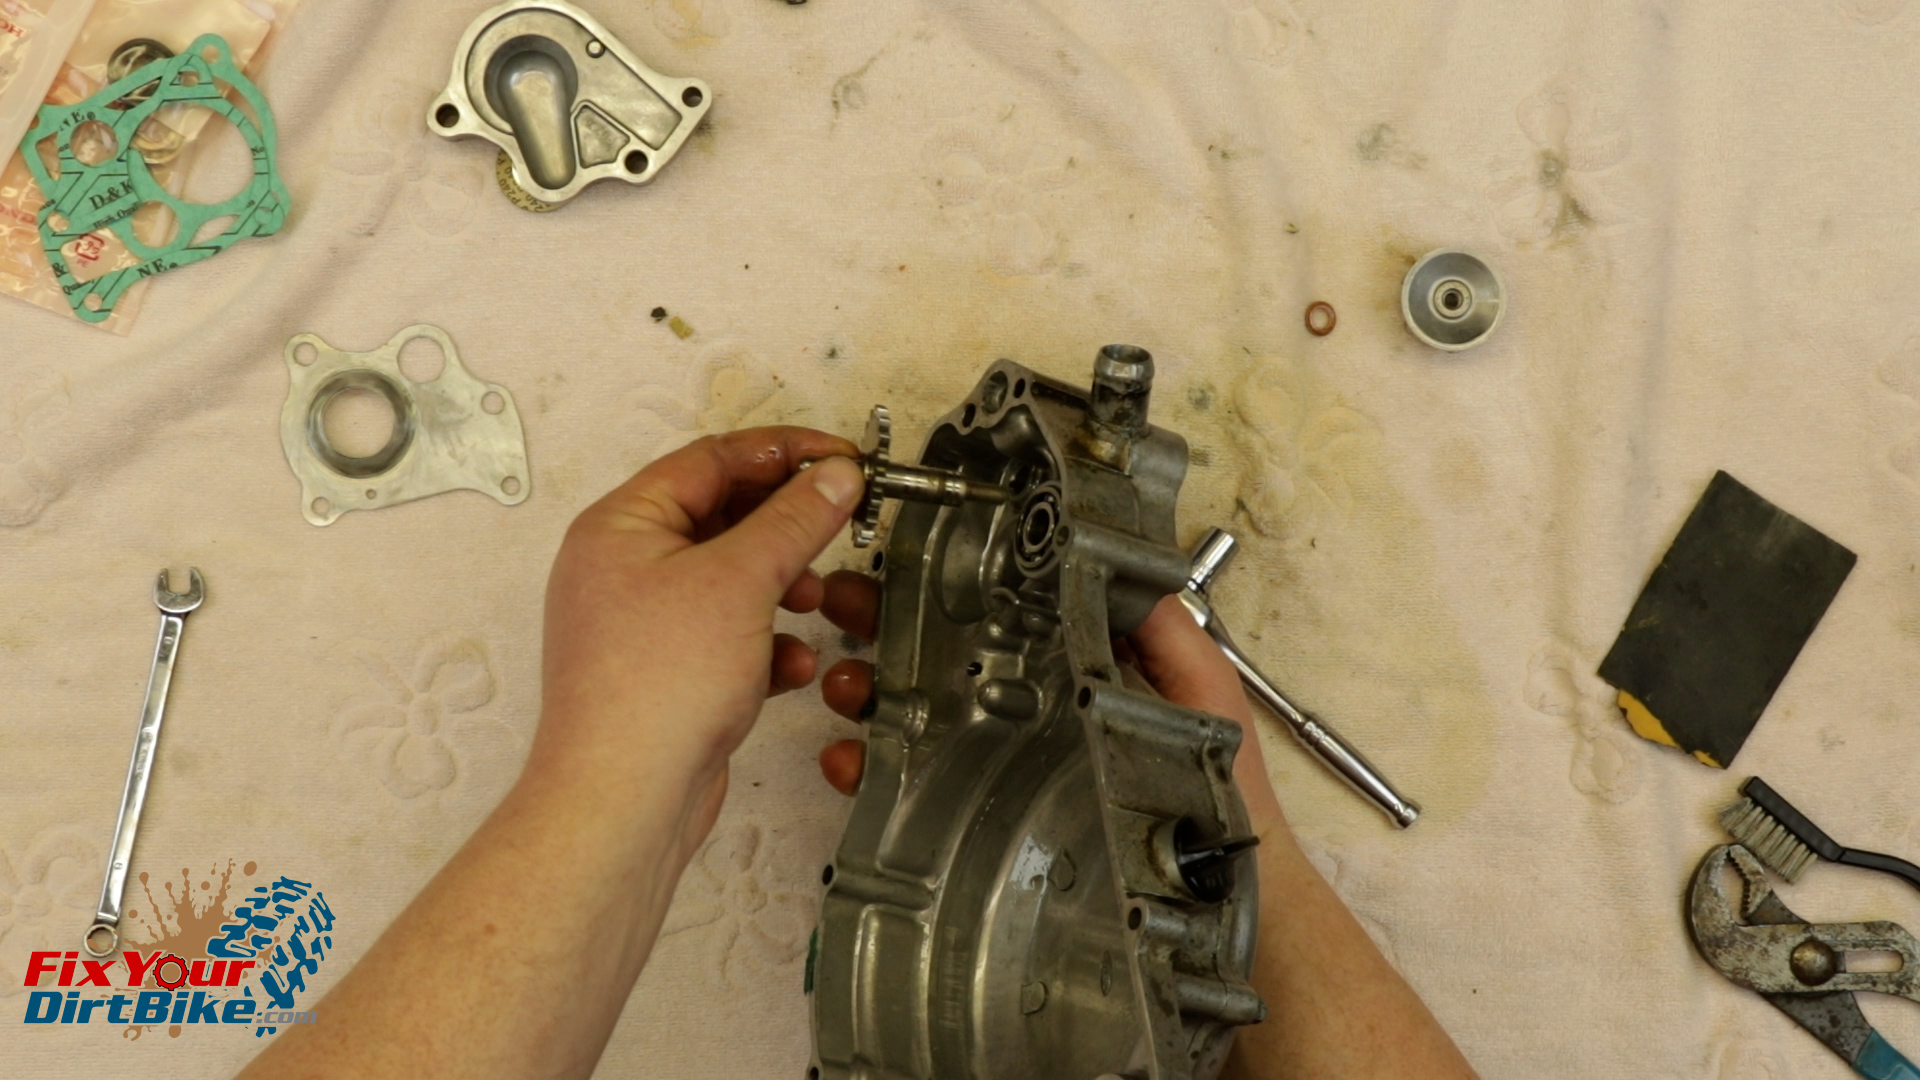
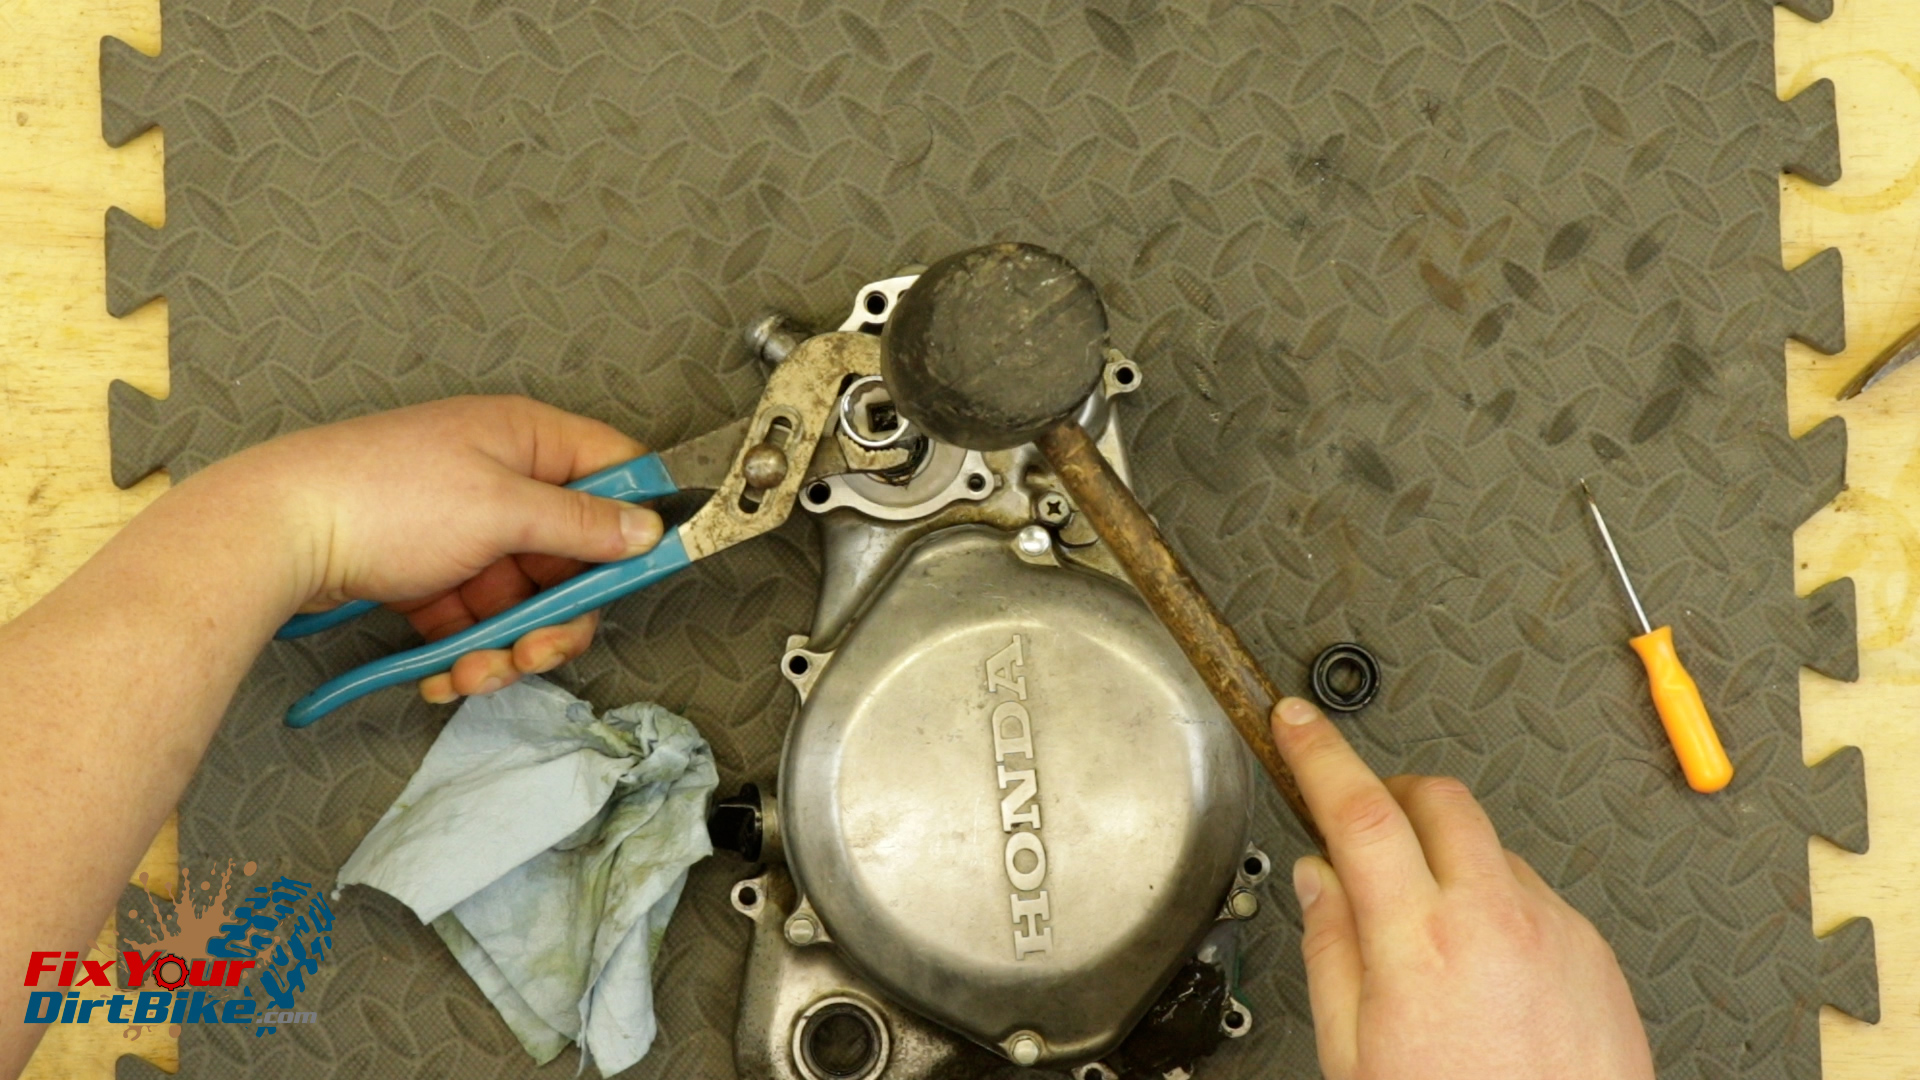
- Remove the coolant side seal with a flat screwdriver and a towel to protect the housing.
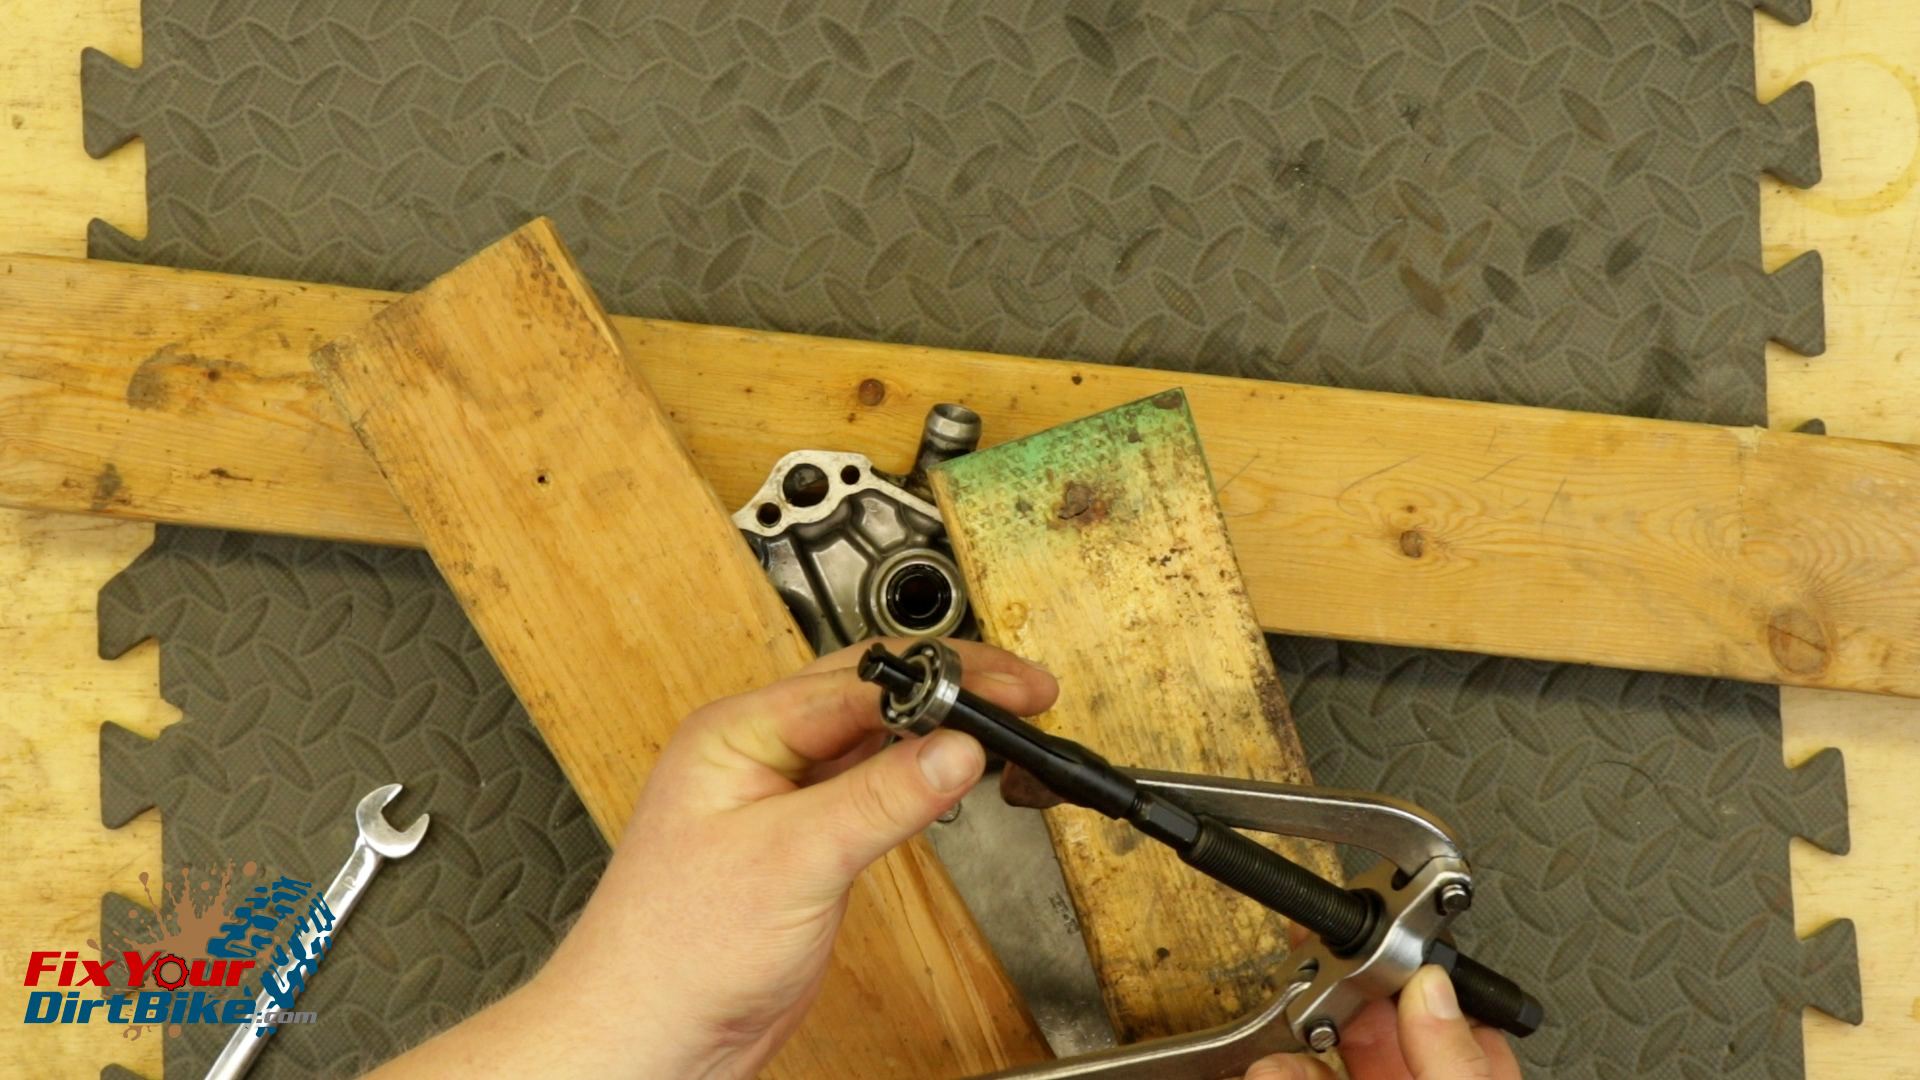
- The oil side seal is behind the impeller shaft bearing, and the bearing needs to be pulled with a blind bearing puller.
- You could theoretically punch the bearing out from outside the cover with a drift, but I am NOT TELLING YOU TO DO THAT.
- Fortunately, the impeller bearing is not a press fit and can be removed and installed easily.
- Remove the oil side seal with a flathead screwdriver and a towel.
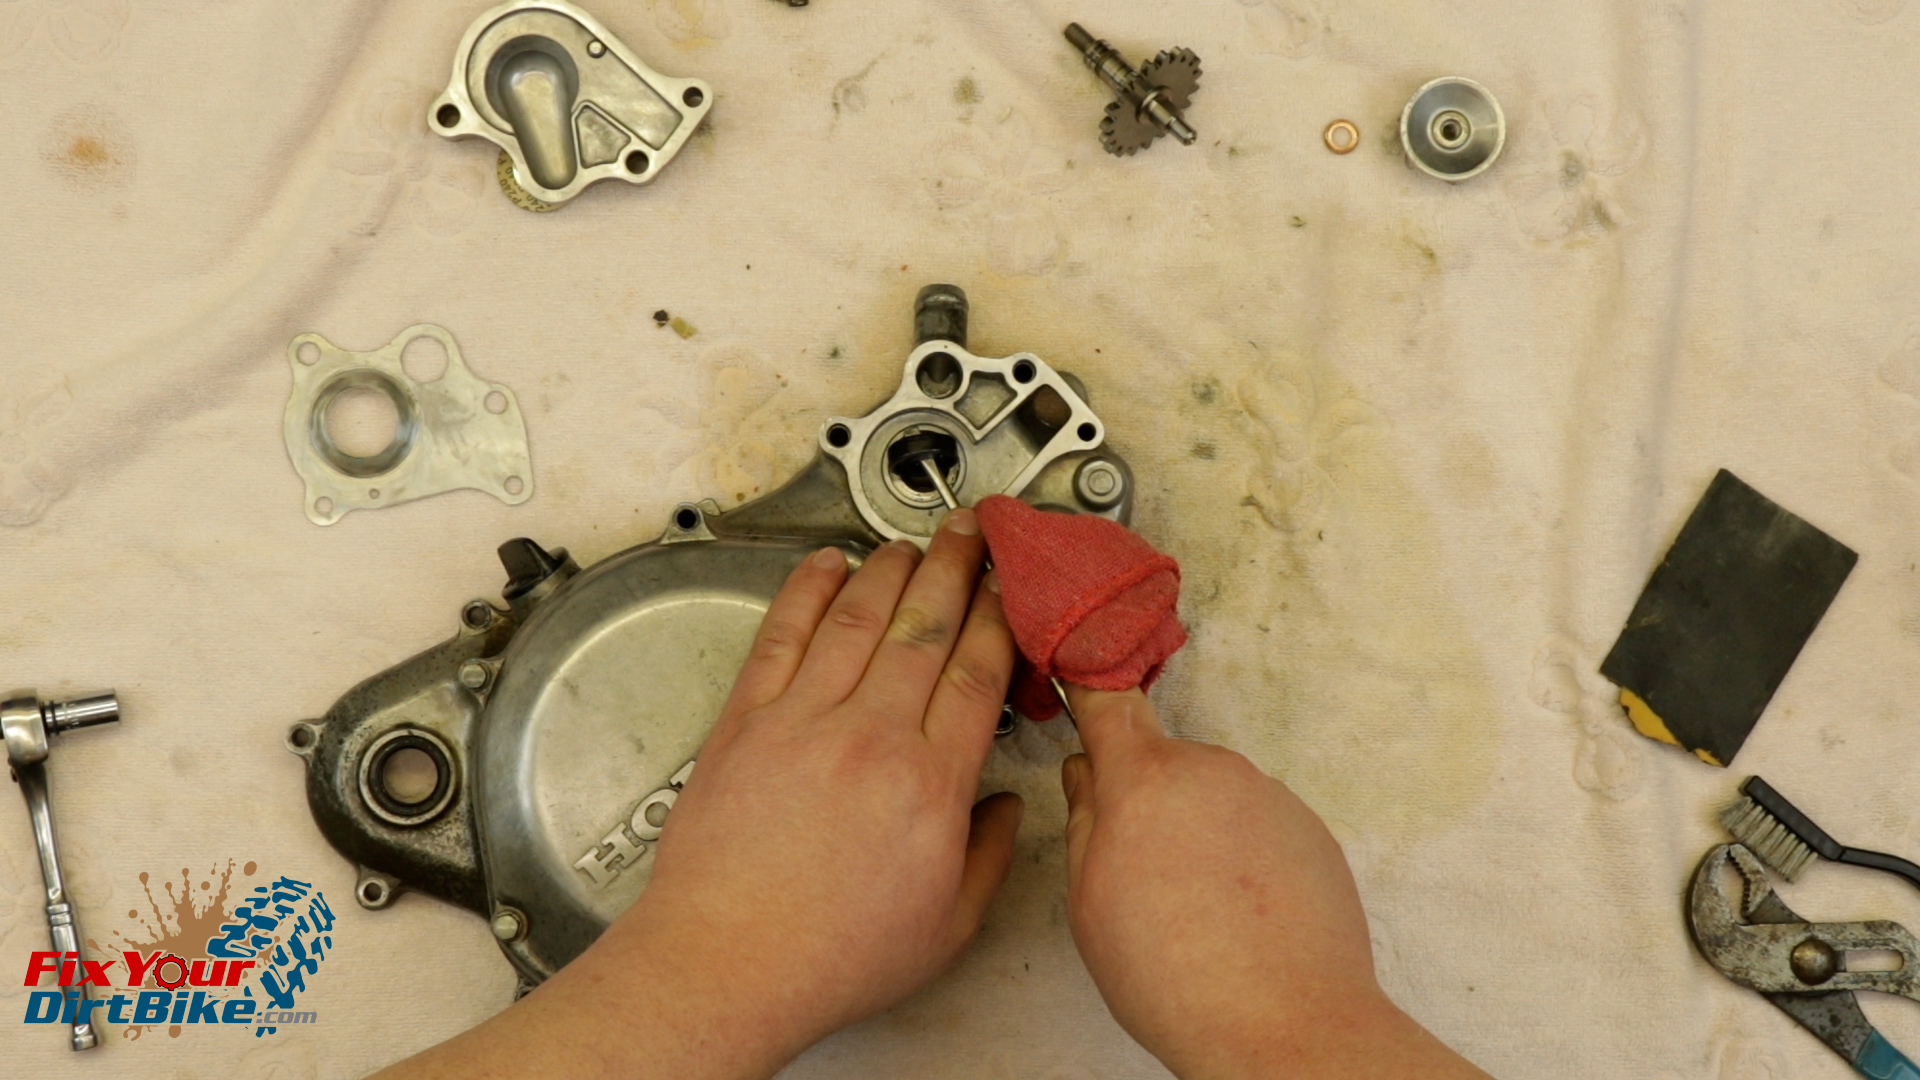
- Thoroughly clean the seal bores and the bearing bore.
Assembly
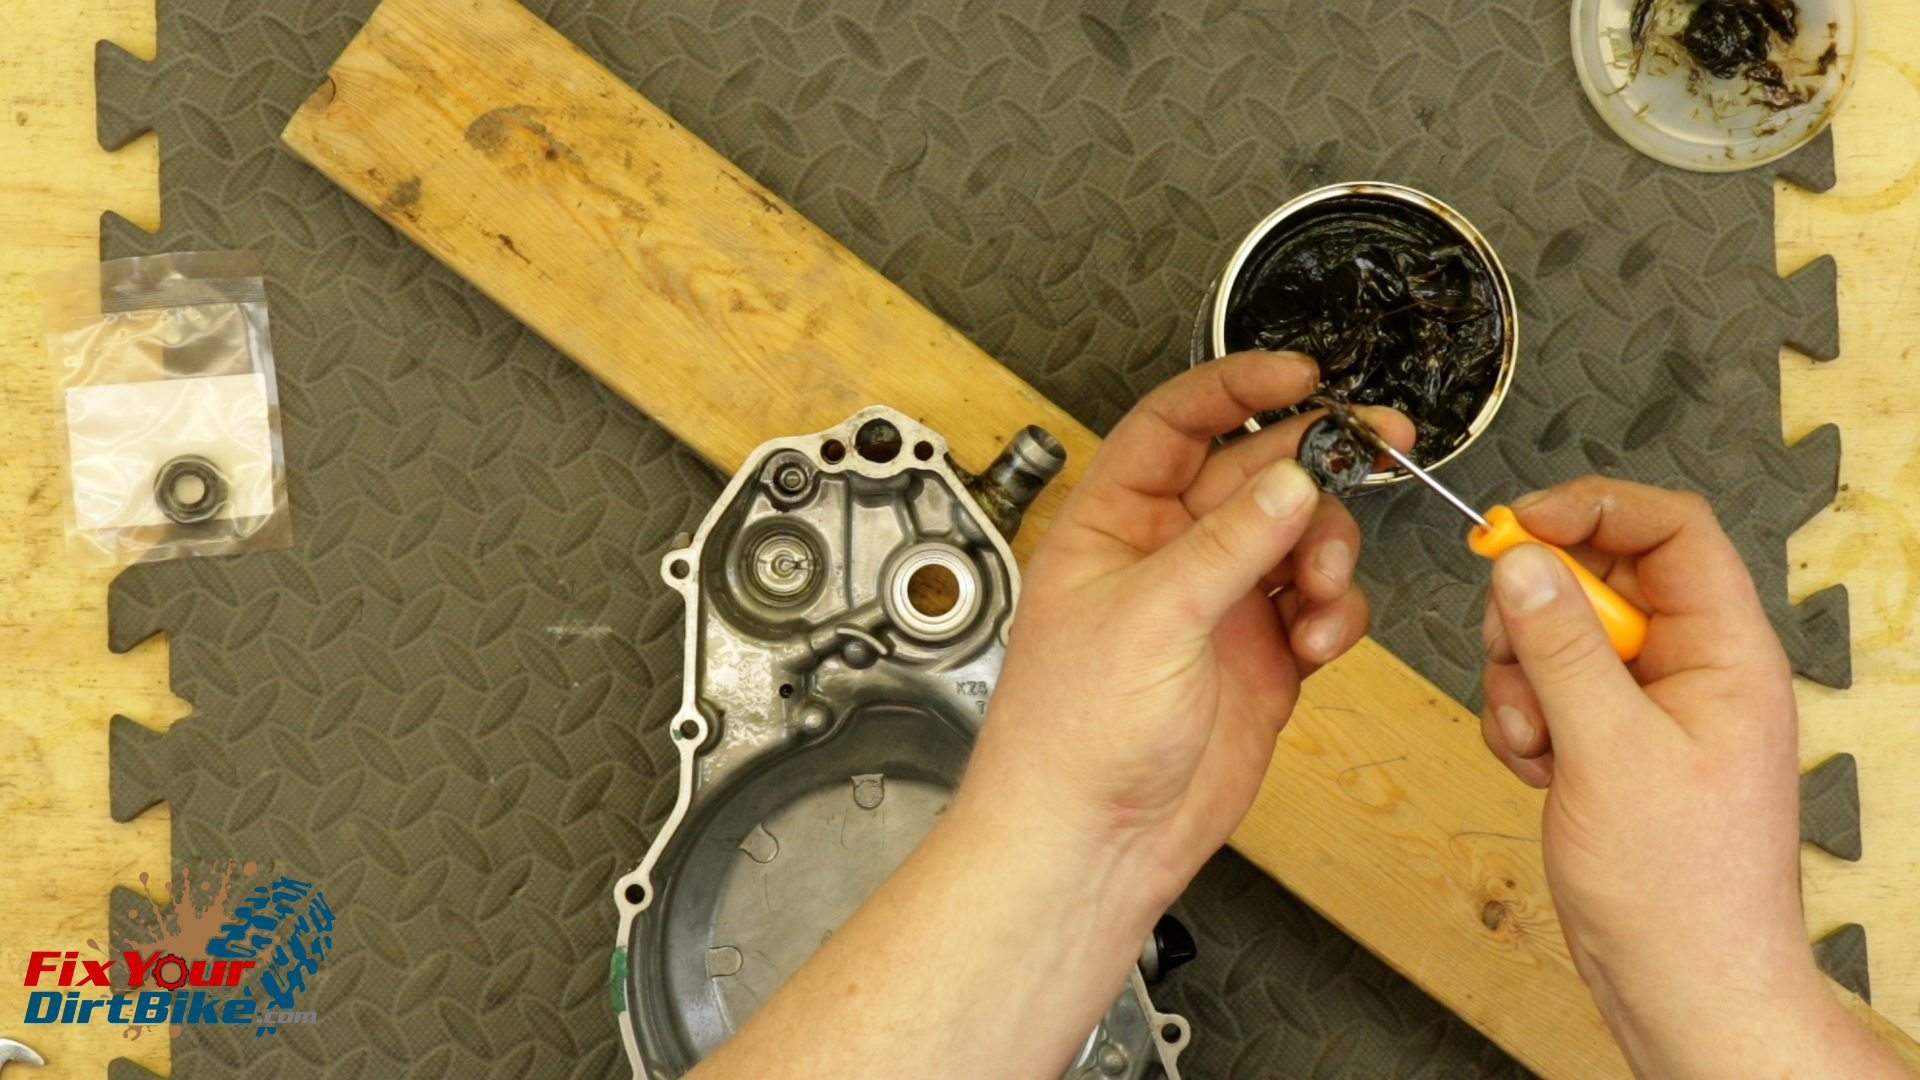
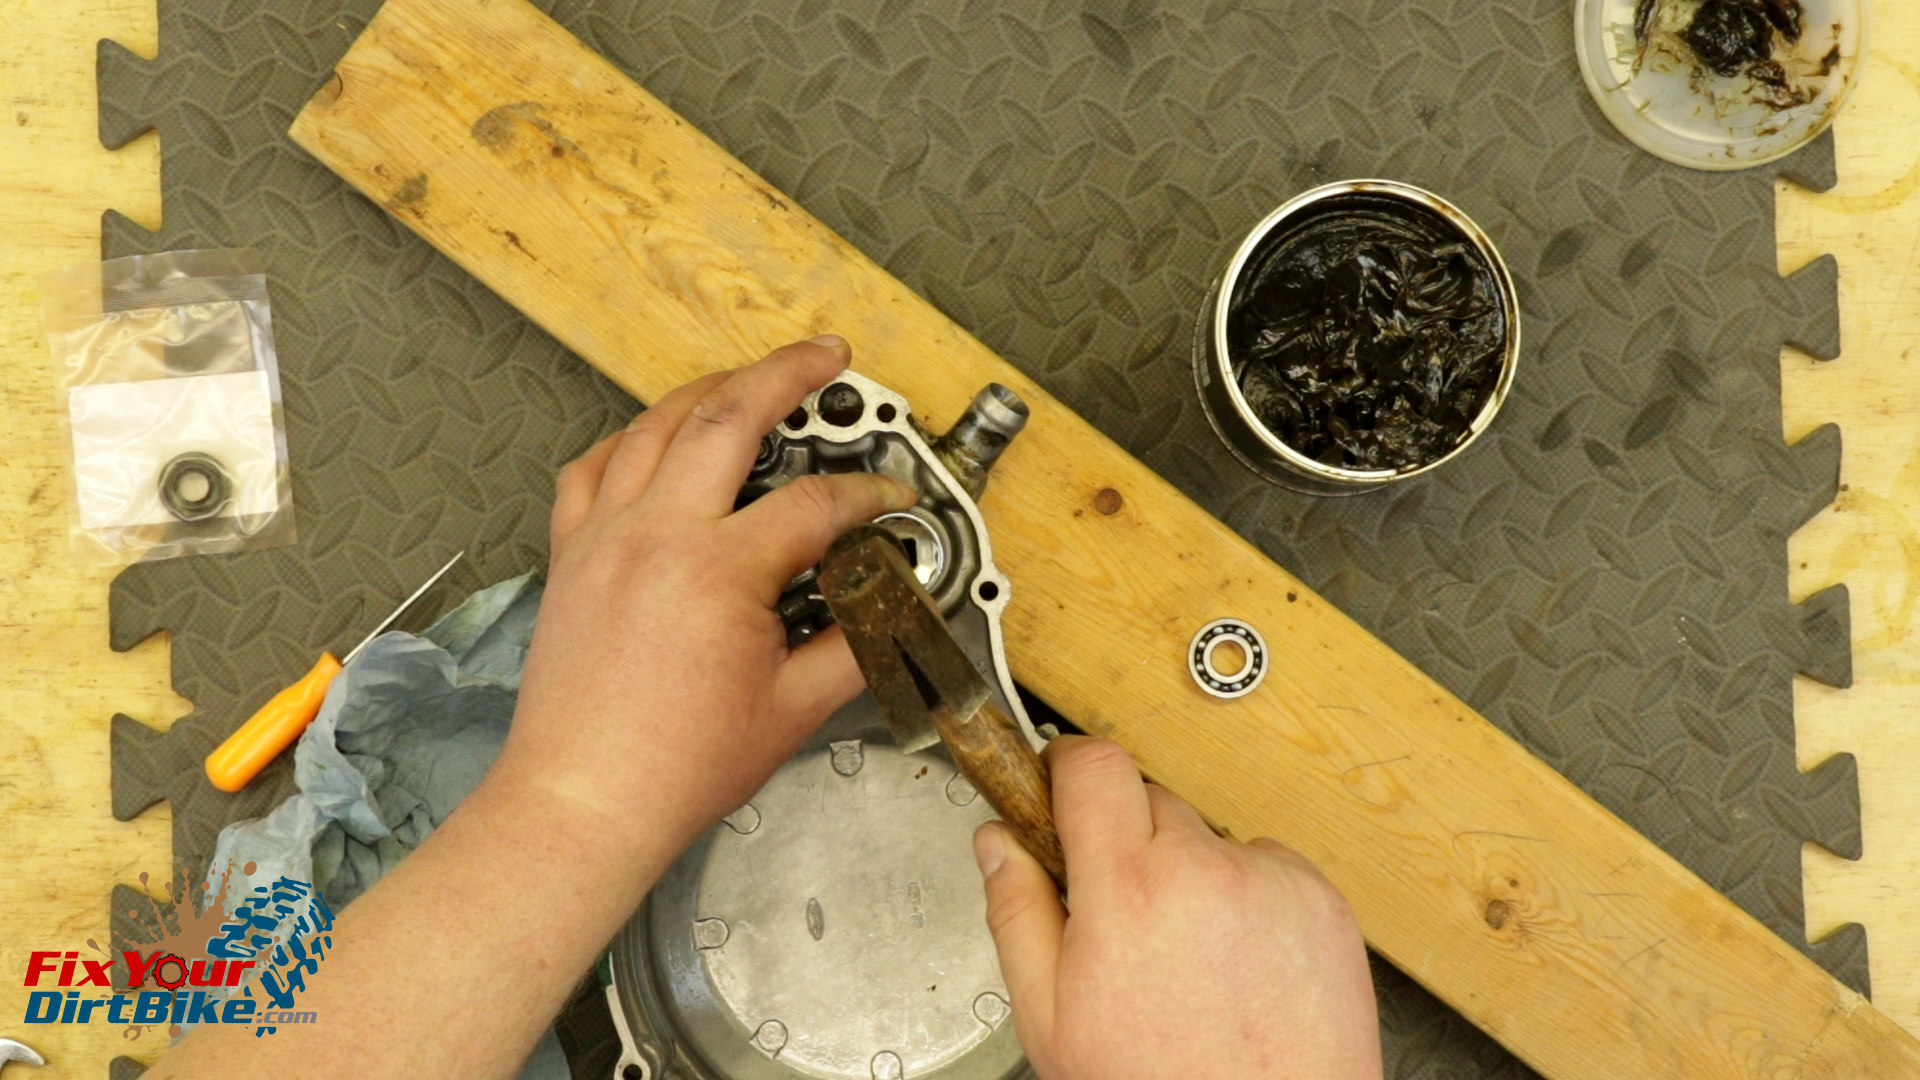
- Pack your new oil seal with lithium grease and install it with the open side facing up.
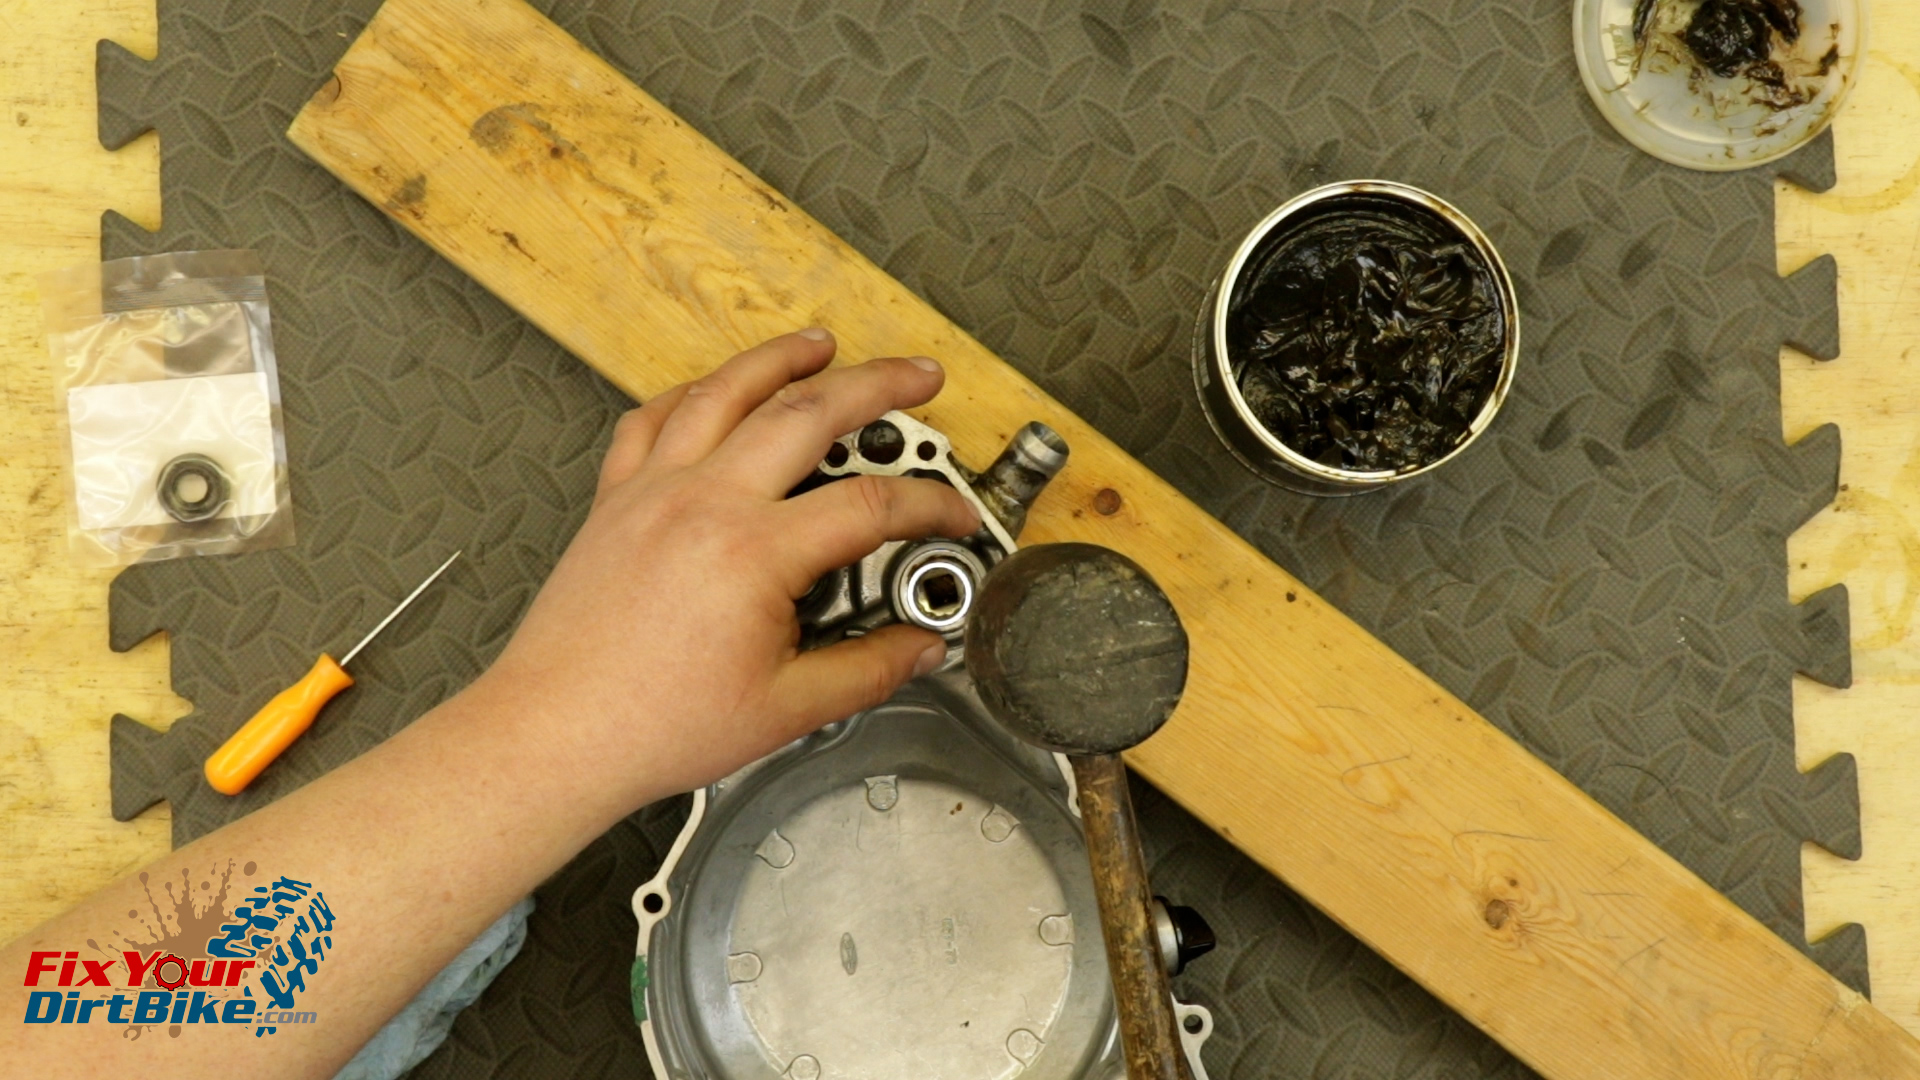
- Use a socket of matching size, and drive the seal into the bore.
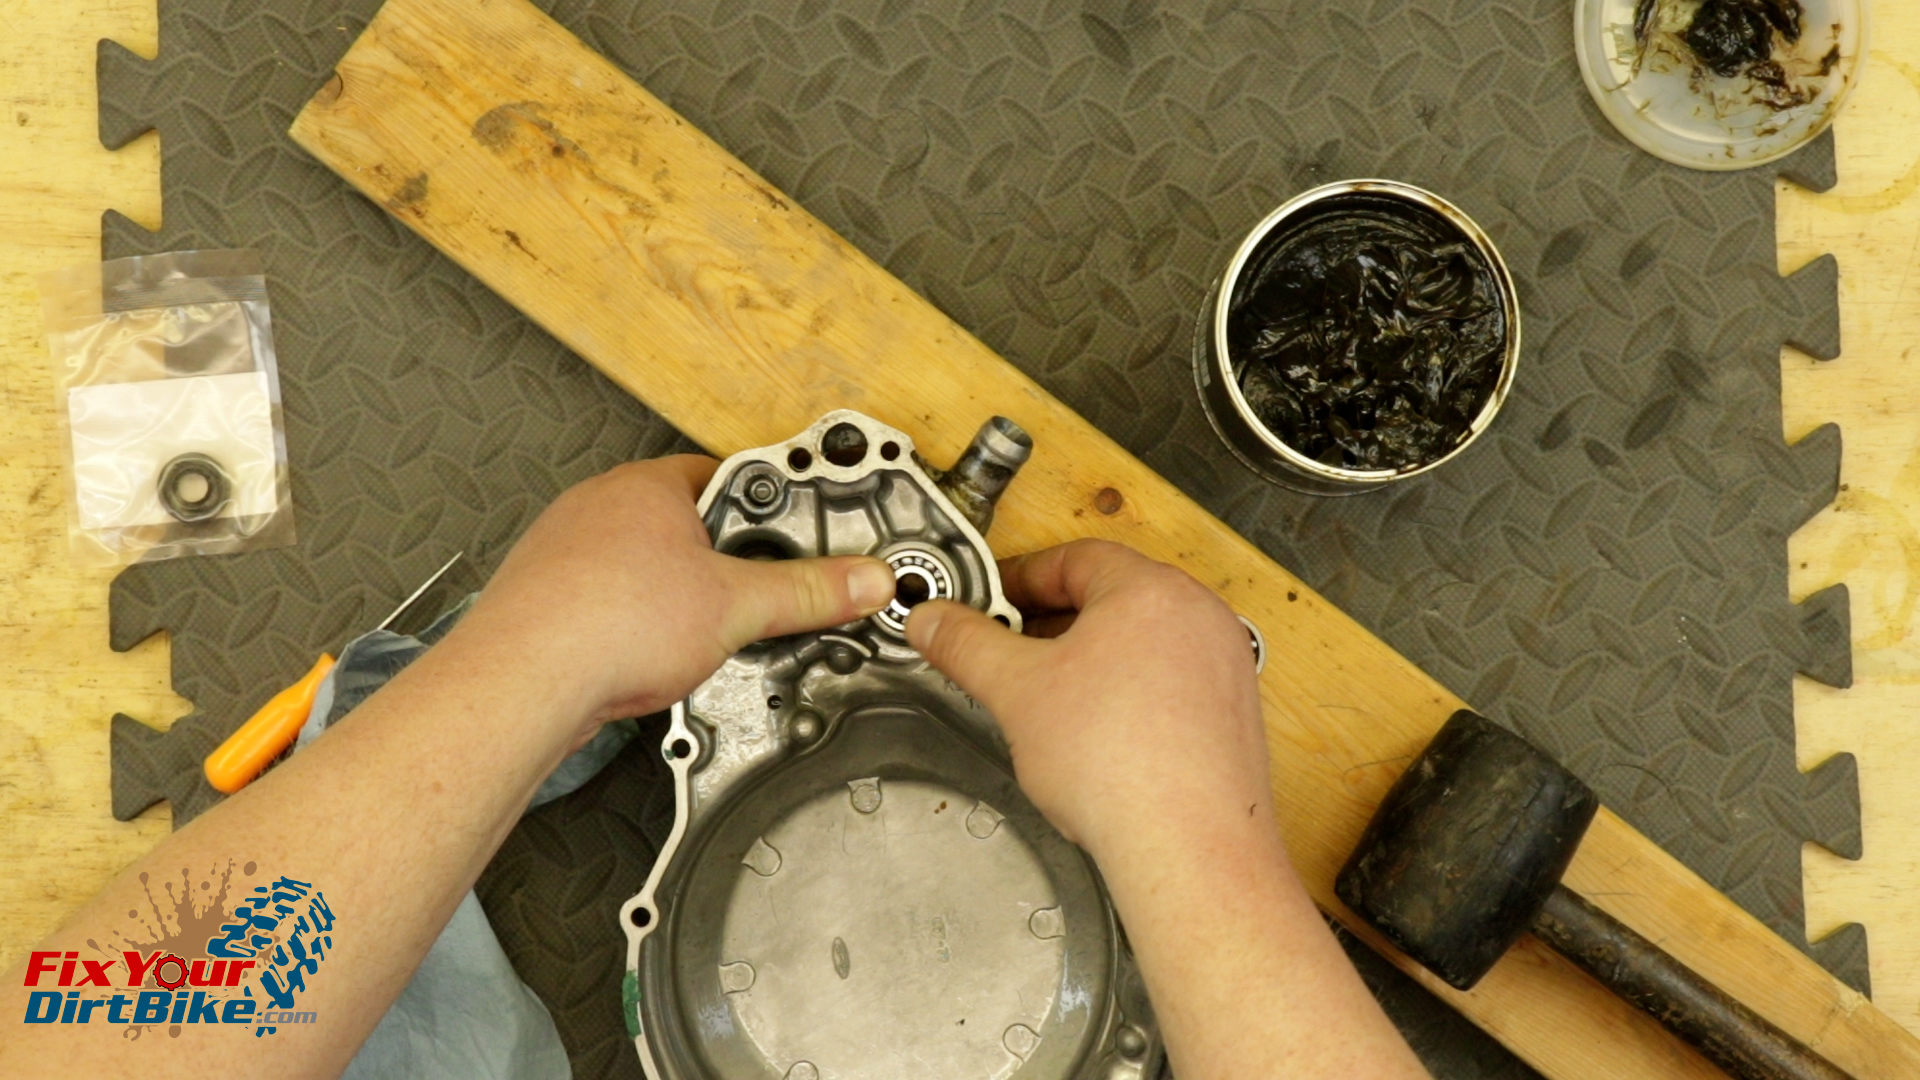
- Place your new bearing squarely over the bore, and drive it into place with a socket that matches the OUTSIDE bearing race.
- Drive your bearing until it bottoms out.
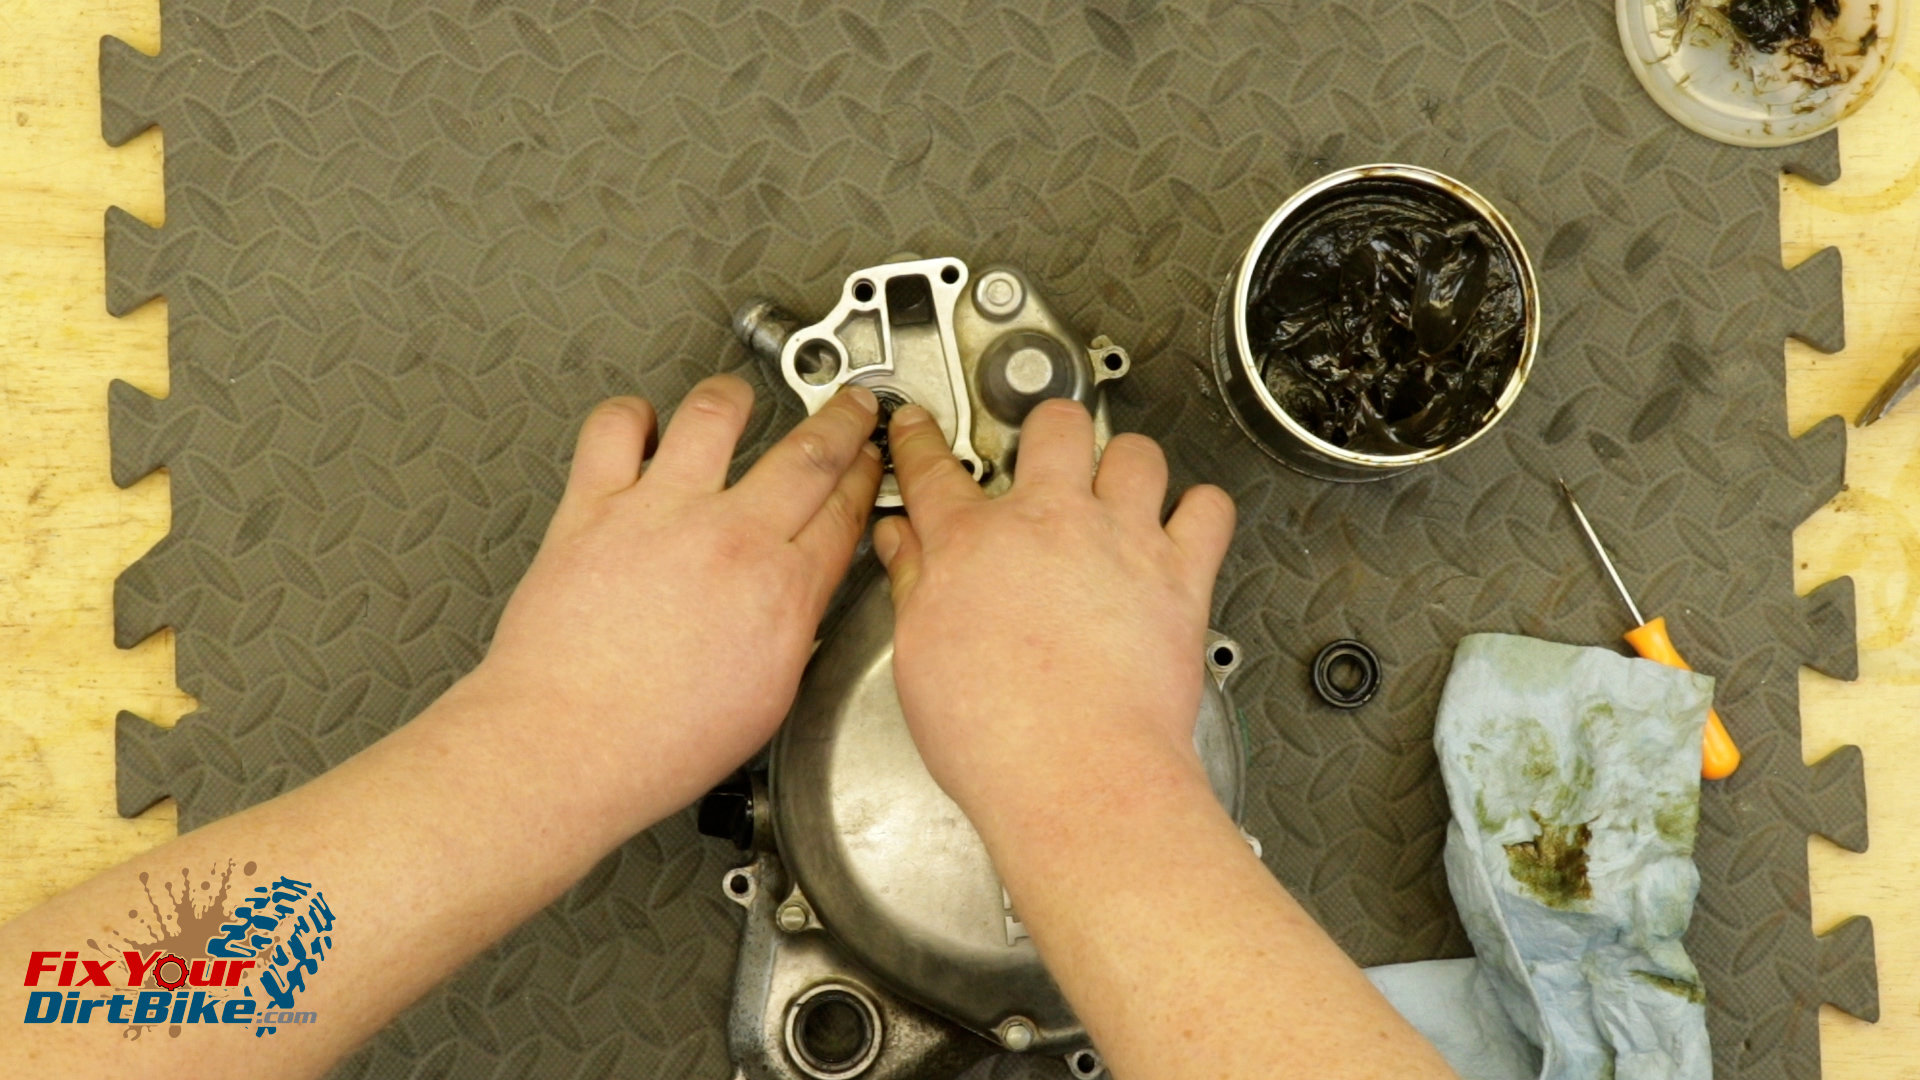
- Pack the coolant side seal with lithium grease and install it with the open side facing up.
- The coolant seal is a different size, so you must use a different matching socket to drive the seal into the bore.
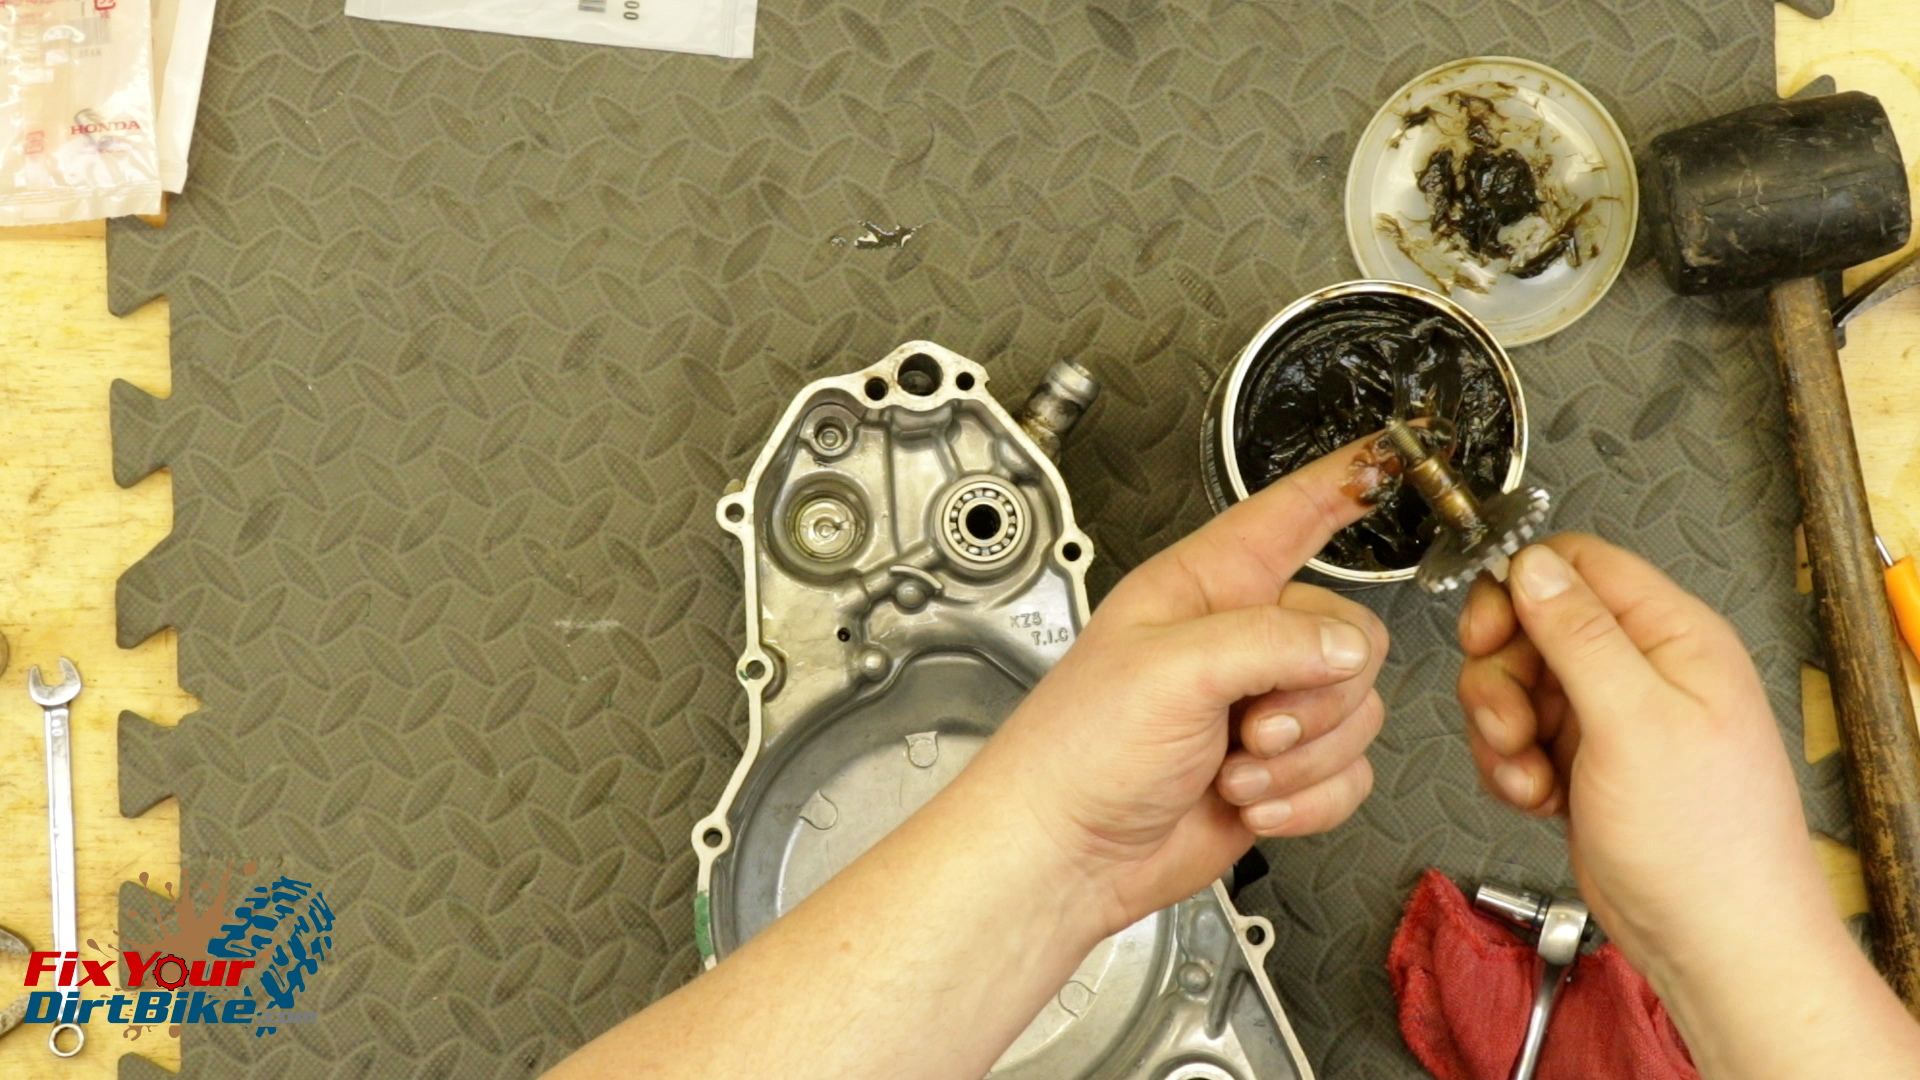
- Apply grease to the impeller shaft and carefully install it into the case in a twisting motion.
- Install a NEW copper washer, followed by your impeller.
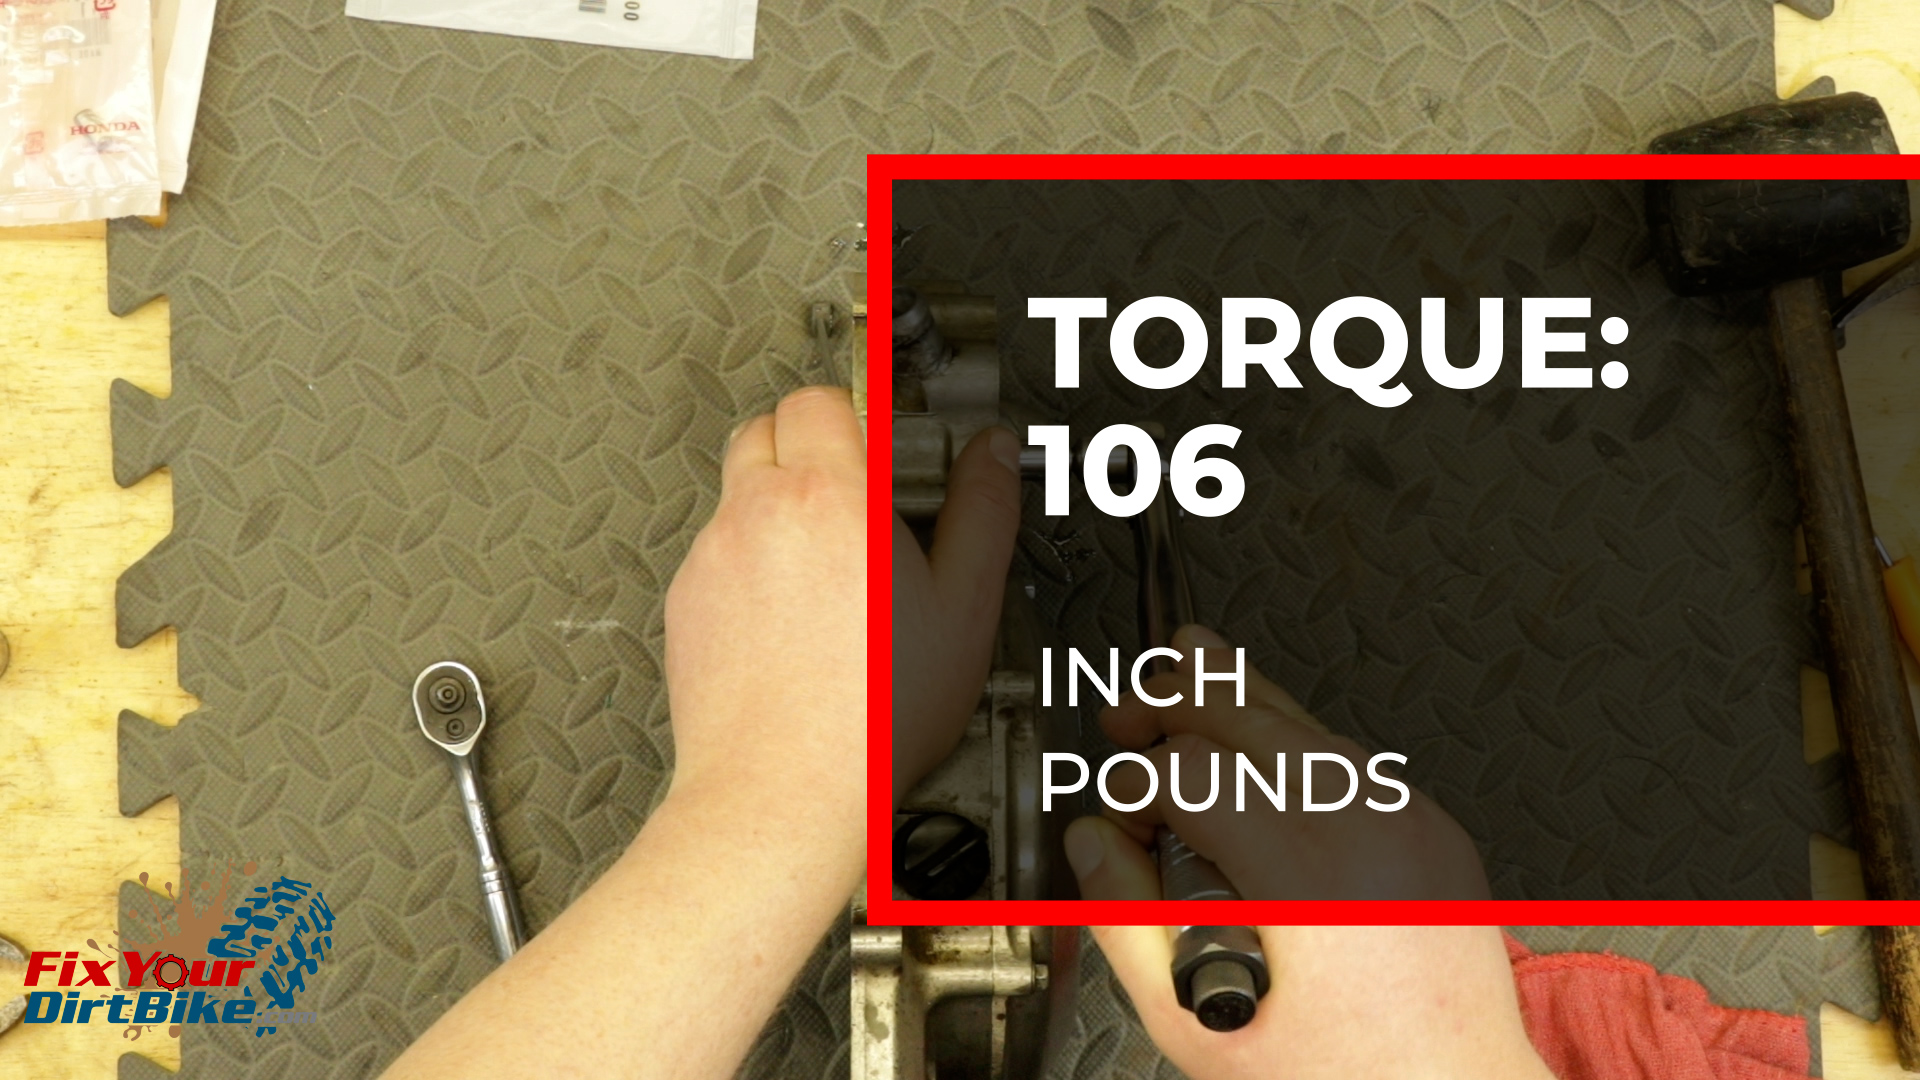
- Hold the impeller shaft with a box wrench and torque to 106-inch pounds.

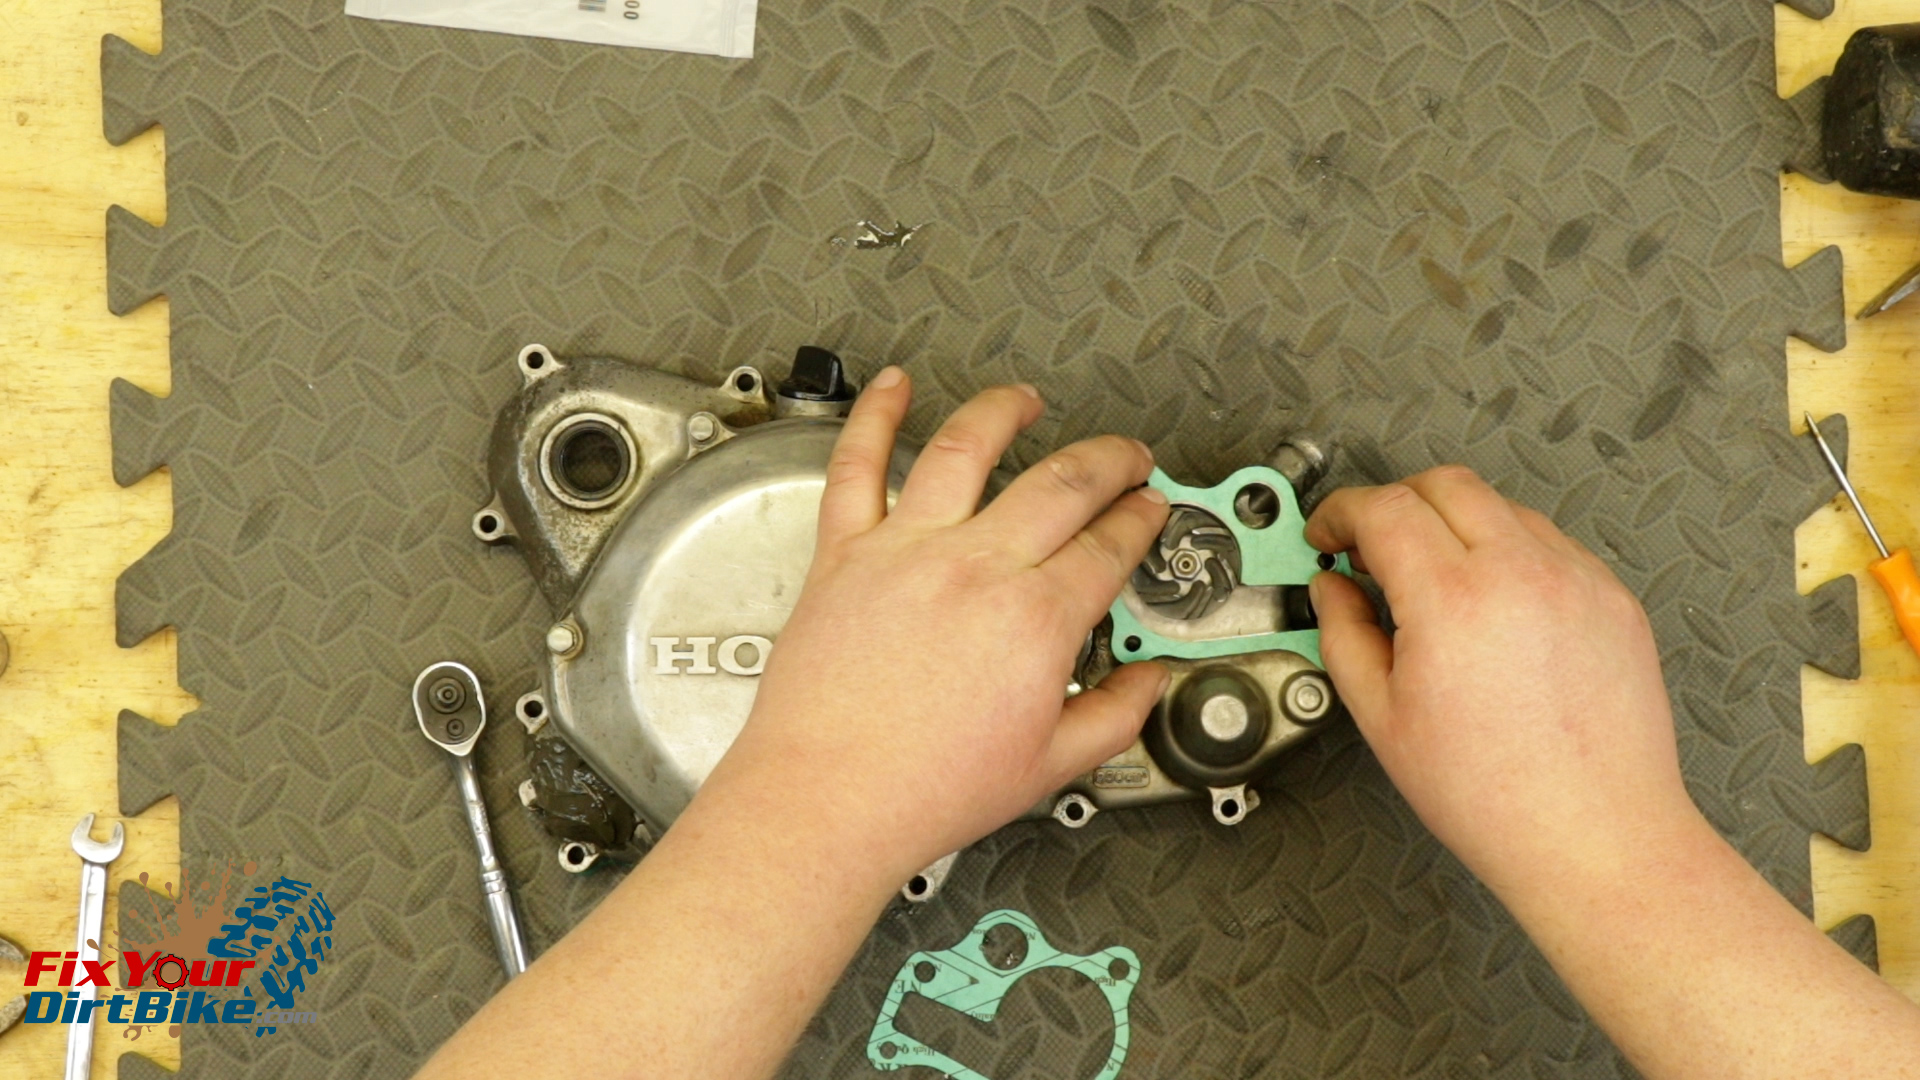
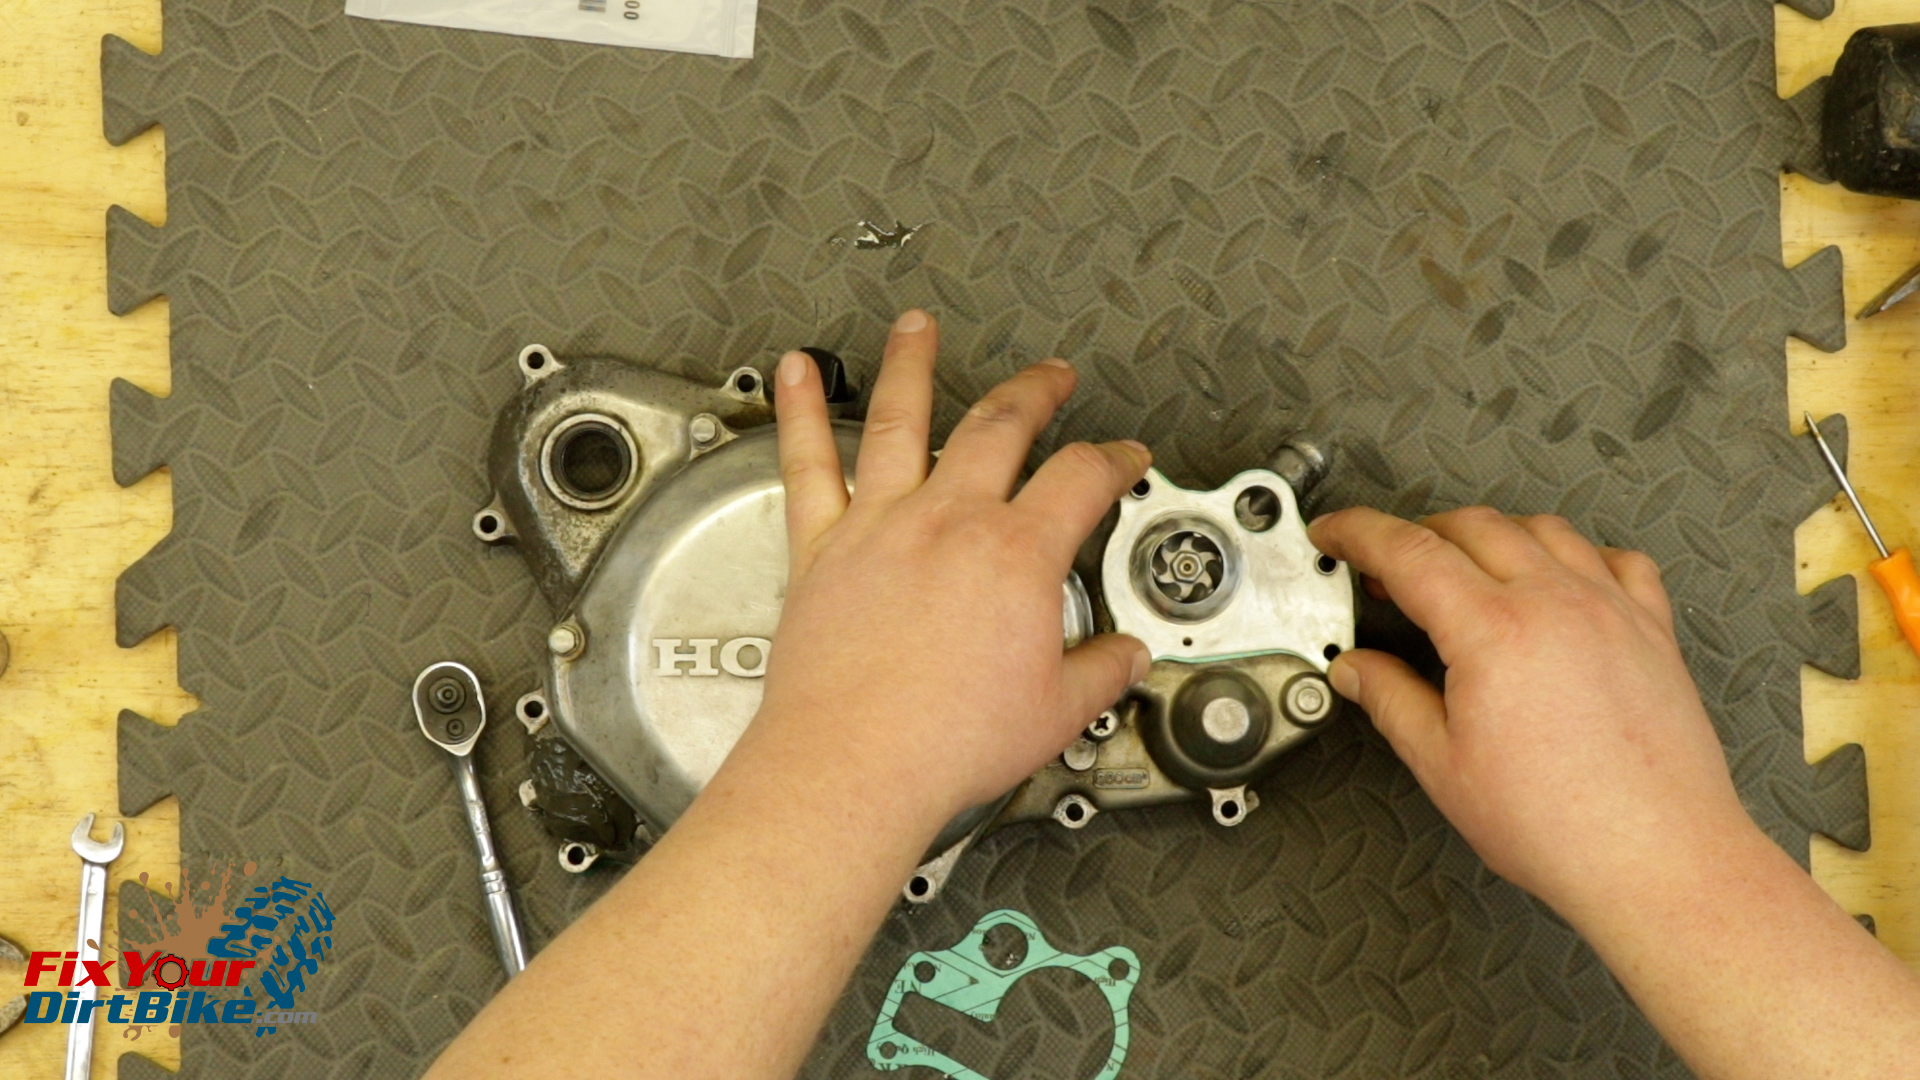
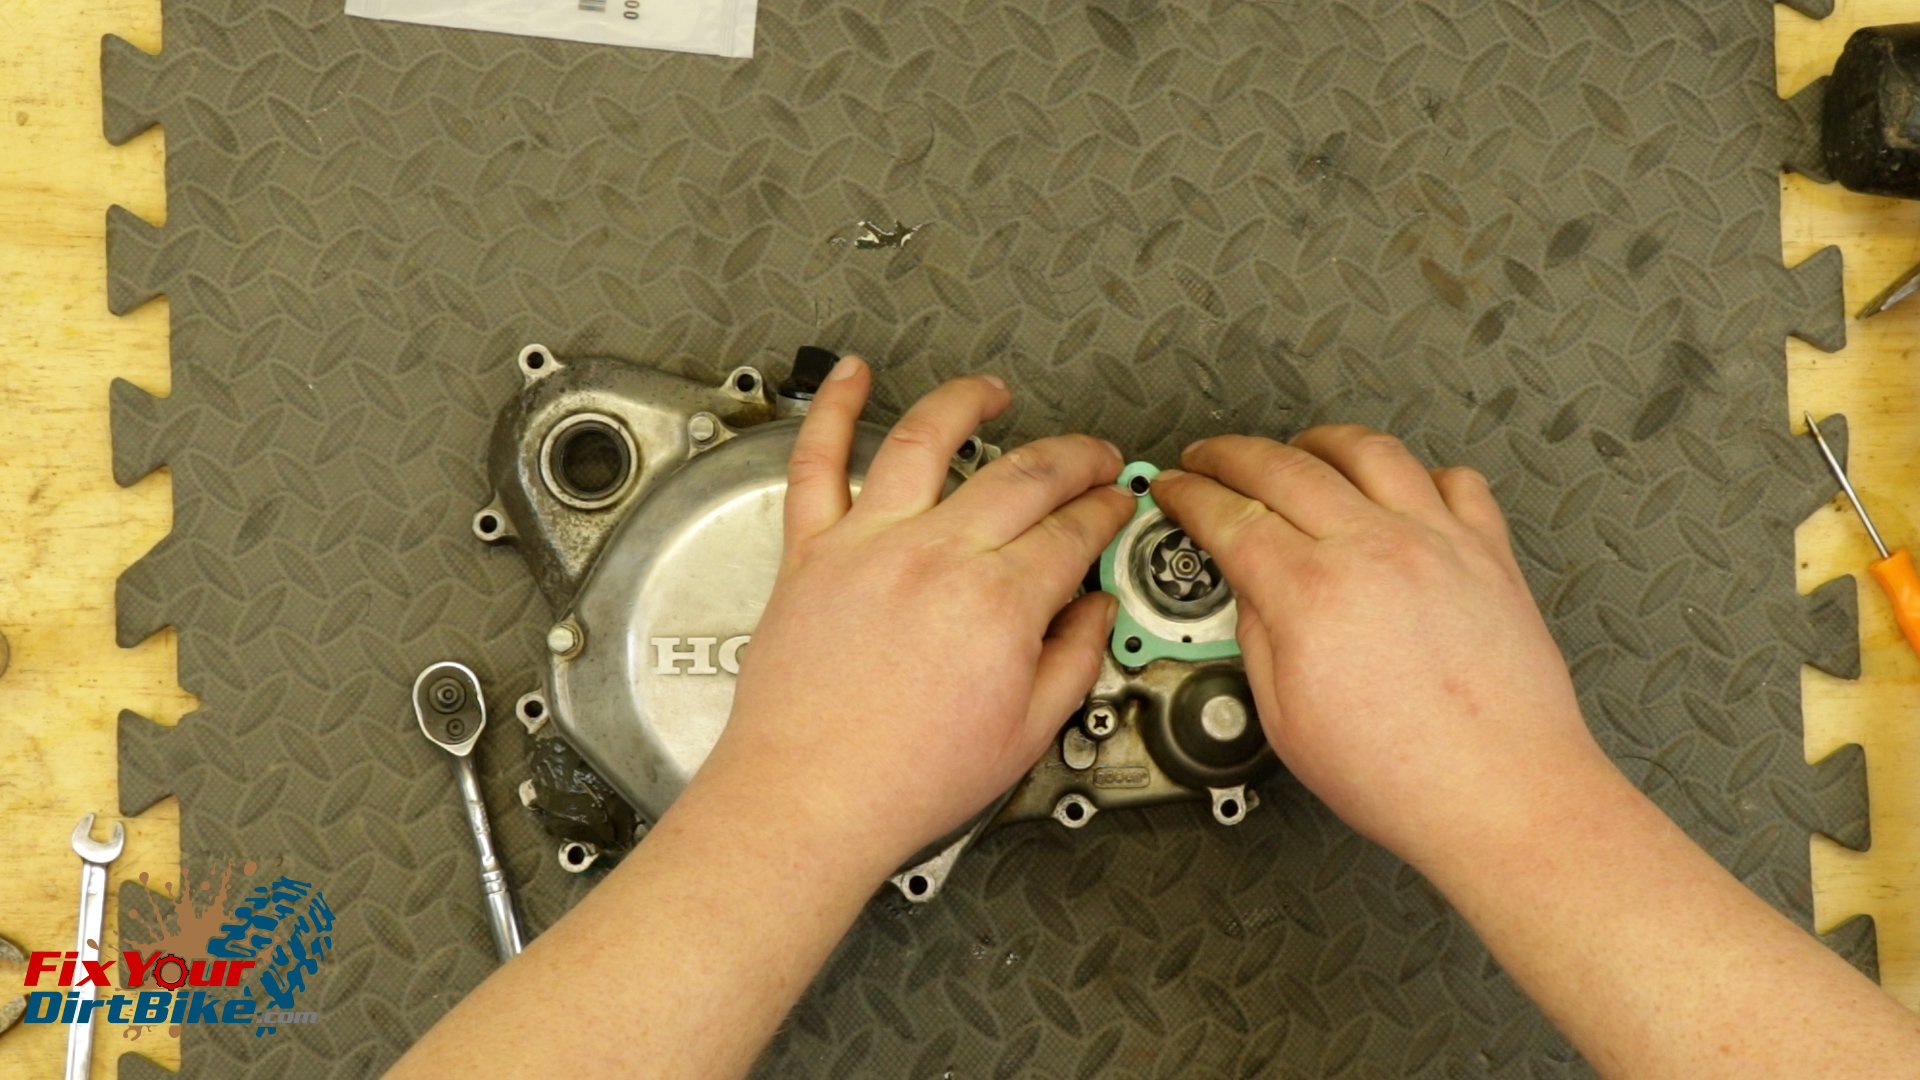
Water Pump Installation
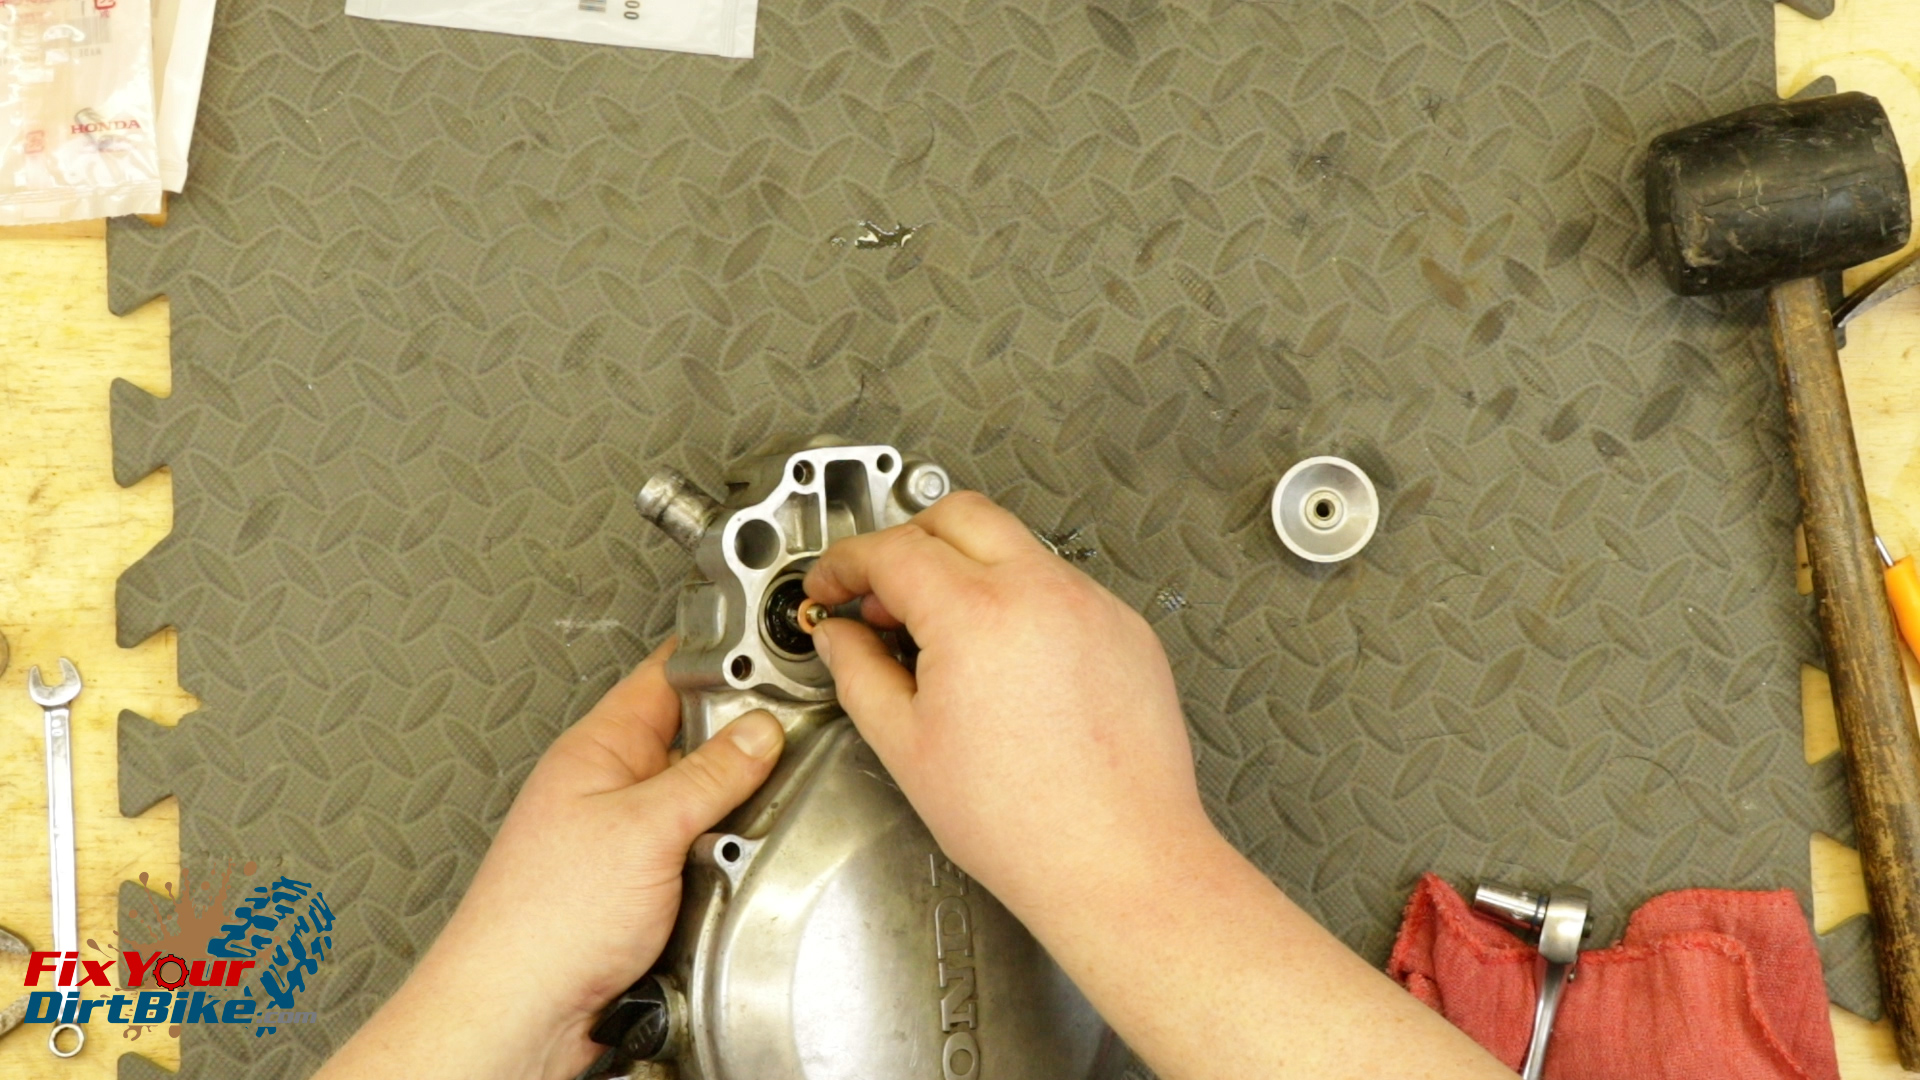
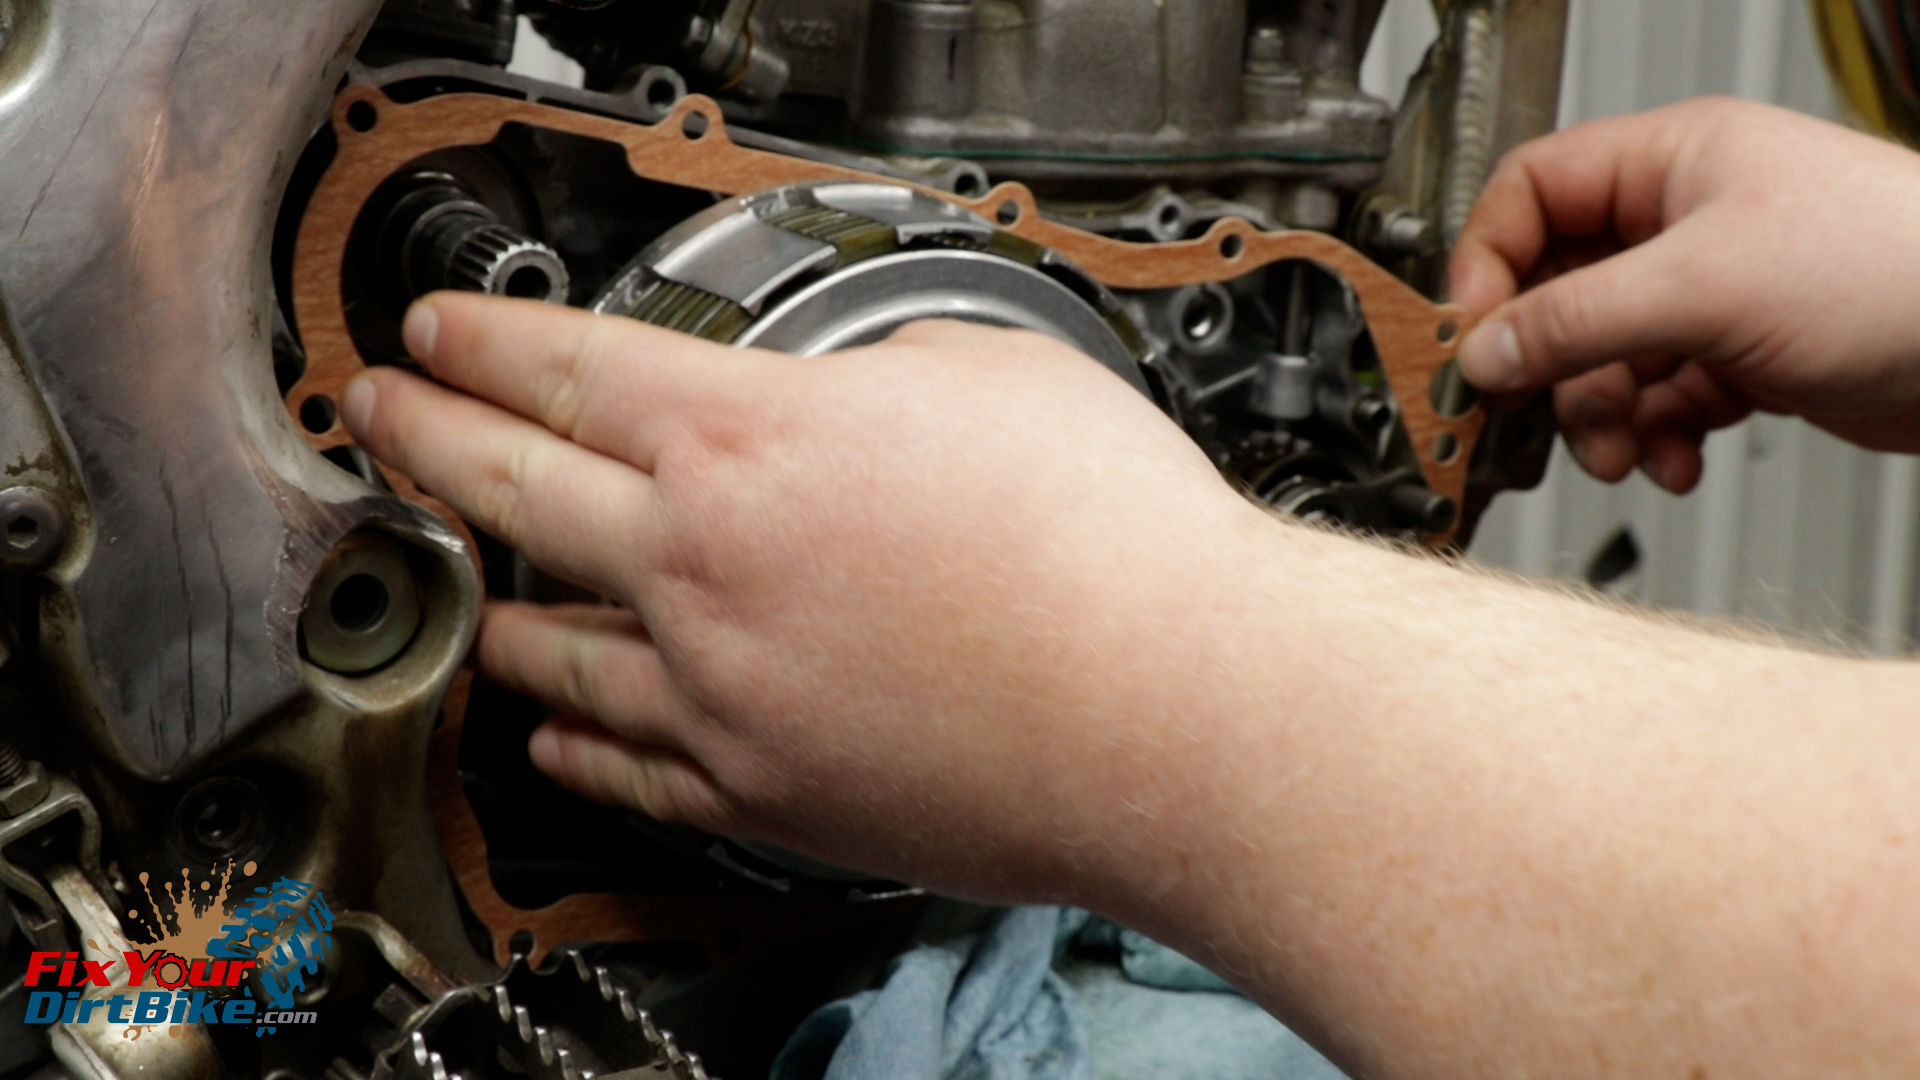
- Place your new dowels in the case.
- Place your inner gasket, the flow plate, and the outer gasket.
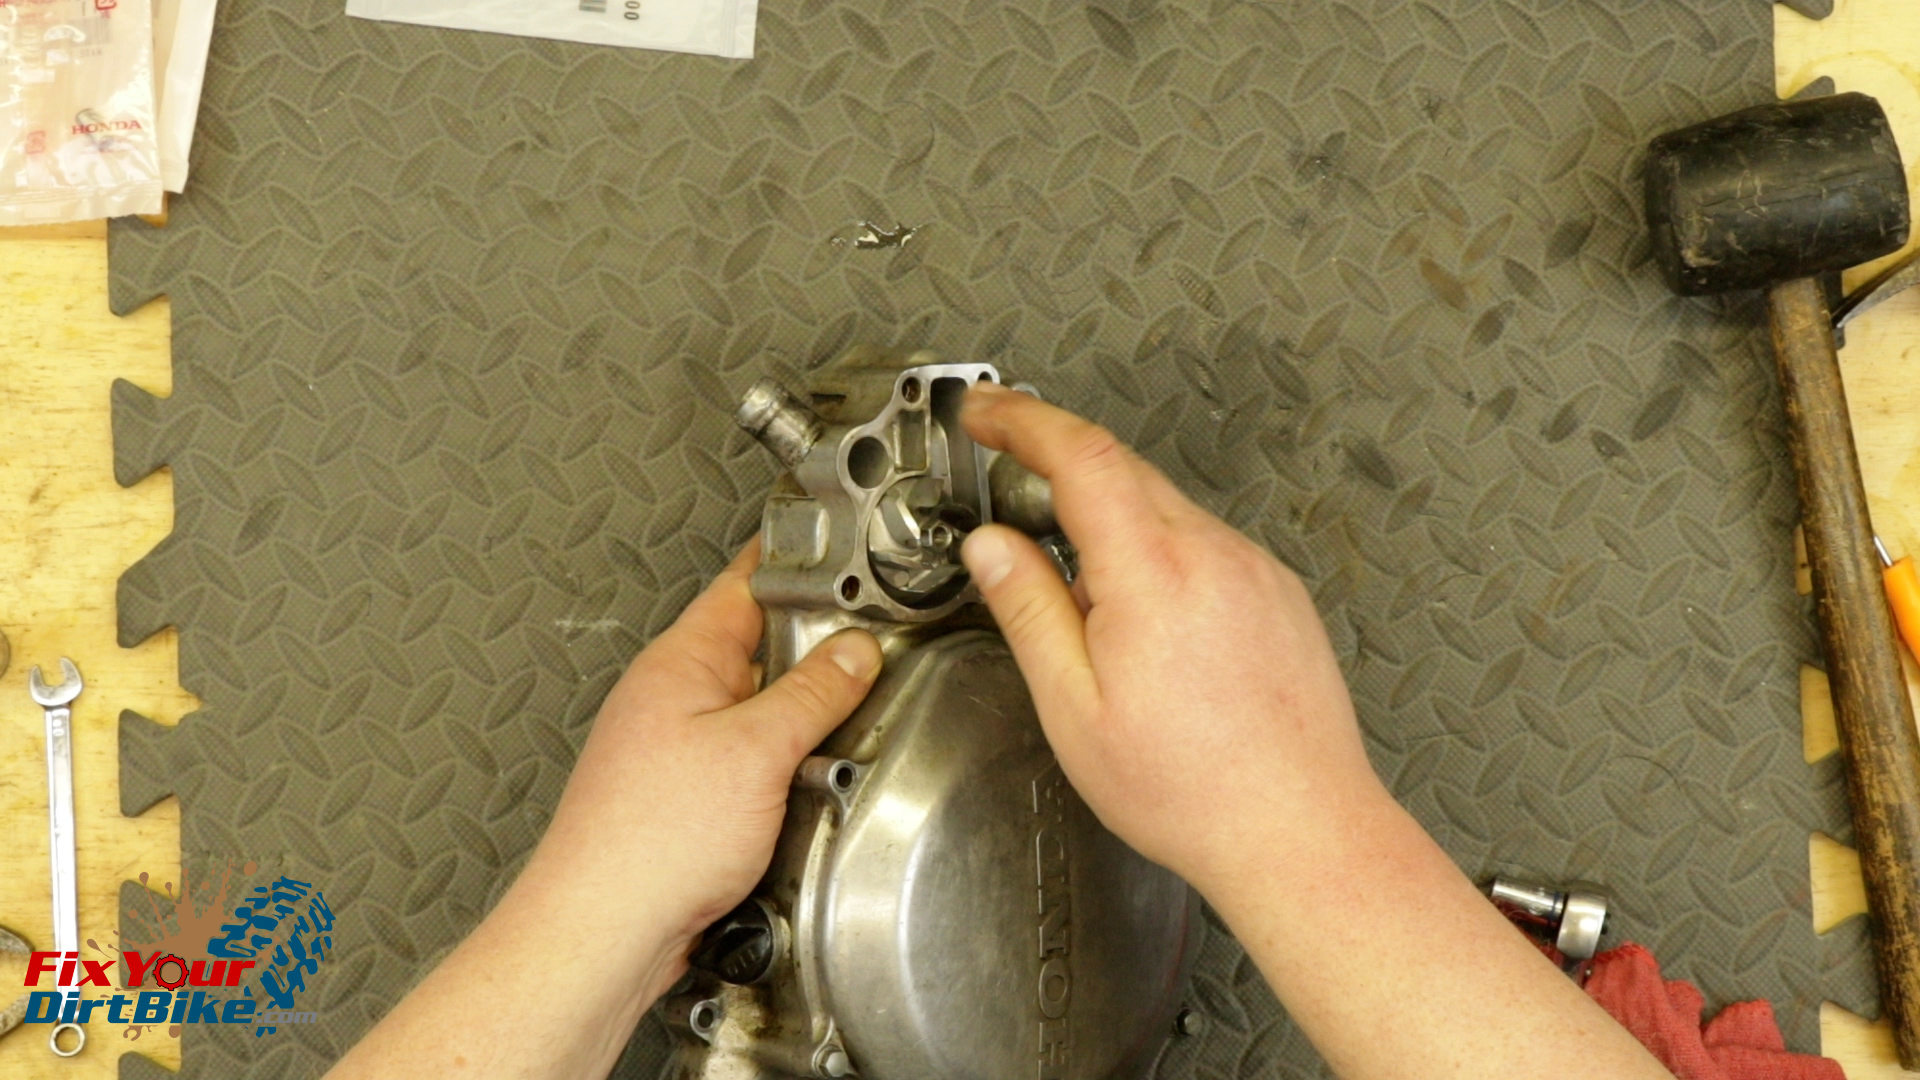
- Place your water pump cover and press it firmly into place.
- Install the case side impeller shaft washer and ensure the exhaust valve governor washer is still in place.
- Install a fresh gasket on your crankcase and install the right crankcase cover.
- Place the bolts that you kept organized and tighten them hand tight.
- The right crankcase bolts do not have a torque specification, but the water pump cover does at 106-inch pounds.
- However, I DO NOT recommend torquing these bolts to 106-inch pounds, as I have had several bolts break.
- I recommend tightening the right crankcase cover bolts no tighter than what a small 1/4in ratchet will achieve.
If you need help with your 1997-2001 Honda CR250 water pump service, please let me know in the comments or on social media!
Keep Your ’97-’01 CR250 Running Right!
- Service Specification
- Clutch Replacement
- Carburetor Service
- Engine Top End
- Engine Bottom End
- Brakes
- Exhaust
- Front Suspension
- Rear Suspension
- Wheels & Tires
- Kickstarter Inspection
- External Shift Linkage


