
How To Service The Transmission On Your 97-01 Honda CR250
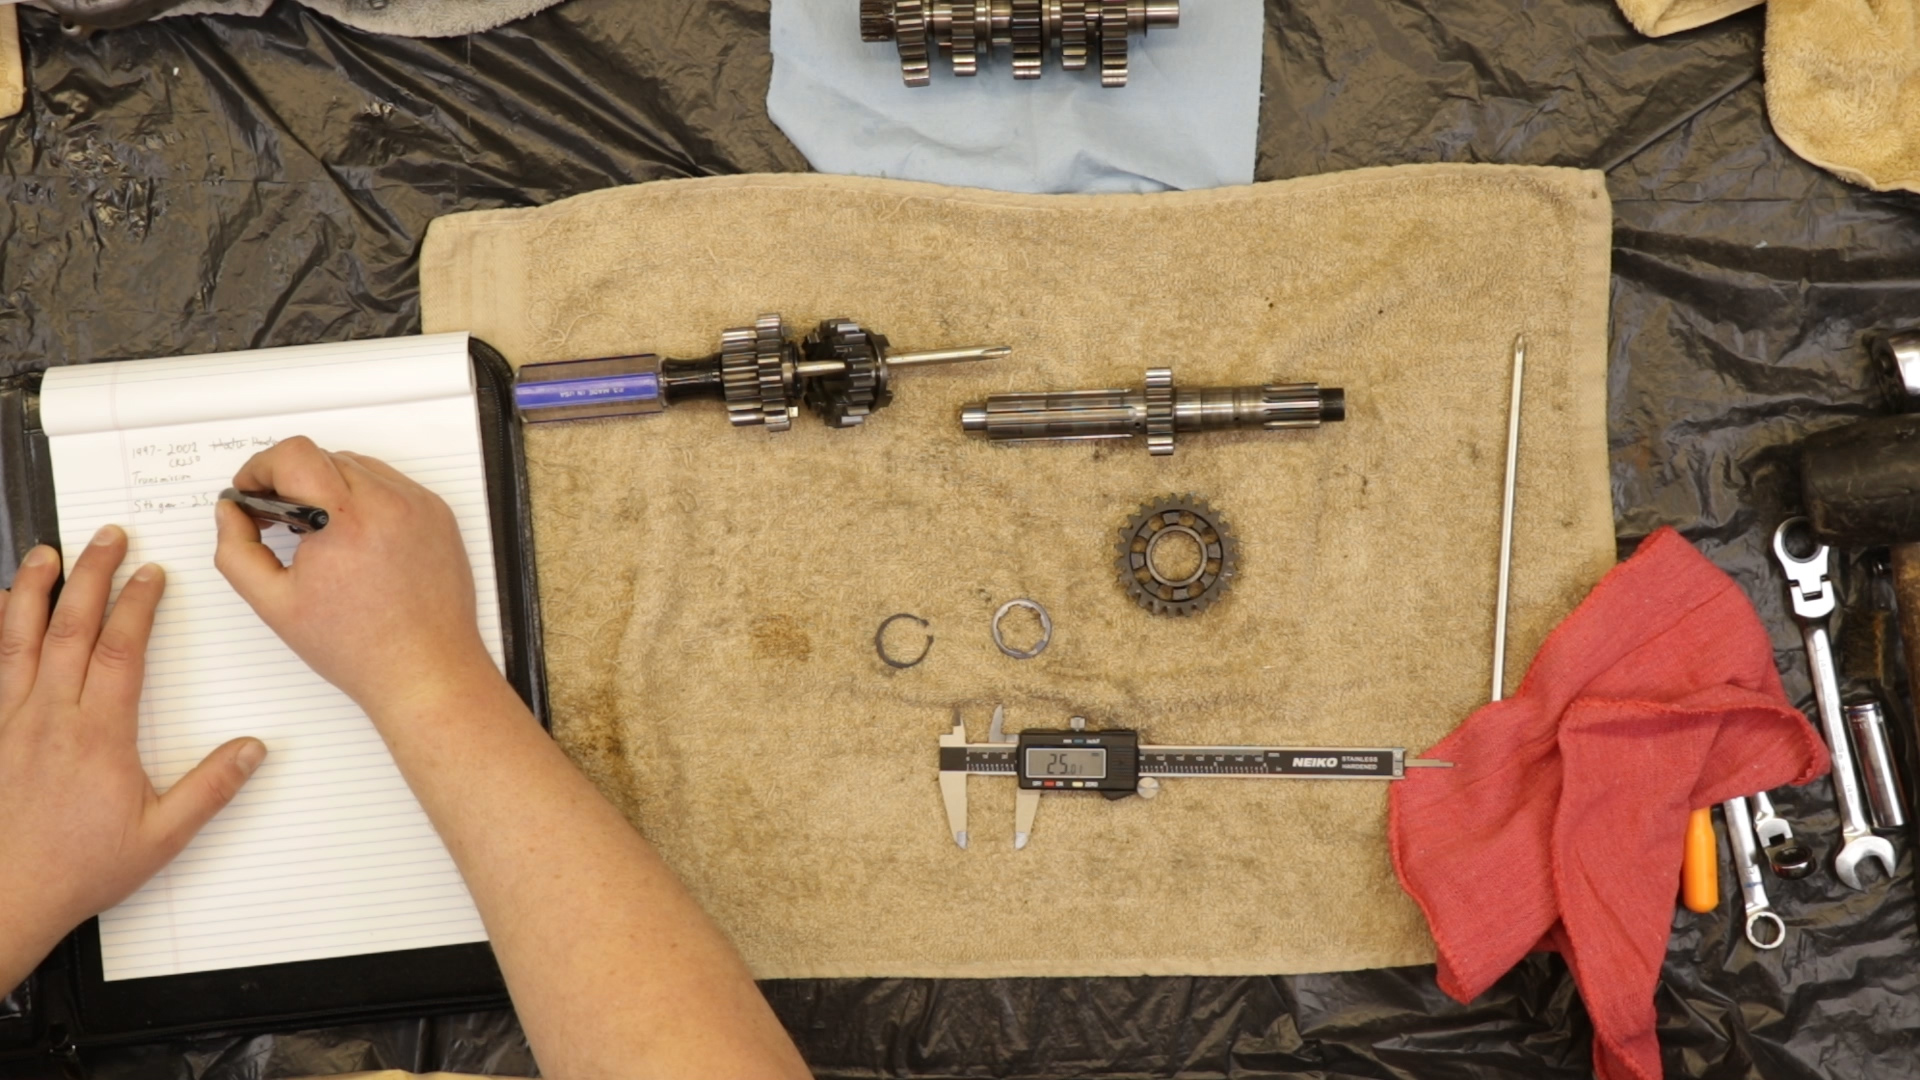
Inspecting your transmission is not hard, but it requires cleanliness, organization, notes, and math.
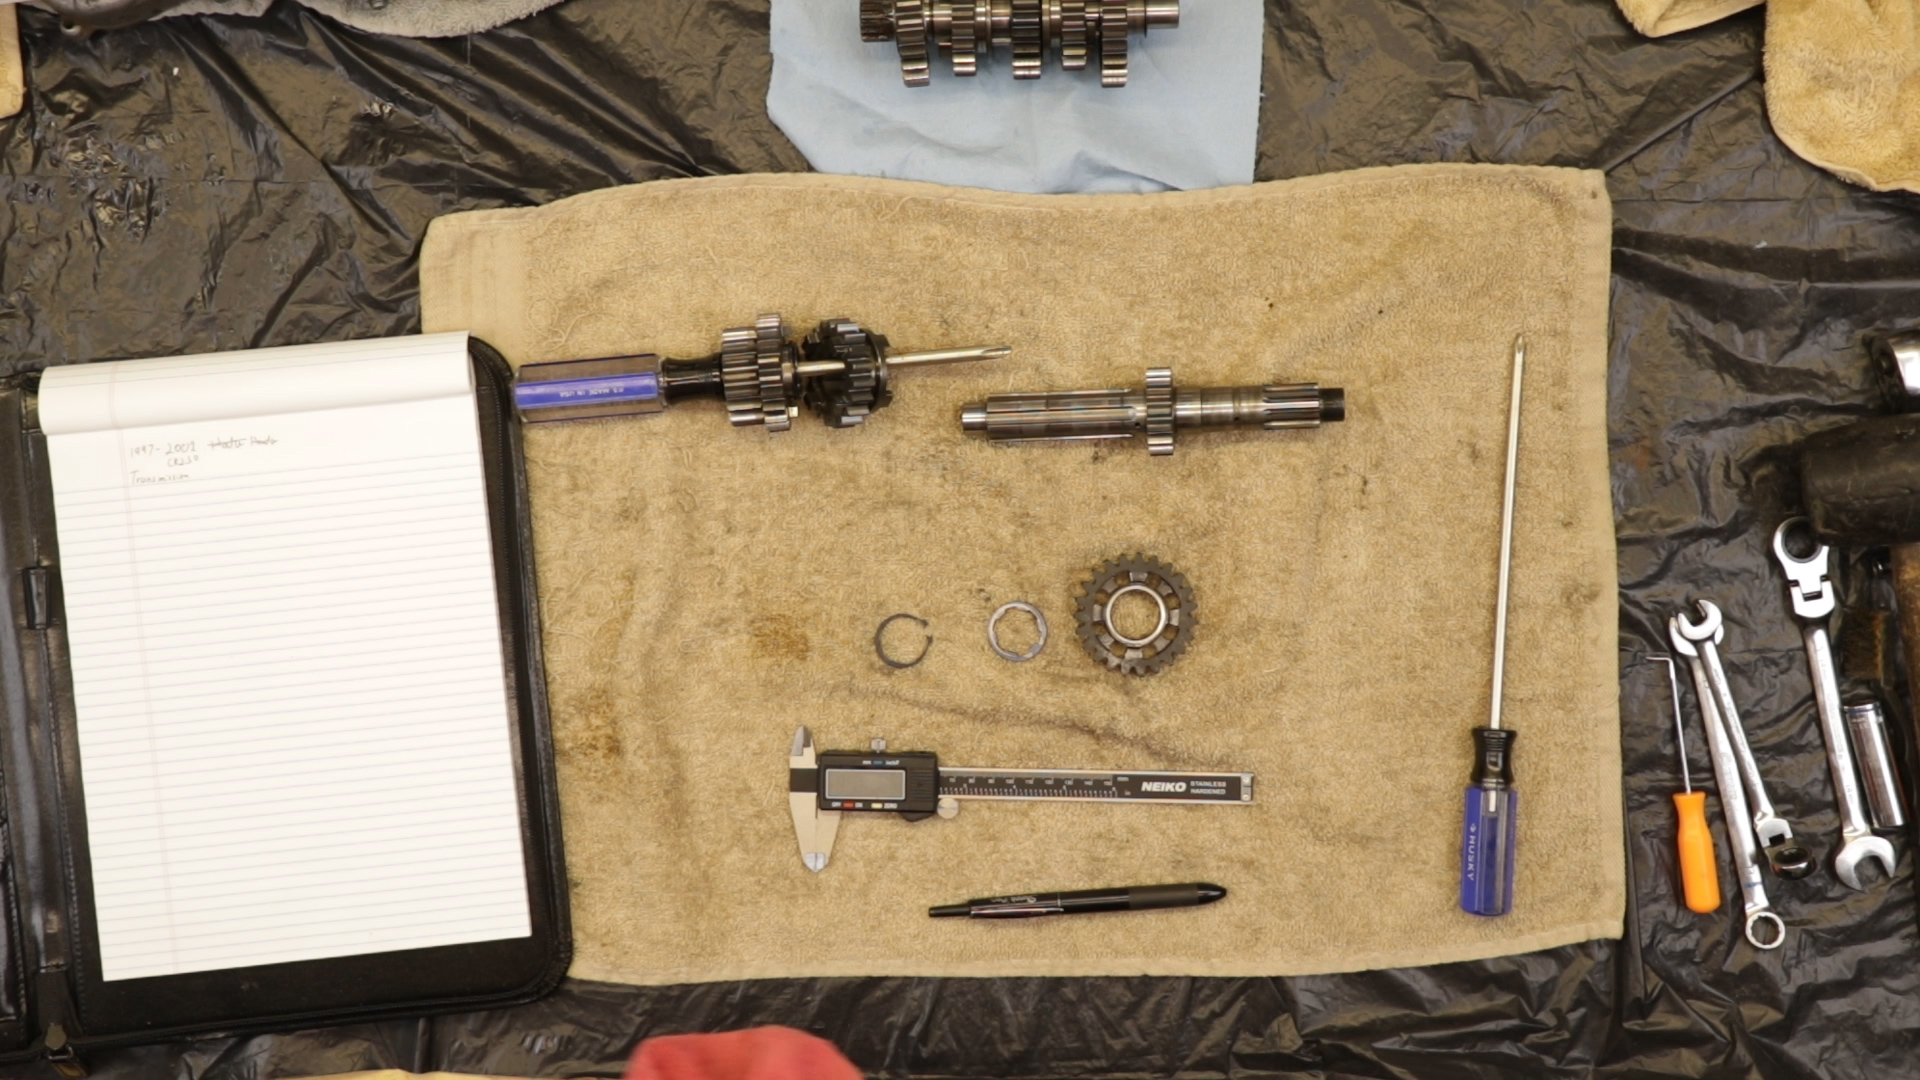
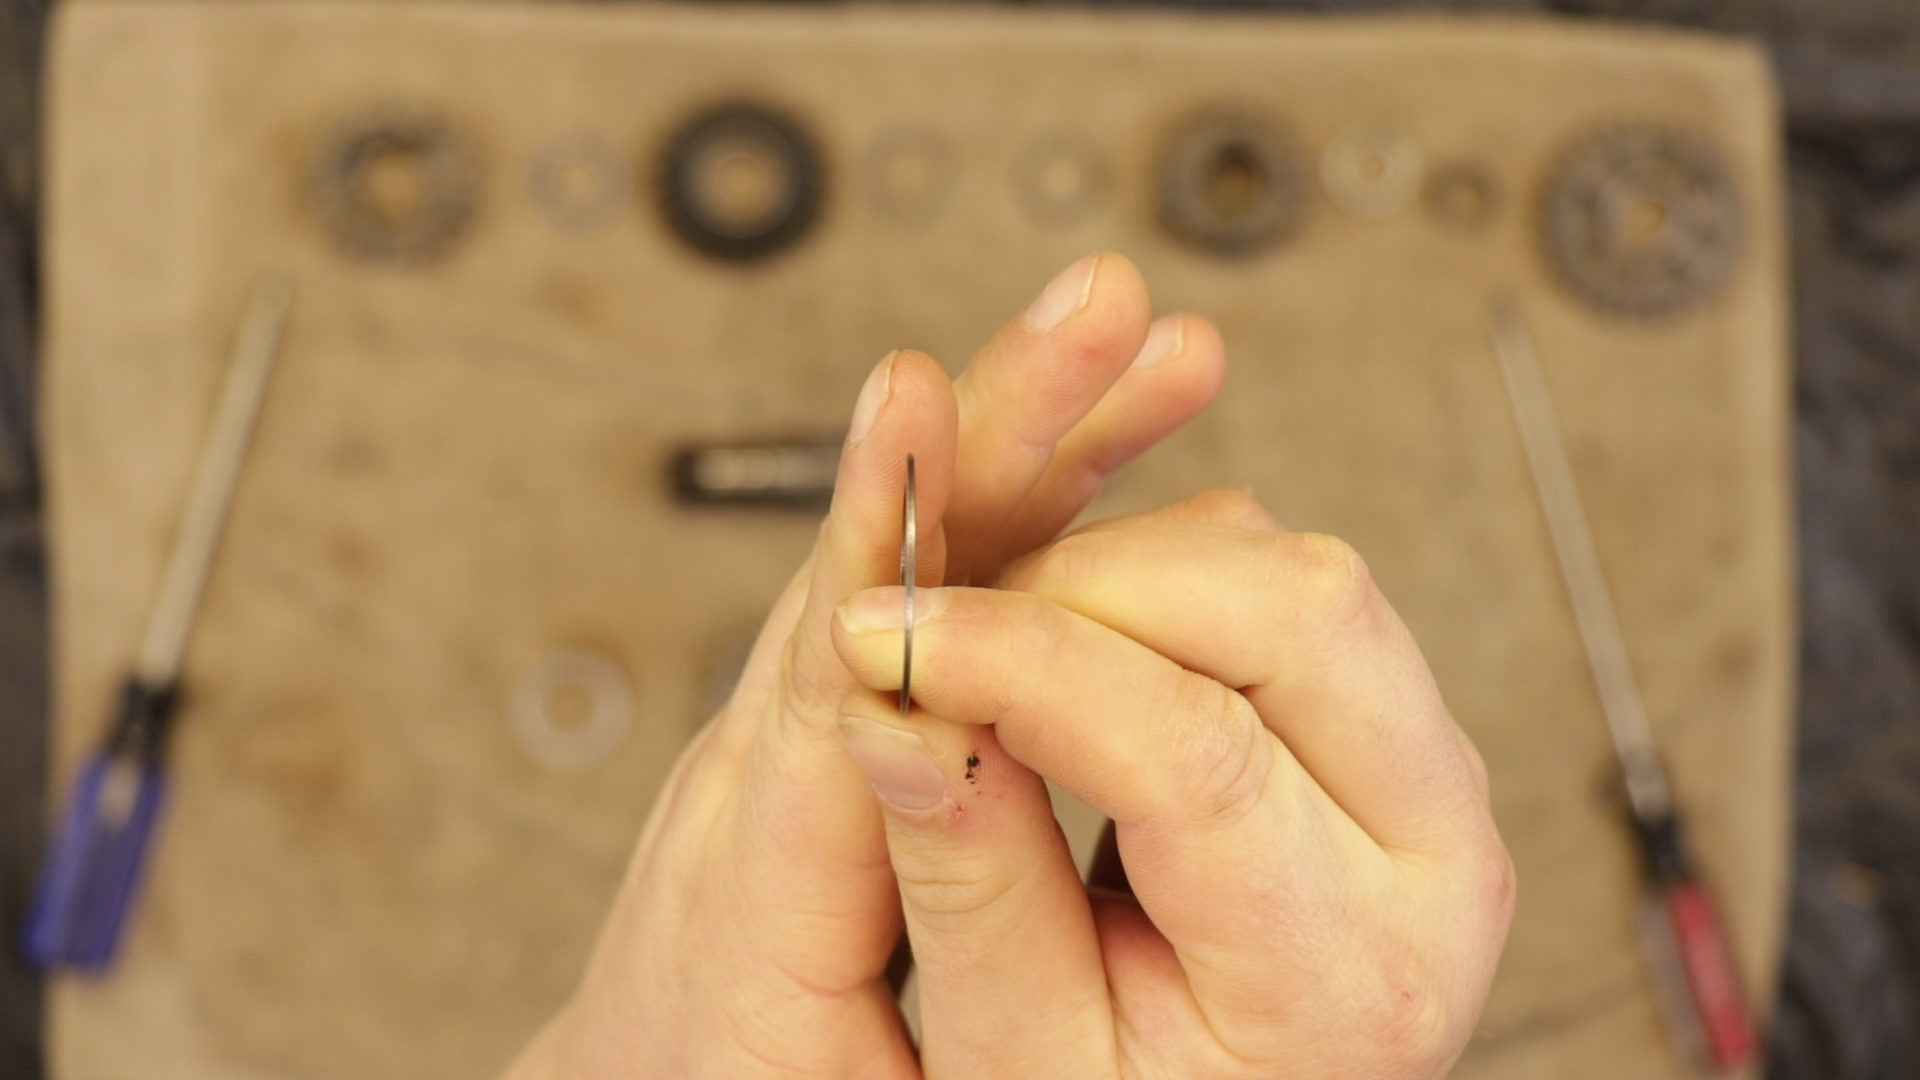
No matter what you find during your inspection, you WILL need three new snap rings, as the old ones will deform when you remove them.
As you go, measure the inside diameter of the gears, and the inside and outside diameters of the bushings.
Inspect every part for visible wear, such as broken teeth, cracking, gouging, and pitting. If anything looks damaged, you will need to replace it.
The Tools You Will Need
- 4 Long Screwdrivers
- Snap Ring Pliers → https://amzn.to/3DKBrns
- Calipers → https://amzn.to/3BRoCXX
- Parts Cleaner
- Towels
- Safety Glasses → https://bulltru.com
- Notepad & Pen
Let’s start with the Mainshaft.
Pre-Service Notes
- I recommend opening the Bottom End Service Specifications in a new tab for easy reference.
- If you need parts and tools, make sure to buy them here!
- Pictures with captions are after the steps below.
- If you need any help, don’t hesitate to ask!
Related: How to service the kickstarter on your 97-01 Honda CR250.
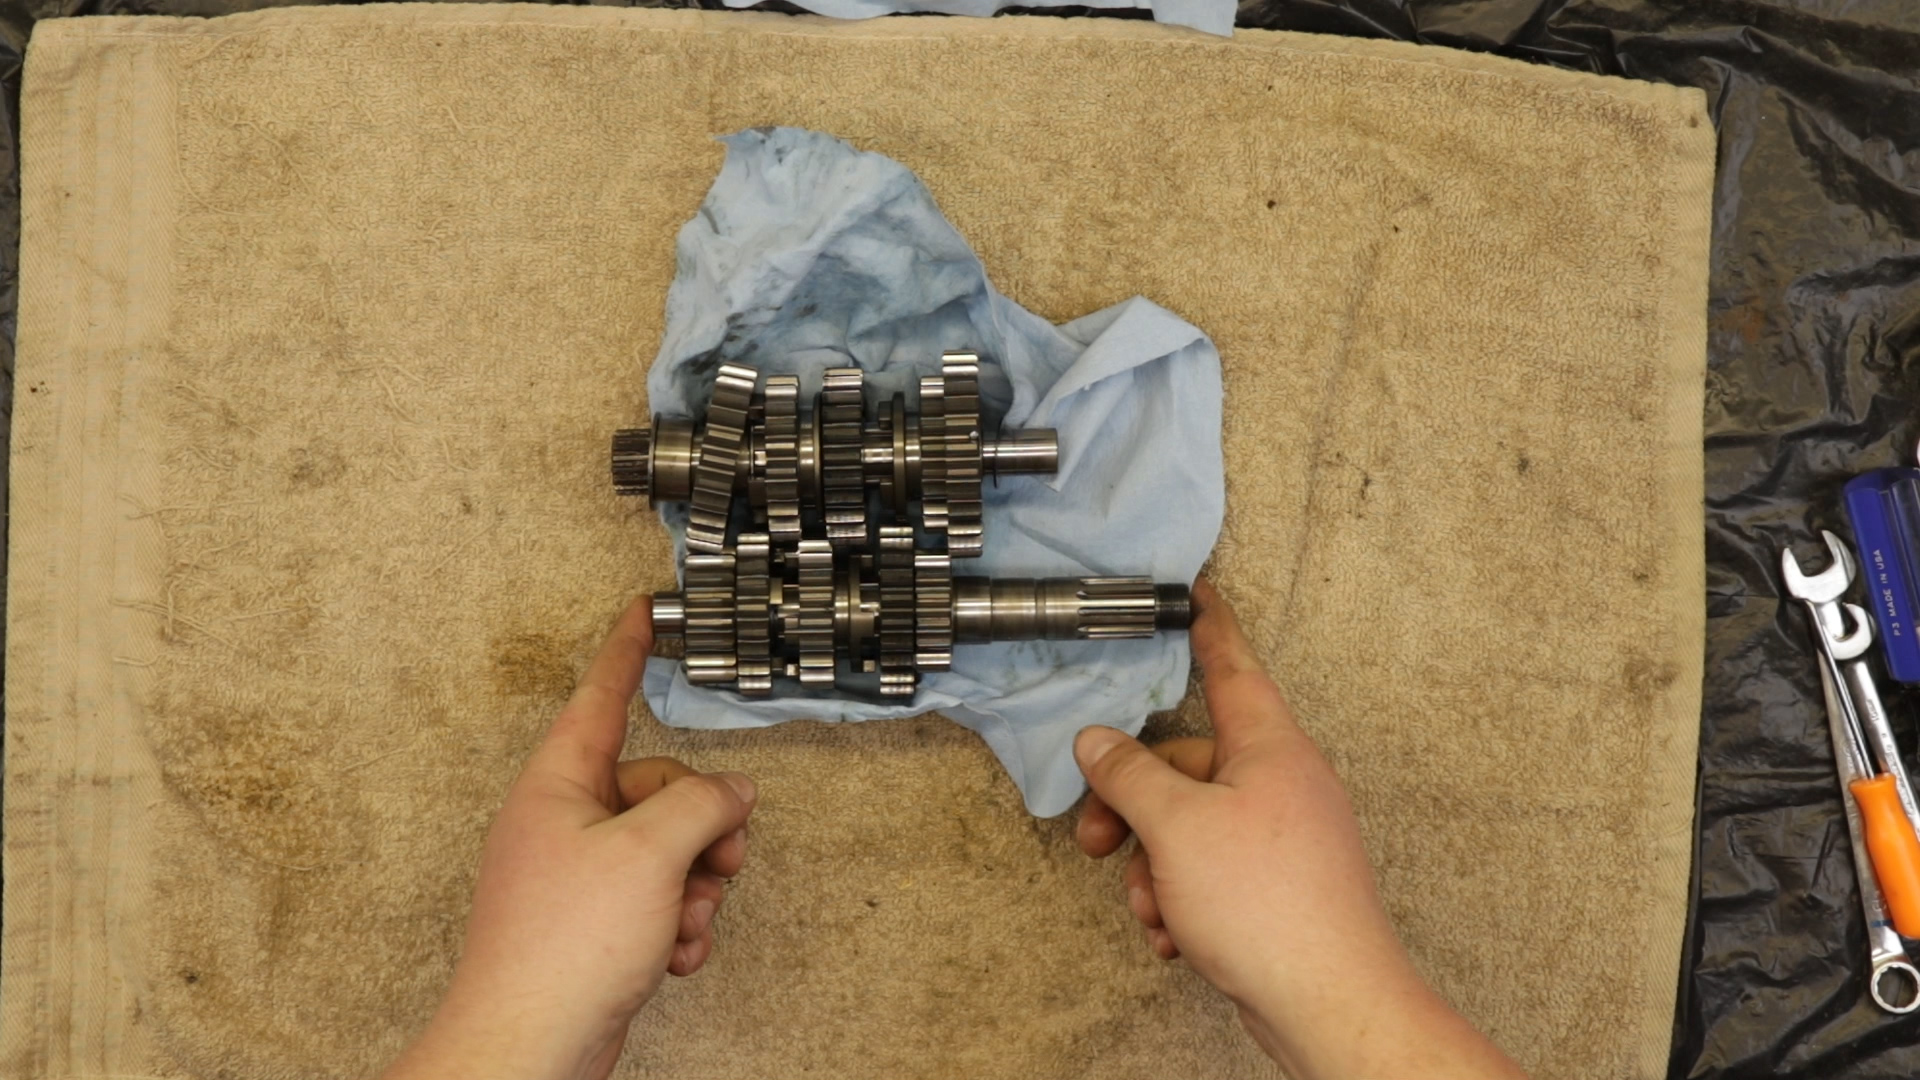
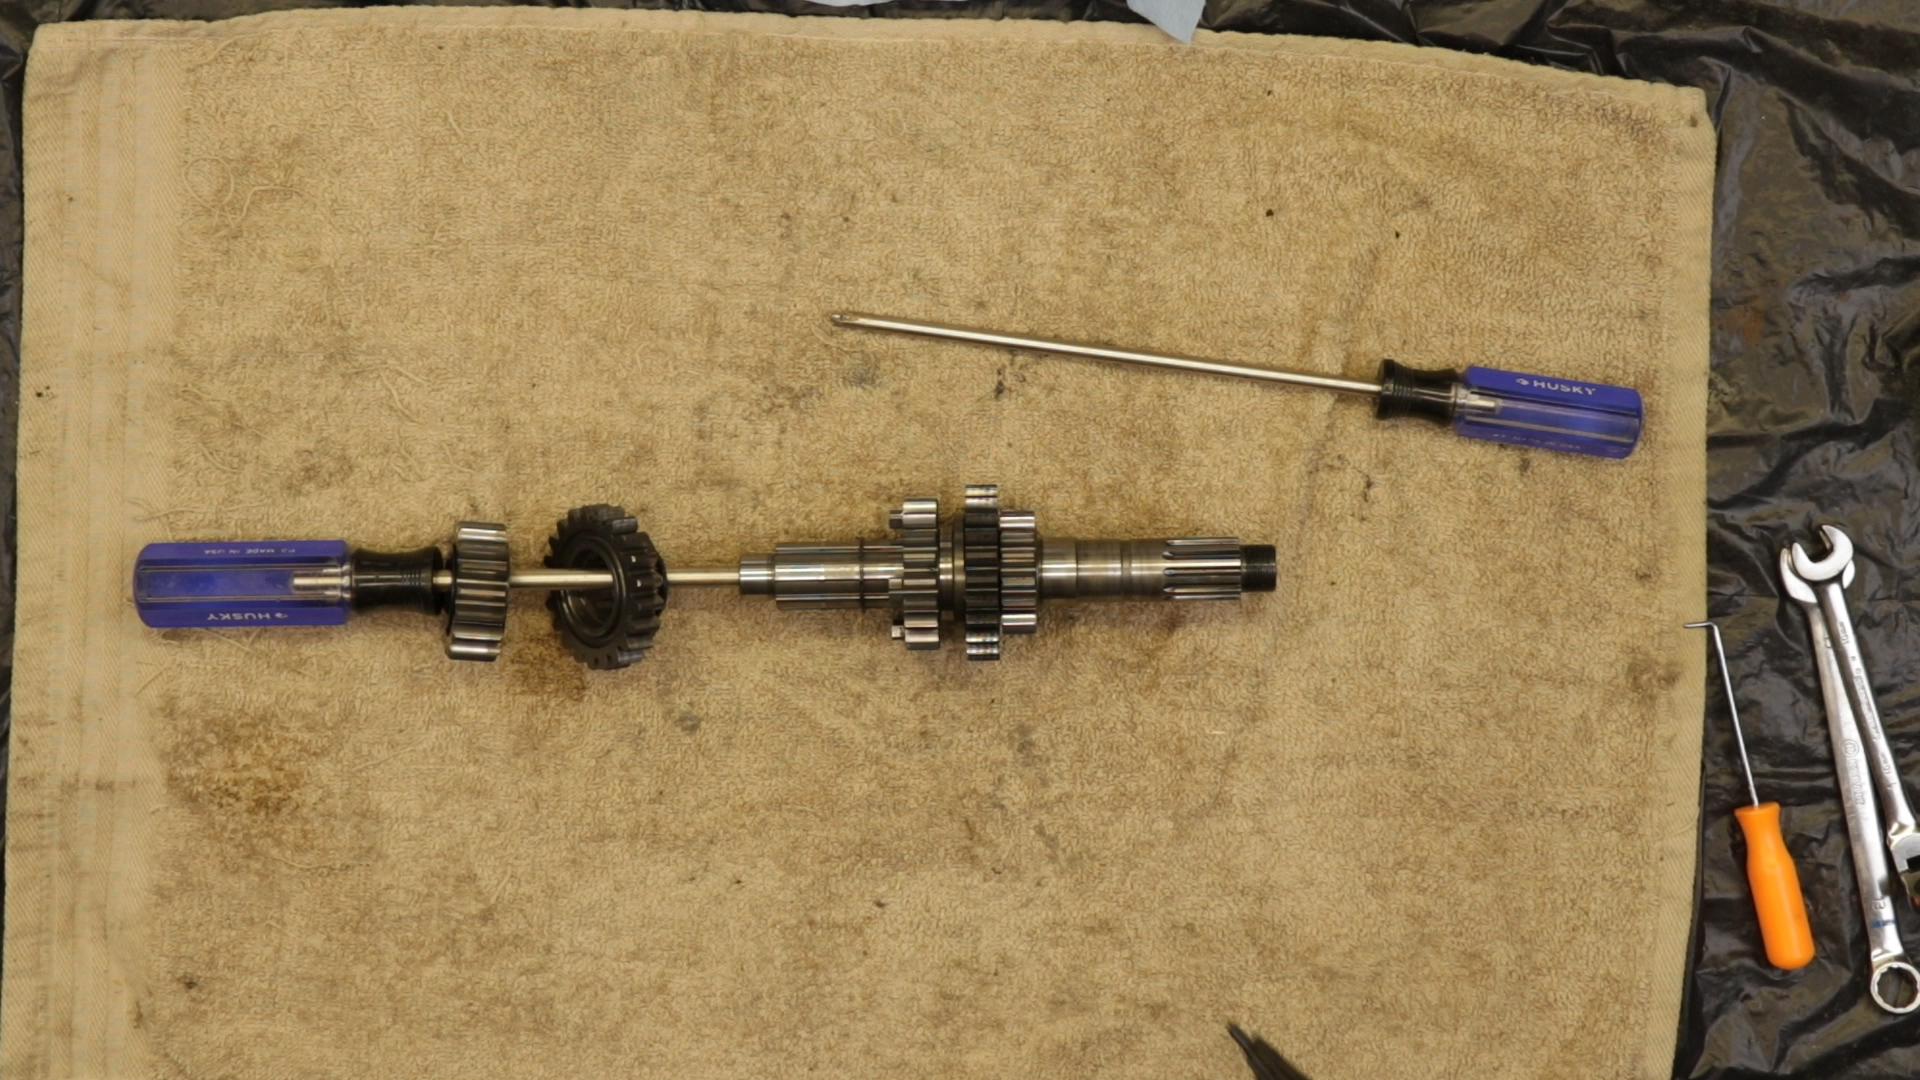
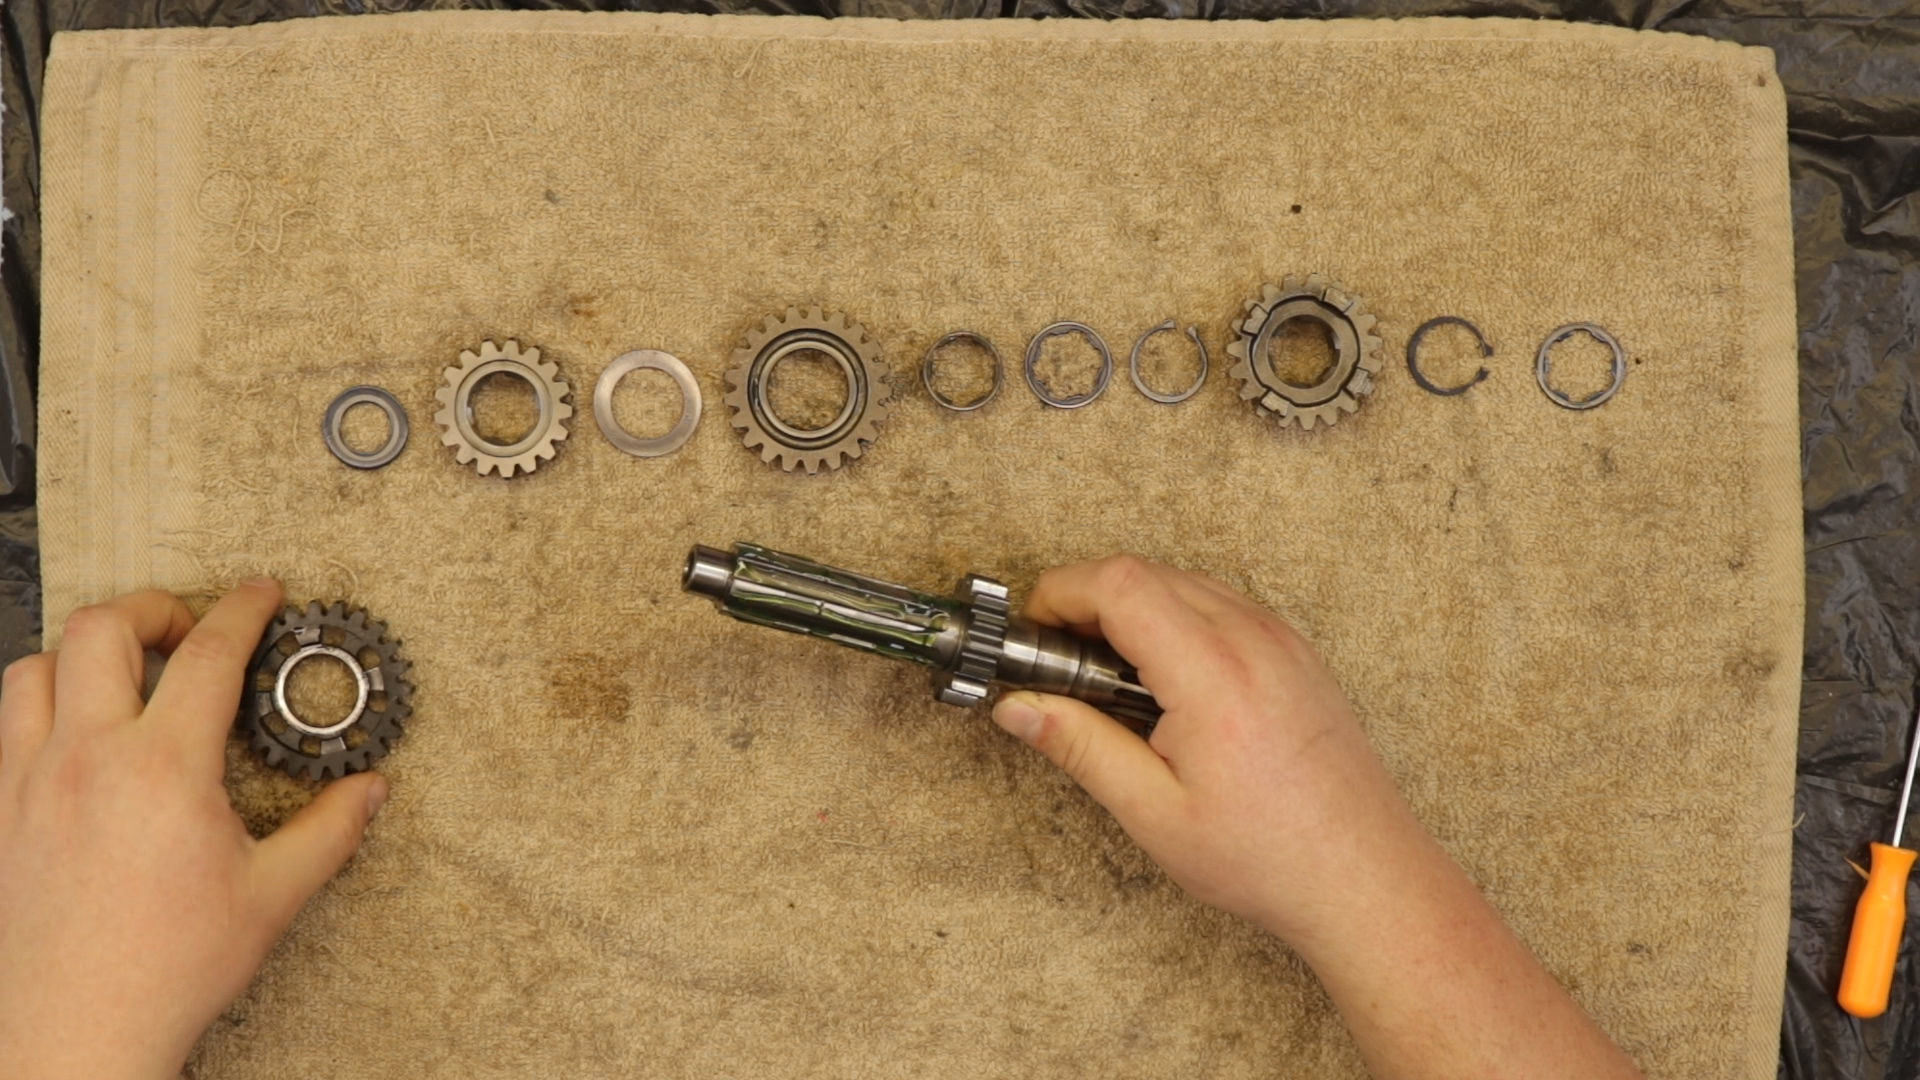
Transmission Mainshaft
- The main shaft is the larger of the two shafts.
- Disassemble the main shaft, transferring every part in order to a long screwdriver.
- Inspect and measure each gear, washer, and bushing.
- Measure the main shaft diameter at the fifth gear and inspect the splines, gears, and snap ring grooves.
- Record each measurement as you go.
Mainshaft Gear Stack Orientation
- Washer
- Second gear
- Washer
- Fourth gear and bushing
- Spline washer
- Snap ring
- Third gear
- Snap ring
- Spline washer
- Fifth gear
- And first gear is the countershaft
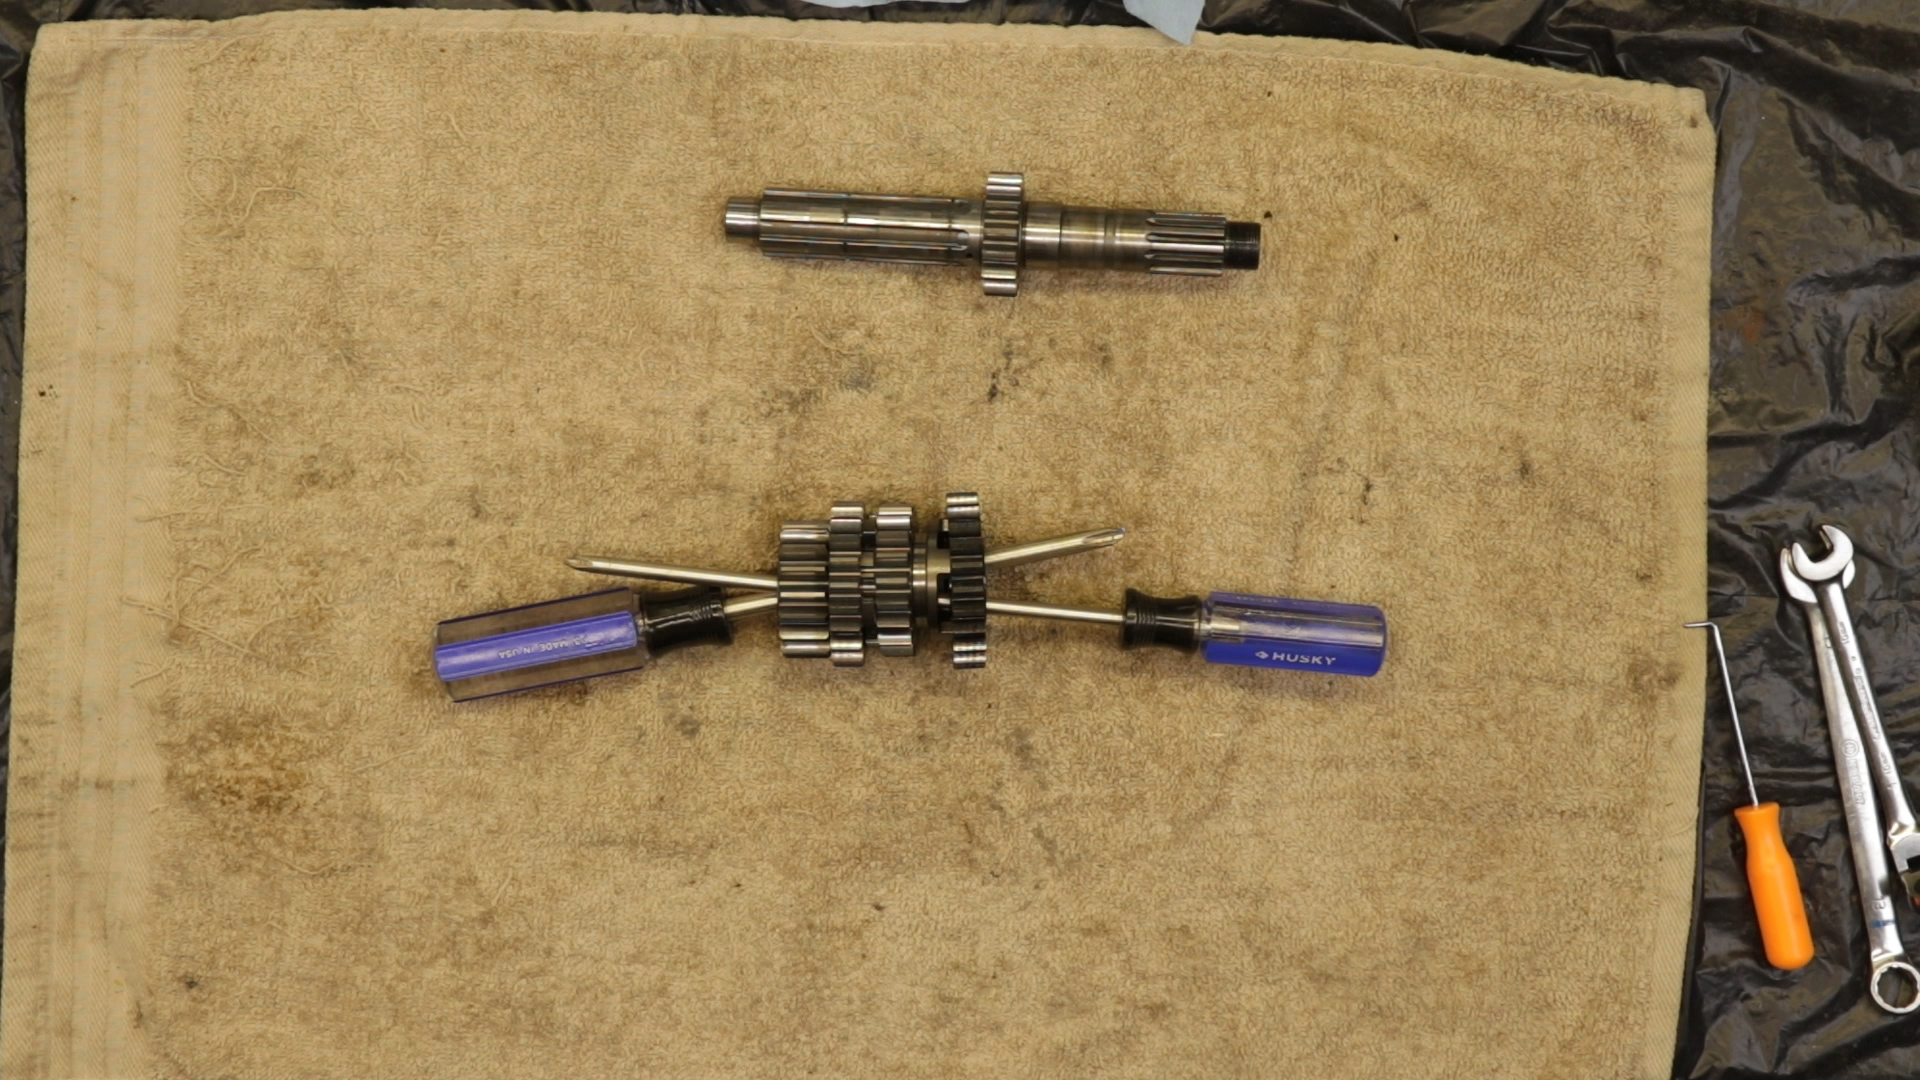
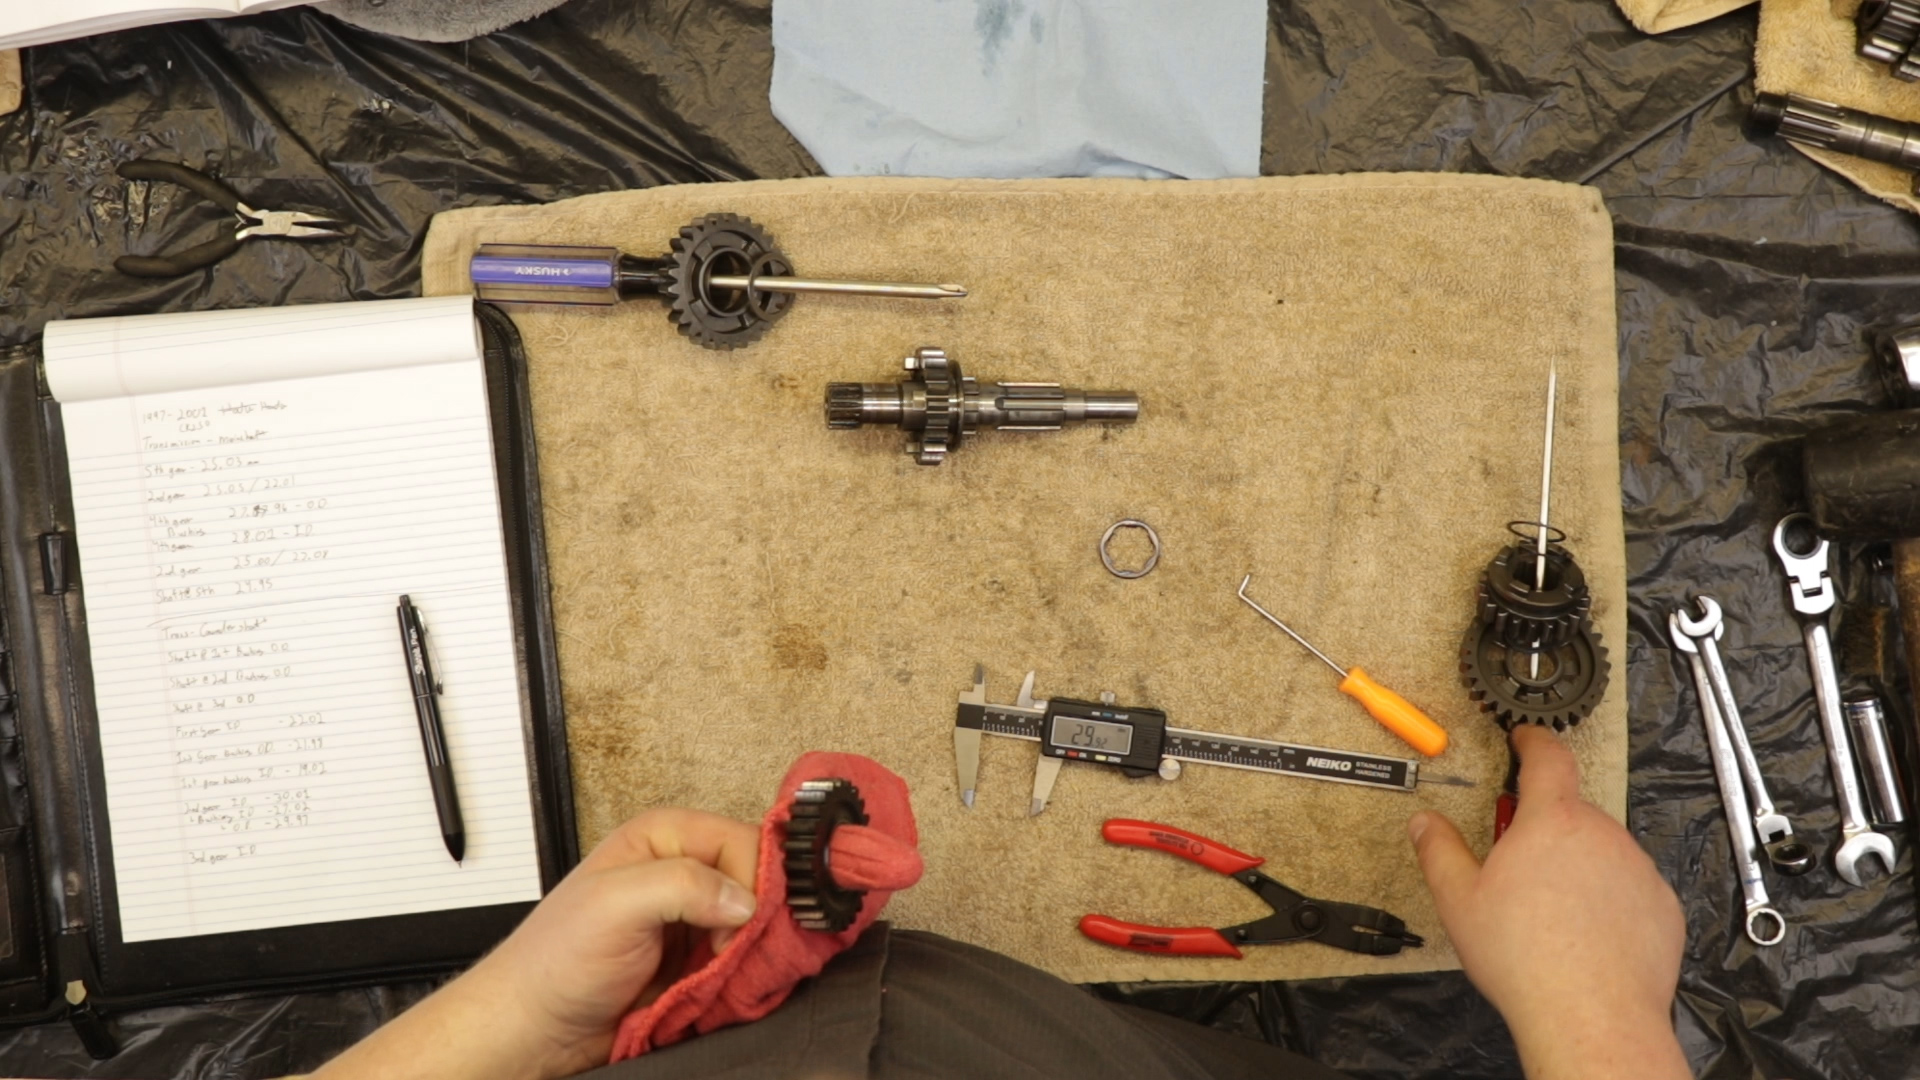
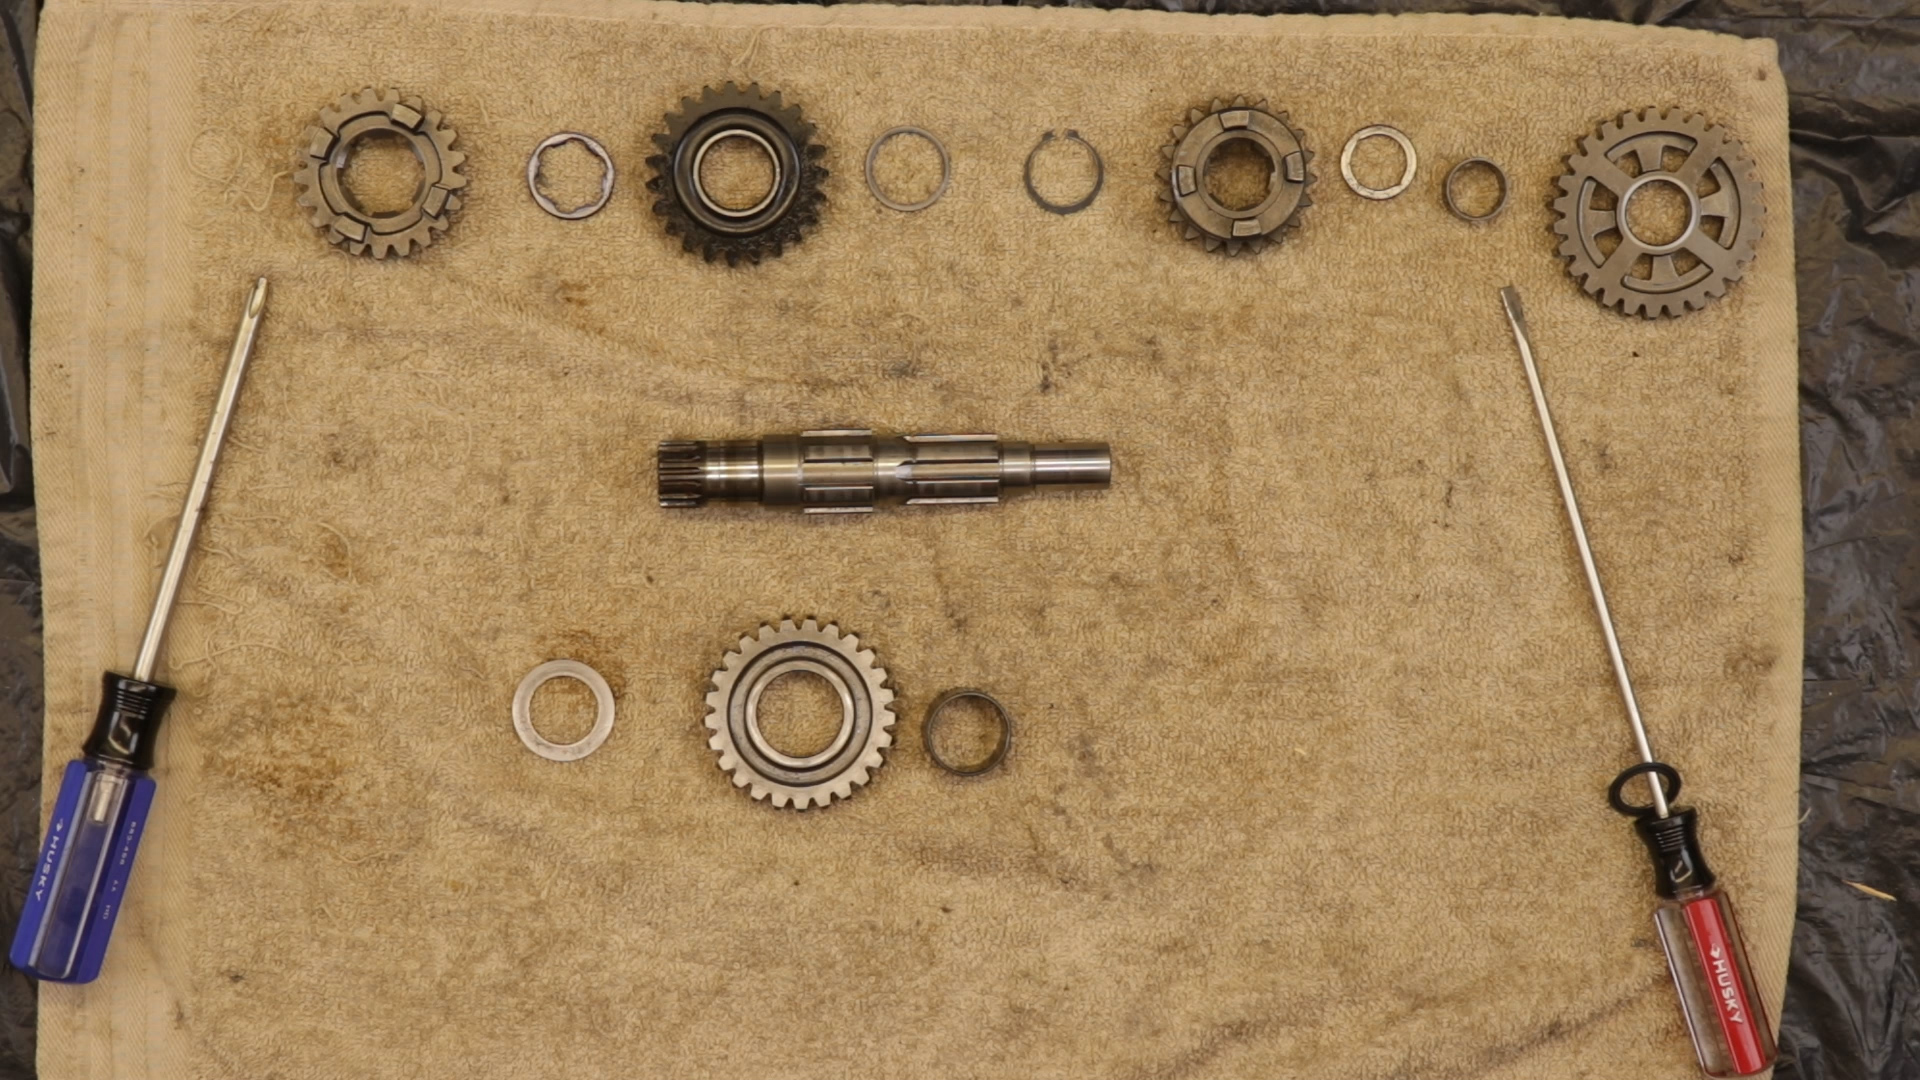
Transmission Countershaft
- The countershaft is the shorter of the two shafts and is disassembled from both sides.
- Remove each side to a separate screwdriver, cleaning and measuring as you go.
- Measure the countershaft at first, second, and third gear positions, and check the splines and snap ring grooves for damage.
- Record every measurement as you go.
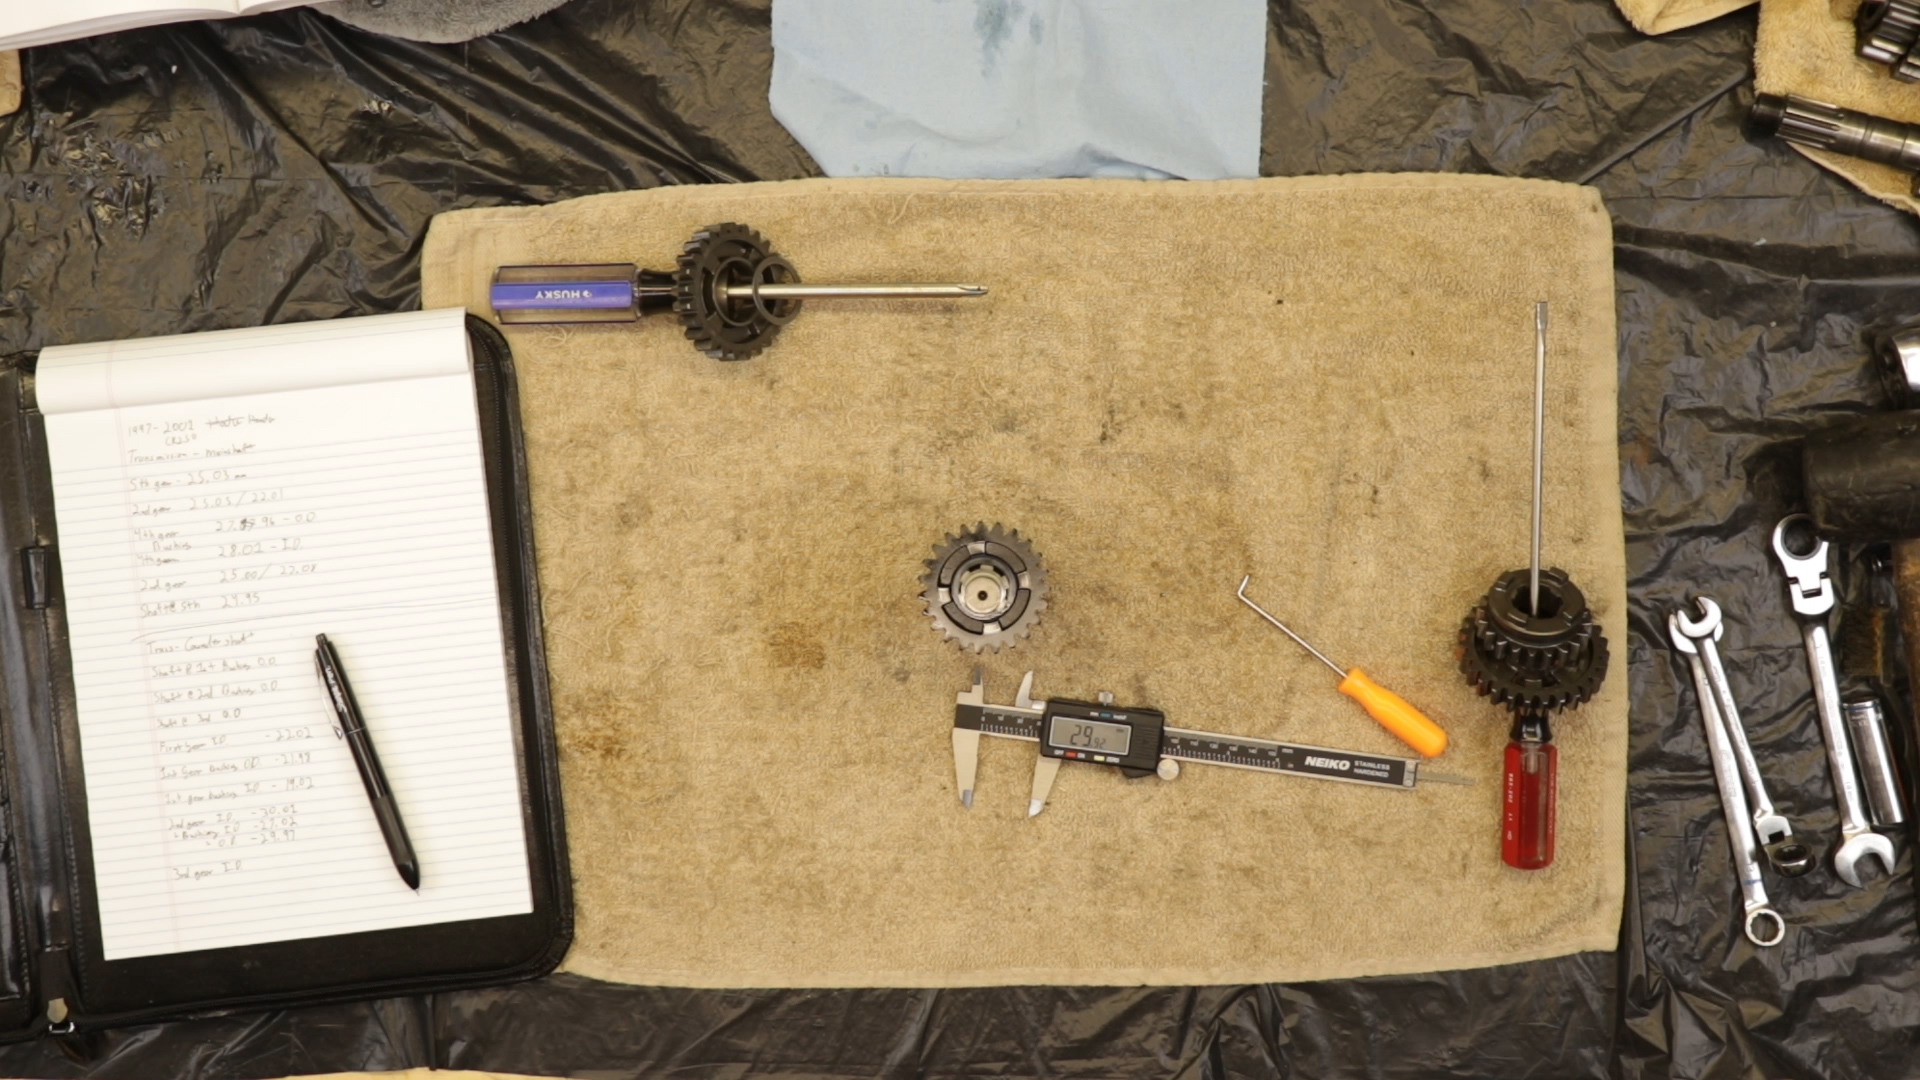
Countershaft Gears Stack – Left Side Orientation
- Washer
- Second gear and bushing
- Washer
- Fourth gear
Countershaft Gears Stack – Right Side Orientation
- Washer
- First gear and bushing
- Washer
- Fifth gear
- Snap ring
- Spline washer
- Third gear
- Washer
Clearance Calculations
You will need to calculate the clearance between the gears and their bushings and the bushings with the shaft.
Here is a link to the service specifications. The second table lists the various clearances that need to be measured and calculated.
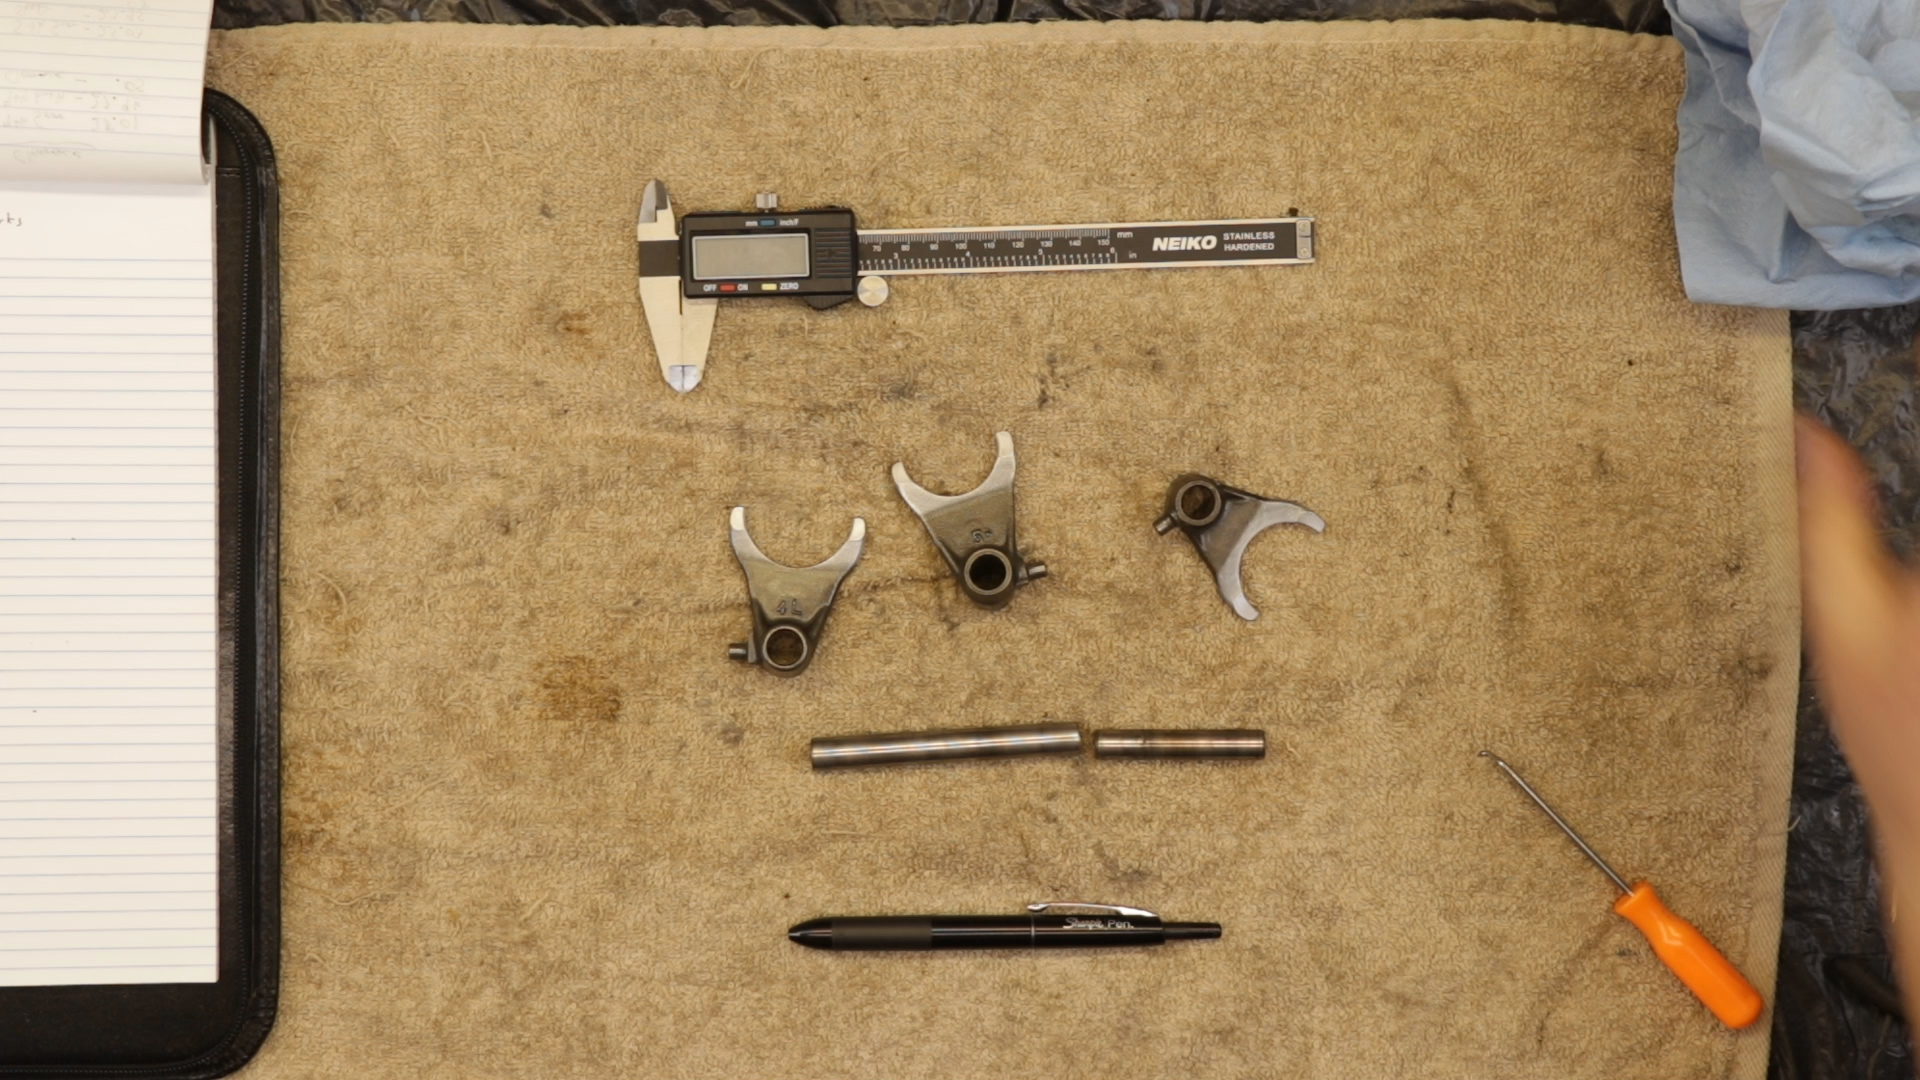
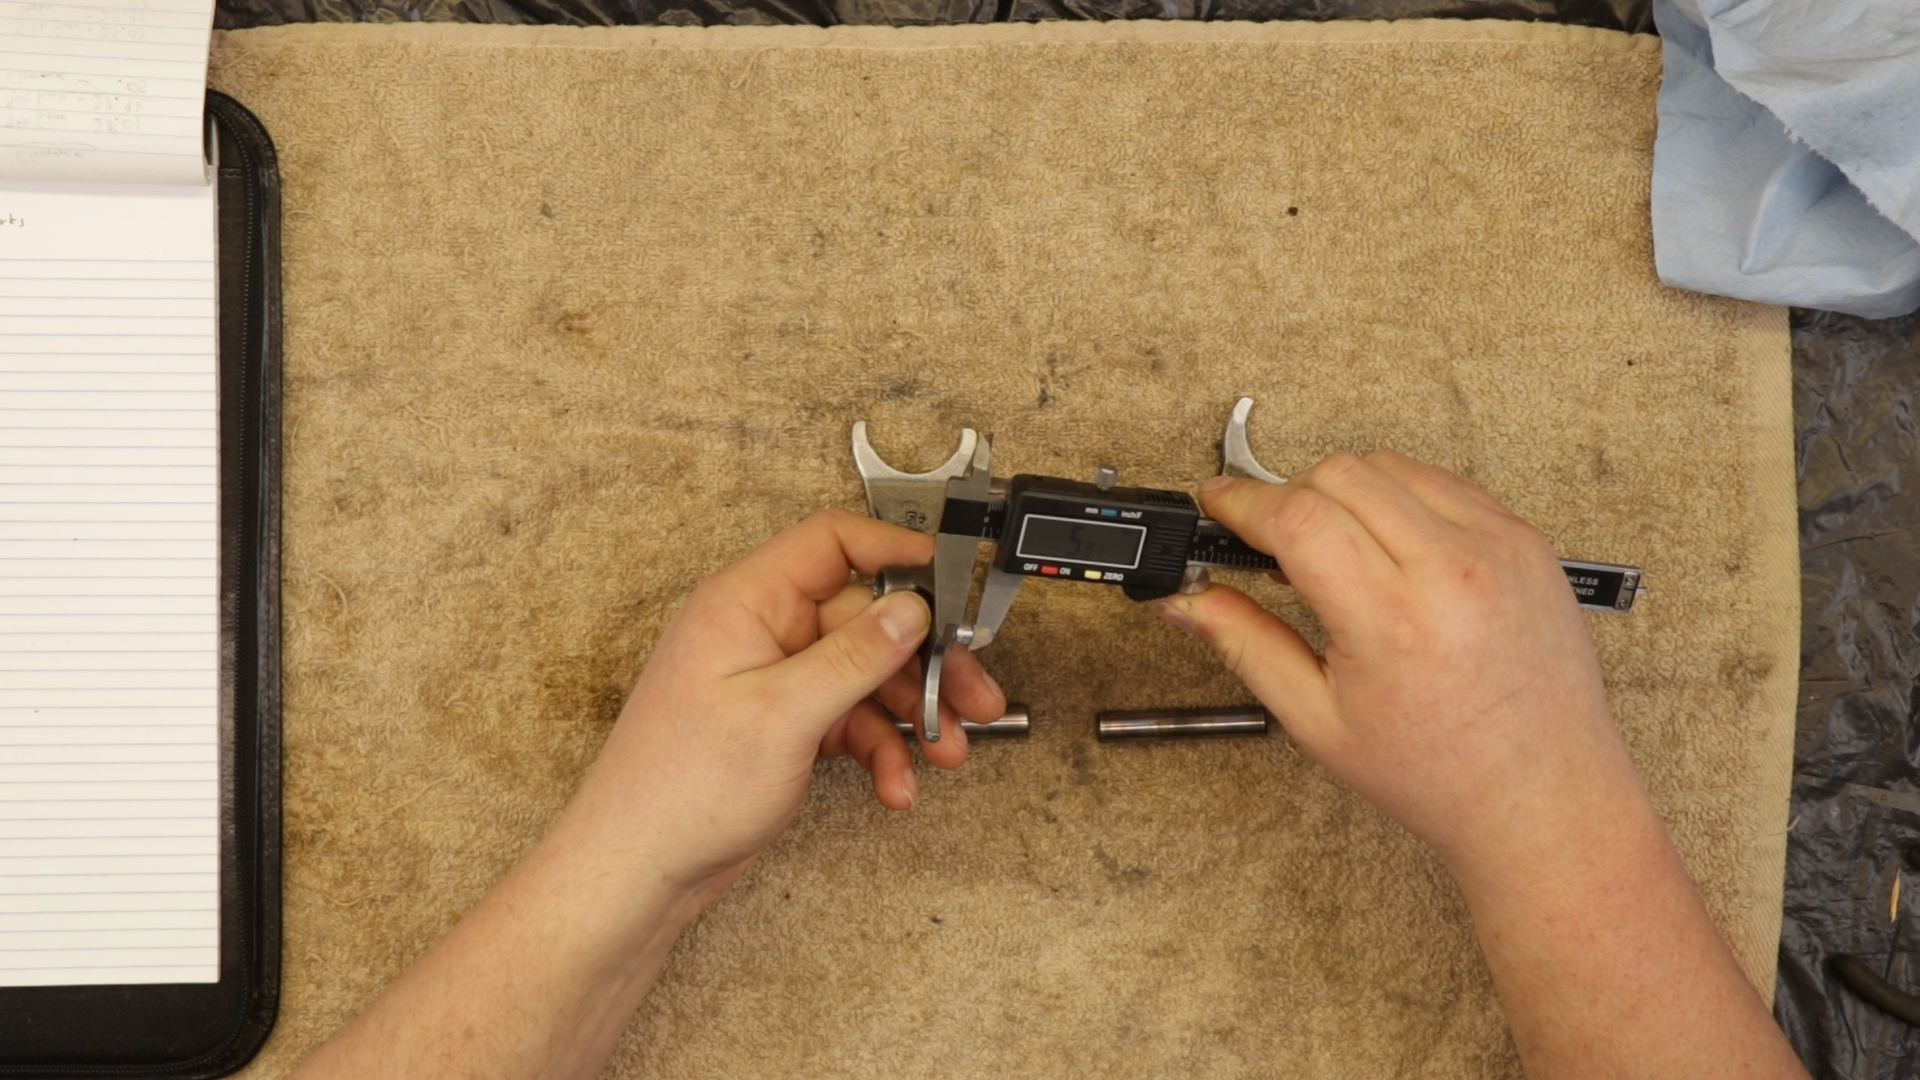
Shift Drum & Forks
- Clean the shift drum, forks, and fork shafts.
- Measure each fork’s claw thickness, inside diameter, and guide pin.
- Measure the diameter of the long shift fork shaft at each end and center point.
- Measure the short-shift fork shaft at the center point.
- Check the play of each shift fork in their respective gears.
- Right shaft to fifth gear
- Center shaft to third gear
- Left shaft to fourth gear.
- The forks should have a slight play in the grooves.
Related: How to inspect the external shift linkage on your 1997-01 CR250.
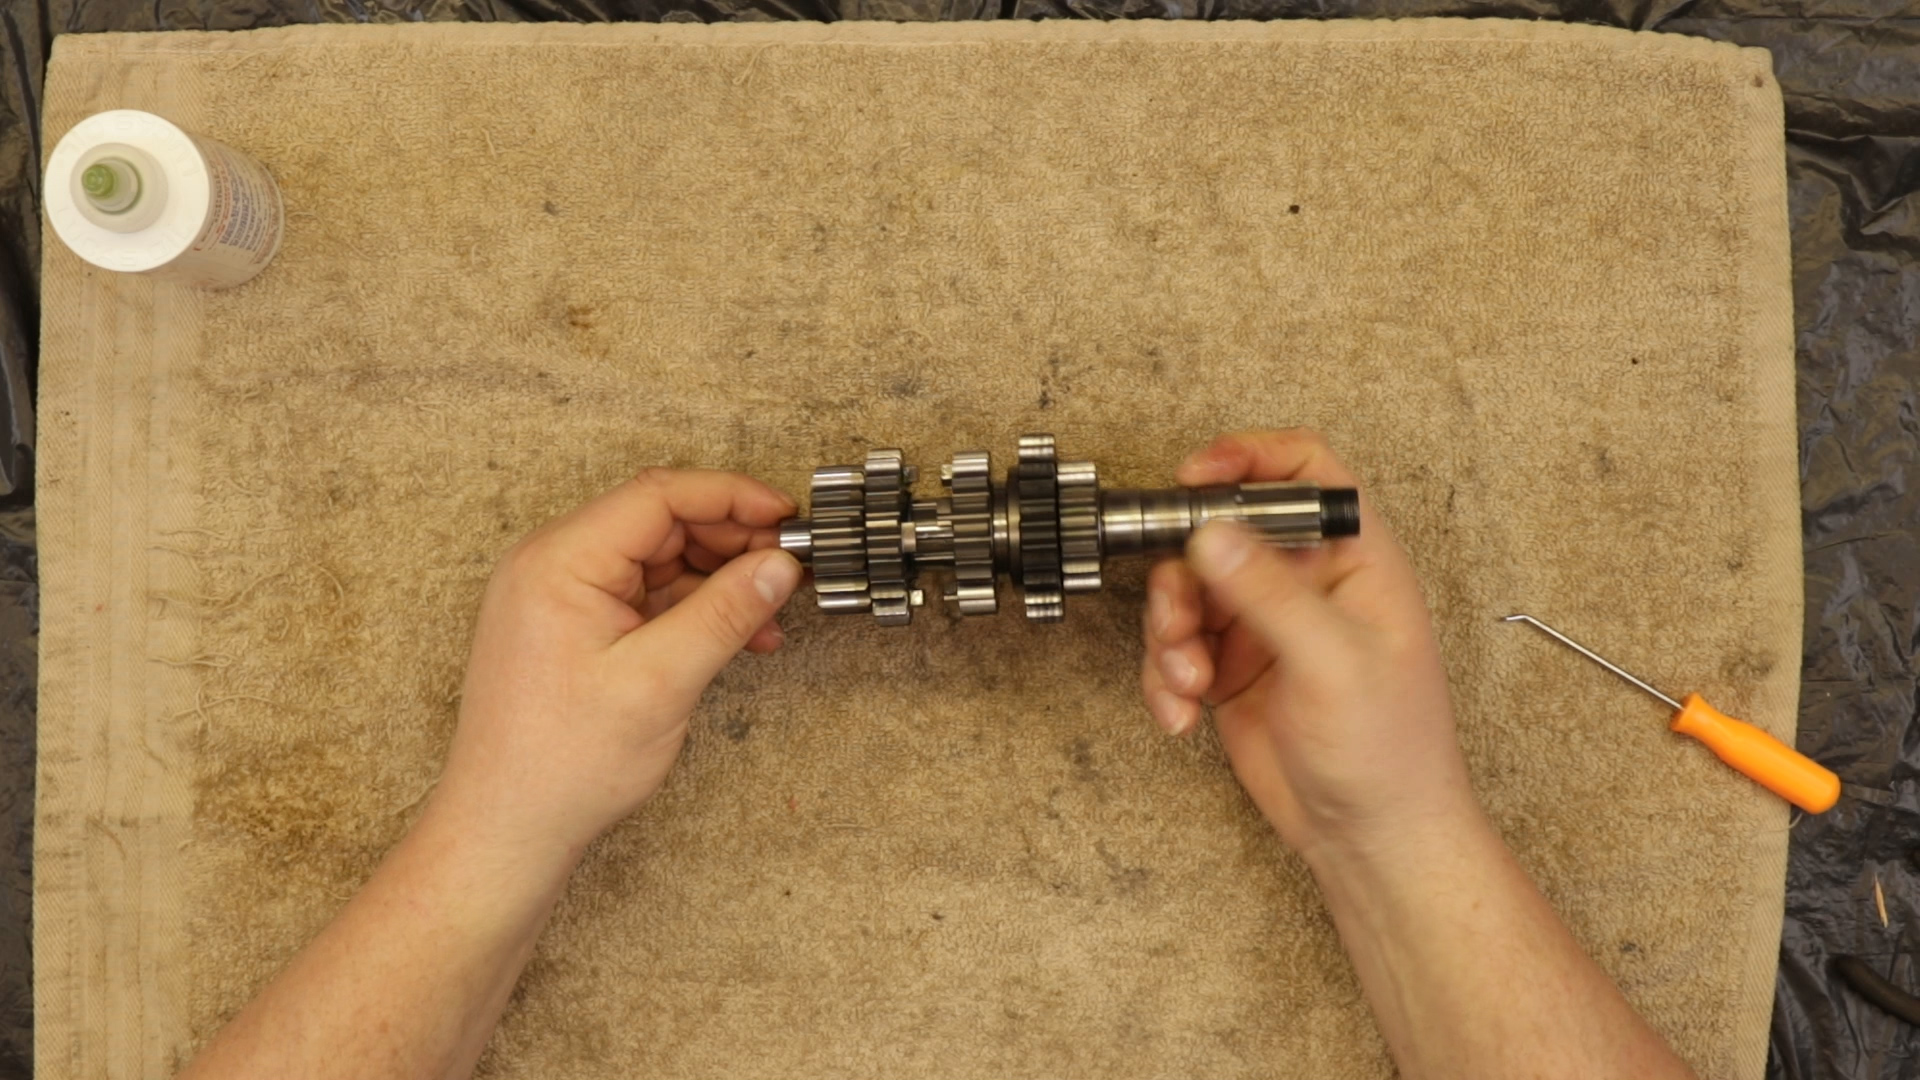
Shaft Assembly
- If everything has stayed in order, you only need to transfer the gear stack from your screwdrivers back onto the shafts.
- Make sure to use plenty of assembly lube at every contact point.
- During assembly, you must ensure that your new snap rings and washers face the correct direction.
- Although both sides look flat, one side is slightly rounded.
Mainshaft Snap Ring And Washer Direction: (Flat Side, From Left To Right)
Washer: Left | 2nd | Washer: Right| 4th | Washer: Left | Snap Ring: Left | 3rd | Snap Ring: Left | Washer: Left | 5th | 1st
Countershaft Snap Ring And Washer Direction: (Flat Side, From Left To Right)
Washer: Left | 2nd | Washer: Right | 4th | Washer: Left | 3rd | Washer: Right | Snap Ring: Right | 5th | Washer: Right | 1st | Washer: Right
Wrap your gear stacks in a clean towel and set aside until assembly.

← Part 1: Removal & Disassembly
Part 3: Bearings Replacement →
Keep Your ’97-’01 CR250 Running Right!
- Service Specification
- Clutch Replacement
- Carburetor Service
- Engine Top End
- Engine Bottom End
- Brakes
- Exhaust
- Front Suspension
- Rear Suspension
- Wheels & Tires
- Kickstarter Inspection
- External Shift Linkage


