
How To Install The Piston On Your 97-01 Honda CR250
 The Tools You Will Need
- Feeler Gauge → https://amzn.to/4hd7qen
- Small Pick
- 2-Stroke Oil → https://amzn.to/3WnyXSl
- Assembly Lube → https://amzn.to/4ar8mty
The Parts You Will Need
- New ’97-’01 Honda CR250 Piston Rings → https://amzn.to/4jiRVDt
- New Piston Pin Clips → https://amzn.to/4g9ToJj
If you are installing a new piston, I suggest a Pro X piston kit. It’s a cast piston, so it’s a little heavier than forged but costs much less. Pro X is distributed and supported by Wiseco, so if you have any questions, you can just call.
I already put together an article covering piston selection, so I’m not going to go into that here, but a cast piston works for me because I will be installing it in a bike I use for Enduro.
- OEM – $75ish
- (Cast) – Pro X Piston Kit → https://amzn.to/3E23Ipx
- (Forged) – Wiseco Piston Kit → https://amzn.to/3PIF0x4
- (Cast) – Vertex Piston Kit → https://amzn.to/3Wpsbv8
Pre-Service Notes
- I recommend opening the Service & Torque Specs in a new tab for easy reference.
- If you need parts and tools, make sure to buy them here! → https://amzn.to/4h4lDKq
- Pictures with captions are after the steps below.
- If you need any help, don’t hesitate to ask!
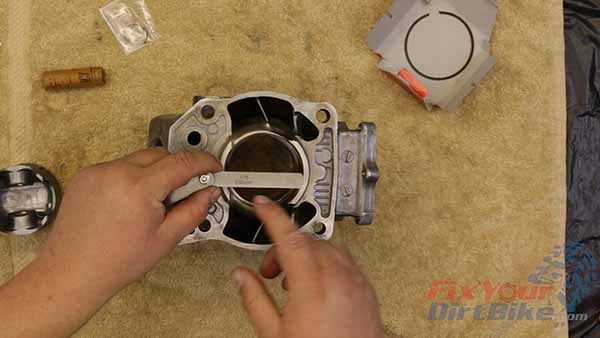
Gap Your New Rings
- Before installing the piston rings, we need to ensure the end gap is within spec.
- Place each ring into the bottom of the cylinder and push it down with the piston.
- Measuring the ring gap with a feeler gauge.
- The end gap on both rings should be no greater than 0.026 inches.
- If the rings are too tight, you can file the ends with a fine metal file until they are in spec.
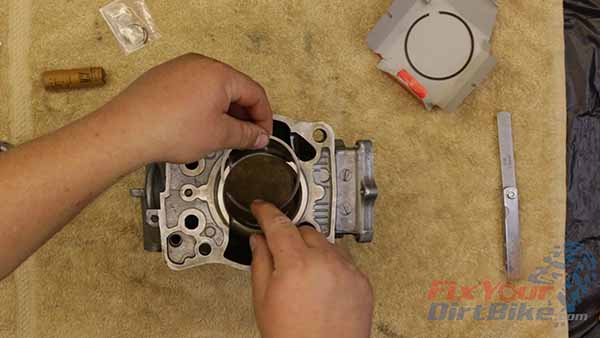
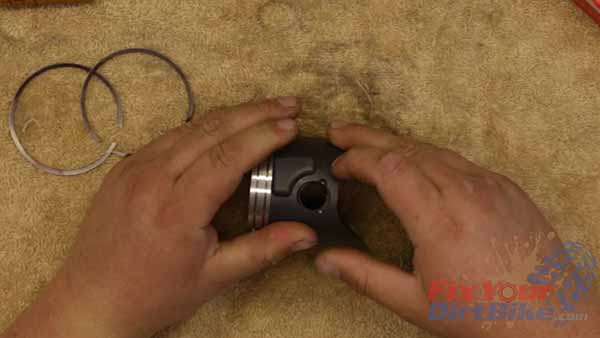
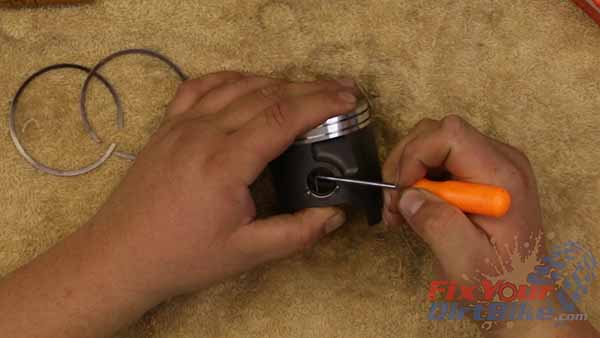
Pin Clip Install
- Install the first piston pin clip into the pin bore groove.
- Your thumbs and a small pick should work fine, but be careful not to gouge the cylinder with the end of the clip.
- Rotate the clip so the opening faces up.
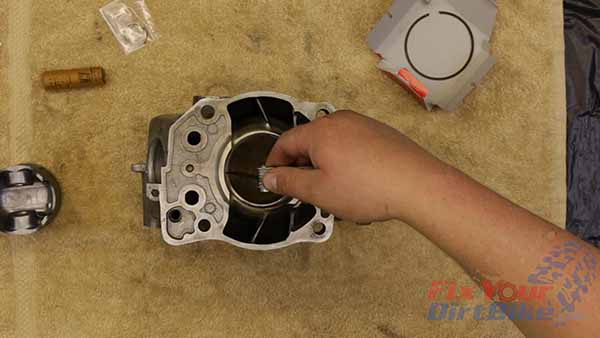
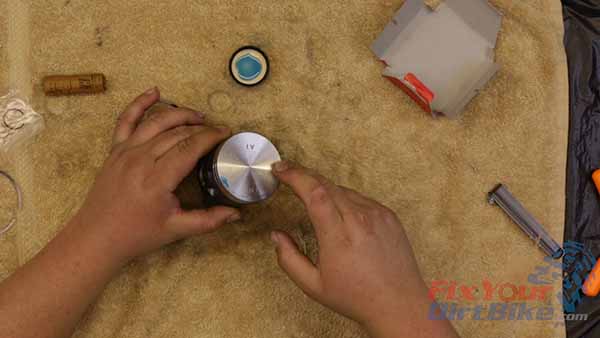
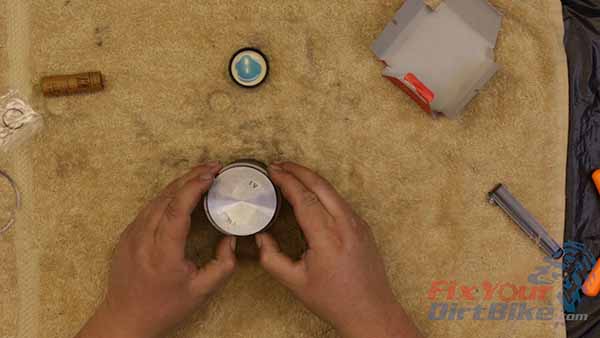
Piston Ring Installation
- Double-check that the rings are clean and dry.
- Lubricate the piston edge and ring grooves with 2-stroke oil.
- Check that the IT mark faces up and align the bottom ring with the alignment pin.
- Spread the ring just enough to clear the piston, and install it straight down. Do not try to wrap the ring into the groove.
- Check that the ring is free in the groove.
- Repeat for the top ring.
- We use oil to install the rings, but the oil must be thoroughly wiped off afterward.
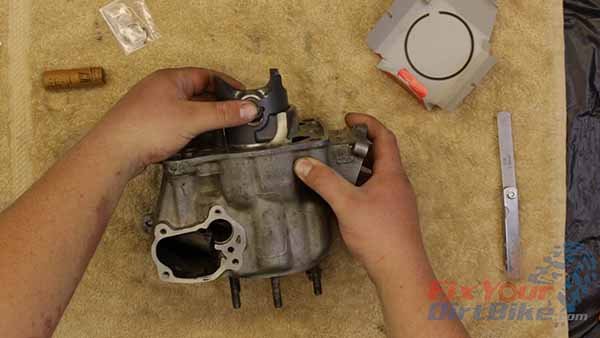
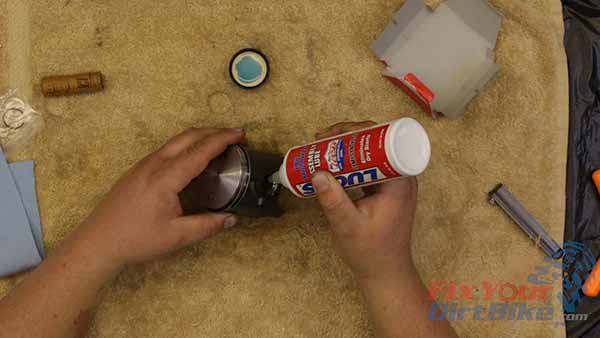
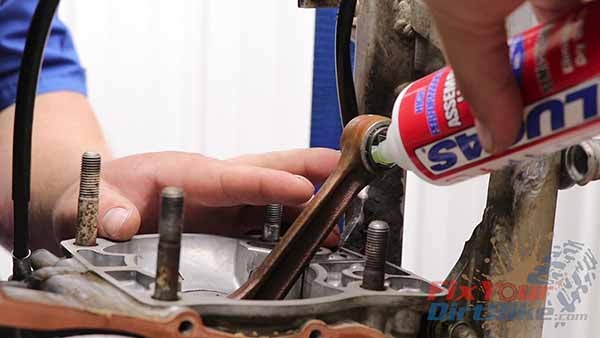
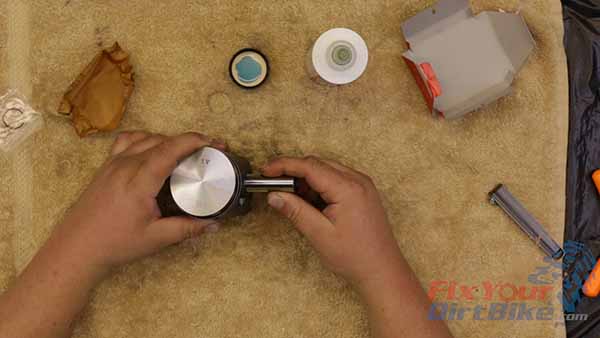
Piston Installation
- Lubricate the pin and pin bore, and press the pin into the open side of the piston.
- Apply assembly lube to the connecting rod opening, install the needle bearing, and then apply lube to the inside of the needle bearing.
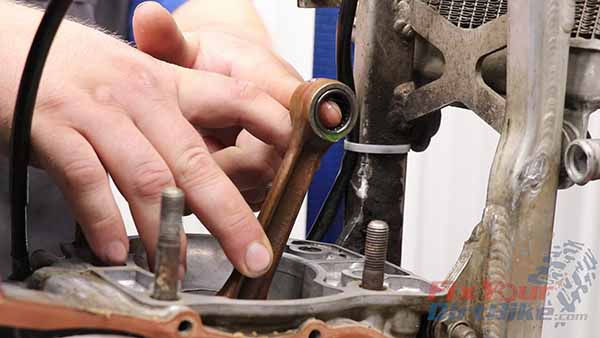
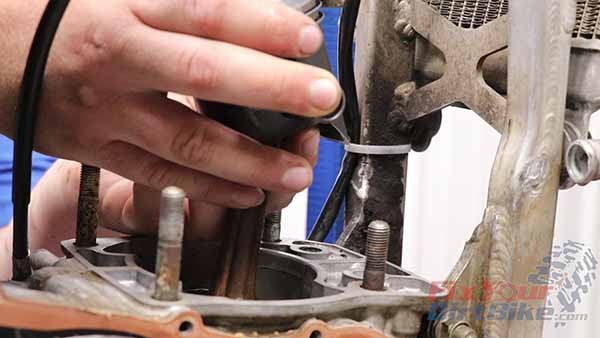
- Position the piston over the connecting rod so the IN marking faces your bike’s rear.
- Press the pin through the connecting rod and seat it against the pin clip on the other side of the piston.
- Install the second pin clip with the opening facing up.
- Before you move on, place your piston holder to keep it in place.


← Part 10: Exhaust Valve Installation
Part 12: Cylinder Installation →
Keep Your ’97-’01 CR250 Running Right!
- Service Specification
- Clutch Replacement
- Carburetor Service
- Engine Top End
- Engine Bottom End
- Brakes
- Exhaust
- Front Suspension
- Rear Suspension
- Wheels & Tires
- Kickstarter Inspection
- External Shift Linkage


