
This is PART 1 of the full step-by-step external shift linkage inspection for your 1997-2001 Honda CR250 Dirt Bike.
You can find Part 2: Inspection and Part 3: Installation.
When did you last perform a full external shift linkage inspection on your motocross or trail Honda CR250?
Your External Shift Linkage might be bad, and you don’t even know it, which could damage other internal parts. A common Honda CR250 external shift linkage problem is having problems getting your bike into gear. This problem has no definite cause, so you must inspect every part of the linkage.
The Tools You Will Need Are
- 8mm socket
- 10mm box wrench
- 2 Pry bars
Pre-Service Notes
- To access the shift linkage, you will need to remove the right crankcase cover and clutch assembly. The Clutch Inspection Walkthrough explains how to do this.
- I highly recommend using OE parts. Although aftermarket parts may be cheaper, they may not be of the same quality as the original Honda parts.
- I recommend opening the Service & Torque Specs table in a new tab for easy reference.
- If you need parts and tools, make sure to buy them here! → https://amzn.to/4h4lDKq
- Put a box or tray under your bike to catch falling parts.
- The external shift linkage has many tiny components, so keep everything in a Ziploc bag!
- Pictures with captions are after the steps below.
- Honda OEM part numbers are listed at the bottom of the page.
- If you need any help, don’t hesitate to ask!
Related: Is it time for a bottom-end rebuild on your CR250? Get started here!
External Shift Linkage Removal
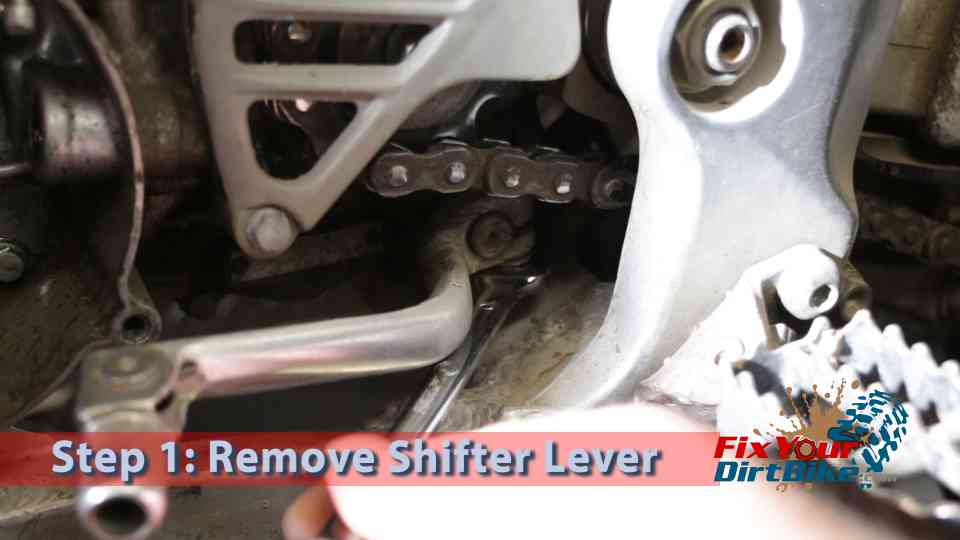
- Step 1: Remove the shift lever.
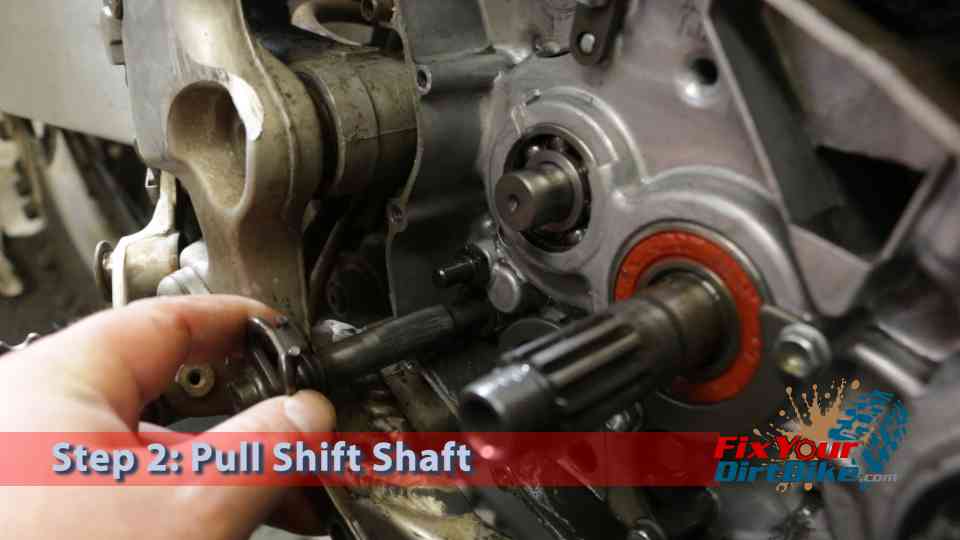
- Step 2: Pull the shift shaft from the crankcase. The washer may be stuck to the crankcase.
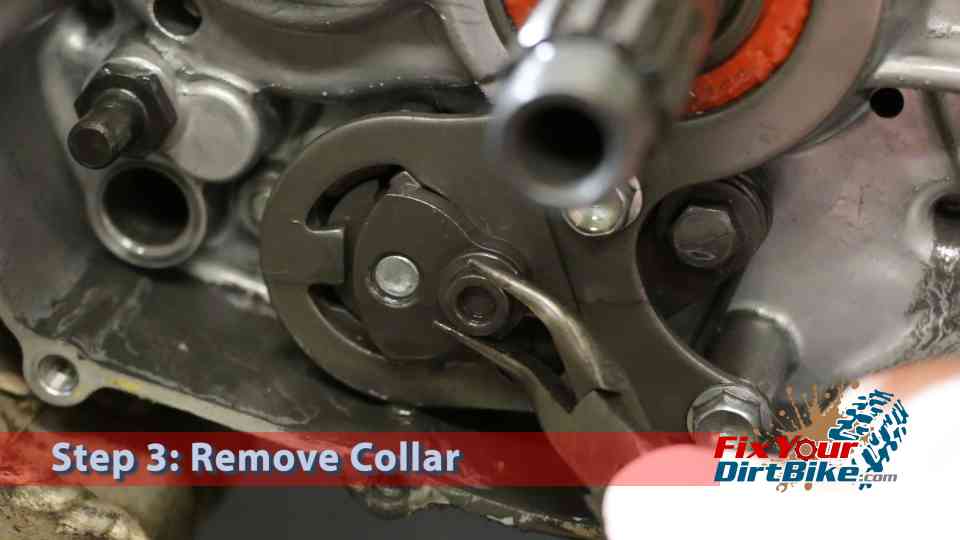
- Step 3: Remove the guide collar.
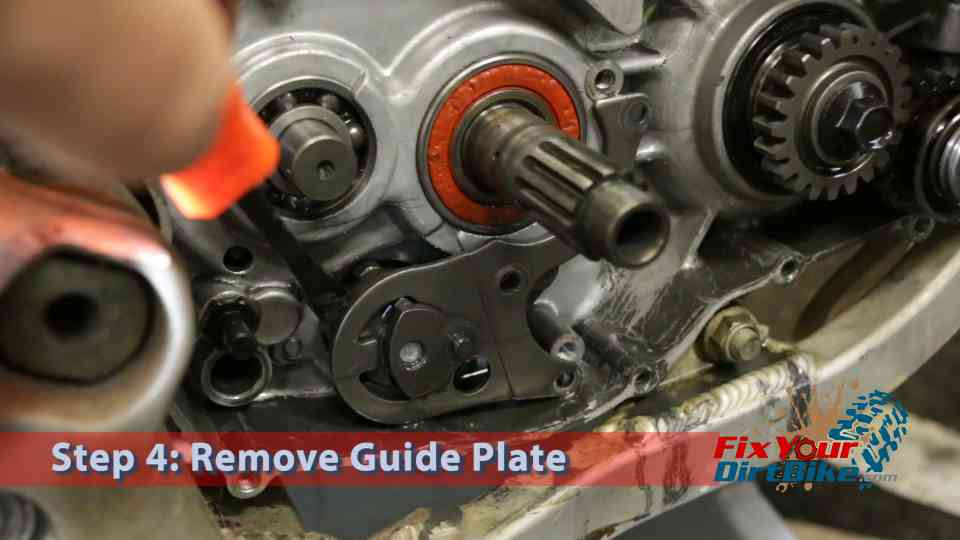
- Step 4: Remove the guide plate.
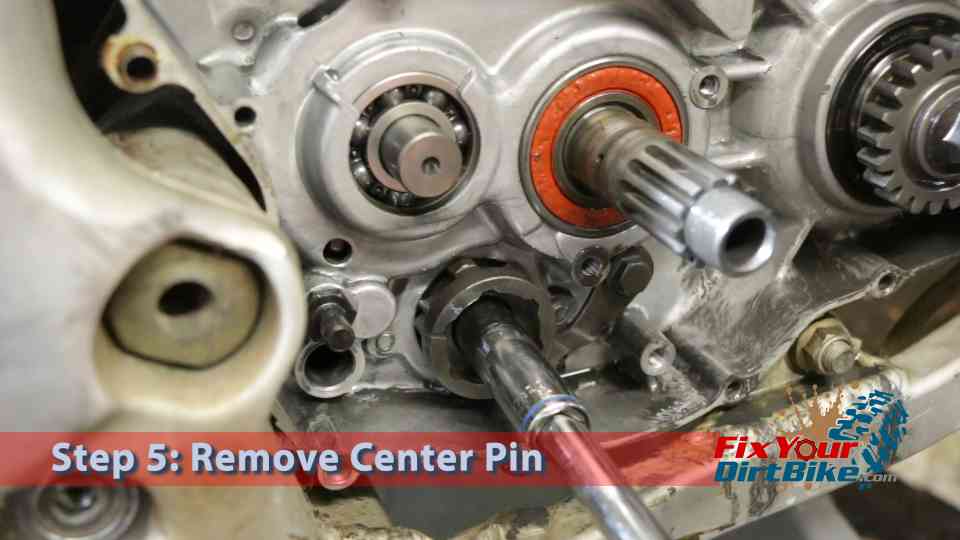
- Step 5: Remove the shifter drum center pin.
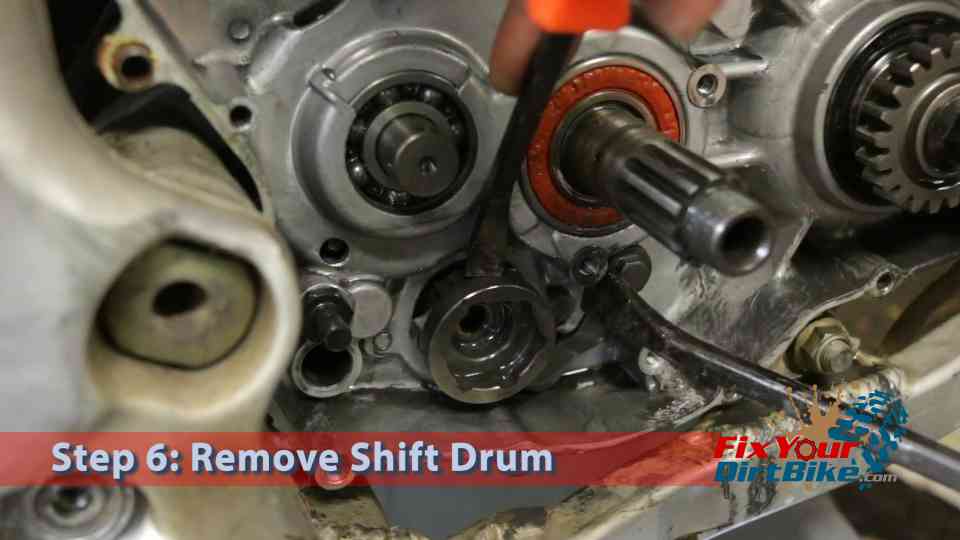
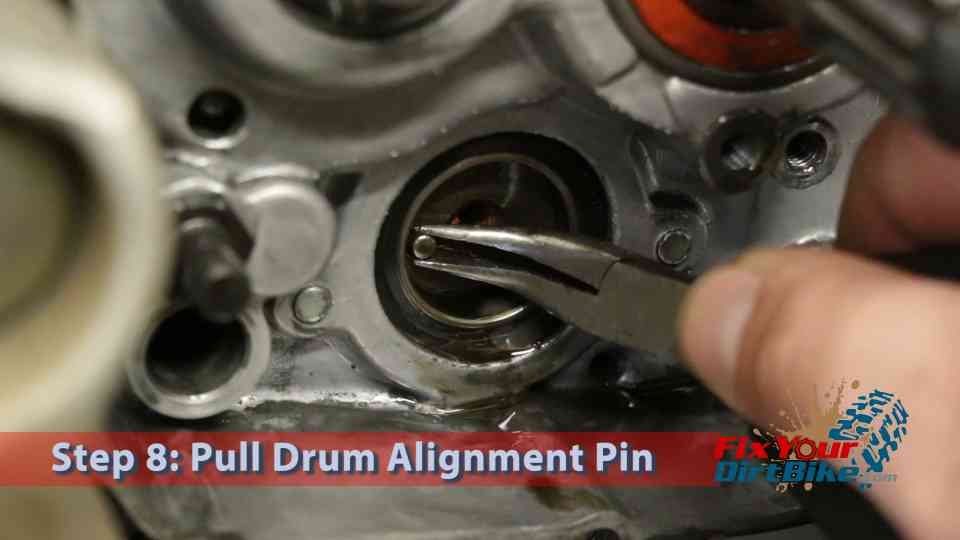
- Step 6: Pry back the stopper arm and remove the shifter drum.
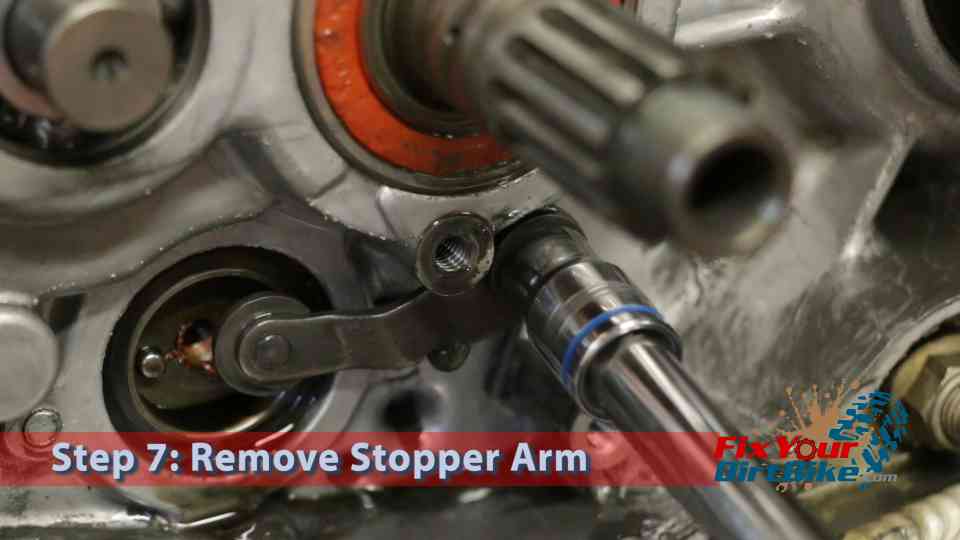
- Step 7: Remove the stopper arm.
If you have any questions or comments, please leave them in the comments or on our Facebook page!
OEM Honda Part Numbers
Shift Shaft
- Shift Shaft – 24610-KZ3-890
- Spring Mount Pin – 24652-HA0-000
- Shift Shaft Spring- 24651-KZ3-860
- Shift Shaft Spring Clip – 94510-14000
- Shift Shaft Washer – 90435-HB3-000
Stopper Arm
- Drum Stopper Arm – 24430-KA3-740
- Drum Stopper Arm Bolt – 90022-MG8-000
- Drum Stopper Arm Washer – 90451-155-000
- Drum Stopper Arm Spring – 24435-KA4-770
Guide Plate
- Guide Plate – 24328-KA5-690
- Guide Plate Bolt – 96300-06016-00
- Pawl – 24325-KA3-711
- Plunger – 24326-KBH-901
- Plunger Spring – 24329-KA3-740
- Drum Shifter – 24321-KZ3-891
Shifter Drum
- Drum Center Pin – 24315-HA0-000
- Shift Drum – 24312-KA3-741
- Shift Drum Alignment Pin – 96220-40080
97-01 Honda CR250 External Shift Linkage Part 2: Inspection →
Keep Your ’97-’01 CR250 Running Right!
- Service Specification
- Clutch Replacement
- Carburetor Service
- Engine Top End
- Engine Bottom End
- Brakes
- Exhaust
- Front Suspension
- Rear Suspension
- Wheels & Tires
- Kickstarter Inspection
- External Shift Linkage


