
How To Service The Rear Swingarm On You 97-01 Honda CR250
 The swingarm is a torch and hammer service, so arrange your work area accordingly.
The Tools You Will Need Are
- 22mm Socket
- Breaker Bar
- 10mm Socket
- 10mm Wrench
- Philips Head Screwdriver
- Pick
- Parts Cleaner
- Soft Bristle Brush
- Towels
- Clamp
- Propane Torch
- Hammer
- Socket To Match Bearing
- Socket Extension
- Clamp
- Mallet
The Parts You Will Need Are
- New New ’97-’01 Honda CR250 Bearings Set
- New Pivot Bolt
- Moly Grease
- Regular Grease
Pre-Service Notes
- Support your bike, so the rear wheel is off the ground.
- I recommend opening the Service & Torque Specs in a new tab for easy reference.
- If you need parts and tools, make sure to buy them here!
- Pictures with captions are after the steps below.
- If you need any help don’t hesitate to ask!
Swingarm Removal
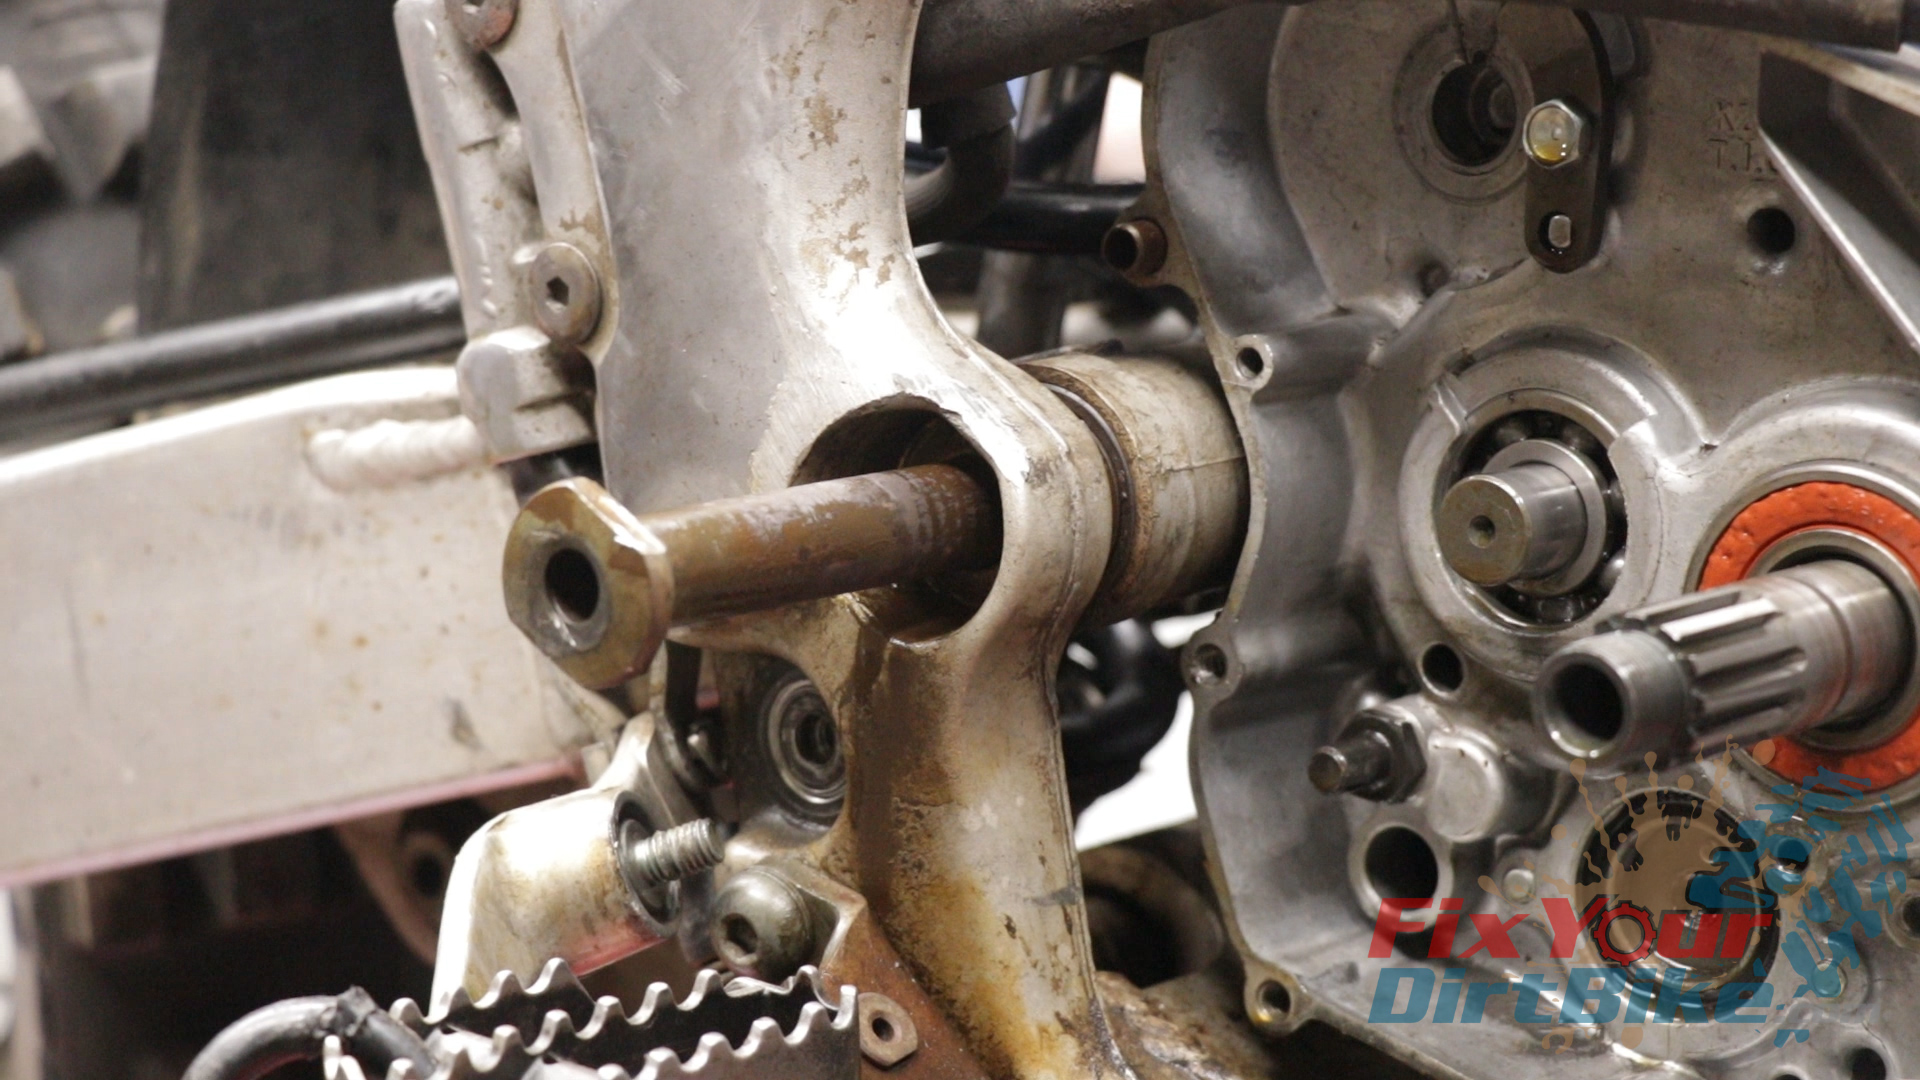
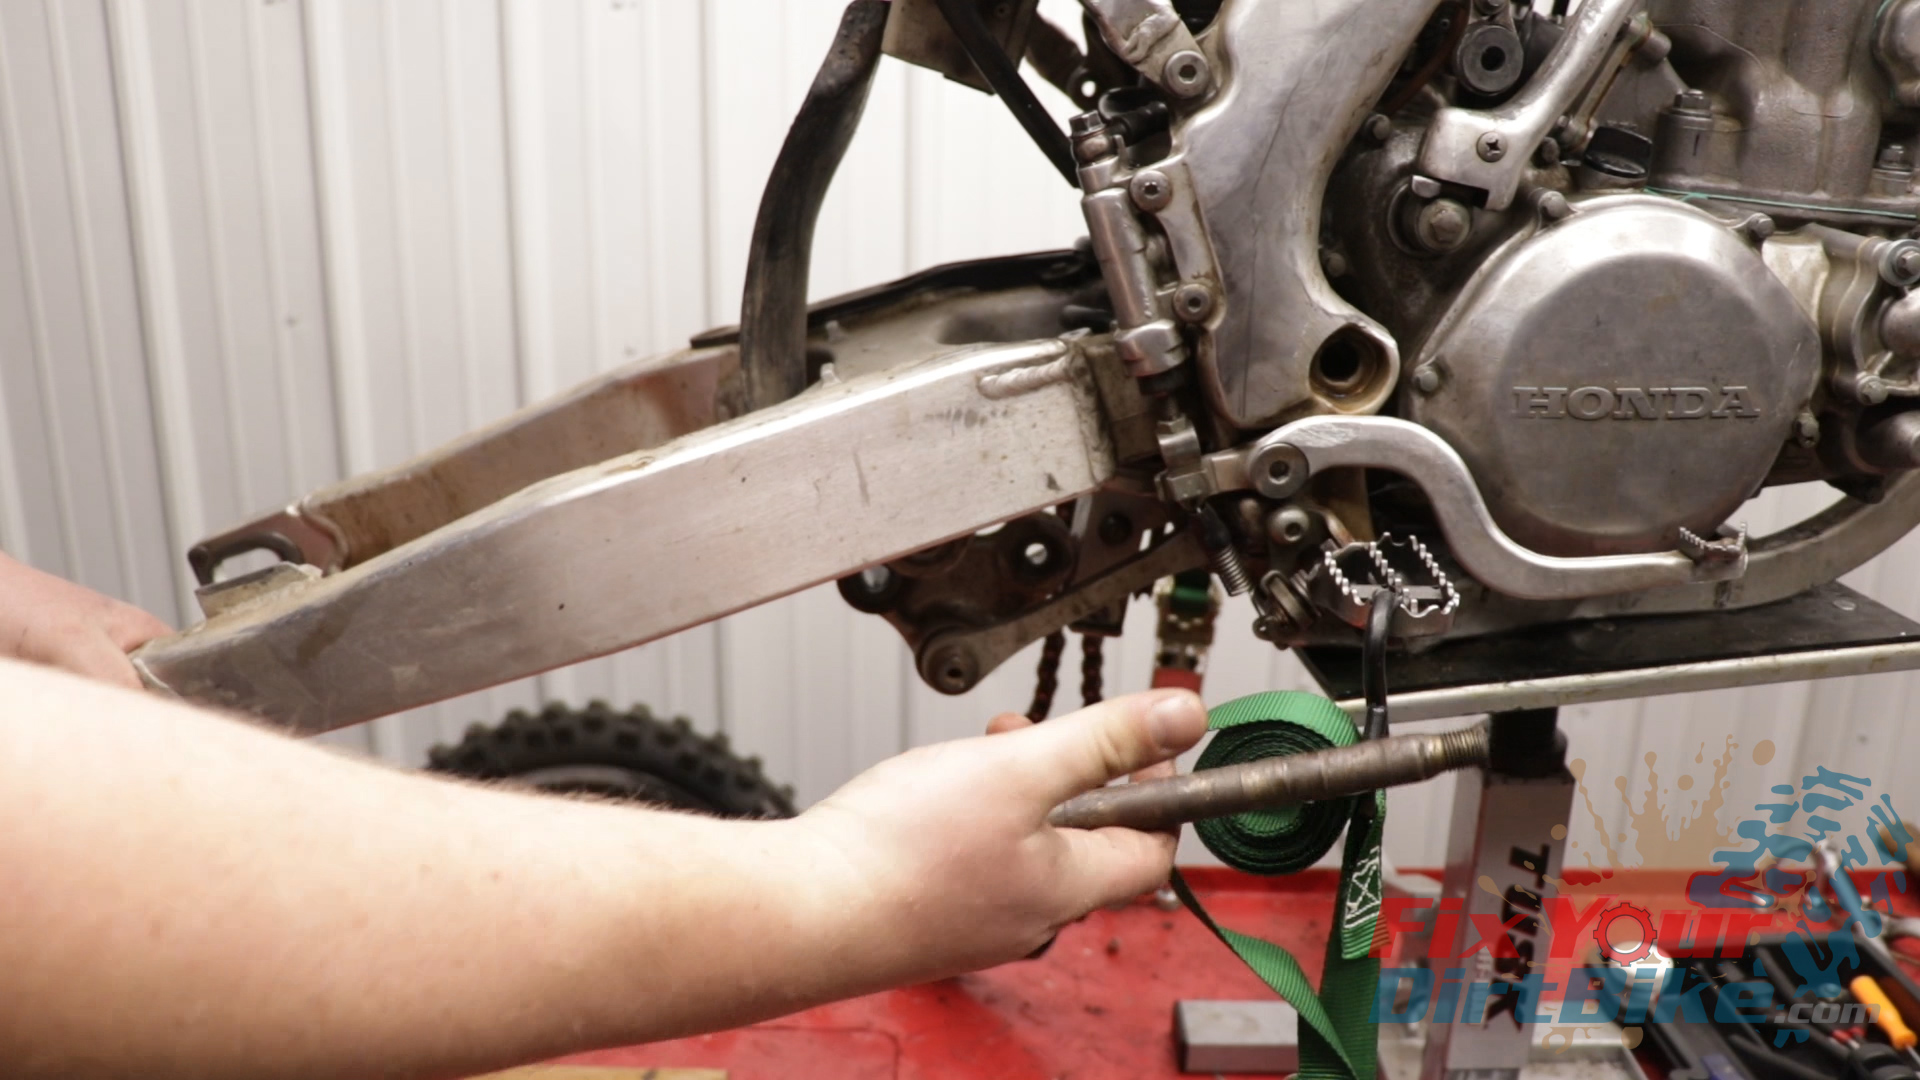
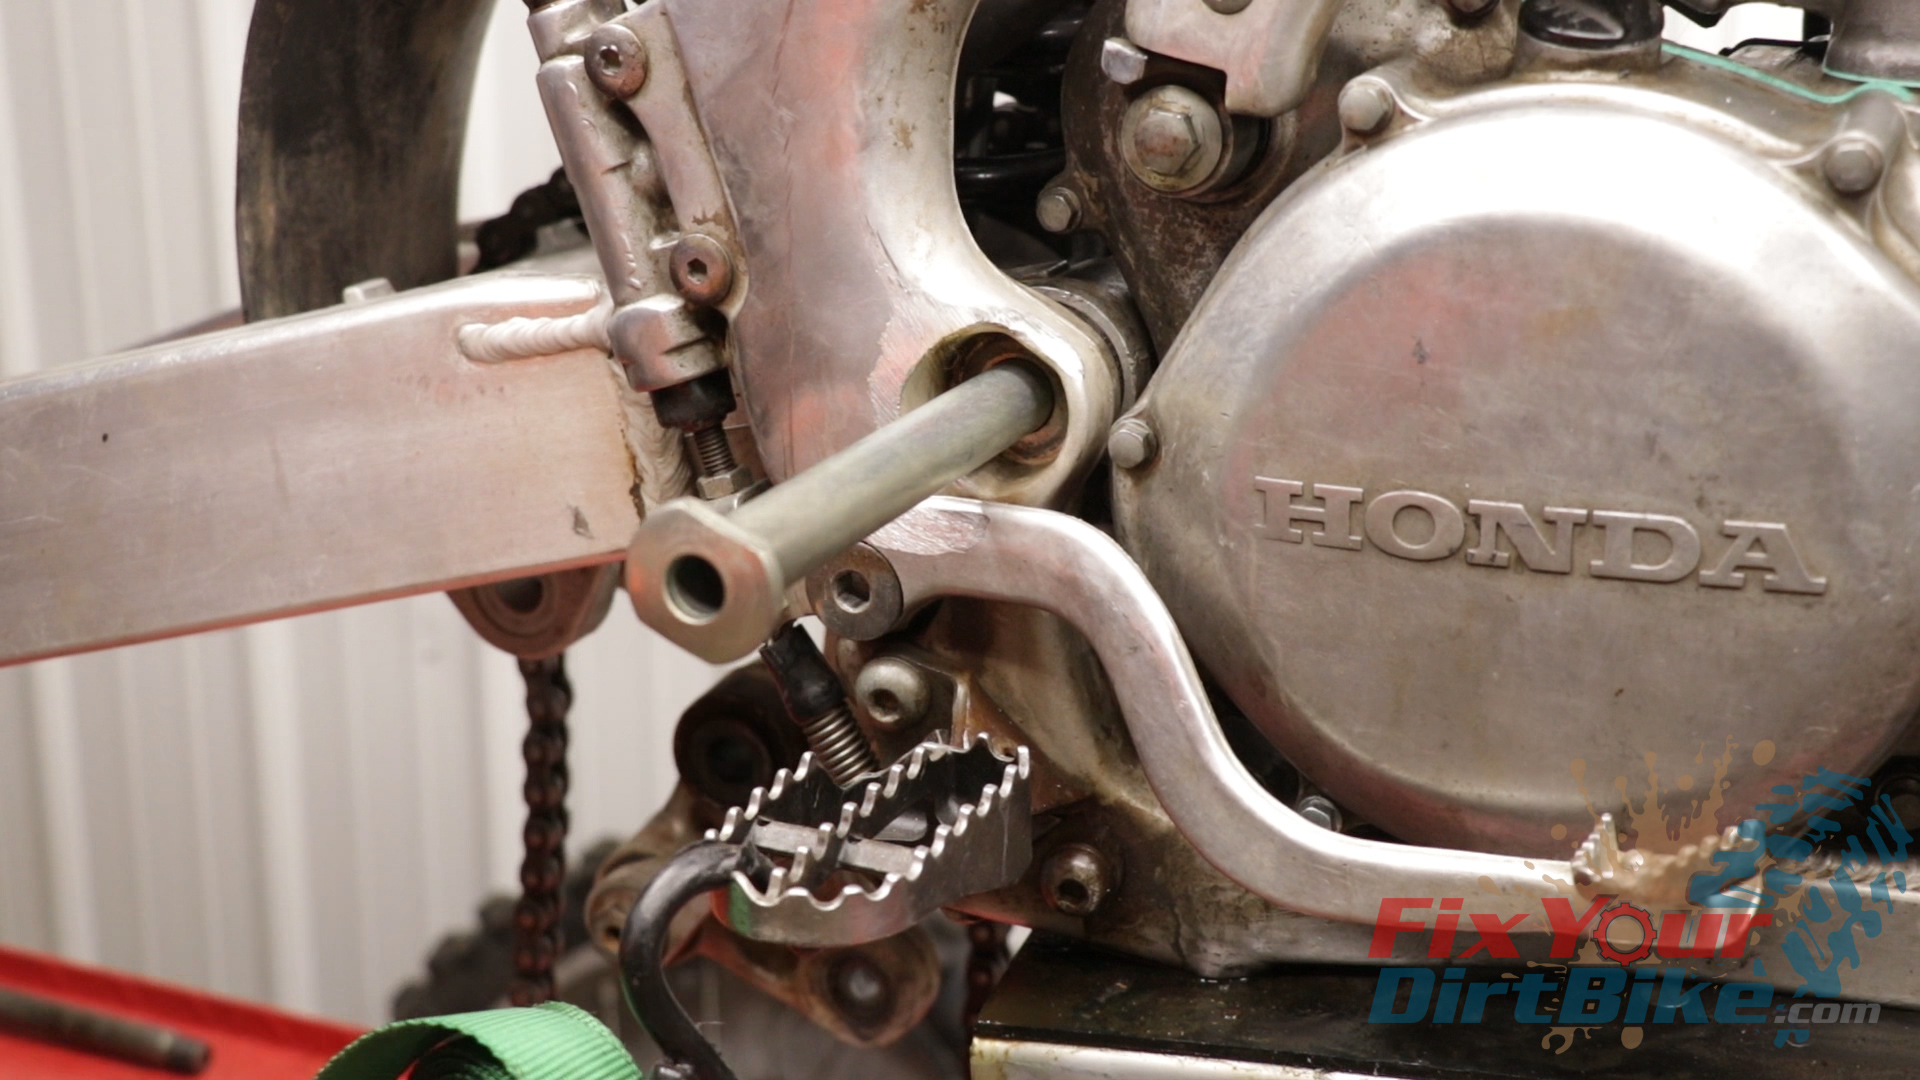
- Before you start stripping the swingarm, remove the swingarm pivot bolt. You may need to lay your bike on its side and beat the bolt out with a sledgehammer, and that’s easier to do with the rear wheel still on.
- Once you get the pivot bolt out, replace it just enough to keep the swingarm attached.
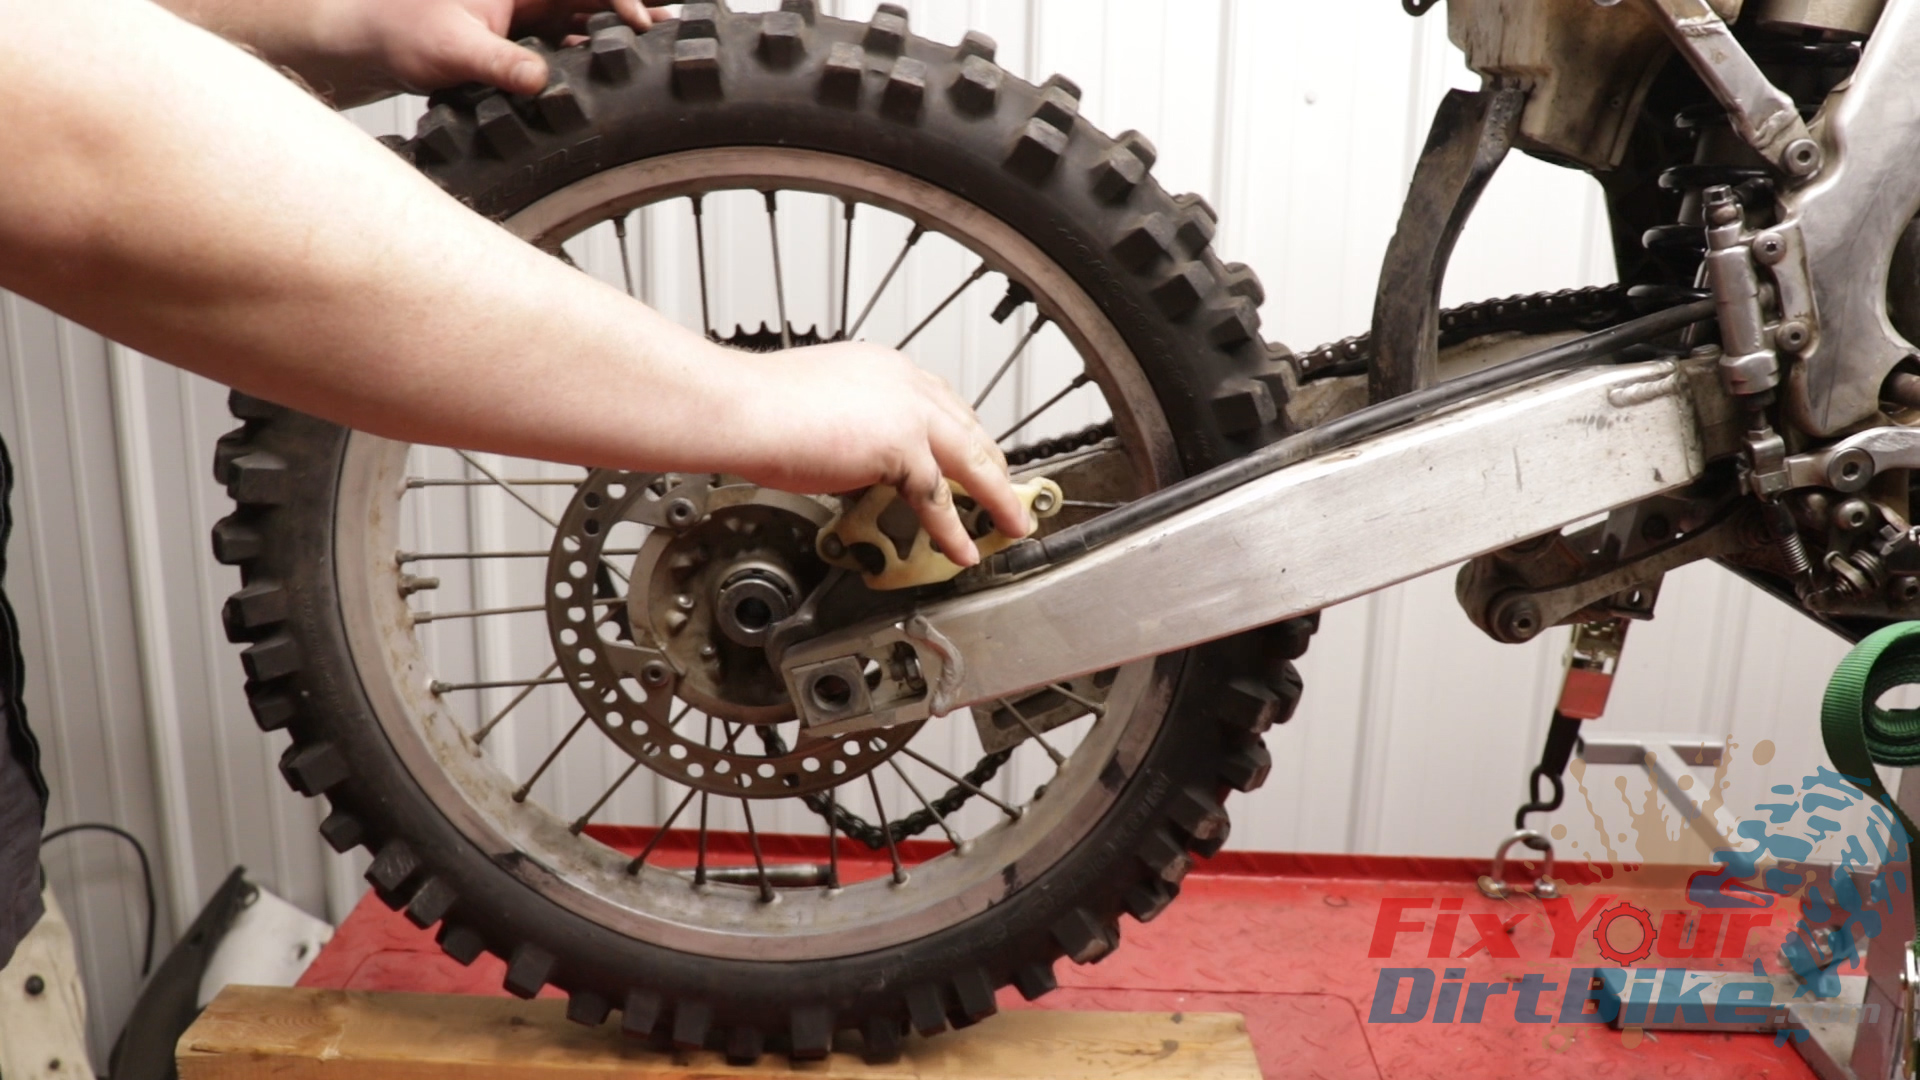
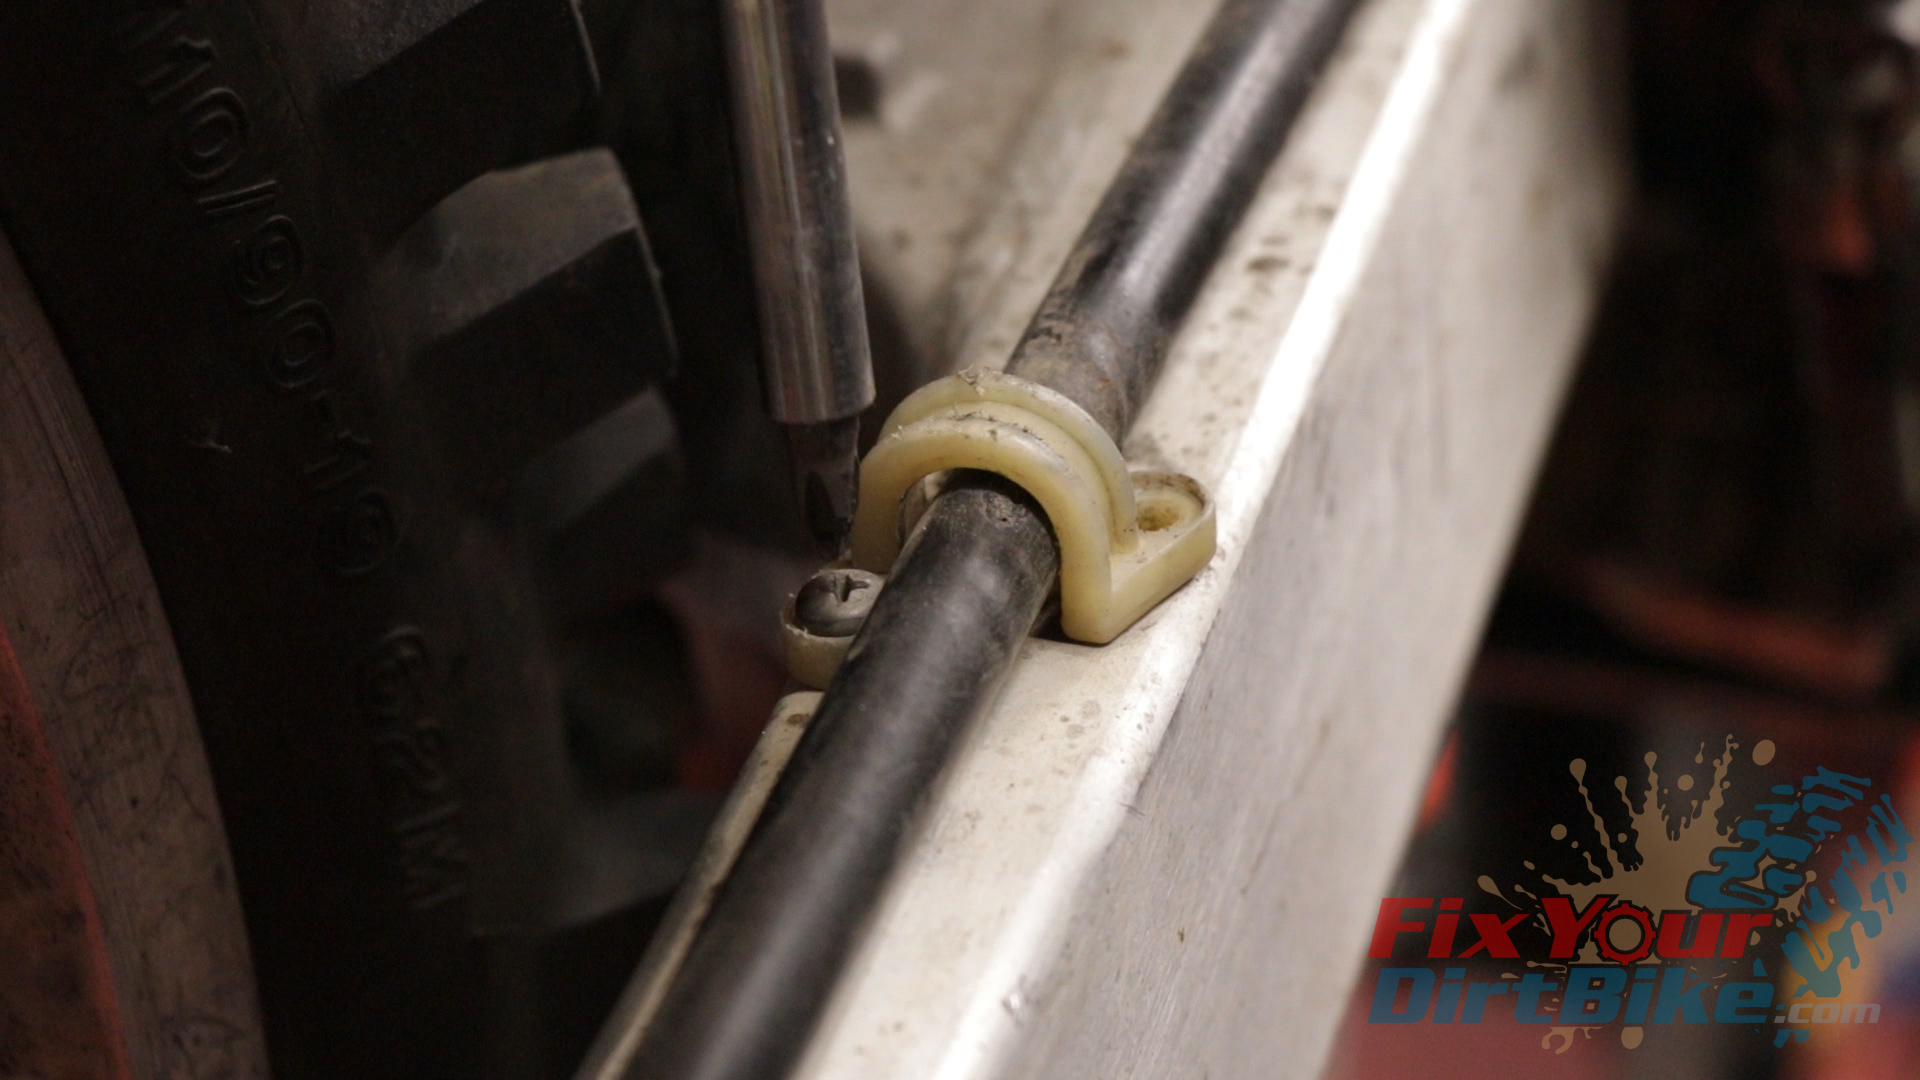
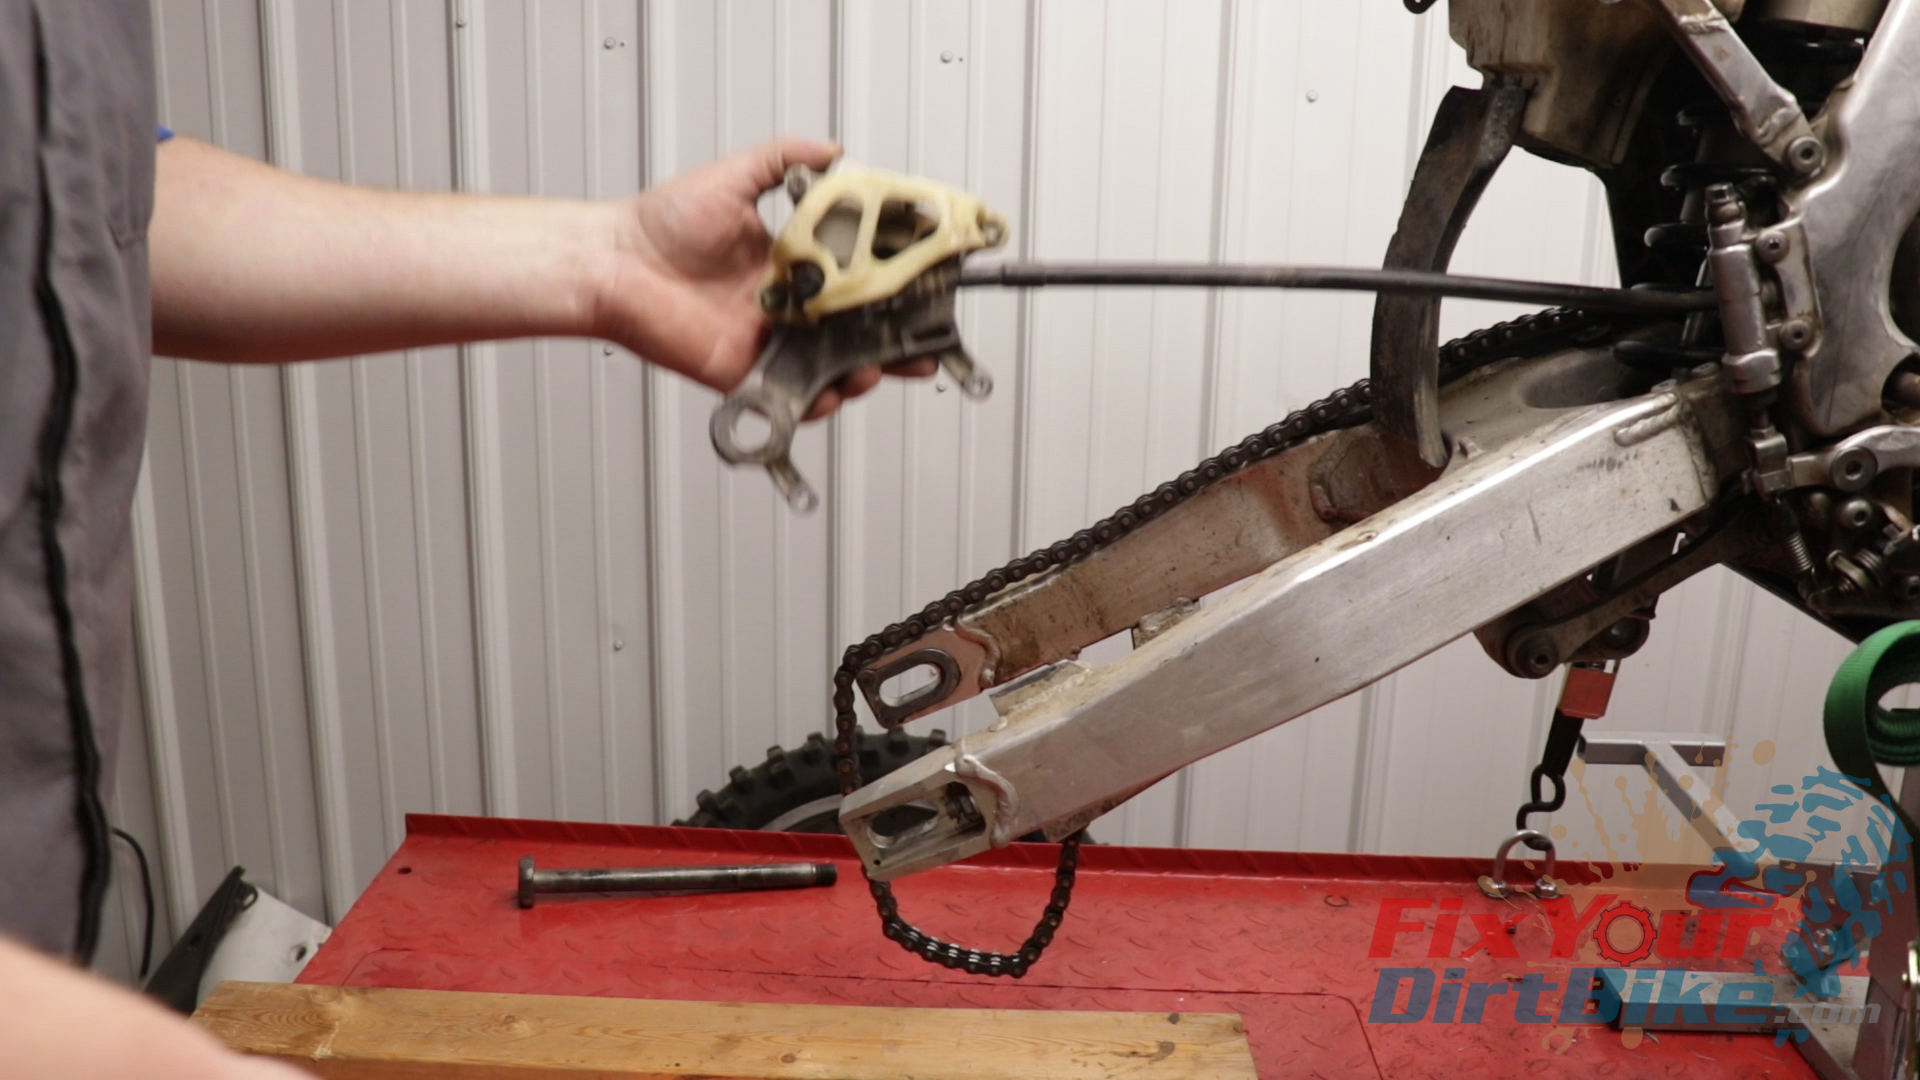
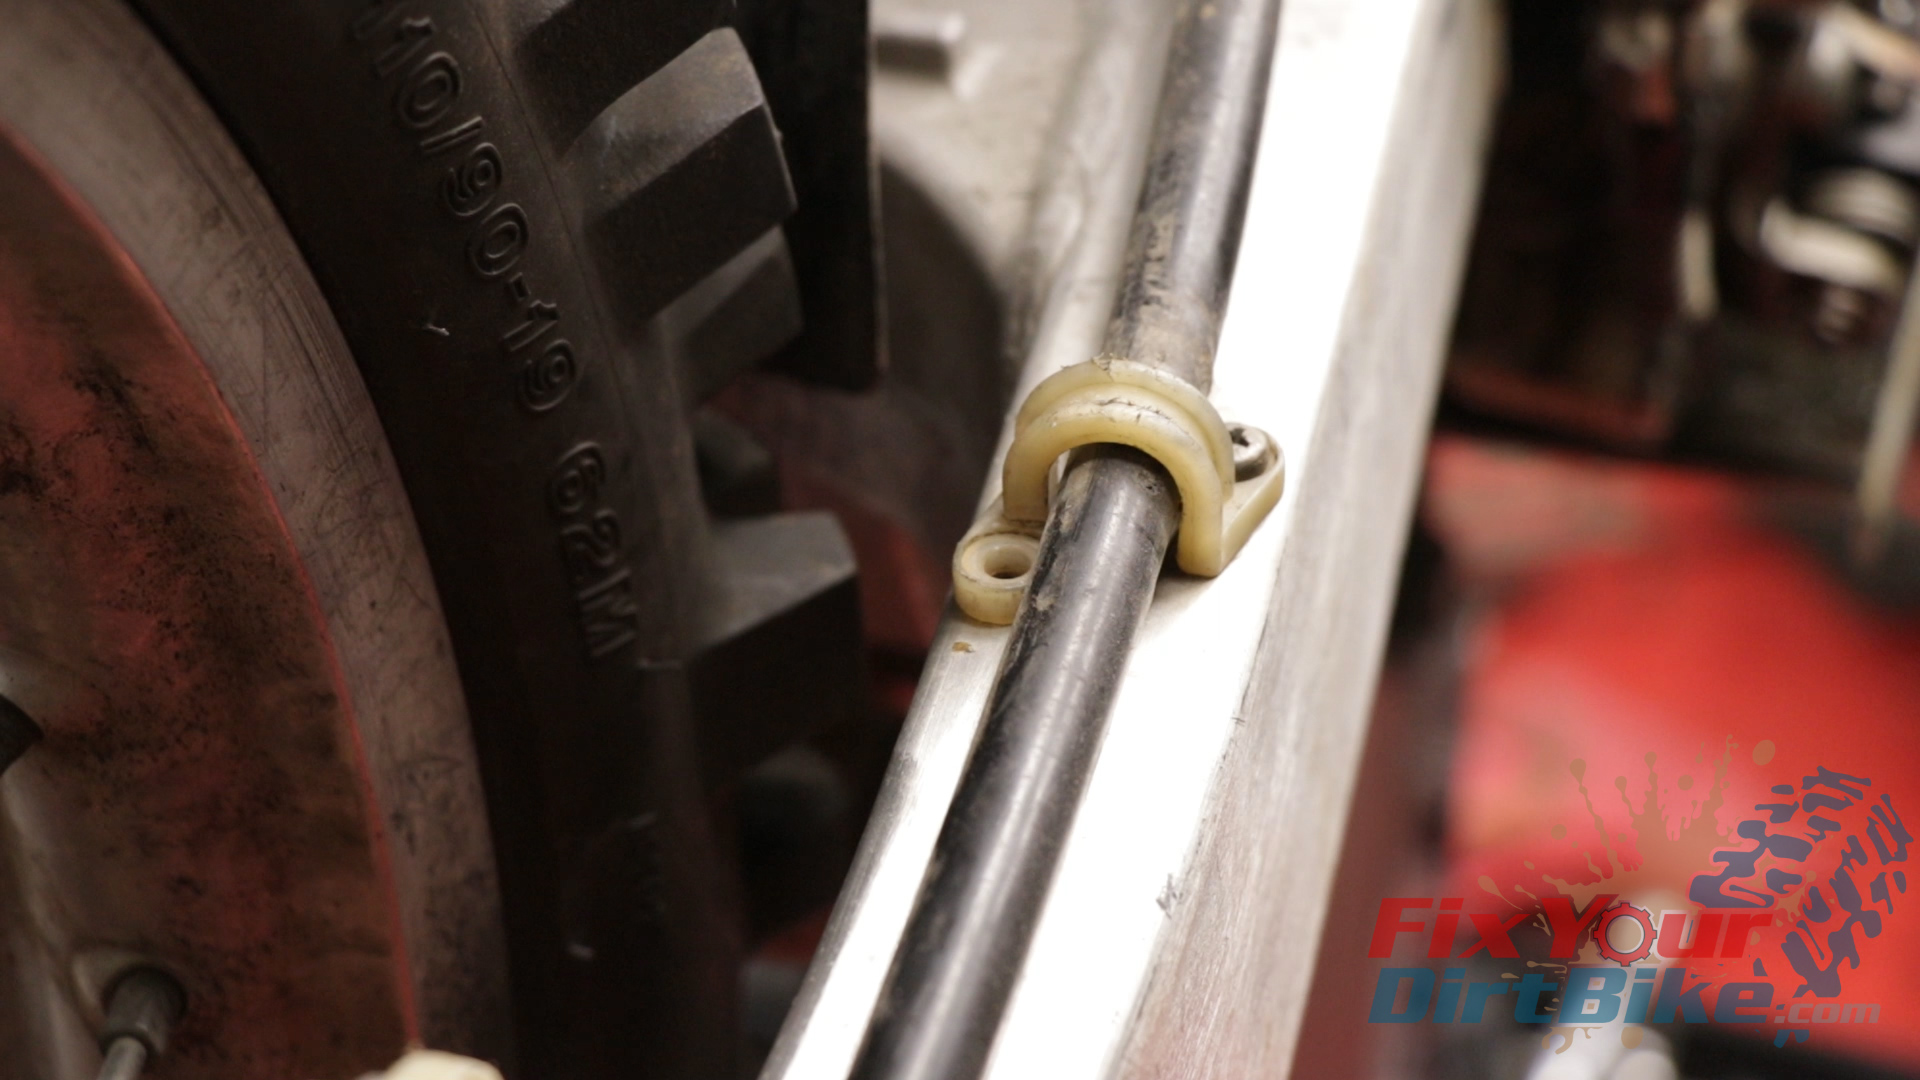
- Remove the rear wheel, brake caliper, and brake line guides.
- Hang the caliper out of the way.
- Remove the chain guide assembly.
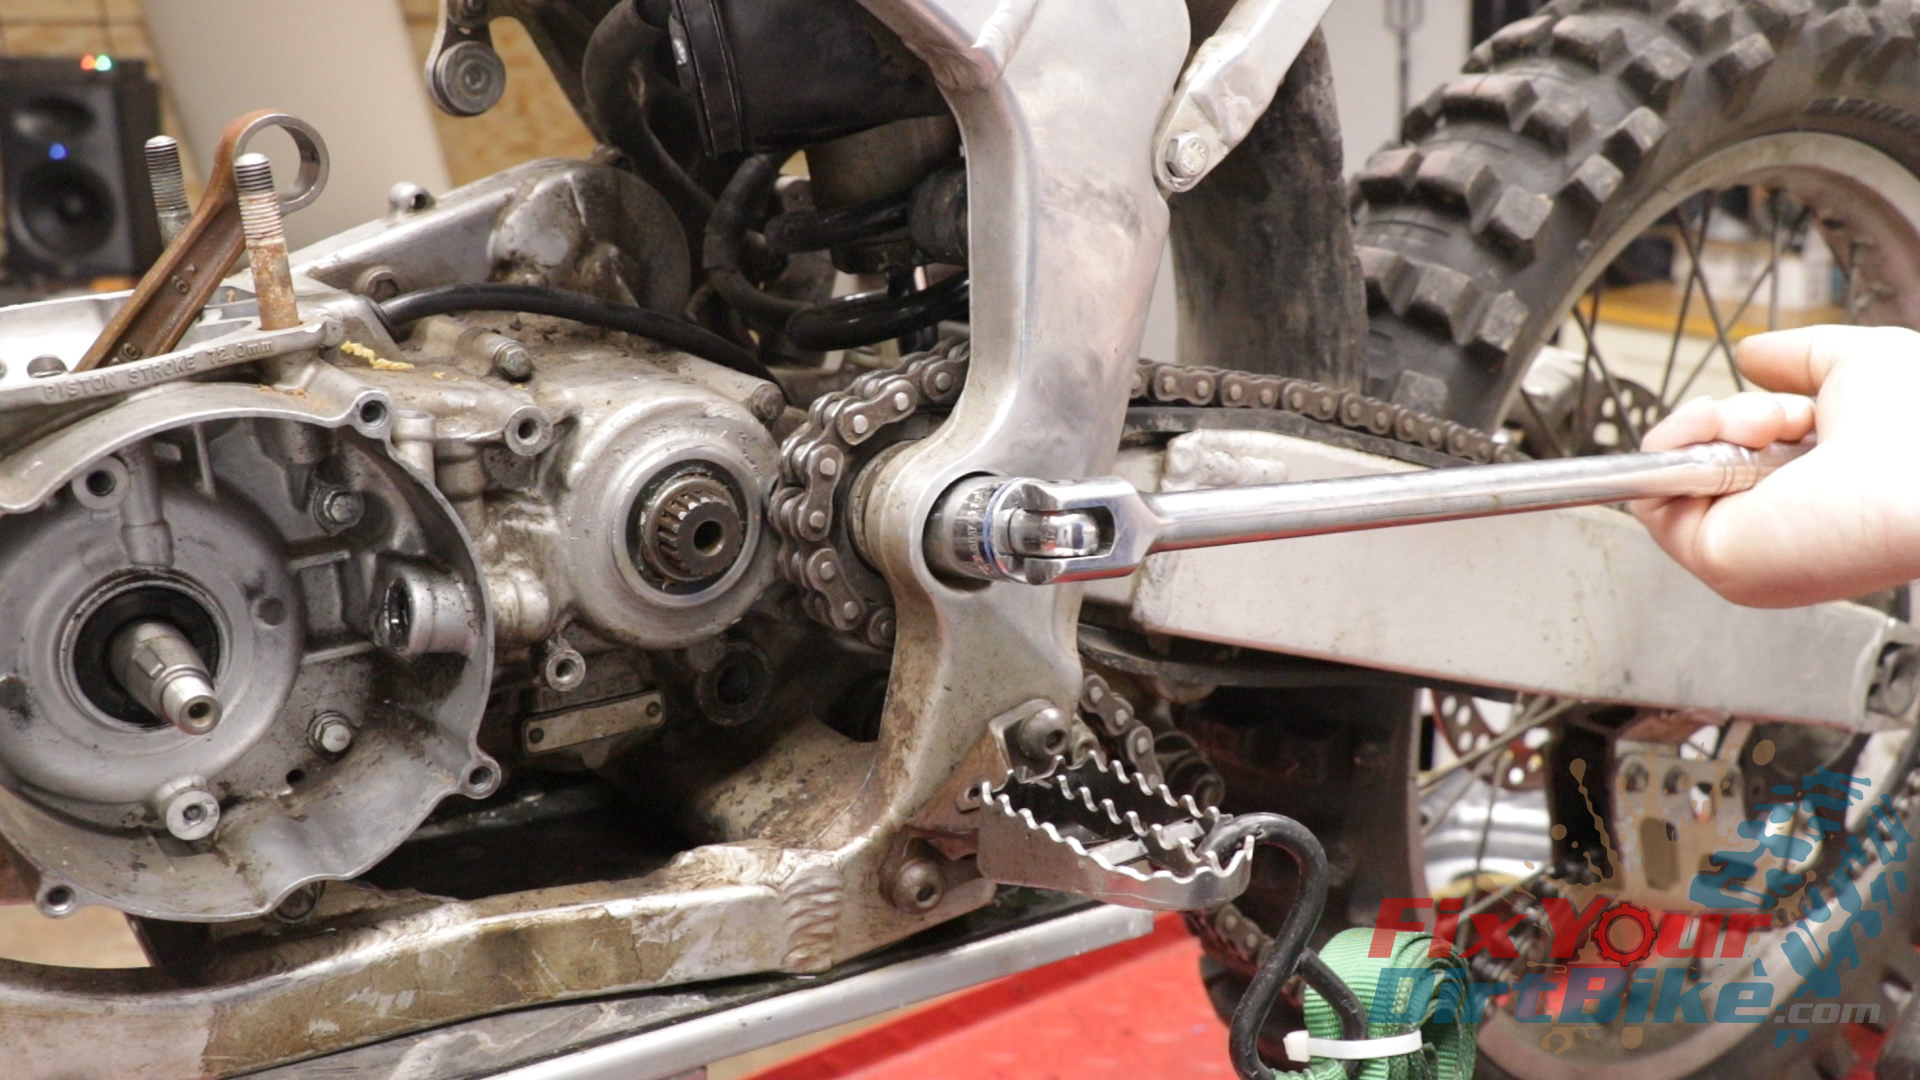
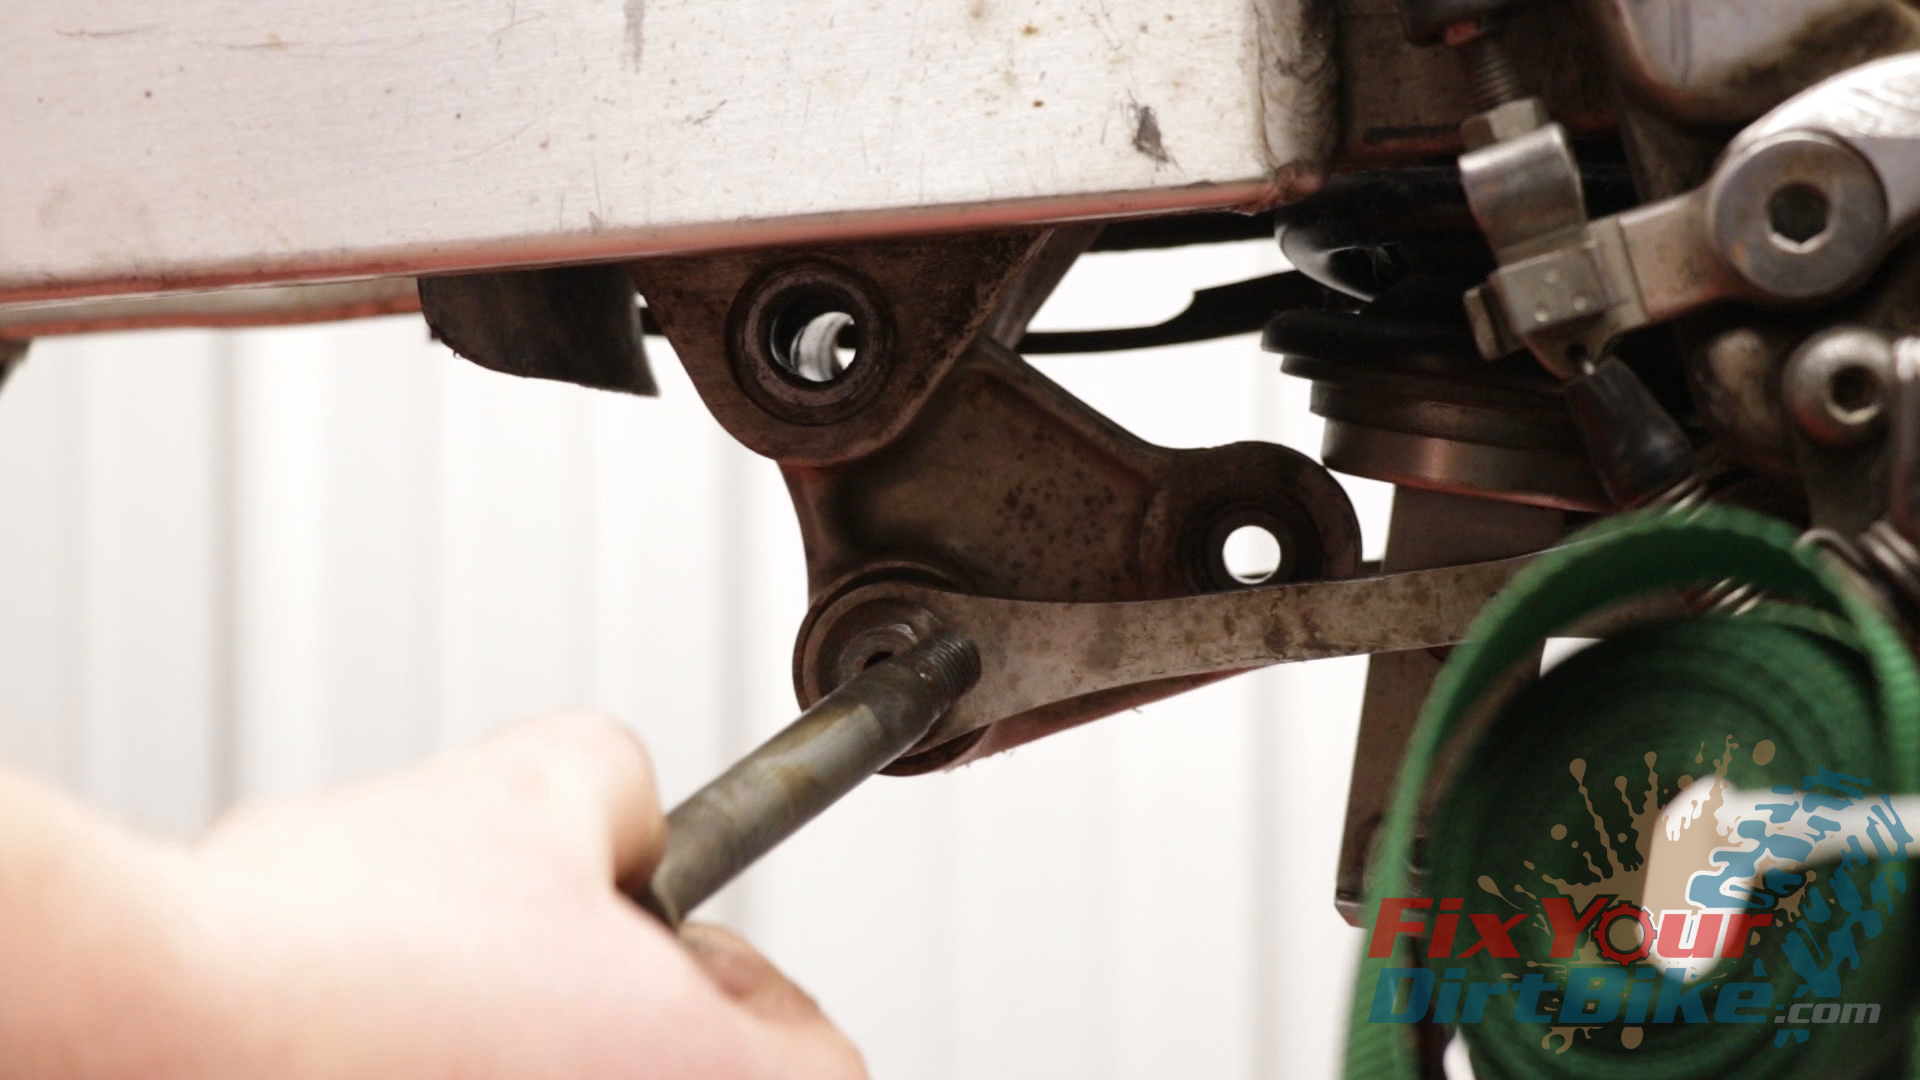
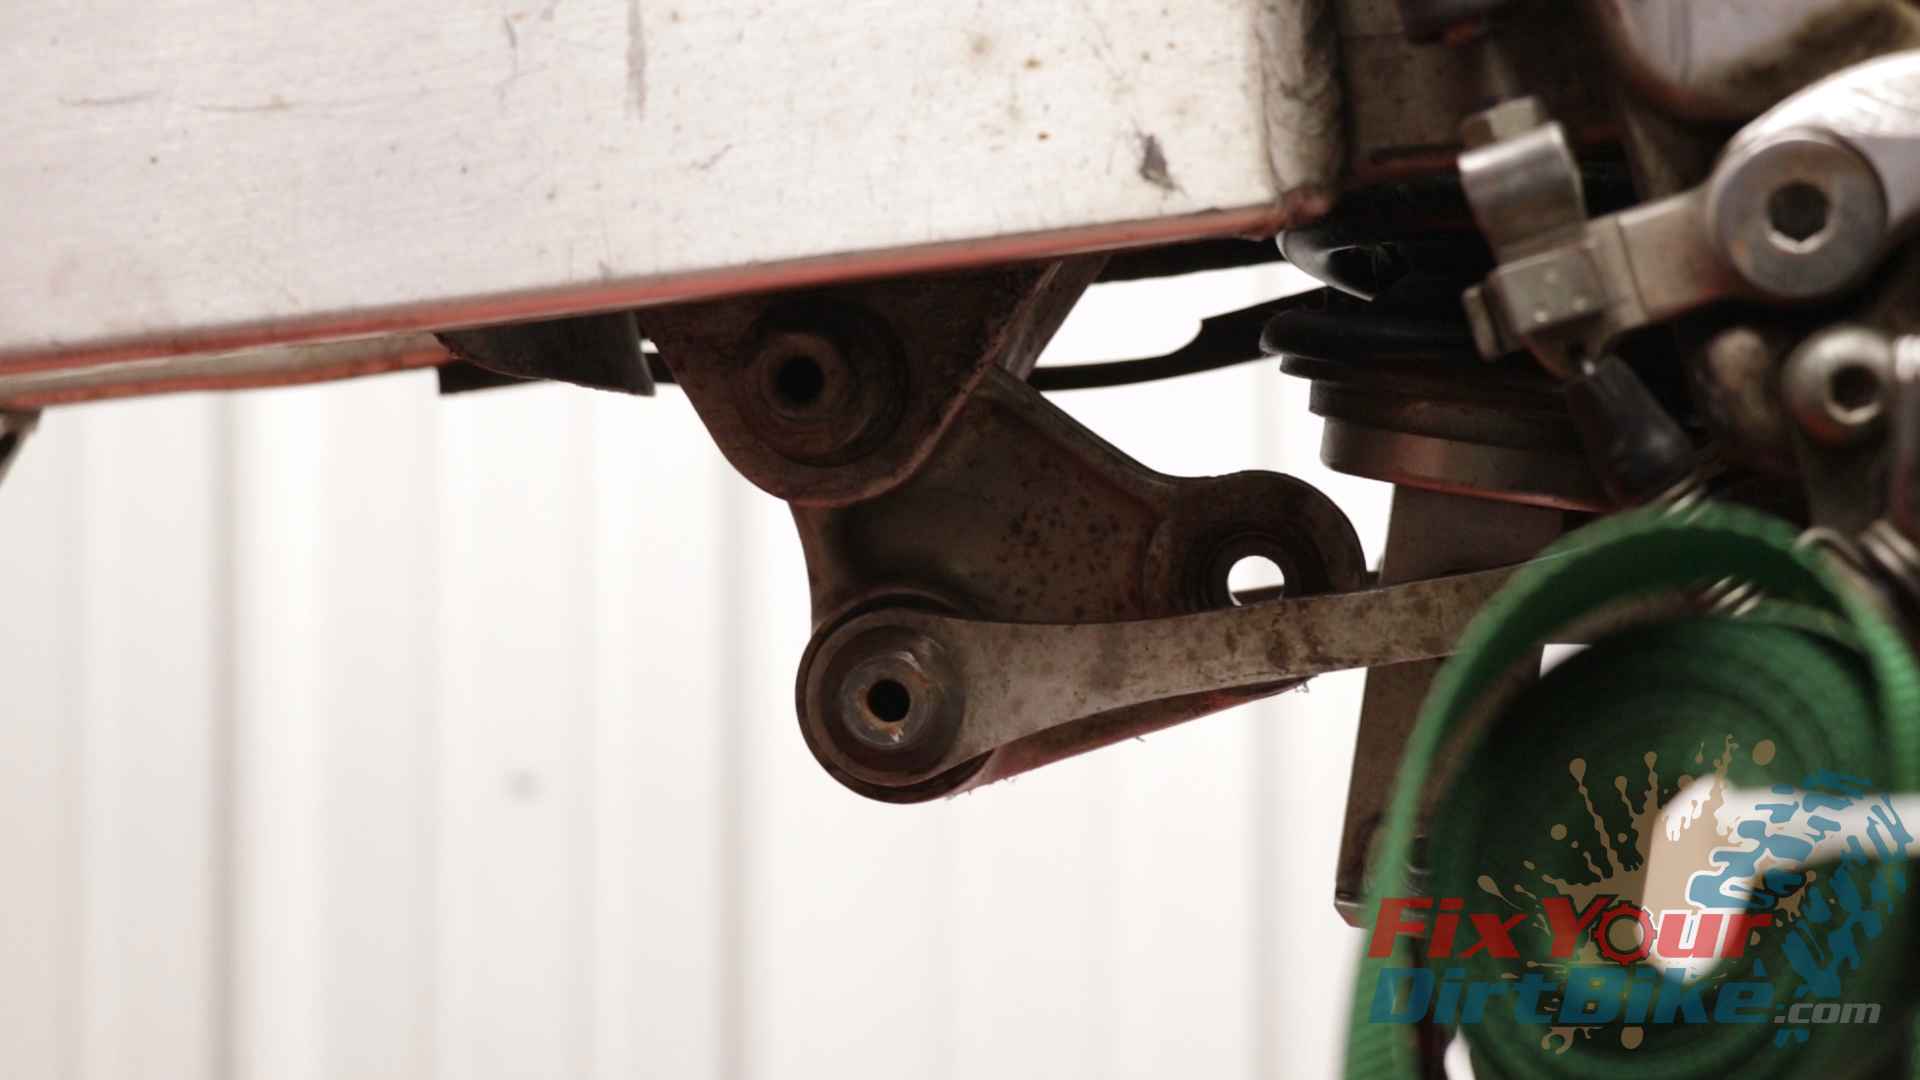
- On the bottom of the swingarm, remove the bolt connecting the swingarm to the shock arm.
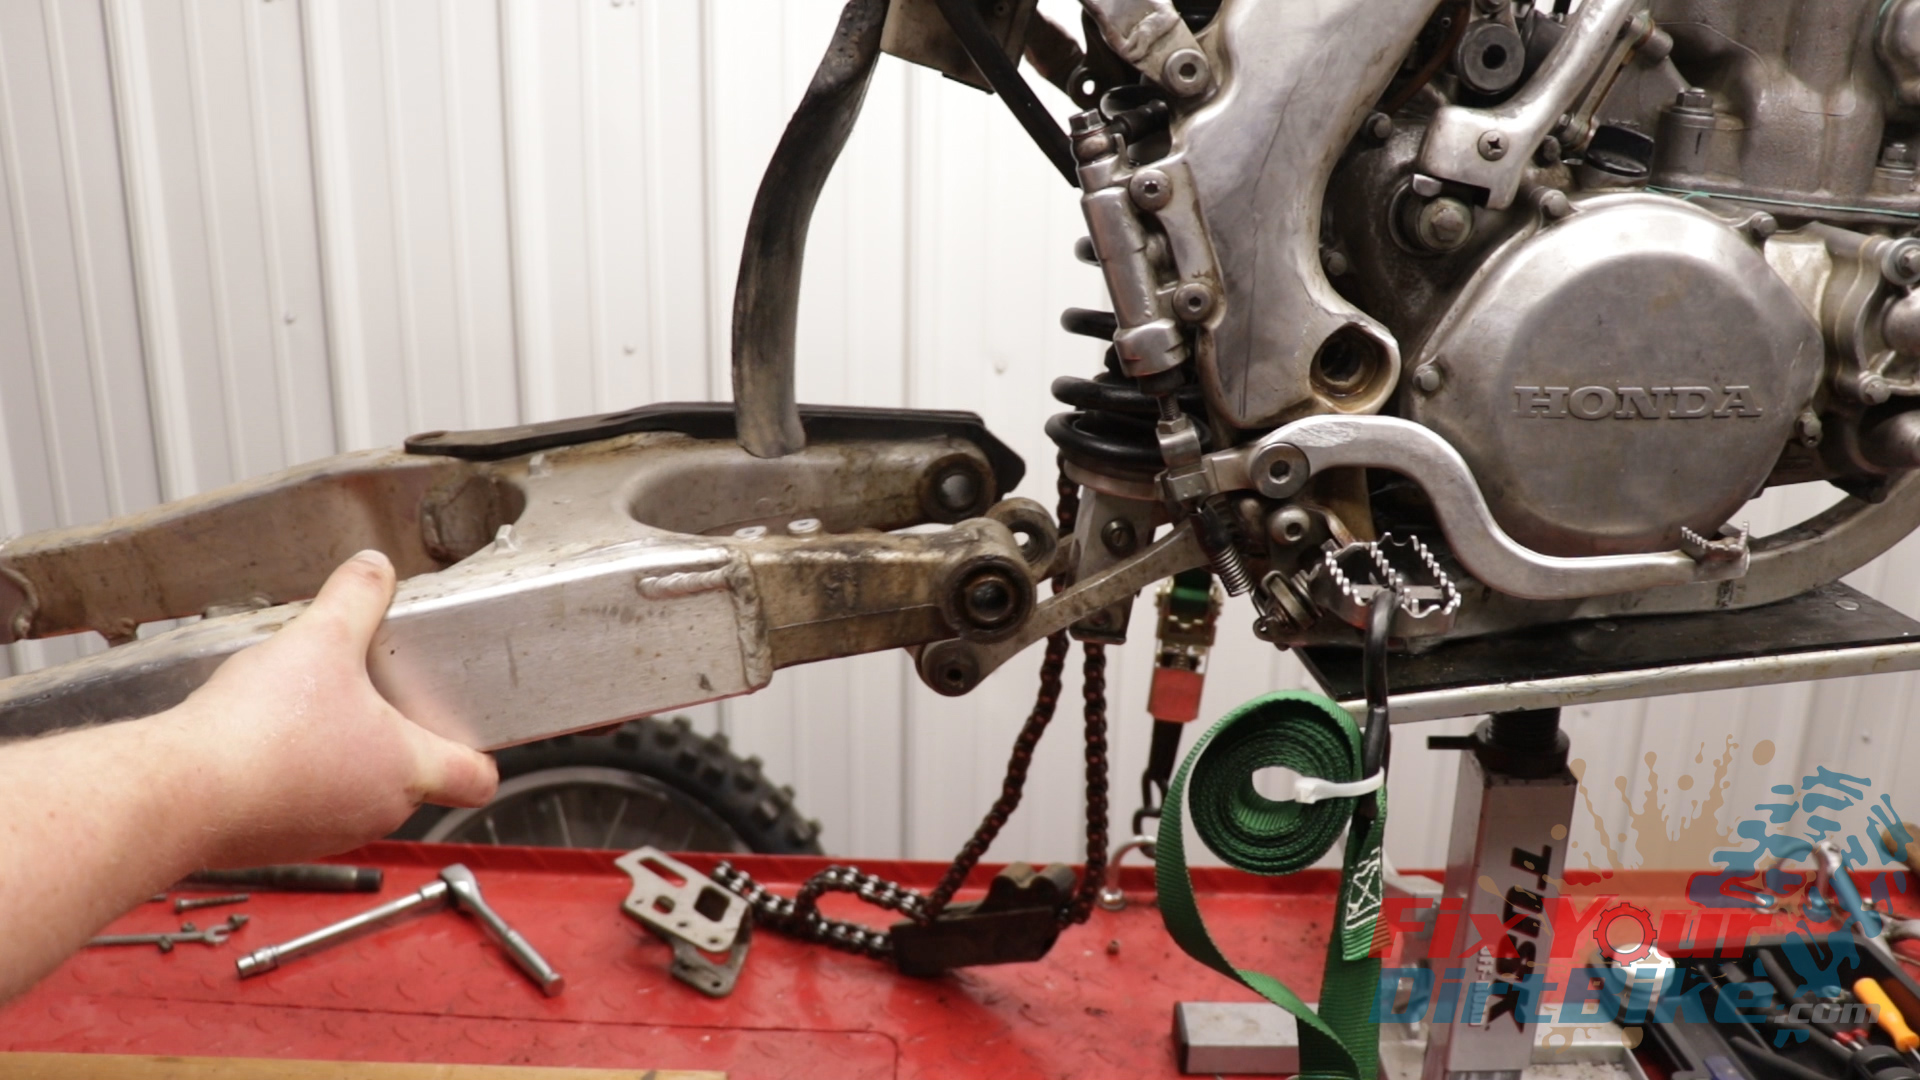
- Pull the swingarm pivot bolt, and remove the swingarm from your bike.
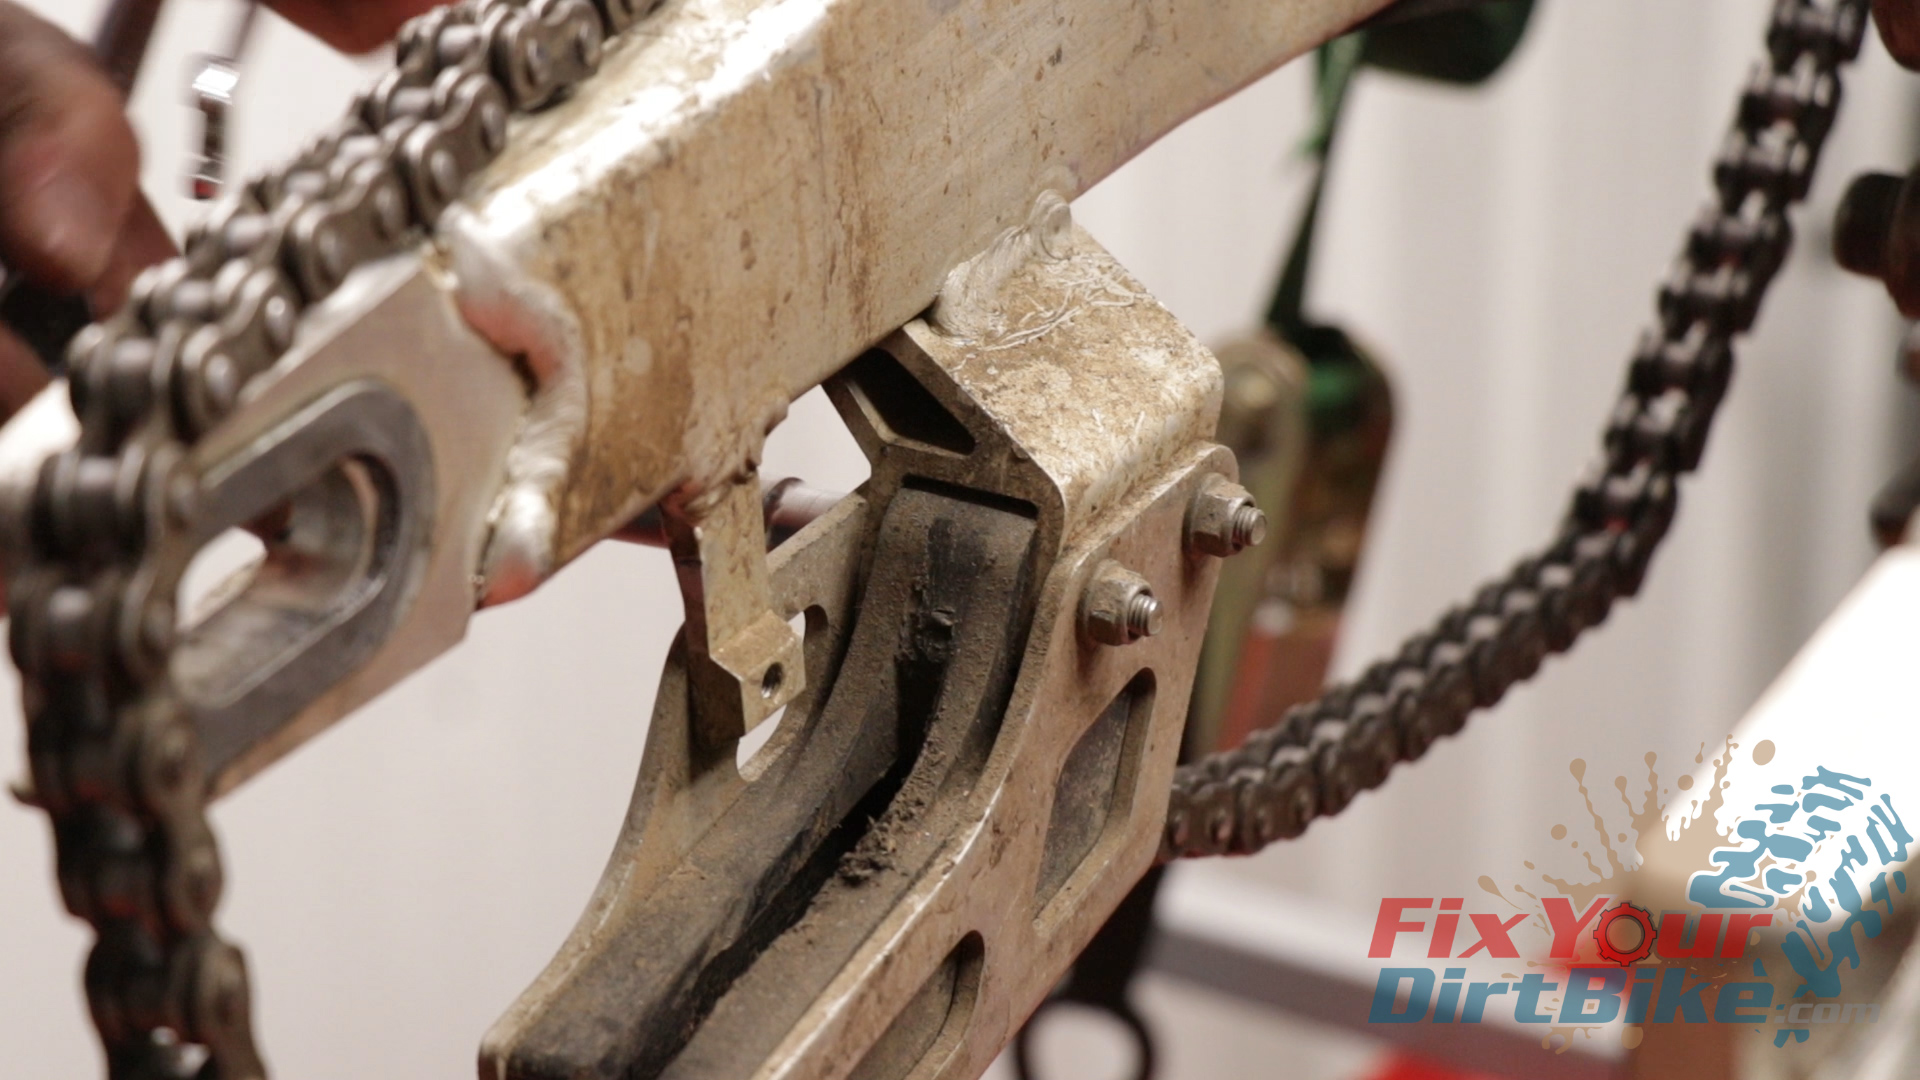
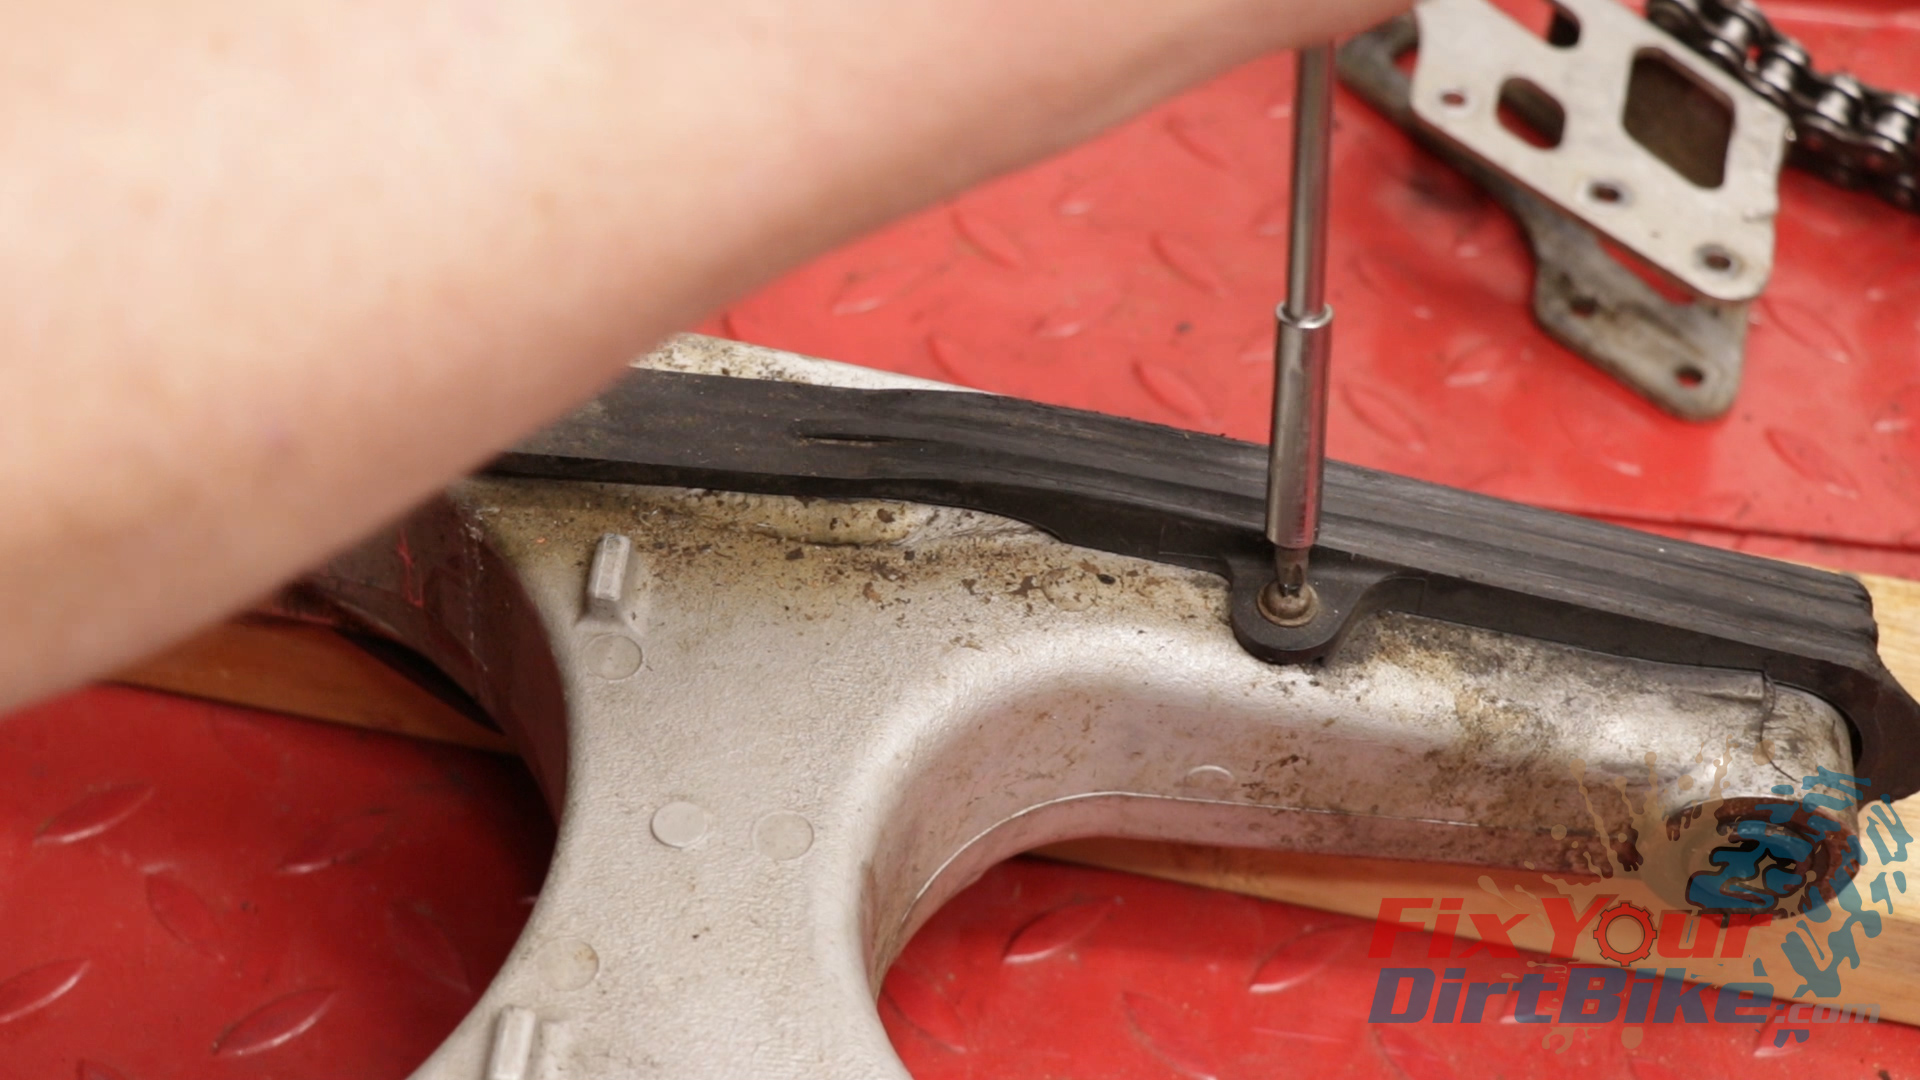
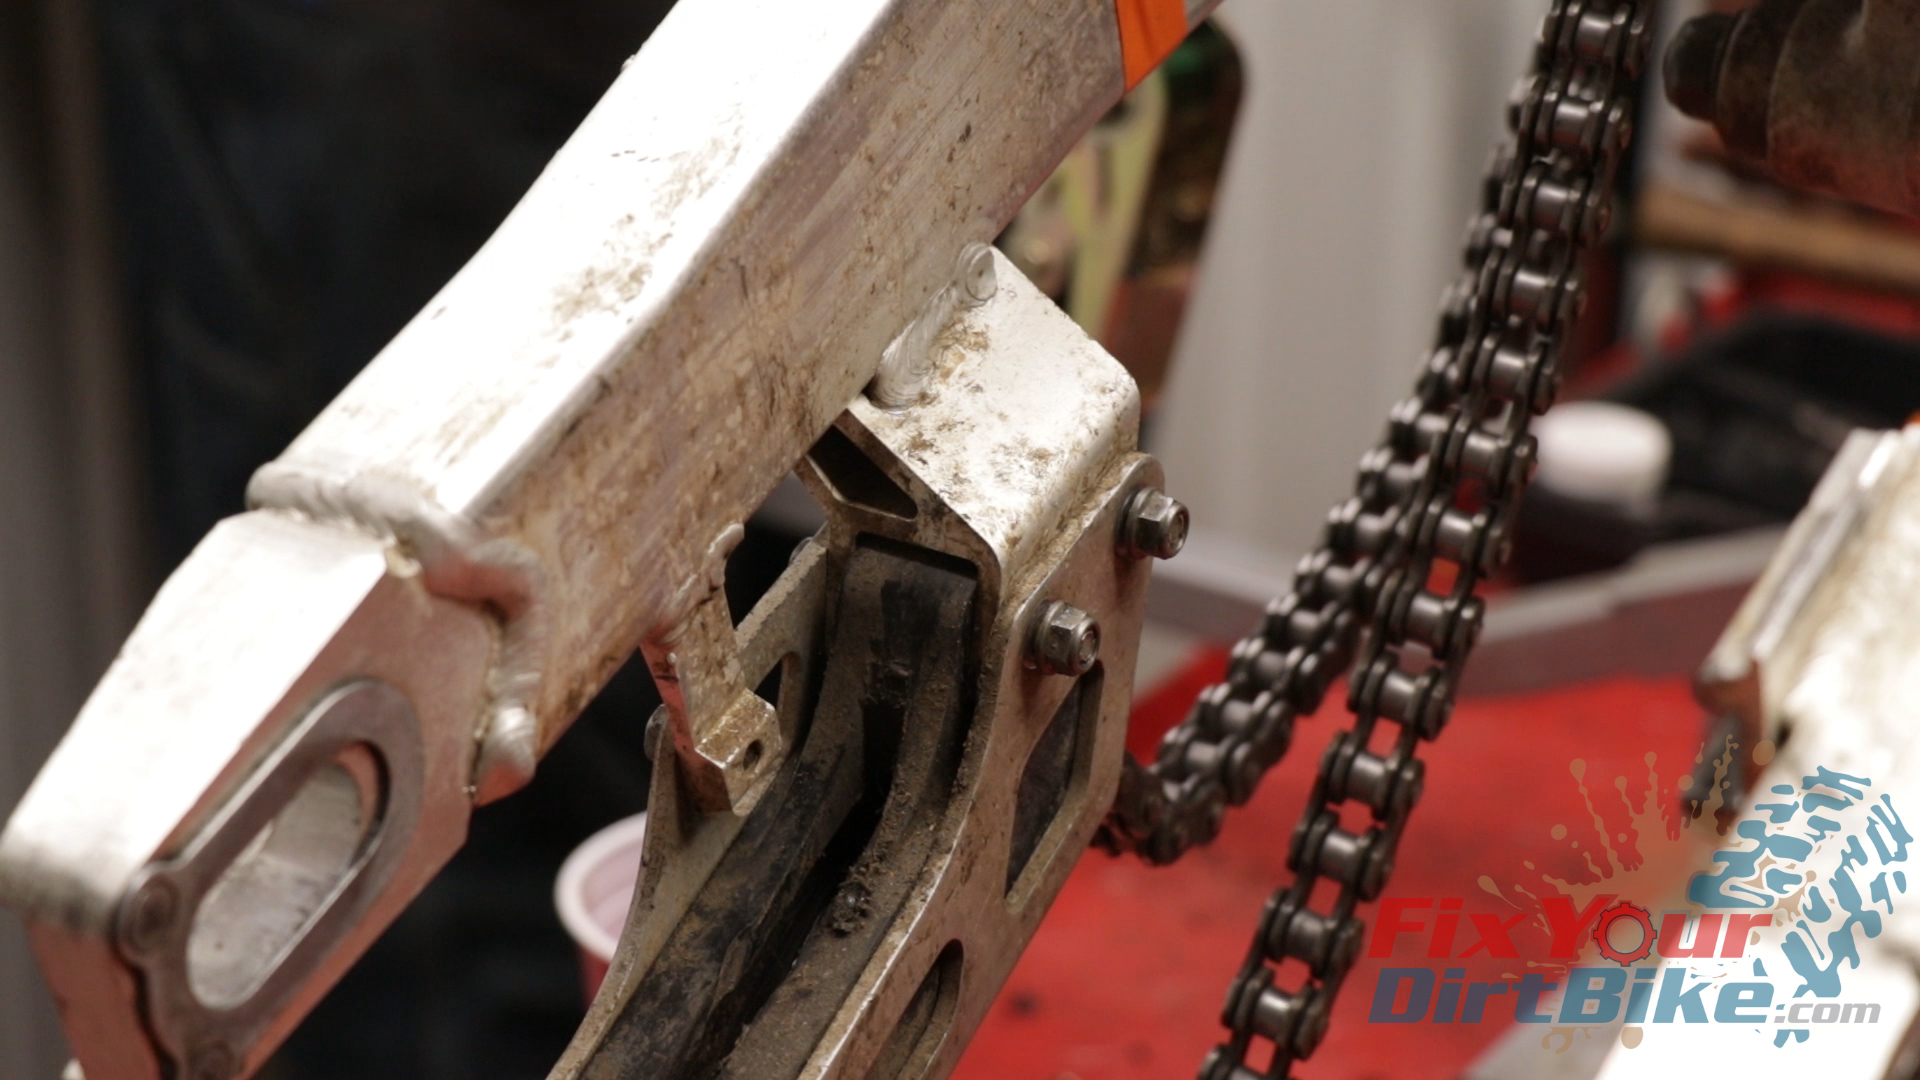
- Remove the chain slider.
- Give your swingarm a scrub and a rinse before taking it to the bench.
Related: How to remove and install the rear wheel on your 1997-’01 Honda CR250.
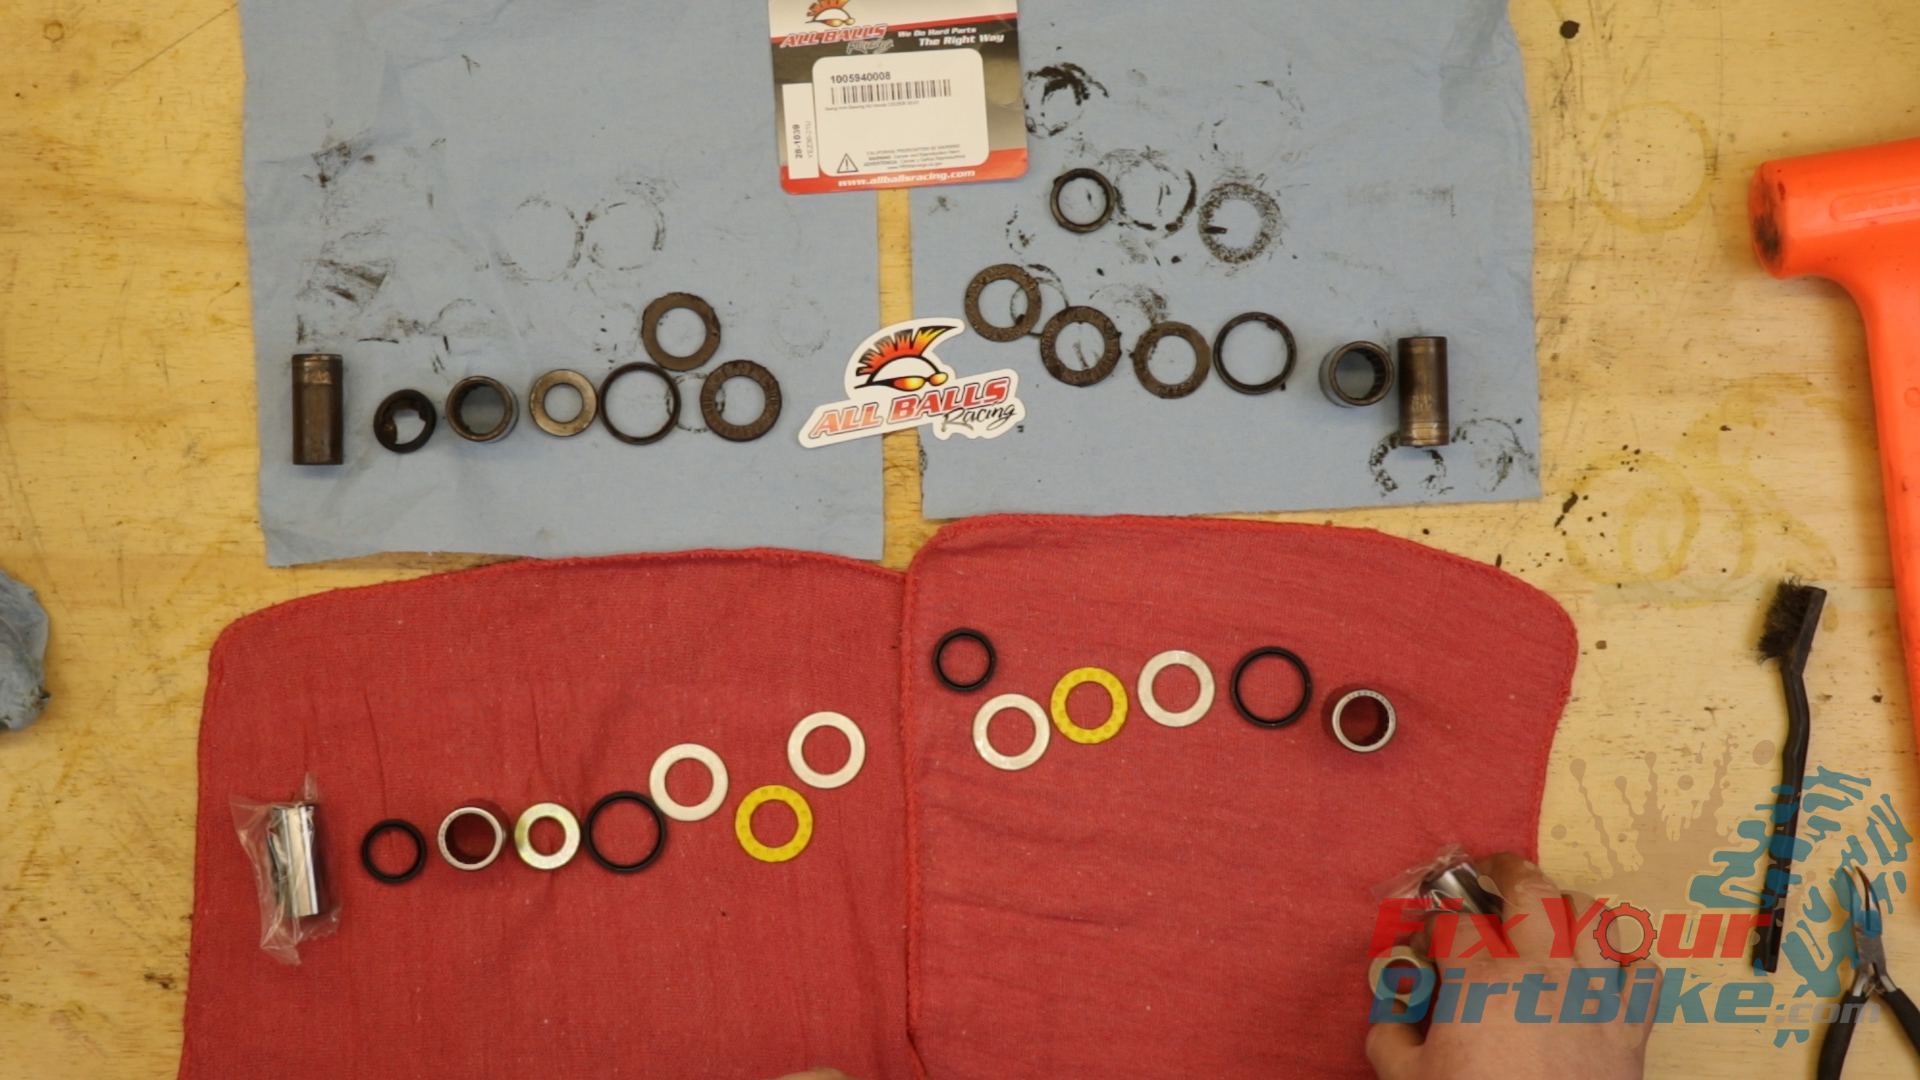
Swingarm Disassembly
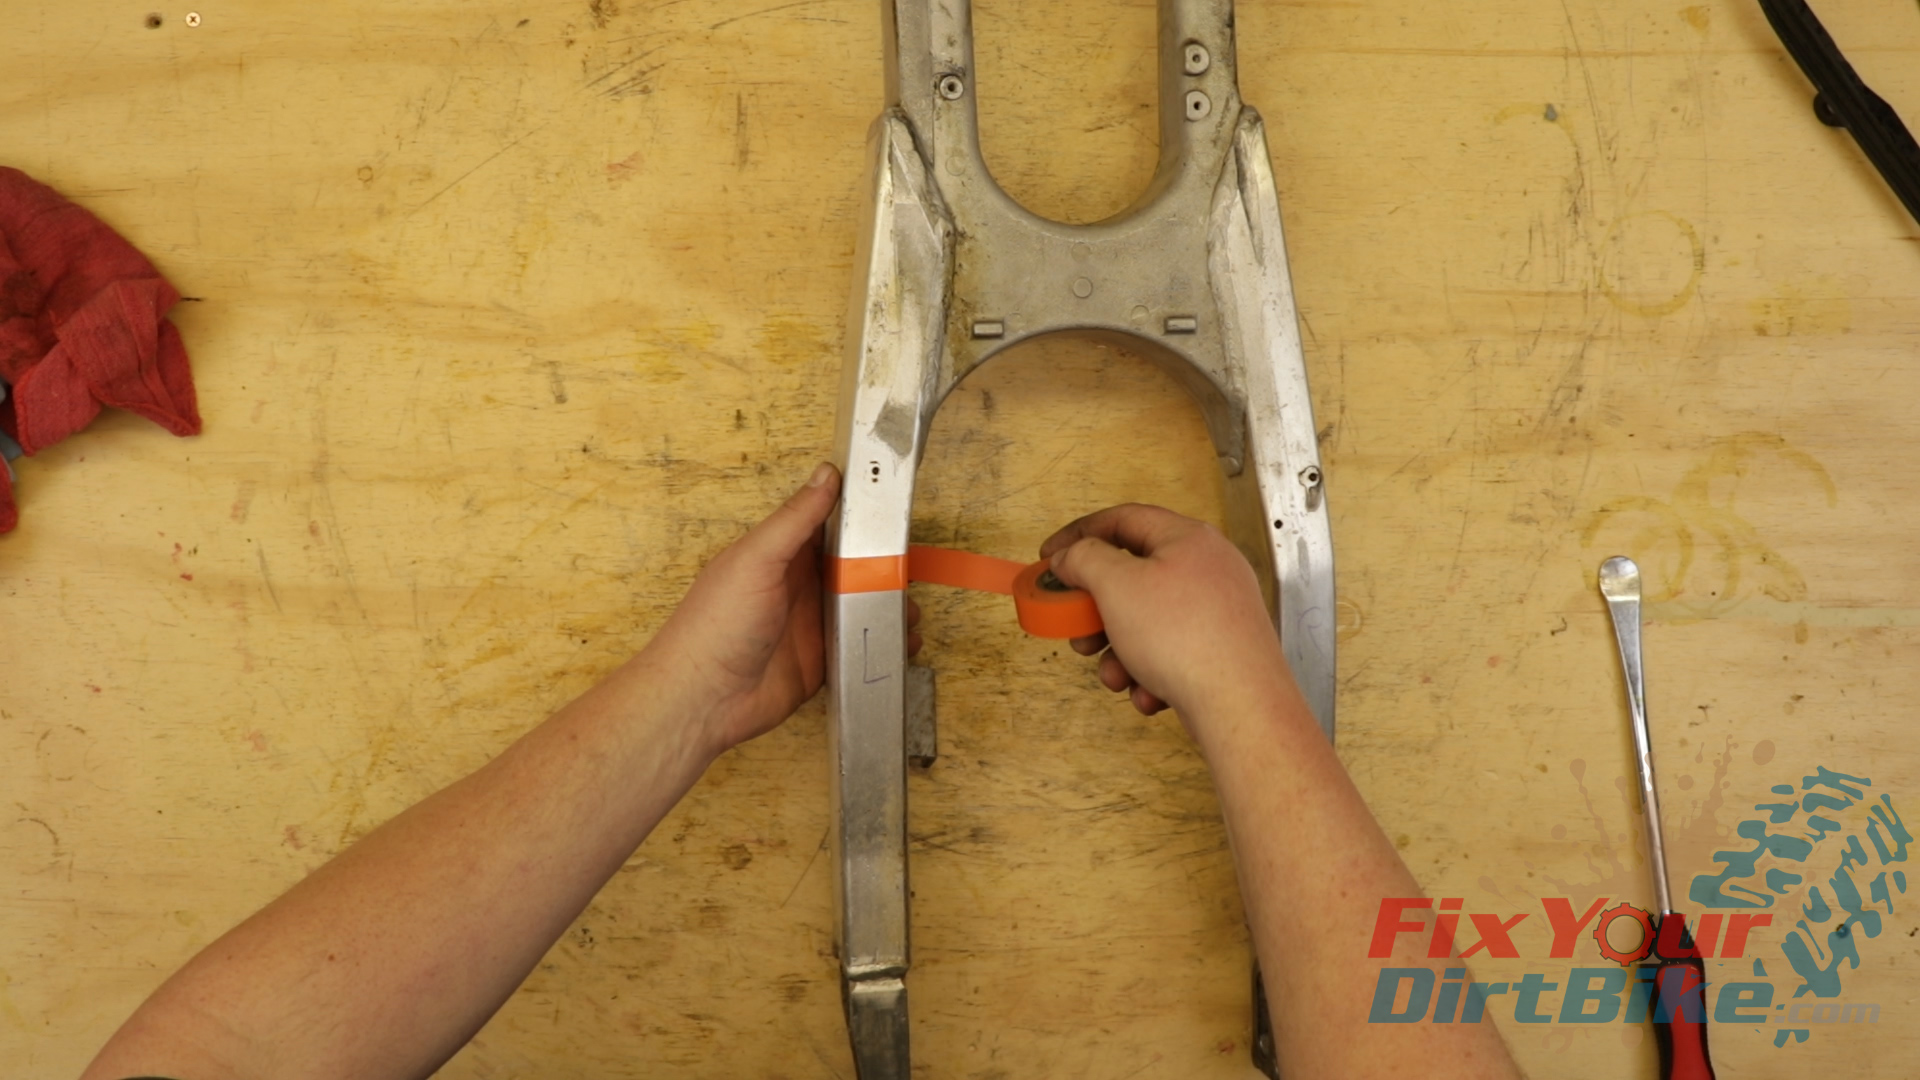
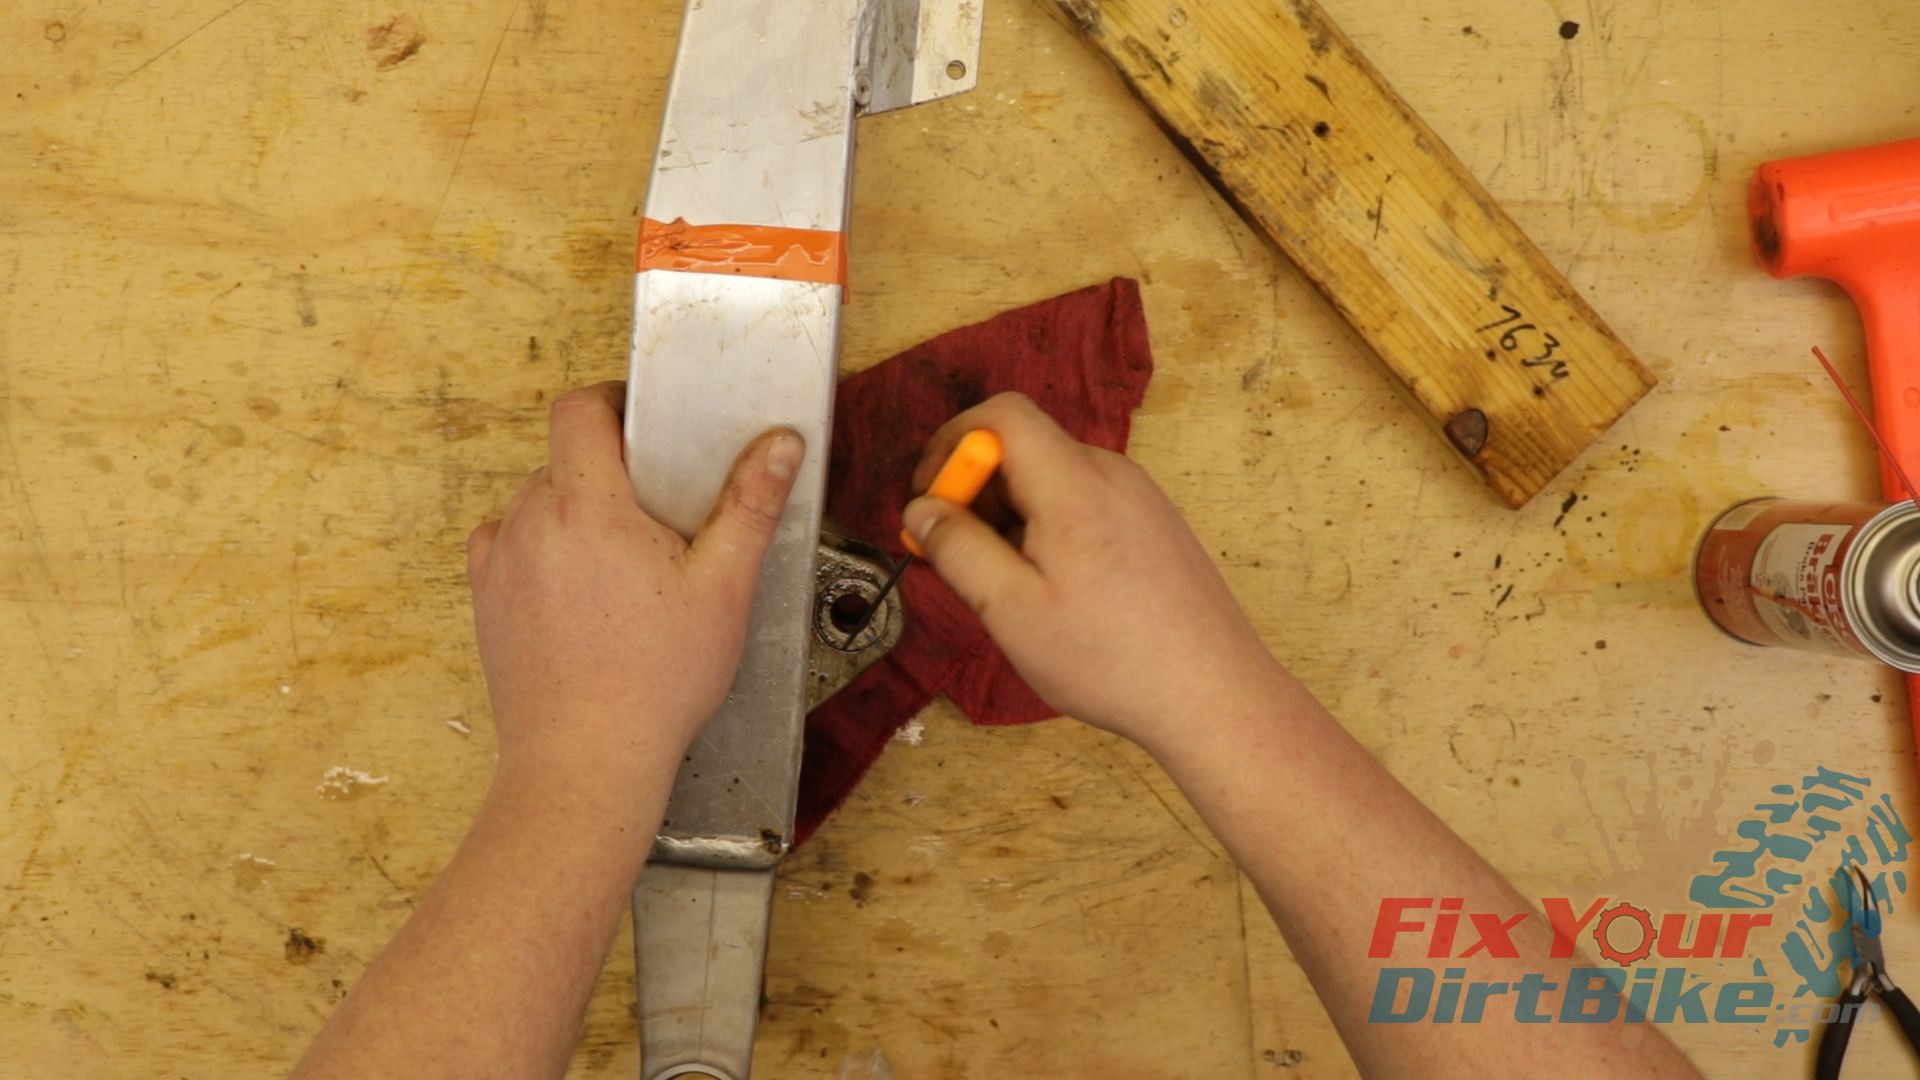
- Start by marking the left side of the swingarm; electrical tape works pretty well.
- It doesn’t matter what side you start with, but disassemble one side at a time, and make sure to keep each side separated. I will be starting with the left side.
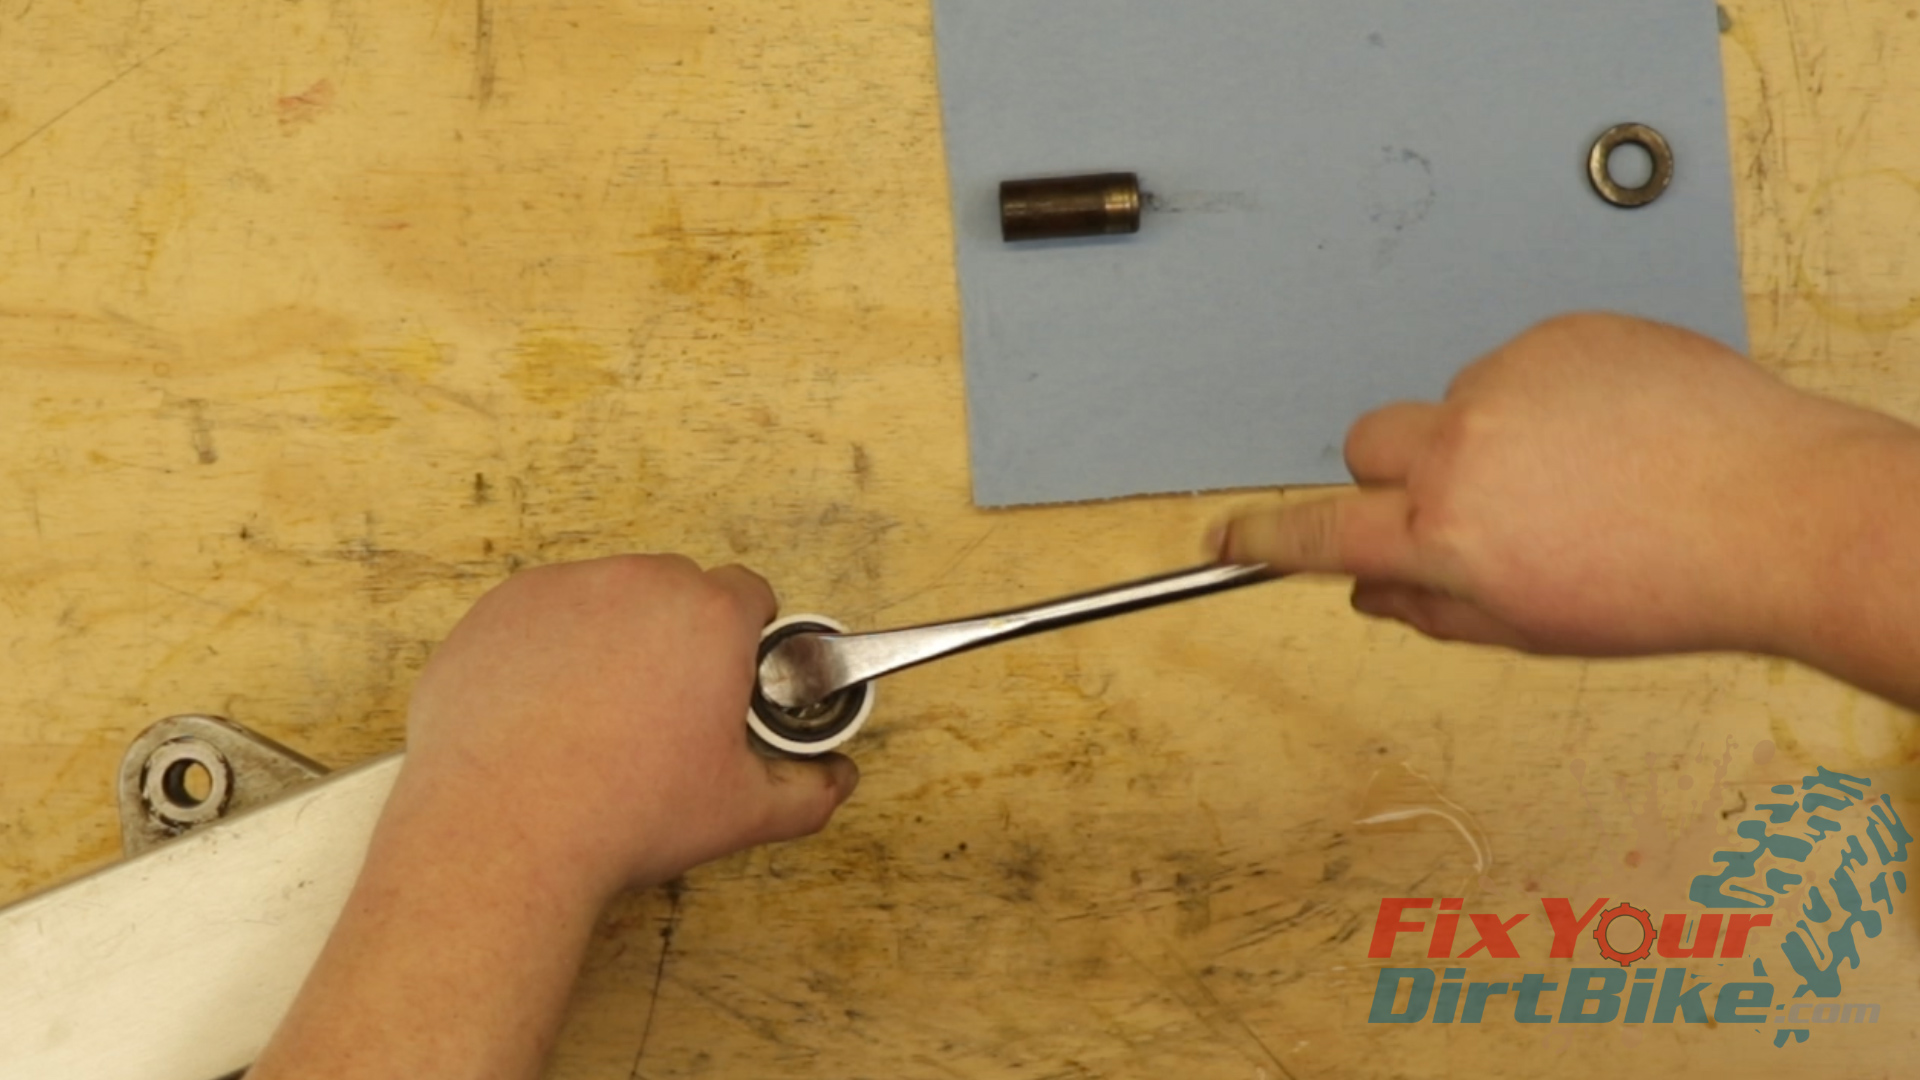
- Remove the seals from the inside and outside of the bore.
- Remove the collar from the inside of the swingarm, and the thrust bearing and washers from the outside of the swingarm.
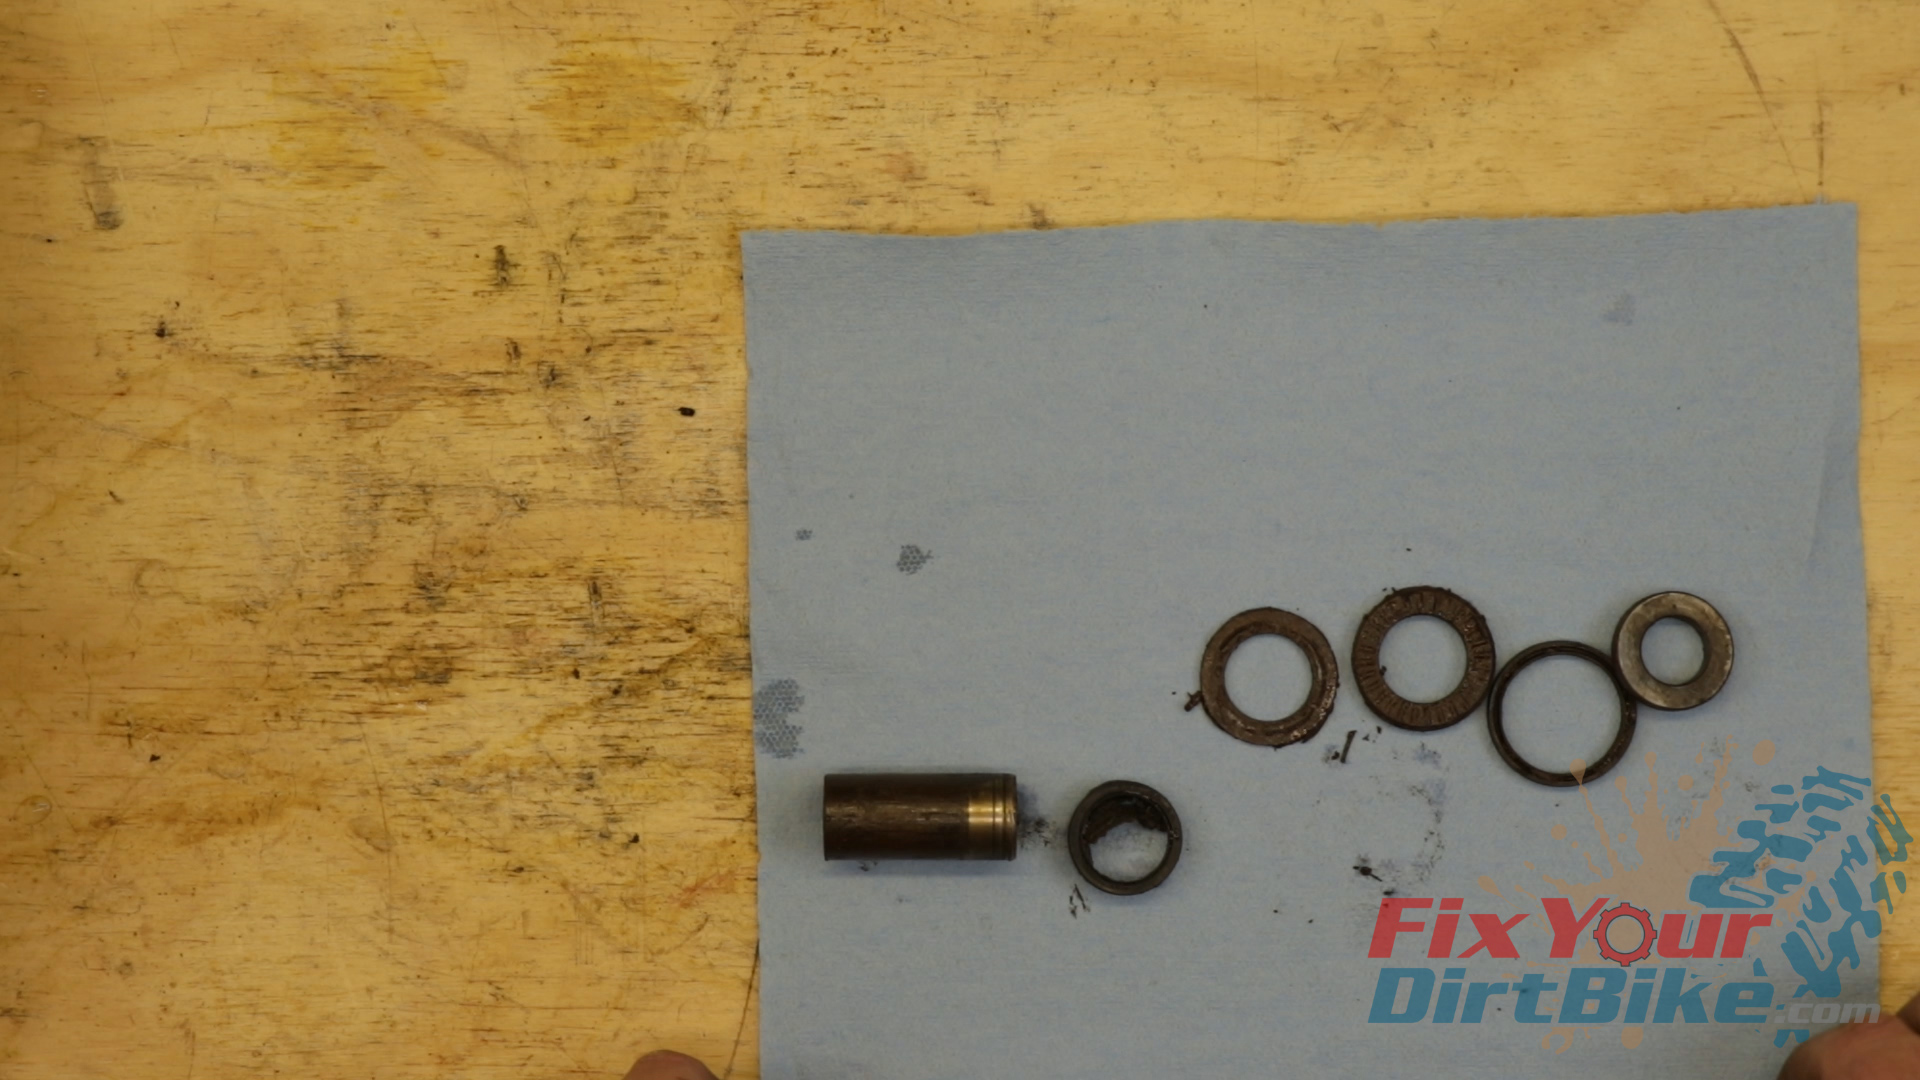
- You should have seven pieces per side: Inner seal, collar, thrust washer, thrust bearing, thrust washer, seal, and side collar.
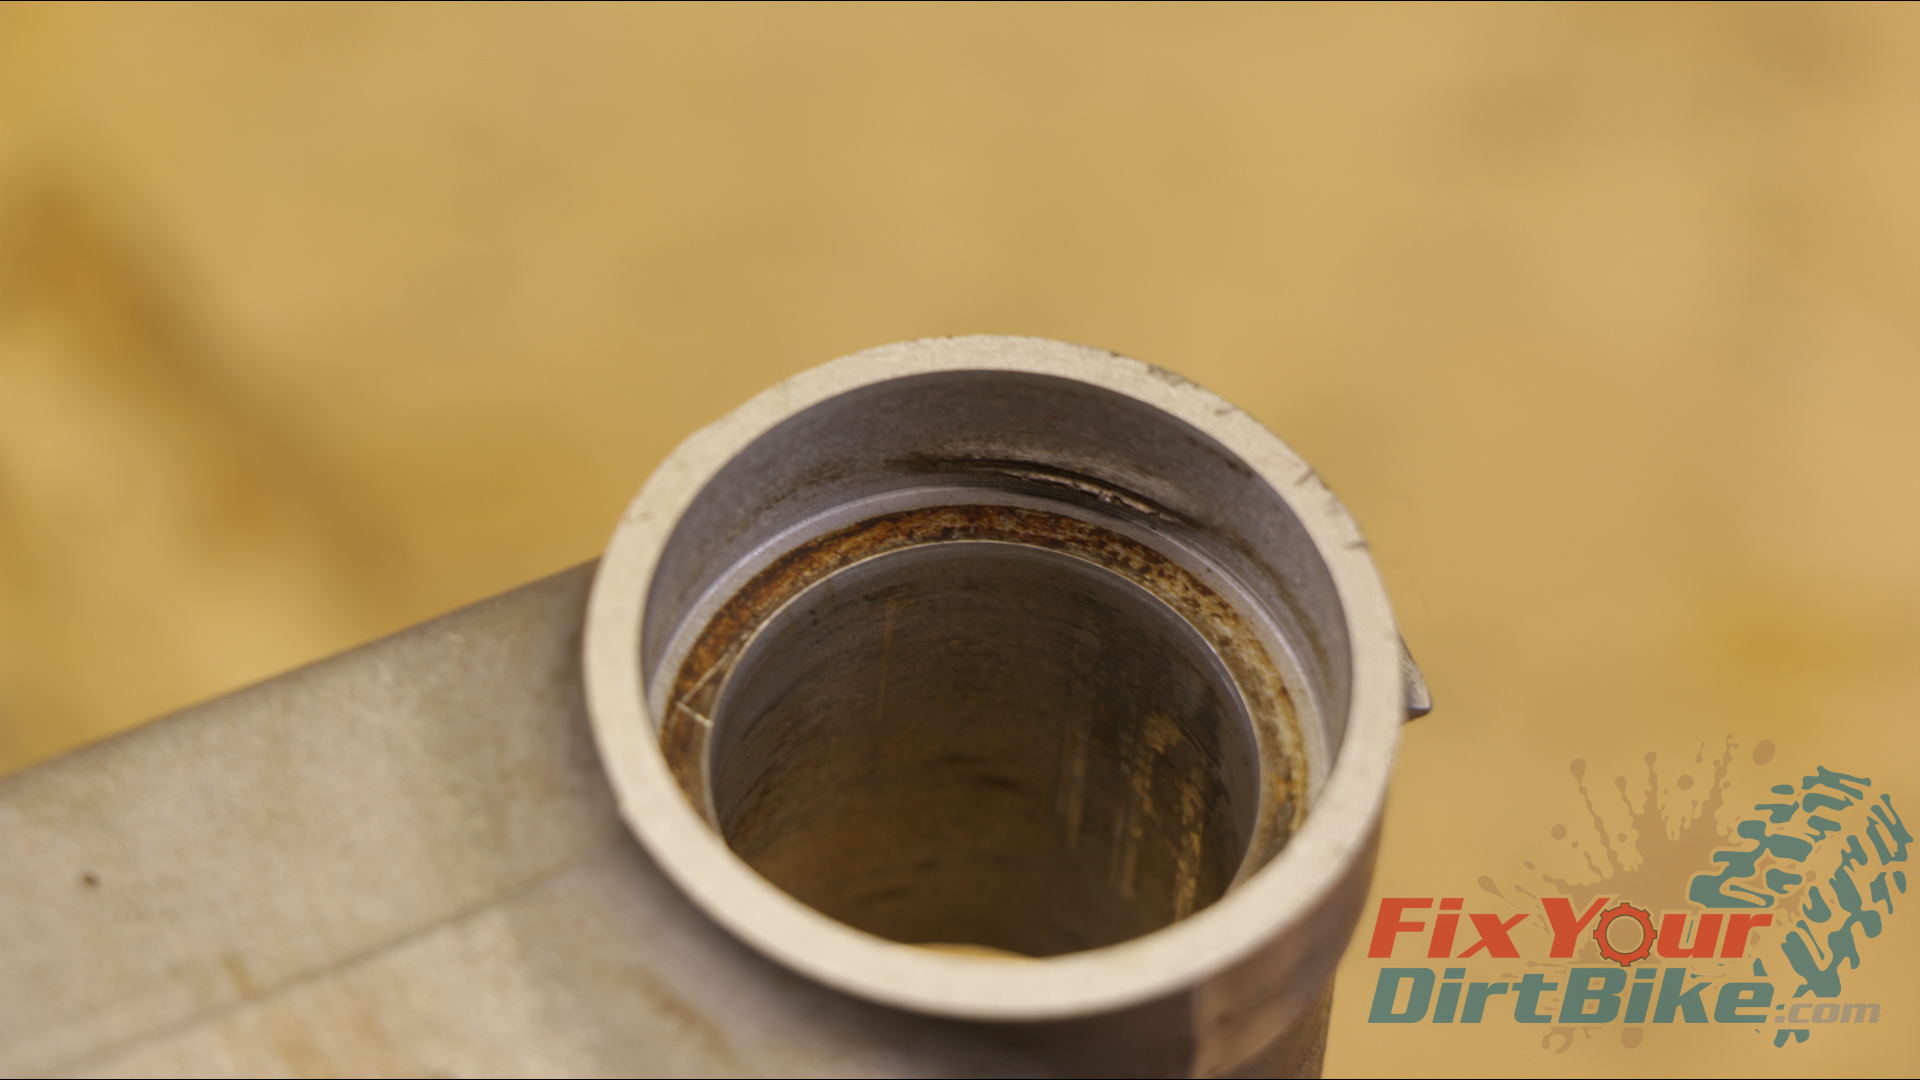
- As you can see here, I am missing a thrust washer that is still stuck on the bore.
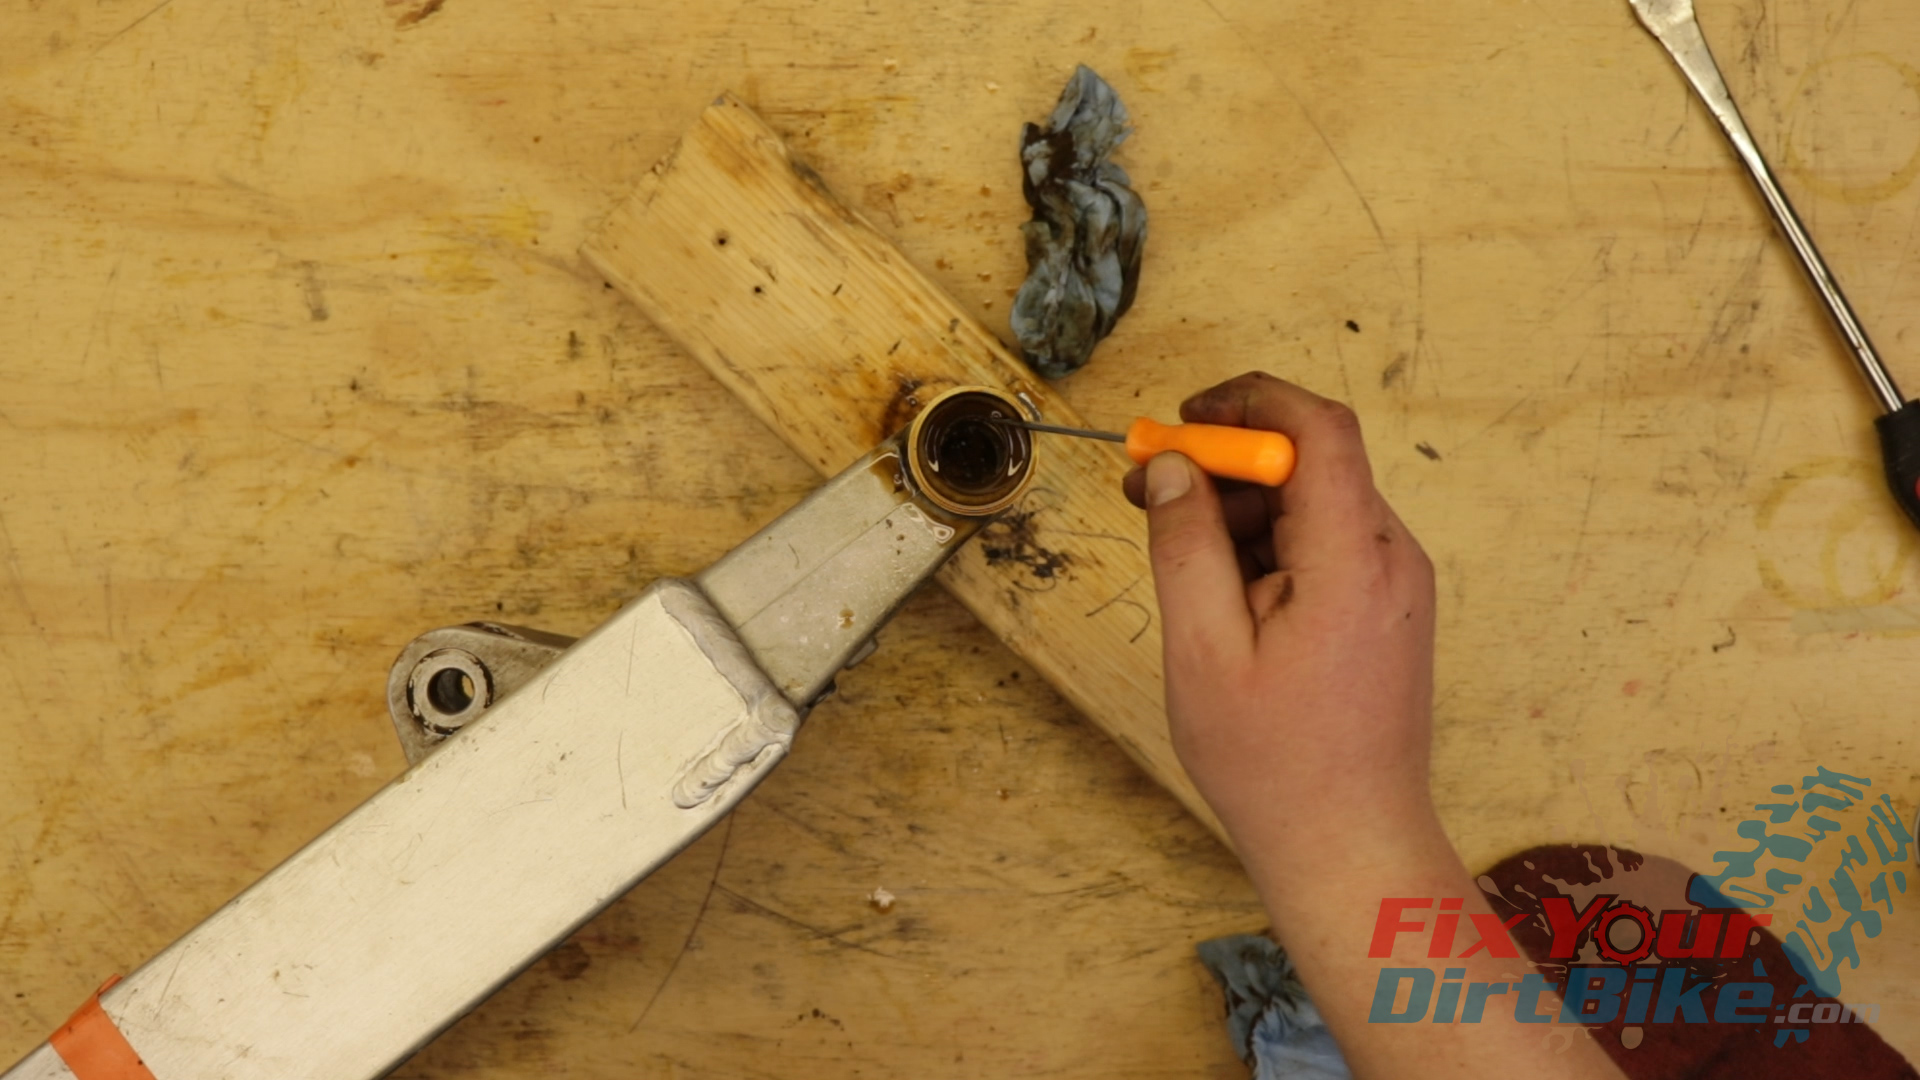
- This swingarm bore is exceptionally contaminated, and all the grit pressing against the washer rubbed a groove in the bore. After a lot of Pb blaster and picking, I was able to remove it without too much hassle.
- With each side disassembled, clean the bore with parts cleaner and a towel or soft bristle brush.
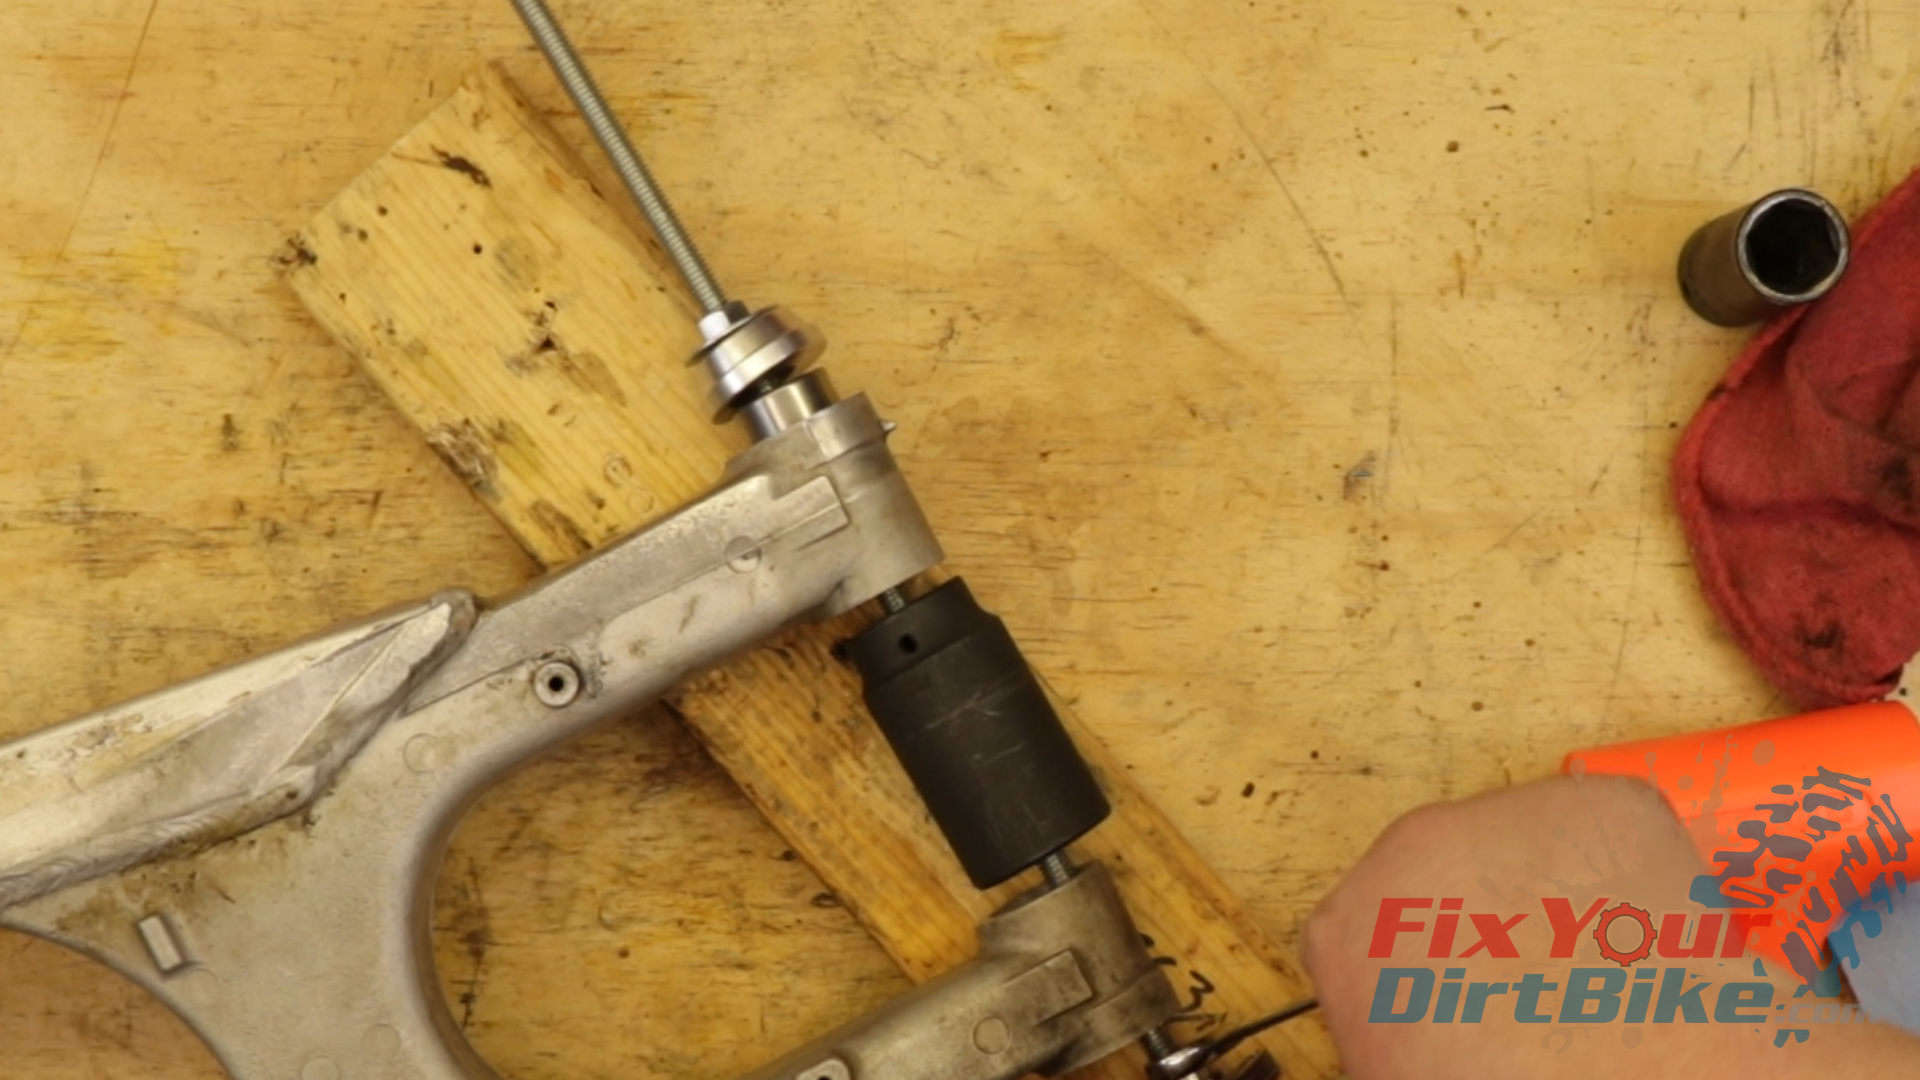
Bearing Removal
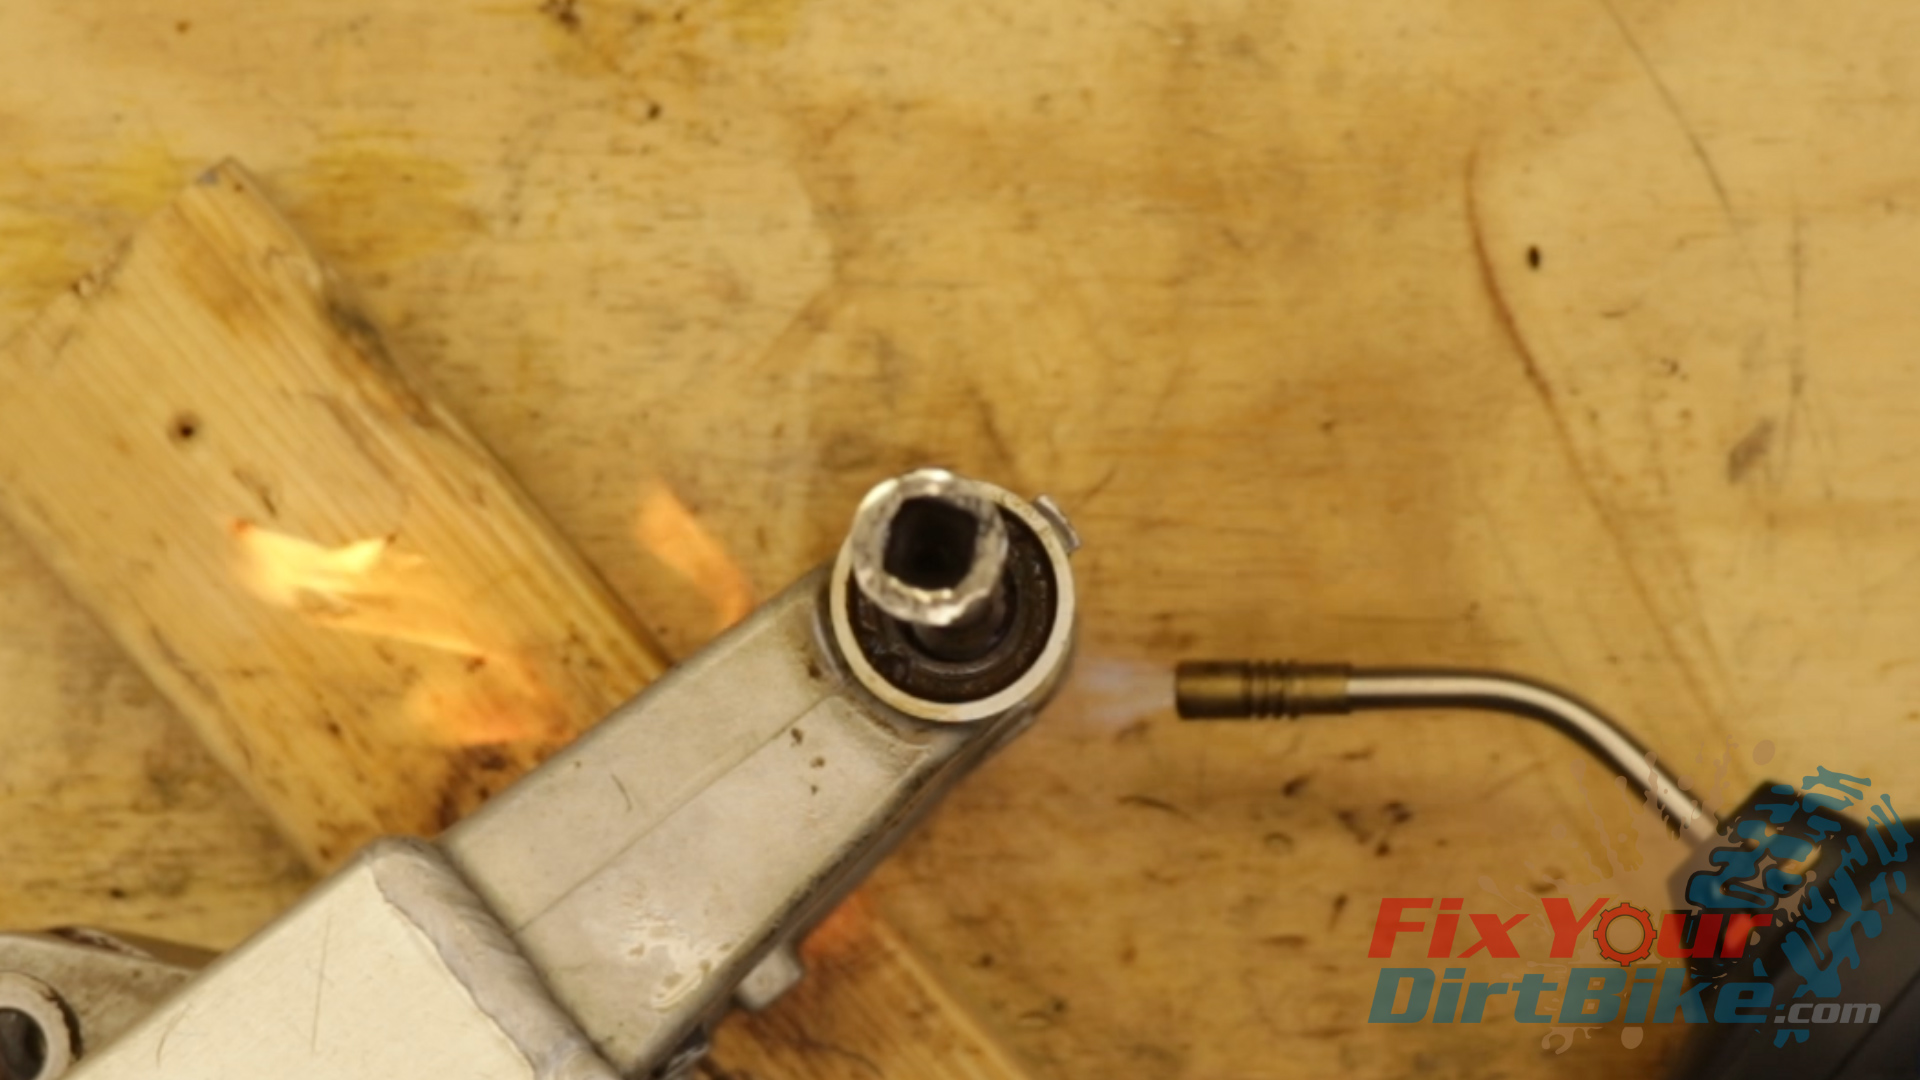
- These bearings are a press fit, so you will need a press to remove them. I don’t have a press, and I bet you don’t either, so the heat and beat method will work just fine.
- You need to remove these bearings from the inside of the swingarm, so you will need a socket extension to reach throughout the opposite bore.
- Stabilize your swing with a block of wood, and if you can clamp it down, even better.
- Assemble your socket and extension, and rest it on the bearing.
- Heat the swingarm bore for about 60 seconds, making sure to move the torch for even heating.
- Smoke is normal, and grease residue may catch fire. Remove the torch and firmly tap the bearings
- If you have to hammer at them, reheat until you don’t.

Related: How to service the rear wheel bearings on your 1997-2001 Honda CR250.
Clean & Inspect
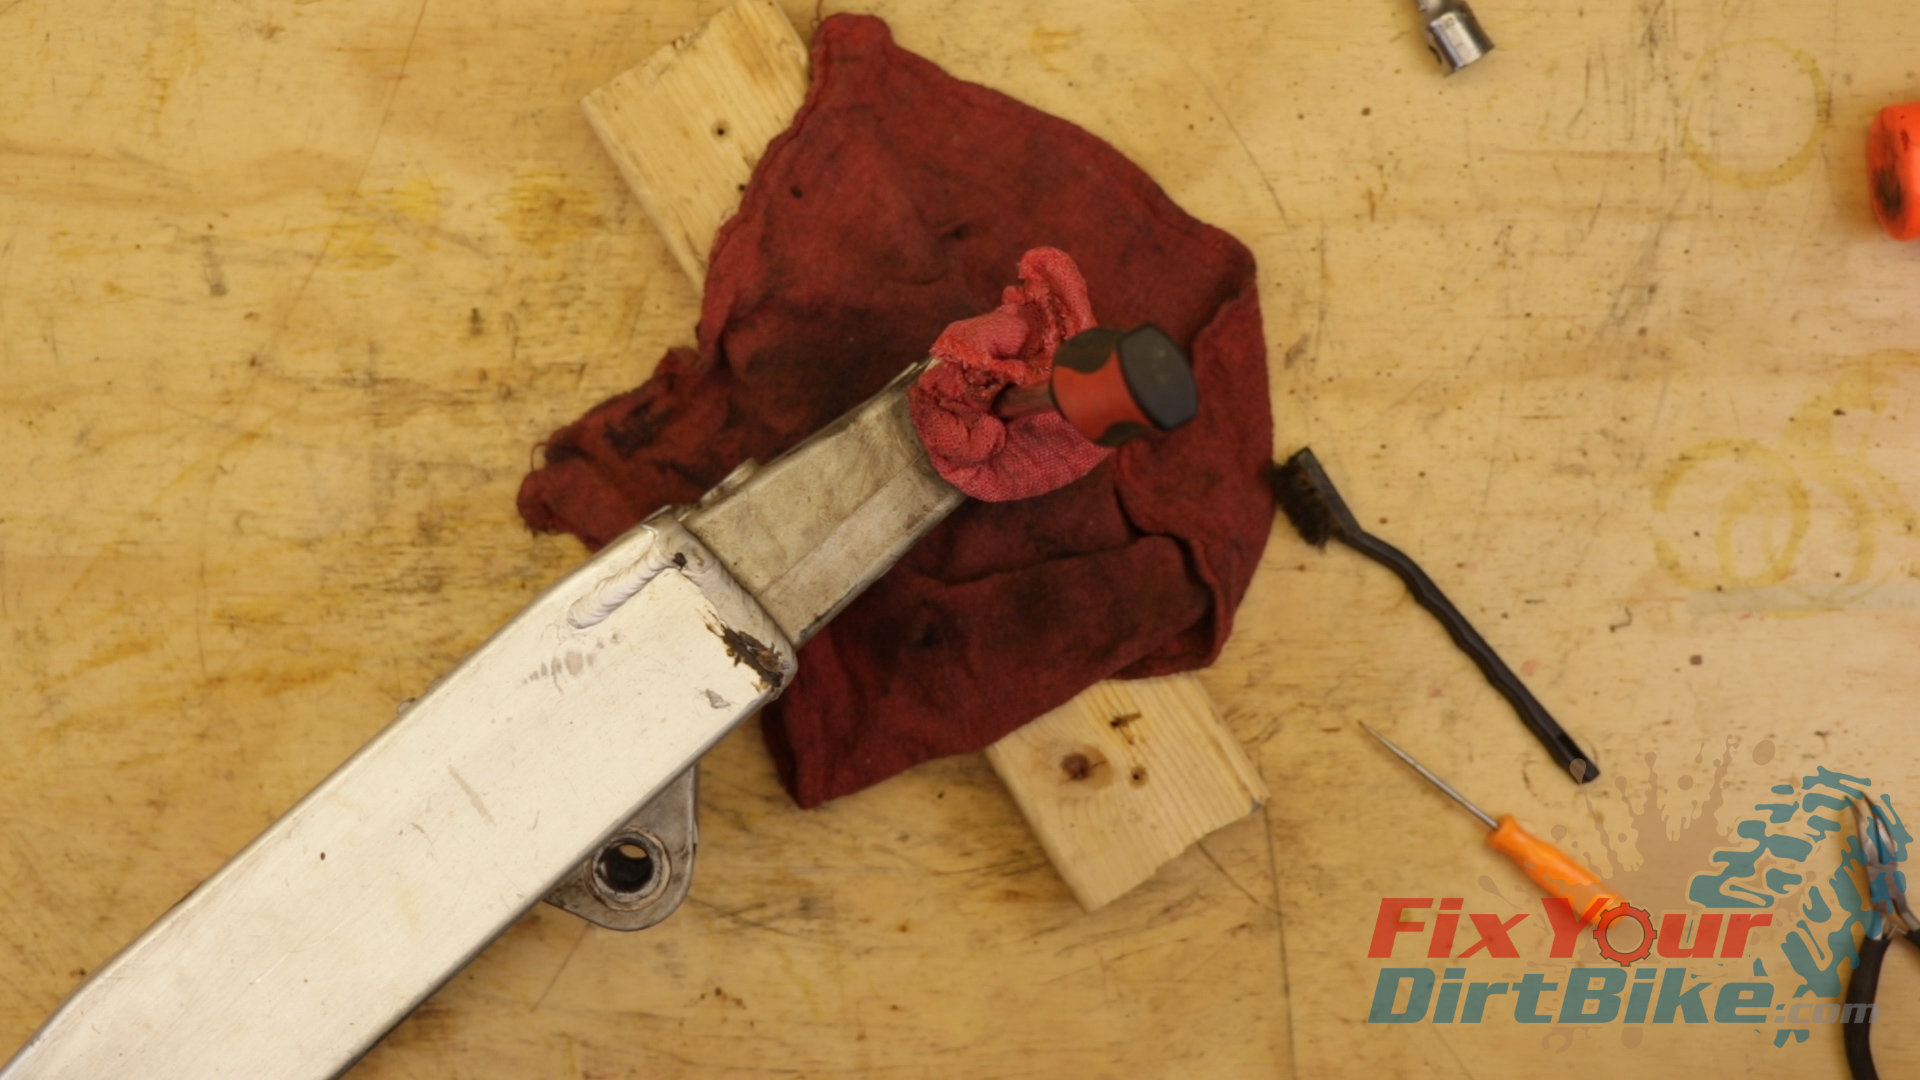
- Clean the swingarm thoroughly.
- Make sure every hole is clean and smooth, and sand them if they are not.
- I had to grind down the washer groove on the left side bearing bore with a Dremel and carbide bit, followed by a sanding bit to smooth it out.
- Finally, clean the pivot shaft mounting holes on the body.
Make sure every hole is clean and smooth, and sand them if they are not.
New Swingarm Parts
I am using an All Balls rebuild kit for this service. This kit comes with a nylon bushing instead of a thrust washer replacement.
While not OEM, these nylon replacements are a good alternative. Keep your sides separated, and match up your new parts.
Remember, you can get all the tools and parts for this service through our partner links. It won’t cost any more, and it helps us pay the bills!
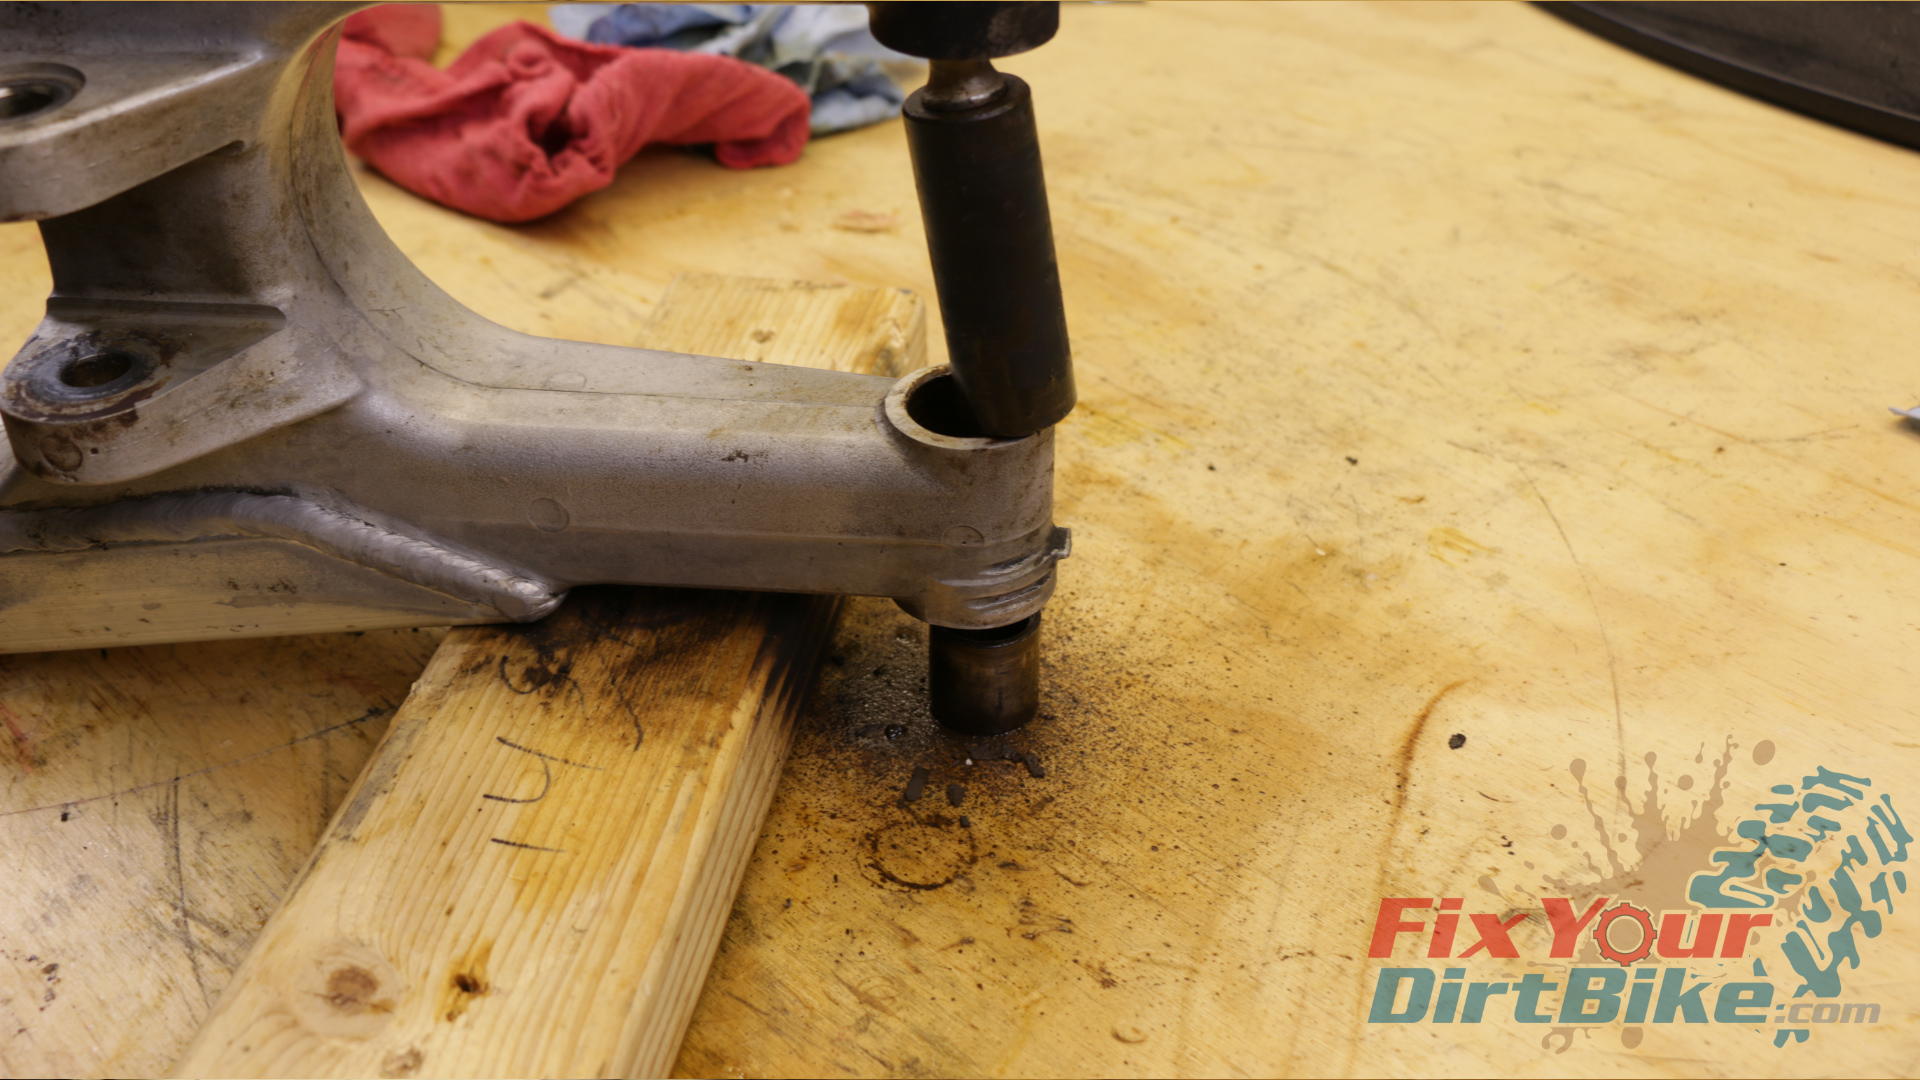
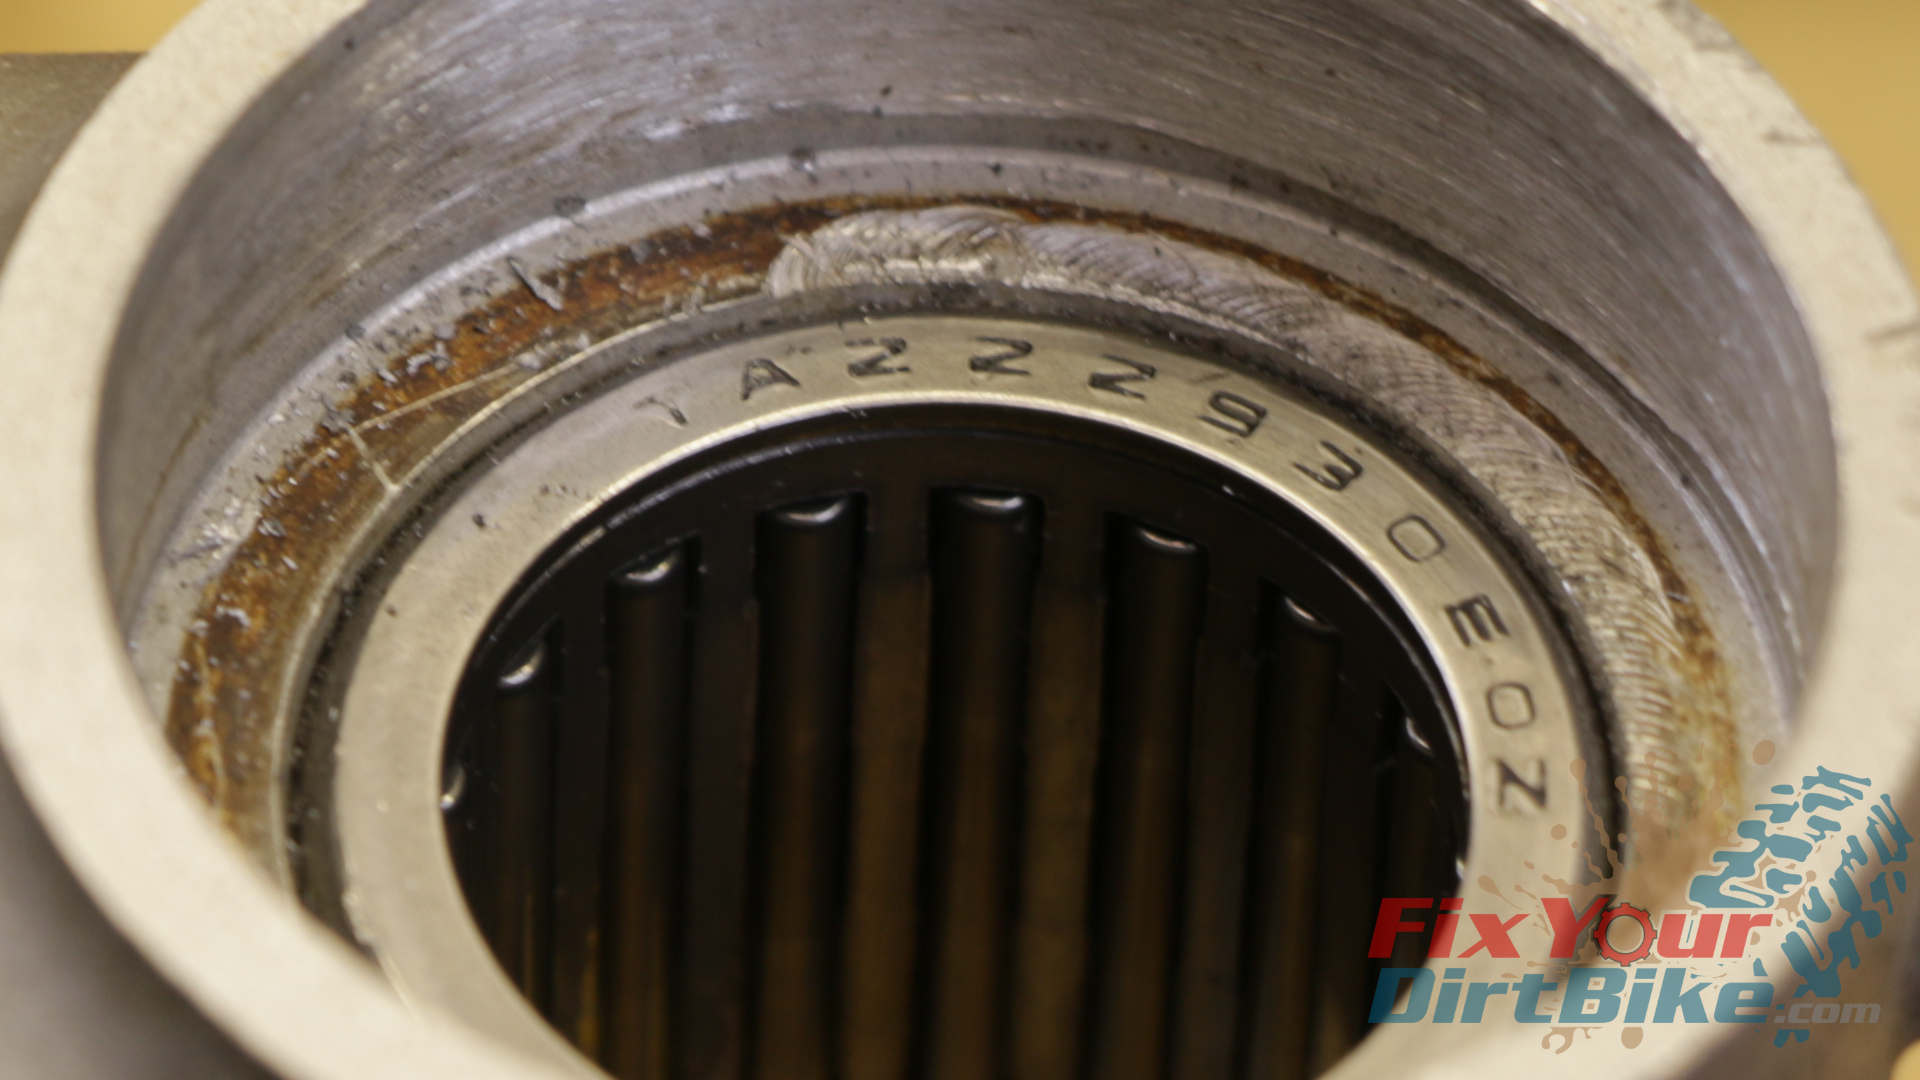
 Bearing Install
- These bearings are longer than they are wide, which will make installing with a socket and a hammer difficult.
- I find using a DIY press, and a mallet works very well.
- Depending on what you have to work with, your socket, nut and washer orientation will be different than mine.
- As you tighten the nuts, give corrective taps with your mallet as needed to keep the bearing straight.
- Once your bearing is about ¾ of the way in, you can remove your press and finish driving the bearing with a socket and a hammer.
- When you finish driving, the bearing should be flush with the inner lip of the bore.
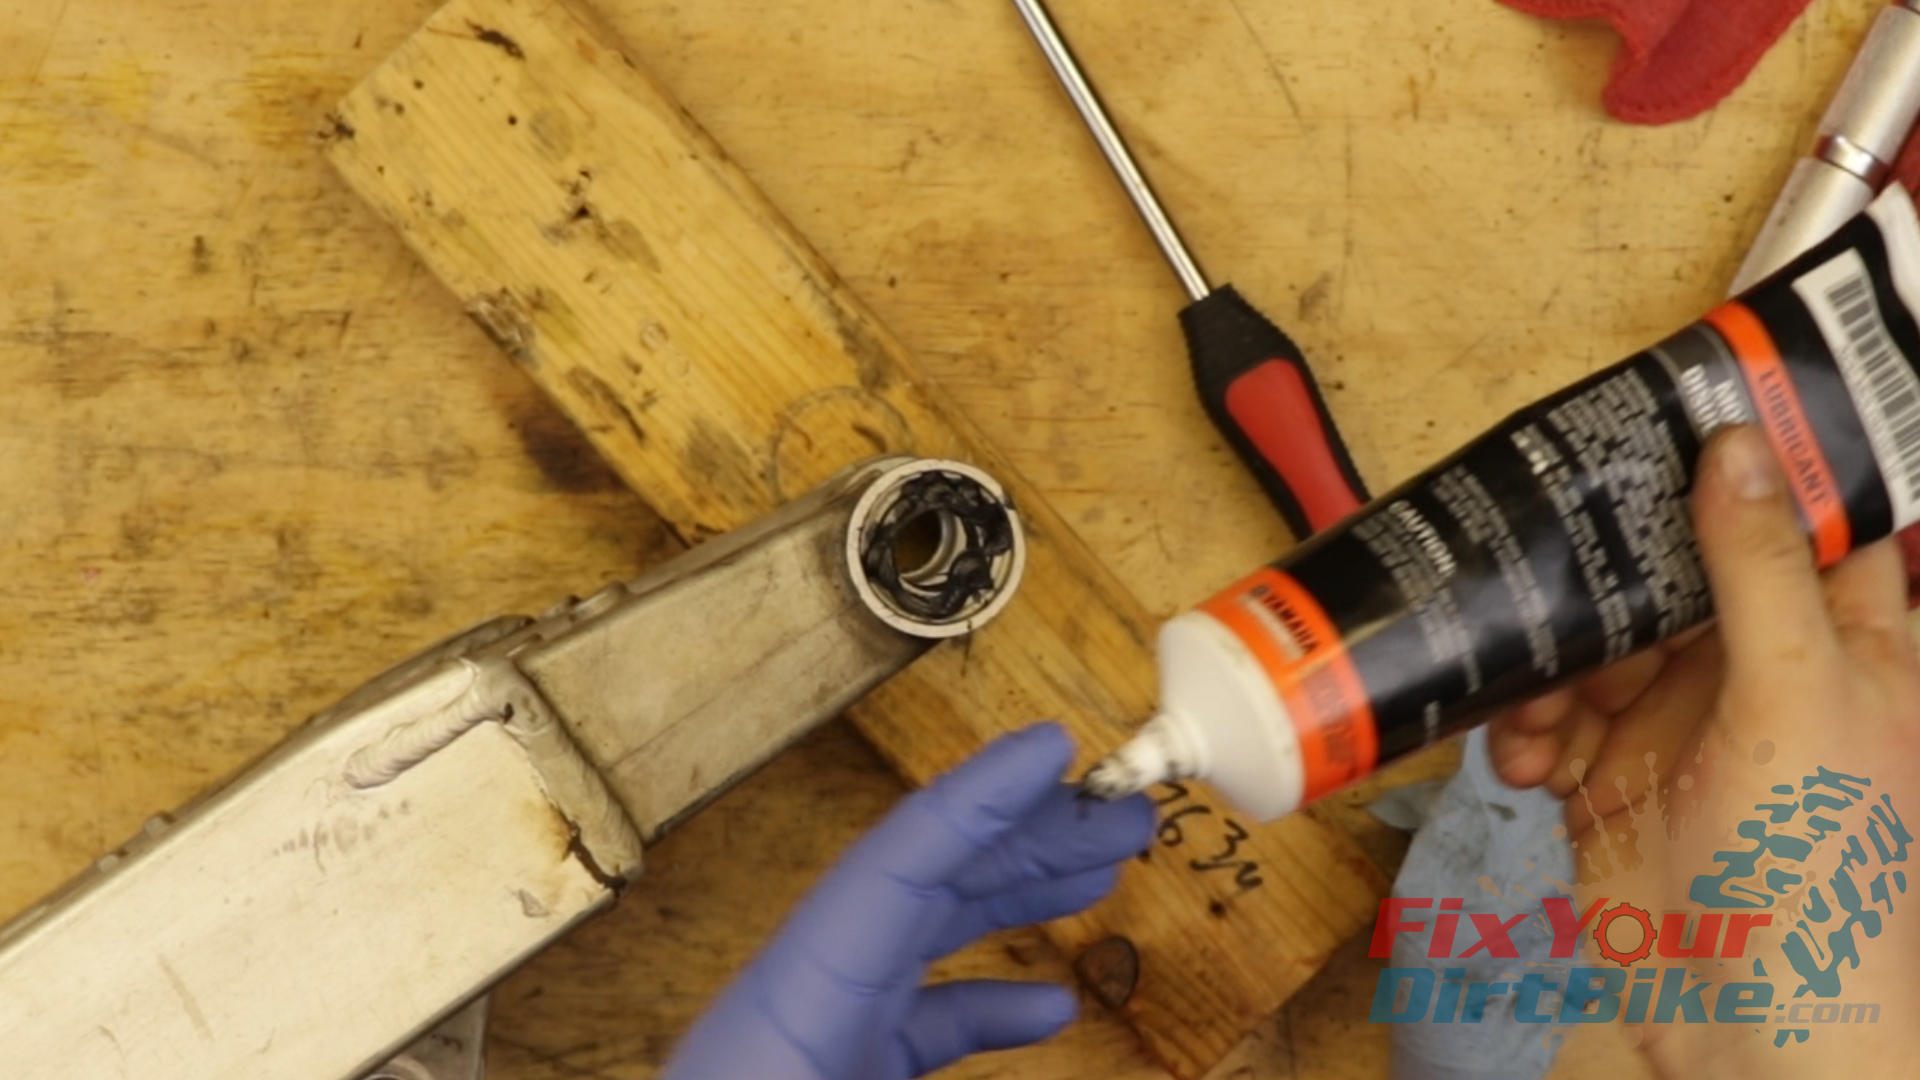
Swingarm Assembly
- Apply a fat layer of moly grease for every piece installed.
- I like to start with the outside first, followed by the inside seal, then inside collar.
- I know it sounds weird installing the collar before the seal, but seating the seal around the collar is extremely difficult. And since you’re using so much grease, it won’t be a problem.
- The outside stack is oriented: Thrust Washer | Thrust Bearing | Thrust Washer| Seal | Side Collar
- With both sides installed, clean off the excess grease and re-attach the chain slider.
Related: How to change the steering stem bearings on your 1997 – 2001 CR250.
Swingarm Installation
- Do not grease your new pivot bolt; the grease will scrape off as it’s installed.
- Instead, apply grease to the right side of every bore on the frame and case.
- Internal greasing will give the grease a better chance of reaching the other side of the frame.
- Align your swingarm, and install the new pivot bolt.
- Install the shock arm bolt, and re-attach the chain guide.
- Install the rear wheel, brake caliper, and replace the brake line guides.
 If you have any questions please let me know in the comments or on social!
Back To 1997-2001 Honda CR250 Master Repair Index