
How To Service The Steering Stem Bearings On Your 97-01 Honda CR250

For this service, you will need three specialty tools: a steering stem nut adjustment wrench, a DIY bearing press, and a metal pipe that matches the diameter of the inner bearing race but still fits over the steering stem.
A steering stem wrench costs around $13. You can make your bearing press out of grade 8 bolts and washers for about $15, and the pipe will cost between $10 and $25, depending on the store.
The Tools You Will Need Are
- Steering Stem Adjustment Wrench → https://amzn.to/42cPiwY
- Smackin’ Pipe (A pipe for smaking)
- Bolt Press
- Torque Wrench → https://amzn.to/3DOqm4B
- Breaker Bar
- 32mm Socket
- 10mm Socket
- Long Flat Screwdriver / Blind Bearing Puller → https://amzn.to/3Wmkl5B
- Chisel / Dremel with Sanding Disc → https://amzn.to/407t6l3
- Gloves
- Grease
- Safety Glasses → https://bulltru.com
The Parts You Will Need Are
- New ’97-’01 Honda CR250 Steering Stem Bearing Kit → https://amzn.to/40vsC9W
- Lithium Grease → https://amzn.to/3ChhKTB
Pre-Service Notes
- Start with your bike on a stand with the front end completely stripped except for one fork.
- I recommend opening the Service & Torque Specs in a new tab for easy reference.
- If you need parts and tools, make sure to buy them here! → https://amzn.to/4h4lDKq
- Pictures with captions are after the steps below.
- If you need any help, don’t hesitate to ask!
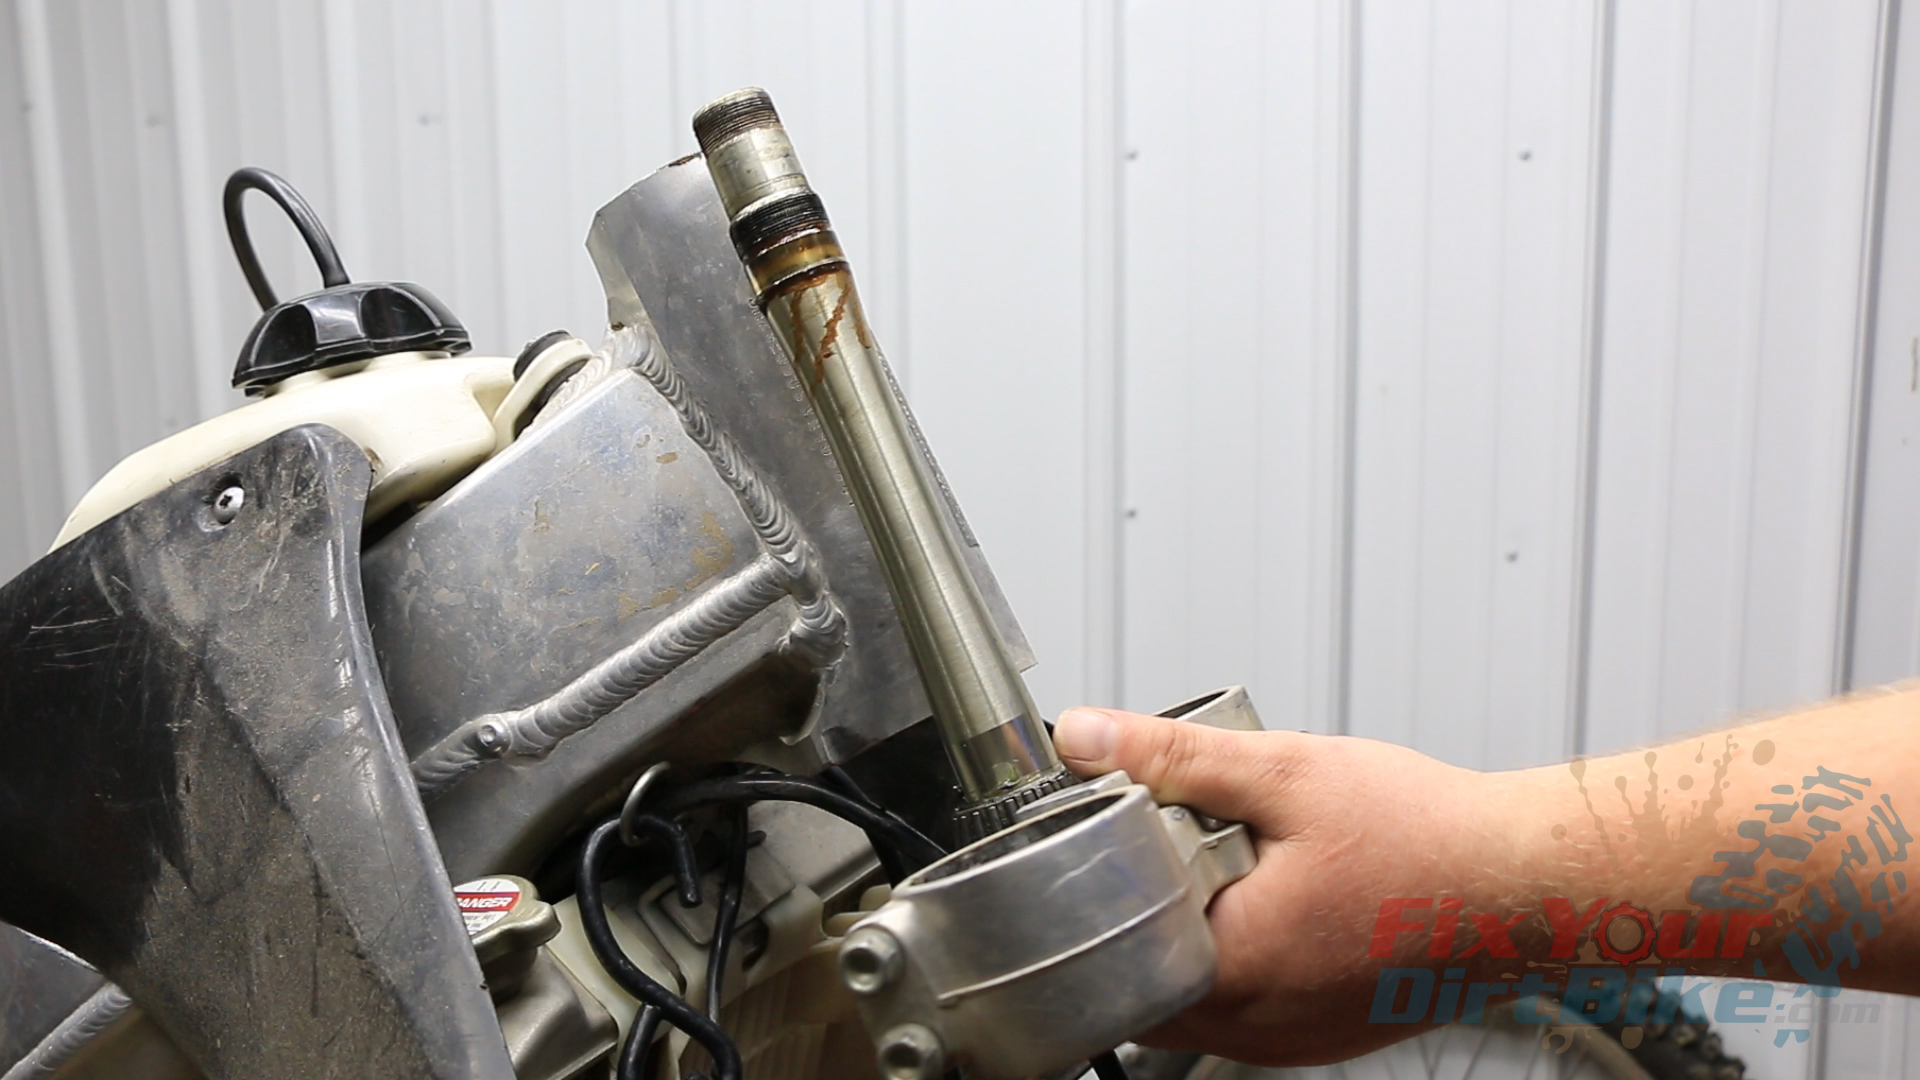
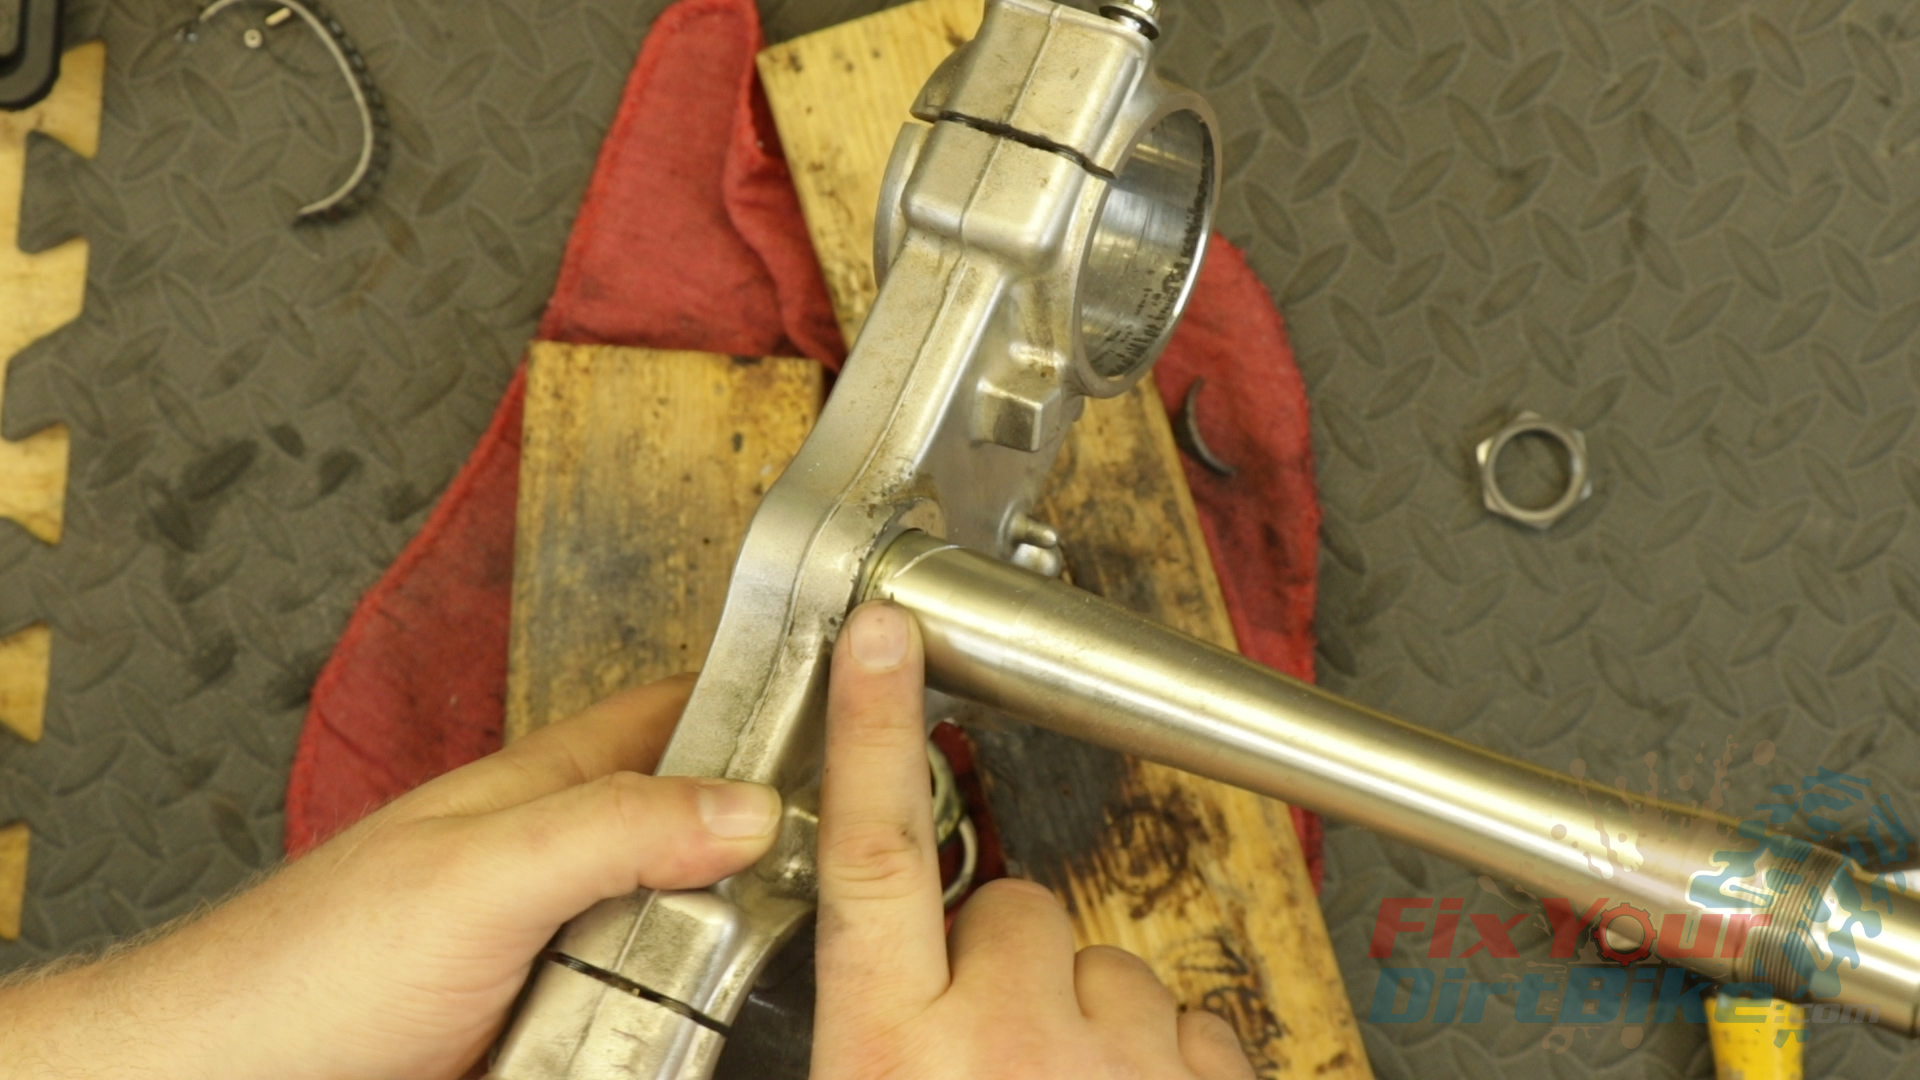
Steering Stem Removal
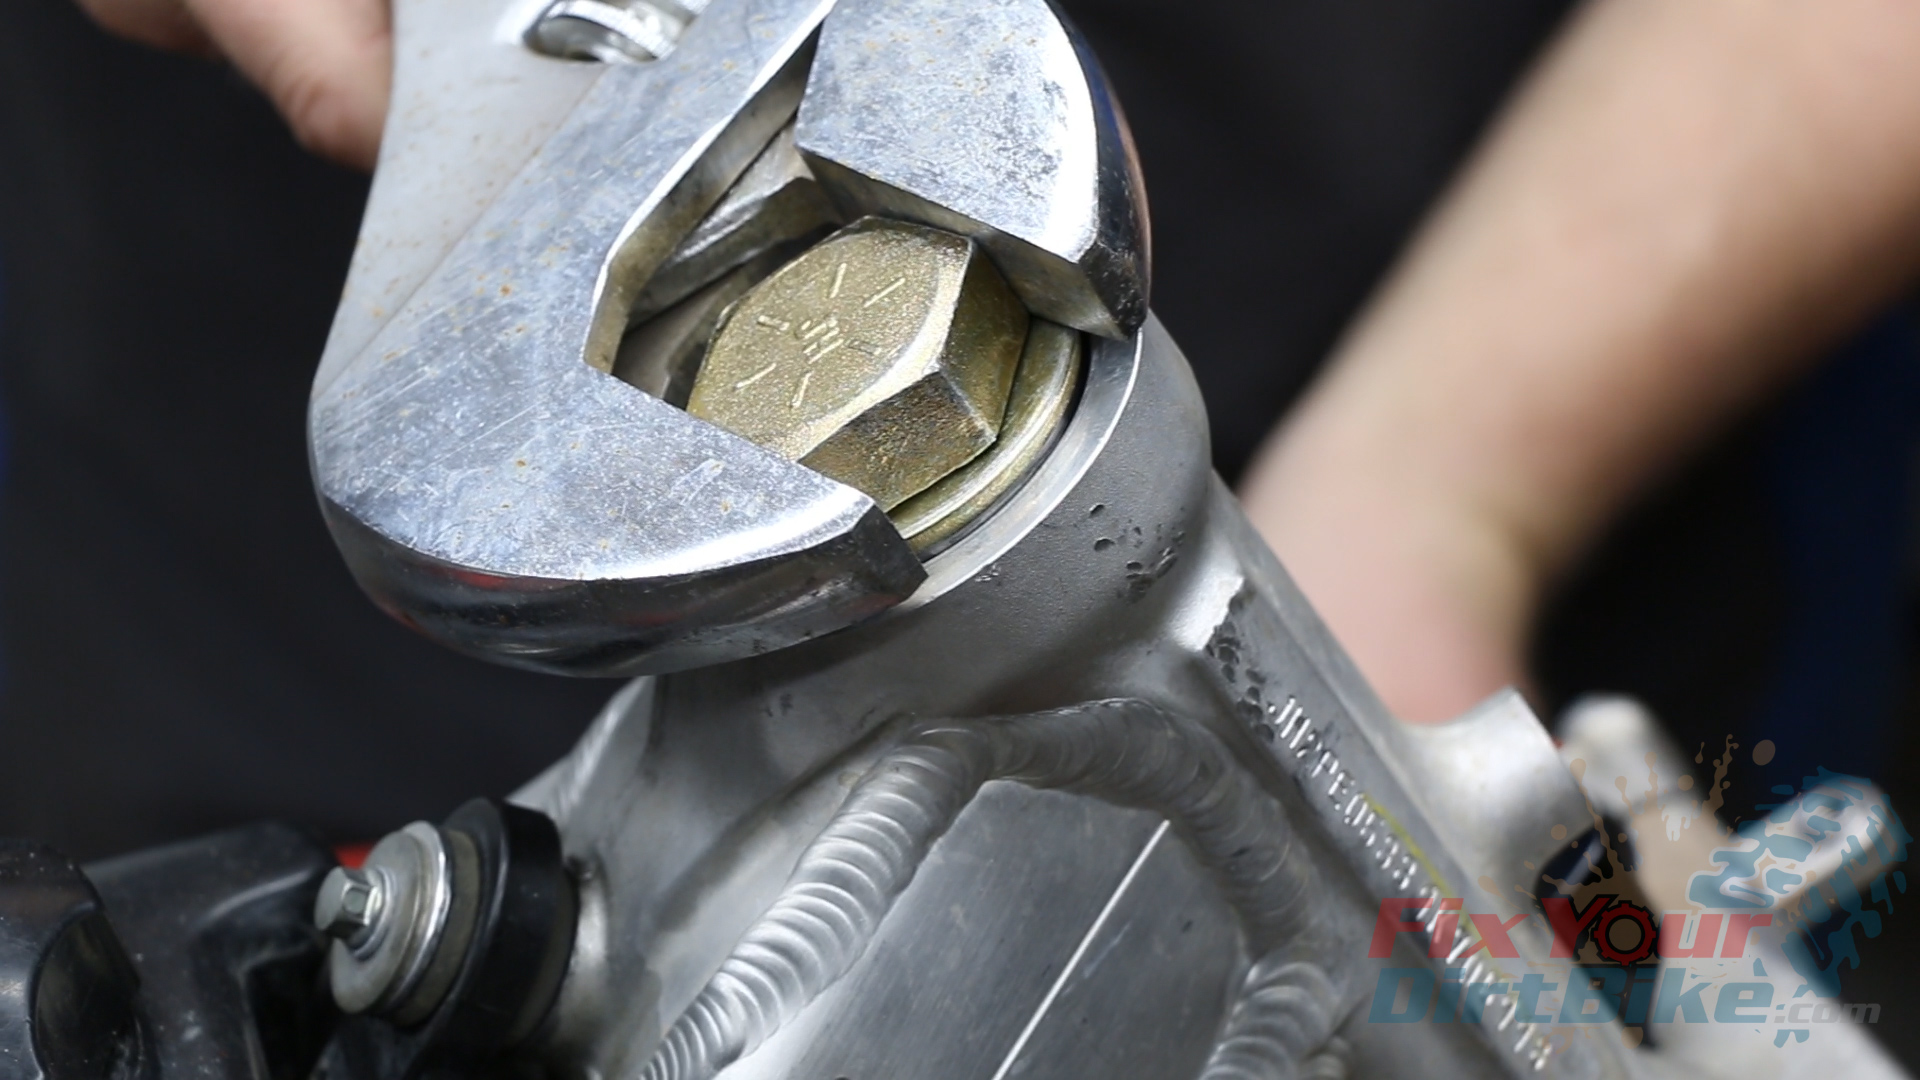
- Loosen and remove the steering stem nut and washer, then remove the other fork.
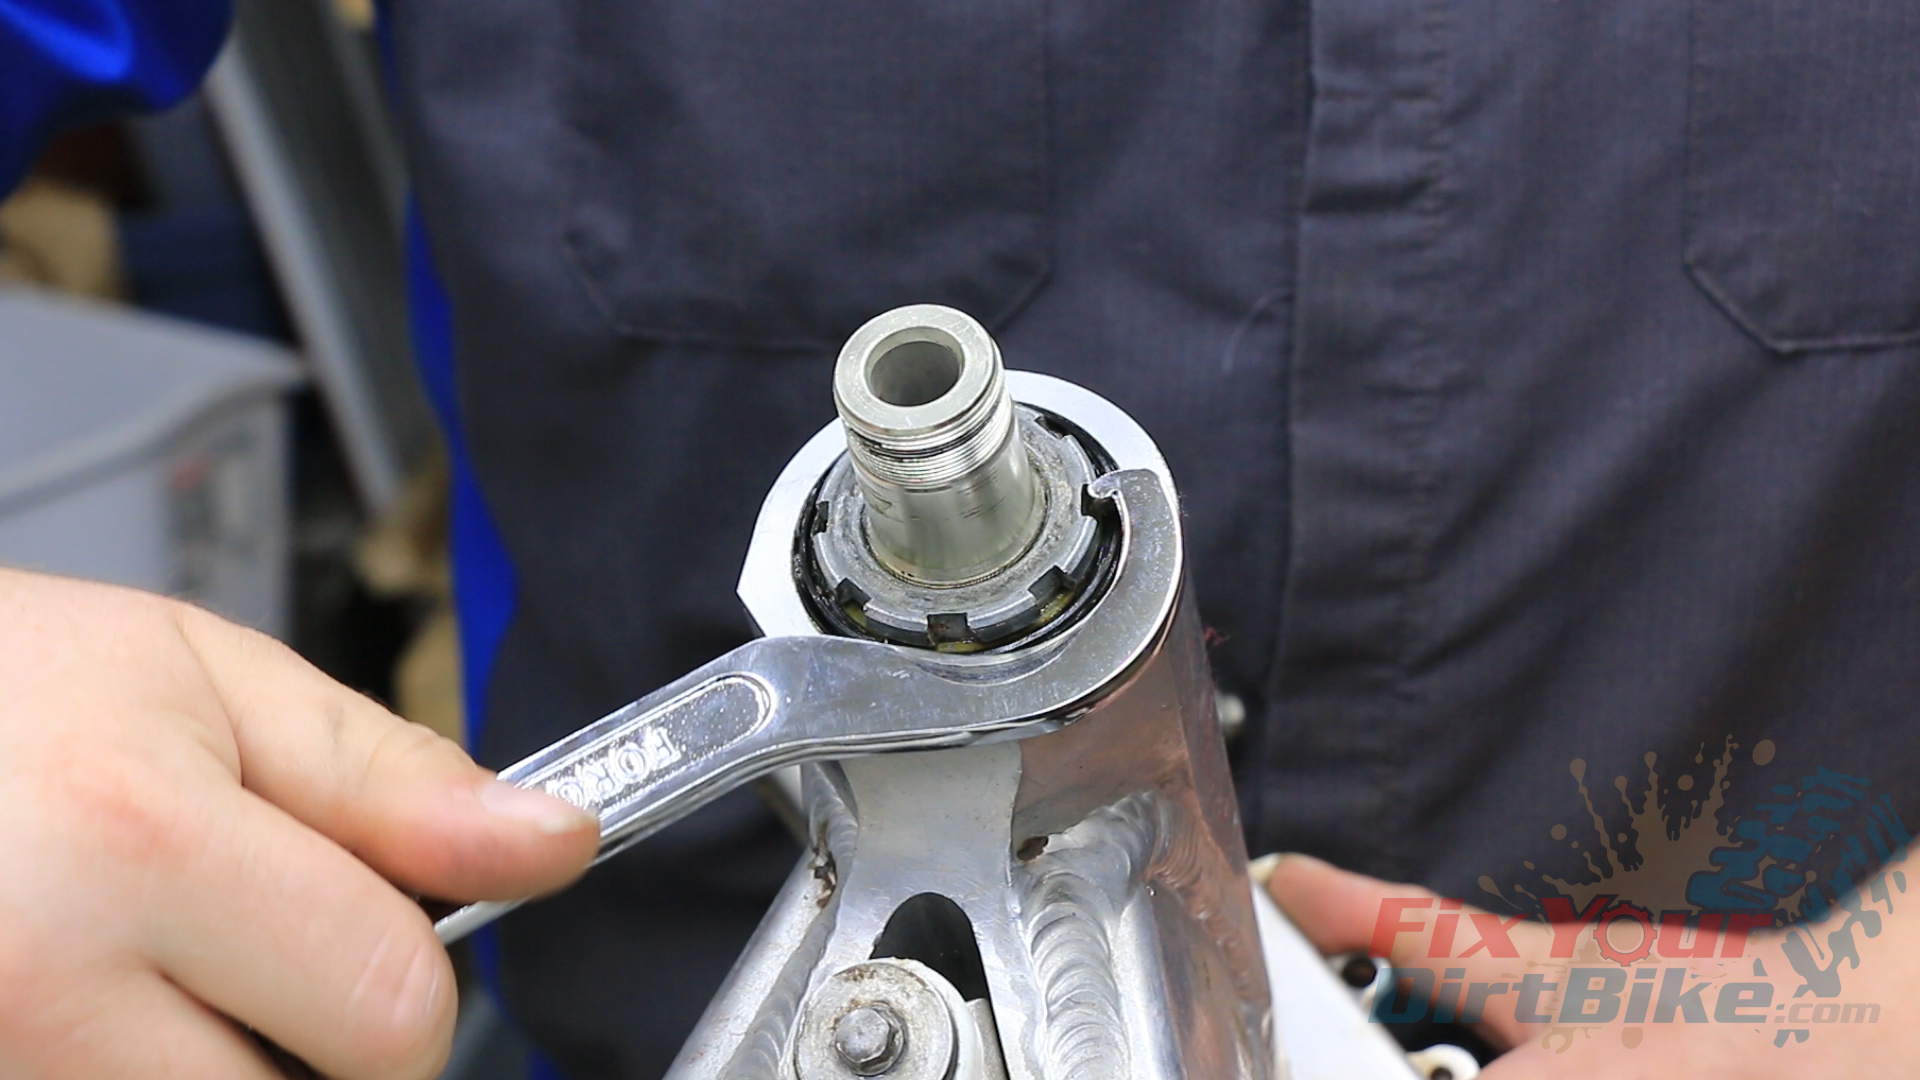
- Loosen and remove the steering stem adjustment nut, and lower the steering stem out of the steering head.

 Related: Front-wheel bearing service for your 97-01 Cr250.
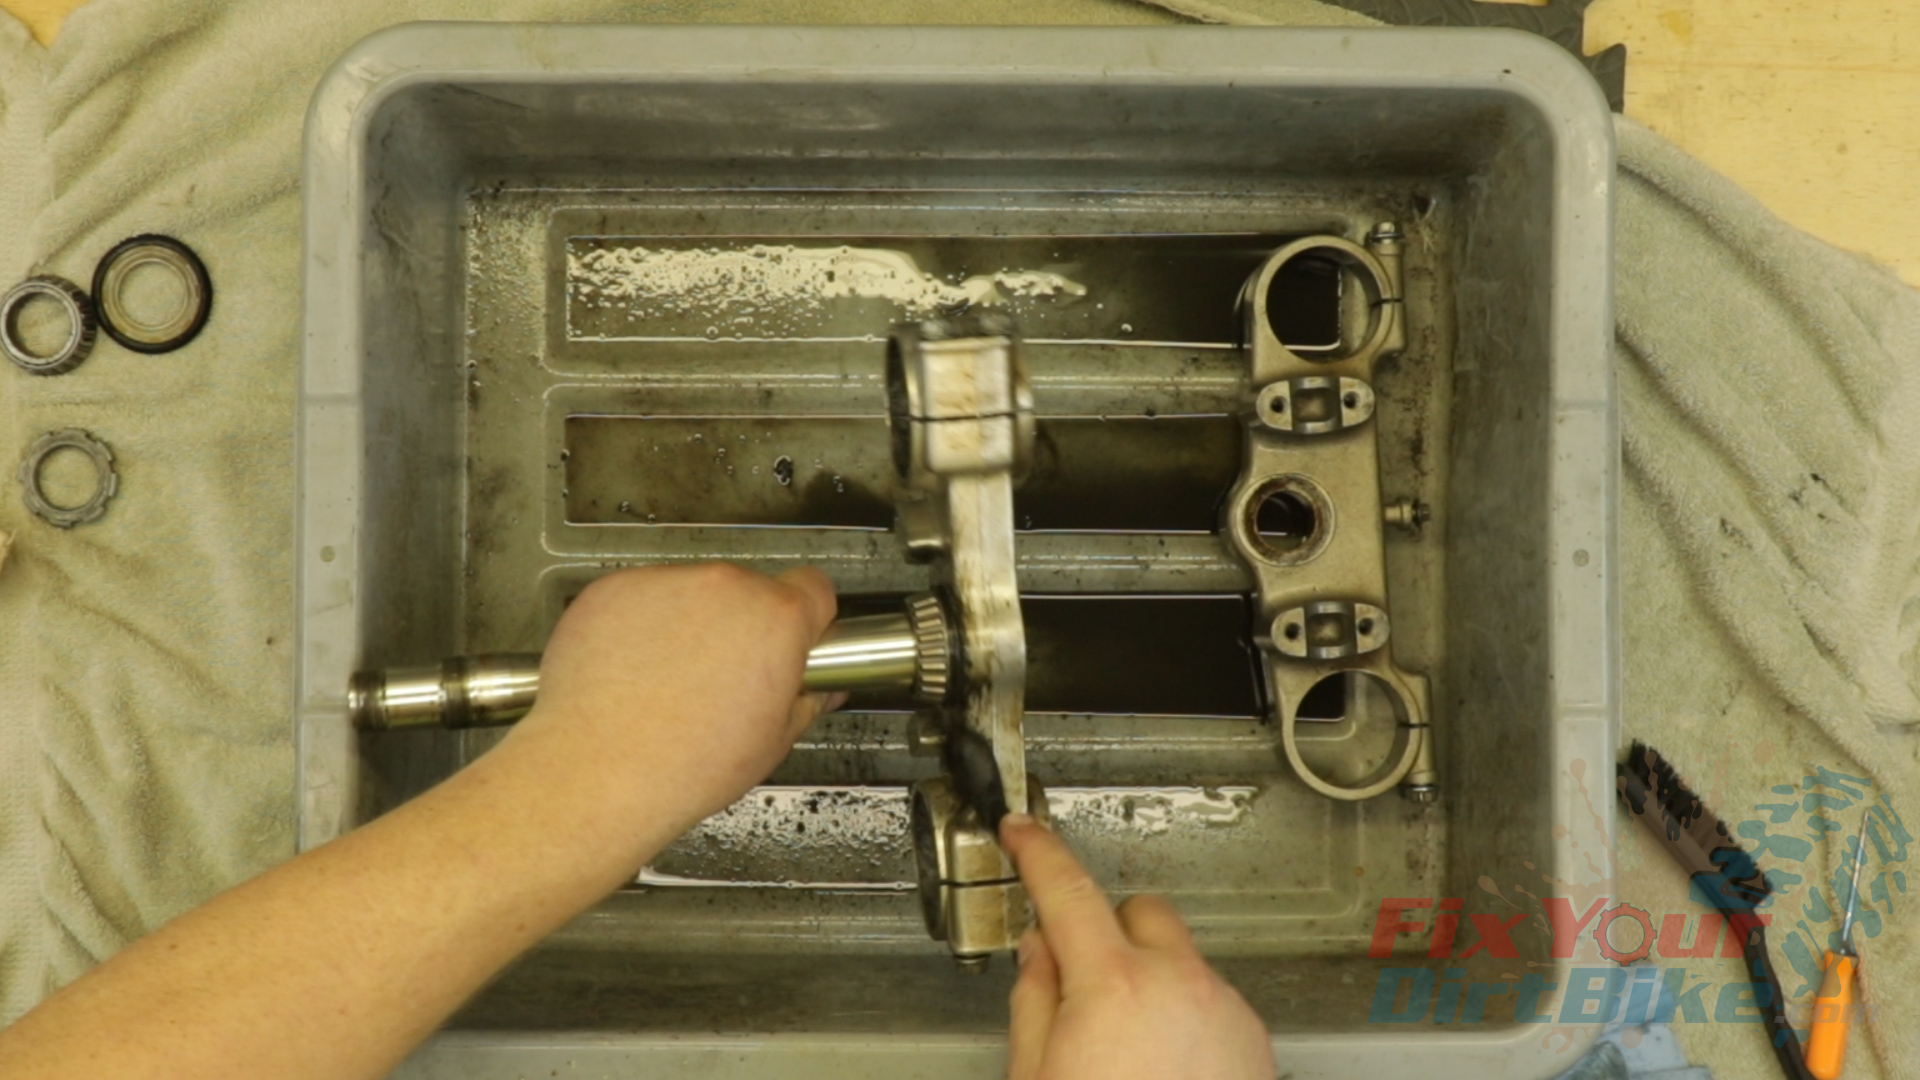
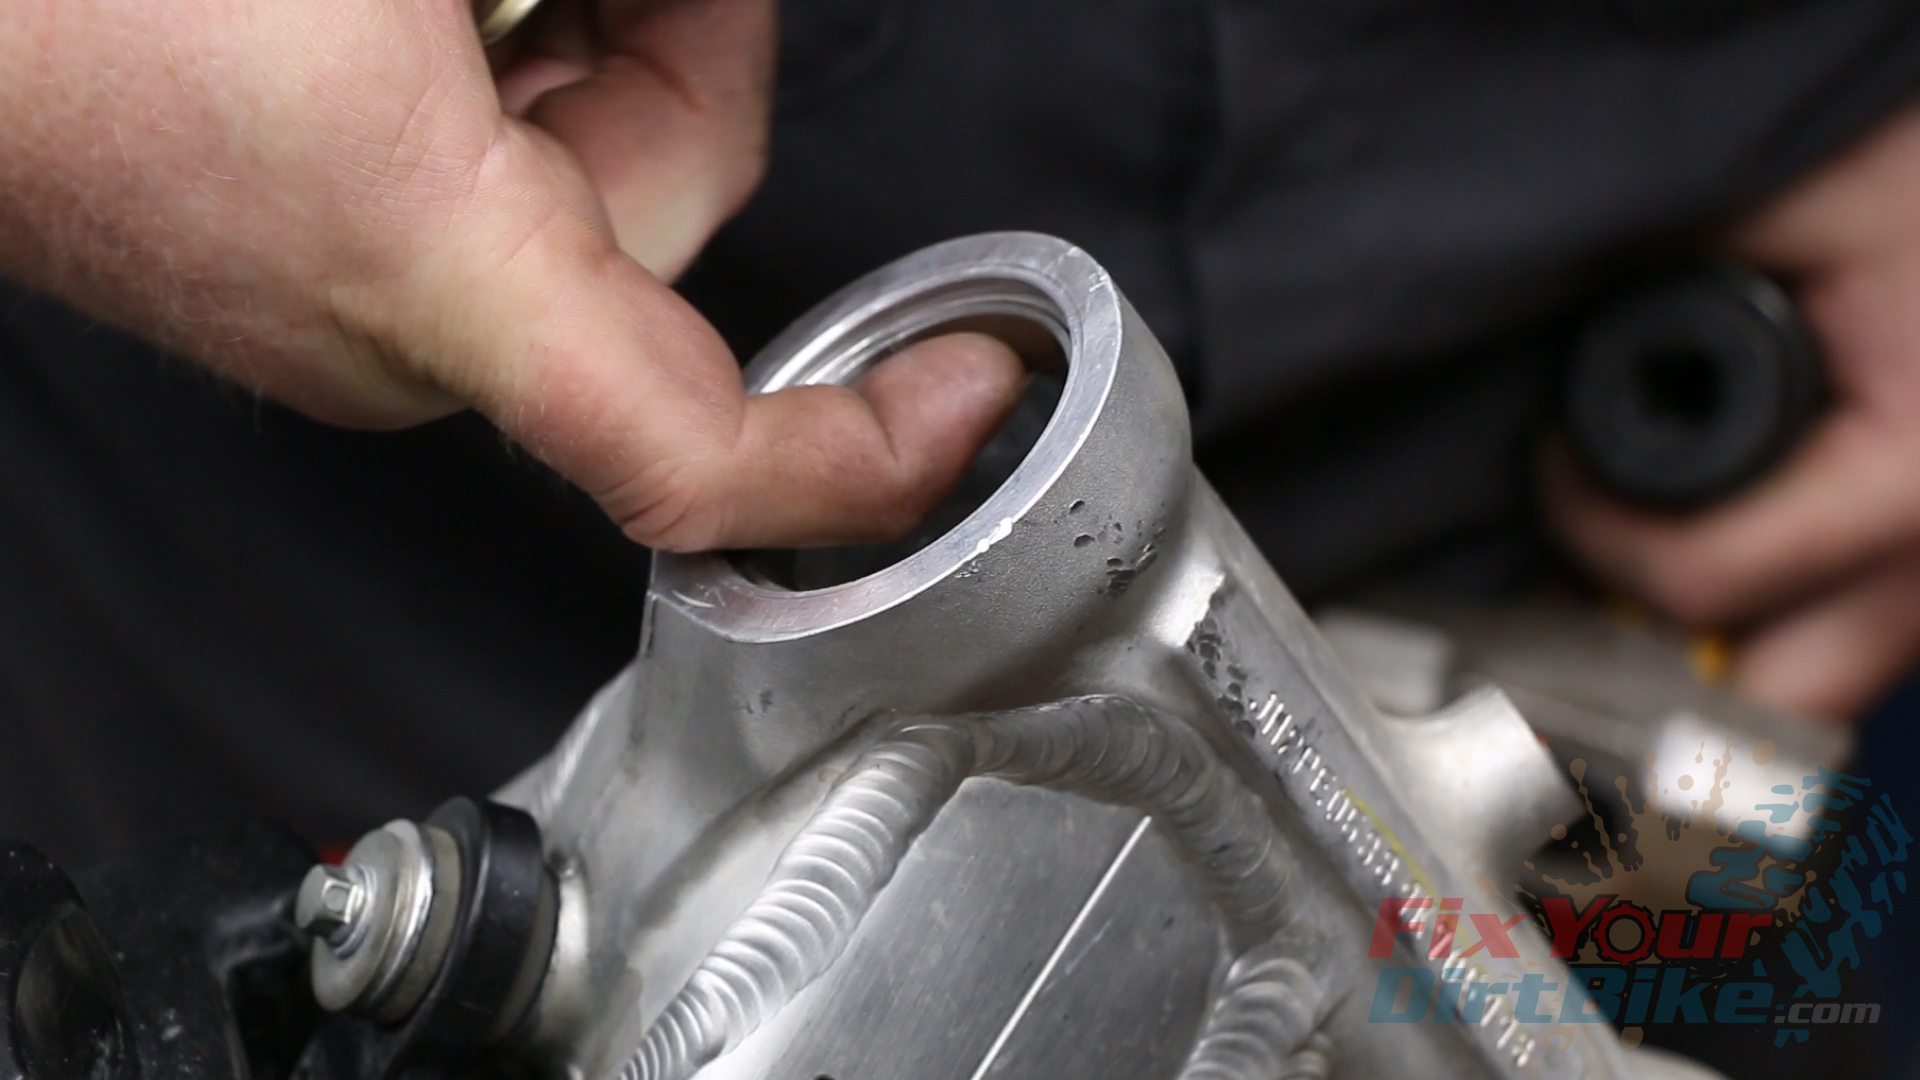
Clean & Inspect Your Steering Components
- Clean all components and check for apparent damage or wear to the bearings and welds.
- DO NOT REMOVE THE LOWER BEARING until you have cleaned and inspected it. Clean and inspect the steering head. The bearings are two pieces, with the outer race mounted inside the steering head.
- DO NOT REMOVE THE OUTER RACES FROM THE STEERING HEAD until you inspect them. You want to look for damage in the bearing races and the welds connecting the head to the frame.
Steering Stem Bearing Replacement
These bearings and races on my 1997 Honda CR250 are in surprisingly good condition, so I will not replace them. Instead, I’m going to show you on my 2009 CRF450r. While the bearings are slightly different, the procedure is the same.
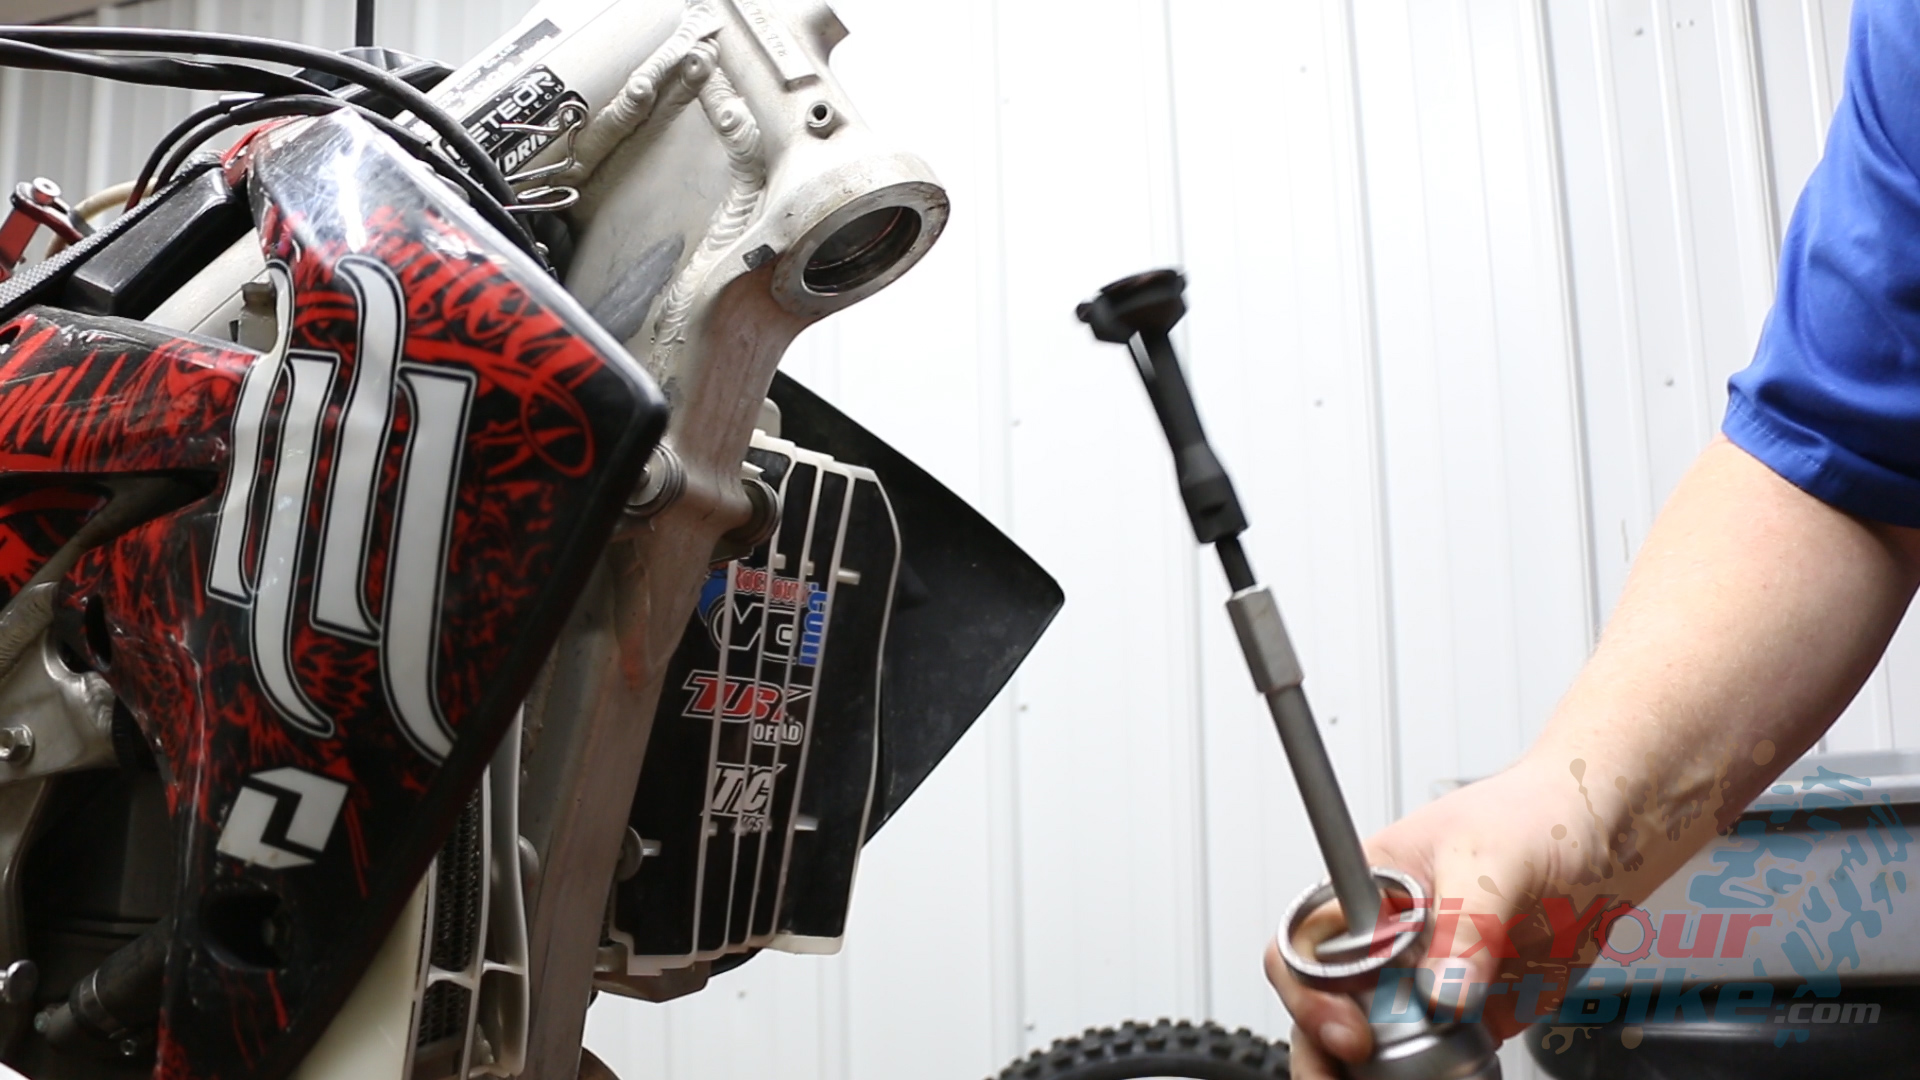
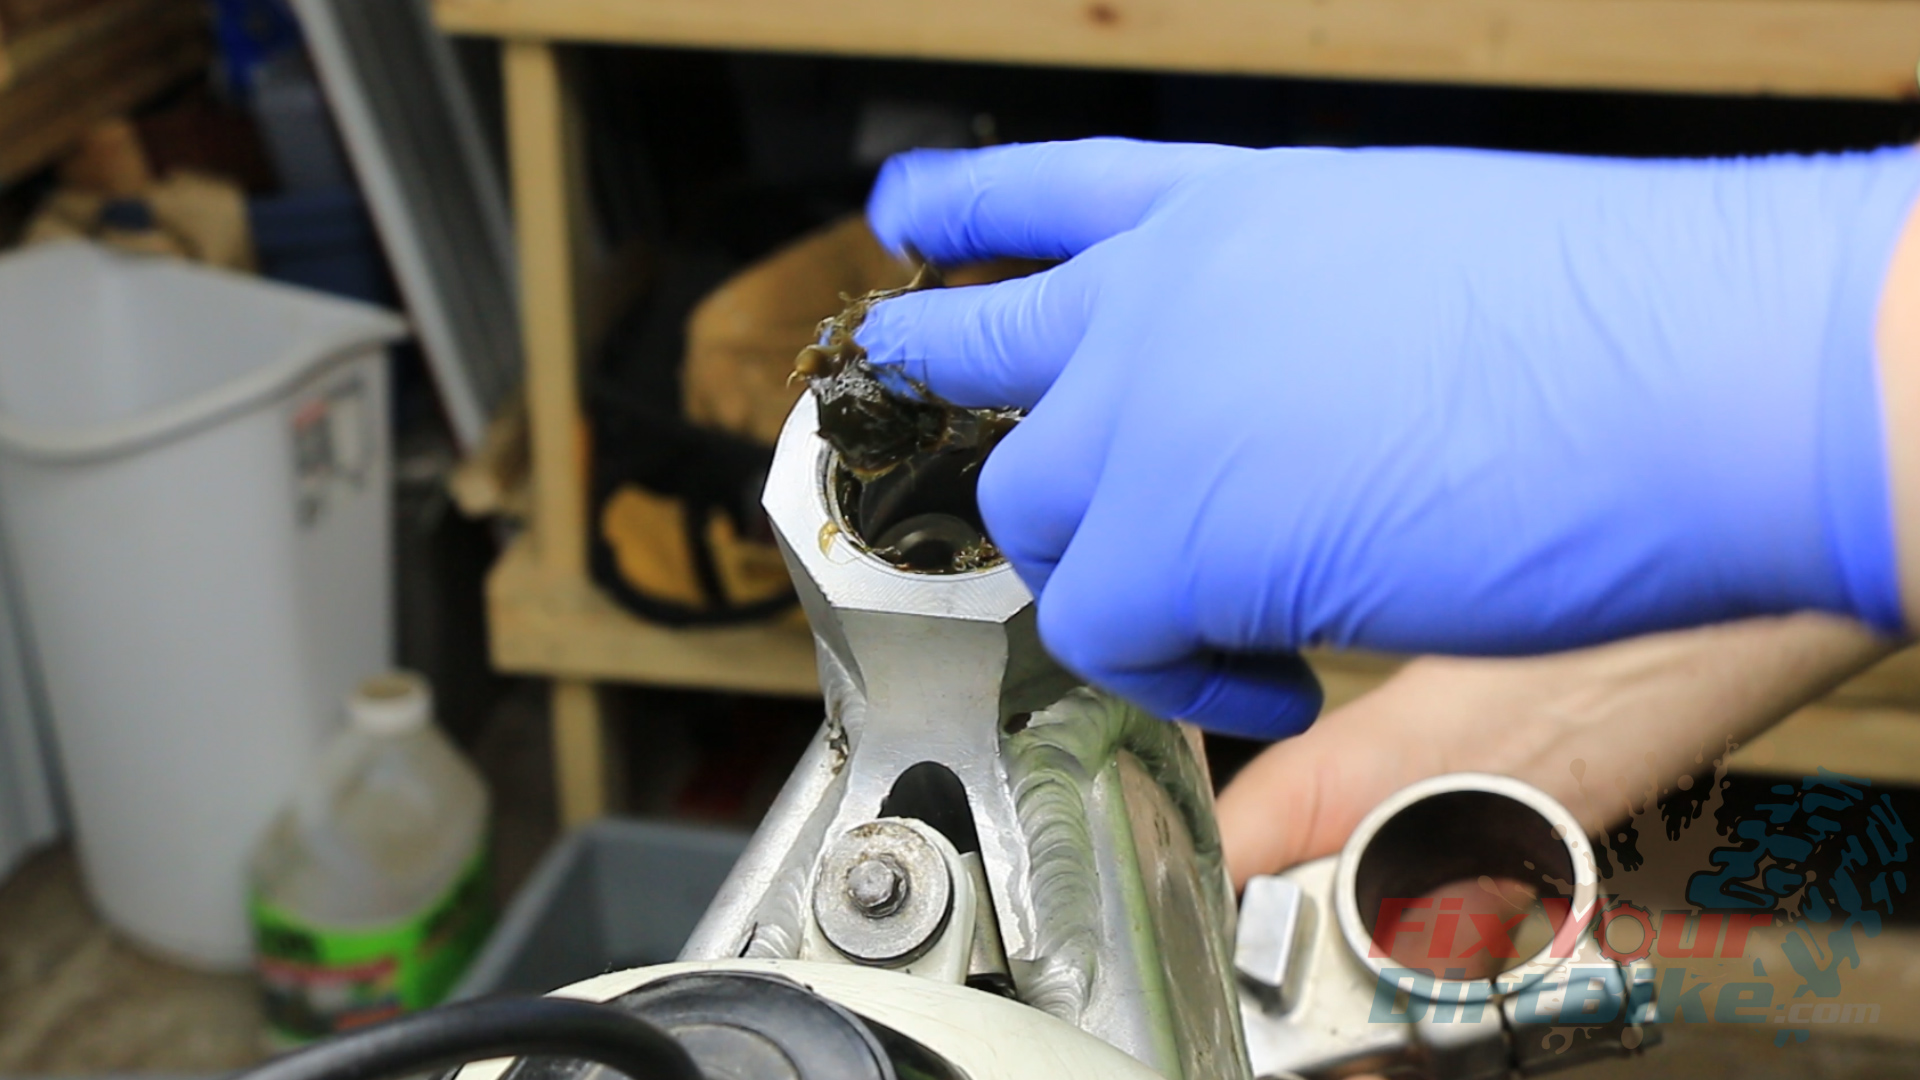
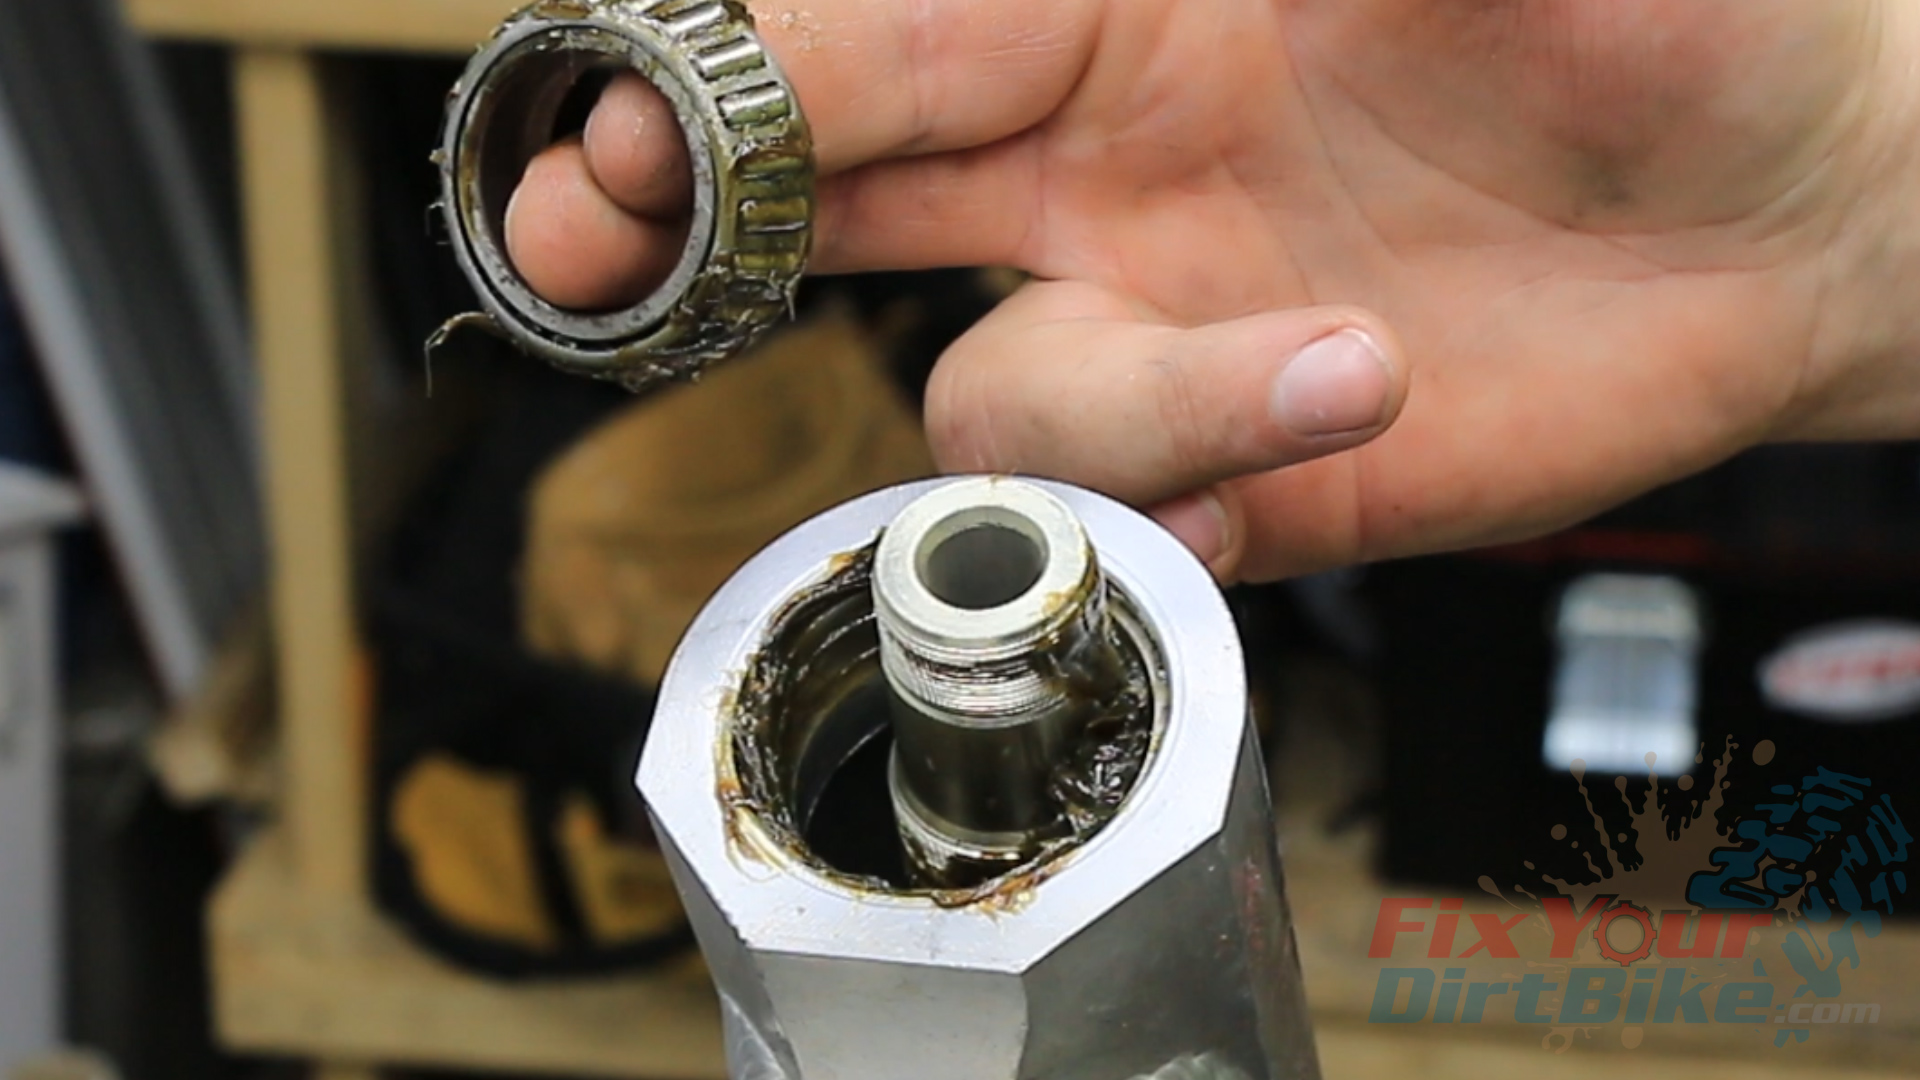
The outer races are pressed into the steering head, and the lower bearing is pressed onto the steering stem.
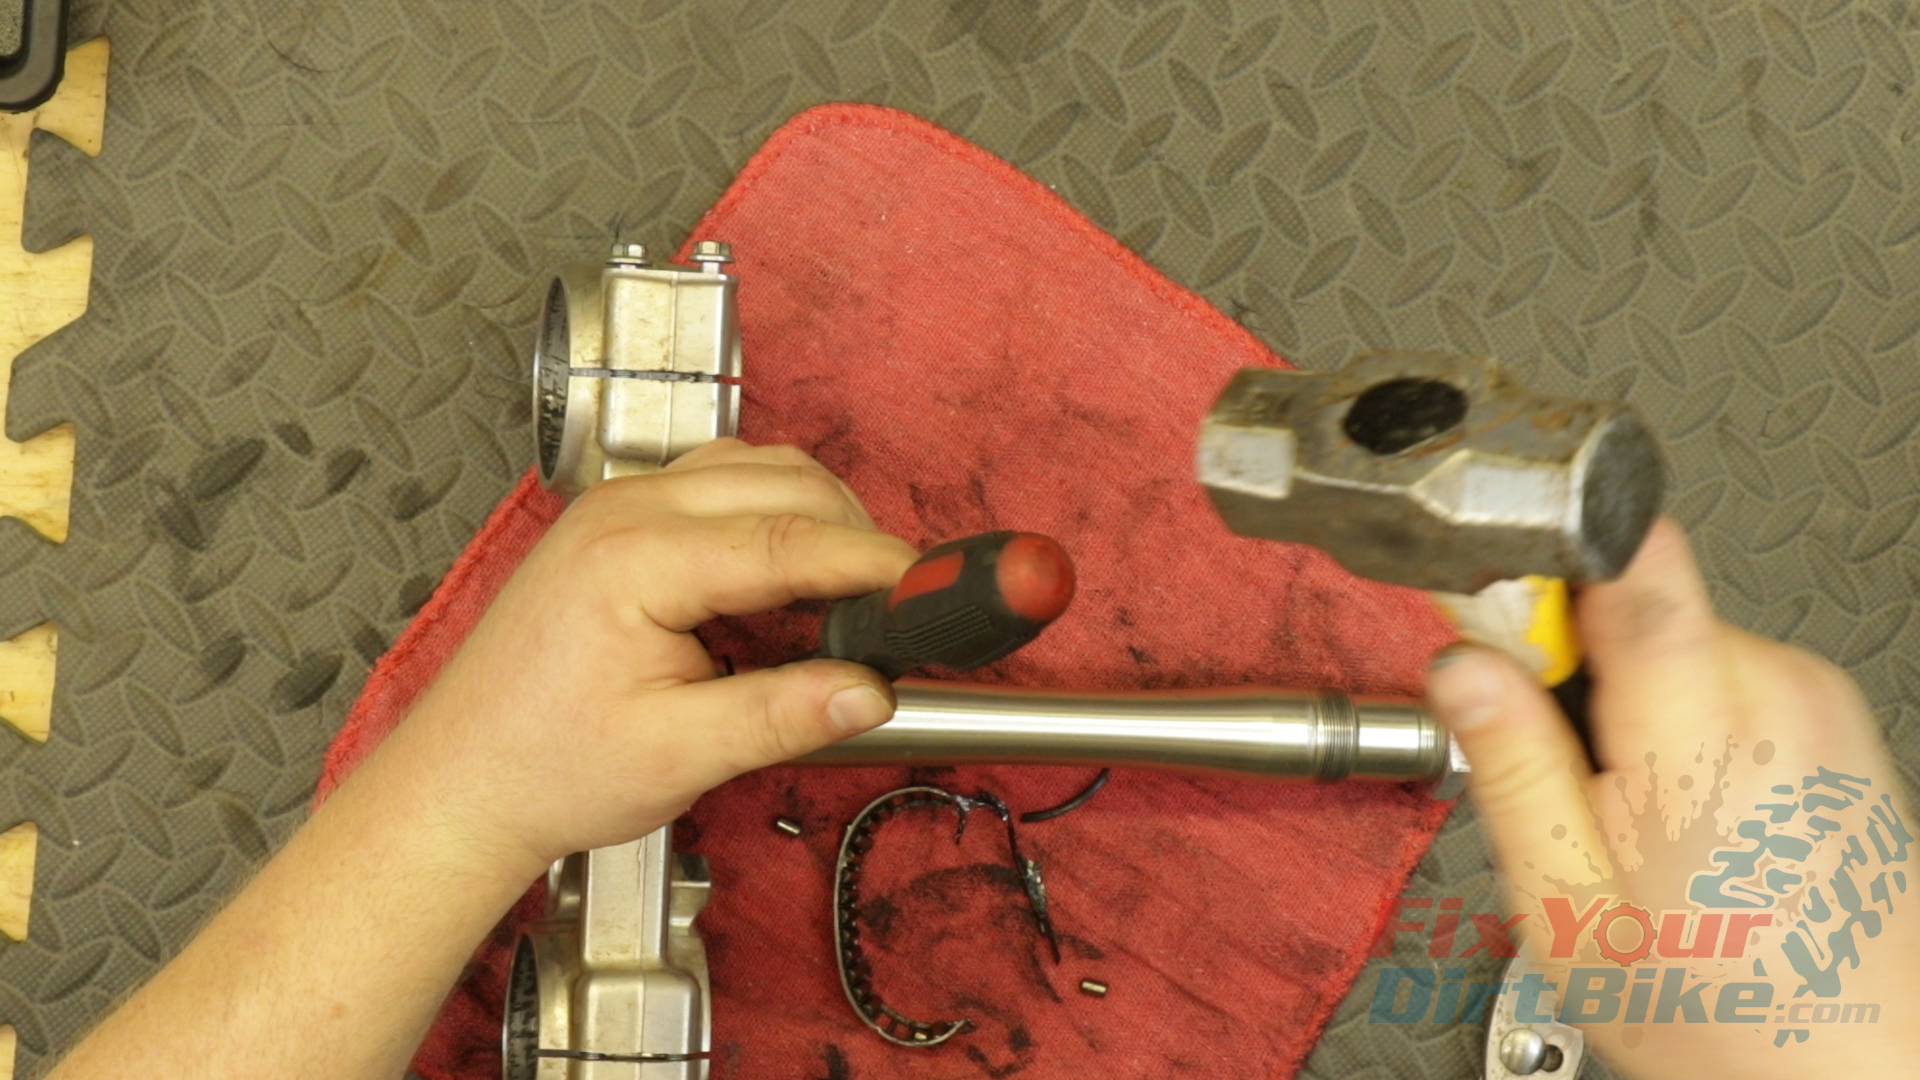
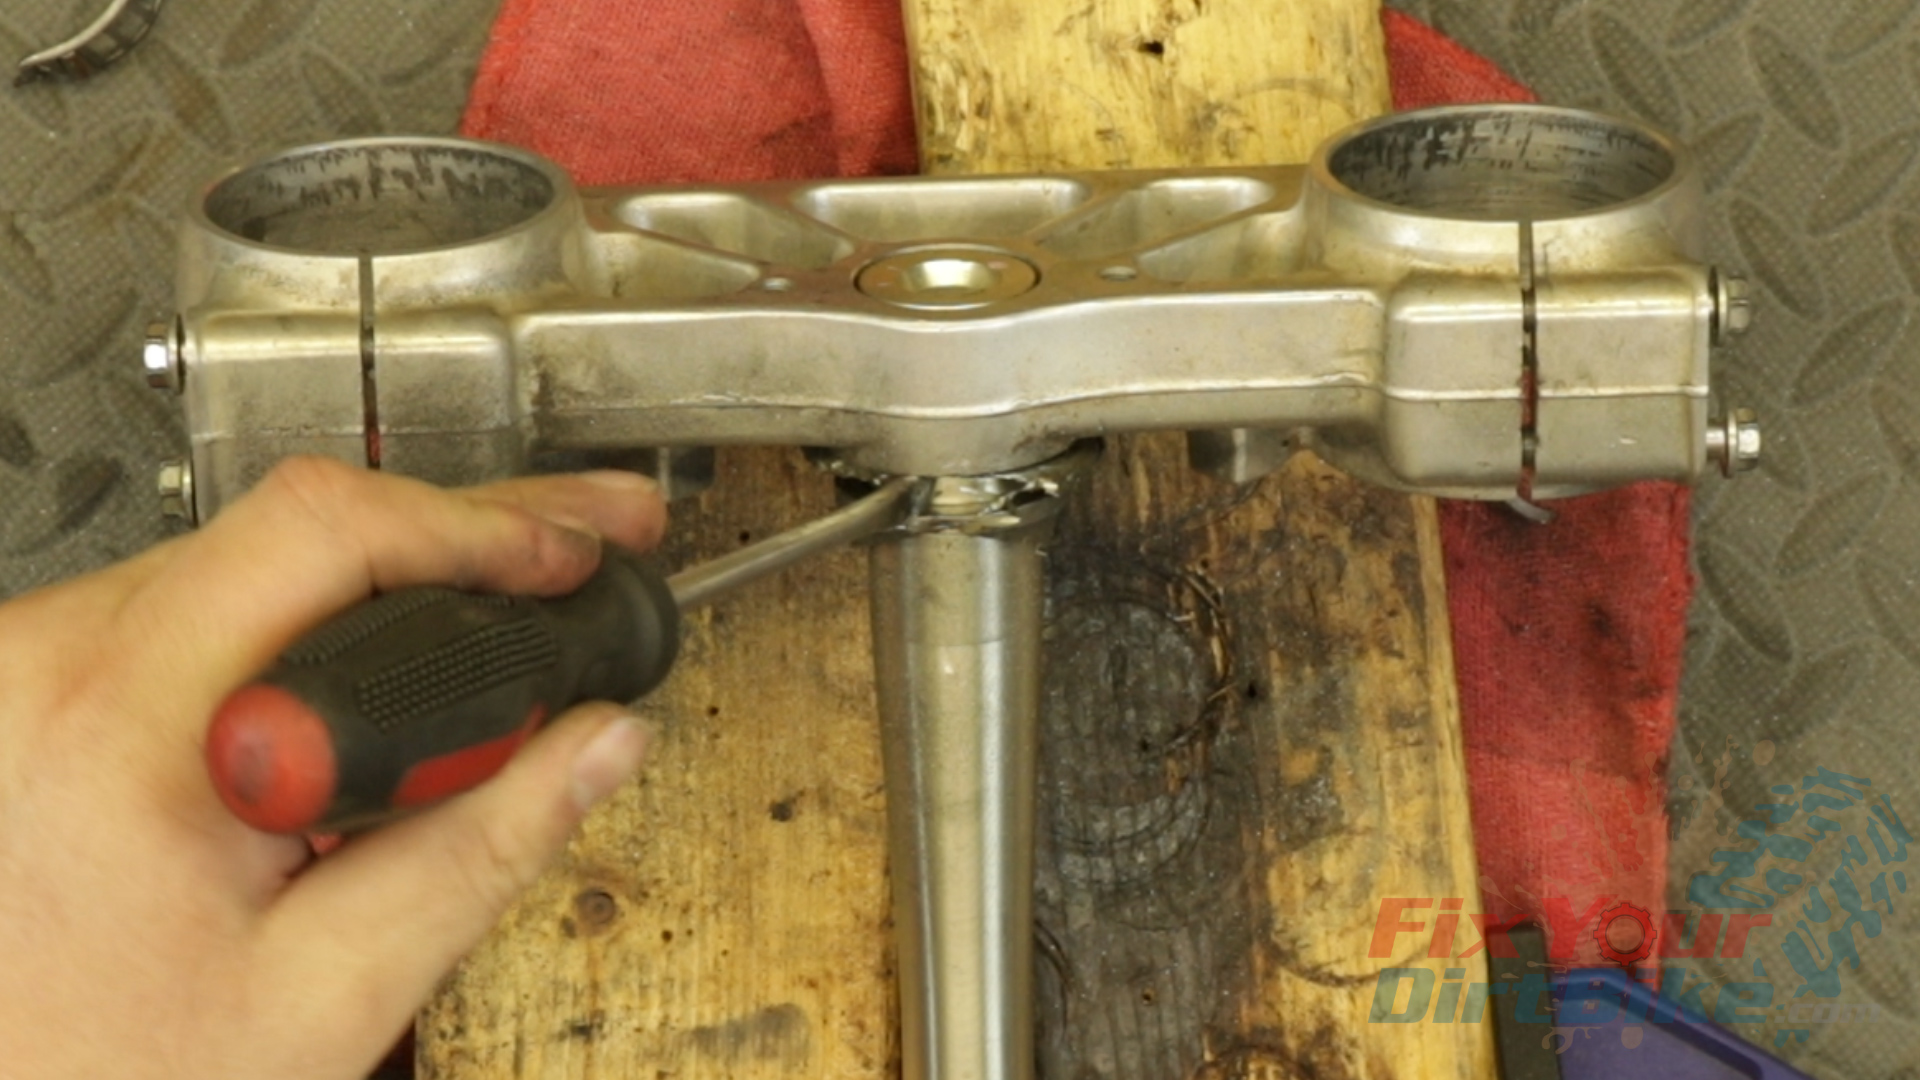
Bearing Removal
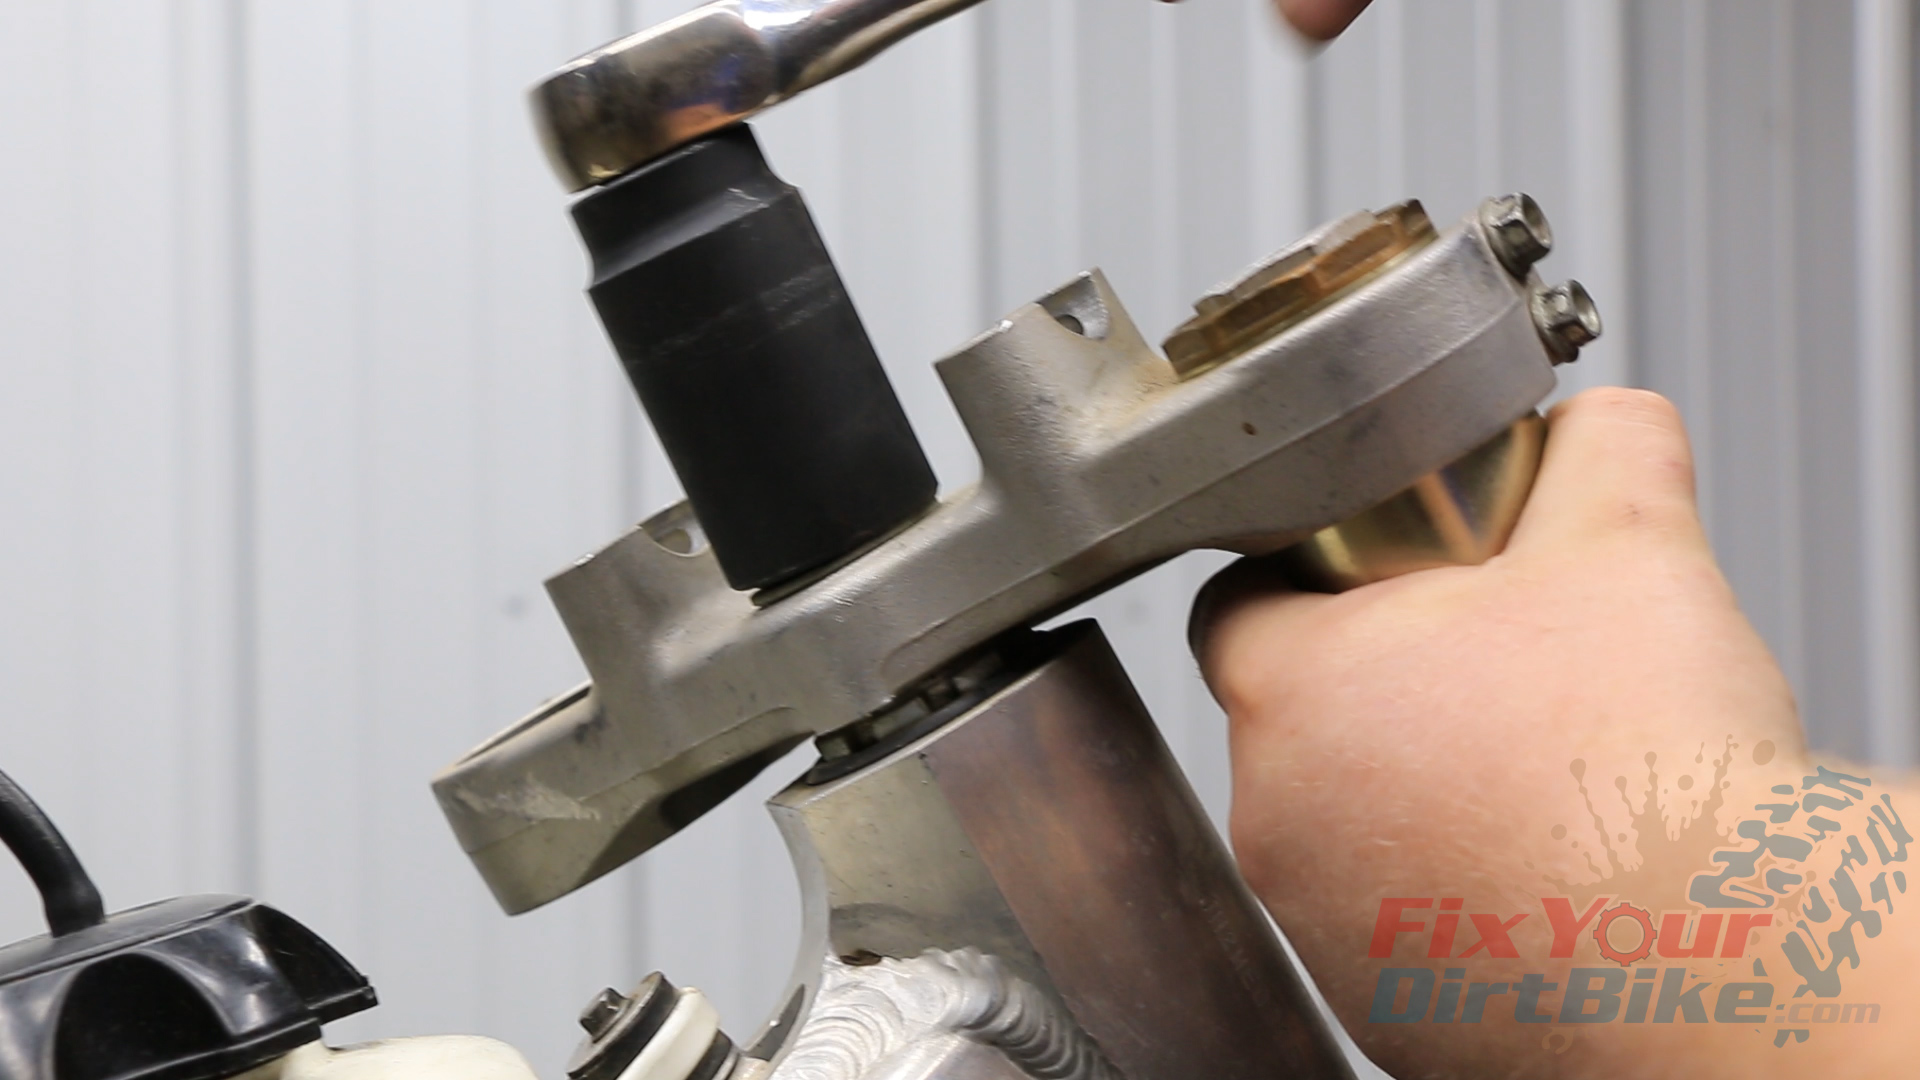
- You will need a sharp screwdriver or chisel to remove the lower bearing from the stem.
- If you try hammering the bearing off the stem, you will only catch the seal ring or crush the outer cage. Instead, hammer your chisel between the bridge and the bearing and work your way around.
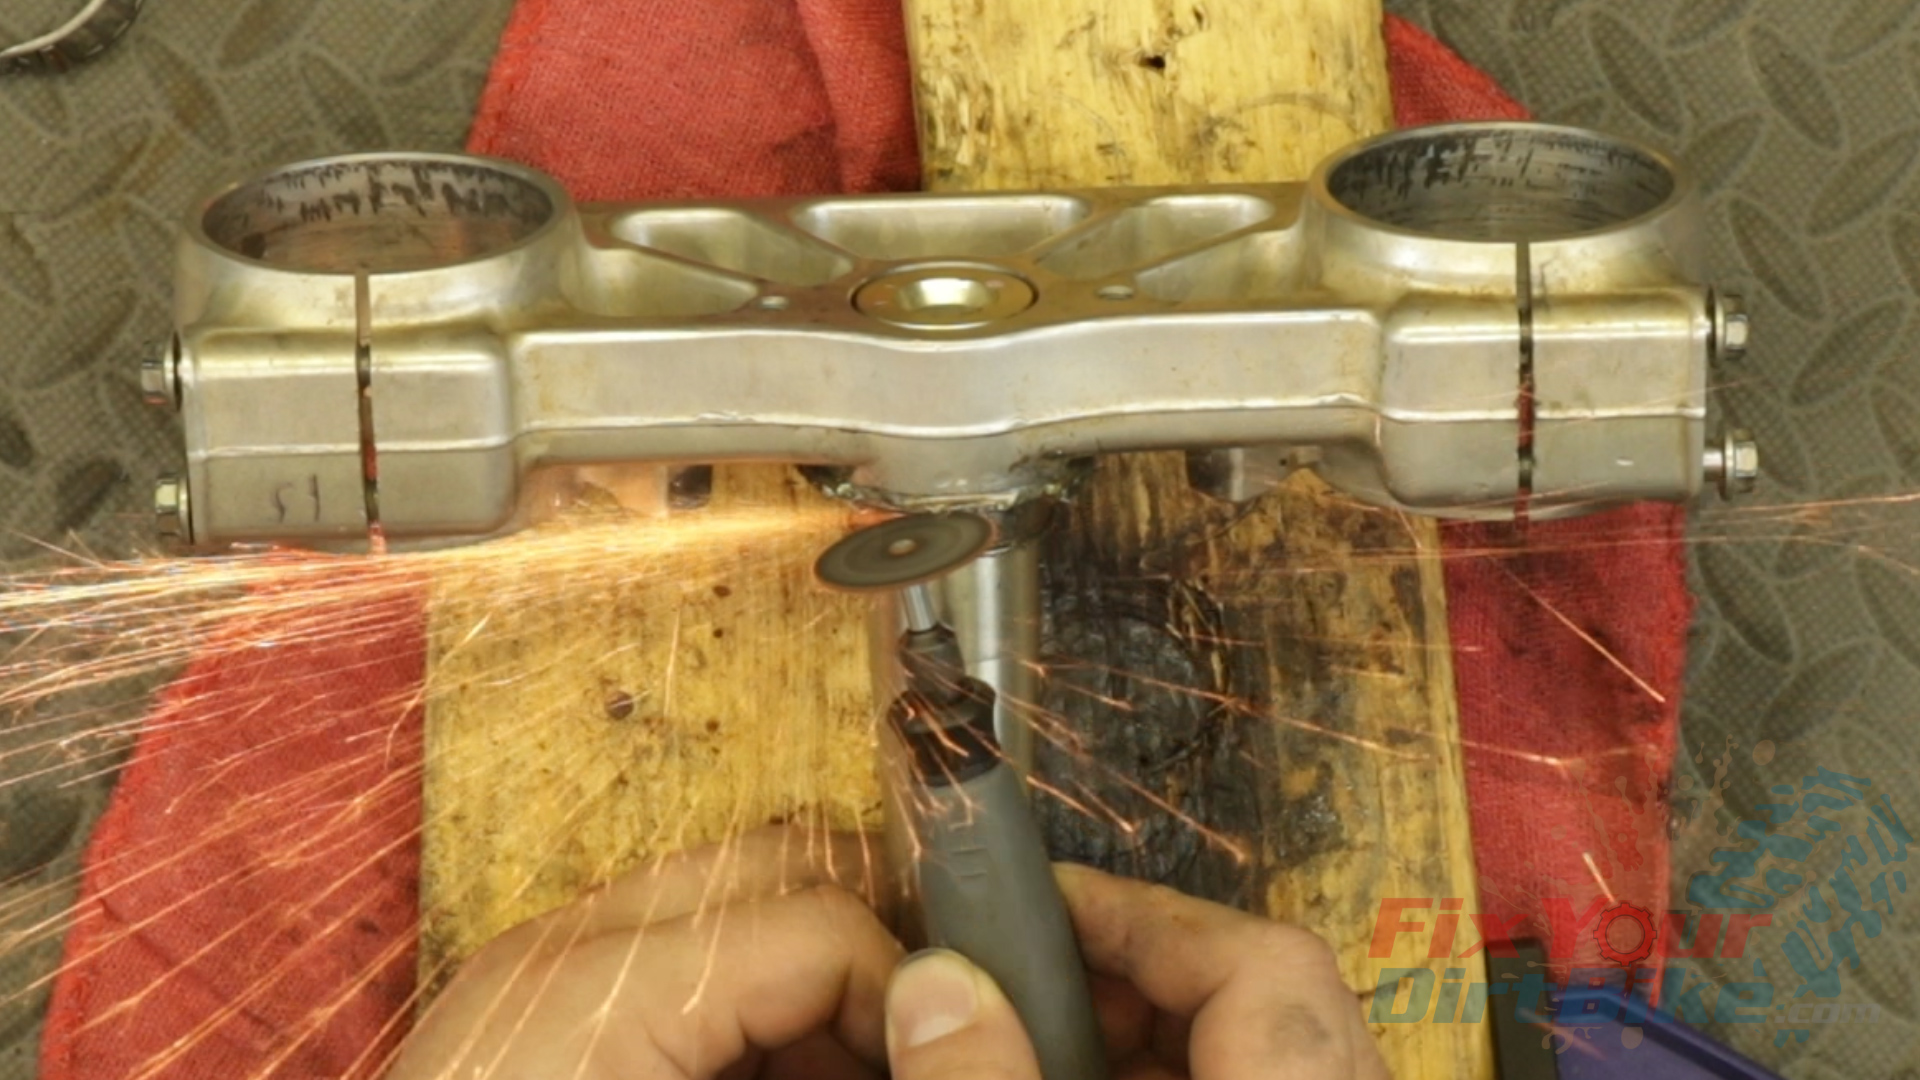
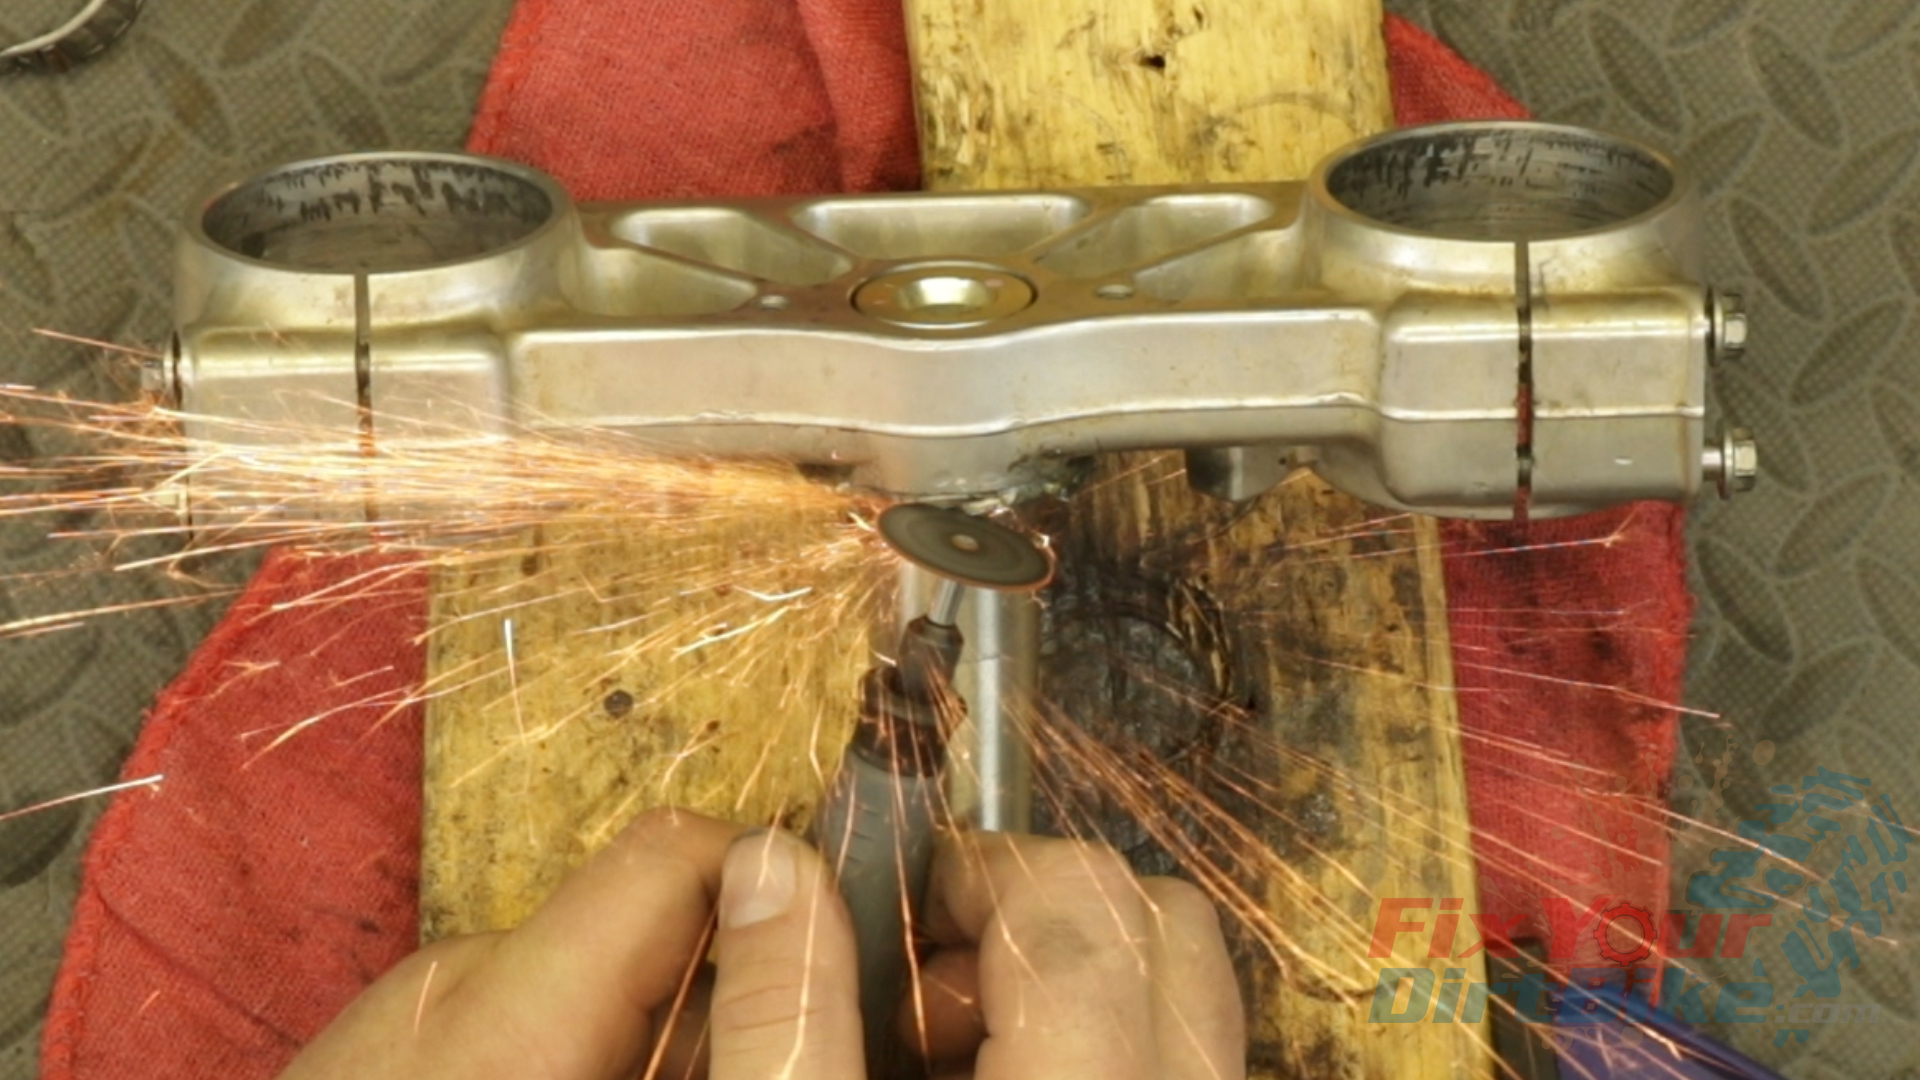
- The chisel and hammer should separate the bearing from the bridge, but they probably won’t. As with most worn-out parts, this bearing refused to budge, so I moved to a Dremel with a cut-off wheel.
- This cut is tricky because you can not get a perpendicular angle to the bearing. So start with a parallel cut about 2mm from the bridge, then make two cuts in a V shape between the edge of the bearing and the parallel cut.
- Obviously, this is not ideal, but if you take your time and watch your depth, you will be fine.
- I got a little too deep on my V cuts, but it wasn’t anything some light sanding and polishing couldn’t fix.

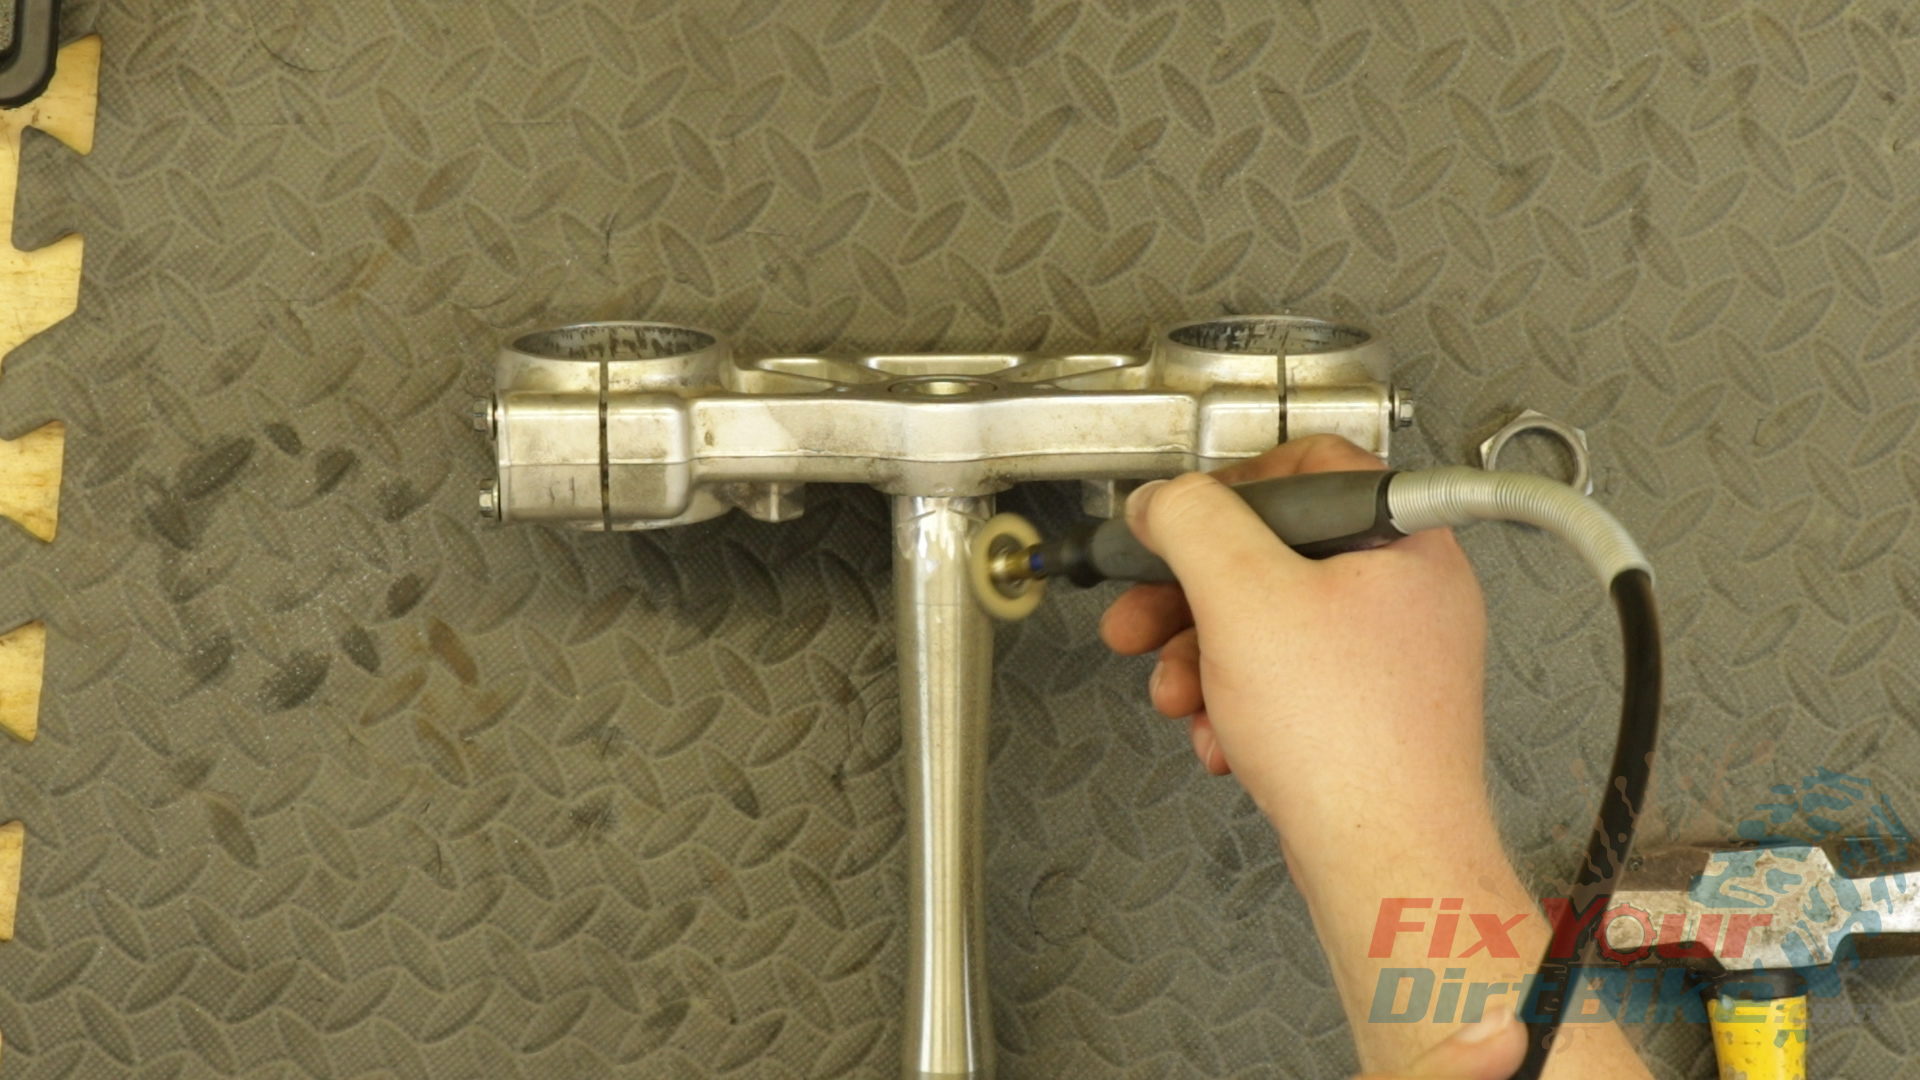
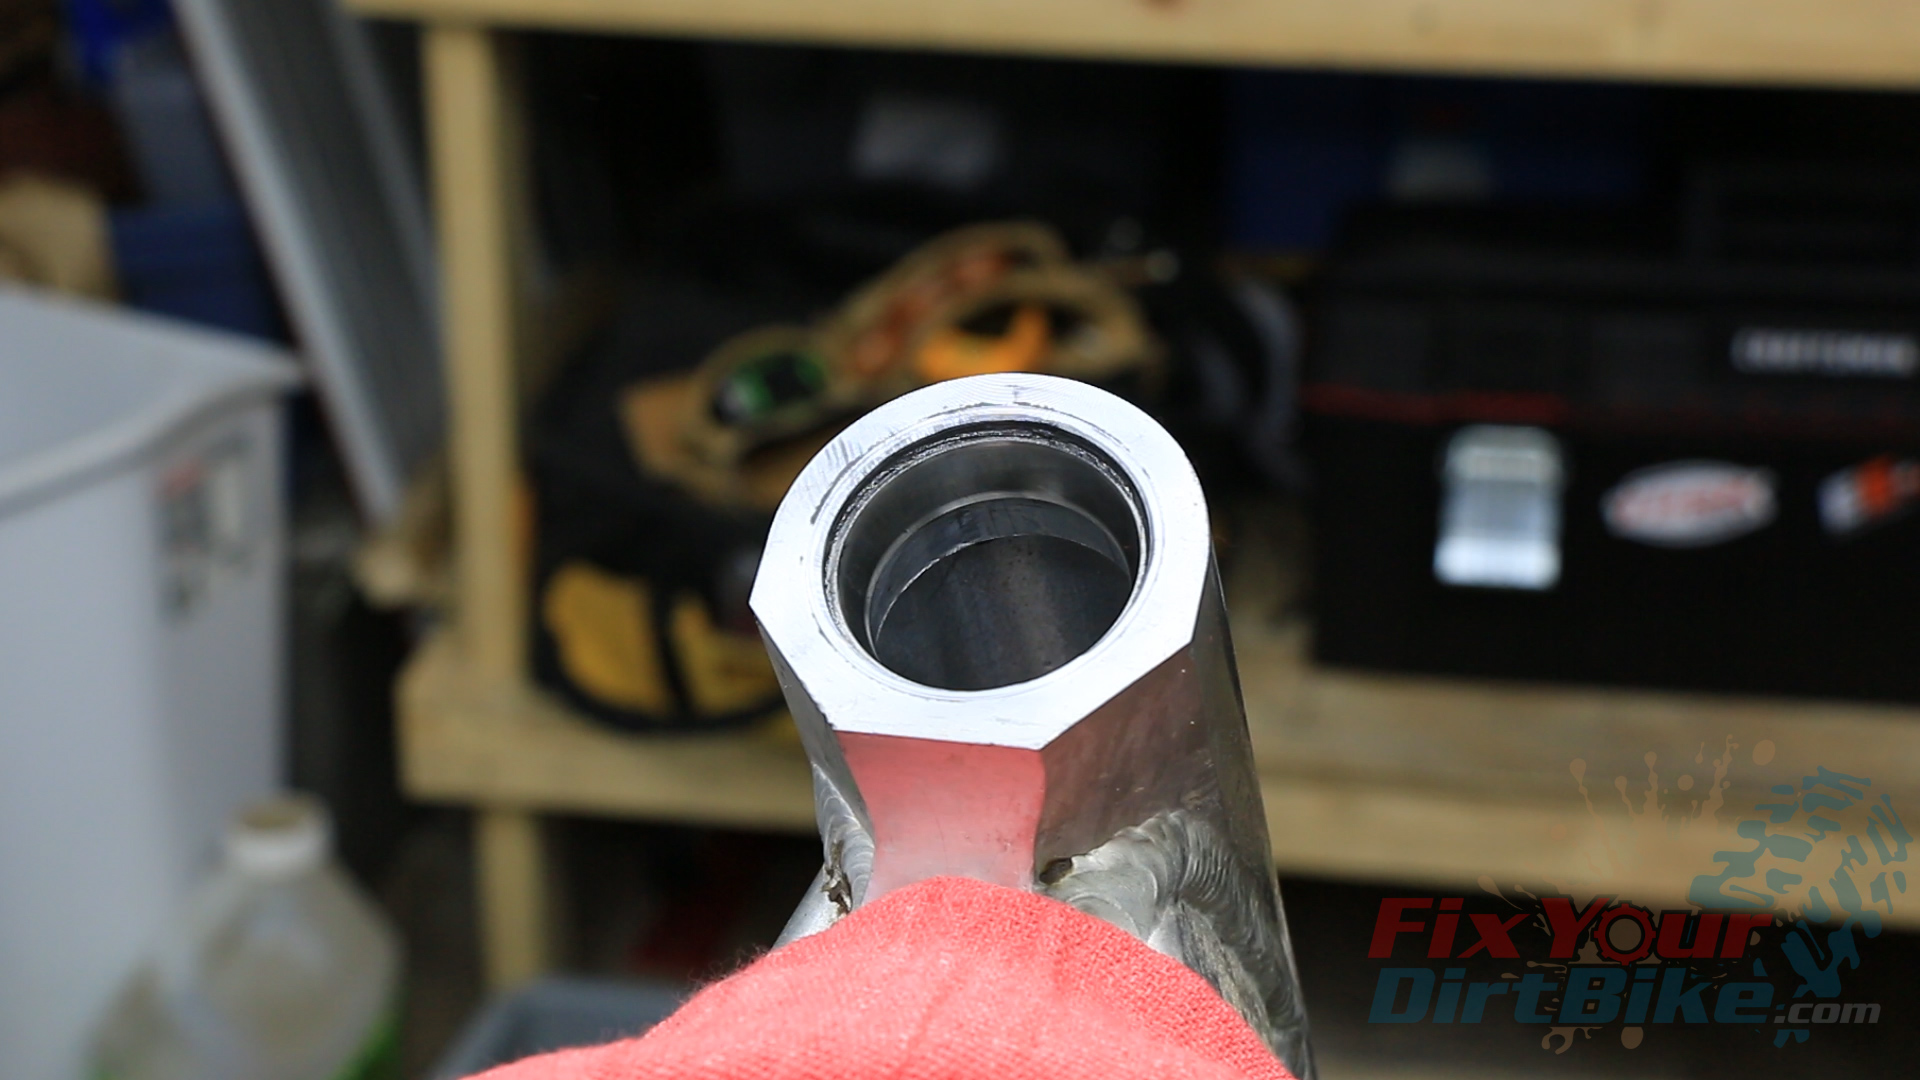
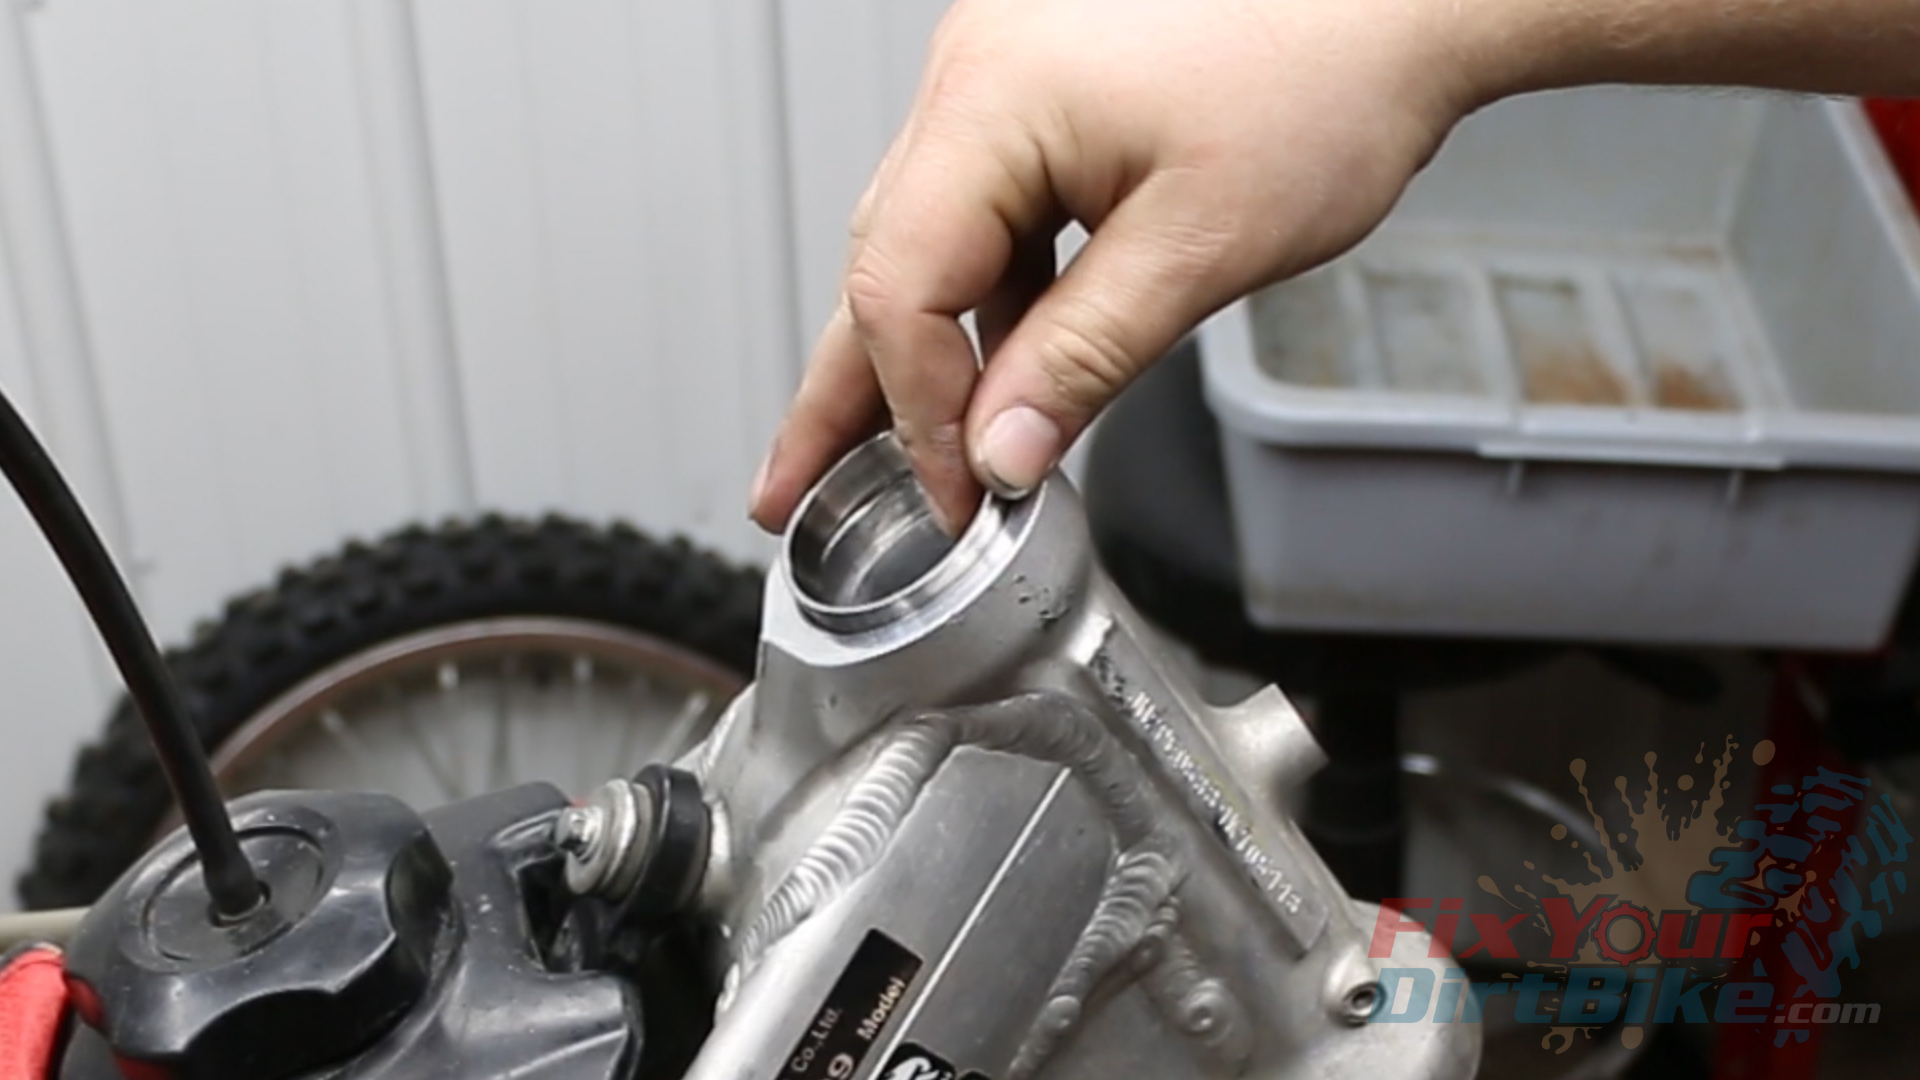
Outer Race Removal
- The outer bearing races have a small lip that sticks out inside the steering head.
- Take a screwdriver or another long flat tool and hammer the race out of the steering head, working around it as you go.
- The outer race is another example of old parts not cooperating, so I removed it using a blind bearing puller.
- If you don’t have a blind bearing puller set, you do not need to buy one. Most chain auto parts stores have loaner tools available with a refundable deposit.
- With the outer race removed, inspect the race bores. If the edges and surfaces are anything but smooth, correct the damage before installing the new races.
New Steering Stem Bearings
I will be installing an All Balls bearing kit, which includes new bearings, outer races, and seals.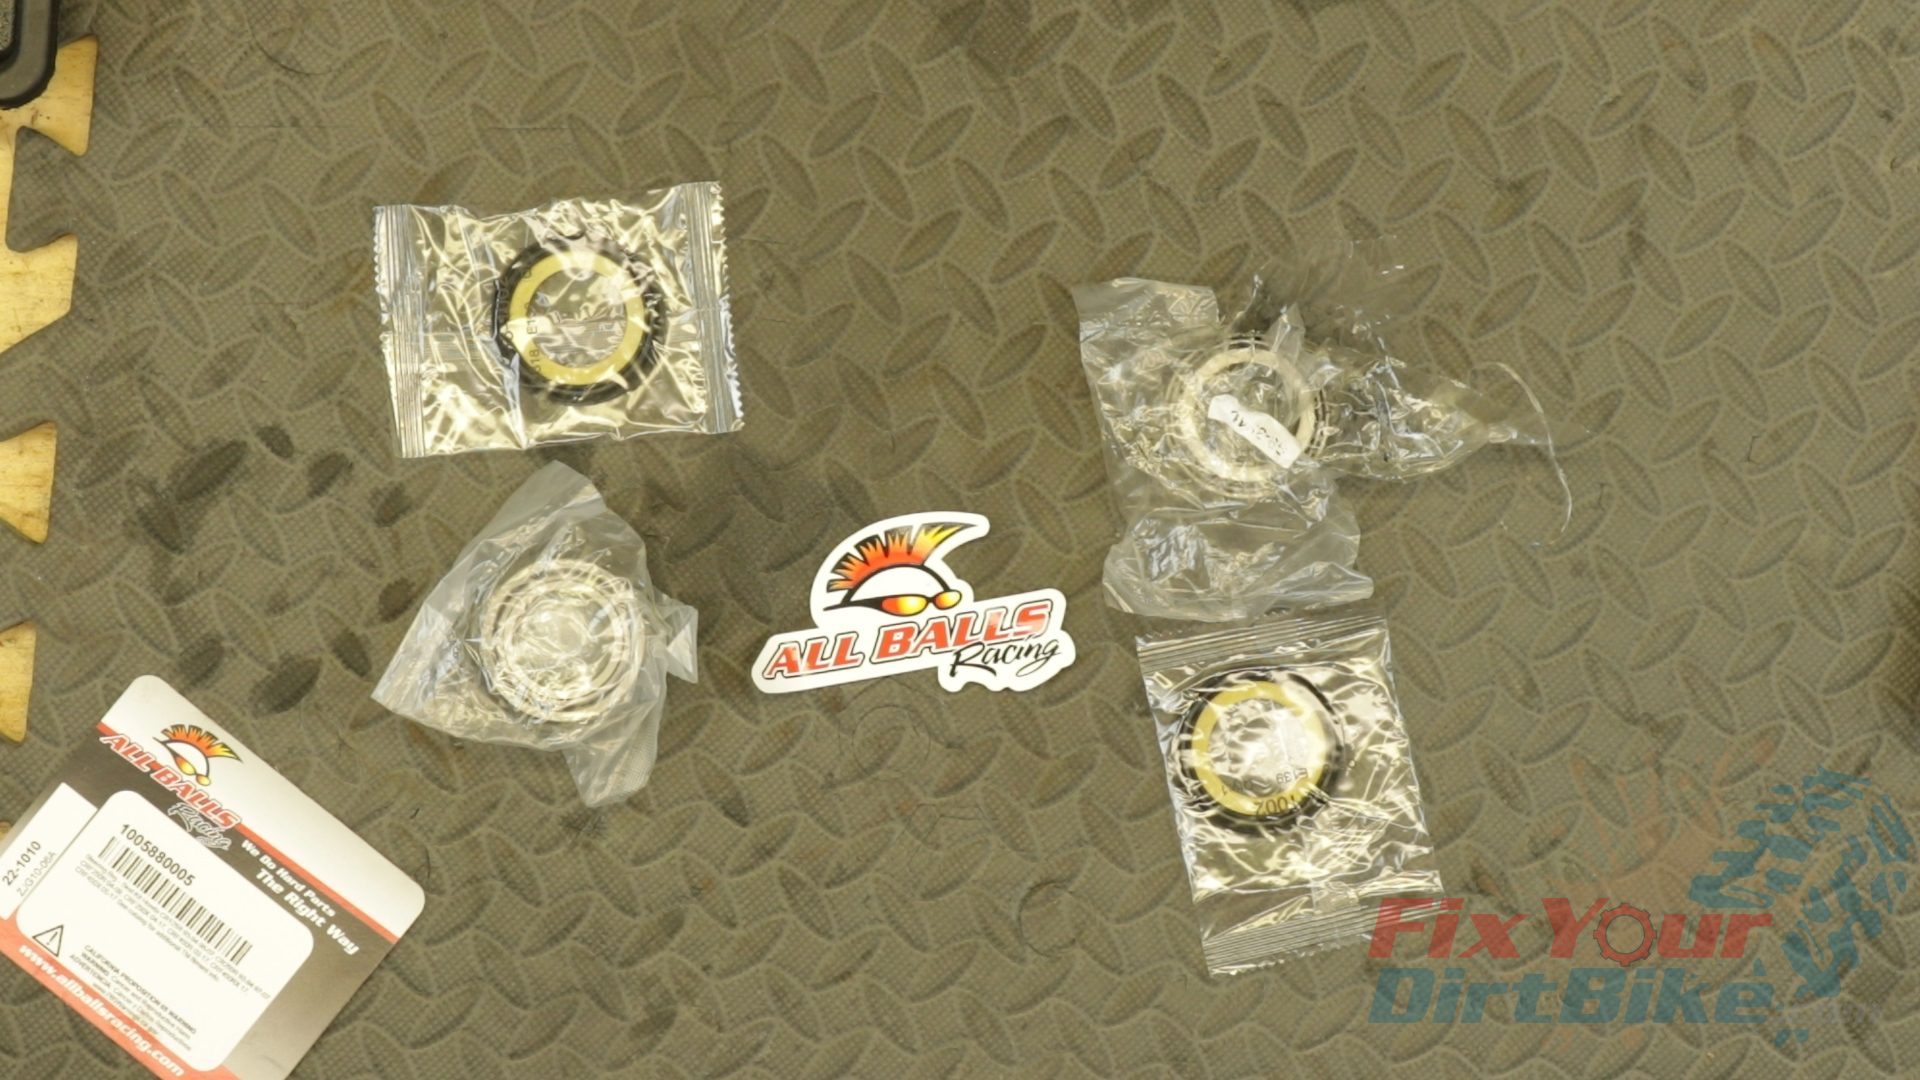 Bearing Installation
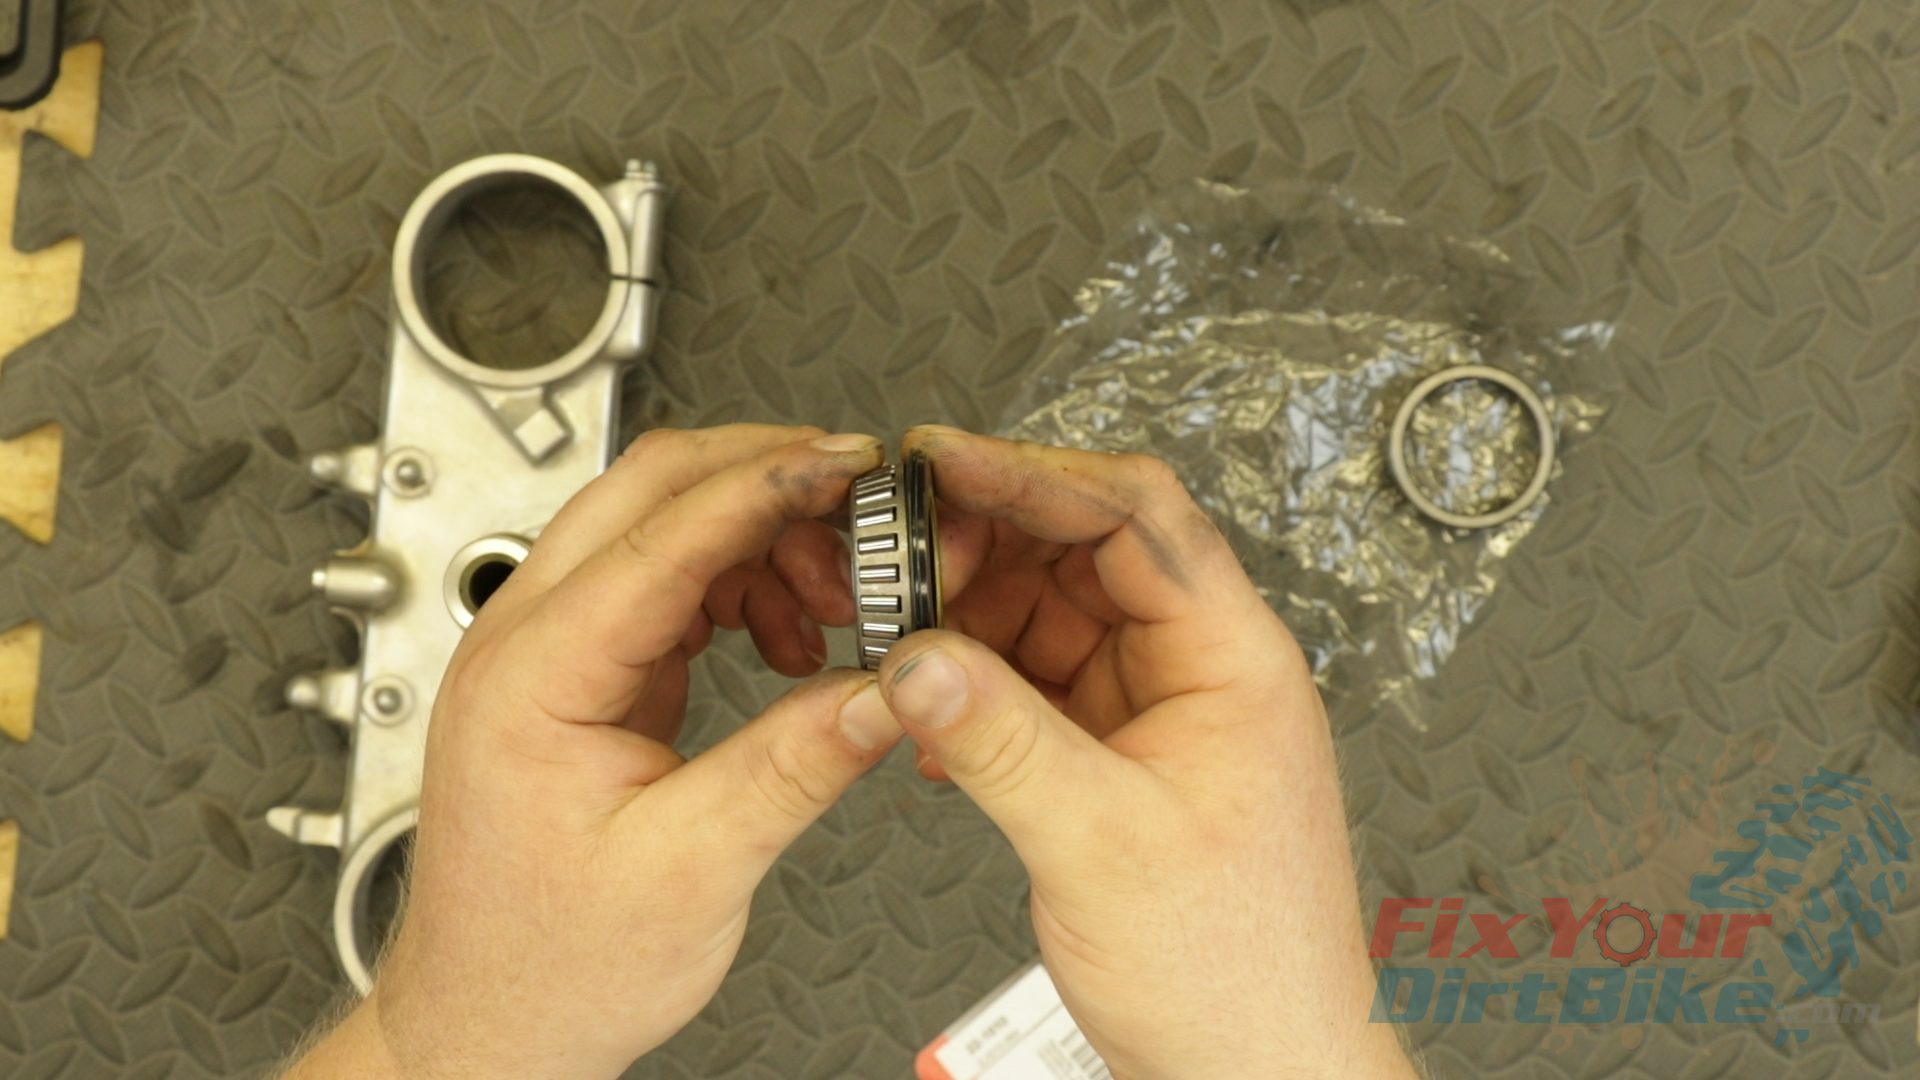
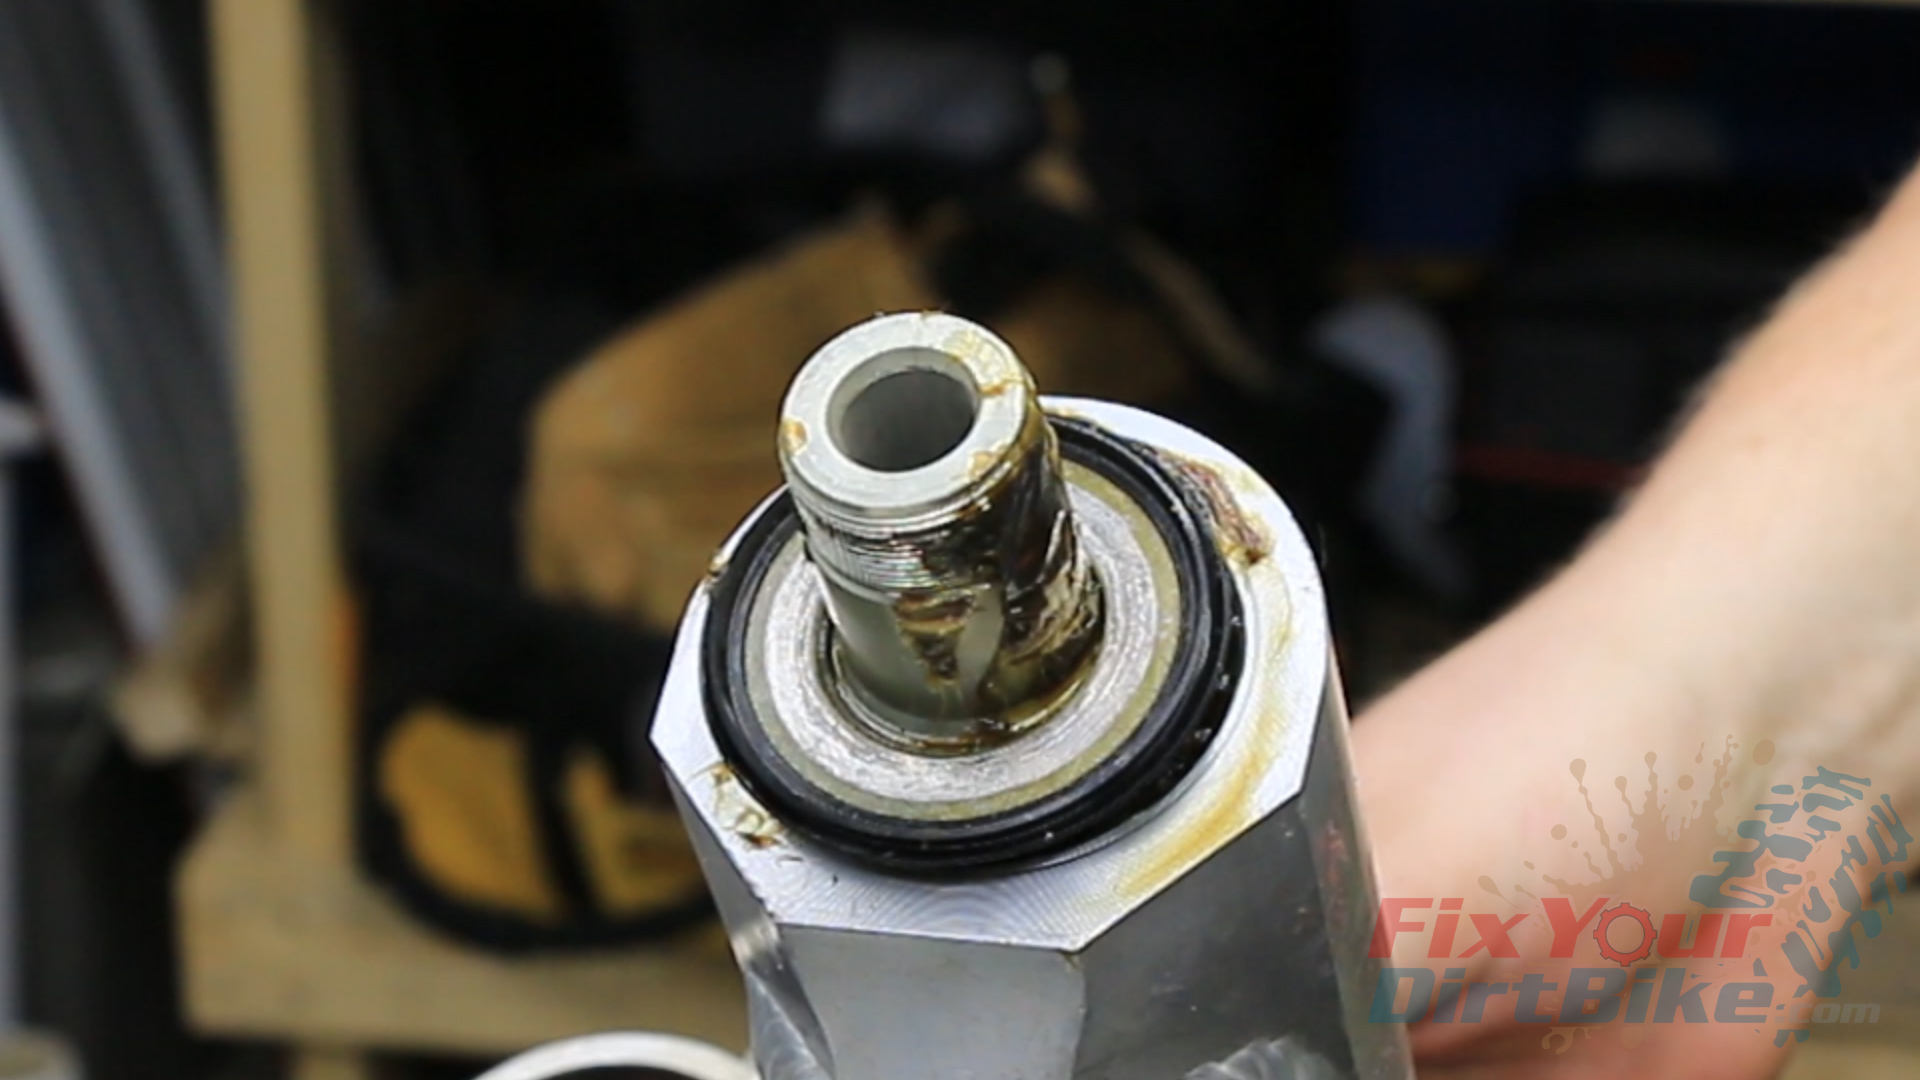
- Slide the new seal onto the steering stem with the wide side facing away from the bridge, followed by the bearing with the small side facing away from the bridge.
- Drive the bearing home with your metal pipe and hammer.
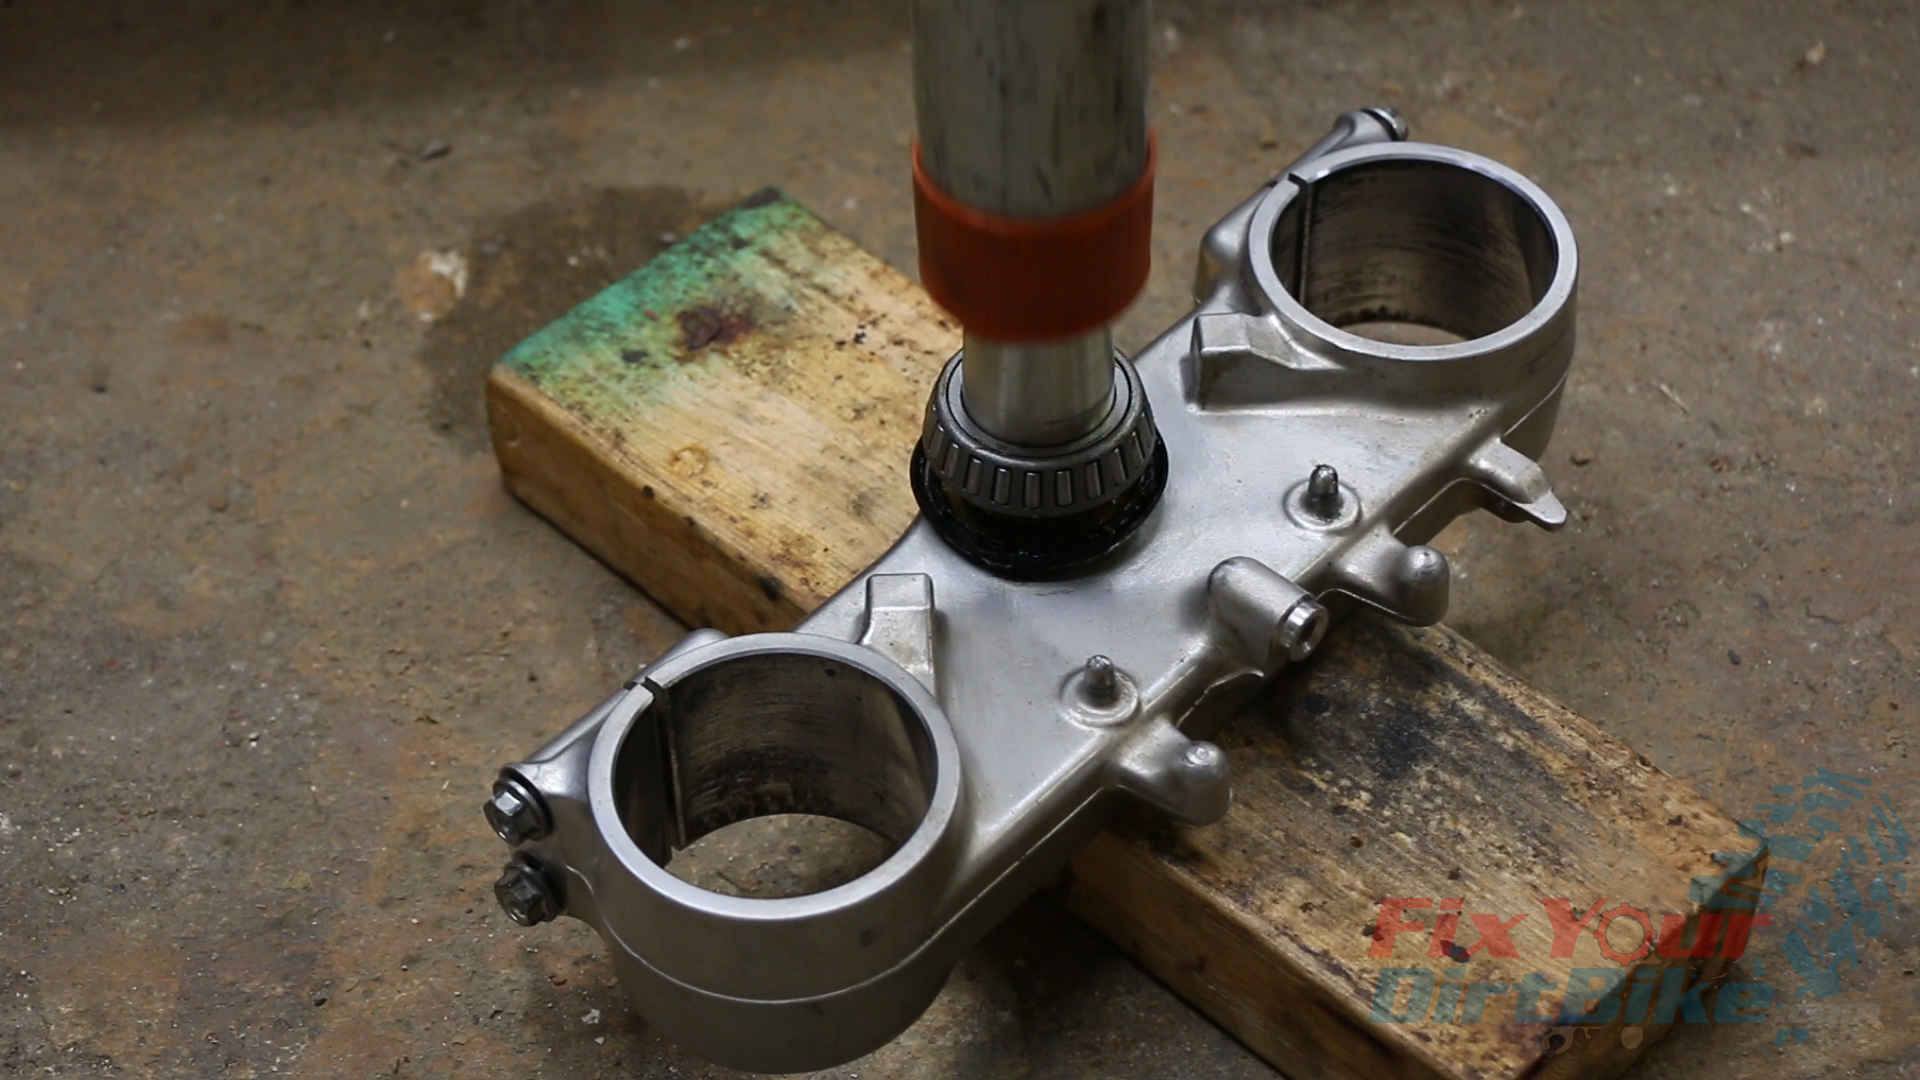
Outer Race Installation
- Place your new bearing race in the bore with the wide side facing out.
- Assemble your bearing press with the bolt head on the side you are pressing. You will have to get creative with the spacers on the nut side. For example, I like to use the top bridge as a spacer because it rests flat on the bottom of the steering head.
- On the bolt side, you need to find a washer that will fit over the race but still clear the outer bore. As with most bearings, some slight adjustments may be necessary to keep everything aligned.
- Press the bearing into the bore.
- These bearing races are NOT an interference fit so that they will press in quickly. If you are forcing them in, something is wrong, so reset and try again.
- Run your fingernail along the bottom side of the race to check for any gaps. My race did not press into the bore completely, but I corrected that with a large socket and hammer.
- Repeat with the bottom race.
Related: How to service the swingarm on your 1997-2001 Honda CR250
Steering Stem Installation
Choosing The Propper Grease
- Steering stem bearings require EP grease. The EP stands for Extreme Pressure.
- But since there is very little heat in the steering head, the grease can’t be too thick, or it will not move around the bearings.
- Moly-based greases provide the best protection under extreme load but are also incredibly thick.
- General-purpose grease is the right consistency but provides inadequate pressure protection under load.
- I find that a Lithium-based EP grease provides the proper level of protection at the right consistency.
Install The Stem
- Apply a thick layer of grease around each bearing and outer race. When I say thick, I mean THICK; you want as much grease in those rollers as possible.
- Install the top seal with the wide side facing down.
- Install and tighten the adjustment nut until it is bottomed out.
- Work the stem back and forth with the nut tight to the seal. This will disperse the grease and allow you to check for rough spots.
- Loosen the nut to the point where the steering stem rotates freely with no play.
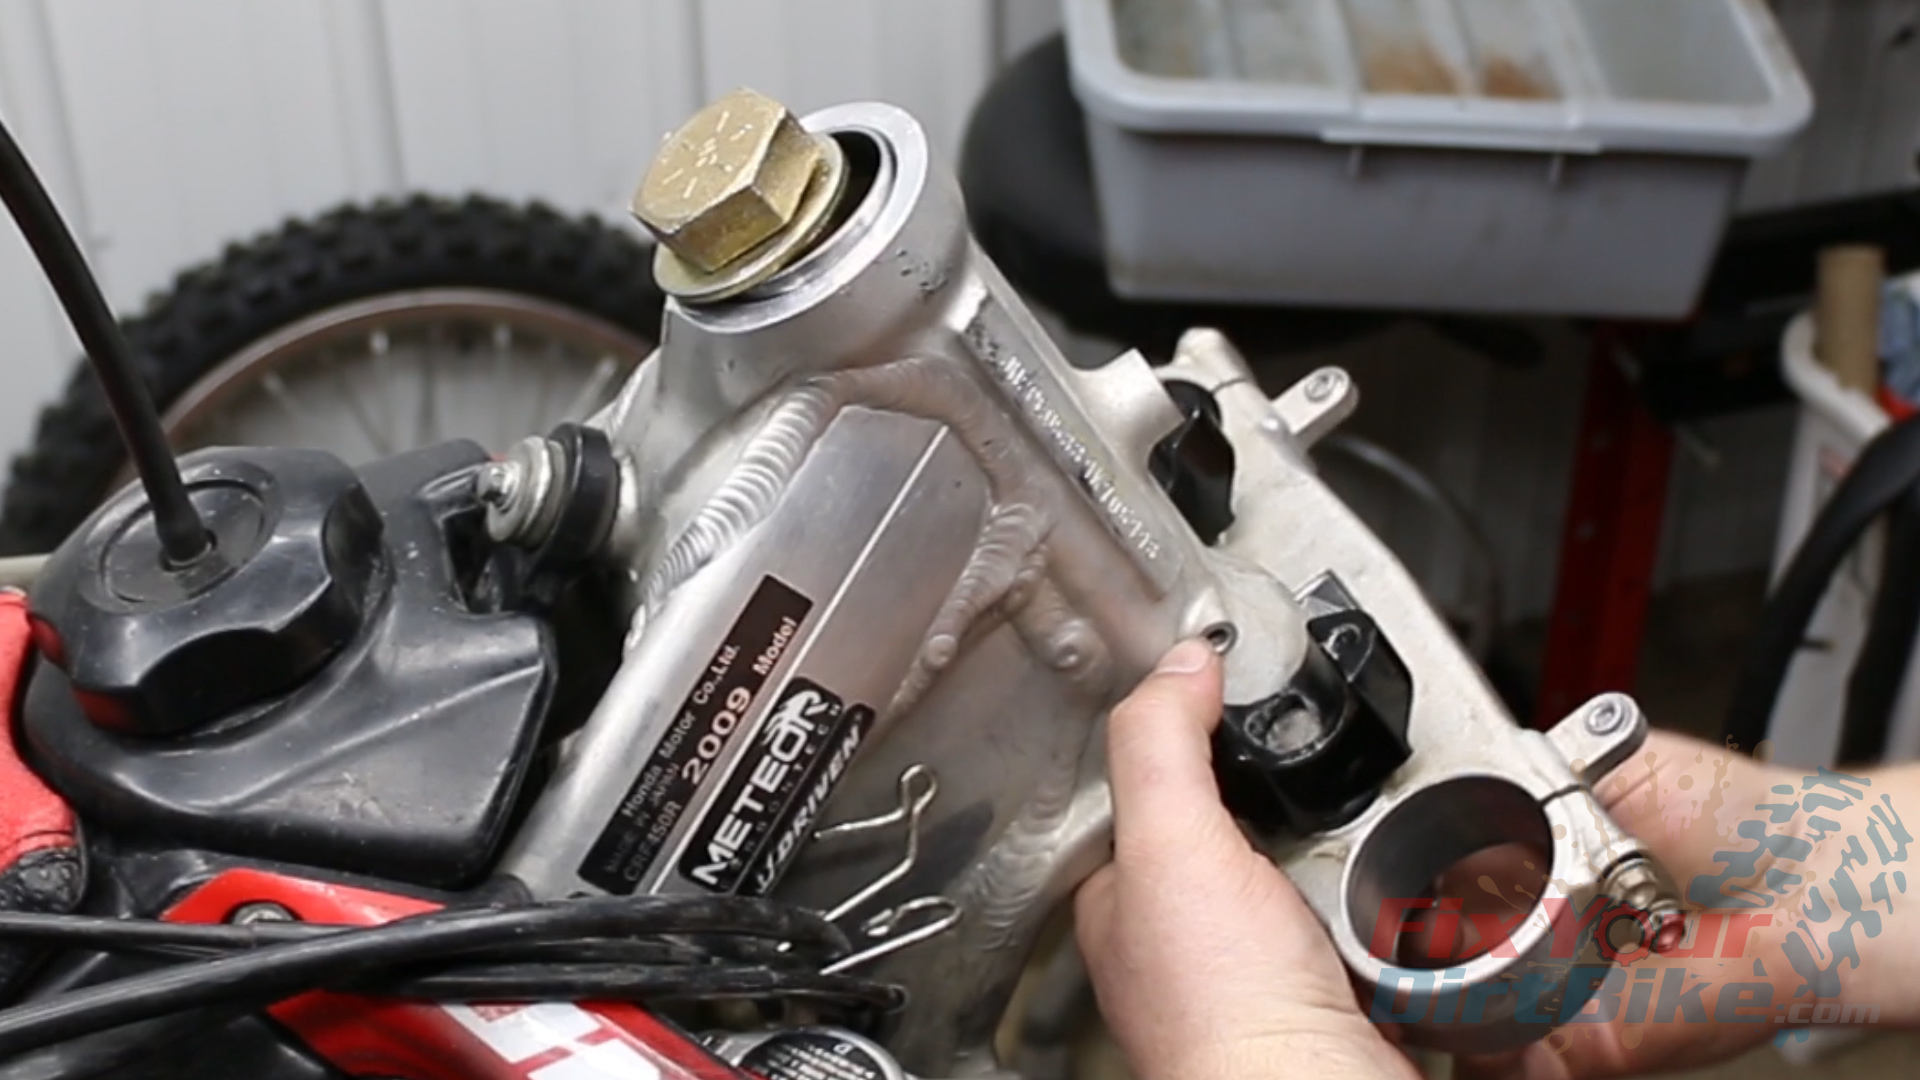
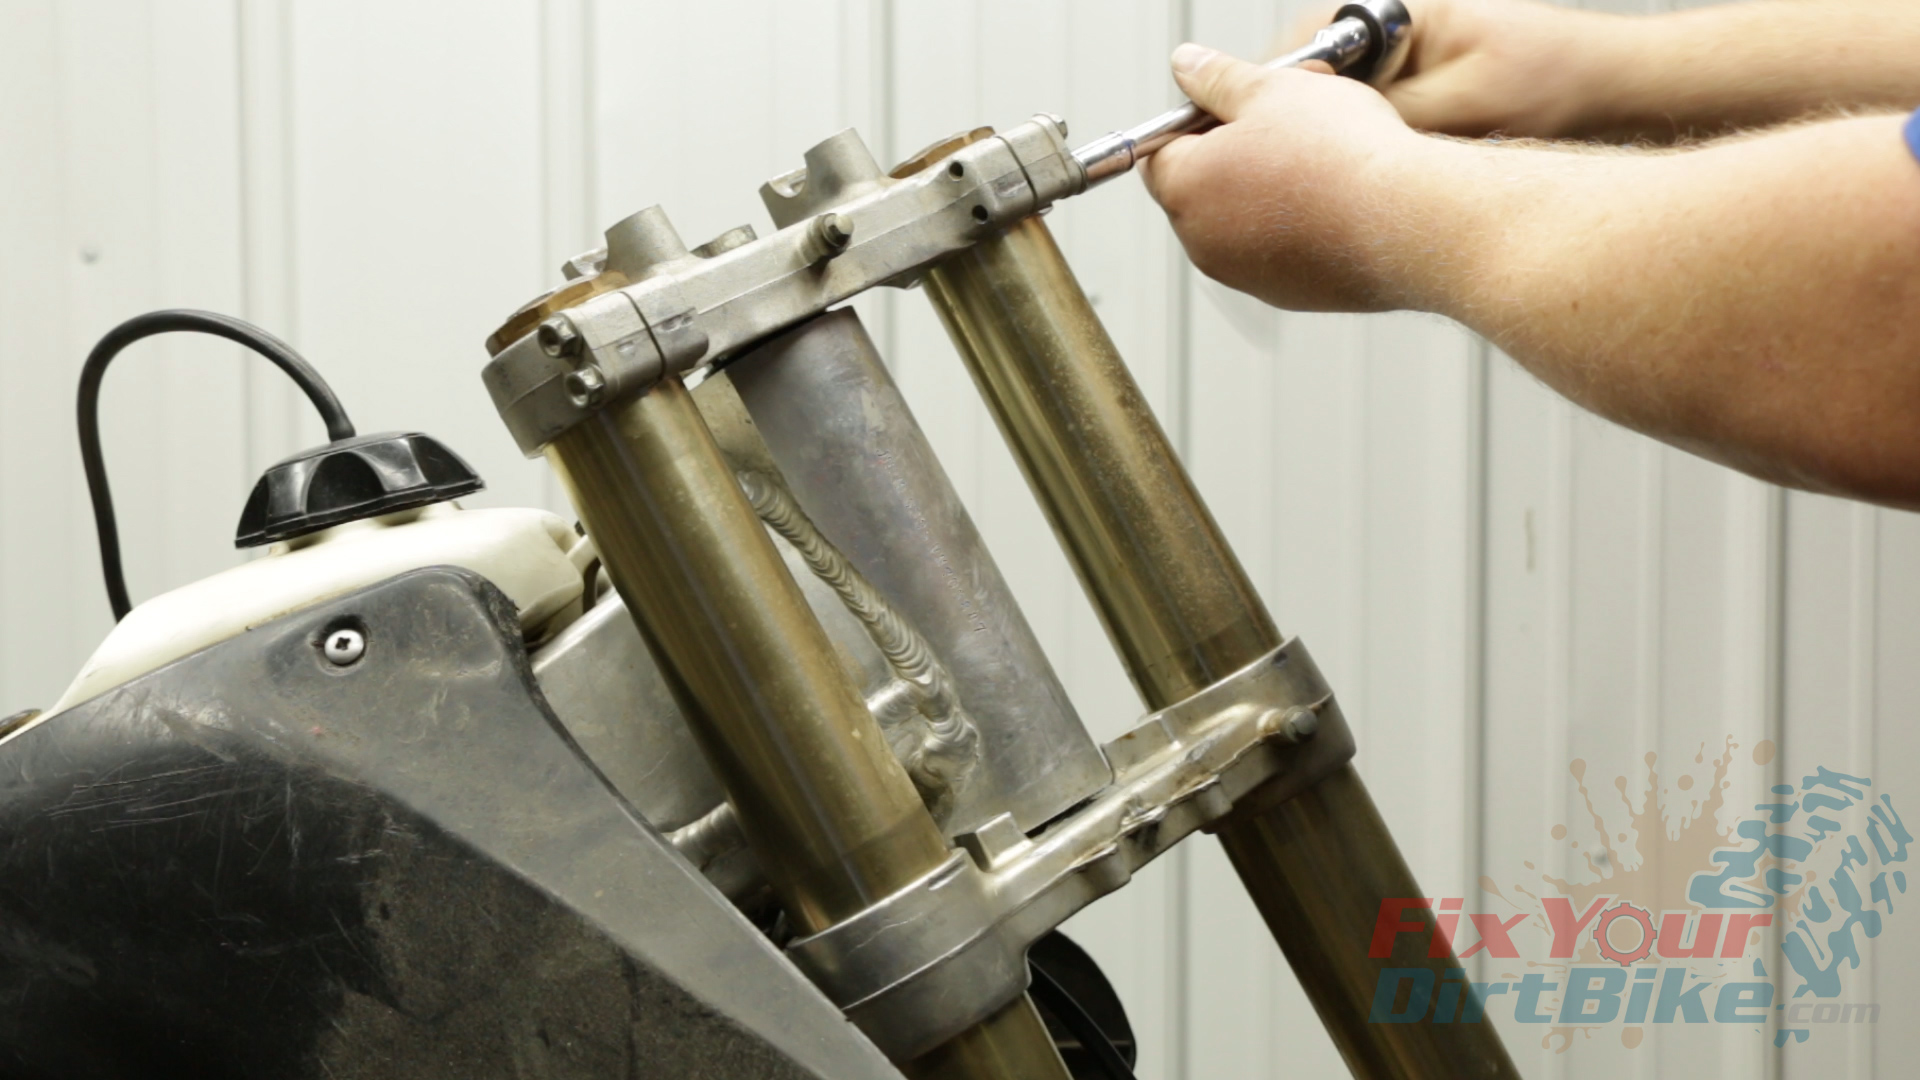
- Install the forks, but only tighten the upper pinch bolts.
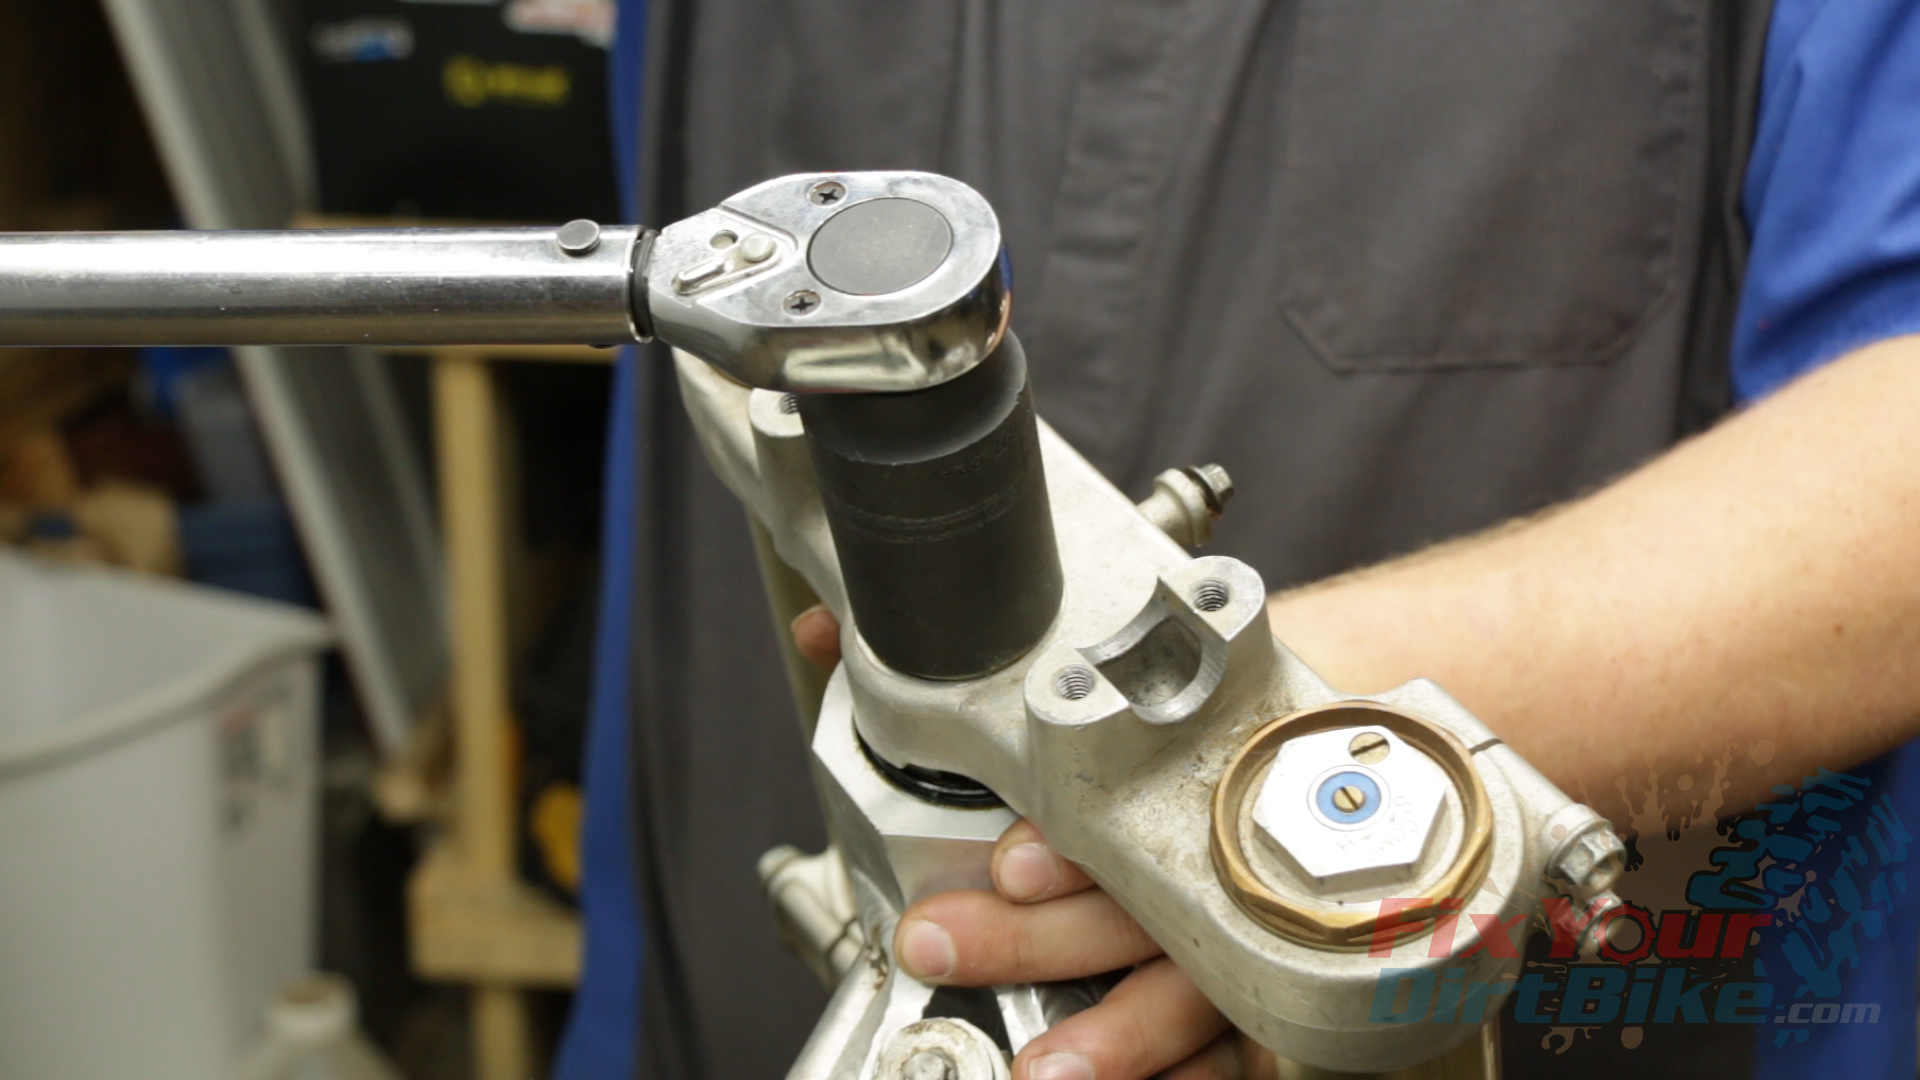
Install The Steering Stem Nut; Torque To
- 108 ft-lbs on 97-2000 models
- 80 ft-lbs for 2001 models
 Recheck the rotation; You should still be able to rotate the stem freely with no play.
Assemble your front end and ride around for about 30 minutes.
Related: 97-01 Honda CR250 bottom end service.
Steering Adjustment
- After your break-in ride, put your bike on a stand and check your steering stem bearing adjustment.
- With the wheel facing forward, you should be able to tap the fender left or right, and the front end should rotate to lock under its own weight. This is the correct adjustment.
- The adjustment nut is too tight if the front end does not turn freely.
- Push and pull the forks; if you feel anything moving in the steering head, the adjustment nut is too loose.
- To correct the adjustment, loosen the lower fork pinch bolts, loosen the steering stem nut, turn the adjustment nut ¼ turns, and then re-torque the steering stem nut.
- Repeat this process until you reach the proper adjustment, and then re-torque your lower bridge pinch bolts.
If you have any questions about this shock link service, please let me know in the comments or on social!
Keep Your ’97-’01 CR250 Running Right!
- Service Specification
- Clutch Replacement
- Carburetor Service
- Engine Top End
- Engine Bottom End
- Brakes
- Exhaust
- Front Suspension
- Rear Suspension
- Wheels & Tires
- Kickstarter Inspection
- External Shift Linkage


